TIPS & TRICKS Process your images before you place them in your layout. If you need to process an image that is already part of a layout, it is advisable to rename it and re-insert it; otherwise, the program might not display the new version. 
> Scaling and Cropping Your Photos
> Isolating Image Details Using Transparency Effects
Many photo book software programs offer simple, built-in image processing tools that save you the time and trouble involved in switching to a separate program while creating your layout. However, if you need to perform complex changes to your images—such as adjusting brightness, contrast, or noise artifacts—I recommend image processing programs such as Photoshop, Photoshop Elements, Lightroom, Picasa, or GIMP. These programs offer a much broader range of processing options than proprietary photo book software.
TIPS & TRICKS Process your images before you place them in your layout. If you need to process an image that is already part of a layout, it is advisable to rename it and re-insert it; otherwise, the program might not display the new version. 
You can usually change the size of an image by altering the size of the box that surrounds it (see section 6.1, “Photo Book Software Basics”). Most programs also support direct cropping, which is a great help if you need to adjust the framing of an image after you have placed it on a page.
TIPS & TRICKS If the photos on a page show various people, try to scale or crop them so that they appear equally distant. 
To alter the framing, Blurb and SmileBooks simply require you to click in the center of an image before dragging it. AdoramaPix requires you to click the Pan button and even lets you rotate an image within its frame—a function that you can use, for example, to straighten a skewed horizon in a landscape. Picaboo requires you to move the box using arrow buttons. But remember, these methods only work if there are hidden pixels available (i.e., if the visible detail is smaller than the actual image).
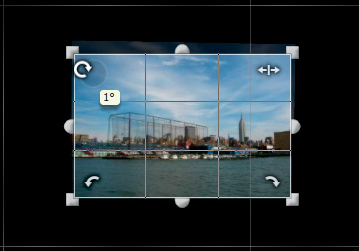
Figure 7.1: AdoramaPix software allows you to rotate an image within its box
Most programs also allow you to enlarge an image within its box. Blurb, MyPublisher, and Picaboo have dedicated zoom sliders for doing just that, while others, such as SmileBooks, use dedicated buttons. However the tool works, you usually have to select the image first by clicking it.
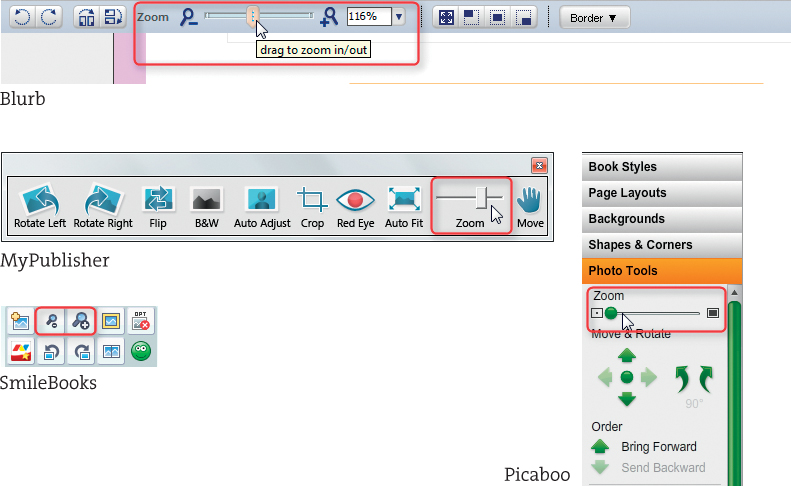
Figure 7.2: Various providers offer different framing tools. Many use a zoom slider, which is located in the upper toolbar at Blurb (top image), in the left tool palette at Picaboo (bottom right), or in a floating tool panel at MyPublisher (center) and AdoramaPix (not illustrated). SmileBooks (bottom left) uses +/– buttons to perform the same task.
WARNING! Independent scaling of images and their boxes can be confusing if you aren’t used to using photo book software. Cropped images cannot always be rotated, and it is not always possible to enlarge an image detail within a box. The reason for these anomalies is usually that there are no pixels that can be moved within the visible frame, especially if the image and the box have the same aspect ratio. If, however, the two aspect ratios differ, it is often possible to adjust the size of the visible image detail.
Most photo book software automatically scales an image to fit the box into which it is inserted, so if you place a square image in a rectangular box, the program automatically scales it to fit the rectangle rather than producing white space around the image. This moves large parts of the image outside the visible frame. Imagine a conventional picture frame on a wall (equivalent to a software box): your picture has to fit within the frame without leaving any space around it. If the software you’re using does not automatically scale the image, the way to set things right is to adjust the aspect ratio of the frame. 
InDesign and Scribus offer more flexible scaling options than most proprietary photo book software. The most useful of these options is the ability to insert images into boxes that don’t have the same proportions as the image. This initially produces a distorted image, which is why most providers don’t support this functionality. If you are using pro software, make sure that you use the appropriate keystroke to prevent distortion during scaling—in InDesign, this means pressing the Shift key while scaling.
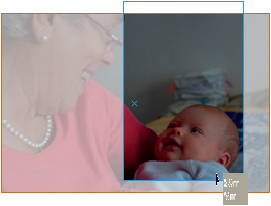
Figure 7.3: InDesign fades the parts of an image that lie outside the box, making it easy to visualize the relationship between the original image and the visible detail 
Cropping and re-framing an image can significantly change the message it conveys, just as bringing selected details to the fore can strengthen the impact of a photo. A photo that shows Paris, the Eiffel Tower, your family, and the funny expression on your dog’s face probably won’t do justice to any of the individual subjects. Remember the gestalt principles we discussed earlier: a crowded image makes it difficult for the viewer to perceive the photo’s main message. An effective crop often makes an image more pleasing and simpler to interpret. It’s important to select the right detail(s) before cropping, as illustrated by figures 7.4–7.7.
This example clearly illustrates how cropping affects the message an image conveys. Note that heavy cropping requires you to use either high-resolution source material or a smaller image size within the layout.
Most photo book software includes basic image processing tools that allow you to make a range of adjustments, from simple image enhancements (such as contrast adjustments) to special effects. While these tools make it possible to process your images without switching to a dedicated image processing program, they offer fewer options than their specialist counterparts.
Typical photo book software has only single-function sliders for making basic adjustments to image contrast and brightness. In contrast, specialist software has options for selectively adjusting shadows and highlights, plus tools for adjusting the individual gradation curves of an image.
Similarly, photo book software has only limited leeway for applying decorative effects, such as conversion to black-and-white or image desaturation, whereas specialist software offers a far superior range of processing options. For example, MyPublisher and Blurb both have black-and-white conversion tools, but no options for influencing the strength or style of the effect. On the other hand, Photoshop has tools for adjusting the conversion parameters separately for each color channel, making it possible to emphasize selected image details.
I recommend that you use a dedicated image processing program such as Photoshop, Photoshop Elements, Lightroom, Picasa, or GIMP to make adjustments to your images before placing them in a layout.
Figure 7.4: The original snapshot of a regatta wasn’t particularly well composed. Cropping the image to exclude the lone boat on the left significantly improves the photo.

Figure 7.5: The framing in the cropped image produces a much more dynamic look and suggests competition between the two boats in the center of the frame.

Figure 7.6: This version emphasizes the crew and the maneuver they are performing. The viewer instinctively looks toward the crew members in the stern, just like the person standing in the bow.

Figure 7.7: An even closer, vertical crop turns the photo into a portrait
Figure 7.8: A double-click in the SmileBooks interface opens the image editor dialog
In spite of these limitations, the image processing tools built into photo book software can be quite useful. The following sections introduce some of the more effective tools and demonstrate how to apply them. As always, each provider has its own approach—at MyPublisher and Picaboo, all you have to do is click the active image to open the image editing tool panel. Others, such as SmileBooks, require a double-click, which then opens a separate editing window.
Most editing panels or windows have separate areas or menus with settings for image optimization, effect filters, etc.
Transparency—or rather, a decrease in opacity—is a popular effect among makers of photo books. It is often used to “fade” a background image and emphasize the main subject, a usage borne out by the SmileBooks Background Image filter. Other providers, such as AdoramaPix and Picaboo, use sliders (called Opacity and Fade) to regulate the effect steplessly. See section 9.3, “Using Your Own Backgrounds,” for more instructions on how to use image processing software to reduce image opacity.
Figure 7.9: Picaboo includes the Fade option for steplessly adjusting image opacity
PRO-GRADE SOFTWARE Pro-grade software always includes tools for stepless adjustment of an object’s opacity. In InDesign, the Opacity slider is located at the top of the Effects panel.
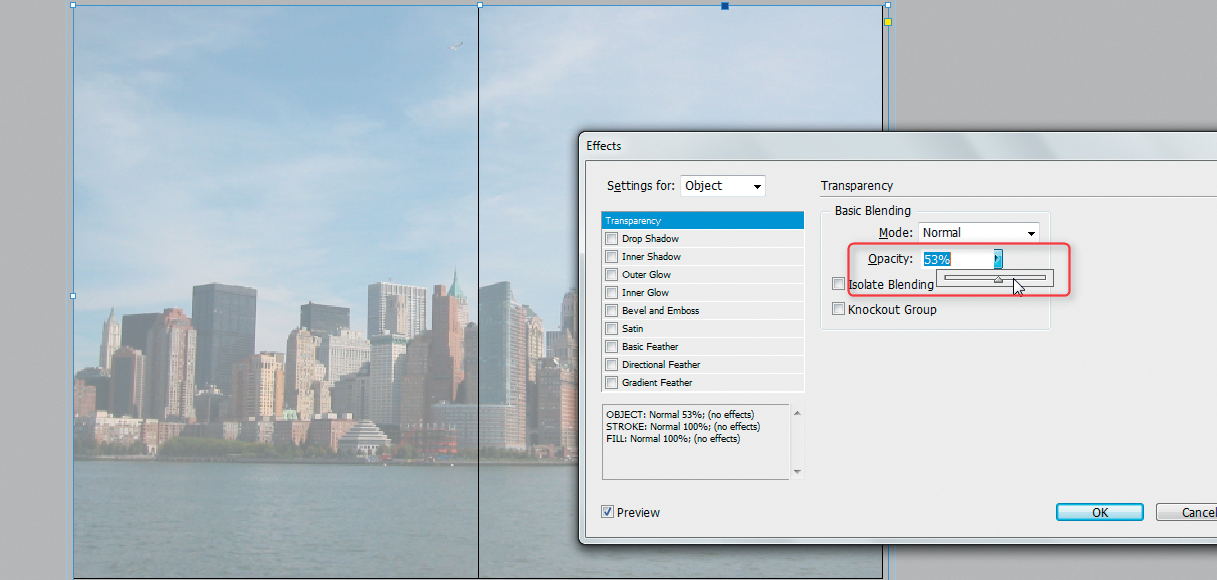
Figure 7.10: The InDesign Opacity slider can be used to fine-tune the transparency of an object 
The use of artistic effect filters is not only a matter of taste—their suitability also depends on the nature of your project. The best way to find out which effects you like is to try them out on an image of your choice.
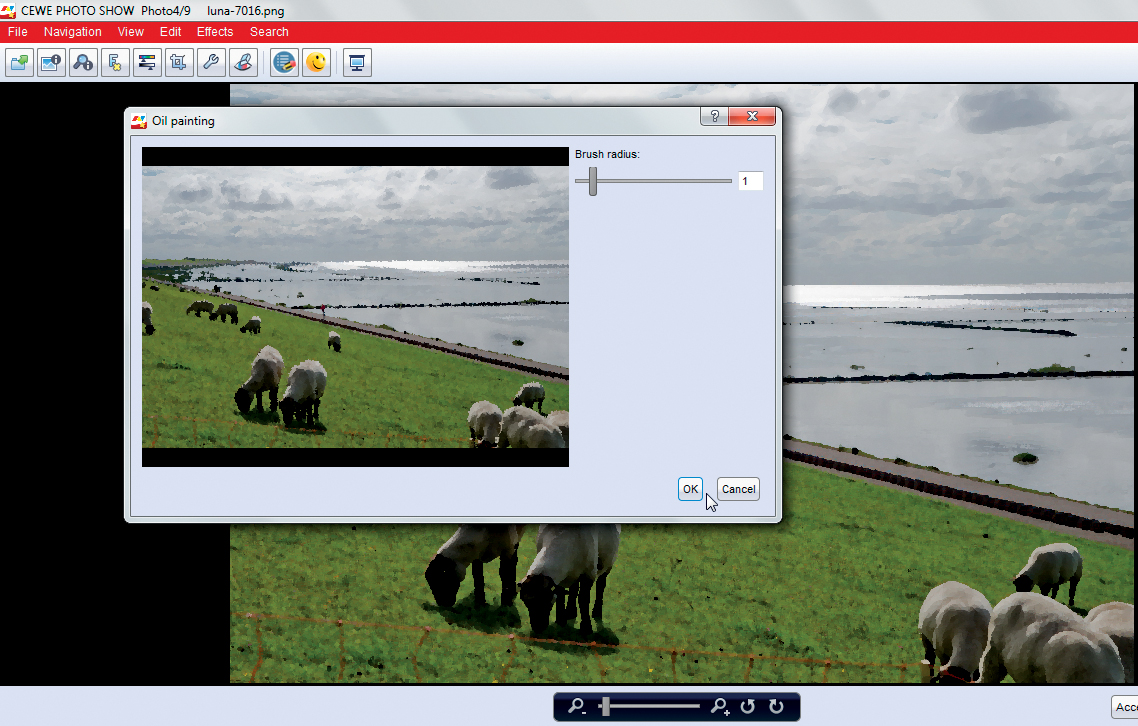
Figure 7.11: Smile-Books software offers a range of artistic effects, including Oil painting
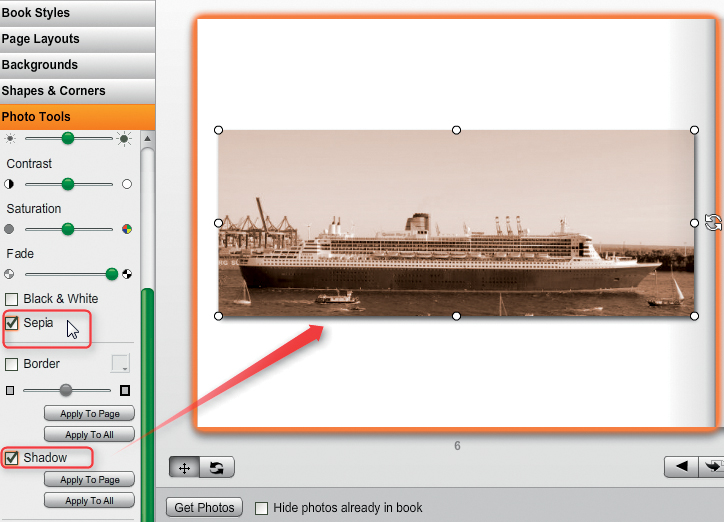
Figure 7.12: Picaboo includes sepia toning and drop shadow tools in its Photo Tools menu
Figure 7.13: Select the background using the Magic Wand tool

Figure 7.14: The re-appearance of the checkerboard pattern helps you see whether you have successfully deleted the background
Another popular photo book effect is to use objects with no visible background to underscore the narrative—for instance, a sand castle bucket in a vacation book or a street sign in a travel book. The best way to create this type of effect is to make large portions of the image transparent. This is relatively simple to do using complex image formats such as PNG, but it’s impossible to apply transparency effects to the more popular and widespread JPEG format.
Most provider software doesn’t support transparency effects, but some (Blurb, Picaboo, and SmileBooks, for example) do support the PNG image format with a transparent alpha channel. To create transparency effects, you will need to use either a commercial image processing program such as Photoshop, or a free alternative such as GIMP or Paint.NET (not to be confused with Microsoft Paint).
The following paragraphs explain how to create a transparency effect using Paint.NET. The overall process is about the same in most equivalent programs.
Start by opening the image you want to process. Subjects with a clear outline photographed against a uniform background are easiest to isolate. The process is much trickier to perform for highly detailed subjects such as human hair or subjects that have similar background colors. A red bucket on white sand or a street sign against a dark blue sky are examples of details that are relatively easy to isolate.
Figure 7.15: Additional transparency options appear when you save an image in PNG format
Select the Magic Wand tool and click on the background. Ideally, the tool will automatically select the entire background. Whether this works on the first attempt depends on the nature of the background. You can use the Tolerance setting to determine just how uniform the background has to be to ensure inclusion in the selection, and playing with this setting often produces more accurate results.
If the background isn’t uniform, you will have to remove it in several stages. Once the Magic Wand selects a piece of background, simply delete it using the Del key. Continue selecting and deleting until the entire background is eliminated. The original checkerboard background pattern will appear wherever you have deleted the background.
Once you are satisfied with the results, you can save your image. Select the PNG image format and a suitable filename for the new file. Confusingly, the transparency settings only appear once you have clicked the Save button. The Transparency Threshold setting is usually set to the correct value of 255 by default. This is crucial to the success of the effect.

Figure 7.16: An example of how the cropped detail could look in a finished book
TIPS & TRICKS If possible, change the color of the canvas (i.e., the background) in your image processing program from the standard gray checkerboard pattern to a single, bright color. This makes it much easier to see whether you have precisely selected the object’s outline or whether there are still some details missing. 
You can then insert the image into your layout as usual. Some software (Smilebooks, for example) displays transparent backgrounds in black in the image selection preview window. Don’t let this put you off—the image will be correctly displayed once you place it in your layout. Other programs (for instance, Blurb) display transparent backgrounds in gray in the layout overview. Again, if an image is displayed correctly in the layout preview (which it is in both cases), you can be sure that it will be correctly printed.
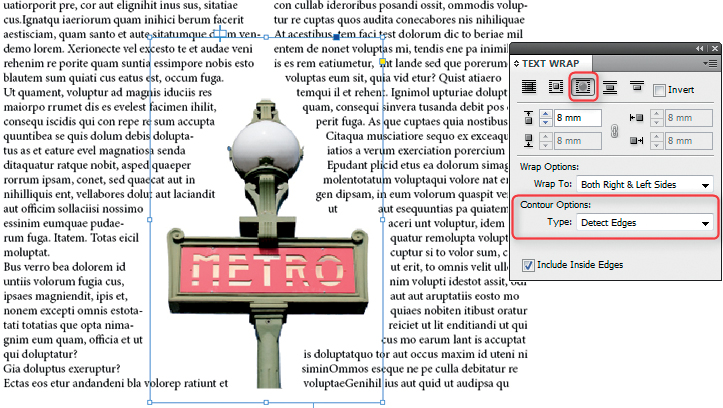
PRO-GRADE SOFTWARE Professional layout software such as InDesign supports free text flow (called Text Wrap) around cropped objects, which provides more layout options than most photo book software.
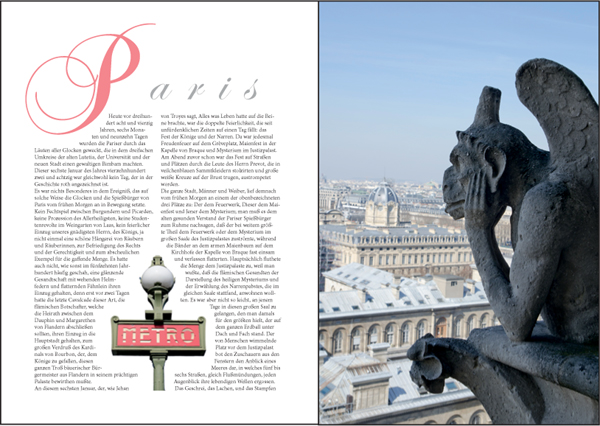
Figure 7.17: Professional software like InDesign includes flexible text wrap effects
InDesign Text Wrap settings are made in the eponymous panel. The appropriate settings must be made for the frame you want the text to wrap around (not for the text frame itself) using the Wrap around object shape option. The Contour options determine exactly how the program wraps the text. The Detect Edges option is best for objects that have clearly defined edges. You can also define the offset between the text and the image.
Find out what looks best by experimenting with various combinations of settings, but make sure the text frame is always on top of the image frame.
With InDesign, use the Adobe PSD file format for your cropped images rather than the PNG format used by most provider software. 
