Chapter 3. Getting Started with Microsoft Azure Machine Learning and Automated ML
In Chapter 2, we explained the concept of Automated Machine Learning and provided a brief overview of the automated ML tool on Microsoft Azure Machine Learning. In this chapter, we look at how to get started with Azure Machine Learning and, subsequently, automated ML. Before going into details of automated ML, we’ll first discuss some of the common challenges that enterprises face in their machine learning projects, to better understand these issues.
The Machine Learning Process
When solving problems with machine learning, we begin with a problem statement in terms of what we are trying to optimize. Next, we look for a dataset that will help us solve the problem. We begin looking at the data and use a data manipulation library like Pandas. We look at missing values, distribution of data, and errors in the data. We try to join multiple datasets. When we think we have a good enough dataset to get underway, we split it into train, test, and validation datasets, typically in a ratio of 70:20:10. This helps avoid overfitting, which basically means we’re not using the same dataset for training and testing. We use the train dataset to train the machine learning algorithm. The test dataset is used for testing the machine learning model after training is complete, to ascertain how well the algorithm performed.
We establish a metric to determine algorithm performance and keep iterating until we get a good algorithm. Then we use the validation dataset to check the algorithm’s performance. Sometimes, the validation dataset might not be in the main dataset, in which case we can split the original dataset for training and testing in an 80:20 ratio. All of these datasets should be representative samples of the main dataset to avoid skewed data (also known as bias). As you can see, this process is iterative and can be time-consuming. Figure 3-1 shows a summary of the manual process.

Figure 3-1. Manual process for custom artificial intelligence
Let’s look at some of the other challenges a data scientist can face when embarking on a machine learning project.
Collaboration and Monitoring
Data scientists in the enterprise can work solo or in teams. Nowadays, machine learning projects are more complicated, and data scientists often collaborate. However, it might not be easy for data scientists to share results and review code.
Other challenges that data scientists face when working together are how to track the machine learning experiments and then track the history of multiple iterations (runs) within each experiment. There are additional challenges to having a training environment that can scale horizontally and vertically. When we need more nodes in a cluster, we want to scale it horizontally, and when we need more CPU or memory, we scale each node vertically.
Deployment
After the trained model satisfies the business criteria, the next step is to operationalize it so that we can use it for predictions. This is also known as deployment of the model. A model can be deployed as a web service for real-time scoring or as a batch-scoring model for scoring in bulk. Figure 3-2 shows a summary of the steps a data scientist might perform, from training to deployment. Now, let’s understand how Azure Machine Learning and automated ML help address some of these challenges.

Figure 3-2. The steps for machine learning
Setting Up an Azure Machine Learning Workspace for Automated ML
The Azure Machine Learning service helps data scientists track experiments and iterations (runs) in a cloud-based workspace. It is a machine learning platform designed to help with end-to-end (E2E) machine learning.
To use the Azure Machine Learning service (including the Azure Machine Learning SDK, and automated ML), you must have an Azure Machine Learning workspace. This workspace resides in your Azure subscription and you can use it as a single collaborative place to track experiments and do more things. Anyone with owner or contributor access to the resource group can create the workspace in an Azure resource group. You can create it using Microsoft Azure portal or using the Python SDK. Later in this chapter, we review in detail the steps of installing the SDK.
When creating the workspace for the first time, you need to register a few resource providers (RP) in the Azure subscription. Let’s register the RPs needed to use the Azure Machine Learning workspace. You can search for this RPs in the Azure portal under your subscription. Here are the steps to do this:
-
Open the Azure portal, and then go to your subscription, as shown in Figure 3-3.

Figure 3-3. Subscription overview
-
On the left side of the pane, browse to “Resource providers,” as shown in Figure 3-4.

Figure 3-4. Resource providers list
-
In the filter, in the Search box, type “machinelearning,” and then register the Machine Learning RPs, as shown in Figure 3-5.
-
Register the KeyVault, ContainerRegistry, and ContainerInstance RPs, as shown in Figures 3-6 and 3-7.
Now we’re ready to create an Azure ML workspace. To do this, we need Contributor or Owner access to the Azure resource group. After we have confirmed the appropriate access, let’s create the Azure Machine Learning workspace:
-
Go to the Azure portal and search for “machine learning service workspaces,” as shown in Figure 3-8.

Figure 3-8. Going to the machine learning workspace on Azure portal
-
Fill in the required details in the pane, as shown in Figures 3-9 through 3-11.

Figure 3-9. The Azure Machine Learning service creation pane
You can choose an existing resource group or create a new one.
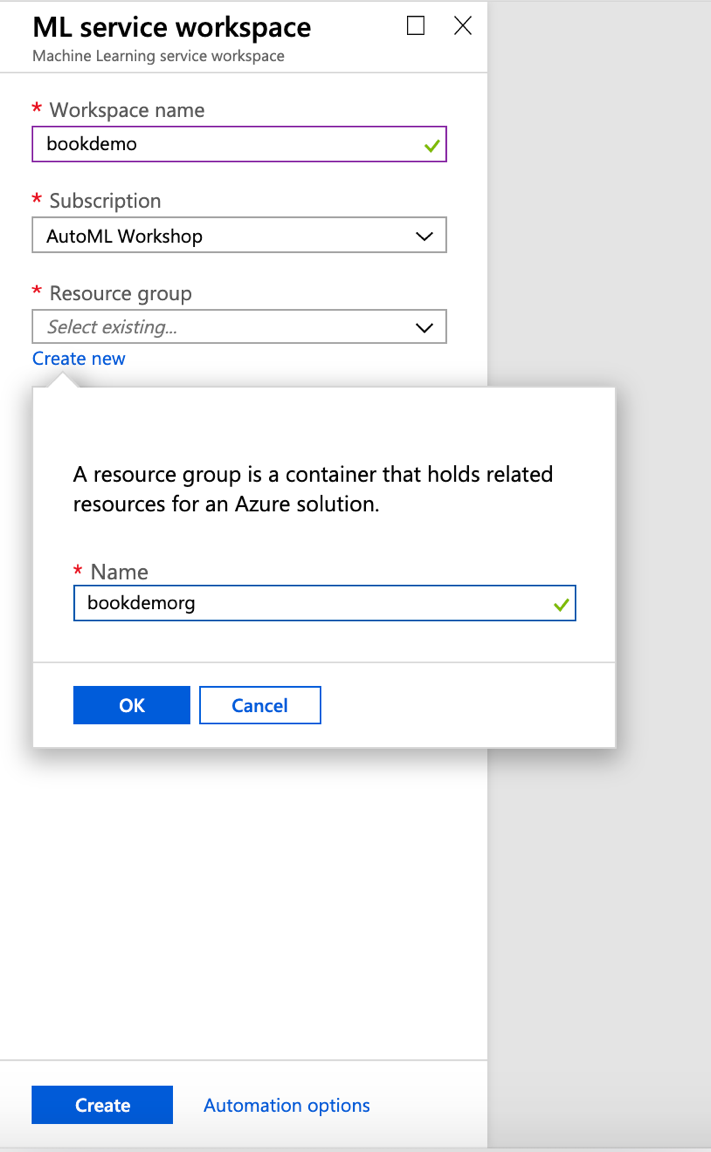
Figure 3-10. The Azure resource group creation pane
Click Create when you have made all your selections.
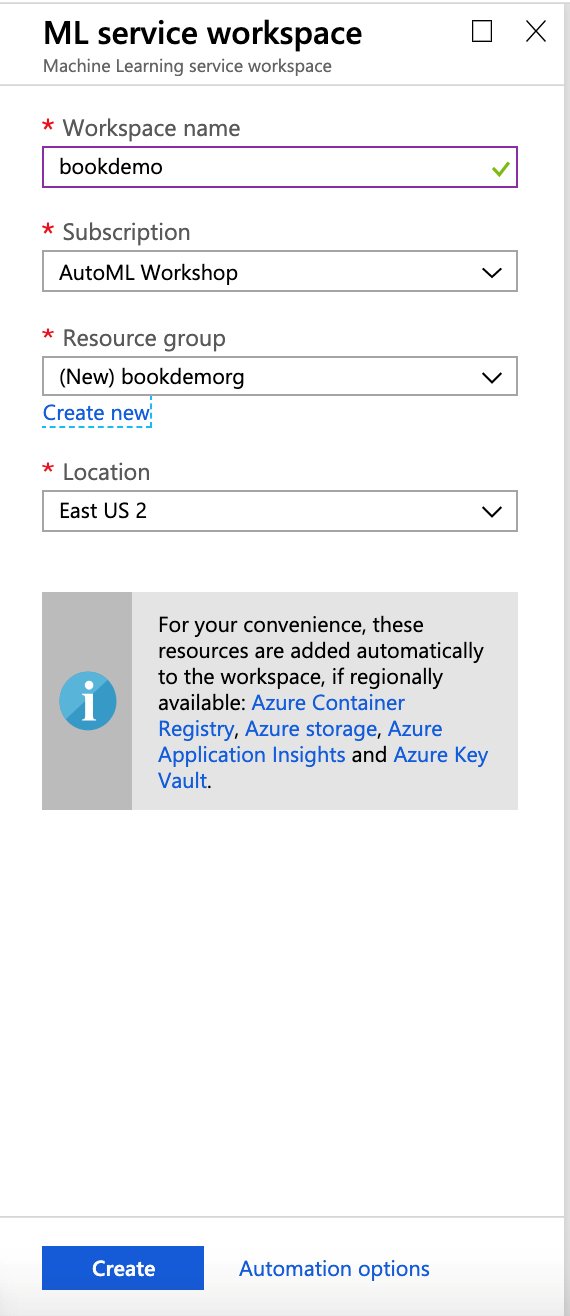
Figure 3-11. The Azure Machine Learning workspace creation pane
-
In the upper part of the notification pane that then opens, click the bell icon (Figure 3-12) to go to the newly created Azure Machine Learning workspace.
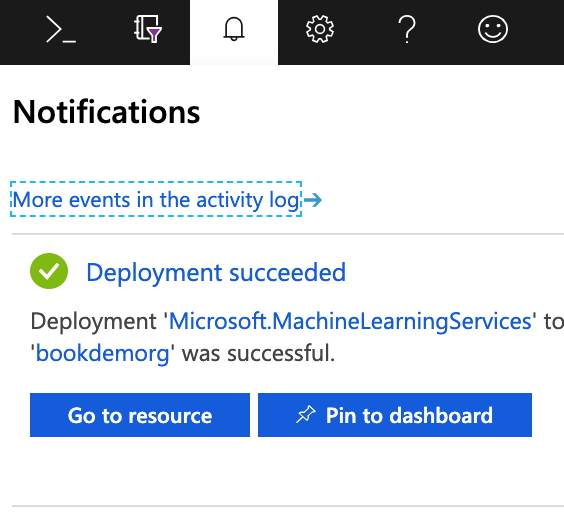
Figure 3-12. Azure Machine Learning workspace notification pane
-
As shown in Figure 3-13, the main page of the Azure Machine Learning workspace shows you how to get started and all of the assets that are a part of the workspace. When we run our automated ML experiment, the details will show up in the Experiments section.
After you create this workspace, you can use it for training, deployment, and more machine learning–related activities. For the remainder of this chapter, we focus on using automated ML.
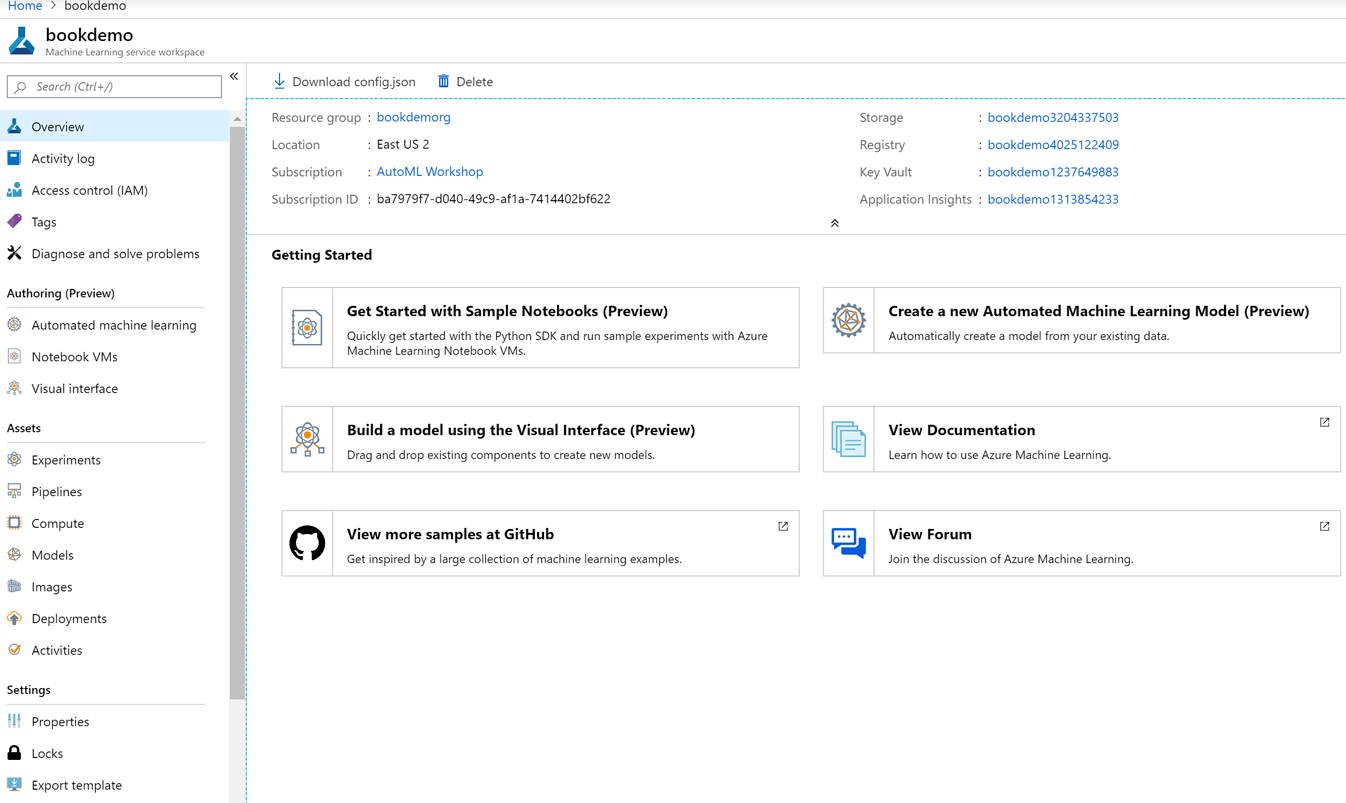
Figure 3-13. Azure Machine Learning workspace overview page
Azure Notebooks
There are multiple ways a data scientist or artificial intelligence (AI) developer can use automated ML. It comes packaged as part of the Azure Machine Learning SDK. It can be installed in any Python environment as a PyPi package.
Here we use Azure Notebooks (a Jupyter environment in the cloud) to run an E2E experiment with automated ML. When used with Azure Notebooks, the SDK is preinstalled in the environment. Let’s create a project:
-
Start Azure Notebooks by going to https://notebooks.azure.com, as shown in Figure 3-14. Click the Try It Now button and sign in.
Figure 3-14. Azure Notebooks home screen
-
From your profile page, you can view the Azure Notebooks projects (Figure 3-15).
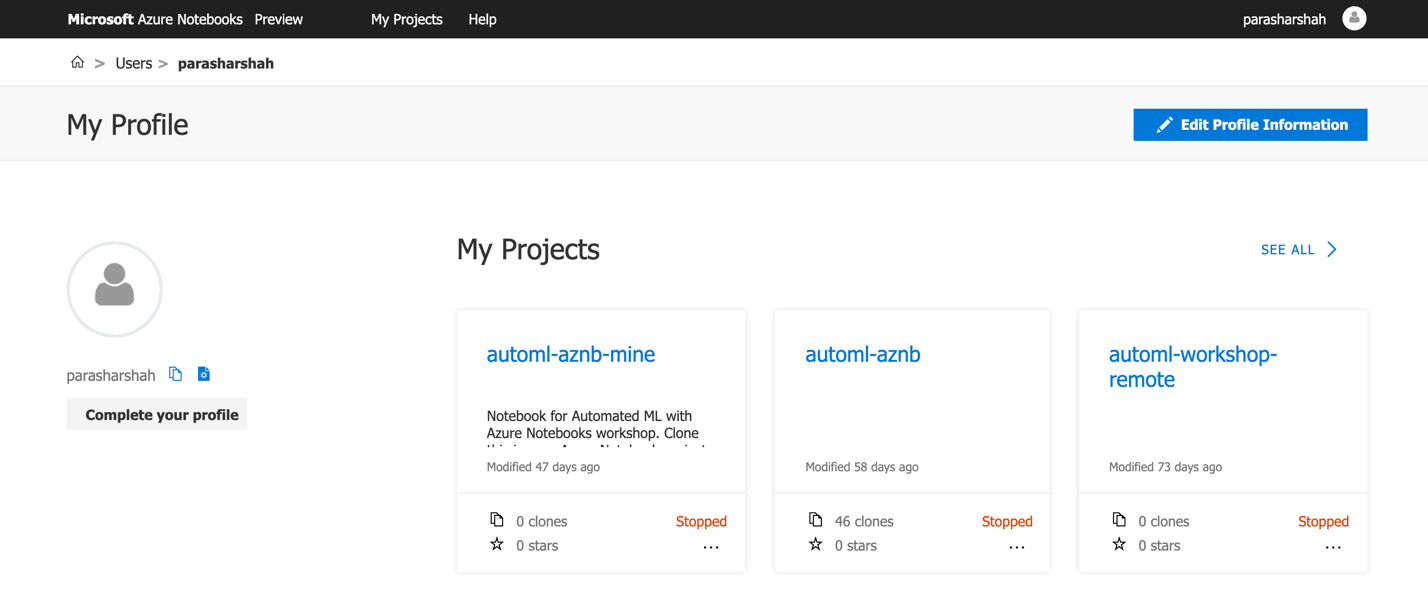
Figure 3-15. An example Azure Notebooks profile page
-
Run the compute as your notebook server, as depicted in Figure 3-16.
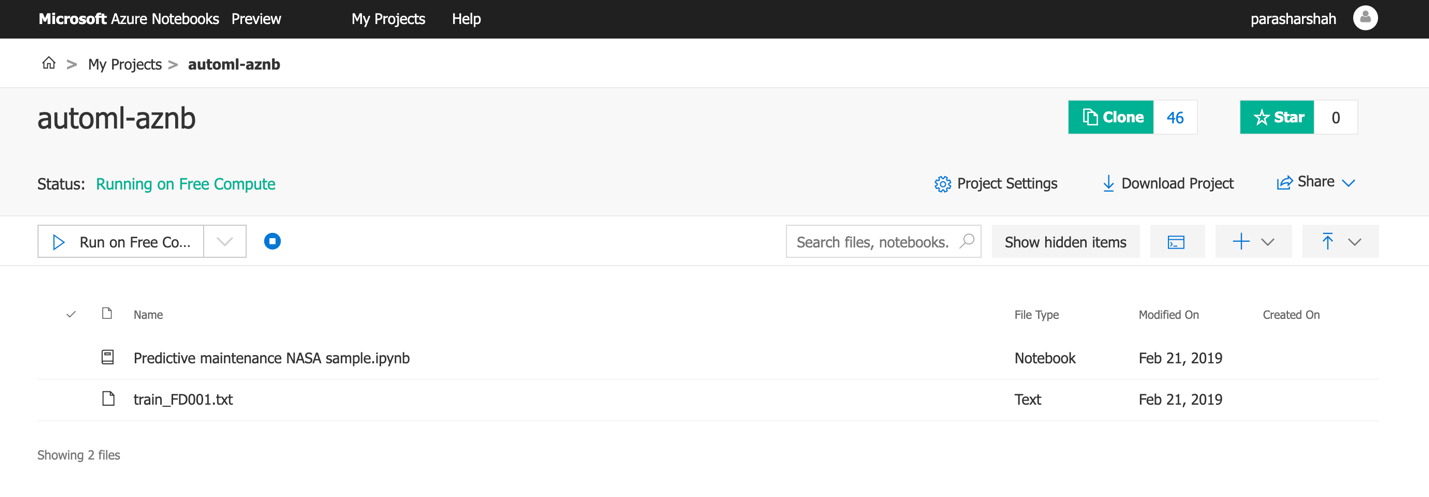
Figure 3-16. Associating a Jupyter server for the compute type
-
Once you open the notebook (see Figure 3-17), it spins up the Jupyter kernel. You can execute the code in the cell by pressing Shift + Enter.

Figure 3-17. A Jupyter notebook
-
As shown in Figures 3-18 and 3-19, you begin by authorizing the environment to access the Azure subscription and thus the Azure Machine Learning workspace that you created earlier.

Figure 3-18. Connecting to Azure

Figure 3-19. Authorizing the Azure Machine Learning workspace
-
Now, instantiate the Azure Machine Learning workspace by providing the subscription, resource group, and workspace name as shown in Figures 3-20 and 3-21. Begin by importing the libraries and then use the
getmethod to instantiate the workspace object, which can then be used by automated ML and other related activities.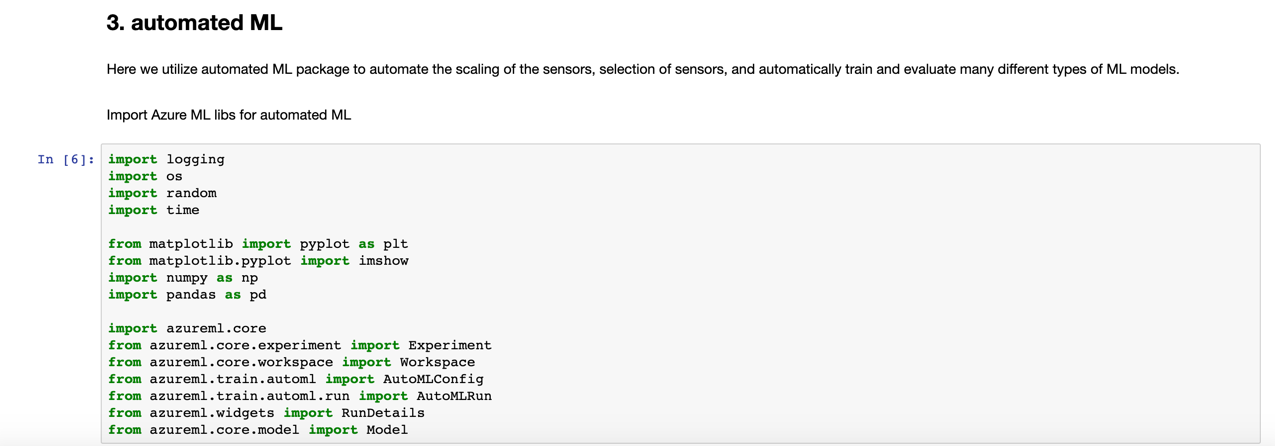
Figure 3-20. Importing Azure Machine Learning libraries

Figure 3-21. Instantiating the Azure Machine Learning workspace
-
Define an experiment within the Azure Machine Learning workspace to get started with automated ML, as shown in Figure 3-22.
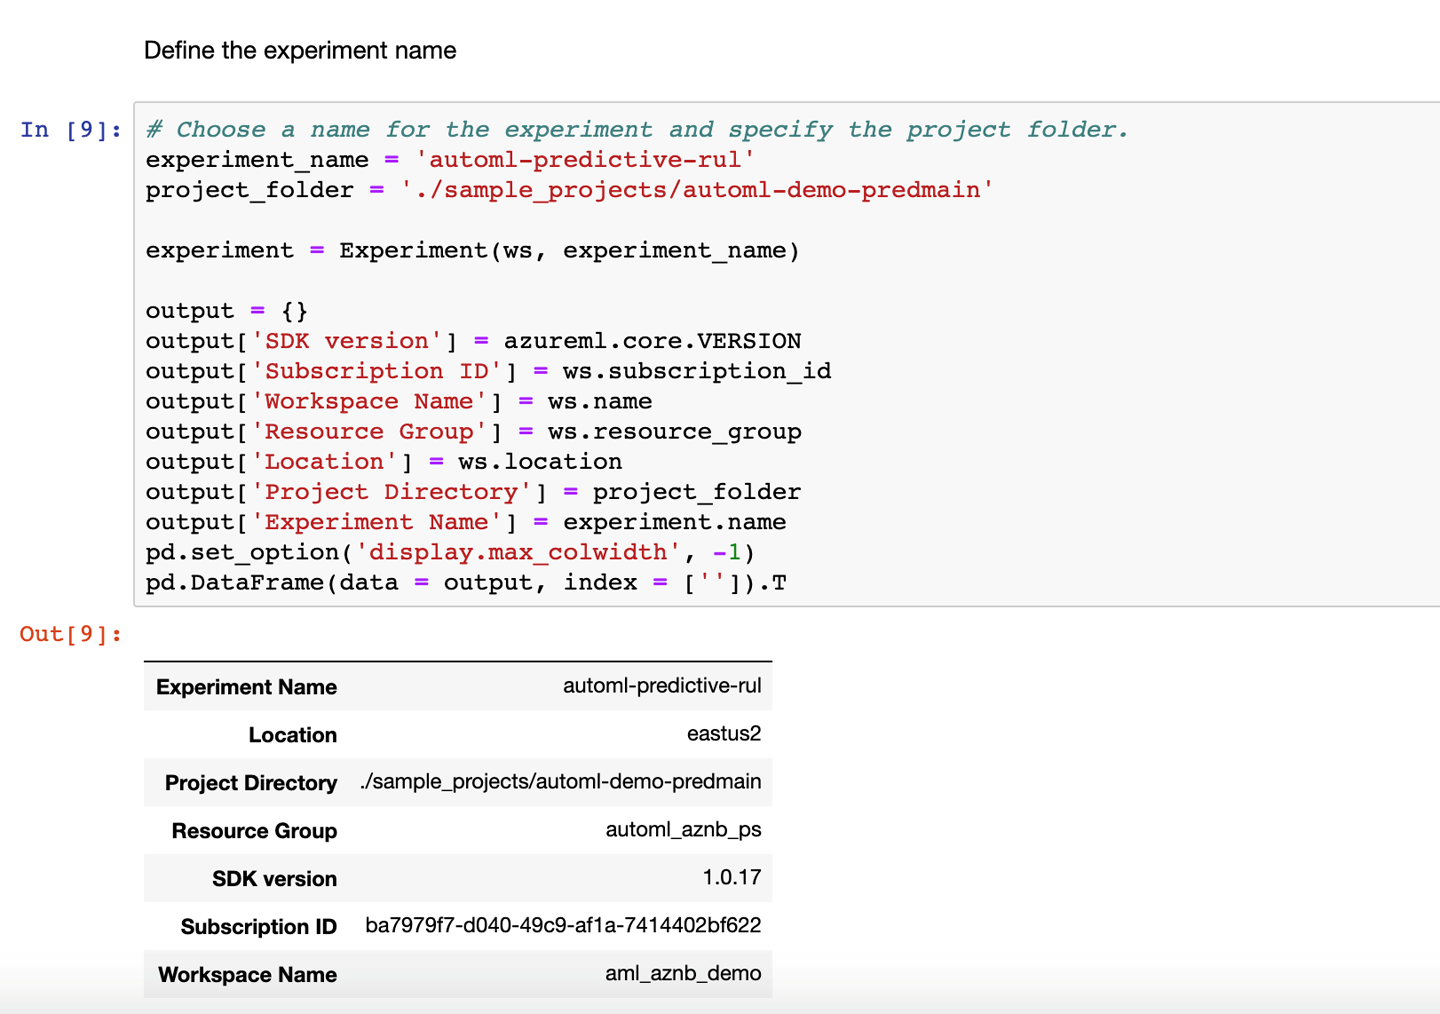
Figure 3-22. Defining an experiment in the Azure Machine Learning workspace
-
From the dataset that will be used for automated ML training, we create the DataFrames for the feature columns and prediction label. These DataFrames are represented as X and y in the automated ML configuration. The configuration takes various other parameters, as shown in Figures 3-23 and 3-24.
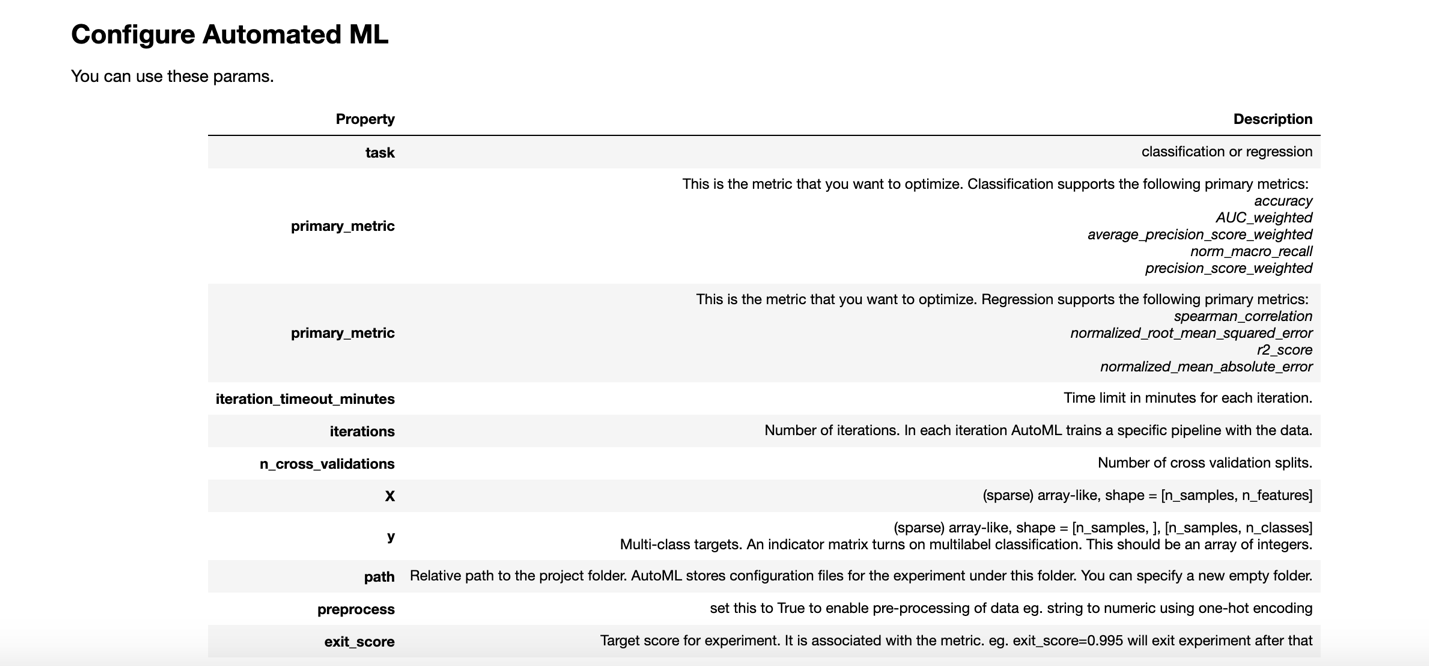
Figure 3-23. Configuration parameters for an automated ML experiment in the Azure Machine Learning workspace
In addition to the experiment type, these parameters define the constraints that help control the time it takes and the money we spend on training. Details of these parameters are available in the official Azure documentation.

Figure 3-24. Configuring an automated ML experiment
Submit this training and monitor the progress of the experiment in the notebook by using a widget, or through the Azure portal in your Azure Machine Learning workspace, as shown in Figures 3-25 through 3-27. This shows the metric score, status, and duration of the experiment run. These metrics can be useful to find what automated ML tried and the result of each iteration.

Figure 3-25. Monitoring the progress of an experiment in the Azure Machine Learning workspace
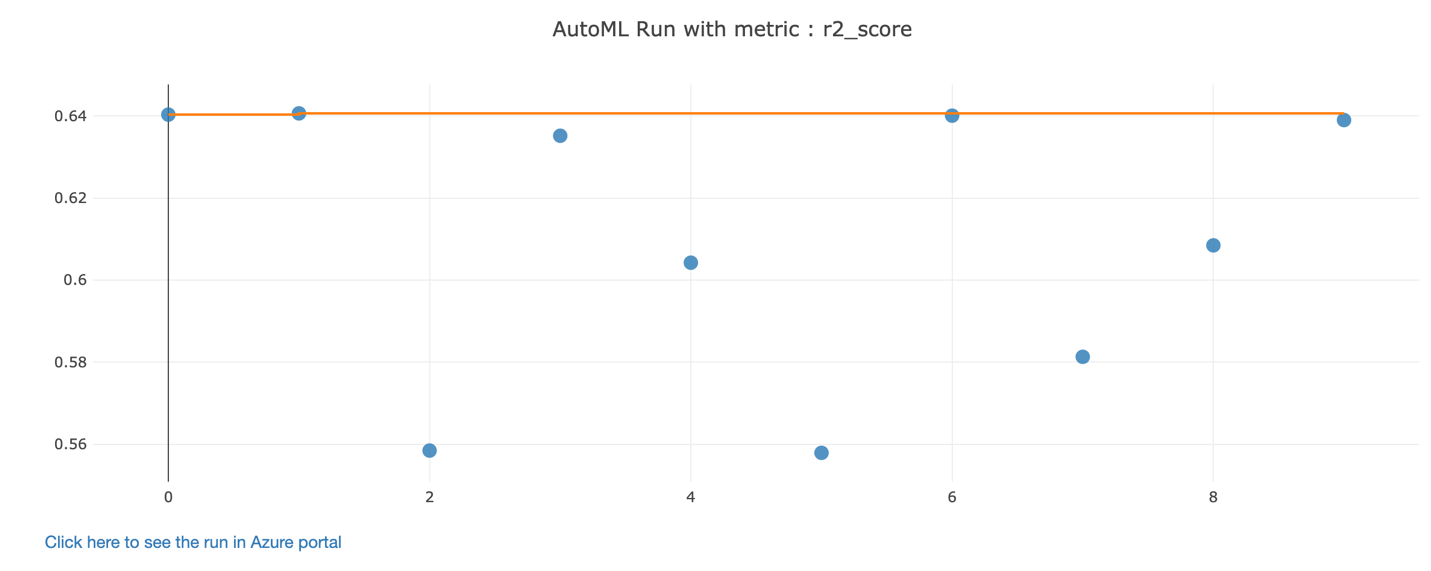
Figure 3-26. Metrics of an automated ML run in the Azure Machine Learning workspace
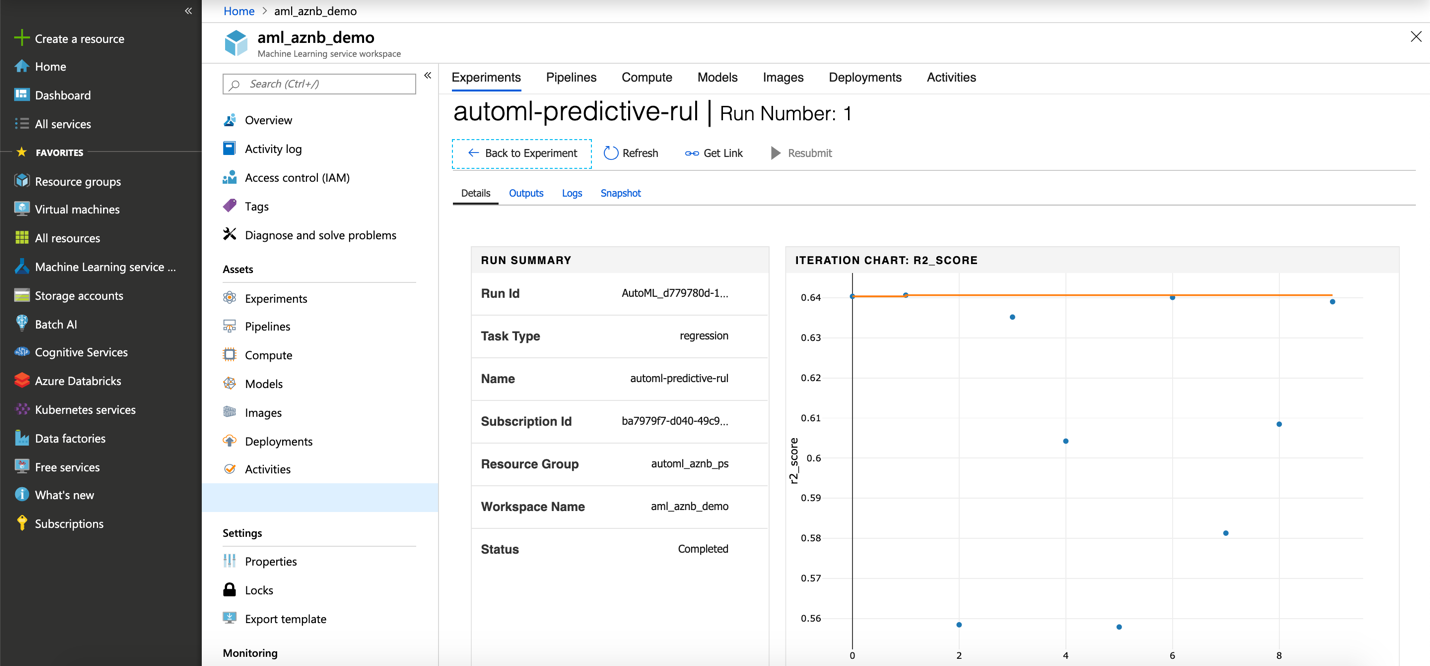
Figure 3-27. Summary and iteration chart in the Azure Machine Learning workspace
-
We can explore details in the child runs (iteration) by checking graphs of the true value and predicted value, as shown in Figures 3-28 and 3-29.
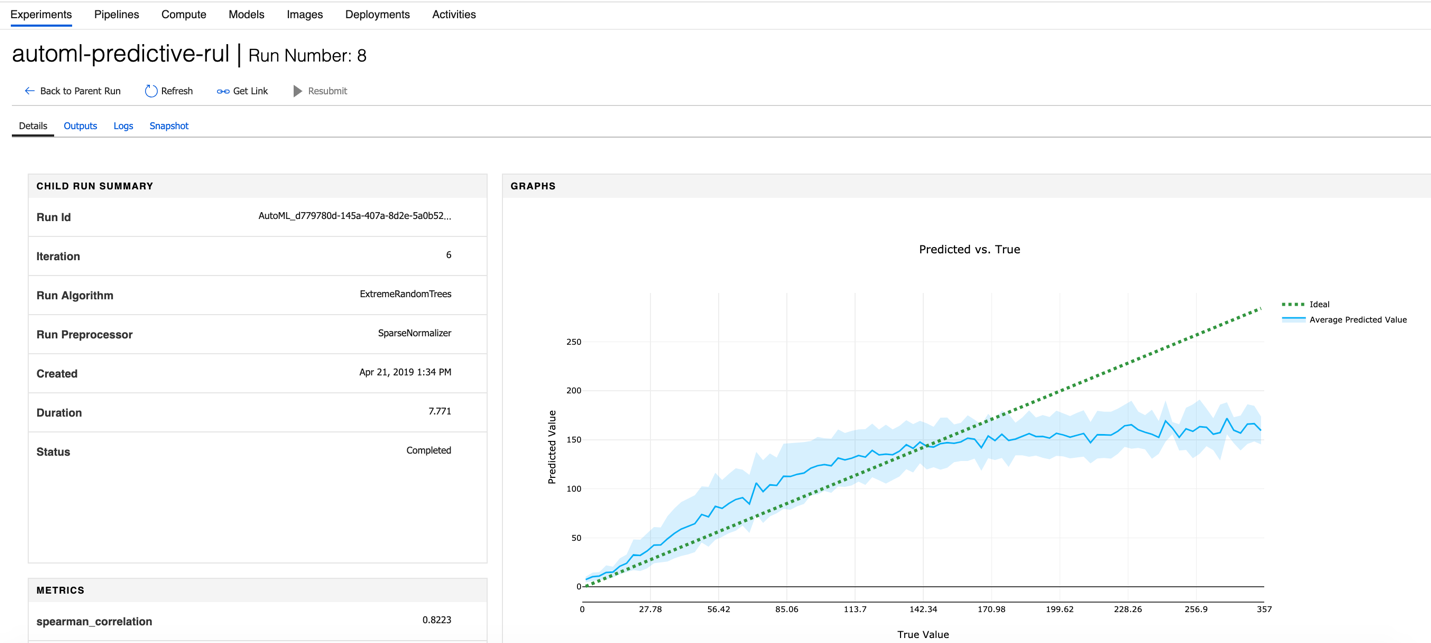
Figure 3-28. Prediction versus true value
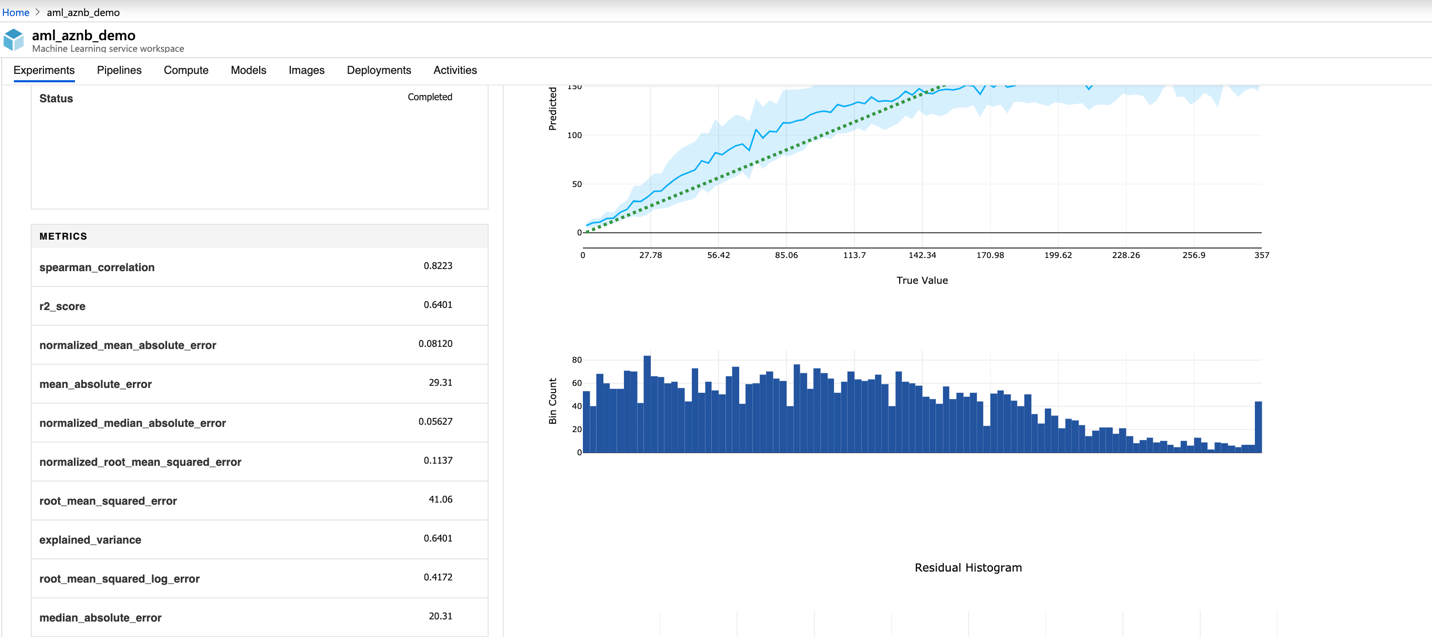
Figure 3-29. Metrics to evaluate model performance
-
You can export the trained model from any of the child runs, as shown in Figure 3-30. Using Azure Machine Learning, you can deploy this model to the cloud or edge for making predictions. You also can deploy it to another environment of your choice. You can take advantage of the benefits of containerizing the model and then deploying it as a real-time web service or as a batch service using Azure Machine Learning. (We examine deployment in Chapter 5.)
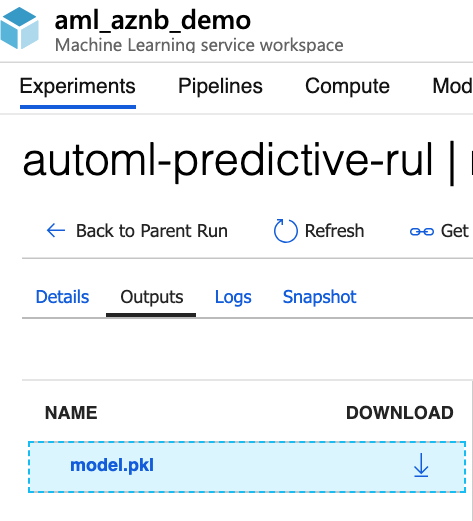
Figure 3-30. Downloading and deploying a model file
-
Alternatively, after the training is complete, you can select the best model writing Python code as shown in Figure 3-31.

Figure 3-31. Selecting the model from the best run
-
When you go to the main experiments page in your Azure Machine Learning workspace, you can look at all the experiments that you have run as well as their child runs. The portal automatically sorts the child runs based on the metric you are optimizing. In Figure 3-32, you can see a summary of the experiment run. It has various panes to show the run config and the run results. The best pipeline is shown at the top in Figure 3-33.
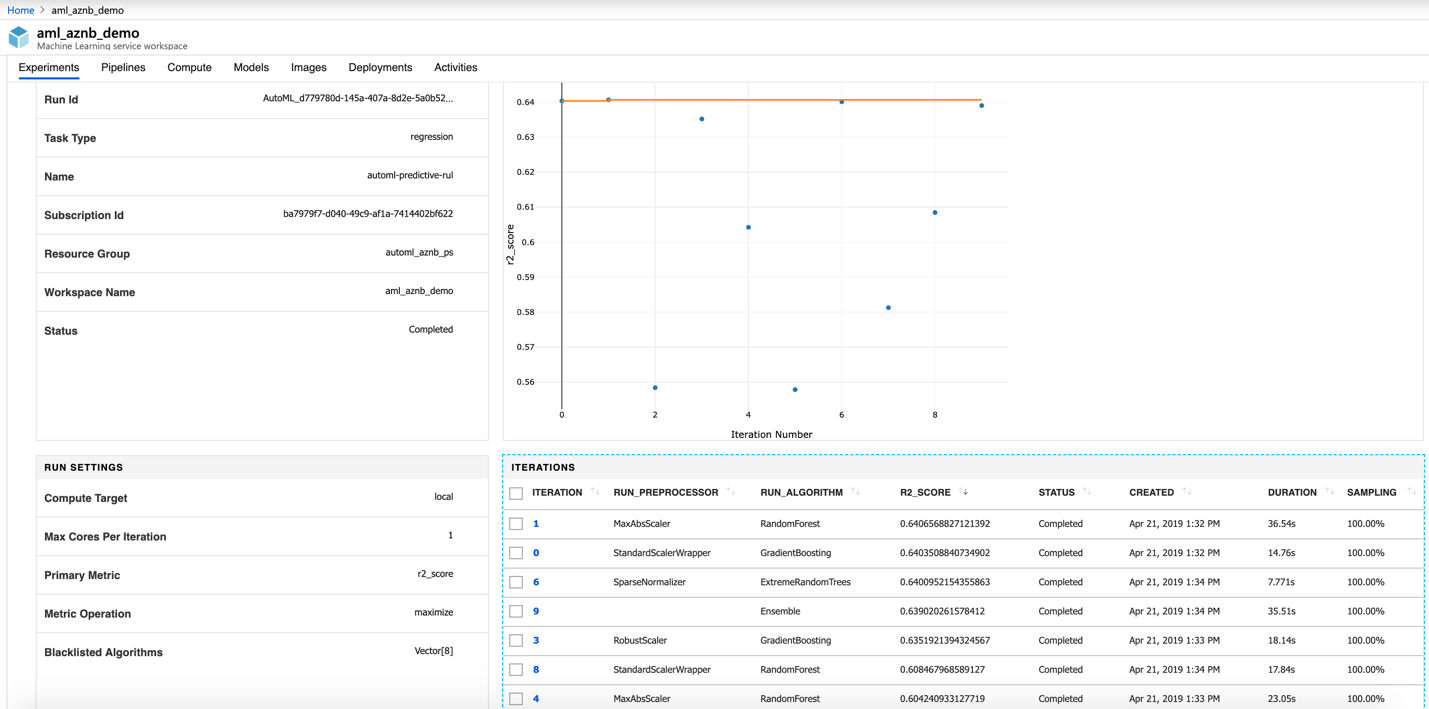
Figure 3-32. An automated ML experiment run summary

Figure 3-33. Run results sorted based on metric
Notebook VM
As of this writing, a new cloud-based notebook server is available in preview. This secure, cloud-based Azure workstation provides a Jupyter notebook server, JupyterLab, and a fully prepared machine learning environment. You can learn more about it in the Azure Machine Learning Notebooks documentation.
Conclusion
In this chapter, you learned about the Azure Machine Learning workspace and how to get started with automated ML by using Azure Notebooks. In Chapter 8, you’ll use more coding environments to run automated ML experiments.


