Inkscape comes with an extensive collection of preset composite filters. To apply a preset filter to any number of selected objects, just choose a command from the submenus of the Filters menu. Most filters will apply immediately; a few will first display a simple dialog where you can adjust their parameters, similar to any other extension effects (see 13.3 Path Extensions; such filters have an “. . .” at the end of their names in the menu):

To get a brief description of an individual preset filter (or of any menu command, for that matter), just hover the mouse over its command in the menu and read the status bar. I will not describe all preset filters here; there are dozens of them, and more are added with each Inkscape version. Instead, here is a brief description of the submenus that group together similar filters:
The ABCs submenu collects the most used, simple, basic filters that typically contain just one or two primitives. They include:
Smoke-like “fractal noise” texture applied either to fill (Noise Fill) or to transparency (Noise Transparency).
3D bevel with gloss (Specular Light) or without gloss (Diffuse Light).
Feather (Figure 17-4) applies a blurred opacity mask to the edges of the object.
Roughen randomly distorts the shape of the object.
Simple Blur adds a small amount of Gaussian blur (17.1 Blur).
Most often, these filters are used not on their own but as components in more complex filters that you can build just by layering multiple preset filters on top of one another. You can even roughly adjust the amount of a filter by applying it multiple times to the same object (for more precise adjustments of filter parameters, you will need to visit the Filter Editor, 17.4 The Filter Editor Dialog).
The Bevels submenu presents many variations on the theme of bevels (pseudo-3D raised edges): Here you will find opaque and translucent materials, glossy and matte finishes, bevels lit by multiple sources of light, with and without shadows, with depressions in the middle and with raised border, and so on. All these filters mostly preserve the original color of the object, though they may make it lighter or darker in places for the 3D effect.
The Blurs submenu offers horizontal and vertical motion blur, soft blurry glow behind an object, different approaches to blurring the inside color boundary of the object while keeping its outline crisp (Evanescence, Blur Content, and Cross-Smooth), Noisy Blur that combines shape distortion with blurring, and some other filters (Figure 17-10).
Color submenu contains filters that only modify the colors of the object they apply to. Here you will find Desaturate for turning any object to grayscale, Sepia, Invert and Invert Hue, various colorization filters (Colorize, Solarize, Moonarize), and others.
Distort filters distort the shape of the object using horizontally stretched jitter, like a reflection in water (Ripple), random roughening of edges (Torn Edges), scattering of disconnected bits (Chalk and Sponge), or edge distortion in combination with uneven texture (Pixel Smear). The Roughen Inside filter leaves the outline intact but roughens any color boundaries inside the object.
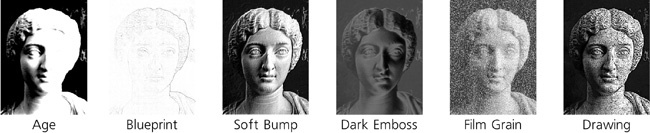
Image Effects are the filters that largely make sense for bitmaps, such as Sharpen, Edge Detect, Emboss, or Oil Painting.
The Masking Tools submenu contains several effects that make parts of objects transparent. The most basic of these, Eraser, makes every white area in the object transparent. For example, if you overlay a small white circle over a black rectangle, group them together, and apply Eraser to the group, the white circle will turn into a hole through which the background will show.
The Materials submenu presents a gallery of imitations of various materials: wood, gold splatter, marble, wax, leopard fur, and many others. Most these filters discard the original color of the object and use their own color.
The Morphology submenu contains filters that deal with the shape of the object by cutting holes in it, adding outlines, and so on.
The Non Realistic Shaders submenu filters take a flat-colored object and add soft or crisp shading to it, highlighting some areas and darkening others, as may be useful for cartoons. This is a bit similar to thick bevels, but it goes deeper and produces more interesting and believable shapes.
Overlays do not change the object itself, but treat it as a pad for displaying some kind of texture, adding it as an overlay on the object’s original color.
The Ridges submenu filters turn an object into a narrow ridge along the edge and treat this ridge in various ways.
The Scatter submenu filters explode an object into variously shaped fragments—tree leaves, cubes (looking more like squares), random spray splotches—and scatter these fragments randomly around.
The Shadows and Glows submenu filters treat the edges of the object in some way, usually making use of Gaussian blur. Perhaps the most widely used filters in this category are Drop Shadow and Drop Glow, which are identical except that the former creates a black shadow and the latter, a white glow (invisible unless you have dark background under your object). For these two filters, you can adjust the amount of blur, the opacity of the shadow or glow, and its offset.
The Textures submenu contains all kinds of naturalistic textures: crumpled plastic, jam spread, bark, horizontally striped carpet, and many others (see Figure 17-17).


To remove any filters applied to the selected objects, use the Filters ▸ Remove Filters command. You can also combine preset filters in any order just by applying them on top of one another; for example, after you change the texture of an object, you can add a drop shadow to it. The Remove Filters command will remove all filters you have applied, not just the one you added last.
If the scale of the applied filter is not what you need (e.g., the bubbles or the feathered edges are too large or too small for your object) and the filter does not allow you to adjust that with a dialog, you can use this simple trick: Scale your object up (or down), for example by pressing  or
or  a few times, then apply the filter, and scale the result back down (or up) by the same multiplier.
The illustrations and descriptions here cover only a subset of the preset filters available. If you want to review all of the preset filters, load the file filters.svg from the share/examples directory of your Inkscape installation.
Note
You can easily add your own preset filters to the menu—no programming required! Once you have an SVG file with the filters you’d like to be able to reuse, simply place that file in the Filters subdirectory of your Inkscape’s profile directory (~/.config/inkscape on Linux, Documents and Settings\<your username>\Application Data\Inkscape on Windows; create the Filters subdirectory there if it does not yet exist). After that, any filters defined in that file will be listed in a Personal submenu under Filters. (All these filters will apply immediately; unfortunately, you cannot at this time create a filter with an adjustment dialog without doing some programming.)
Note
The preset filters that come with Inkscape are useful not only by themselves but also as starting points for your own derivative filters. Once you are familiar with filter primitives and the Filter Editor dialog, choosing one of the preset filters—closest to what you want to get—and working from it is usally much easier than starting from scratch.