Daffodil, narcissus, jonquil. Spring-blooming bulbs.
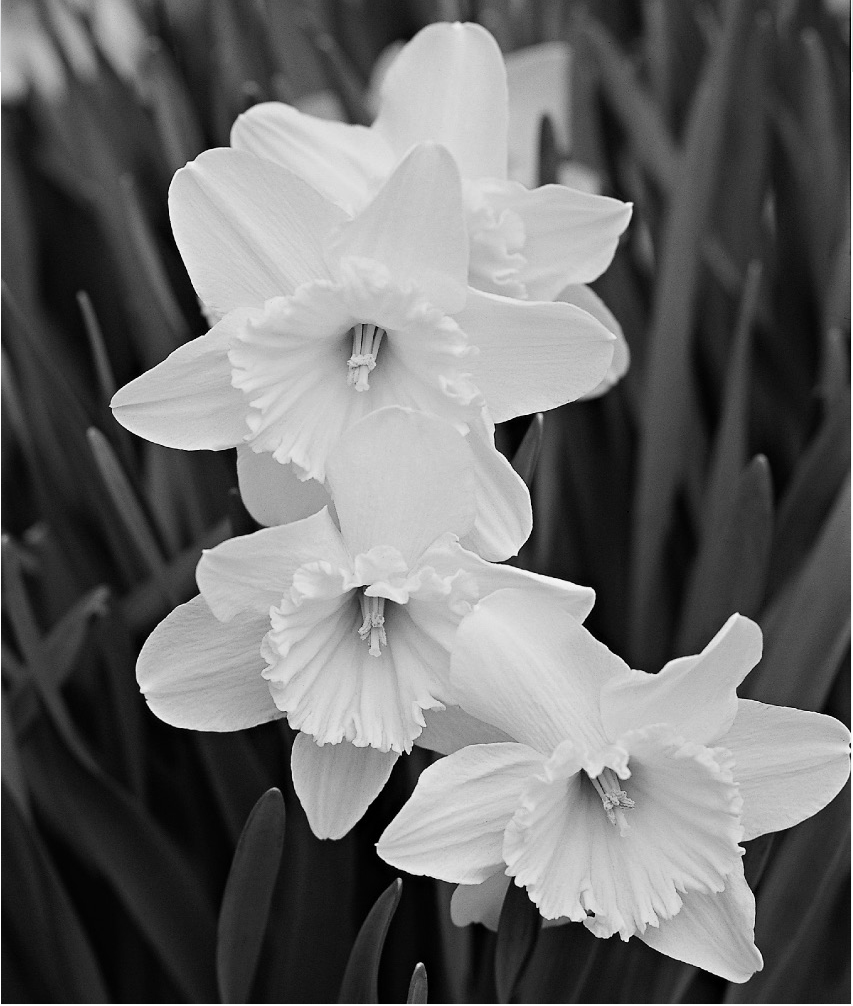
Description: Daffodils, the first showy flowers of the season, bear blooms with a cup- or trumpet-shaped corona surrounded by six outer petals collectively called the perianth. Flowers measure from less than 1 inch to over 6 inches wide. Colors include shades of white, yellow, orange, pink, and red. Daffodils are available in many flower forms and sizes (the American Daffodil Society has established 13 daffodil classes), from the clusters of tiny, fragrant flowers borne by tazetta types to the 4-inch-wide trumpet types, with their large, tubular coronas. Heights vary from species a few inches tall to sturdy hybrids reaching 2 feet. Flowers are borne singly or in clusters, above straplike or, rarely, reedlike leaves. Thousands of cultivars are available, and most are hardy in Zones 3–8.
In addition to the cultivars, four species worth considering include: Narcissus cyclamineus, bearing strongly swept-back golden perianths and prominent trumpets and growing to 1 foot, Zones 6–9; N. jonquilla, the classic jonquil, with multiple flattish, fragrant golden flowers on 1½-foot stems among rushlike leaves, Zones 4–9; N. poeticus, the poet’s narcissus, with a rounded white perianth and a fine, fragrant, red-and-green cup, blooming at the end of daffodil season and reaching 1 foot, Zones 4–9; and N. triandrus, angel’s tears, bearing multiple hanging white blooms on 1-foot stems, Zones 4–9.
How to grow: Plant in early fall (or late summer in the far North) in a spot that receives sun in spring. Set the bulbs at a depth 2 to 3 times their width in average, well-drained soil containing organic matter. (Daffodils tolerate less-fertile soils but will probably not bloom as well.) Add some alfalfa meal, bonemeal, and wood ashes, scratching them in around the bulbs. Water if fall rains are scanty. Cover with a few inches of light mulch in the North after the ground begins to freeze. Remove the mulch in early spring and scatter more fertilizer, again watering if rain falls short. After bloom, deadhead daffodils if they set seed, provide water if necessary, and let the foliage turn yellow before cutting it off near the soil line. Never tie it up in bunches, because sun must reach the leaves for them to manufacture food for next year’s flowers.
With good culture, after several years one bulb will multiply into a large, tight mass that will bloom less freely. Dig up the entire clump after the leaves turn yellow but before they disappear and separate out the largest bulbs for replanting immediately, or store them in a shady, well-ventilated spot until fall planting time. Plant the smaller bulbs in a nursery area for growing into blooming-size bulbs or naturalize them. Fertilize each year in fall as you would for newly planted bulbs. Don’t plant soft or squishy bulbs, and destroy any with streaked foliage, which indicates viral infection.
To naturalize daffodils, plant them in thin, rough grass that you can leave unmowed until the leaves have yellowed. Then leave them to their own devices, perhaps adding a little fertilizer to boost them along.
Daffodil bulbs are poisonous, so they don’t fall prey to animal pests like tulips and other bulbs do. A lucky break for gardeners, and another reason to plant plenty!
Landscape uses: Plant sweeping masses or small groups in thin grass or in woodlands, or grow them in borders and beds, allowing companion plants to partially disguise the foliage as it fades after blooming is finished. Site them close to the house and near windows for easy viewing indoors on cold days; bring some indoors for cut flowers. Many cultivars are excellent for forcing in winter. (See the Bulbs entry for more on forcing.)
See Tropaeolum
Any plant that grows naturally in the habitat where it evolved is a native, or indigenous, plant. Most experts subscribe to the view that North American native plants are those species already present on the continent at the time when Europeans first arrived. Plants brought to North America by settlers, immigrants, and plant collectors, either deliberately or accidentally, are called nonnative, introduced, alien, or exotic species. Introduced species that have escaped gardens and now grow in wild areas throughout North America are called naturalized plants. Orange daylilies (Hemerocallis fulva), oxeye daisies (Leucanthemum vulgare), and Queen Anne’s lace (Daucus carota) are three examples of nonnative species that have naturalized widely throughout North America.
All plants have a native location—the part of the world where they first occurred. A few species still are found only in their native habitat, but most plants have been transferred and transplanted to a wide variety of countries and continents through the intentional or accidental actions of people. Throughout history, settlers seeking new lands tended to take their food and medicinal plants with them. Plant explorers sought out unique perennials, trees, shrubs, and vines from remote locations and collected their seeds or cuttings to raise in nurseries, hoping to find treasures that would become new landscape favorites.
Many of the results of these horticultural undertakings are positive—imagine how much more limited our diets would be if we grew and ate only the plants native to North America, for example. But some immigrant plants have turned out to be troublemakers—they’ve not only done well growing in gardens and cultivated landscapes, they’ve escaped into natural areas and outcompeted the native plants there. Many gardeners have heard of the most notorious exotic invasives, including multiflora rose and Japanese knotweed. Unfortunately, some popular garden plants have turned out to be invasive, too, depending on where you live. Japanese barberry is one example. Long recommended to attract birds, these shrubs have turned out to be a problem because of those bright berries that birds love. The birds eat the berries, fly off to the woods, and defecate, depositing the barberry seeds along with their waste. The seeds sprout, and the bushes crowd out native shrubs and wildflowers.
Figuring out how to combat invasive plants and to conserve native plants is not easy, and the situation has become more complex as the changing climate also causes a shift in the areas in which plants can survive. There are predictions that some native plants, such as sugar maples, will be greatly reduced in their native ranges as weather patterns change. Plant conservation organizations are studying the best ways to respond to these problems.
If nonnative plants cause so many problems, it seems that growing only native plants would be the right thing to do. However, that seemingly simple solution isn’t realistic in our modern landscapes. In North American home landscapes and gardens, more than 90 percent of the plants we grow originated in other parts of the world. Of those nonnatives, only a small number are known to be invasive.
In a few cases, native plants have gotten out of control, too, because of human-caused changes in their native environment. For example, the native hay-scented fern now outcompetes other plants in woodland areas in the eastern United States. It turns out that this species used to live compatibly with neighboring plants, but as forest soils have become more acid over time due to acid rain, the hay-scented fern has become dominant because it can thrive in the more acidic conditions.
A balanced approach may be to choose a native plant whenever you can, as long as it is suitable for the site and compatible with the plants around it. Favor wildlife-friendly plants—but not the nonnatives that displace native plants. Identify plant communities such as northeast woodland, prairie, or wetland plants, and group them together. For more information on choosing and using native plants, see the Native Plants entry.
Keep in mind that many experts feel that home gardens and cultivated landscapes will be the only refuge for some native plants as their natural habitats are developed or overrun by invasives. If every home gardener decided to protect just a few of the plants native to their area, what a difference it could make!
Why has interest in gardening with native plants grown so much in recent years? One reason is a concern about native plant species becoming rare in the wild. Another is an appreciation that native plants are well suited to the soil, climate, natural rainfall, and other conditions in their native range. Thus, a garden planted with regional natives will use less water and require less maintenance than one planted with species that are not as well suited to the site.
Another reason for the rise in popularity of natives is in reaction to nonnative species such as Japanese knotweed that have turned out to be very aggressive. These species have escaped from gardens and overtaken large areas, and it’s difficult to reclaim such an invaded area for any other horticultural purpose. Gardening with native plants avoids the potential risks that nonnatives pose.
The best way to create a native plant garden is to start with a local or regional focus. After all, although plants native to Florida or Georgia are North American natives, that doesn’t mean they will thrive—or even survive—in gardens in Oregon or Alaska, for example.
Start your search for native plants to include in your garden by consulting local nature centers, native plant societies, or native plant nurseries. You can also search on the Internet by plugging “native plants” into your browser. Either add your state to the search parameters or look for national sites that let you select your state for a regionally adapted list.
You may decide to hire a landscape designer or work with a garden consultant to choose plants, but before you do, set your goals for what you want to create. Are you going to include only species native to your county, your state, or your region? You can narrow your focus further by growing only strains, or ecotypes, of plants that evolved in your immediate area. Choosing local ecotypes allows you to grow individual plants that are best adapted to your immediate area. For example, while a particular wildflower may be native over a large area from Minnesota south to Georgia, individual plants grown from seed collected in Georgia may be far more tolerant of heat and humidity than their northern relatives. Or do you want to include any plant that’s native to North America in your garden?
You’ll also need to decide if you want to grow only native plants, or if you want to include nonnatives. Many gardeners wouldn’t be happy without a wide range of both natives and nonnative plants, since many beloved garden plants, including hostas, peonies, many roses, and the majority of our favorite fruit and vegetable crops, aren’t North American natives.
Cultivated forms of plants present another question. Do you want to grow only native species, including varieties and forms that occur naturally? For example, crested iris (Iris cristata) bears bluish lilac flowers; both the species and its white-flowered variant, I. cristata f. alba, fall into this category. Or do you want to include cultivars (cultivated varieties) of native species? These have been carefully selected for particular characteristics that appeal to gardeners, but they also are less diverse genetically and in appearance than the species. For example, ‘Henry’s Garnet’ Virginia sweetspire (Itea virginica ‘Henry’s Garnet’) features larger flowers and richer autumn leaf color than the species. Maturing at 3 to 4 feet, it also is more compact than the species, which ranges from 5 to 10 feet.
There are many ways to incorporate native plants into your landscape. Consider the following ideas.
 Shade gardens are perfect for native woodland wildflowers, ferns, shrubs, and small trees.
Plant a wildflower meadow on a sunny site using a seed mix of local perennials and grasses. Add container-grown natives purchased at local native plant sales.
Include native plants in perennial beds and borders. Showcase unusual native perennials like sweet joe-pye weed (Eutrochium purpureum) and Culver’s root (Veronicastrum virginicum) in perennial borders along with familiar native garden plants like phlox (Phlox spp.) and bee balm (Monarda didyma).
Re-create a style of landscape that appeals to you and suits your site. For example, if you have a rocky hillside, consider covering it with native rock garden plants. If you have a sunny site, but love shady woodlands, start by planting native trees, then fill in underneath them with woodland wildflowers.
Replace lawn areas with native groundcovers such as creeping juniper (Juniperus horizontalis) or fragrant sumac (Rhus aromatica).
You can use native plants to re-create or restore natural landscapes on your property. Start by looking closely at the topography, exposure, and soil on your site. Is the area flat, rolling, or hilly? Does it face east or west? Is it in sun or shade? For how much of the day? What about moisture and soil type? Is it a well-drained, sandy slope or a mucky bottom? Think about how these conditions match those in various parts of your yard.
Next, look at the way the plants are arranged or layered in nearby natural, undeveloped areas. Do tall trees shelter small flowering trees, which in turn rise above a diversity of deciduous and evergreen shrubs, ferns, and wildflowers? Is there mostly a cover of grasses, with an occasional wild-flower, shrub, or tree? The way plants grow with others is part of the distinctive look of a native plant community. It’s a look you’ll want to bring to your own yard, if you want your woods or meadow to look “real.”
Now identify the dominant species. If you removed all the oaks, for example, would the woodland be radically altered? If a particular groundcover were gone, would the look of the woods change? These key species will be vital to reproducing the scene in your home landscape. Note other showy or abundant species that will add interest and variety to your design.
Another important consideration is how the plants grow. Some plants grow in masses or drifts; others are sprinkled sparingly across the land. Look at the spacing. Are plants clumped or do they grow singly? Do they cluster at the bases of trees? Make notes, take photographs, or sketch the patterns you see.
As you look, you’ll see that repetition of key elements—like the brown tree trunks in a forest—unifies the landscape. When you see the tree trunks, you think, “forest.” In a prairie, unity comes from the continuous background of grasses and the virtual absence of trees and shrubs. To make a recognizable natural landscape at home, you have to give it a unified look. But balance unity with diversity. The unexpected in nature is what keeps us excited. Choose a variety of plant forms, textures, and colors to keep your landscape exciting. See the Landscaping entry for more information on creating an effective landscape. See the Invasive Plants entry to learn about native alternatives for common invasive exotics.
See Peach
See Pests; Plant Diseases and Disorders; Soil
Catmint. Spring- to summer-blooming perennials.
Description: Nepeta × faassenii, blue catmint, produces a profusion of ½-inch blue-violet blooms borne in clusters over 1½- to 2-foot spreading mounds of 1- to 1½-inch fragrant, gray-green, scalloped leaves. Zones 4–8. N. cataria is the rather weedy herb, catnip, beloved of felines. Zones 3–7.
How to grow: Plant in spring or fall (or divide in spring) in a sunny spot (partial shade in the South) with average, well-drained soil. Cut back by half and fertilize lightly after flowering for fall rebloom. Buy cutting-grown plants to make sure you get N. × faassenii rather than its less-attractive parent, N. racemosa, which can be grown from seed.
Landscape uses: Group near the front of borders; grow as an edging along walks or beds or as a low hedge or among rocks. Combine with roses, pinks, and gray-leaved plants in a cottage garden.
A nursery bed is an area designed for nurturing plants that need special care and attention before they are planted in the garden. Creating your own nursery bed is a great way to save money on plants. If you’re planning a garden that calls for lots of groundcovers or hostas, for example, buy only a plant or two of the required species or variety. Then systematically propagate those plants for a year or more by division, cuttings, or layering (depending on what works best for the type of plant), until you have a small nursery of plants to transplant to your garden. Here are some other suggestions for using a nursery bed.
Grow seedling perennials for a few seasons in a protected spot until you have good-sized clumps that are large enough to transplant.
Direct-sow seeds into a nursery bed, then move plants to the garden once they’re established.
Move excess transplants to a nursery bed until their roots have recovered from dividing or transplanting.
Care for small, newly purchased perennials. Mail-order plants that arrive in small pots or bareroot specimens may not be ready for the garden proper, so use a nursery bed to grow them on and get them established.
Coddle divisions that need extra attention. Although clumps of daylilies or hostas can be cut in two and replanted easily, if you want the maximum number of plants, separate out all the fans or plants in a clump, then watch them closely and care for them in a nursery bed until they are well established.
Nurture cuttings, plants that have been layered, or suckers that have been removed from a parent plant until their roots are established and plants are ready to go into the garden.
Grow replacement plants. Use your nursery bed as a warehouse for flowers like chrysanthemums or impatiens that can be moved into the garden in full bloom to fill an empty spot. Or use it to grow replacement plants to fill spots in a boxwood hedge, for example.
Select a protected location in partial shade for your nursery bed. An east-facing site is best. Also be sure to select a location with easy access to a hose, since plants in a nursery bed will require frequent watering. Since a nursery bed is a working area of the garden—somewhat like a compost pile—and not a display bed, a spot that’s out of the way but easy to get to is ideal.
Prepare the soil for your bed the same way you would for a perennial or vegetable garden. See the Soil entry for details. Be sure to remove rocks, dirt clods, and twigs, and use screened compost to amend the soil, since fine-textured soil is best for growing small plants. Don’t add any more fertilizer than you would in your garden—in fact less is better, since too much fertilizer will encourage weak, rank growth.
Plan on installing posts or framework over your nursery bed to support lightweight screens and/or shade cloth to protect plants. Tiny seedlings and cuttings in a nursery bed need protection from direct sun, hard rain, wind, and pests in order to thrive. Another option is to build a large, open-topped cold frame. Line the bottom with hardware cloth to prevent voles and other pests from entering, then fill the frame with soil. Use the sides of the frame to support screens over the plants (see the Cold Frames entry for more details).
Once your nursery bed is ready to accept occupants, you’ll no doubt find more than enough plants to fill it. Arrange plants in rows to simplify weeding, mulching, and basic care. Be sure to moisten the soil before moving new, vulnerable plants to the nursery bed, and water each plant as you set it in the ground. Ideally, transplant on a cloudy or rainy day. Protect plants from sun, rain, and wind with screens and/or shade cloth suspended overhead. Sheets of wood or plastic lattice and overturned bushel baskets also work well to protect new nursery bed residents.
Visit your nursery bed daily—especially just after moving in new plants. The objective is to coddle your plants and make the transition as gentle and seamless as possible. Make sure the soil stays evenly moist, and check carefully for pests (see the Pests entry for problems to watch for) and other problems. Keep the nursery bed well weeded, since weeds can easily outcompete perennials or other plants that are just getting established. Mulch with chopped leaves or another light mulch, but keep it a couple of inches away from the stems of seedlings, cuttings, and other plants.
Once plants have overcome the shock of being moved, they’ll put down root growth and send up new topgrowth. See the Transplanting entry for guidelines on the best times to move plants to their permanent locations in the garden.
Reliably long lived, often simply gargantuan in size, and possessing many unique physical attributes, nut trees are an important part of American culture. Grown since Colonial times, nut trees are truly a multipurpose crop, providing shade, beauty, edible nuts, valuable lumber, and wildlife habitats.
Nuts are excellent sources of the same proteins and fats commonly found in meats. Many nuts contain up to 30 percent protein by weight, while fresh beefsteak contains less than 20 percent. Except for chestnuts, which are nearly 50 percent carbohydrate, most nuts also contain 50 to 70 percent fat. Nearly all of this fat is unsaturated. Nuts are also good sources of certain vitamins and of minerals, mined by the deep root systems of the trees.
Nut trees provide us with some of our finest building materials. Black walnut trees are especially prized for their exceptional, beautifully grained lumber. An ideal single specimen can sell for as much as $30,000. Lumber cut from nut trees is prized by woodworkers and craftspersons for its beauty, strength, and durability.
The natural beauty of nut trees is enhanced by the abundance of wildlife that makes full use of their generous bounty. Squirrels, partridges, wild turkeys, deer, and other enjoyable creatures enrich our suburbs and small towns with their presence while gleaning American’s nut crops. Nut trees are a natural choice for gardeners who want to attract local wildlife.
Although they respond best with ideal growing conditions, many nut trees are wonderfully adaptable to a range of sites. You can plant them on steep slopes to stop soil erosion or in soils too rocky to be plowed. And nut-producing plants come in a range of sizes, from bushy filberts to towering hickories, so there’s one to fit in almost every garden.
People often ask whether they should plant cultivars or seedling nut trees. Named cultivars are produced vegetatively, usually by grafting or budding, yielding genetically identical clones. The advantage of grafted trees is that you know exactly what you are going to get with respect to hardiness, cracking quality, flavor, size, and other crop characteristics. Seeds, on the other hand, are always somewhat different genetically. This genetic diversity can make a stand of seedlings less susceptible to serious insect or disease problems than a stand of genetically identical cultivars.
Where high-quality nut production is of greatest importance, as with pecan or English walnut trees, stick to named cultivars where available. For trees such as black walnut and butternut, where timber value may be as important as the nut quality, plant a few grafted trees and use high-quality seedlings to fill out the rest of the planting. The resulting forest will be much healthier, and the cost of seedling trees is also a fraction of that of grafted ones.
These low-maintenance plants can adapt to a range of sites. They generally need very little extra care once established. Keep in mind that many nut trees, including pecans and most black and English walnuts, need cross-pollination; be sure to plant more than one cultivar or seedling of each kind, or make sure a suitable pollen provider is nearby, if your property is too small to accommodate more than one large nut tree.
Planting: Soil requirements vary; “Nut Trees for Home Use” tells about the particular cultural conditions each kind of tree prefers. In general, though, nut trees thrive in deep, rich, moist, loam or clay-loam soil. Top-grade soils bring out the best in nut trees; one well-documented study identified an entire grove of black walnuts that had reached an average height of 100 feet in only 26 years!
Planting nuts directly into the ground is a nice idea, but experience has proven that planting high-quality seedlings is far more successful. Squirrels and other rodents have an uncanny ability to sniff out planted nuts. In addition, most reputable nurseries screen their seedlings, discarding weak and unhealthy trees, so you’ll get better plants.
Most nut trees have a deep anchoring taproot, making them a bit more difficult to establish than other trees. Whenever possible, start with small, young trees; they will often adjust more quickly and begin growing sooner than larger trees. Make sure you dig the planting hole deep enough to accommodate the taproot.
Aftercare: Water the planted tree thoroughly and top-dress with 6 to 8 inches of compost or mulch to help keep the soil underneath moist. (Keep the mulch away from the trunk, though, to avoid rodent damage.) Failure to keep the moisture level high around the newly planted tree can cause the soil in the hole to shrink away from the taproot during hot, dry weather. Insufficient water during the first year is probably the leading cause of death in newly planted nut trees. Water young trees deeply once a week during dry spells until they are established.
Once they have settled in, the trees should grow rapidly, producing crops anywhere from 3 to 7 years after planting, depending on the type of nut and the local climate.
Pruning: Unlike fruit trees, most nut trees don’t require special pruning techniques to produce good crops. Prune nut trees as you would any shade tree, removing dead, diseased, or crossing branches regularly. If you’ve planted grafted trees, be sure to prune off any suckers that may arise from the rootstock. For trees that are eventually intended for timber, keep side limbs pruned off to about 12 to 16 feet up the trunk.
Although a host of pests and diseases can attack nut trees, none of these are usually lethal. The best pest-control program is to maximize a tree’s natural resistance by keeping it healthy. Applying Bt (Bacillus thuringiensis) is an effective control for many leaf-eating caterpillars. Resistant cultivars are available for some pests and diseases. Pick up fallen leaves, twigs, husks, and nuts regularly to remove possible overwintering sites for pests and diseases.
Chestnut blight (Cryphonectria parasitica) is a serious fungal disease of American chestnut trees (Castanea dentata). Since the early 1900s, it has wiped out nearly all American chestnuts. Nut enthusiasts have begun to identify strains that appear to be resistant to the blight, but until effective control measures or proven resistant cultivars are available, crosses between Chinese chestnut (C. mollissima) and American chestnut trees may be better choices. Or choose another type of nut.
Most nuts are best gathered as soon as they become ripe. Remove the outer husk as soon as possible to prevent mold or darkening of the nut kernel. Store the husked nuts in their shells in a cool, dry, rodent-free area. Allow the nuts to cure (dry) for 1 to 3 months. After curing, most nuts will keep in the shell for at least a year.
Besides producing a tasty crop, many nut trees are beautiful, long-lasting landscape specimens. Depending upon how much space you have available, you may want to try planting one or several of the nut trees described below in your home landscape. For information on other popular nut trees, see the Quercus (oak), Pinus (pine), and Juglans (walnut) entries.
Almond (Prunus dulcis): Small tree (20 to 30 feet) with beautiful flowers that bloom very early; drought tolerant; needs rich, well-drained soil; Zones 7–9.
Beechnut, American beech (Fagus grandifolia): Large tree (50 to 100 feet) with smooth blue-gray bark; slow growing but long-lived; prefers a wooded site with rich, moist, rocky soil; Zones 2–8.
Buartnut (Juglans × bixbyi): Hybrid of butternut (J. cinerea) and heartnut (J. ailantifolia); medium-size tree (40 to 70 feet) that produces large quantities of attractive nuts; nuts may stain pavement; prefers rich, deep soil; Zones 4–8.
Butternut (Juglans cinerea): Graceful tree (40 to 70 feet) but susceptible to disease; nuts will stain pavement; prefers rich, deep soil; Zones 3–7.
Chestnut, Chinese (Castanea mollissima): Small tree (10 to 20 feet) that’s good for small yards; Chinese-American crosses will be taller; prickly burs surround nuts; needs light, sandy loam soil; Zones 5–8.
Chestnut, European (Castanea sativa): Stately, long-lived tree (50 to 90 feet); prickly burs surround nuts; needs rich, loamy soil; Zones 5-8.
Filberts, hazelnuts (Corylus spp.): Small tree or multistemmed bush (10 to 40 feet) with crimson foliage in autumn; husks litter the ground; needs rich, light, well-drained soil; Zones 2–8.
Ginkgo (Ginkgo biloba): Stately, slow-growing tree (30 to 60 feet) with beautiful foliage; nuts are encased within foul-smelling fruits on female trees; needs rich, moist, heavy soil; Zones 4–8.
Heartnut (Juglans ailantifolia): Fast-growing tree (30 to 60 feet) with light-colored bark and lacy foliage; nuts can stain pavement; needs deep, rich soil; Zones 5–8.
Hickory, shagbark and shellbark (Carya ovata and C. laciniosa): Stately, long-lived tree (60 to 120 feet); husks will litter the ground; prefers rich soil; Zones 3–8.
Pecan (Carya illinoinensis): Stately, long-lived tree (70 to 150 feet); husks litter the ground; needs deep, rich, moist soil; Zones 6–9.