INTRODUCTION TO
BASIC DRAWING
Drawing is not only fun, it is also an important art form in itself. Even when you write or print your name, you are actually drawing! If you organize the lines, you can make shapes; and when you carry that a bit further and add dark and light shading, your drawings begin to take on a three-dimensional form and look more realistic. One of the great things about drawing is that you can do it anywhere, and the materials are very inexpensive. You do get what you pay for, though, so purchase the best you can afford at the time, and upgrade your supplies whenever possible. Although anything that will make a mark can be used for some type of drawing, you’ll want to make certain your magnificent efforts will last and not fade over time. Here are some of the materials that will get you off to a good start.

Sketch Pads Conveniently bound drawing pads come in a wide variety of sizes, textures, weights, and bindings. They are particularly handy for making quick sketches and when drawing outdoors. You can use a large sketchbook in the studio for laying out a painting, or take a small one with you for recording quick impressions when you travel. Smooth- to medium-grain paper texture (which is called the “tooth”) is often an ideal choice.
Drawing Papers For finished works of art, using single sheets of drawing paper is best. They are available in a range of surface textures: smooth grain (plate and hot pressed), medium grain (cold pressed), and rough to very rough. The cold-pressed surface is the most versatile. It is of medium texture but it’s not totally smooth, so it makes a good surface for a variety of different drawing techniques.
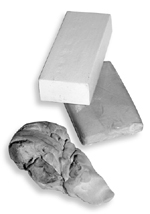
Charcoal Papers Charcoal paper and tablets are also available in a variety of textures. Some of the surface finishes are quite pronounced, and you can use them to enhance the texture in your drawings. These papers also come in a variety of colors, which can add depth and visual interest to your drawings.
Work Station It is a good idea to set up a work area that has good lighting and enough room for you to work and lay out your tools. Of course, an entire room with track lighting, easel, and drawing table is ideal. But all you really need is a place by a window for natural lighting. When drawing at night, you can use a soft white light bulb and a cool white fluorescent light so that you have both warm (yellowish) and cool (bluish) light.
Artist’s Erasers A kneaded eraser is a must. It can be formed into small wedges and points to remove marks in very tiny areas. Vinyl erasers are good for larger areas; they remove pencil marks completely. Neither eraser will damage the paper surface unless scrubbed too hard.
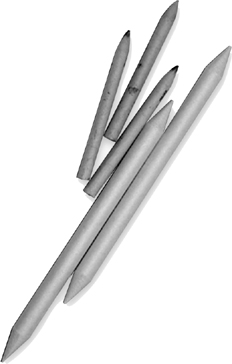
Tortillons These paper “stumps” can be used to blend and soften small areas where your finger or a cloth is too large. You can also use the sides to quickly blend large areas. Once the tortillons become dirty, simply rub them on a cloth, and they’re ready to go again.

Utility Knives Utility knives (also called “craft” knives) are great for cleanly cutting drawing papers and mat board. You can also use them for sharpening pencils. (See the box on page 7.) Blades come in a variety of shapes and sizes and are easily interchanged. But be careful; the blades are as sharp as scalpels!
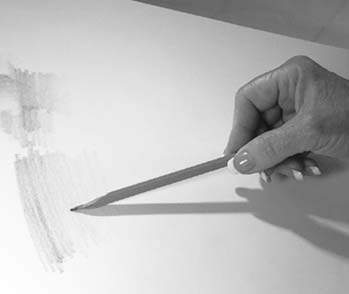
You don’t need a lot of supplies to start; you can begin enjoying drawing with just a #2 or an HB pencil, a sharpener, a vinyl eraser, and any piece of paper. You can always add more pencils, charcoal, tortillons, and such later. When shopping for pencils, notice that they are labeled with letters and numbers; these indicate the degree of lead softness. Pencils with B leads are softer than ones with H leads, and so they make darker strokes. An HB is in between, which makes it very versatile and a good beginner’s tool. The chart at right shows a variety of drawing tools and the kind of strokes that are achieved with each one. As you expand your pencil supply, practice shaping different points and creating different effects with each by varying the pressure you put on the pencil. The more comfortable you are with your tools, the better your drawings will be!
ADDING ON
Unless you already have a drawing table, you will probably want to purchase a drawing board. It doesn’t have to be expensive; just get one large enough to accommodate individual sheets of drawing paper. Consider getting one with a cut-out handle, especially if you want to draw outdoors, so you can easily carry it with you.
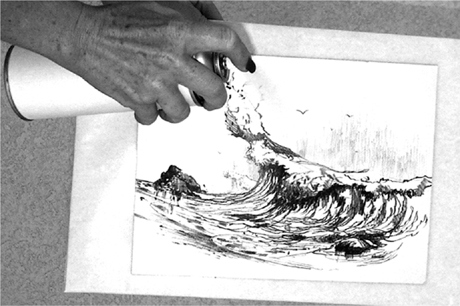
Spray Fix A fixative “sets” a drawing and protects it from smearing. Some artists avoid using fixative on pencil drawings because it tends to deepen the light shadings and eliminate some delicate values. However, fixative works well for charcoal drawings. Fixative is available in spray cans or in bottles, but you need a mouth atomizer to use bottled fixative. Spray cans are more convenient, and they give a finer spray and more even coverage.
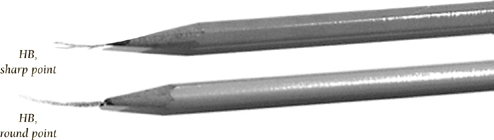
HB An HB with a sharp point produces crisp lines and offers good control. With a round point, you can make slightly thicker lines and shade small areas.
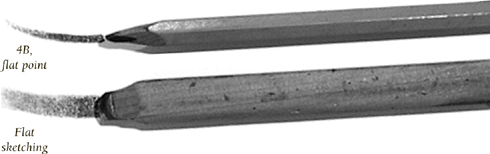
Flat For wider strokes, use the sharp point of a flat 4B. A large, flat sketch pencil is great for shading large areas, but the sharp, chiseled edge can be used to make thinner lines too.
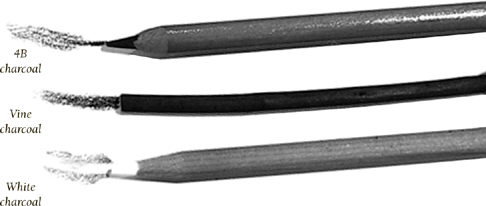
Charcoal 4B charcoal is soft, so it makes a dark mark. Natural charcoal vines are even softer, and they leave a more crumbly residue on the paper. Some artists use white charcoal pencils for blending and lightening areas in their drawings.
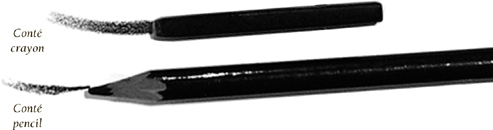
Conté Crayon or Pencil Conté crayon is made from very fine Kaolin clay. Once it came only in black, white, red, and sanguine sticks, but now it’s also available in a wide range of colored pencils. Because it’s water soluble, it can be blended with a wet brush or cloth.
SHARPENING YOUR DRAWING IMPLEMENTS
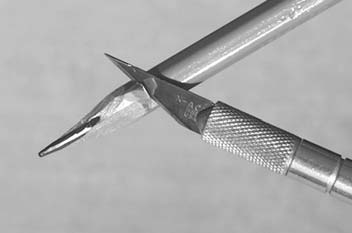
A Utility Knife can be used to form different points (chiseled, blunt, or flat) than are possible with an ordinary pencil sharpener. Hold the knife at a slight angle to the pencil shaft, and always sharpen away from you, taking off only a little wood and graphite at a time.
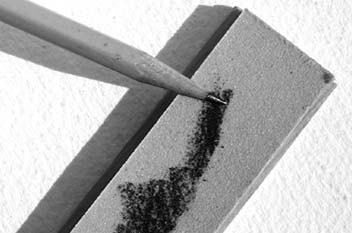
A Sandpaper Block will quickly hone the lead into any shape you wish. It will also sand down some of the wood. The finer the grit of the paper, the more controllable the resulting point. Roll the pencil in your fingers when sharpening to keep the shape even.
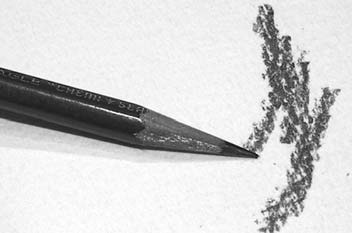
Rough Paper is wonderful for smoothing the pencil point after tapering it with sandpaper. This is also a great way to create a very fine point for small details. Again, it is important to gently roll the pencil while honing to sharpen the lead evenly.
Drawing is actually quite simple; just sketch the shapes and masses you see. Sketch loosely and freely—if you discover something wrong with the shapes, you can refer to the rules of perspective below to make corrections. Your drawings don’t need to be tight and precise as far as geometric perspective goes, but they should be within the boundaries of these rules for a realistic portrayal of the subject. Practice is the only way to improve your drawing skills and to polish your hand-eye relationships. It’s a good idea to sketch everything you see and keep all your drawings in a sketchbook so you can track the improvement. (See page 12 for more on sketching and keeping a sketchbook.) Following are a few exercises to introduce the basic elements of drawing in perspective. Begin with the one-point exercise.
ONE-POINT PERSPECTIVE
In one-point perspective, the face of a box is the closest part to the viewer, and it is parallel to the horizon line (eye level). The bottom, top, and sides of the face are parallel to the picture plane.

1. Draw a horizontal line and label it “eye level” or “horizon line.” Draw a box below this line.
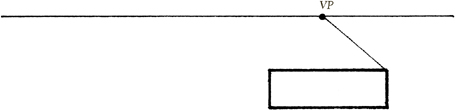
2. Now draw a light guideline from the top right corner to a spot on the horizon line. Place a dot there and label it VP (vanishing point). All side lines will go to the same VP.
3. Next, draw a line from the other corner as shown; then draw a horizontal line to establish the back of the box.
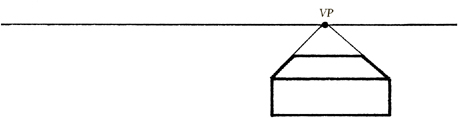
4. Finally darken all lines as shown, and you will have drawn a perfect box in one-point perspective. This box may become a book, a chest, a building, etc.
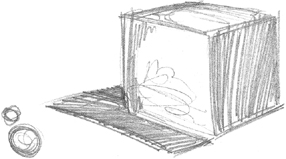
TWO-POINT PERSPECTIVE
In two-point perspective, the corner of the box is closest to the viewer, and two VPs are needed. Nothing is parallel to the horizon line in this view. The vertical lines are parallel to the sides of the picture plane.

1. Establish the horizon line (see “One-Point Perspective” at left), and then place a dot at each end and label them VP. Draw a vertical line that represents the corner of the box closest to the viewer.
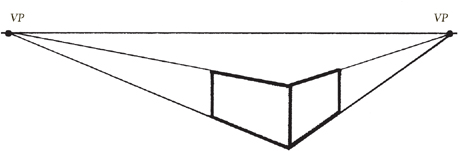
2. Draw guidelines to each VP from the top and the bottom of the vertical line. Draw two more vertical lines for the back of the sides.
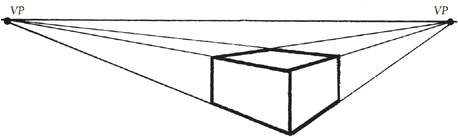
3. Draw two lines to the VPs, as shown, to establish the top of the box. Now darken all the lines and you will have drawn a perfect box in two-point perspective.
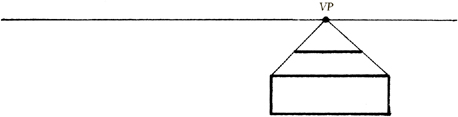
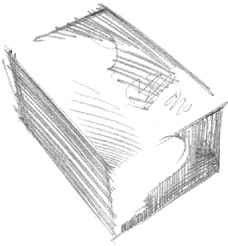
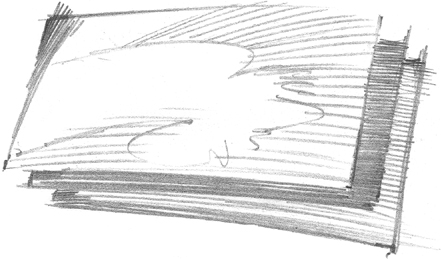
FINDING THE PROPER PEAK AND ANGLE OF A ROOF

1. Draw a box in two-point perspective.
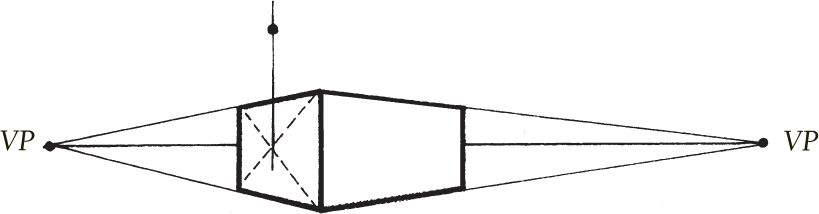
2. Find the center of the face by drawing diagonal lines from corner to corner; then draw a vertical line upward through the center. Make a dot for the roof height.
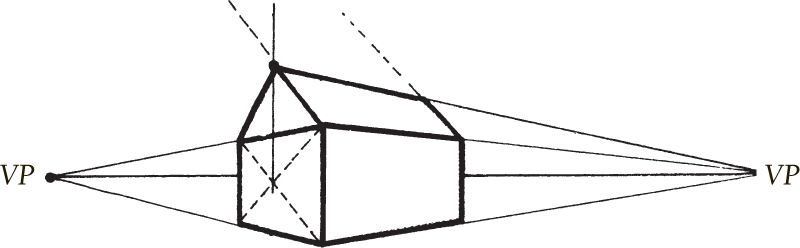
3. Using the vanishing point, draw a line for the angle of the roof ridge; then draw the back of the roof. The angled roof lines will meet at a third VP somewhere in the sky.
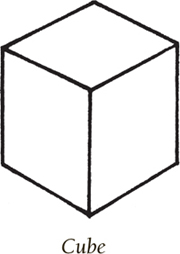
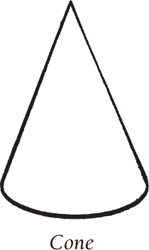
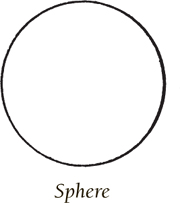
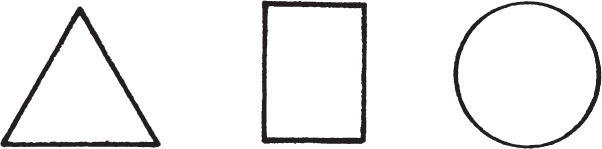
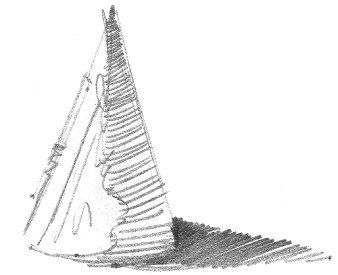
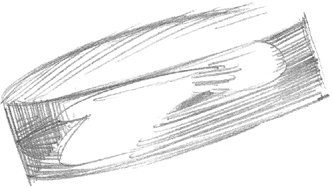
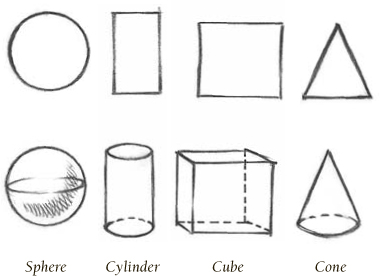
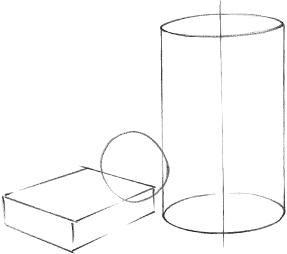
There are four basic forms you should know: the cube, the cone, the cylinder, and the sphere. Each of these forms can be an excellent guide for beginning a complex drawing or painting. Below are some examples of these forms in simple use.

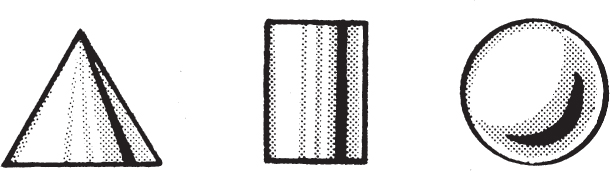
CREATING DEPTH WITH SHADING
To create the illusion of depth when the shapes are viewed straight on, shading must be added. Shading creates different values and gives the illusion of depth and form. The examples below show a cone, a cylinder, and a sphere in both the line stage and with shading for depth.
Line
Shaded
FORESHORTENING
As defined in Webster’s dictionary, to foreshorten is “to represent the lines (of an object) as shorter than they actually are in order to give the illusion of proper relative size, in accordance with the principles of perspective.” Here are a few examples of foreshortening to practice.

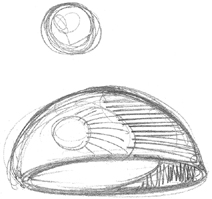
ELLIPSES
An ellipse is a circle viewed at an angle. Looking across the face of a circle, it is foreshortened, and we see an ellipse. The axis of the ellipse is constant, and it is represented as a straight centerline through the longest part of the ellipse. The height is constant to the height of the circle. Here is the sequence we might see in a spinning coin.
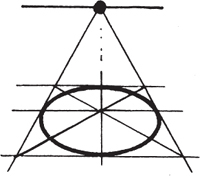
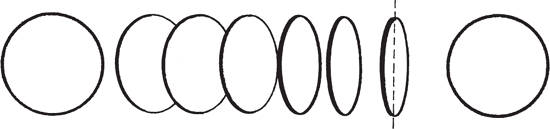
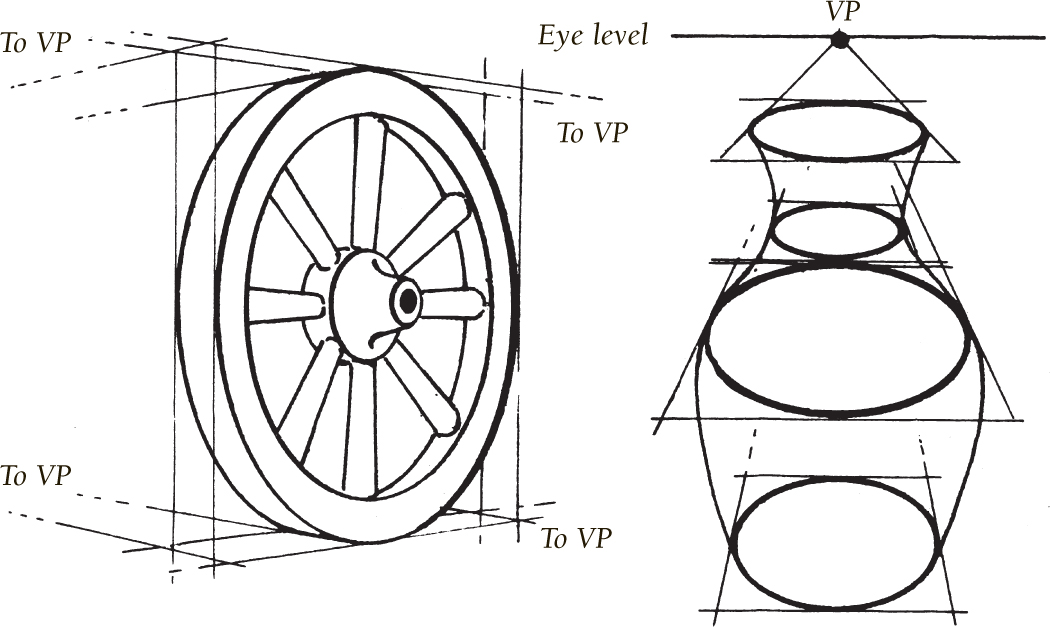
Notice the use of eye-level VPs to establish planes for the ellipses.
CAST SHADOWS
When there is only one light source (such as the sun), all shadows in the picture are cast by that single source. All shadows read from the same vanishing point. This point is placed directly under the light source, whether on the horizon line or more forward in the picture. The shadows follow the plane on which the object is sitting. Shadows also follow the contour of the plane on which they are cast.

Light rays travel in straight lines. When they strike an object, the object blocks the rays from continuing and creates a shadow relating to the shape of the blocking object. Here is a simple example of the way to plot the correct shape and length of a shadow for the shape and the height of the light.
If the light is raised, lowered, or moves to the side, the shape of the shadow will change accordingly.
Drawing is about observation. If you can look at your subject and really see what is in front of you, you’re halfway there already—the rest is technique and practice. Warm up by sketching a few basic three-dimensional forms—spheres, cylinders, cones, and cubes. (See page 16 for more on basic shapes and their corresponding forms.) Gather some objects from around your home to use as references, or study the examples here. And by the way, feel free to put a translucent piece of paper over these drawings and trace them. It’s not cheating—it’s good practice.
STARTING OUT LOOSELY
Begin by holding the pencil loosely in the underhand position. (See page 16.) Then, using your whole arm, not just your wrist, make a series of loose circular strokes, just to get the feel of the pencil and to free your arm. (If you use only your wrist and hand, your sketches may appear stiff or forced.) Practice drawing freely by moving your shoulder and arm to make loose, random strokes on a piece of scrap paper. Keep your grip relaxed so your hand does not get tired or cramped, and make your lines bold and smooth. Now start doodling—scribble a bunch of loose shapes without worrying about drawing perfect lines. You can always refine them later.

Roughing In Lightly sketch the general shapes of a variety of objects, roughly indicating the shaded areas. Also look at the shape of the shadow the object throws, and use your darkest shading here. Experiment by using different types of pencils (H, HB, 2B), changing the pressure on your pencil, and see what different lines you create.
BLOCKING IN A SIMPLE COMPOSITION
Now loosely sketch an assortment of shapes in a simple still life. (See Chapter 2 for a more in-depth coverage of drawing still lifes.) Collect objects that have a variety of sizes and shapes—large and small, tall and short, spherical and rectangular—and put them together in an interesting arrangement. Then start blocking in the shapes using a sharp HB pencil. Remember to use your whole arm and to work quickly so you don’t start tightening up and getting caught up in details. The more you practice drawing this way, the more quickly your eye will learn to see what’s really there.
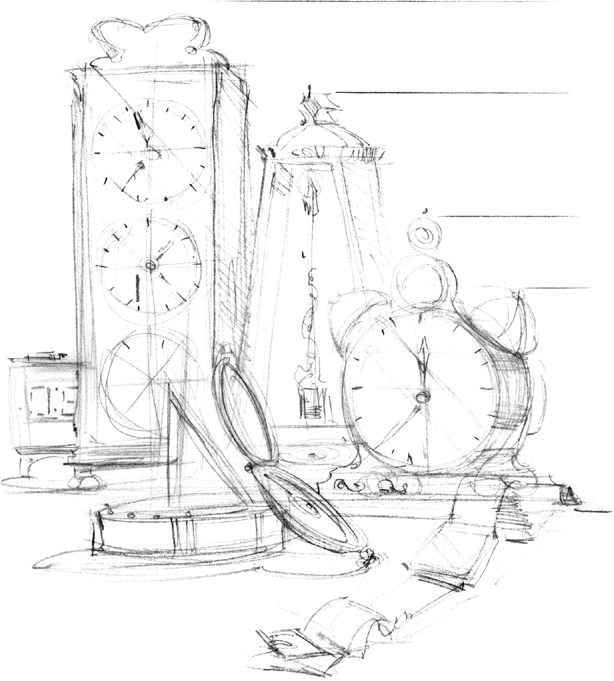
Measuring Up Before you start sketching the individual shapes, make sure you establish the correct proportions. When drawing freely like this, it’s easy to lose sight of the various size relationships. Draw a few guidelines to mark the height of each object, and keep your sketches within those lines.
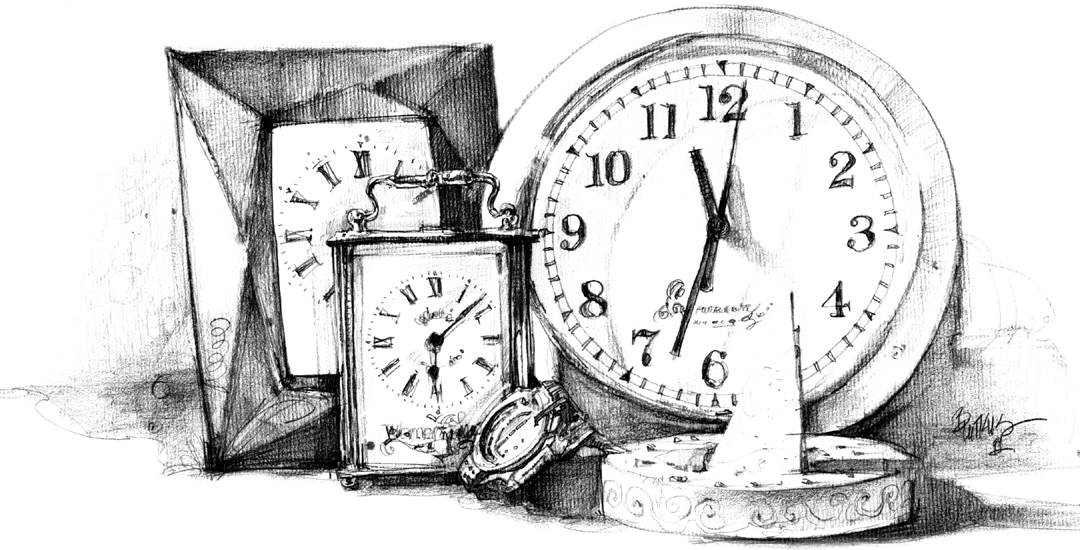
Time’s Up You can create this piece by lightly roughing out the objects using rectangles and circles. Then refine the shapes and gently erase the initial guidelines.
Sketching is a wonderful method of quickly capturing an impression of a subject. Depending on the pencil lead and technique used, you can swiftly record a variety of shapes, textures, moods, and actions. For example, dark, bold strokes, can indicate strength and solidity; lighter, more feathered strokes can convey a sense of delicacy; and long, sweeping strokes can suggest movement. (See the examples below for a few common sketching techniques.) Some artists often make careful sketches to use as reference for more polished drawings later on, but loose sketches are also a valuable method of practice and a means of artistic expression, as the examples on these pages show. You might want to experiment with different strokes and sketching styles. With each new exercise, your hand will become quicker and more skilled.
Using Circular Strokes Loose, circular strokes are great for quickly recording simple subjects or for working out a still life arrangement, as shown in this example. Just draw the basic shapes of the objects and indicate the shadows cast by the objects; don’t pay attention to rendering details at this point. Notice how much looser these lines are compared to the examples from the sketchbook at right.
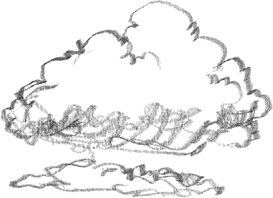
Scribbling Free, scribbled lines can also be used to capture the general shapes of objects such as clouds, treetops, or rocks. Use a soft B lead pencil with a broad tip to sketch the outlines of the clouds; then roughly scribble in a suggestion of shadows, hardly ever lifting your pencil from the drawing paper. Note how this technique effectively conveys the puffy, airy quality of the clouds.

Using Wide, Bold Strokes This method is used for creating rough textures and deep shadows, making it ideal for subjects such as foliage and hair and fur textures. For this example, use the side of a 2B pencil, varying the pressure on the lead and changing the pencil angle to produce different values (lights and darks) and line widths. This creates the realistic form and rough texture of a sturdy shrub.

Recording Your Impressions Here are examples of a few pages that might be found in an artist’s sketchbook. Along with sketching interesting things you see, make notes about the mood, colors, light, time of day—anything that might be helpful when you refer back to them. It’s a good idea to carry a pad and pencil with you at all times, because you never know when you will come across an interesting subject you’d like to sketch.
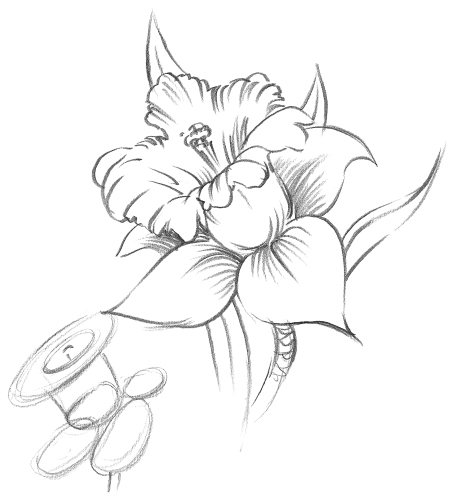
Sketching for Reference Material Here is an example of using a rough sketch as a source of reference for a more detailed drawing. Use loose, circular strokes to record an impression of the flower’s general shape, keeping your lines light and soft to reflect the delicate nature of the subject. Then use the sketch as a guide for the more fully rendered flower above.
Conveying Movement To show movement in a drawing, you need to fool the viewer’s eye and make it appear as if the object is moving up, down, or sideways. In the examples above, the arrows indicate the direction of movement—but your pencil strokes should actually be made in the opposite direction. Press down at the beginning of each stroke to get a strong line, lifting your pencil at the end to taper it off. Note how these lines convey the upward and downward direction of water and the rising and billowing movement of smoke.
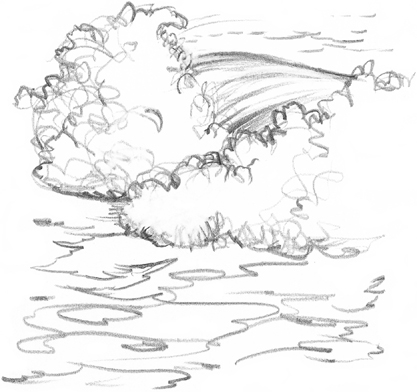
Rendering Wave Action Quickly sketch a wave, using long, flowing strokes to indicate the arcing movement of the crest, and make tightly scribbled lines for the more random motions of the water as it breaks and foams. As in the examples at left, your strokes should taper off in the direction opposite the movement of the wave. Also sketch in a few meandering lines in the foreground to depict the slower movement of the pooled water as it flows and recedes.
FOCUSING ON THE NEGATIVE SPACE
Sometimes it’s easier to draw the area around an object instead of drawing the object itself. The area around and between objects is called the “negative space.” (The actual objects are the “positive space.”) If an object appears to be too complex or if you are having trouble “seeing” it, try focusing on the negative space instead. At first it will take some effort, but if you squint your eyes, you’ll be able to blur the details so you see only the negative and positive spaces. You’ll find that when you draw the negative shapes around an object, you’re also creating the edges of the object at the same time. The examples below are simple demonstrations of how to draw negative space. Select some objects in your home and place them in a group, or go outside and look at a clump of trees or a group of buildings. Try sketching the negative space, and notice how the objects seem to emerge almost magically from the shadows!
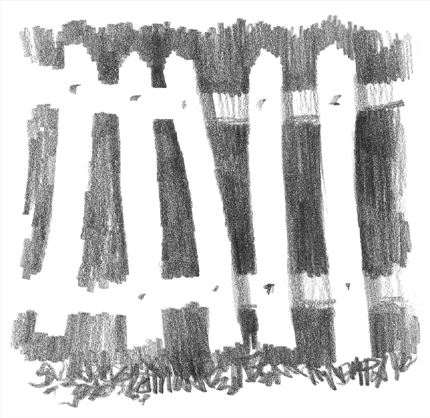
Filling In Create the white picket fence by filling in the negative spaces around the slats. Don’t draw the slats—instead draw the shapes surrounding them and then fill in the shapes with the side of a soft lead pencil. Once you establish the shape of the fence, refine the sketch a bit by adding some light shading on the railings.
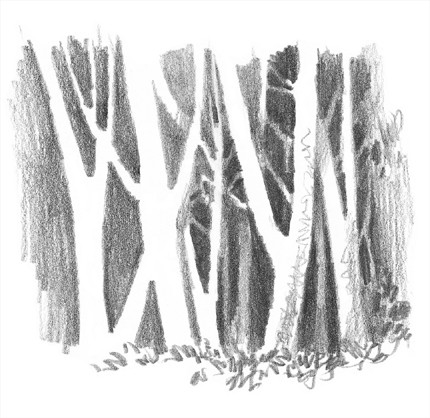
Silhouetting This stand of trees is a little more complicated than the fence, but having sketched the negative spaces simplified it immensely. The negative shapes between the tree trunks and among the branches are varied and irregular, which adds a great deal of interest to the drawing.
Many beginners draw without really looking carefully at their subject; instead of drawing what they actually see, they draw what they think they see. Try drawing something you know well, such as your hand, without looking at it. Chances are your finished drawing won’t look as realistic as you expected. That’s because you drew what you think your hand looks like. Instead, you need to forget about all your preconceptions and learn to draw only what you really see in front of you (or in a photo). Two great exercises for training your eye to see are contour drawing and gesture drawing.
PENCILING THE CONTOURS
In contour drawing, pick a starting point on your subject and then draw only the contours—or outlines—of the shapes you see. Because you’re not looking at your paper, you’re training your hand to draw the lines exactly as your eye sees them. Try doing some contour drawings of your own; you might be surprised at how well you’re able to capture the subjects.
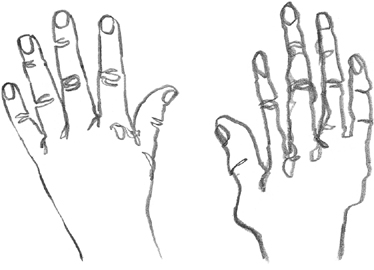
Drawing “Blind” The contour drawing above can be made while occasionally looking down at the paper while you draw your hand. The drawing on the right is an example of a blind contour drawing, where you can draw without looking at your paper even once. It will be a little distorted, but it’s clearly your hand. Blind contour drawing is one of the best ways of making sure you’re truly drawing only what you see.

Drawing with a Continuous Line When drawing a sketch like the one of this man pushing a wheelbarrow, glance only occasionally at your paper to check that you are on track, but concentrate on really looking at the subject and tracing the outlines you see. Instead of lifting your pencil between shapes, keep the line unbroken by freely looping back and crossing over your lines. Notice how this simple technique effectively captures the subject.

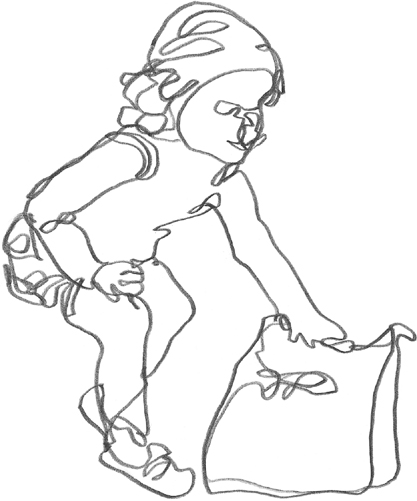
Drawing Children By training your eye to observe carefully so that you can draw quickly, you can easily capture the action of this child looking and then reaching into the bag.
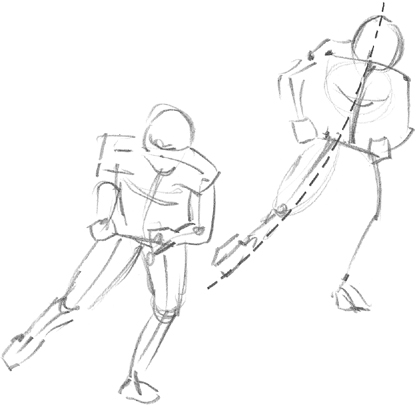
Another way to train your eye to see the essential elements of a subject—and train your hand to record them rapidly—is through gesture drawing. Instead of rendering the contours, gesture drawings establish the movement of a figure. First determine the main thrust of the movement, from the head, down the spine, and through the legs; this is the line of action, or action line. Then briefly sketch the general shapes of the figure around this line. These quick sketches are great for practicing drawing figures in action and sharpening your powers of observation. (See pages 134–137 for more on drawing people in action.)
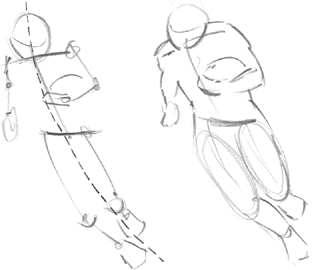
Starting with an Action Line Once you’ve established the line of action, try building a “skeleton” stick drawing around it. Pay particular attention to the angles of the shoulders, spine, and pelvis. Then sketch in the placement of the arms, knees, and feet and roughly fill out the basic shapes of the figure.
Studying Repeated Action Group sports provide a great opportunity for practicing gesture drawings and learning to see the essentials. Because the players keep repeating the same action, you can observe each movement closely and keep it in your memory long enough to sketch it correctly.
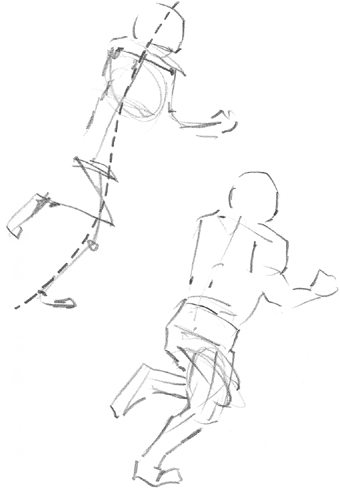
Working Quickly To capture the action accurately, work very quickly, without including even a suggestion of detail. If you want to correct a line, don’t stop to erase; just draw over it.

Drawing a Group in Motion Once you compile a series of gesture drawings, you can combine them into a scene of people in action, like the one above.
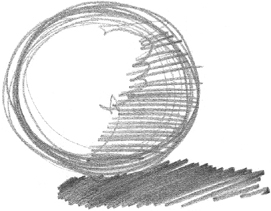
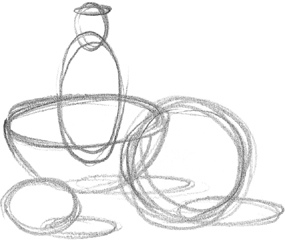
Anyone can draw just about anything by simply breaking down the subject into the few basic shapes: circles, rectangles, squares, and triangles. By drawing an outline around the basic shapes of your subject, you’ve drawn its shape. But your subject also has depth and dimension, or form. As you learned on pages 9–10, the corresponding forms of the basic shapes are spheres, cylinders, cubes, and cones. For example, a ball and a grapefruit are spheres, a jar and a tree trunk are cylinders, a box and a building are cubes, and a pine tree and a funnel are cones. That’s all there is to the first step of every drawing: sketching the shapes and developing the forms. After that, it’s essentially just connecting and refining the lines and adding details.
Creating Forms Here are diagrams showing how to draw the forms of the four basic shapes. The ellipses show the backs of the circle, cylinder, and cone, and the cube is drawn by connecting two squares with parallel lines. (How to shade these forms is shown on page 10.)
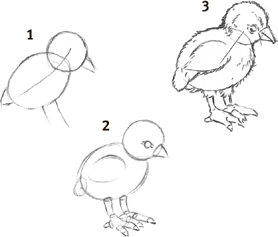
Combining Shapes Here is an example of beginning a drawing with basic shapes. Start by drawing each line of action (see page 15); then build up the shapes of the dog and the chick with simple ovals, circles, rectangles, and triangles.
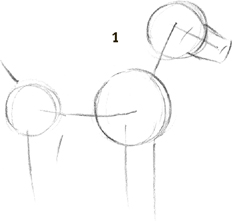
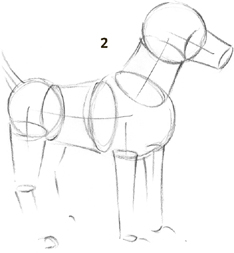
Building Form Once you establish the shapes, it is easy to build up the forms with cylinders, spheres, and cones. Notice that the subjects are now beginning to show some depth and dimension.
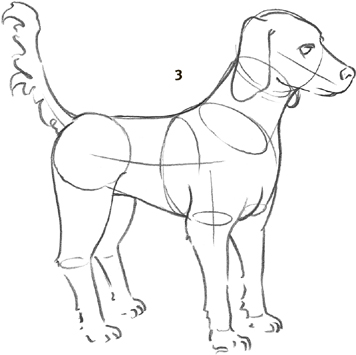
Drawing Through Drawing through means drawing the complete forms, including the lines that will eventually be hidden from sight. Here when the forms were drawn, the back side of the dog and chick were indicated. Even though you can’t see that side in the finished drawing, the subject should appear three-dimensional. To finish the drawing, simply refine the outlines and add a little fluffy texture to the downy chick.
HOLDING YOUR DRAWING PENCIL
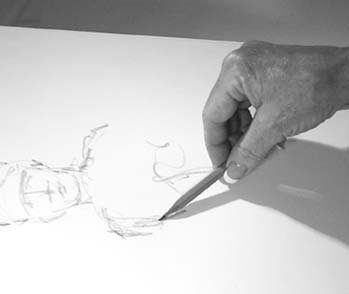
Basic Underhand The basic underhand position allows your arm and wrist to move freely, which results in fresh and lively sketches. Drawing in this position makes it easy to use both the point and the side of the lead by simply changing your hand and arm angle.
Underhand Variation Holding the pencil at its end lets you make very light strokes, both long and short. It also gives you a delicate control of lights, darks, and textures. Place a protective “slip sheet” under your hand when you use this position so you don’t smudge your drawing.
Writing The writing position is the most common one, and it gives you the most control for fine detail and precise lines. Be careful not to press too hard on the point, or you’ll make indentations in the paper. And remember not to grip the pencil too tightly, as your hand may get cramped.
Now train your eye and hand by practicing drawing objects around you. Set up a simple still life—like the one on page 11 or the arrangement below—and look for the basic shapes in each object. Try drawing from photographs, or copy the drawings on this page. Don’t be afraid to tackle a complex subject; once you’ve reduced it to simple shapes, you can draw anything!
STEP ONE Begin with squares and a circle, and then add ellipses to the jug and sides to the book. Notice that the whole apple is drawn, not just the part that will be visible. That’s another example of drawing through.

STEP TWO Next add an ellipse for the body of the jug, a cone for the neck, and a cylinder for the spout. Also pencil in a few lines on the sides of the book, parallel to the top and bottom, to begin developing its form.
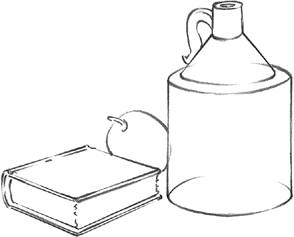
STEP THREE Finally refine the outlines of the jug and apple, and then round the book spine and the corners of the pages. Once you’re happy with your drawing, erase all the initial guidelines, and your drawing is complete.
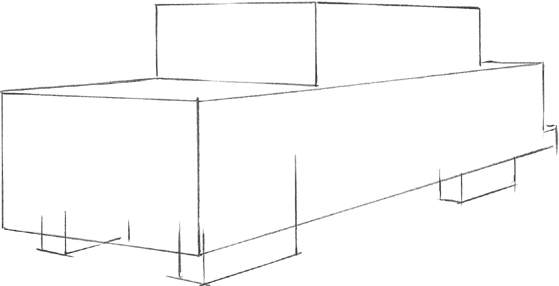
STEP ONE Even a complex form such as this ’51 Ford is easy to draw if you begin with the most basic shapes you see. At this stage, ignore all the details and draw only squares and rectangles. These are only guidelines, which you can erase when your drawing is finished, so draw lightly and don’t worry about making perfectly clean corners.
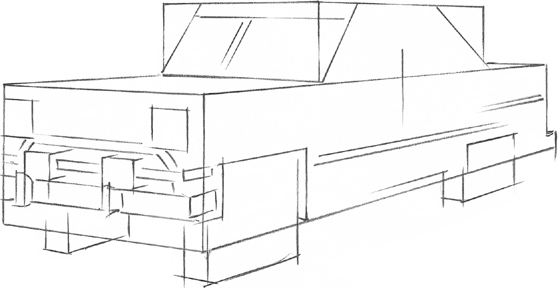
STEP TWO Using those basic shapes as a guide, start adding more squares and rectangles for the headlights, bumper, and grille. Start to develop the form of the windshield with angled lines, and then sketch in a few straight lines to place the door handle and the side detail.
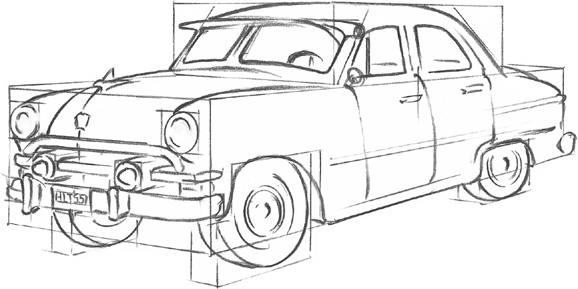
STEP THREE Once you have all the major shapes and forms established, begin rounding the lines and refining the details to conform to the car’s design. Your guidelines are still in place here, but as a final step, you can clean up the drawing by erasing the extraneous lines.
Values tell us even more about a form than its outline does. Values are the lights, darks, and all the shades in between that make up an object. In pencil drawing, the values range from white to grays to black, and it’s the range of values in shading and highlighting that gives a three-dimensional look to a two-dimensional drawing. Focus on building dimension in your drawings by modeling forms with lights and darks.
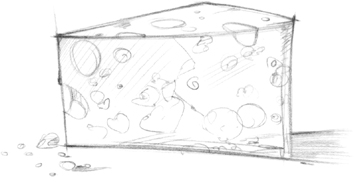
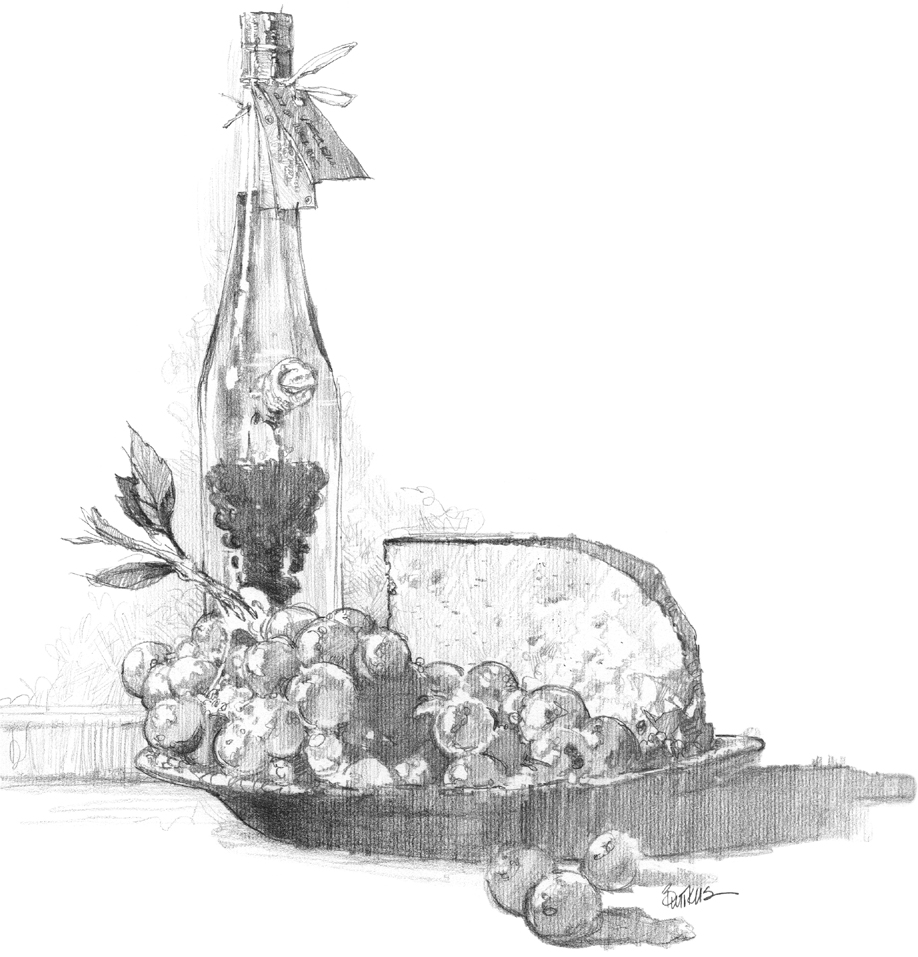
Sketching the Shapes First lightly sketch the basic shape of this angular wedge of cheese.
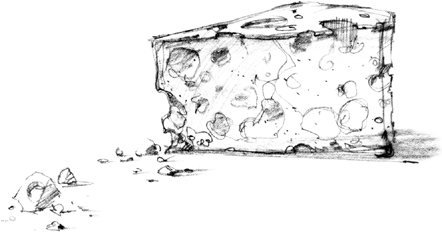
Laying in Values Here the light is coming from the left, so the cast shadows fall to the right. Lightly shade in the middle values on the side of the cheese, and place the darkest values in holes where the light doesn’t hit.

Adding Shadows Look at a bunch of grapes as a group of spheres. You can place all the shadow areas of the grapes (form shadows) on the sides that are opposite the light source. Then can also block in the shadows that the grapes throw on one another and on the surrounding surface (cast shadows).
DRAWING CAST SHADOWS
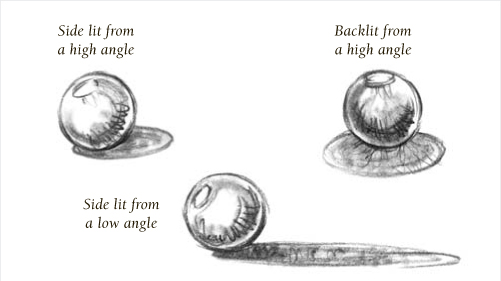
Cast shadows are important in drawing for two reasons. First, they anchor the image, so it doesn’t seem to be floating in air. Second, they add visual interest and help link objects together. When drawing a cast shadow, keep in mind that its shape will depend on the light source as well as on the shape of the object casting it. For example, as shown below, a sphere casts a round or elliptical shadow on a smooth surface, depending on the angle of the light source. The length of the shadow is also affected: the lower the light source, the longer the shadow.
UNDERSTANDING LIGHT AND SHADOWS
To develop a three-dimensional form, you need to know where to place the light, dark, and medium values of your subject. This will all depend on your light source. The angle, distance, and intensity of the light will affect both the shadows on an object (called “form shadows”) and the shadows the object throws on other surfaces (called “cast shadows”; see the box above). You might want to practice drawing form and cast shadows on a variety of round and angular objects, lighting them with a bright, direct lamp so the highlights and shadows will be strong and well-defined.
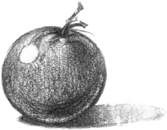
Highlighting Either “save” the white of your paper for the brightest highlights or “retrieve” them by picking them out with an eraser or painting them on with white gouache.
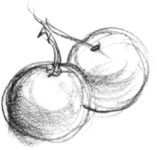
Shading Shade in the middle value of these grapes with a couple of swift strokes using the side of a soft lead pencil. Then increase the pressure on your pencil for the darkest values, and leave the paper white for the lights.
BUILDING DIMENSION
Some artists often sketch with a single HB pencil, but they rarely render a complete drawing with one. Instead they change pencils depending on which values they are applying, using hard leads such as H and HB for light areas and a soft 2B lead for darker areas. You can also make very dark areas by increasing pencil pressure and bearing down harder for the darkest values. Build darkness by shading in layers—the more layers you apply, the darker the area becomes. Most of your shading can be done with the side of the pencil in an under-hand position, but you can add details with the point in the handwriting position. (See page 16.)
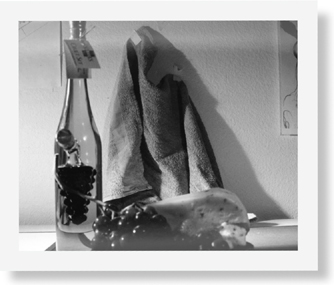
Using Photographs Many artists often draw from photo references, changing them as they see fit. They may prefer to “interpret” in their drawings, rather than simply copying a photograph.
Shading Consistently If you have only one light source, make sure that all the highlights are facing one direction and all the shadows are oriented in the opposite direction. If you mix them up, your drawing won’t be believable.
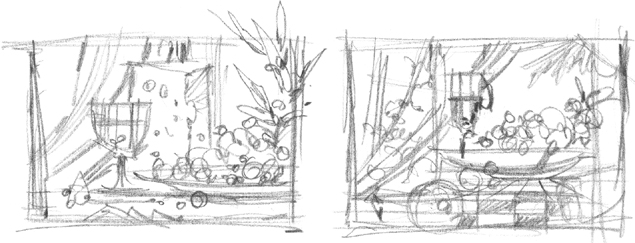
Getting to Know Your Subject Quick, “thumbnail” sketches are invaluable for developing a drawing. You can use them to play with the positioning, format, and cropping until you find an arrangement you like. These aren’t finished drawings by any means, so you can keep them rough. And don’t get too attached to them—they’re meant to be changed.