root
vegetables
—
The root crops tend to play supporting roles in salad making, rather than grabbing the headlines. They are probably underrated: potatoes make superb salad dishes on their own as do beetroot and carrots. In small quantities, these, along with the great family of radishes and uniquely tasting turnips, contribute contrasting elements of flavour, texture and colour to all types of salad. They are especially prized in the winter months when the choice of fresh salad ingredients is far more limited.
Radishes
Raphanus sativus
Countless children have been introduced to gardening by growing radishes. Not only are they fast growing and reliable, but they are a wonderfully varied and versatile salad crop. The familiar sharp flavour of radish roots is muted to refreshing subtlety in sprouted seeds, microgreens and in the highly productive baby leaf seedling crops. Perhaps the best-kept secret is the seed pods that develop after flowering. What a gastronomic treat, if picked young and green! In recent years the small radishes grown in the West have been joined by some of the large Asian radishes, such as the long white Japanese mooli and the spectacular pink- or green-fleshed Chinese Beauty Heart radishes. Most radishes are used raw in salads, but the larger types can be cooked like turnips. Mature leaves of some of the Asian radishes make pleasant cooked greens. Some varieties of radish are only available through heirloom seed libraries or suppliers of Asian vegetables.
–––––
Types of radish
Standard small radishes The most popular radishes are small and round, rarely more than 21/2cm/1in diameter, or oblong or cylindrical in shape usually up to 4cm/11/2in long, though there are other longer varieties. Typical of these is the scarlet-skinned, white-tipped French Breakfast. All have white flesh but the skin can be white, red, pink, yellow, purple to black or in bicoloured combinations – making for colourful salads. They are used fresh throughout the growing season.
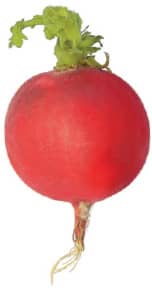
Typical round small radish
Asian radish This diverse group of large radishes includes the white- or occasionally green-skinned Japanese mooli or ‘Daikon’, which are typically 30cm/12in long, weighing 500g/1lb; some giants reach 27kg/60lb (see Further reading Oriental Vegetables). They are used fresh or stored, cooked or raw, mainly in summer and autumn. The various forms of the Beauty Heart types are round, oval or tapered, with mainly pink or green flesh. Rounded varieties are 5–10cm/2–4in in diameter; tapered green varieties up to 20cm/8in long. These decorative radishes are sweet and used raw in salads.
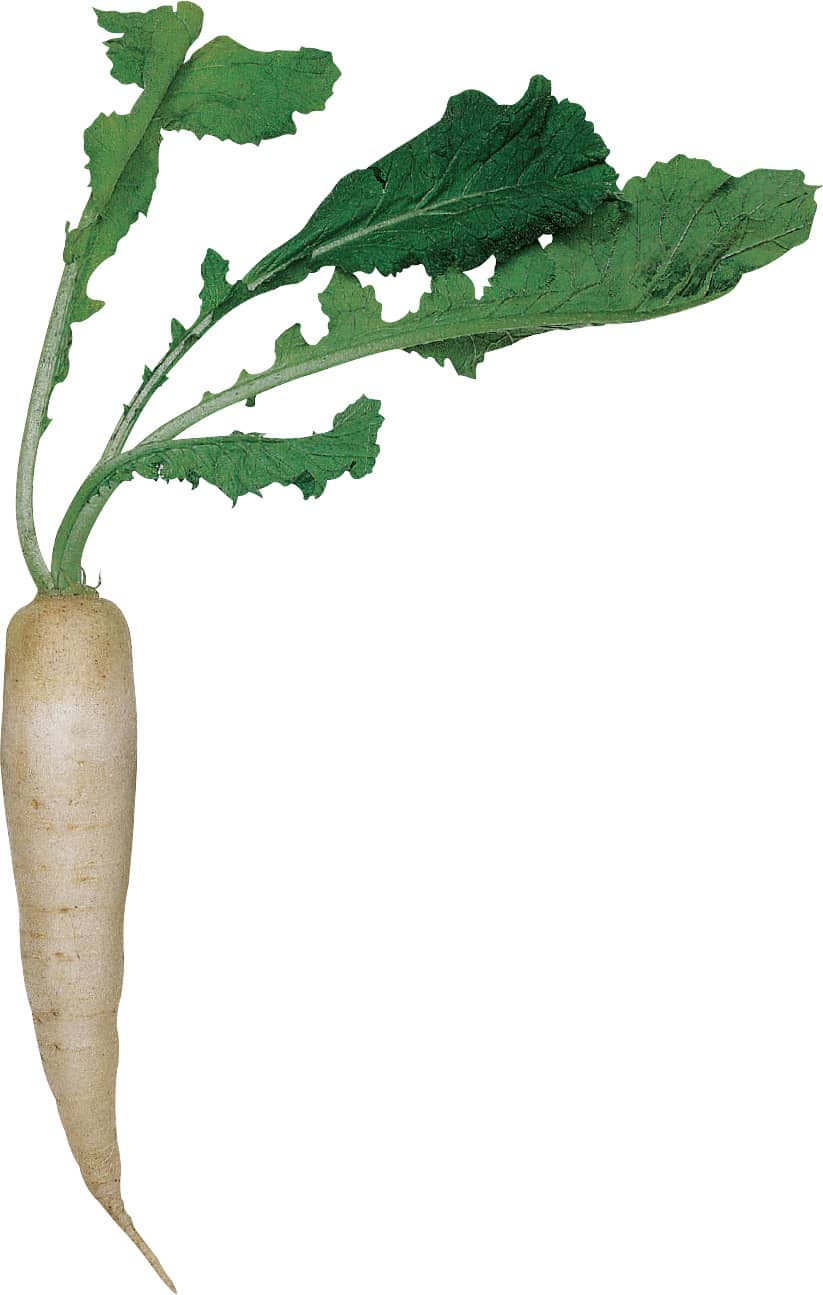
Japanese mooli type
Storage and winter hardy radish These are fairly large radishes, with round and long forms, and black, pink, brown or violet skin. The round forms are 5–10cm/2–4in in diameter; the long types up to about 20cm/8in in length, They display varying degrees of frost hardiness. Some of mine have survived -10°C/14°F outside. They can be lifted and stored for winter use in boxes of moist sand. While they tend to be on the coarse side, they can be grated into salads, and also cooked, for example in stews.
–––––
Soil and site
Radishes grow best in well-drained, light, fertile soil with a neutral pH. Avoid freshly manured ground, which encourages lush leafy growth at the expense of the roots. They tolerate light shade in mid-summer. Adequate moisture throughout growth is essential. In hot, dry soils, growth is slow and there is a risk of radishes becoming pithy, woody, hollow and unpleasantly hot-flavoured. Rotate the larger, slow-growing types as brassicas. All radishes are susceptible to flea beetle attacks at the seedling stage; for control, see here.
–––––
Cultivation of standard small radishes
These are normally ready three to four weeks after sowing, so are ideal for intercropping. For example small groups of seed can be sown between slow-germinating, station-sown parsnips, they can be broadcast in spring above recently planted potatoes, and children can have great fun writing their names in radishes, or making patterns by zigzagging them between established vegetables like cabbages or Brussels sprouts. Seed tapes are ideal for this purpose. These small radishes are easily grown in any kind of container.
For spring to autumn supplies Sow ‘little and often’ at roughly ten-day intervals. Make the first sowings under cover in late winter, followed by outdoor sowings in spring as soon as the soil is workable. Make the earliest sowings in a sheltered spot, protect with cloches or fleece if necessary and use quick-maturing early varieties distinguished by having short tops. (See recommended varieties). Most of the small round radishes and French Breakfast varieties can also used for early sowings. Continue sowing outdoors until early autumn, making the last sowings under cover in mid-autumn.
Sow thinly in situ, broadcast, or in rows 15cm/6in apart, or in shallow wide drills. The commonest cause of failure is overcrowding: entangled lanky seedlings never develop properly. Aim to space seeds 21/2cm/1in apart, or thin early to that, or slightly wider, spacing. Sow at an even depth of about 12mm/1/2in – slightly deeper for long-rooted varieties. This prevents seeds nearest the surface from germinating first and swamping those sown deeper. In dry weather, water weekly at the rate of 11 litres per sq. m/2 gallons per sq. yd. Pull radishes as soon as they are ready. Most varieties bolt rapidly on maturity, though some have good bolting resistance.
Mid-winter crops Certain small-leaved, slow-growing varieties, ‘Saxa’ for example, have been developed for winter culture in unheated greenhouses and polytunnels. Night temperatures should normally be above about 5°C/41°F. Sow from mid-autumn to late winter, thinning to 5cm/2in apart. Keep them well ventilated. They require little watering, except in sudden hot spells: leaves turning dark green indicate that watering is necessary. Give extra protection if colder weather is forecast. They will be ready in late winter/early spring.
–––––
Cultivation of Asian types
These large radishes respond to day length and low temperatures in the same way as oriental brassicas (see here), so it is best to delay sowing until early to mid-summer. Bolt-resistant varieties of white mooli can be sown earlier, in late spring. Once ready, these types stand in good condition far longer than ordinary radishes.
They are susceptible to the normal range of brassica pests and diseases (see here). Growing under fine nets gives excellent protection against cabbage root fly, which is particularly damaging.
Standard mooli These take seven to eight weeks to mature. Sow in situ 1–2cm /1/2–3/4 in deep; or sow in sunken drills 4cm/11/2in deep and pull soil around the stems as they develop for extra support. Plants grow quite large, so it is advisable to sow in rows at least 30cm/12in apart – spacing varies from 71/2–10cm/3–4in apart for smaller varieties to at least 30cm/12in apart for the largest; or you can sow mooli singly in modules and transplant. You can also pull some when immature, leaving the remaining plants to grow larger.
Beauty Heart types The pink-fleshed forms take ten to twelve weeks to mature. Delay sowing until mid-summer, partly to avoid premature bolting, but equally because the deep internal colour develops only when night temperatures fall to about 10°C/50°F in autumn. Sow in situ, spacing plants 20cm/8in apart each way, or 121/2cm/5in apart in rows 30cm/12in apart. For more reliable results, sow in modules, singly or two seeds per module, and plant as one 30cm/12in apart, at the four-to-five-leaf stage.
Where summers are short, plant under cover to extend the season. These types tolerate light frosts, but if there is likely to be heavy frost lift them and store in cool conditions indoors, as hardy winter radish below. Internal colour intensifies with maturity and continues to deepen in storage.
Grow green varieties the same way, but as they mature faster they can be more closely spaced. They can be lifted sooner, as the pale green colour is constant.
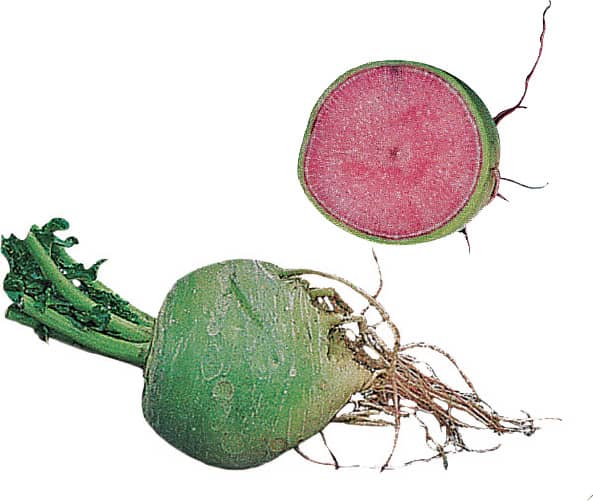
Pink-fleshed Beauty Heart radish
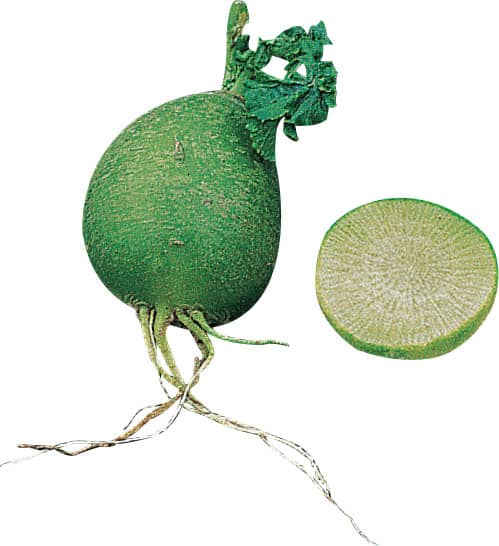
Beauty Heart ‘Green Goddess’
–––––
Storage and hardy winter radish
These radishes are a valuable source of radish in winter and spring. Sow from mid- to late summer as for ‘Beauty Heart’ radish above. In temperate climates, you can leave them in the ground during winter; tuck straw around them to make lifting easier in frost. In more severe climates, or where slug damage is serious, lift the roots in late autumn, trim off the leaves and store in boxes of sand in cool conditions. They should keep sound until spring. Once cut, wrapped roots will keep in a refrigerator for several weeks.
–––––
Baby leaf/seedling radish
The fast growing nature of radish makes it a natural subject for seedling, baby leaf crops. While any of the small radishes can be used, their leaves tend to become hairy, and unpalateable, fairly fast, so are best picked very young before this stage is reached. Some of the Asian radishes have smoother leaves, and have proved excellent for cut-and-come again crops. Packs of these seedling radishes, known as ‘Kaiware’ are very popular in Japan. While most are white or green stemmed, some have very appealing pink tinged leaves and stems. They are a rewarding crop to grow for salads.
Radishes can be sown for baby leaves throughout the growing season. Very useful late sowings can be made under cover in early to mid autumn, the earliest sowings under cover in late winter, followed by outdoor sowings. Leaves can be cut within two to three weeks. For more on cultivation of baby leaves, see here. Radishes are also being used as microgreens, see here.
–––––
Radish pods
The immature seed pods of radishes have an excellent flavour and crisp texture, and are used raw or pickled. Allow a few plants to run to seed for this purpose. The larger the radish, the more succulent the pods seem to be. A single hardy winter radish left in the soil over winter will yield a huge crop of pods the following spring. Pick pods regularly while they are young and crisp to encourage production over several weeks. Alternatively grow varieties with exceptionally long pods, such as Bavarian ‘Munchen Bier’ and ‘Rat’s Tail’. Sow from spring to summer, thinning to 30cm/12in apart. Pollen beetle attacks can damage radish flowers and prevent pods from forming. Where the problem proves serious, plants will have to be protected with fine netting.
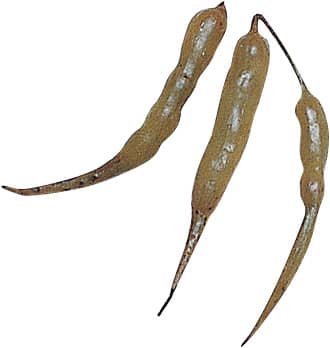
Pickled radish seed pods
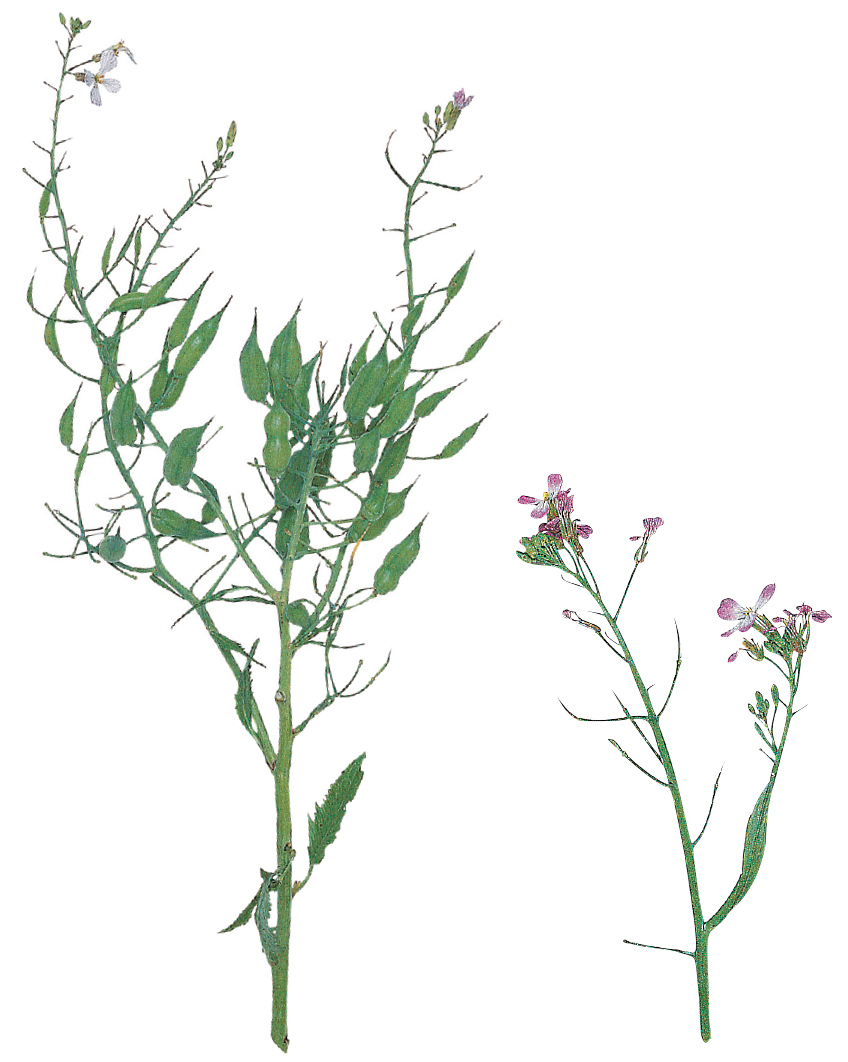
Flowering radish seed heads with edible pods just forming
–––––
Varieties
There is a huge choice: these are a selection of recommended varieties. Mixtures of different coloured types are often available.
Standard round radish (most red skinned) ‘Celesta’ F1, ‘Cherry Belle’, ‘Mars’ F1, ‘Mondial’ F1, ‘Ping Pong’ (white), ‘Rudi’, ‘Rudolph’, ‘Sparkler’ (white tip)
French Breakfast type ‘Flamboyant-Sabina’, ‘French Breakfast 3’, ‘French Breakfast 4-Francis’, ‘French Breakfast – Nelson’
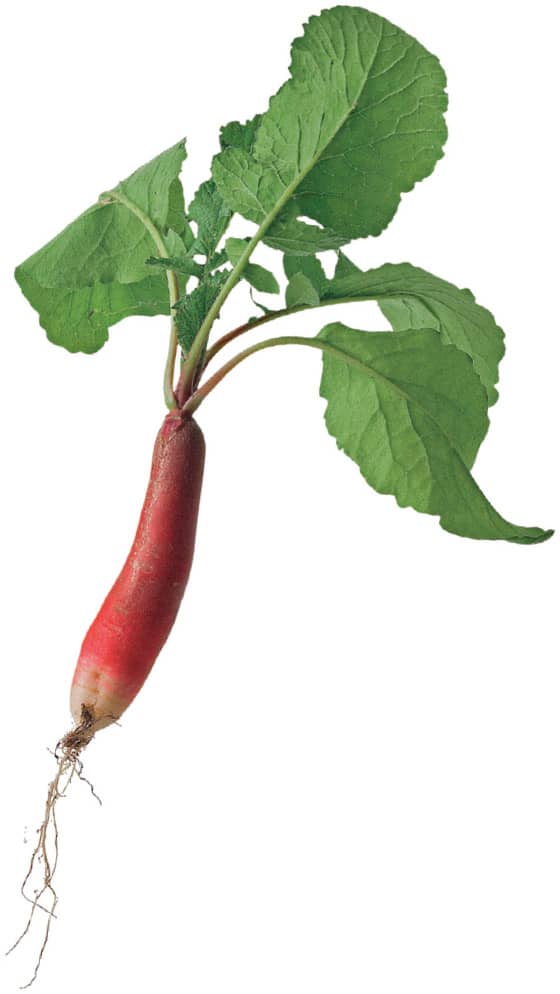
French breakfast type of long, small radish
Unusual skin colour Purple: ‘Amethyst’ F1, ‘Bacchus’ F1, ‘Purple Plum’ Pink: ‘Juztenka’, ‘Pink Beauty’; yellow: ‘Zlata’
Summer mooli (slow-bolting)
‘April Cross’ F1, ‘Long White Icycle’, ‘Mino Early’, ‘Minowase Summer Cross’ F1.
Beauty Heart type ‘Mantanghong’ F1, ‘Red Meat’, ‘Misato Green’
Large winter storage types ‘Black Spanish Round’, ‘Chinese Dragon’ F1, ‘Oriental Rosa 2’, ‘Violet de Gournay’,
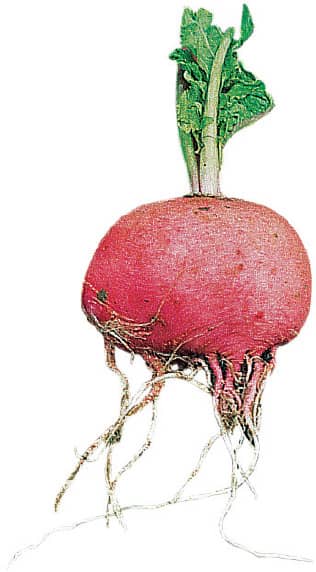
Winter storage radish
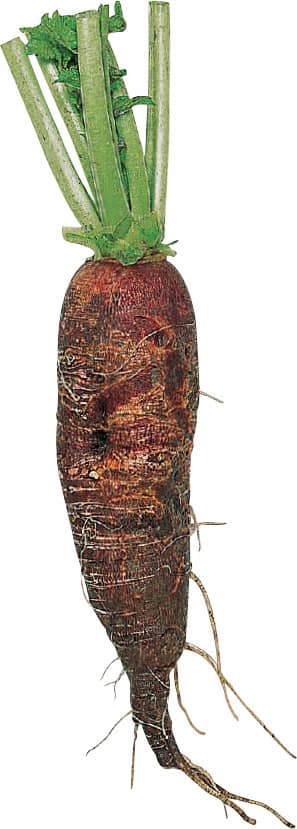
Winter radish ‘Violet de Gournay’
Early short top varieties for early outdoor crops, outdoor crops under fleece, and winter crops in unheated polytunnels/greenhouses winter
‘Fluo’ F1, ‘Poloneza’ (improved Sparkler), ‘Saxa’, ‘Short Top Forcing’
Leaf radish ‘Minowase Spring Cross’, ‘Rioja’ (mostly red leaf), ‘Sai Sai’, ‘Sangria’ (red stem)
Carrot
Daucus carota
My long-standing dislike of grated raw carrot, probably dating back to school days, makes it hard for me to be enthusiastic about them as salad vegetables, although I love them cooked. I now realise that with a good dressing they can become a valuable salad ingredient. Any of the maincrop carrots can be used grated. For cultivation see Further reading, Grow Your Own Vegetables. Tailored to use raw in salads are what are now widely known as ‘baby’, ‘finger’ or ‘mini’ carrots – small, finger-thick carrots harvested at most 71/2cm/3in long. These are sweet, tender and delicious raw, whether nibbled whole or sliced. Also clamouring to be used in salads are those with unusual coloured roots, which have become widely available in recent years. Only these two groups are covered here.
–––––
Cultivation of baby carrots
Carrots require deep, light, fertile, well-drained soil, with a pH between 61/2 and 71/2. Avoid heavy, compacted or clay soils, which prevent roots from swelling, and stony soils, which cause forking. Ideally dig in well-rotted compost or manure several months before sowing. Small carrots are excellent subjects for growing bags or large pots of potting compost. Carrots are cool-season crops, growing best at temperatures of 16–18°C/60–64°F. Seed germinates very slowly at temperatures below 10°C/50°F, so delay sowing until the soil has warmed up: lingering carrots are never succulent. Prepare a finely raked, weed-free seedbed, as carrot seedlings are easily smothered by weeds and awkward to weed.
Mini carrot production depends on growing appropriate varieties at dense spacing. In the past the varieties used commercially were developed from the slender Amsterdam types, and slightly broader Nantes types, which are both cylindrical, stump-rooted carrots traditionally used for forcing and early crops. Nowadays the distinctions between the different types are being eroded, and selections of Chantenay types are also being used. Varieties recommended below are fast-growing and smooth-skinned with a small central core – all factors making for tenderness. The small, round carrots, often recommended for shallow soils and for growing in containers, are also useful for baby carrots.
For a continuous supply, sow outdoors in situ from mid-spring to mid-summer, at two- to three-week intervals. Sow thinly in rows 15cm/6in apart, spacing seeds about 4cm/11/2in apart so that thinning is unnecessary, or thin early to that spacing. Alternatively sow in shallow drills 10–15cm/4–6in wide, with seedlings about 2cm/3/4in apart. Water sufficiently to prevent the soil from drying out. The carrots will be ready for pulling eleven to thirteen weeks after sowing.
Make earlier and later sowing under cover, in polytunnels for example. Protect early outdoor sowings by growing in frames, under cloches, or by covering with fleece. Unless the weather becomes very hot, small carrots can be grown under fleece to maturity. This also protects them from carrot fly.
Carrot fly can be a serious problem, though early sowings often escape attack. To overcome the problem either grow the carrots under fleece or nets like Enviromesh, or surround them with 60cm/2ft-high barrriers (of clear polythene for example) or grow them in containers raised off the ground to that height. This defeats the low flying, egg-laying flies. They are attracted by the smell of bruised foliage, so thin in the evening, burying thinnings in the compost heap.
Baby carrots can also be grown by sowing in modules, standing on soil, as described for ‘pencil fennel’ (see here). Nantes varieties (eg ‘Mokum’, ‘Romance’) seem to do particularly well with this system.
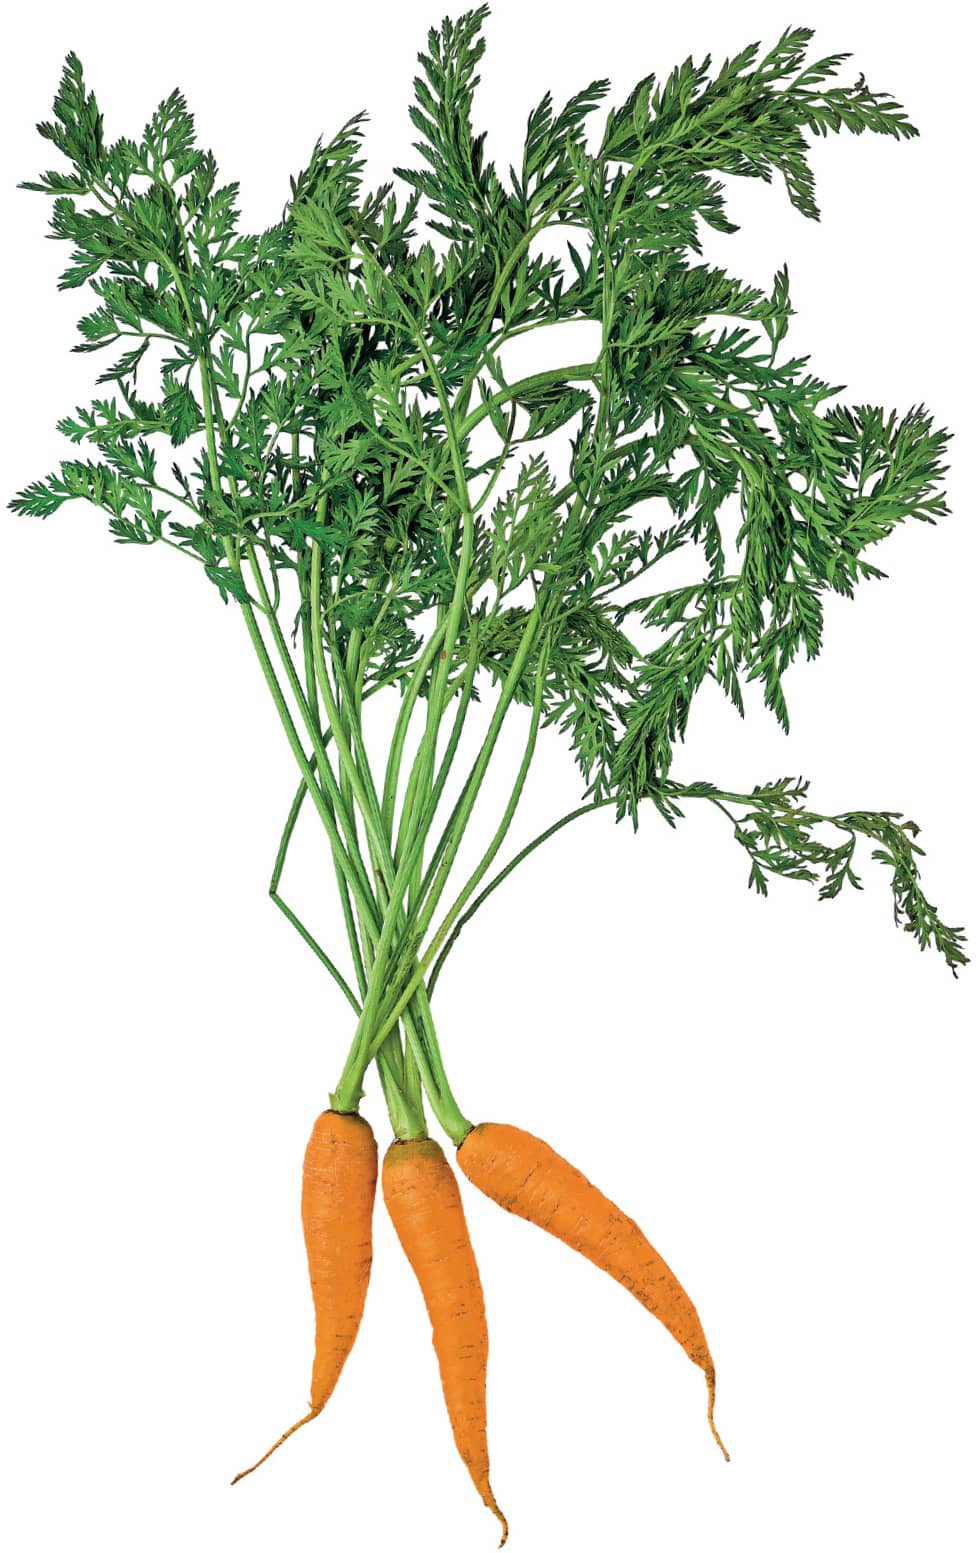
Baby carrots
–––––
Novelty carrots
Although we are conditioned to orange-fleshed carrots, heirloom European yellow and white carrots, often used as fodder crops, are surprisingly sweet-fleshed and well flavoured. More recently a range of colourful carrots has been developed. These include purple-skinned carrots, sometimes pure purple inside, sometimes blended with orange; creamy skin with creamy flesh; bright red skinned with pink flesh; yellow skin with yellow flesh. Although many of the currently available varieties are recommended cooked (preferably by steaming) and cold, as some have strong ‘off flavours’ when raw, it is certainly worth grating small quantities in salads for their unique impact. I once saw green-fleshed carrots in Tunisia, which were very palatable. If they become available, do try them! Different coloured mixes are now widely available.
–––––
Varieties
Especially recommended for baby carrots ‘Adelaide’ F1, ‘Atlas’ (round), ‘Mokum’ F1, ‘Parmex’ (round)
Other suitable varieties ‘Amsterdam Forcing 3’, ‘Caracas’ F1, ‘Carson’ F1, ‘Cascade’ F1, ‘Flyaway’ F1, ‘Ideal Red’, ‘Maestro’ F1, ‘Nairobi’ F1, ‘Napoli’ F1, ‘Romance’ F1, ‘Sugarsnax’ F1
Coloured carrots ‘Cosmic Purple’, (purple skin, orange and yellow flesh), ‘Purple Haze’ F1 (orange flesh), ‘Purple Sun’ F1 (purple skin and flesh), ‘Red Samurai’ F1 (red skin, creamy flesh), ‘White Satin’ F1 (white skin, creamy flesh), ‘Yellowstone’ F1 (yellow skin & flesh), ‘Rainbow’ (mix)
Heirloom ‘Belgian White’, ‘Jaune Obtuse du Doubs’ (yellow)
Beetroot
Beta vulgaris
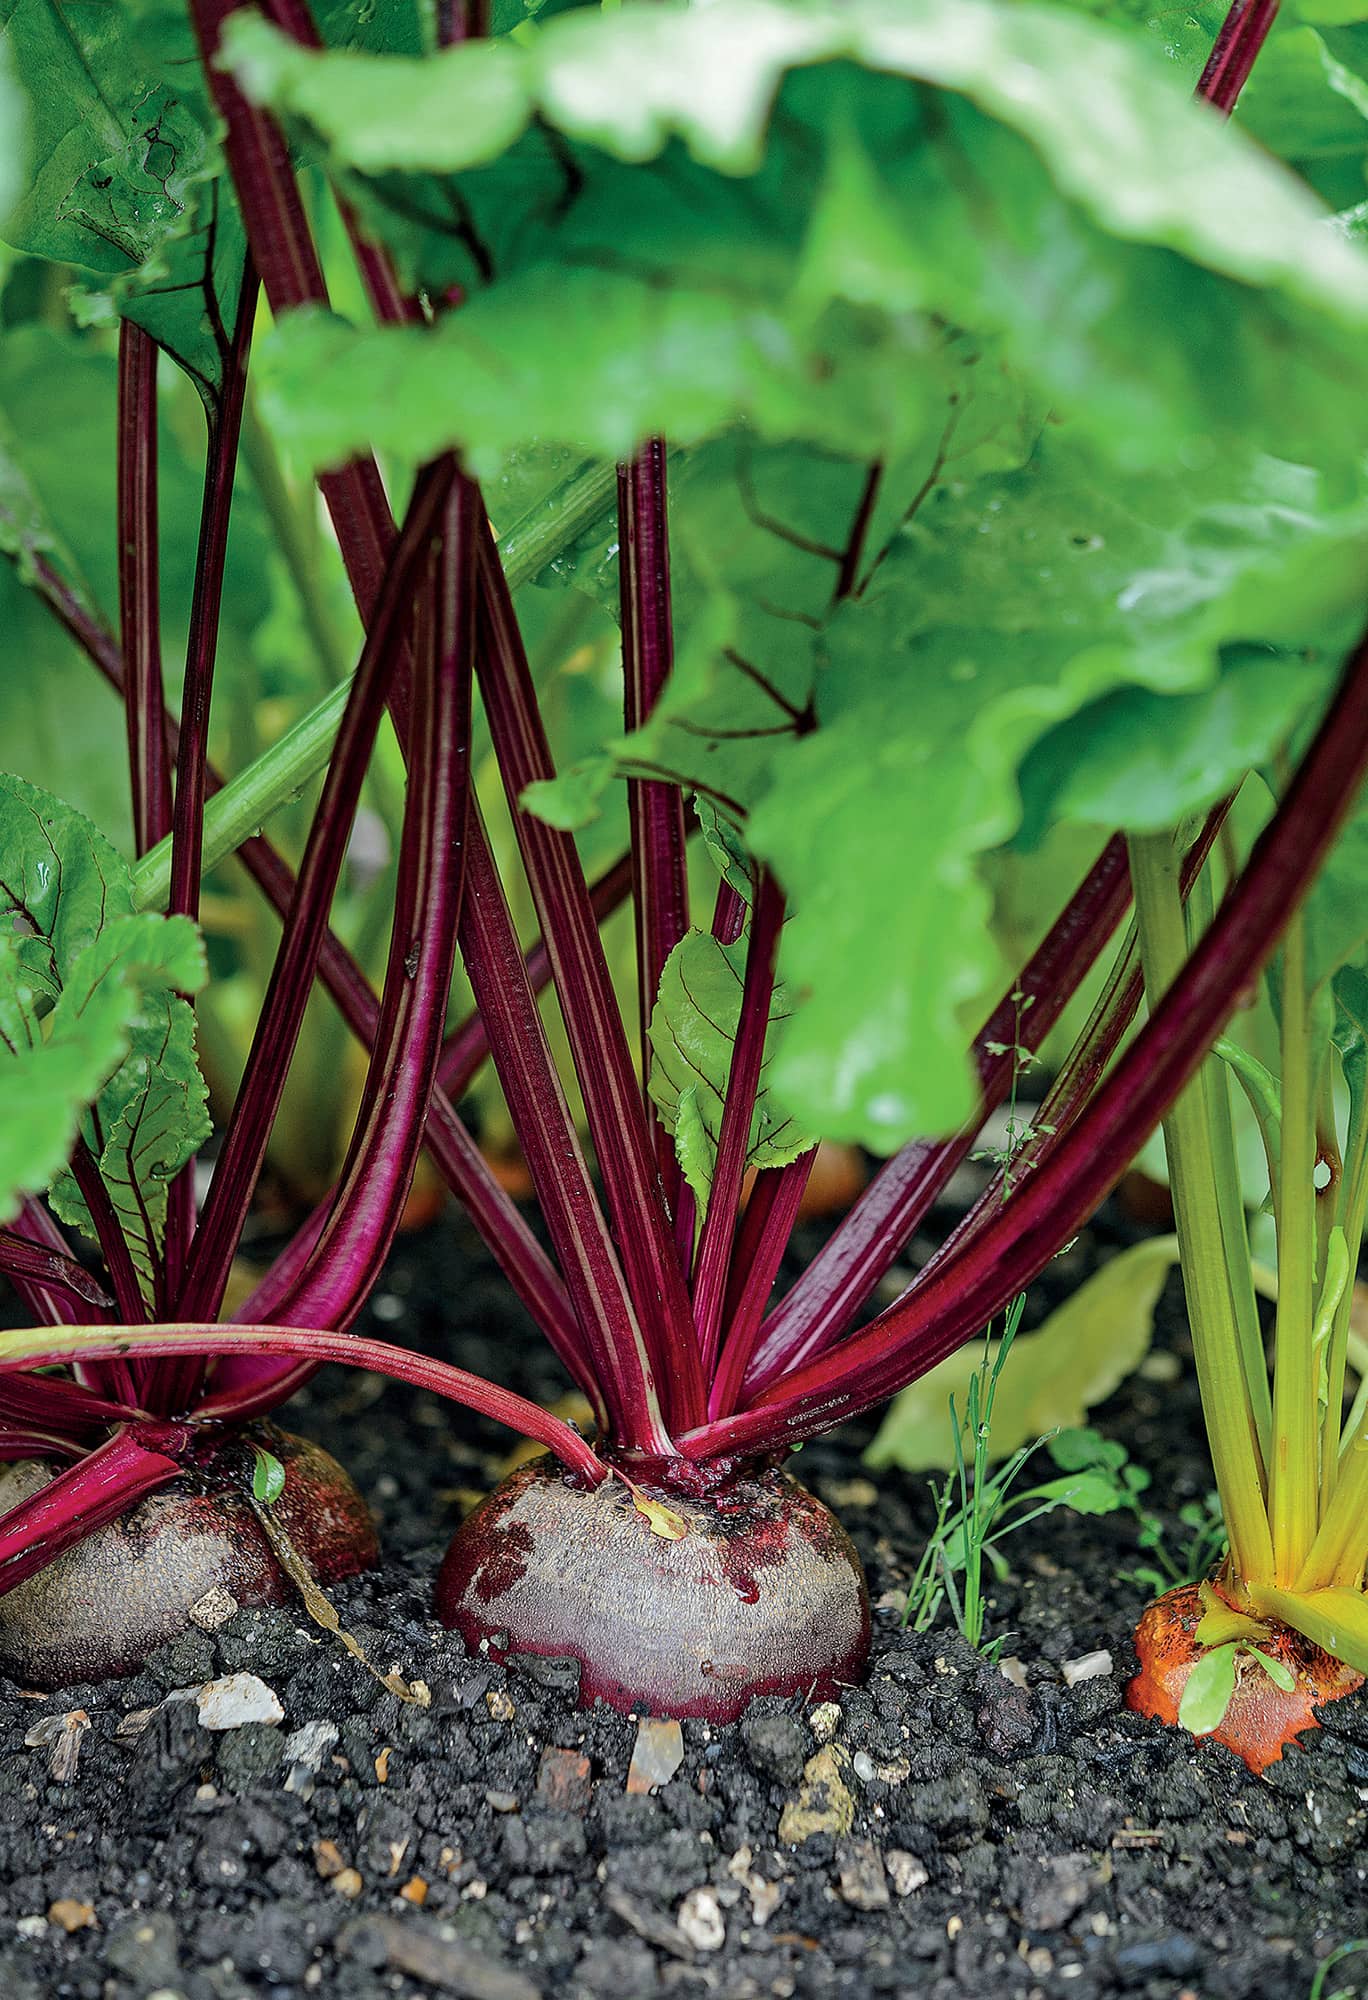
Beetroot are available all year round – fresh during the growing season and stored in winter. They can be flat, round, tapered or cylindrical in shape, and while the textbook modern beet has evenly coloured, deep red flesh, there are older varieties with white or yellow flesh, and in the case of the Italian heirloom ‘Chioggia’ characterized by target-like rings of pink and white. These are all considered well flavoured.
Beet are normally cooked whole (otherwise the flesh bleeds) by baking in foil, steaming or boiling, and then used cold. Although not to everyone’s taste, beet can also be grated raw into salads. The young leaves are edible raw or lightly cooked, the scarlet-leaved varieties being highly decorative and popular for baby leaves and microleaves. Small beet, about 5cm/2in diameter, make delicious pickles. ‘Baby’ or ‘mini beet’, roughly ping-pong-ball size, are probably the beetroot most worth growing for salad use: they develop fast, take least space and are arguably the best-flavoured. The long cylindrical beets, which grow well out of the ground, are ideal for slicing. (For cultivation of standard and storage beet, see Further reading, Grow Your Own Vegetables.) Sugar beet, incidentally, makes a very sweet-flavoured salad: a psychological drawback is its pale colour.
–––––
Cultivation of baby beet
For growing temperatures, soil and cultivation see Carrots, though beet grow successfully on heavier soil than carrots. Beet withstand moderate frost, but risk premature bolting if young plants are exposed for long to temperatures much below 10°C/50°F. Early spring sowings should only be made with bolt-resistant varieties. Seed germinates poorly at temperatures below 7°C/45°F. A chemical inhibitor in the seed sometimes prevents germination; if so, soak seed for half an hour in tepid water before sowing. Beet ‘seed’ is actually a seed cluster, so several seedlings germinate close together and require thinning. (‘Monogerm’ varieties are single-seeded, avoiding the problem.) Beet is normally sown in situ as it does not transplant well, unless sown in modules.
For mini beet, sow in situ from mid-spring to mid-summer. Sow at two-to-three-week intervals for a continuous supply from early to mid-summer until autumn. Sow seeds 2cm/3/4in deep, in rows 15cm/6in apart, thinning seedlings to 21/2cm/1in apart. This will produce small, even, high-quality beets, ready for pulling on average twelve weeks after sowing. If larger beet are required, a few can be left to develop. The earliest outdoor sowings can be protected by sowing in frames or under cloches. Sowing under crop covers such as fleece, removed after four or five weeks, doubles the yields from early sowings.
–––––
Novelty beetroot
The striped, yellow, and white beets all lend themselves to artistic display in salads. Sow in situ from late spring to early summer, in rows 23cm/9in apart, thinning to 71/2–10cm/3–4in apart; or multi-sow in modules, about three seeds per module.
If numerous seedlings germinate, thin to four or five per module before planting out ‘as one’ 20cm/8in apart. The highly coloured, red-leaved ‘Bull’s Blood’ beet is a mainstay of my potagers, retaining its leaf colour late into winter; it has excellent beets. Plant a few under cover in early autumn for quality leaves until spring. It has also become very popular for baby leaves (see here).
–––––
Varieties
For mini beet ‘Action’, F1, ‘Bettolo’ F1 ‘Boltardy’ (bolt resistant), ‘Bona’, ‘Boro’ F1, ‘Monodet’ (monogerm), ‘Pablo’ F1 (bolt resistant), ‘Red Ace’ F1, ‘Rubidus’, ‘Solo’ F1 (monogerm), ‘Subeto’ F1, ‘Wodan’ F1
Long varieties for slicing ‘Alto’ F1, ‘Cylindra’, ‘Taunus’ F1
Novelty beet ‘Albina Verdura’ (white), ‘Albino’, ‘Boldor’ (yellow), ‘Chioggia’ (striped) Red leaved ‘Bull’s Blood’, ‘McGregor’s Favourite’
Mixtures of coloured roots also available.
Turnip
Brassica campestris Rapifera Group
While most turnips are too strongly flavoured for salads, small ‘baby’ or ‘mini’ turnips, harvested at ping pong ball stage, are pleasantly sweet, mild and crisp and can be grated raw in salads. Turnip seedlings are also suitable for cut-and-come-again baby leaf, microgreens, or sprouting. The seedling leaves are mild flavoured, but should be used at an early stage, as they soon develop hairiness. Some varieties of turnips have leaves which can be cooked as greens. For general cultivation of turnips, see Further reading, Grow Your Own Vegetables. For baby leaves see here, and for sprouting and microgreens see here.
–––––
Cultivation of baby turnips
White Japanese varieties of turnip and some varieties with purple tops and white base, are the most suitable for baby turnips. Grow as baby beet (see here), sowing from mid-late spring until late summer for early summer to mid-autumn use. They will be ready within seven weeks of sowing. Continue sowing in frost-free greenhouses or polytunnels until mid-autumn for a mid-winter crop. Harvest them when 21/2-5cm/1-2in in diameter.
Baby turnips can also be grown by the method suggested for ‘pencil fennel’ (see here). For this the varieties ‘Purple Top Milan’ and ‘Sweetbell’ have proved the most suitable. Baby turnips are an ideal crop for containers and growing bags.
–––––
Varieties recommended for baby turnips
‘Market Express’ F1, ‘Oasis’ F1, ‘Primera’ F1 (purple top), ‘Purple Top Milan’, ‘Sweet Marvel’ F1, ‘Tiny Pal’, ‘Tokyo Cross’ F1
Potato
Solanum tuberosum
There has been a sea change in the attitude towards potatoes since the first edition of The Salad Garden in the 1980s. The potato revolution in the UK was spearheaded by the late Donald MacLean. Not only did he set about cleaning up the virused stock of old varieties, but he made the public aware of the innate diversity of potatoes – how each has something unique to offer in terms of cooking quality, pest or disease resistance, flavour or appearance. Gardeners are now far more discerning and knowledgeable: hundreds attend the annual ‘potato days’ held by Garden Organic, the national centre for organic gardening in the UK, and relish the opportunity to learn more and buy a few tubers of unusual varieties. Garden suppliers have responded by producing specialist potato catalogues, offering a very wide choice. The best of the old are being augmented by excellent new varieties.
Where garden space is limited, it may seem logical to forgo potato growing. They are used in fairly large quantities, occupy a lot of space for a long period – nearly five months for ‘late main’ types – and are cheap to buy. Logic goes out of the window once you discover the superior flavour of carefully chosen varieties, freshly dug from your own garden. It is worth finding space for at least a few, more if possible. The less demanding early varieties can also be grown successfully in large containers. For general cultivation of potatoes, see Further reading, Grow Your Own Vegetables.
–––––
What makes a salad variety?
The texture of a potato largely determines how it is best cooked. At one end of the spectrum are potatoes high in dry matter: these become light and fluffy when cooked, and are best for baking, roasting and chips. At the other end are waxy potatoes, closer textured and low in dry matter. After cooking they remain intact without disintegrating, and keep firm if sliced or diced and mixed with dressings. These make the best salad potatoes. There are exceptions to every rule where potatoes are concerned, but waxy potatoes seem to have some of the best flavours, which are often brought out to the full when cooked and cold.
–––––
Cultivation
For practical purposes, potatoes are grouped according to the average number of days they take to mature, though the category chosen for a variety can be a little arbitrary. These are commonly used groupings: ‘earlies’ 75 days (‘very early’) to 90 days ‘first earlies’; ‘second earlies’ – 110 days; ‘early maincrop’ – 135 days; ‘late maincrop’ – 150 days. What is significant is that the earlier, fast-maturing potatoes are initially lifted young as ‘new’ potatoes before the skins have set. (Within limits, the younger they are lifted, the better the flavour.) They are scrubbed whole before cooking.
Simply because they are small, firm and immature, new potatoes often make good salad potatoes, although they will not necessarily have the outstanding flavour of acclaimed salad varieties. They must be eaten fresh: the ‘new potato’ quality is soon lost and declines as the season progresses. You can also plant early varieties mid-season, to get small ‘new’ potatoes later in the year. Maincrop potatoes are slower-maturing but grow larger, have much higher yields and can be lifted and stored in frost-free conditions for winter use.
Most salad varieties are in the earlier maturing groups, with the exception of the old, long, knobbly European varieties such as ‘Pink Fir Apple’ (which stores well) and ‘Ratte’. Salad potatoes are mostly yellow-, creamy- or white-fleshed, but an interesting group of heirloom varieties have deep blue or purple flesh. Their quality is often reasonable and they are highly decorative. Potato performance and flavour can vary enormously with local climate and soil conditions. It is worth trying many varieties to see which perform well in your garden.
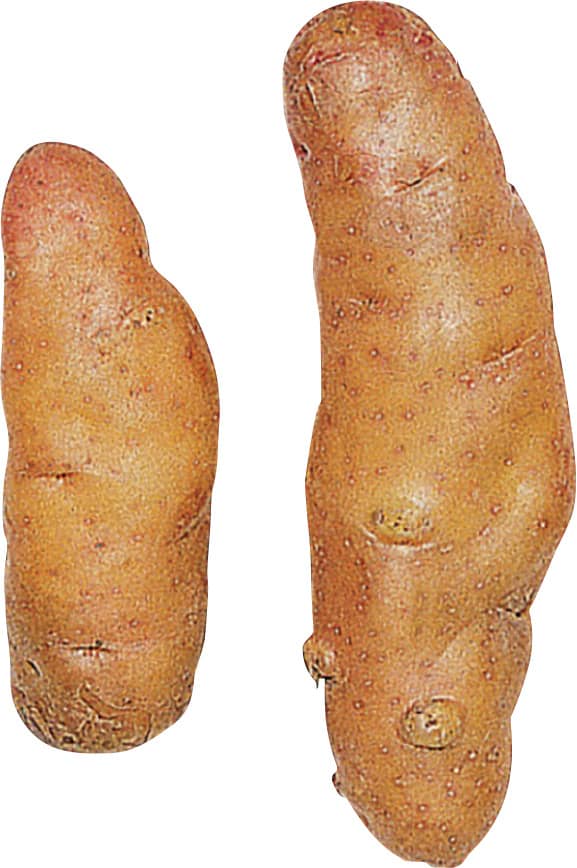
‘Pink Fir Apple’
–––––
Growing in containers
Successful crops of salad potatoes can be grown in containers. This is particicularly useful for early crops in an unheated greenhouse or polytunnel planted in early spring, or outdoors, in mid to late spring, provided there is no risk of frost. Early varieties, being the most compact, are generally the most suitable. All sorts of container can be used: half barrels, tubs, strong ‘polybags’, large pots. They need to be at least 45cm/18in deep and wide, with drainage holes in the bottom. Use good multipurpose potting compost, ideally mixed with well-rotted garden compost to increase fertility and moisture holding capacity. Tubers need to be planted about 30cm/12in apart.
The classic method was to put about 10cm/4in of compost in the bottom of the container, placing chitted potatoes on top, covered with another 10cm/4in layer of compost. When the stems are about 15cm/6in high, they are ‘earthed up’ with another 10cm/4in layer of compost, and this is repeated once more. The container must be kept reasonably moist (potatoes are thirsty plants), and fed with a seaweed based fertilizer roughly every ten to fourteen days once plants are showing. They are normally ready within about ten weeks. In many cases the flowering indicates readiness, but this is not infallible: if in doubt, poke your fingers into the bag and feel gently to gauge the size of the tubers.
A simpler alternative method which has been advocated recently is to fill a bag with good compost, up to about 21/2cm/1 in below the brim and plant the potatoes at a depth of about 12cm/5 in below the brim. Water and feed as above.
–––––
Varieties
The supply of potato varieties is constantly changing. These are currently available and highly recommended for salads. Many can also be used for other purposes. (Consult catalogues and potato source for recommendations.) * = especially recommended for early use in containers.
Early ‘Amandine’, ‘Anabelle’, ‘Casablanca’*, ‘Foremost’, ‘Juliette’, ‘Lady Christl’*, ‘Maris Bard’*, ‘Red Duke of York’, ‘Sharpes Express’*, ‘Swift’*, ‘Vales Emerald’*
2nd early ‘Anya’, ‘Bambino’, ‘Carlingford’, ‘Charlotte’*, ‘Gemson’, ‘Harlequin’, ‘International Kidney’, ‘Jazzy’*, ‘Linzer Delicatesse’, ’Maris Peer’, ‘Milva’, ‘Nicola’, ‘Ratte’, ‘Roseval’
Maincrop ‘Belle de Fontenay’, ‘Imagine’, ‘Pink Fir Apple’
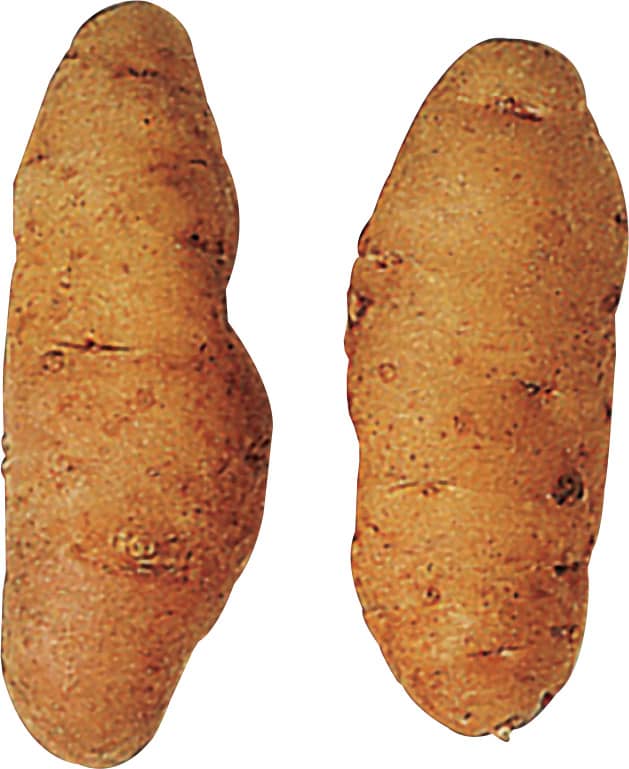
‘Anya’
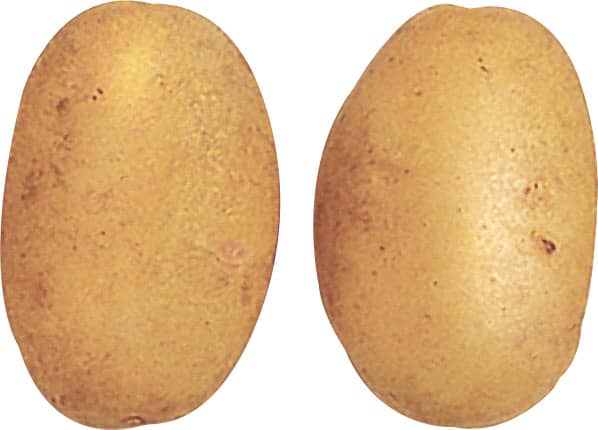
‘Nicola’
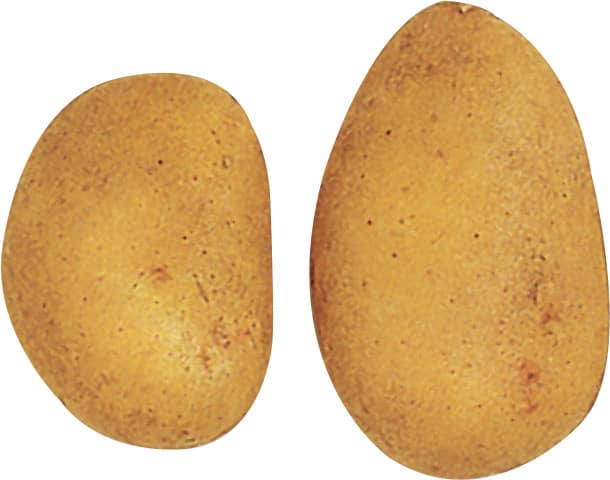
‘Charlotte’
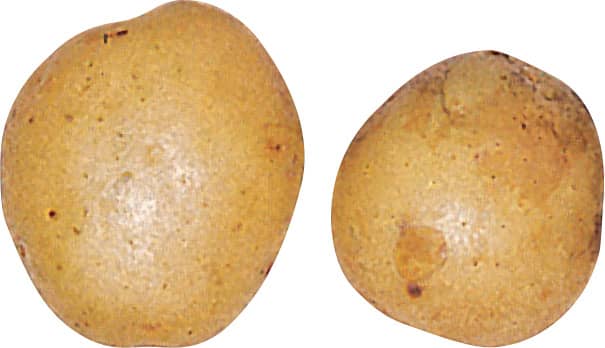
‘Maris Peer’
Hardy roots
Brassica campestris Rapifera Group
The hardy root crops are a neglected group of nutritious, often sweet-flavoured vegetables, which are most useful during the winter months when there is a scarcity of leafy green salads. Some can be grated or sliced raw into salads, but their flavour is often brought out best when cooked and cooled. The more knobbly tubers can be difficult to peel. If so, scrub them, and steam for a few minutes – the skins then come off easily.
Most root crops do best in deep, light soil, with well-rotted manure or compost worked in several months before sowing. They are undemanding other than needing to be weeded in the early stages and watered to prevent the soil from drying out. Those included here normally survive temperatures of -10°C/14°F in the open. They can be lifted and stored in clamps (on a base of straw and covered with straw and/or soil) or in cool conditions under cover, but their flavour and quality often deteriorate. In most cases the leaves die down in winter, so mark the ends of the rows so you can find them in snow. Covering with straw makes lifting easier in frosty weather.
The following notes highlight their salad use. For cultivation see Further reading, Grow Your Own Vegetables.
–––––
Horseradish Armoracia rusticana
This vigorous perennial, with leaves up to 60cm/24in long, has stout roots that are used to make a strongly flavoured relish. They can be grated raw into a salad to add a wonderful piquancy. When about 5cm/2in long, the young leaves have a very pleasant flavour and can be used in salads. It is often found in the wild (see illustration). The easiest way to acquire horseradish is to divide an established plant – but be aware it can be invasive.
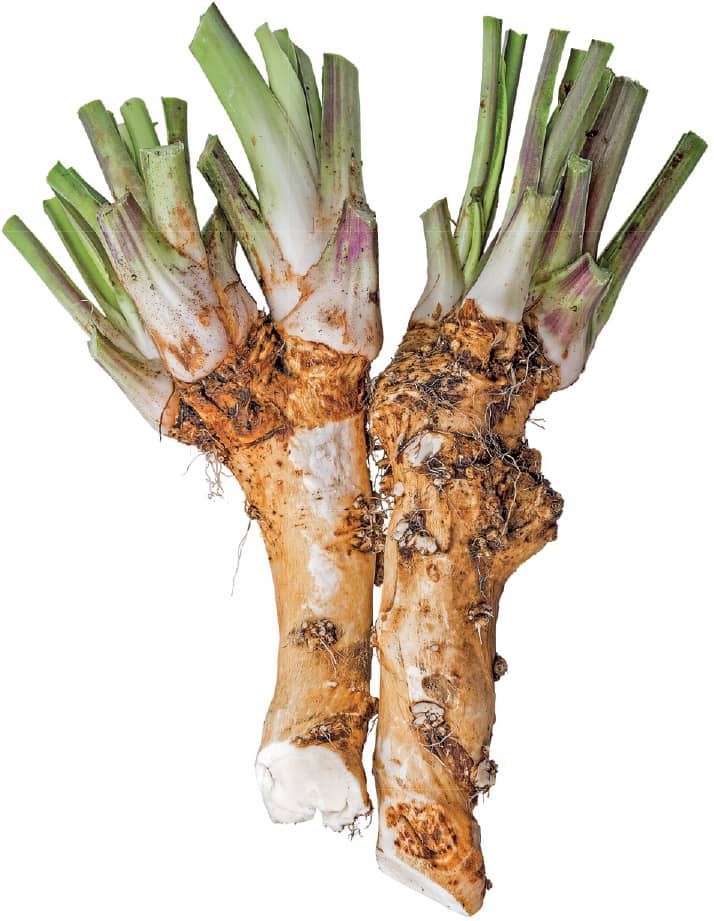
Horseradish
–––––
Jerusalem artichoke Helianthus tuberosus
These tall, hardy perennials produce very knobbly, branched underground tubers, upwards of a hen’s egg in size. They are nutritious, with a distinctive sweet flavour, and are excellent raw or cooked and cold. The problem lies in scrubbing them clean! The tall plants make good windbreaks and their rugged, fibrous root system helps break up heavy ground. The variety ‘Fuseau’ is smoother than most.
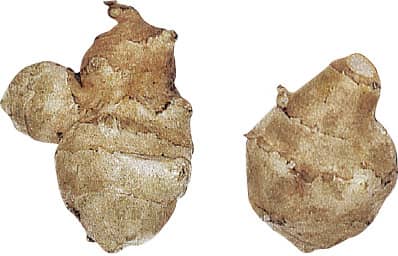
Jerusalem artichokes
–––––
Parsnip Pastinaca sativa
Parsnips have large, sweetly flavoured roots up to 25cm/10in long and 10cm/4in wide at the crown. They are excellent cooked and cold, but unsuitable for use raw in salads.
–––––
Hamburg parsley Petroselinum crispum var. tuberosum
Hamburg parsley is a dual-purpose member of the parsley family. The large roots resemble parsnips and are used in the same way. The dark glossy foliage looks and tastes like broad-leaved parsley, but retains its colour at much lower temperatures, making it invaluable in winter. The young leaves can be used whole or chopped in salads, or for garnishing and seasoning. It is probably easier to grow than parsnip or parsley, and is tolerant of light shade.
–––––
Scorzonera (viper’s grass) Scorzonera hispanica
Scorzonera is a perennial with black-skinned roots and yellow flowers. Roots and flower buds – both eaten cooked and cold – flowers and young shoots or ‘chards’ are all used in salads, and have an intriguing flavour. (See Salsify right and flower illustration shown here.)
–––––
Chinese artichoke Stachys affinis
These white, spiral-shaped knobbly tubers are rarely more than 4cm/11/2in long and 2cm/3/4in wide. They have a crisp texture, appealing translucent appearance and delightful nutty flavour raw. They need diligent scrubbing. Being small, the tubers shrivel fairly soon once lifted. (For further information, see Further reading, Oriental Vegetables.)
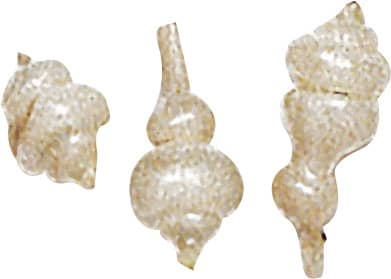
Chinese artichokes
–––––
Salsify (oyster plant) Tragopogon porrifolius
Salsify is a biennial, usually grown for its long, brown-skinned, tapering roots, which have a most delicate flavour when cooked and eaten cold. Less well known is the mysterious flavour of the plump flower buds and light purple petals, which develop in its second season, both used cooked and cold in salads (see here.) In the past salsify was also cultivated for the young blanched leaves, or chards, which develop in spring and are tender enough to use raw in salads. For chards, cut back the withering stems just above ground level in autumn, and cover with about 15cm/6in of soil, straw or leaves. The chards push through in spring; cut them when 10–15cm/4–6in long.