Cakes are as much about texture as they are about rich sweetness, and the secret behind any good cake is creating and trapping tiny bubbles of air in the mixture.
The butter needs to be soft and at room temperature (19—20°C) so that it is pliable enough to hold the increasing number of air bubbles. Butter straight from the fridge will be too hard, while very soft or oily butter will be too liquid to hold the air. So take the butter out of the fridge about 30 minutes before starting (don’t leave it in the sun though).
Use caster sugar as it dissolves faster than the coarser granulated sugar, and helps create those precious air bubbles. Be sure your eggs are at room temperature too - if you add cold eggs to a creamed mixture it will seize up and make the cake’s texture dense and heavy.
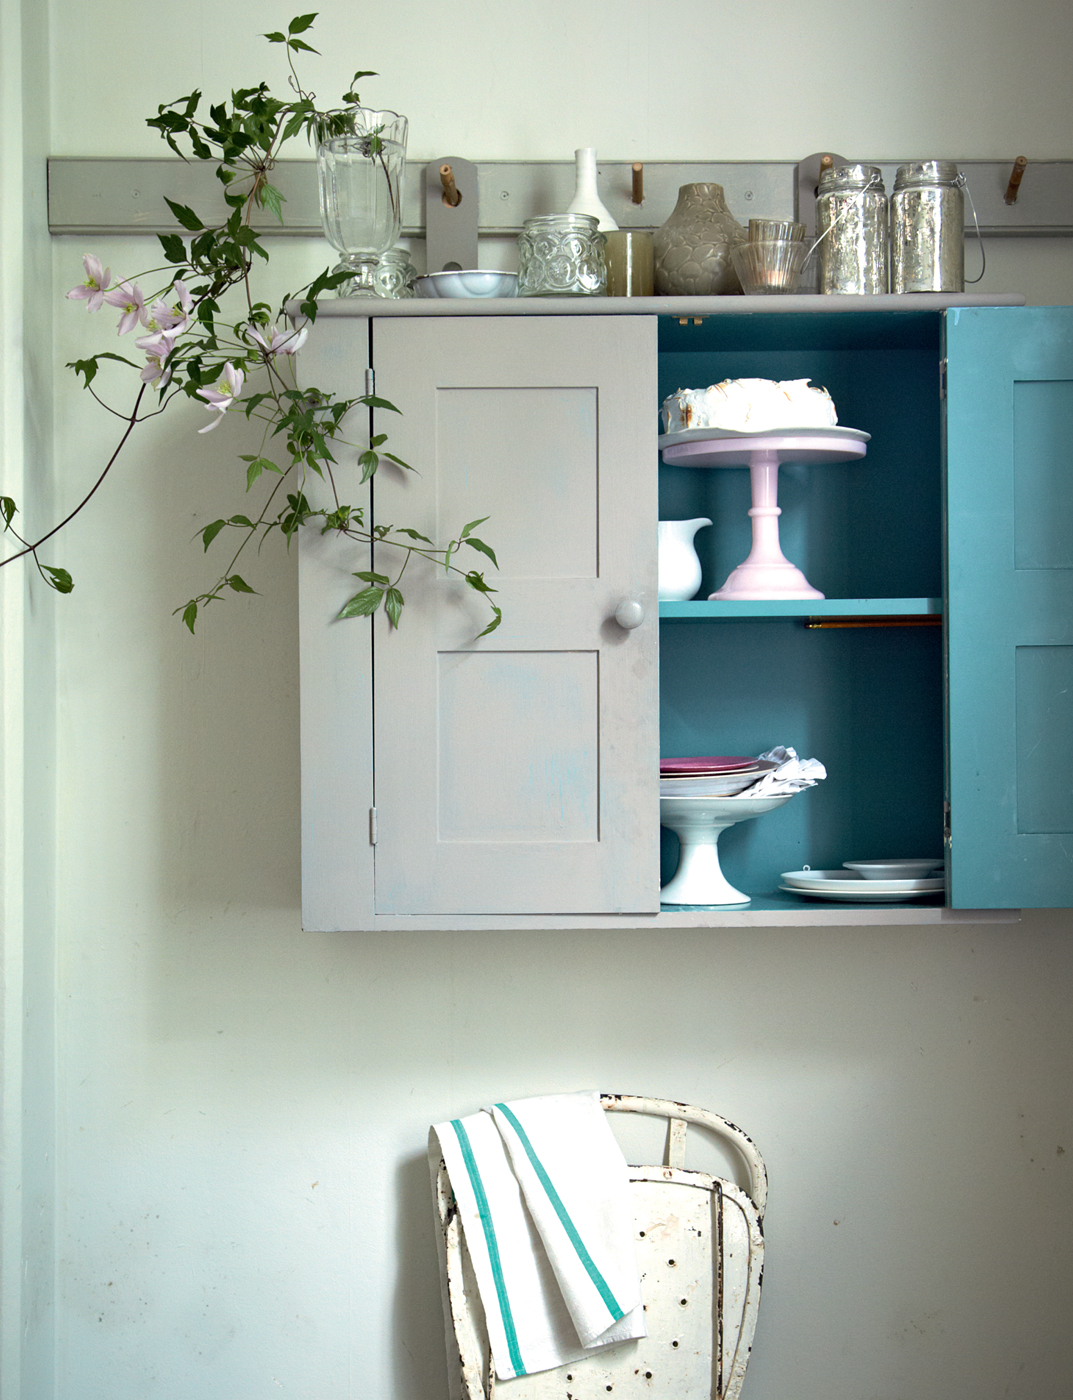
Recipe List
Apple Cake with Rum Buttercream
Cheddar, Apple and Walnut Loaf
It is thanks to buttermilk that this sponge cake has such a lovely light and moist crumb, with berries adding small bursts of flavour. Sprinkle with crunchy demerara sugar before baking. For dessert, serve warm cut into wedges, with a Hot Berry Sauce (see here).
MAKES 1 MEDIUM CAKE
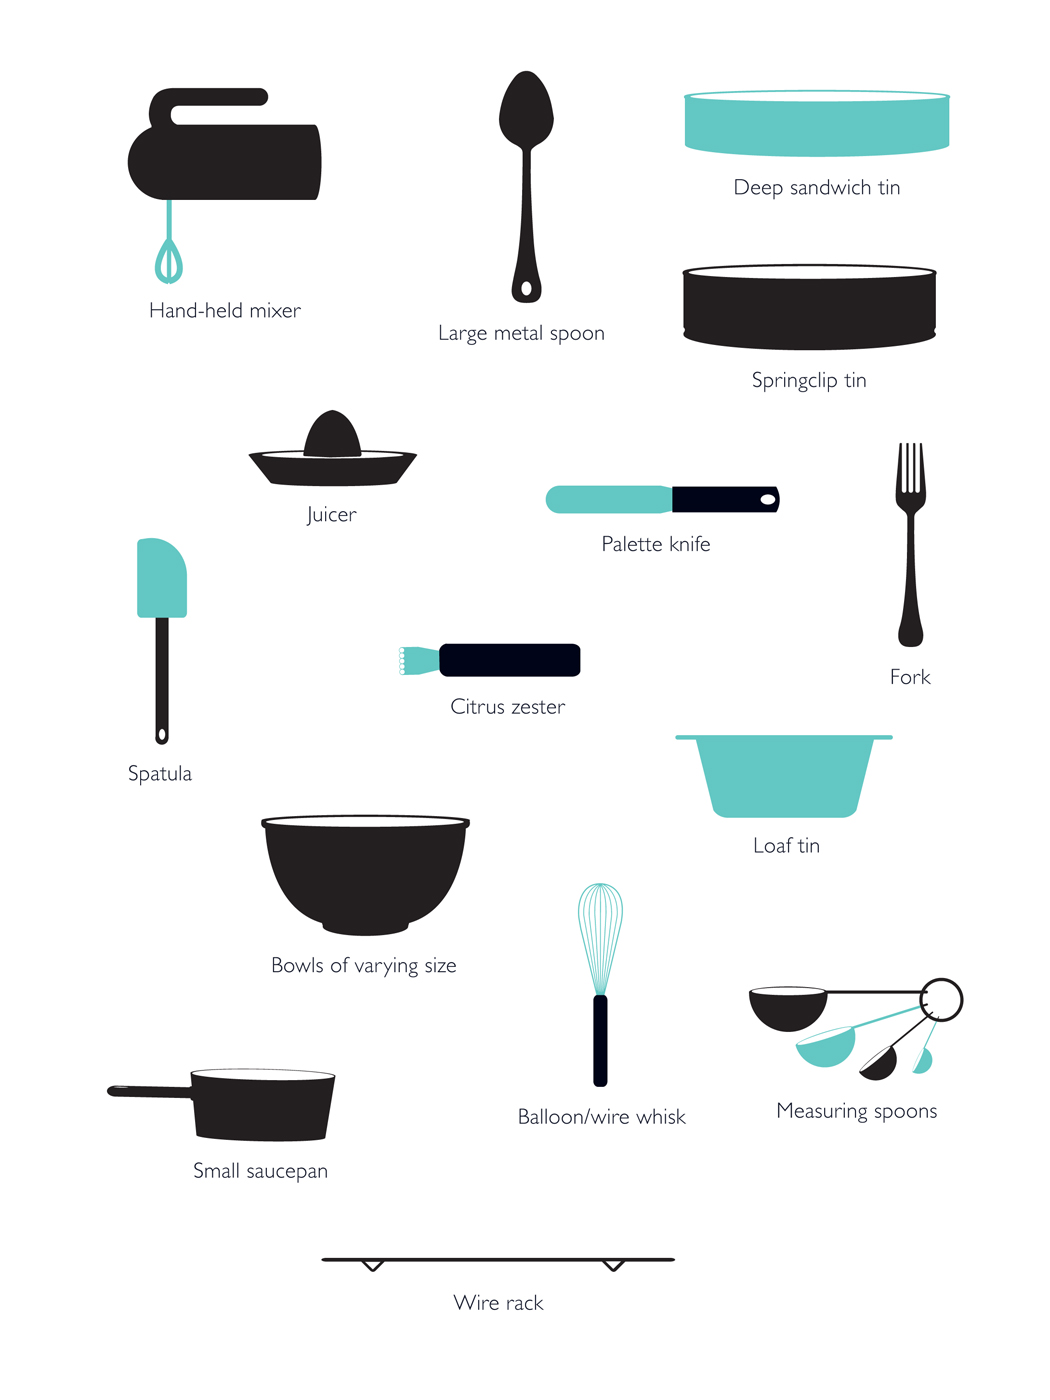
YOU WILL NEED: 1 × 20.5CM ROUND SPRINGCLIP TIN, GREASED AND BASE-LINED
150g fresh blackberries
125g unsalted butter, softened
175g caster sugar
½ teaspoon vanilla extract
2 medium free-range eggs, at room temperature
100ml buttermilk, at room temperature
200g self-raising flour
1½ tablespoons demerara sugar, for sprinkling
1 Heat your oven to 180°C/350°F/gas 4. Gently wipe the blackberries clean with kitchen paper – only rinse them if they look very dirty, then thoroughly drain and pat dry.
2 Put the soft butter into a mixing bowl and beat with an electric mixer until creamy. Gradually beat in the caster sugar. Once all the sugar has been added, scrape down the sides of the bowl, then add the vanilla and beat for a couple of minutes longer until the mixture looks paler and fluffy. Scrape down the sides of the bowl again.
3 Beat the eggs in a small bowl with a fork, just to mix, then gradually add to the butter mixture, beating well after each addition and scraping down the sides of the bowl from time to time as before. Add about a third of the buttermilk and gently fold in with a plastic spatula or large metal spoon, then fold in about a third of the flour. Fold in the rest of the buttermilk and flour in the same way, in 2 batches each.
4 Scrape the mixture into the prepared tin and spread evenly. Scatter the berries over the top and gently press them into the mixture so they are about half-submerged. Sprinkle evenly with the demerara sugar. Place in the heated oven and bake for 35–40 minutes until golden and a skewer inserted into the centre of the sponge comes out clean.
5 Set the tin on a wire rack. Run a round-bladed knife around the sponge to loosen it from the tin, then gently unclip the tin side and remove the cake. Leave it to cool a bit. Eat the cake warm or at room temperature the same or the next day (store in an airtight container).
A quick sauce you can make with fresh or frozen fruit, this is great with the Blackberry Buttermilk Sponge Cake here as well as with ice cream, meringues and pancakes. For a bit of a kick, add a dash or two of kirsch before serving.
SERVES 6
150g fresh blackberries
150g fresh raspberries
2 teaspoons cornflour
2 tablespoons caster sugar
1 Put all the ingredients into a medium-sized pan and mix gently with a wooden spoon so the berries become thoroughly coated with sugar and cornflour.
2 Set the pan on low heat and stir frequently until the juices start to run, then increase the heat slightly and simmer gently until the fruit has softened and the juices have thickened to make a sauce. Keep stirring often as the fruit cooks.
3 Taste the sauce and add more sugar if you want it a bit sweeter. Serve hot, warm or cold.
A very dark and rich cake with a dense, fudgy texture, this is easy to make – you just need a saucepan and a wooden spoon – but you’ll need to wait a day before trying it, and it just keeps getting better! A fresh raspberry topping will really make the cake look glamorous.
MAKES 1 MEDIUM CAKE
YOU WILL NEED: 1 × 20.5CM ROUND SPRINGCLIP TIN, GREASED AND BASE-LINED
240g unsalted butter, diced
5 tablespoons raspberry conserve
75g cocoa powder
300g caster sugar
3 medium free-range eggs, at room temperature
1 teaspoon raspberry liqueur, kirsch or vanilla extract
100g plain flour
good pinch of salt
To finish
icing sugar and cocoa powder OR 2 tablespoons raspberry conserve and 150g fresh raspberries
1 Heat your oven to 180°C/350°F/gas 4. Put the pieces of butter and the jam into a heavy-based pan large enough to hold all the ingredients. Set over the lowest possible heat and melt gently, stirring frequently with a wooden spoon.
2 Once the butter has melted, remove the pan from the heat. Sift the cocoa into the pan, then add the sugar. Set the pan on a damp cloth (to prevent it from wobbling), then stir and beat the ingredients together with the spoon until thoroughly combined.
3 Put the eggs and liqueur in a small bowl and beat with a fork, just to combine. Gradually add to the cocoa mixture, beating well after each addition. Sift the flour and salt into the pan and stir in to make a very thick, smooth mixture with flecks of raspberry.
4 Scrape the mixture into the prepared tin and spread evenly. Place in the heated oven and bake for 15 minutes, then lower the heat to 160°C/325°F/gas 3. Continue baking for about 40 minutes until a skewer inserted into the centre of the cake comes out just slightly sticky.
5 Remove the tin from the oven and set on a wire rack. Run a round-bladed knife around the cake to loosen it from the tin, then leave until completely cold. Unclip the tin and remove the cake, wrap in greaseproof paper or foil and keep in an airtight container overnight.
6 The next day, set the cake on a serving platter. Dust generously with icing sugar, sifted through a tea strainer, and then more lightly with cocoa. Alternatively, cover the cake with fresh raspberries: gently warm the conserve and brush it liberally over the cake, then decorate with the berries. The cake can be kept in an airtight tin for up to 5 days (with the raspberry topping, the cake is best eaten the same or next day).
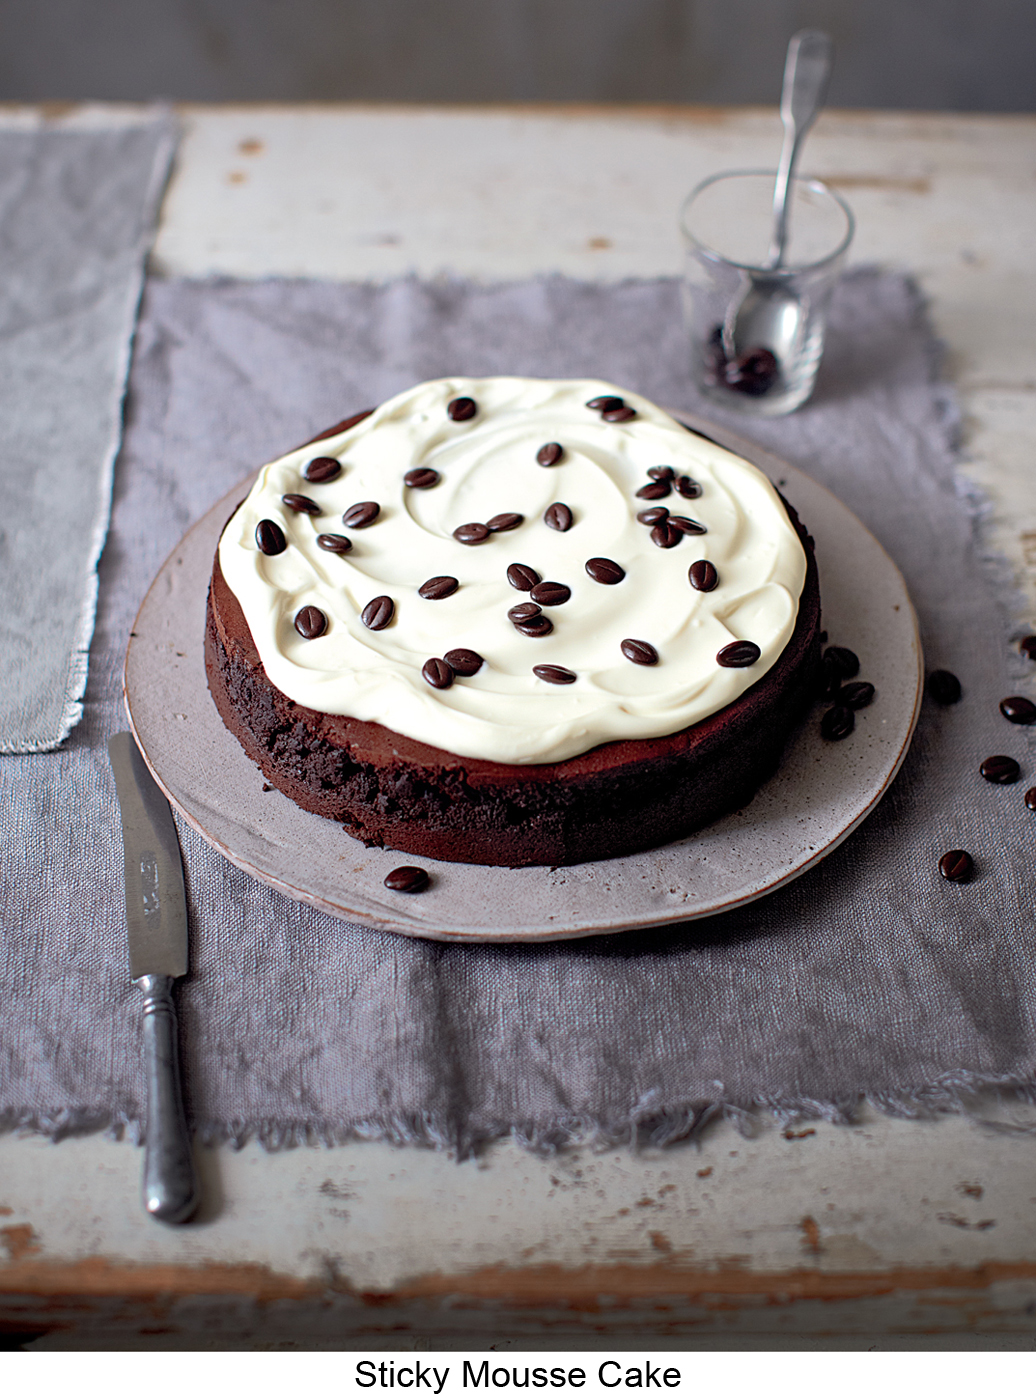
More like a baked chocolate mousse than a cake, this gluten-free bake is a very rich and sticky affair! Coffee cuts the sweetness of the chocolate, giving the cake a bittersweet flavour; if you want it to be sweeter reduce the instant coffee to 1 tablespoon. For the best results make sure all the elements – the melted chocolate mixture, whipped cream and whisked egg mixture – are at the same temperature before you combine them. The cake is baked fairly slowly, in a bain-marie.
MAKES 1 MEDIUM CAKE
YOU WILL NEED: 1 × 20.5CM ROUND SPRINGCLIP TIN, GREASED AND BASE-LINED
1½ tablespoons instant coffee powder or granules
150ml boiling water
300g dark chocolate (about 70% cocoa solids)
225ml double cream
4 medium free-range eggs, at room temperature
150g caster sugar
30g cocoa powder
icing sugar, for dusting
For the topping (optional)
200g crème fraîche, well chilled
50g chocolate coffee beans
1 Heat your oven to 160°C/325°F/gas 3. Set the prepared tin in the centre of a sheet of foil and wrap the foil tightly around the base and sides of the tin to make it completely watertight.
2 Stir the coffee with the boiling water in a cup until dissolved. Leave to cool. Meanwhile, chop or break up the chocolate and put it in a heatproof bowl. Pour over the cooled coffee and set the bowl over a pan of hot water. Melt gently, stirring occasionally. When the mixture is just smooth, remove the bowl from the pan and set aside to cool.
3 Whip the cream until it stands in soft peaks when the whisk is lifted out. Set aside at room temperature until needed.
4 Put the eggs into a large mixing bowl and whisk with an electric mixer until frothy. Add the sugar and whisk for 4–5 minutes until the mixture is very pale and mousse-like (this mixture won’t quite form a ribbon when the whisk is lifted out of the bowl).
5 Using a large metal spoon carefully fold the coffee and chocolate mixture into the whisked egg mix in 3 batches. Sift the cocoa powder on top and fold in. Scrape down the sides of the bowl, then fold in the whipped cream in 3 batches.
6 Transfer the mixture to the prepared tin and spread evenly. Set the tin in a roasting tin and pour lukewarm water into the roasting tin to come halfway up the sides of the cake tin. Place in the heated oven and bake for 75–80 minutes until a skewer inserted into the centre of the cake comes out slightly sticky.
7 Remove the roasting tin from the oven but leave the cake tin in it. Run a round-bladed knife around the cake to loosen it from the tin, then leave to cool. When the cake is cold, remove from the roasting tin and carefully unclip the side of the cake tin. The cake will be quite soft, fragile and crumbly so wrap it in foil and keep overnight before cutting.
8 Serve dusted with icing sugar. Store in an airtight container in a cool place and eat within 4 days. Alternatively, if you want to add a crème fraîche topping, stir the crème fraîche until smooth, then spread it on top of the cold cake. Scatter over the chocolate beans and serve immediately. Store any leftover cake in an airtight container in the fridge and eat within 2 days.
A crumbly streusel mix containing oats and nuts gives this well-flavoured and not too rich cake a good crunchy interior and topping. It’s best freshly baked.
MAKES 1 MEDIUM CAKE
YOU WILL NEED: 1 × 20.5CM ROUND SPRINGCLIP TIN, GREASED AND BASE-LINED
For the streusel
100g light brown muscovado sugar
50g plain flour
25g porridge oats
1 teaspoon ground cinnamon
50g unsalted butter, softened
50g walnut or pecan pieces
For the coffee cake
2 tablespoons instant coffee granules or powder
2 tablespoons boiling water
120g unsalted butter, softened
200g caster sugar
2 medium free-range eggs, at room temperature
200ml buttermilk, at room temperature
250g plain flour
good pinch of salt
½ teaspoon baking powder
½ teaspoon bicarbonate of soda
icing sugar, for dusting
1 Heat your oven to 180°C/350°F/gas 4. To make the streusel put the sugar, flour, oats and cinnamon in a mixing bowl and mix with your fingers. Add the soft butter and work into the dry ingredients, rubbing and squeezing the mixture together, until it looks like very coarse crumbs. Stir in the nuts and set aside.
2 For the cake mixture, stir the coffee with the boiling water in a cup until dissolved. Leave to cool. Put the soft butter into a large mixing bowl and beat with an electric mixer until creamy. Add the sugar and beat for a couple of minutes until fluffy, scraping down the sides of the bowl from time to time.
3 Put the eggs in a small bowl and beat with a fork, just to combine. Gradually add to the butter mixture, beating well after each addition and scraping down the bowl as before. Gradually stir in the buttermilk using a plastic spatula or large metal spoon, then stir in the coffee. Sift the flour, salt, baking powder and bicarbonate of soda into the bowl and fold in with the spatula or spoon until thoroughly combined.
4 Spoon half of the mixture into the prepared tin and spread evenly. Scatter half of the streusel mixture on top in an even layer, and carefully and gently press it down on to the cake mixture. Spoon the rest of the cake mixture on to this and spread out evenly. Scatter the remaining streusel over the cake to cover completely and evenly.
5 Place in the heated oven and bake for about 1 hour until a skewer inserted into the centre of the cake comes out clean. After the cake has been in the oven for about 50 minutes, keep a close eye on the cake and be ready to cover the top with a sheet of greaseproof paper or foil if it starts to turn from golden to dark brown.
6 Set the tin on a wire rack. Run a round-bladed knife around the cake to loosen it from the tin, then carefully unclip the tin side. Wait until the cake is completely cold before removing it from the tin. Dust with icing sugar and eat the same or next day (store in an airtight container).
This light creamed sponge is so good it only needs a simple dusting of icing sugar before serving, and it gets better the longer it is kept. For the best results the butter should be soft – not oily or runny – so remove from the fridge a couple of hours before starting. If you forget you can soften the butter in the microwave for 8–10 seconds, but don’t let it start to melt.
MAKES 1 MEDIUM CAKE
YOU WILL NEED: 1 × 20.5CM SPRINGCLIP TIN, GREASED AND BASE-LINED
225g unsalted butter, softened
finely grated zest of 1 medium unwaxed lemon
225g caster sugar
4 medium free-range eggs, at room temperature
100g ground almonds
100g self-raising flour
2 tablespoons poppyseeds
icing sugar, for dusting
1 Heat your oven to 180°C/350°F/gas 4. Put the soft butter into a large mixing bowl, add the lemon zest and beat with an electric mixer for a minute until creamy. (If you are using a hand-held mixer, set the bowl on a damp cloth so it doesn’t wobble.)
2 Gradually beat in the sugar, a couple of tablespoonfuls at a time. Once all the sugar has been added, scrape down the sides of the bowl, then beat for a further 2–3 minutes until the mixture looks paler in colour and lighter in texture.
3 Put the eggs in a small bowl and beat with a fork, just to mix. Gradually add to the sugar mixture (roughly a tablespoonful at a time), beating well after each addition and scraping down the sides of the bowl from time to time. To prevent the mixture from curdling add a tablespoon of ground almonds with each of the last 2 additions of beaten egg.
4 Scrape down the sides of the bowl once again, then sift the rest of the ground almonds and the flour over the egg mixture. Carefully and thoroughly fold them in using a large metal spoon. When you can no longer see any streaks of flour add the poppyseeds and gently fold in.
5 Scrape the mixture into the prepared tin and spread evenly. Place in the heated oven and bake for 45–50 minutes until golden brown and the top springs back when gently pressed in the centre.
6 Set the tin on a wire rack. Carefully run a round-bladed knife around the sponge to loosen it from the tin, then unclip the side and leave to cool. Once cold remove the sponge from the tin and dust with icing sugar. Store in an airtight container and eat within 5 days.
Filled and topped with a fluffy rum buttercream, this creamed sponge cake is flavoured with chopped apples, raisins and pecans plus a touch of mixed spices. Buttermilk gives the sponge a delicate light texture.
MAKES 1 MEDIUM CAKE
YOU WILL NEED: 2 × 20.5CM DEEP SANDWICH TINS, GREASED AND BASE-LINED
For the cake
150g unsalted butter, softened
300g caster sugar
3 medium free-range eggs, at room temperature
½ teaspoon vanilla extract
300g plain flour
1 teaspoon baking powder
½ teaspoon bicarbonate of soda
½ teaspoon ground cinnamon
¼ teaspoon ground ginger
¼ teaspoon freshly grated nutmeg
225ml buttermilk
1 medium eating apple (about 115g), peeled, cored and finely chopped
40g raisins
40g pecan pieces
For the buttercream
85g caster sugar
4 tablespoons water
2 medium free-range egg yolks, at room temperature
150g unsalted butter, softened
1 teaspoon vanilla extract
2—3 tablespoons dark rum, to taste
1 Heat your oven to 180°C/350°F/gas 4. Put the soft butter and sugar into a large mixing bowl and beat for about 2 minutes with an electric mixer until thoroughly combined. Scrape down the sides of the bowl from time to time.
2 Beat the eggs with the vanilla in a small bowl with a fork, just until mixed. Gradually add to the butter mixture, beating well after each addition and scraping down the sides of the bowl as before.
3 Sift the flour, baking powder, bicarbonate of soda, cinnamon, ginger and nutmeg into another bowl. Add about a third of the flour mix to the egg mix and use a large metal spoon or plastic spatula to stir in gently. Then add about a third of the buttermilk and gently mix it in. Add the remaining flour and buttermilk in the same way, in 2 batches each. Add the apple, raisins and nuts to the bowl and gently stir in until everything is thoroughly combined.
4 Divide the mixture equally between the prepared tins and spread evenly. Place in the heated oven and bake for about 30 minutes until risen and golden brown and the top springs back when gently pressed in the centre.
5 Set the tins on a wire rack and run a rounded-bladed knife around each sponge to loosen it from its tin. Turn out the sponges on to the rack and leave to cool completely.
6 To make the buttercream, put the sugar and water into a small heavy-based pan and heat gently, without boiling, until the sugar dissolves. Then bring the syrup to the boil and boil until the temperature reaches 110°C on a sugar thermometer (this will take about 5 minutes). Don’t let the syrup start to caramelise.
7 While the syrup is boiling, put the egg yolks into a heatproof bowl (set on a damp cloth to prevent wobbling) and whisk for a few seconds with an electric mixer until frothy. As soon as the syrup reaches the right temperature, slowly pour it into the bowl in a steady stream, whisking constantly. Then keep whisking until the mixture becomes very thick and mousse-like, pale in colour and completely cold.
8 Cut the butter into small pieces and gradually whisk into the egg mix, then whisk in the vanilla and rum to taste. The buttercream needs to be easy to spread but firm enough to hold its shape, so if necessary cover the bowl and chill briefly.
9 Set one sponge layer (crust-side down) on a serving plate. Spread half of the buttercream over the surface, then place the second sponge (crust-side up) on this. Cover the top of the sponge with the rest of the buttercream, swirling it with a palette knife or round-bladed knife. Leave, uncovered, at cool room temperature to firm up for a couple of hours before serving. Store in an airtight container in a cool spot (not the fridge) and eat within 4 days.
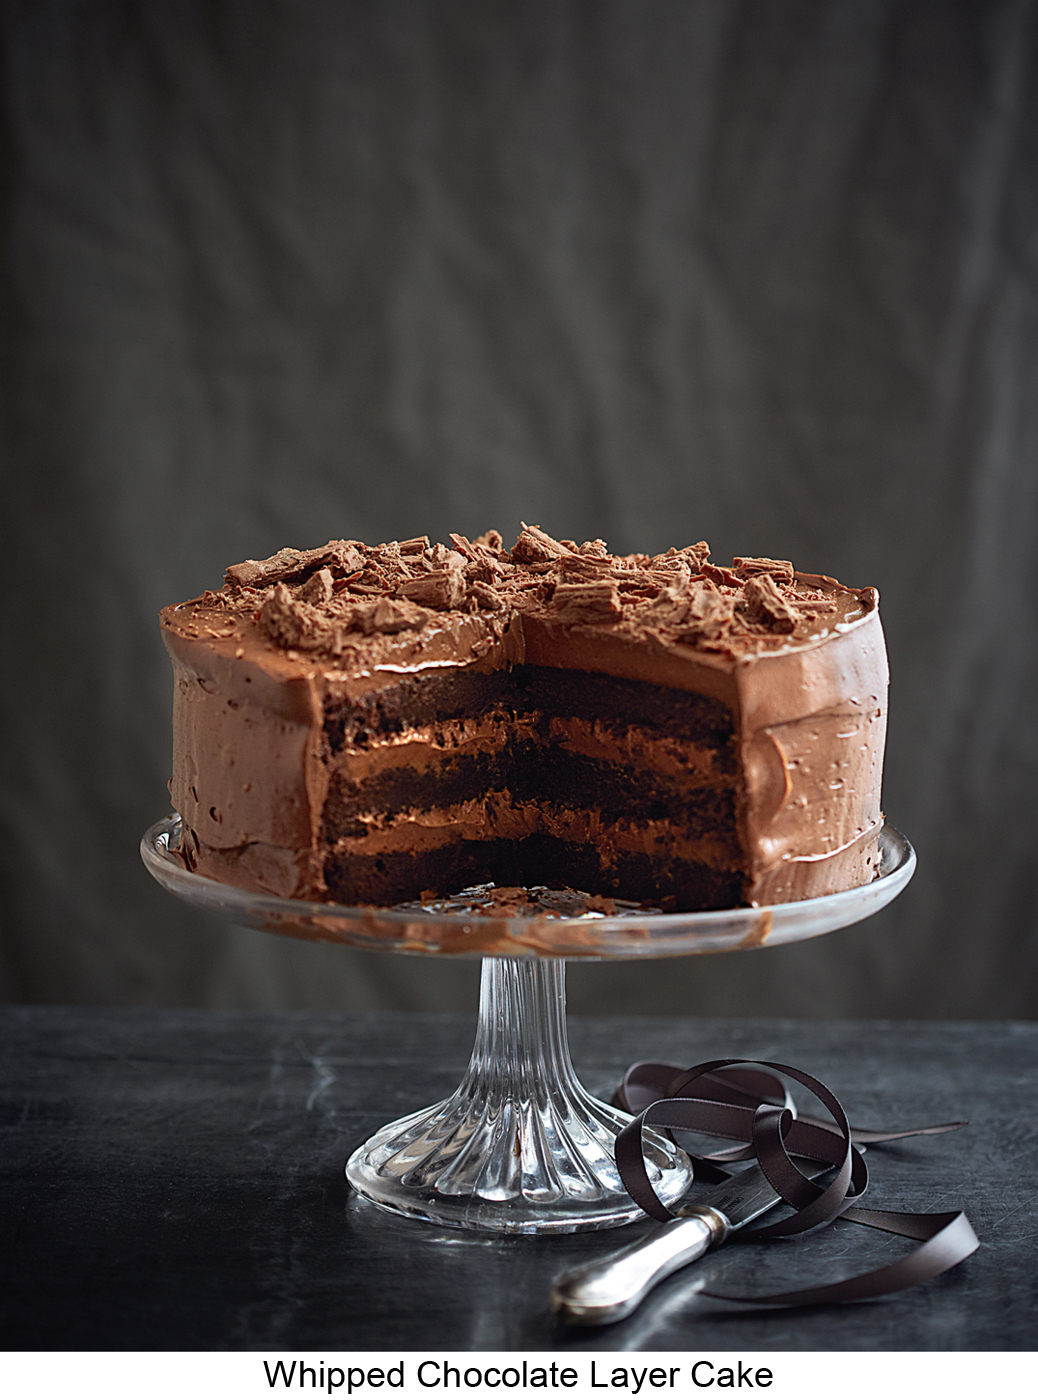
Three layers of dark, soft-textured chocolate sponge are sandwiched with a rich chocolate buttercream. Chocolate flakes add a bit of crunch. The cake will slice more easily if you make it a day or so ahead.
MAKES 1 LARGE CAKE
YOU WILL NEED: 3 × 20.5CM DEEP SANDWICH TINS, GREASED AND BASE-LINED
For the sponge mixture
60g cocoa powder
250ml boiling water
30g dark chocolate (about 70% cocoa solids), finely chopped or grated
225g unsalted butter, softened
325g light brown muscovado sugar
2 medium free-range eggs plus 2 yolks, at room temperature
½ teaspoon vanilla extract
4 tablespoons crème fraîche
225g self-raising flour
good pinch of salt
For the filling and frosting
200g dark chocolate (about 70% cocoa solids), finely chopped
125ml double cream
2 medium free-range egg whites, at room temperature
200g caster sugar
450g unsalted butter, softened and diced
4 flaked milk chocolate bars (about 100g)
1 Heat your oven to 180°C/350°F/gas 4. Sift the cocoa into a heatproof bowl. Pour in the boiling water, whisking constantly. When the mixture is smooth and lump-free, whisk in the chocolate until melted and silky smooth. Set aside until needed.
2 Put the butter into a large mixing bowl and beat with an electric mixer until creamy. Press any lumps out of the sugar, then add to the butter and beat on low speed. Once all the sugar has been worked in, increase the speed and beat until the mixture looks fluffy and paler in colour. Stop the mixer and scrape down the sides of the bowl from time to time.
3 Place the whole eggs, yolks and vanilla in another bowl and beat with a fork, just to mix. Gradually add to the butter mixture, beating well after each addition. Scrape down the bowl as before. Fold in the cooled cocoa and chocolate mixture, then add the crème fraîche to the bowl and sift the flour and salt on top. Fold in using a large metal spoon until thoroughly combined.
4 Divide the mixture equally among the 3 prepared tins and spread evenly. Place in the heated oven and bake for 20–25 minutes until the centre of each sponge springs back when gently pressed in the centre with a fingertip.
5 Remove from the oven. Run a round-bladed knife around each sponge to loosen it from its tin, then turn out on to a wire rack. Leave to cool.
6 To make the ganache for the filling and frosting, put the chopped chocolate in a heatproof bowl. Heat the cream in a small pan until just boiling, then pour over the chocolate and stir until melted and smooth. Leave this ganache to cool to room temperature, stirring occasionally.
7 While the ganache is cooling, put the egg whites and sugar in a large heatproof bowl and whisk with a hand-held electric mixer until slightly frothy. Set the bowl over a pan of simmering water (don’t let the base of the bowl touch the water) and whisk for 4–5 minutes until the mixture turns into a thick, white, stiff and glossy meringue. Remove the bowl from the pan and set it on a cloth to prevent any wobbling, then carry on whisking until the meringue is cold (don’t skip this bit or the filling will split when the butter is added).
8 Gradually whisk the butter into the meringue, then whisk in the ganache to make a mousse-like buttercream. It needs to be firm enough to spread easily and to hold its shape so it doesn’t slide off the cake, so if necessary cover and chill for a few minutes (don’t chill it too long or it will become too firm to spread). Spoon half of the buttercream into another bowl and reserve for the frosting.
9 When you’re ready to assemble the cake, set one layer of sponge, crust-side down, on a serving platter or cake board. Spread half of the buttercream filling over the sponge. Break up one of flaked chocolate bars into shards and scatter over the filling. Set a second sponge on top, cover with the rest of the filling and add shards of another flaked chocolate bar. Place the last sponge on top, crust-side up.
10 Using half of the reserved buttercream frosting, cover the side of the cake, spreading the frosting with a round-bladed knife or palette knife. Pile the rest of the frosting on top of the cake and spread out evenly. Decorate with the rest of the flaked chocolate bars, broken into large chunks. Leave the cake in a cool place to set and firm up.
11 For the best results, once the cake is firm store it overnight in an airtight container in a cool place (or the fridge in hot weather) before slicing. Eat within 4 days.
In this loaf cake, some of the butter is replaced with cream cheese, which really improves the texture of the cake, making it less likely to be dry and crumbly. When it comes out of the oven the cake is soaked in a lime syrup – like a drizzle cake – then finished with a simple lime glacé icing.
MAKES 1 LARGE LOAF CAKE
YOU WILL NEED: 1 × 900G LOAF TIN (ABOUT 26 × 12.5 × 7.5CM), GREASED AND LINED WITH A LONG STRIP OF BAKING PAPER TO COVER THE BASE AND 2 SHORT SIDES
175g unsalted butter, softened
150g full-fat cream cheese, at room temperature
finely grated zest of 2 medium limes
250g caster sugar
3 medium free-range eggs, at room temperature
½ teaspoon vanilla extract
225g self-raising flour
For the syrup
4 tablespoons lime juice
50g caster sugar
For the glaze
150g icing sugar
finely grated zest of 1 medium lime
about 1 tablespoon lime juice
1 Heat your oven to 180°C/350°F/gas 4. Put the soft butter and cream cheese in a large mixing bowl. Add the lime zest and beat with an electric mixer until soft and creamy. Scrape down the sides of the bowl, then gradually beat in the caster sugar. Once all the sugar has been added, scrape down the sides of the bowl again and carry on beating until the mixture is light and fluffy.
2 Break the eggs into a small bowl, add the vanilla and beat with a fork until just mixed. Gradually add to the butter mixture, beating well after each addition and scraping down the sides of the bowl from time to time. Sift the flour into the bowl and gently fold in with a large metal spoon.
3 Transfer the mixture to the prepared tin and spread evenly. Place in the heated oven and bake for 50–55 minutes until risen and golden brown and a skewer inserted into the centre of the cake comes out clean.
4 While the cake is baking make the lime syrup. Put the juice and sugar in a small pan and heat gently, stirring, until the sugar dissolves. Bring to the boil, then remove from the heat. Keep hot.
5 When the cake is ready, remove from the oven and set it on a wire rack (do not turn it out). Prick the surface of the cake all over with a wooden cocktail stick. Spoon the hot syrup over the top of the cake and leave to soak in and cool.
6 When the cake is cold run a round-bladed knife around the cake to loosen it from the tin, then gently lift the cake out of the tin using the long strip of paper to help you. Set the cake on the wire rack.
7 Now make the glaze. Sift the icing sugar into a mixing bowl and add the zest, then stir in enough lime juice to make a thick but runny icing. Spoon the icing over the cake and allow to drip down the sides. Leave to set before slicing. Store the cake in an airtight container and eat within 5 days.
Like all good ginger cakes, this is made by melting butter in a pan with sugar and syrups before whisking in flour, spices, eggs and milk (the melting method). But this round cake also has dark chocolate added to the sticky dark gingerbread mix – a great combination. You can leave it at that or, for even more richness, top with Ginger and Chocolate Icing (opposite).
MAKES 1 MEDIUM CAKE
YOU WILL NEED: 1 × 20.5CM ROUND SPRINGCLIP TIN, GREASED AND BASE-LINED
125g unsalted butter
125g dark brown muscovado sugar
2 lumps (about 40g) stem ginger in syrup, drained and chopped
2 tablespoons ginger syrup from the jar
200g golden syrup
250g self-raising flour
good pinch of salt
4 teaspoons ground ginger
1 teaspoon ground mixed spice
1 teaspoon ground cinnamon
1 teaspoon bicarbonate of soda
2 medium free-range eggs, at room temperature
250ml milk, at room temperature
100g dark chocolate or chocolate chips (about 70% cocoa solids) OR 1 × 100g bar dark chocolate with crystallised ginger
1 Heat your oven to 180°C/350°F/gas 4. Cut the butter into chunks and put into a medium-sized pan with the sugar, chopped stem ginger, ginger syrup and golden syrup. Stir gently over low heat until melted. Remove from the heat and leave to cool for a few minutes until barely warm.
2 While the mix is cooling, sift the flour, salt, ground ginger, mixed spice, cinnamon and bicarbonate of soda into a large mixing bowl. Put the eggs and milk in a small bowl and beat with a fork until just mixed. Finely chop the chocolate (unless using chips).
3 Pour the syrup mixture into the flour mix in the big bowl, add the milk mixture and gently beat everything together with a wire whisk or wooden spoon to make a thick smooth batter (with small pieces of ginger). Stir in the chopped chocolate.
4 Pour into the prepared tin. Place in the heated oven and bake for 40–50 minutes until a skewer inserted in the centre comes out clean (take care not to undercook this cake or the centre will sink as it comes out of the oven).
5 Set the tin on a wire rack. Run a round-bladed knife around the cake to loosen it from the tin, then leave to cool – the cake will shrink a little. When it is cold unclip the tin side and remove the cake. Wrap in greaseproof paper or foil and keep overnight in an airtight container before cutting. This is best eaten within 6 days.
Here’s a quick, optional finish for the Sticky Chocolate Gingerbread (opposite). It also makes a good topping for chocolate cupcakes or can be used to sandwich meringues and sablés (see here).
MAKES ENOUGH TO ICE A 20.5CM ROUND CAKE
100g dark chocolate (about 70% cocoa solids), chopped or broken up
100g unsalted butter, diced
1 teaspoon ginger syrup from the jar
2 lumps (about 40g) stem ginger in syrup, drained
1 Put the chocolate, butter and ginger syrup into a heatproof bowl. Set the bowl over a pan of hot water and melt gently, stirring frequently, until smooth. Remove the bowl from the pan.
2 Dry the lumps of ginger on kitchen paper, then cut into thin slices. Dip into the melted chocolate mixture so they are half-covered. Lay them on a small piece of baking paper and set aside. Leave the rest of the chocolate mix to cool, stirring occasionally, until it has thickened but is still fluid.
3 Turn the cold cake over so the flat underside is facing up and set on a serving platter. Spoon the chocolate mixture over the top of the cake and allow it to drip a little down the sides. Leave to set, then decorate with the slices of ginger.
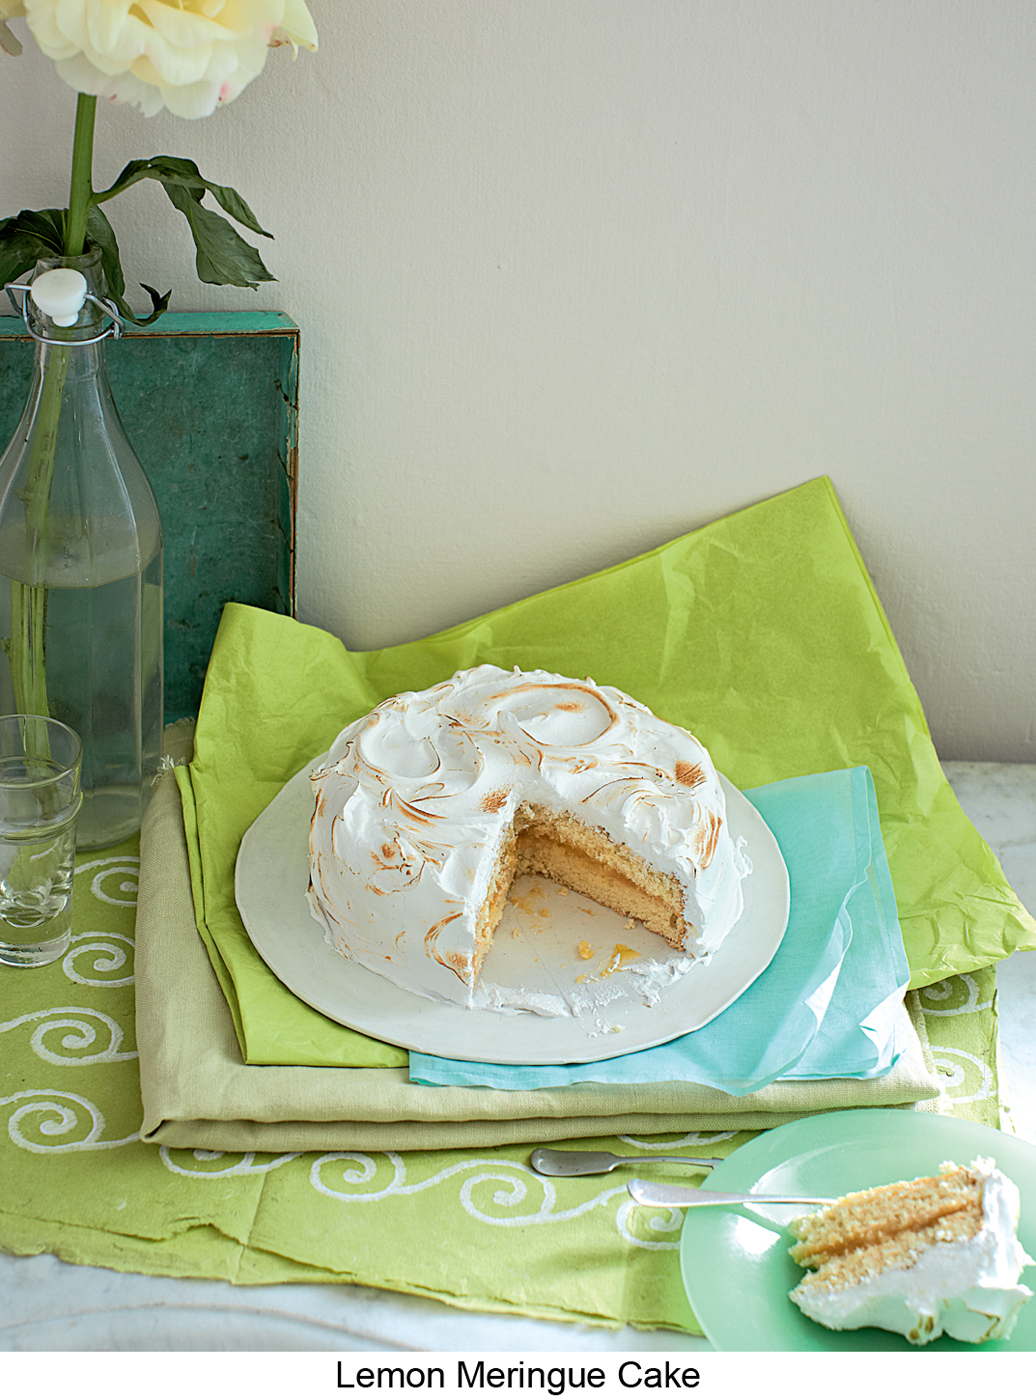
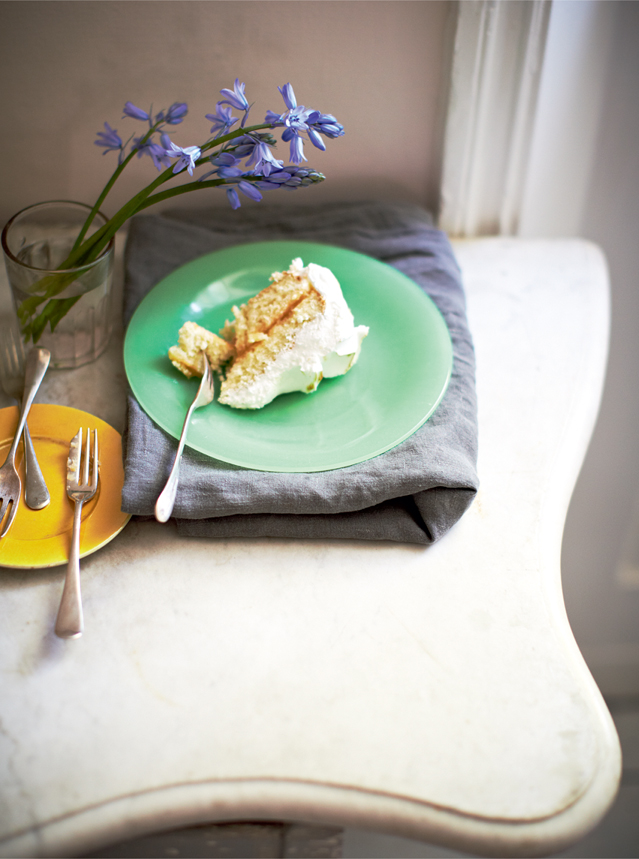
This has an ultra-lemony filling and fluffy white meringue, plus a light lemon-soaked whisked sponge. There’s a fair amount of work here, but everything can be assembled a day before serving. The lemon curd needs to be thoroughly chilled so weigh it out, then cover and return to the fridge.
MAKES 1 LARGE CAKE
YOU WILL NEED: 2 × 20.5CM DEEP ROUND CAKE TINS, GREASED AND BASE-LINED, THEN DUSTED WITH PLAIN FLOUR
250g Lemon Curd (see here), well chilled
For the whisked sponges
4 medium free-range eggs, at room temperature
120g caster sugar, plus extra for sprinkling
120g plain flour
pinch of salt
For the lemon syrup
75g caster sugar
finely grated zest and juice of 1 medium unwaxed lemon
For the meringue frosting
2 medium free-range egg whites, at room temperature
¼ teaspoon cream of tartar
good pinch of salt
4 tablespoons water
300g caster sugar
1 Heat your oven to 180°C/350°F/gas 4. To make the sponges put the eggs into a mixing bowl and whisk until frothy. Add the sugar and whisk for about 5 minutes until the mixture has greatly expanded and is very light and mousse-like – stop whisking when the mix will make a ribbon trail on itself.
2 Sift a third of the flour plus the salt into the bowl and very gently fold into the mousse using a large metal spoon. Repeat to add the rest of the flour in 2 batches, and stop folding as soon as you can no longer see any specks of flour.
3 Divide the mixture equally between the prepared tins and gently spread evenly. Place in the heated oven and bake for 17–20 minutes until a light golden brown and the top of each sponge springs back when gently pressed in the centre.
4 While the sponges are baking cover a large wire rack with a sheet of baking paper and sprinkle this with caster sugar. As soon as the sponges are ready, remove them from the oven. Run a round-bladed knife around each sponge to loosen it from its tin, then turn out on to the sugared paper so the sponge is browned crust-side down. Carefully remove the lining paper and leave until the cakes are cold.
5 While the sponges are cooling, make the lemon syrup. Put the sugar and lemon zest and juice into a small, heavy-based pan and heat gently, stirring frequently, until the sugar has completely dissolved. Bring to the boil and simmer for a couple of minutes to make a light syrup. Keep hot.
6 Place one sponge, still upside down, on a cake board or serving platter and brush with half of the hot syrup. Brush the second sponge – still upside down on the wire rack – with the rest of the syrup. Leave to soak in for an hour.
7 Spread the chilled lemon curd over the sponge on the cake board. Set the second sponge, browned crust-side up, on top. Very lightly cover the cake (or put it into a large container) and chill for a couple of hours.
8 For the meringue frosting, put all the ingredients into a large heatproof bowl and beat with a hand-held electric mixer on low speed for a minute. Set the bowl over a pan of simmering water (don’t let the base of the bowl touch the water) and whisk on high speed for about 7 minutes to make a very thick, stiff, white and glossy meringue. Remove the bowl from the pan, set it on a heatproof surface and whisk for a further 5 minutes until the meringue is cold.
9 Now you need to work quickly, while the meringue is still pliable. Remove the cake from the fridge and rapidly cover the sides, and then the top, with the meringue, swirling and peaking it with a round-bladed knife or palette knife – rather like adding the topping to a lemon meringue pie. Once the meringue looks good, lightly brown it with a kitchen blowtorch. Leave uncovered at cool room temperature (not the fridge) to firm up – overnight if possible – before cutting. Store in an airtight container and eat within a couple of days.
This is a stiffer and less sweet version than the usual curd, making it perfect for filling sponge cakes as well as to use in a bread and butter pudding (see recipe here).
MAKES ABOUT 400G
YOU WILL NEED: 2 × STERILISED 200G SCREW-TOP JARS
70g unsalted butter, diced
125g caster sugar
finely grated zest of 3 medium unwaxed lemons
100ml lemon juice
2 medium free-range eggs plus 2 yolks, at room temperature
1 Put the butter, sugar, and lemon zest and juice into a heatproof bowl. Set the bowl over a pan of simmering water (don’t let the base of the bowl touch the water) and stir with a wooden spoon until the sugar has completely dissolved – you should no longer feel or see any gritty crystals in the base of the bowl.
2 Remove the bowl from the pan and set it on a heatproof surface. Beat the whole eggs with the yolks in a small bowl with a fork until well mixed, then strain into the lemon mixture and mix well. Set the bowl over the pan of simmering water again and stir the mixture until it becomes very thick and opaque. Don’t be tempted to hurry things by turning the heat up: the eggs will scramble if the mixture gets anywhere near boiling. The lemon curd is ready when you can draw a finger through the mixture on the wooden spoon and make a clear path.
3 Immediately lift the bowl from the pan and spoon the lemon curd into 2 screw-topped jars or other containers. Cover with wax discs if using, then leave until cold. Seal tightly with lids or clingfilm and store in the fridge. Use within 2 weeks.
Grated courgette adds moistness to this unusual wholemeal loaf cake, while honey provides sweetness, and hazelnuts and chocolate chips make sure there is plenty of texture. The recipe is easy – just mix and bake.
MAKES 1 LOAF CAKE
YOU WILL NEED: 1 × 900G LOAF TIN (ABOUT 26 × 12.5 × 7.5CM), GREASED AND LINED WITH A LONG STRIP OF BAKING PAPER TO COVER THE BASE AND 2 SHORT SIDES
2 medium free-range eggs, at room temperature
100g clear honey
100ml sunflower oil
70g light brown muscovado sugar
1 medium courgette (about 200g)
225g plain wholemeal flour
2 teaspoons baking powder
1 teaspoon ground mixed spice
50g chopped toasted hazelnuts
100g dark or milk chocolate chips
1 tablespoon honey, warmed, to finish
1 Heat your oven to 180°C/350°F/gas 4. Break the eggs into a large mixing bowl. Add the honey, sunflower oil and sugar and beat with a wooden spoon until thoroughly combined.
2 Rinse and dry the courgette, then trim off the ends. Coarsely grate the courgette and weigh 175g (you won’t need the rest). Stir into the egg mixture.
3 Sift the flour, baking powder and mixed spice into the bowl; add any pieces of bran left in the sieve too. Mix in with the wooden spoon, then stir in the nuts and chocolate chips until thoroughly combined.
4 Transfer the mixture to the prepared tin and spread evenly. Place in the heated oven and bake for about 45 minutes until a good golden brown and a skewer inserted into the centre of the cake comes out clean.
5 Set the tin on a wire rack and immediately brush the top of the cake with the warmed honey. Run a round-bladed knife around the cake to loosen it from the tin, then leave to cool for 15 minutes. Carefully lift the cake out of the tin and on to the rack, using the strip of lining paper to help you. Leave until the cake is cold before slicing. Store in an airtight container and eat within 4 days.
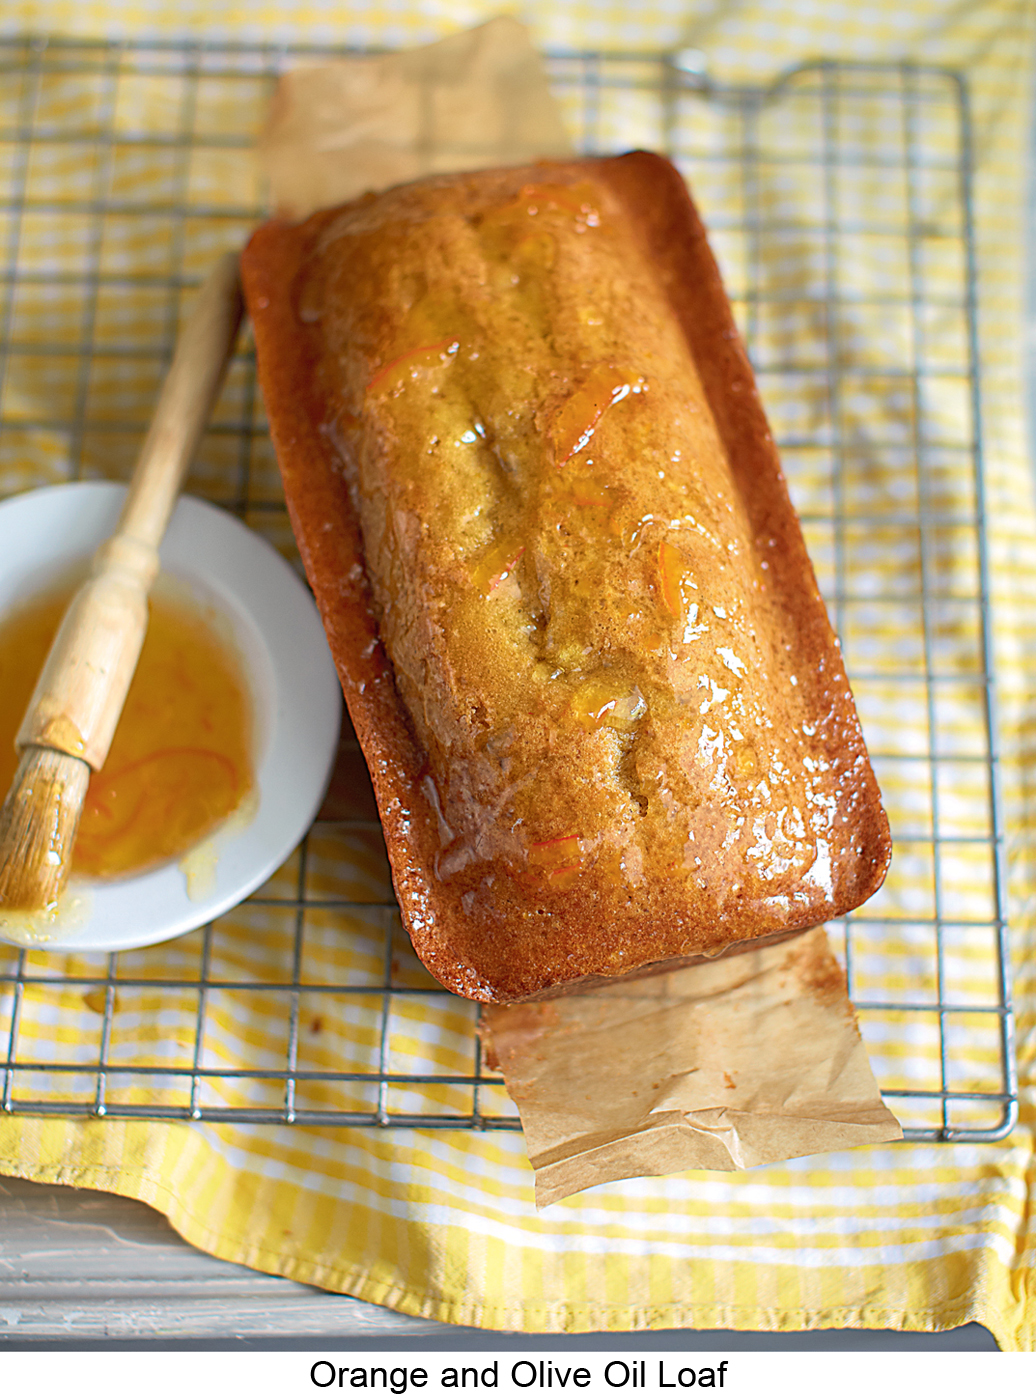
Made with white spelt flour, which has a ‘nuttier’ taste than regular plain flour, this unusual cake is quick to put together. Olive oil adds a gentle fruity flavour and moist texture. There’s no need to use an expensive olive oil, but for the best results pick one that’s fairly light and just mildly peppery.
MAKES 1 LARGE LOAF CAKE
YOU WILL NEED: 1 × 900G LOAF TIN (ABOUT 26 × 12.5 × 7.5CM), GREASED AND LINED WITH A LONG STRIP OF BAKING PAPER TO COVER THE BASE AND 2 SHORT SIDES
2 medium free-range eggs, at room temperature
125ml mild, fruity, extra virgin olive oil
finely grated zest of 1 large orange
175ml semi-skimmed or full-fat milk
200g caster sugar
200g white spelt flour
½ teaspoon baking powder
½ bicarbonate of soda
good pinch of salt
1 tablespoon marmalade, warmed, to finish
1 Heat your oven to 160°C/325°F/gas 3. Break the eggs into a large mixing bowl. Add the oil, orange zest and milk and whisk with a balloon whisk until thoroughly combined. Whisk in the sugar. Sift the flour, baking powder, bicarbonate of soda and salt into the bowl and mix in well with a wooden spoon to make a smooth but runny batter-like mixture.
2 Transfer the mixture to the prepared tin and spread evenly. Place in the heated oven and bake for 55–60 minutes until risen and golden brown and a skewer inserted into the centre of the cake comes out clean.
3 Set the tin on a wire rack. Immediately brush the top of the cake with the warmed marmalade. Run a round-bladed knife around the cake to loosen it from the tin, then leave to cool completely before removing it from the tin. Store in an airtight container and eat within 5 days.
A decoration of macaroons transforms a vanilla sponge cake – those here, flavoured with coconut and almonds, are attached to the cake with jam or chocolate. The topping is a giant crunchy macaroon, added to the cake halfway through baking.
MAKES 1 LARGE CAKE
YOU WILL NEED: 1–2 BAKING SHEETS, LINED WITH BAKING PAPER; 1 × 20.5CM ROUND SPRINGCLIP TIN, GREASED AND BASED-LINED
For the macaroons
100g desiccated coconut
100g ground almonds
100g flaked almonds
250g caster sugar
2 tablespoons cornflour
2 medium free-range egg whites, at room temperature
½ teaspoon vanilla extract
For the cake mixture
225g unsalted butter, softened
225g caster sugar
4 medium free-range eggs, at room temperature
1 teaspoon vanilla extract
200g self-raising flour
25g desiccated coconut
25g ground almonds
2–3 tablespoons apricot jam or melted chocolate, to finish
1 Heat your oven to 160°C/325°F/gas 3. Make the macaroons first. Put the coconut, ground and flaked almonds, sugar and cornflour in a mixing bowl. In another bowl whisk the egg whites and vanilla together with a fork for a minute or so until frothy, then add to the dry ingredients. Mix well with a wooden spoon to make a stiff mixture. Leave to firm up for 10 minutes.
2 Set aside half of the mixture to top the cake. Carefully spoon the rest of the mixture on to the lined baking sheets to make about 15 macaroons 4cm across and about 1.5cm high. Space them well apart to allow for spreading. Place in the heated oven and bake for 15–20 minutes until a light golden brown. Remove from the oven and leave the macaroons on the baking sheets until completely cold before peeling them off the baking paper.
3 While the macaroons are cooling, turn up the oven to 180°C/350°F/gas 4, and make the cake. Put the soft butter into a mixing bowl and beat with an electric mixer until creamy. Gradually whisk in the sugar, scraping down the sides of the bowl from time to time. Once all the sugar has been incorporated, beat for a couple of minutes until the mixture is light and fluffy, scraping down the bowl as before.
4 Beat the eggs with the vanilla in another bowl until just mixed, then gradually add to the butter mixture, beating well after each addition and scraping down the bowl as before. To prevent the mixture from curdling add a tablespoon of the flour with each of the last 2 additions of egg. Sift the rest of the flour into the bowl. Add the coconut and ground almonds and carefully fold in with a large metal spoon until thoroughly combined.
5 Transfer the mixture to the prepared tin and spread evenly. Place in the heated oven and bake for 45 minutes. At this point the mixture will only be half cooked and barely set. Carefully remove from the oven and gently spoon the rest of the macaroon mixture on top of the cake to make an even layer.
6 Return the cake to the oven, reduce the heat to 160°C/325°F/gas 3 and bake for a further 30–35 minutes until the macaroon topping is golden brown and a skewer inserted into the centre of the cake comes out clean (make sure you find the middle of the cake mixture below the macaroon). Keep an eye on the cake towards the end of the baking time – you may have to cover the top with a sheet of foil to prevent the macaroon from getting too brown.
7 Set the tin on a wire rack. Gently run a round-bladed knife around the cake to loosen it from the tin, then unclip the tin side. Once the cake is cold, remove it from the tin.
8 To finish, set the cake on a serving platter. Cover the side of the cake with the macaroons, using a dab of jam or melted chocolate as glue. If the macaroons are slightly too tall then trim them to the height of the cake (place them so the trimmed edge is at the base of the cake). Store in an airtight container and eat within 3 days. The cake and macaroons can also be stored separately for 4 days before assembling.
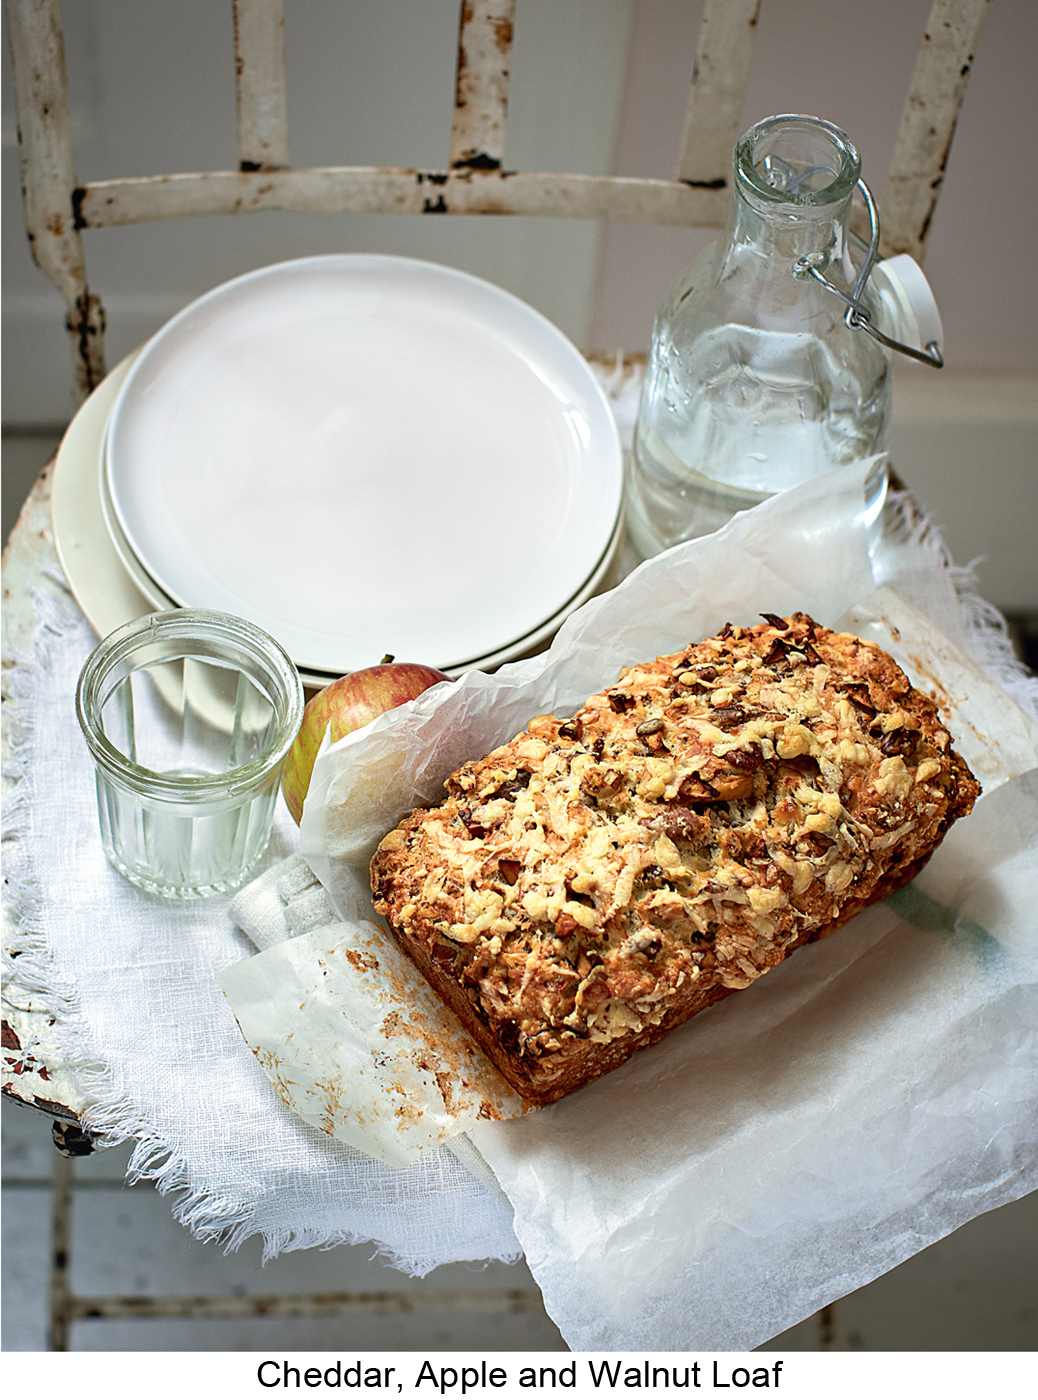
Richer than a scone or soda bread, here is a robust savoury cake that is good thickly sliced for a snack or to go with soup or a salad. The cake is packed with flavour and texture, and even better a day after baking.
MAKES 1 MEDIUM LOAF CAKE
YOU WILL NEED: 1 × 450G LOAF TIN (ABOUT 19 × 12.5 × 7.5CM), GREASED AND LINED WITH A LONG STRIP OF BAKING PAPER TO COVER THE BASE AND 2 SHORT SIDES
50g walnut pieces
175g self-raising flour
¼ teaspoon salt
125g unsalted butter, chilled and diced
50g bran flake cereal
125g extra mature Cheddar cheese, grated
1 medium eating apple, cored and cut into small pieces
3 medium free-range eggs, at room temperature
To finish
25g extra-mature Cheddar cheese, grated
1 Heat your oven to 180°C/350°F/gas 4. Spread the walnut pieces in a small baking dish or tin and toast in the heated oven for 8–10 minutes until they turn a light golden brown. Set aside to cool, leaving the oven on.
2 Sift the flour and salt into a big mixing bowl. Add the diced butter and rub into the flour with your fingertips until the mixture looks like coarse crumbs. Gently crush the bran flakes in your hands, just to make them slightly smaller (they shouldn’t be like crumbs), and add to the bowl with the cooled walnuts, grated cheese and apple.
3 Lightly beat the eggs in a small bowl with a fork, just to mix. Add to the big bowl and stir in with a wooden spoon to make a stiff mixture (similar to a rock cake mixture).
4 Spoon the mixture into the prepared tin and spread evenly. Scatter the 25g Cheddar cheese on top. Place in the heated oven and bake for 45–50 minutes until a good golden brown and a skewer inserted into the centre of the loaf comes out clean.
5 Set the tin on a wire rack. Run a round-bladed knife around the loaf to loosen it from the tin, then leave it to cool for 20 minutes before turning out. Once cold wrap in foil and eat within 2 days.
For a traditional, festive touch you can replace the lemon juice with a tablespoon of brandy, sherry or dark rum. Finish the cake with a marzipan topping covered with white icing and your favourite Christmas decorations or leave the cake plain, simply tied with a pretty ribbon.
MAKES 1 LARGE CAKE
YOU WILL NEED: 1 × 20.5CM SPRINGCLIP TIN OR ROUND DEEP CAKE TIN, GREASED AND LINED (WITH BAKING PAPER OR A READY-MADE CAKE LINER)
For the cake
175g unsalted butter, softened
175g dark brown muscovado sugar
finely grated zest of 1 unwaxed lemon plus 1 tablespoon juice
4 medium free-range eggs, at room temperature
250g plain flour
1 teaspoon ground mixed spice
500g luxury mixed dried fruit (with glacé cherries and apricots)
200g marzipan
To finish
2 tablespoons apricot jam or apricot glaze
300g marzipan
icing sugar, for dusting
½ quantity Royal Icing (opposite)
Christmas ribbon or decorations
1 Heat your oven to 150°C/300°F/gas 2. Put the soft butter, sugar and lemon zest into a large mixing bowl (set the bowl on a damp cloth so it doesn’t wobble). Beat with an electric mixer for about 3 minutes until the mixture looks very smooth (no lumps of sugar) and it has turned much paler in colour. Scrape down the sides of the bowl every minute or so.
2 Lightly beat the eggs in a small bowl, just to mix. Gradually add the eggs to the butter mixture, a tablespoonful at a time, beating well after each addition and scraping down the sides of the large bowl from time to time. To prevent the mixture from curdling, add a tablespoonful of the flour with the last 2 additions of egg.
3 Sift the rest of the flour and the mixed spice into the bowl. Add the lemon juice and gently fold into the butter mixture with a large metal spoon. Add the mixed fruit and fold in until thoroughly combined with the cake mixture. Cut the marzipan into cubes about 1.5cm and gently fold into the cake mixture.
4 Spoon the mixture into the prepared tin and smooth the surface so it is even. Place in the heated oven and bake for 2–2½ hours until the cake is a good golden brown and a skewer inserted into the centre comes out clean. It’s a good idea to test the cake in several places to make sure you haven’t just hit a molten lump of marzipan.
5 Set the tin on a wire rack and leave to cool. When the cake is completely cold remove it from the tin and peel off the lining paper. Wrap the cake in greaseproof paper or foil and store it in an airtight container for at least a day before you add the finishing touches.
6 When you’re ready to finish the cake, place it upside down on a cake board or serving platter (the flat underside is smoother for icing). Gently warm the apricot jam in a small bowl in the microwave for 10 seconds (or in a small pan over very low heat), then brush it over the top of the cake to make a sticky surface for the marzipan.
7 Gently mould the marzipan in your hands to make a ball. Sprinkle your worktop with a little icing sugar, then roll out the marzipan to a circle about the same size as the top of the cake and as thick as two stacked one pound coins. Set the (empty) cake tin on the marzipan and cut around it with a small sharp knife to make the circle very neat. Lift the marzipan circle on to the cake and press it down firmly with your palm. Cover the cake loosely with a sheet of clingfilm or an upturned cake tin and leave it to firm up overnight.
8 Spoon the royal icing on to the marzipan on top of the cake and spread it out with a round-bladed knife to cover the marzipan completely. You can make a smooth surface or swirl the icing into peaks or even a ski-slope, ready for your decorations. If you’re adding edible sprinkles or sparkles, you can do this while the icing is still soft and sticky, then leave overnight to set firm. Add non-edible decorations or a ribbon the next day. Store in an airtight container and eat within 3 weeks.
This snow-white icing can be spread smooth or swirled into peaks. It is also suitable for piping and for ‘flooding’ and run-outs. If you are covering a cake, add a few drops of glycerine to the icing so it sets firm but not inedibly rock-hard.
Royal icing can be tinted using food colouring pastes, which are available in many colours and even shimmery tones. Add a tiny amount of colouring using a cocktail stick and mix in well before adding more – some colours darken as they set.
MAKES ENOUGH TO COVER A 20.5CM ROUND DEEP CAKE
2 large free-range egg whites (very fresh), at room temperature
few drops of lemon juice
½ teaspoon glycerine (optional – use if covering a formal celebration cake)
500–600g icing sugar, sifted
1 Using a wooden spoon, beat the egg whites with the lemon juice, and glycerine if using, in a large bowl until thoroughly combined. Gradually beat in the icing sugar – the icing must be very smooth with no air bubbles, which could ruin the final appearance. (If your icing does have a lot of bubbles simply press a piece of clingfilm on to the surface and leave at room temperature overnight.)
2 Icing for coating and piping should be fairly thick and leave a solid trail on its surface when the spoon is lifted out. Icing for run-outs and flooding should be slightly softer and almost runny, so add a few more drops of lemon juice. Once made the icing can be kept – with clingfilm pressed on to the surface, and the bowl also tightly covered – for up to a week. Don’t attempt to freeze royal icing.
3 To make piped and run-out shapes to attach to cookies and cakes, spoon the icing into a piping bag fitted with a small plain tube and pipe the outline of the shape on a tray lined with baking paper (if necessary draw the shape first on the underside of the paper to guide you). Fill in the shape with slightly softer icing, spreading it right up to the piped lines. Leave to set overnight. You can also pipe on top of the icing shapes in a contrasting colour.
Variation: Quick Royal Icing
Put 5 tablespoons water into a large mixing bowl and gradually add 500g Royal Icing sugar (about a tablespoonful at a time), beating with a wooden spoon or hand-held electric mixer on low speed until the icing is very thick. To check if the icing is the right consistency, lift out the spoon or whisk: the tips of the icing peaks should just flop over. If the icing is runny or too floppy, beat in more sugar a teaspoon at a time; if the icing feels too stiff or seems hard to spread, stir in more water a few drops at a time. Use immediately, while the icing is spreadable, then leave to set firm.
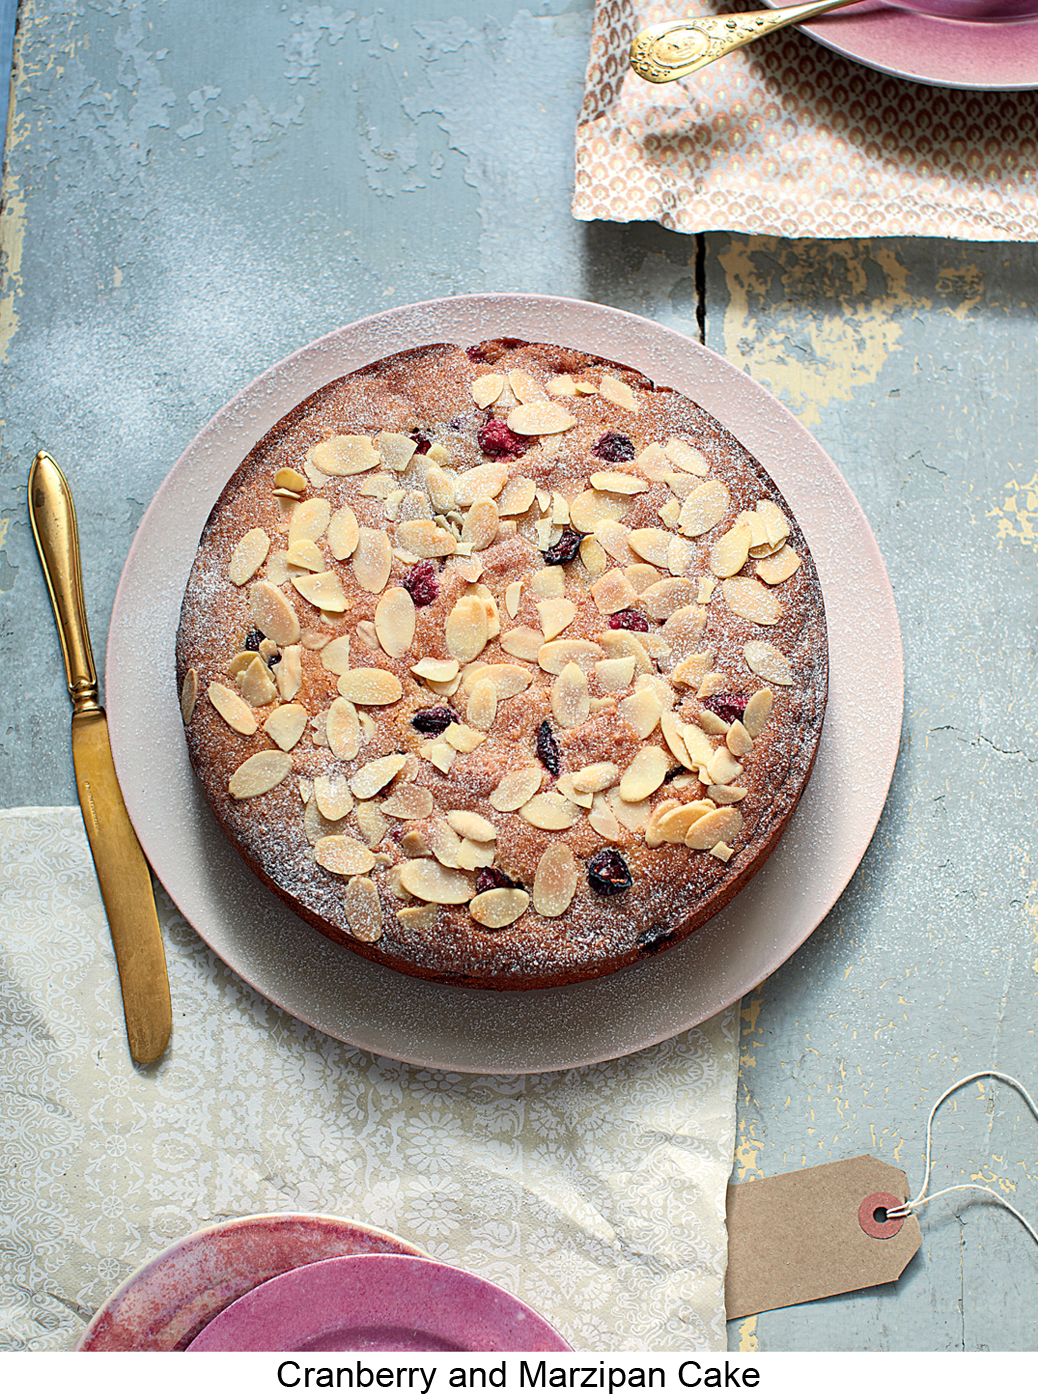
A pretty red-flecked golden sponge, rich with seasonal flavours – cranberries, nuts and marzipan – this makes a lighter alternative to a traditional fruit cake or, served warm with ice cream or custard (see recipe here), for Christmas pudding. Like most cakes made with nuts it tastes even better a day or so after baking.
MAKES 1 MEDIUM CAKE
YOU WILL NEED: 1 × 20.5CM ROUND SPRINGCLIP TIN, GREASED AND BASE-LINED
115g cranberries (thawed if frozen)
100g unsalted butter, softened
65g caster sugar
200g marzipan
3 medium free-range eggs, at room temperature
120g ground almonds
120g plain flour
2 teaspoons baking powder
25g flaked almonds
icing sugar, for dusting
1 Heat your oven to 180°C/350°F/gas 4. Chop the cranberries fairly coarsely in a food processor or by hand. Set aside until needed.
2 Put the soft butter and sugar into a mixing bowl and beat with a hand-held electric mixer until light and creamy. Scrape down the sides of the bowl. Crumble or break up the marzipan into small pieces and add to the bowl. Beat thoroughly until very smooth and creamy, scraping down the sides from time to time.
3 Beat the eggs in a small bowl with a fork until broken up, then gradually add to the butter mixture, beating well after each addition and scraping down the bowl as before. Gently stir in the ground almonds with a large metal spoon.
4 Sift the flour and baking powder into the bowl and fold in with the metal spoon. As soon as all the flour has been incorporated, carefully fold in the cranberries. Avoid over-mixing at this point – stop as soon as the cranberries look evenly distributed in the cake mixture.
5 Scrape the mixture into the prepared tin and spread evenly. Scatter the flaked almonds over the top. Place in the heated oven and bake for 40–45 minutes until risen and golden brown and a skewer inserted into the centre comes out clean.
6 Set the tin on a wire rack. Run a round-bladed knife around the cake to loosen it from the tin, then carefully unclip the tin side and leave the cake to cool completely. Once cold, wrap in greaseproof paper or foil and store in an airtight container overnight. Dust with icing sugar before serving.