Puddings and desserts are the highlight of a meal for many and much anticipated. Chocolate gives flavour and colour, but it can also affect the texture of a pudding. Watch carefully during baking: a chocolate mix will carry on cooking after the pudding comes out of the oven, so can end up rather dry. Slightly underbake a chocolate pudding if in doubt.
When making creamy egg custards always add the heated milk and cream to the beaten eggs, pouring in a thin steady stream, and not the other way round. If you find your meringues sometimes ‘weep’ during baking, check your oven temperature. If it’s too low, the meringues will be under-cooked and will collapse instead of solidifying. Beading – small drops of caramelised sugar on the top edge of the meringue – means the oven is probably a bit too high, making the exterior harden too quickly. Invest in a digital sugar thermometer – it’s so helpful when you are melting and tempering chocolate or making sugar syrups and caramel.
Recipe List
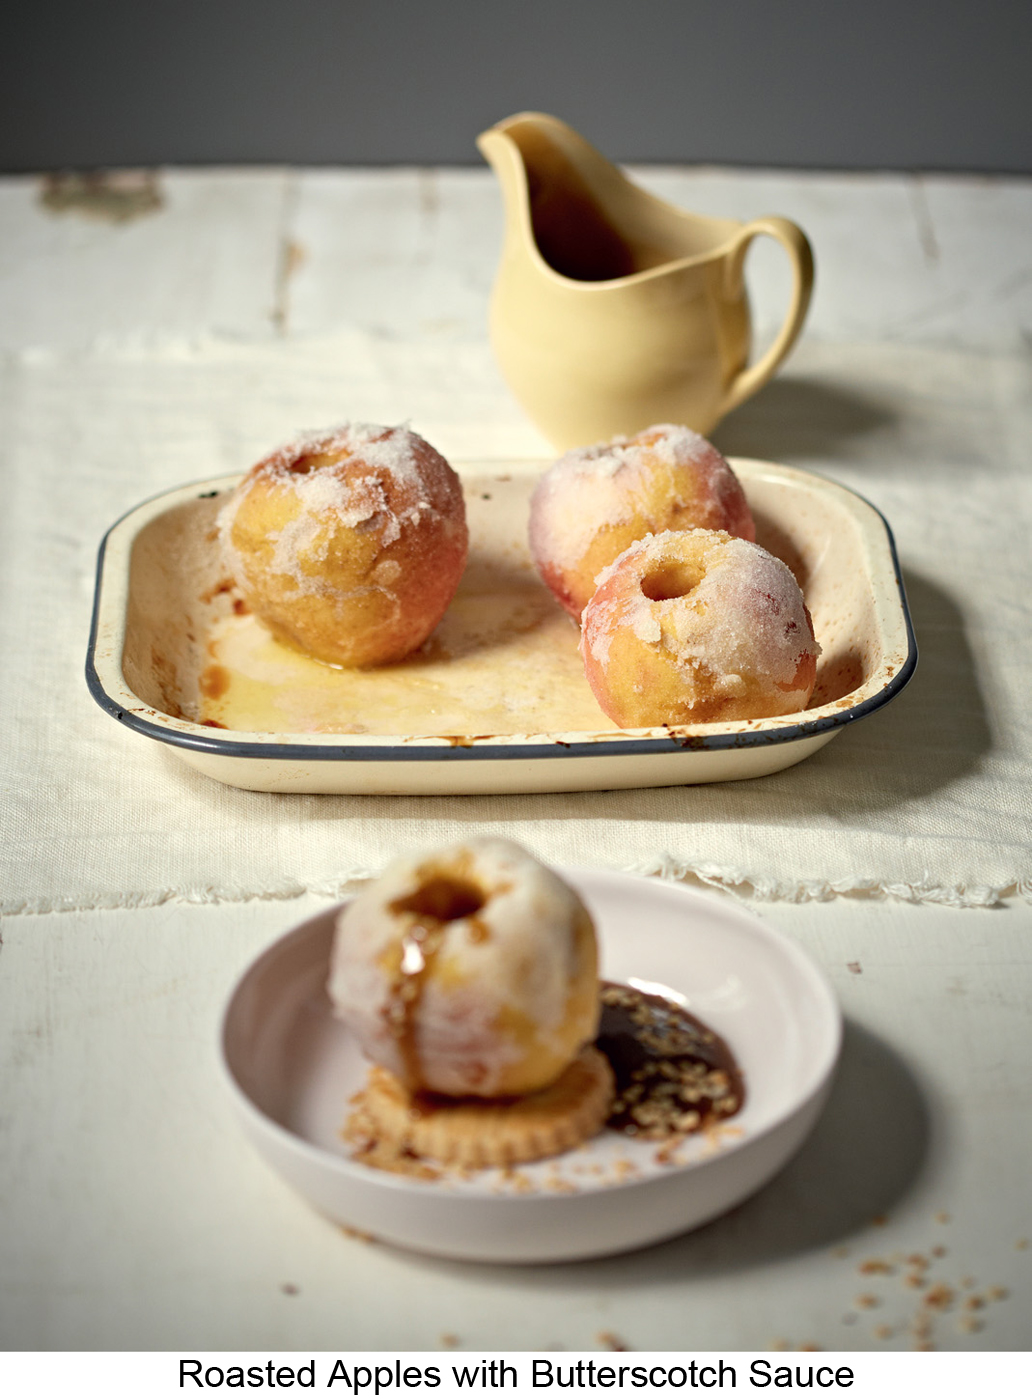
Roasted Apples with Butterscotch Sauce
Cinnamon, Blueberry and Apple Cobbler
Raspberry and Chocolate Pavlova
Home-made crisp, buttery biscuits plus hot apples and a warm butterscotch and hazelnut sauce – a delicious combination.
SERVES 4
YOU WILL NEED: 1 BAKING DISH LARGE ENOUGH TO HOLD THE APPLES UPRIGHT, GREASED WITH BUTTER
4 large, crisp eating apples
40g unsalted butter
4 tablespoons caster sugar
4 Vanilla Sablés (see here)
For the sauce
150g light brown muscovado sugar
75g unsalted butter, diced
100ml double cream
1 vanilla pod, split open
2 tablespoons chopped roasted hazelnuts
1 Heat your oven to 200°C/400°F/gas 6. Peel the apples. Using an apple corer or small sharp knife cut out the cores, leaving the fruit whole.
2 Melt the butter in a small pan, or in a shallow heatproof dish in the microwave. Put the sugar on to a small plate. One at a time, roll the apples first in the melted butter and then in the sugar so they are thickly coated. Set the apples upright, not touching, in the baking dish. Place in the heated oven and bake for 25–30 minutes until the fruit is tender and lightly coloured (the exact time depends on the apple variety).
3 While the apples are in the oven, make the sauce. Put the sugar, butter, cream and vanilla pod into a small pan. Heat gently, stirring frequently, until the butter has melted, then simmer for about 5 minutes until the sauce is thicker and sticky. Stir in the nuts. Keep warm until needed.
4 When the apples are ready, set a sablé on each of 4 heatproof plates. Carefully place an apple upright in the centre of each sablé. Gently reheat the sauce, if necessary, then remove the vanilla pod. Spoon a little sauce into the centre of each apple. Serve immediately, with the rest of the sauce in a jug.
This very simple all-in-one sponge mix is a good way to use slightly tart windfall apples. After baking, some of the sauce is spooned over the pudding so it seeps in and makes it sticky.
SERVES 6
YOU WILL NEED: 1 × 1.25–1.5 LITRE DEEP BAKING DISH, GREASED WITH BUTTER
For the sponge
4 medium tart eating apples (about 500g in total)
100g walnut pieces
2 medium free-range eggs, at room temperature
125g unsalted butter, softened
125g light brown muscovado sugar
150g self-raising flour
For the toffee sauce
200g dark muscovado sugar
100g unsalted butter, diced
150ml whipping or single cream
1 Heat your oven to 180°C/350°F/gas 4. Peel and quarter the apples. Cut out the cores, then chop the apples into pieces about 1cm – they don’t need to be neat. Put into a bowl with the nuts and mix well. Set aside.
2 Put the eggs in a large bowl and beat with a fork, just to mix. Add the soft butter, sugar and flour and beat well with a wooden spoon or electric mixer until the mixture is smooth and even in colour. Tip the apples and nuts on to the sponge mixture and thoroughly fold in with a large metal spoon or plastic spatula.
3 Scrape the mixture into the greased dish and spread evenly. Place in the heated oven and bake for about 40 minutes until a skewer inserted into the centre of the sponge comes out clean.
4 While the sponge is baking make the sauce. Put the sugar, butter and cream into a small pan and melt gently over low heat, stirring now and then. Bring to the boil, then simmer gently for 5 minutes until the sauce is slightly thickened. Remove from the heat.
5 Remove the dish from the oven and set it on a heatproof surface. Reheat the sauce, if necessary. Using a table knife, cut several deep slits in the sponge, then spoon over about a third of the sauce. When the sauce has seeped in, return the pudding to the oven and bake for a further 3 minutes. Serve hot with the remaining sauce.
If you have spent time making a wonderful pie or pud, it’s worth serving a proper custard too. You need rich, high-fat milk and a vanilla pod for the best flavour.
MAKES ABOUT 475ML
425ml creamy milk (eg Jersey or Guernsey)
1 vanilla pod
4 medium, free-range egg yolks, at room temperature
1 Put the milk into a medium pan (preferably non-stick). With the tip of a small, sharp knife, split the vanilla pod open along its length without cutting all the way through. Scrape some of the tiny specks – the seeds – into the milk, then add the pod. Bring to the boil, stirring frequently with a wooden spoon, then remove from the heat, cover the pan and leave to infuse for about 20 minutes.
2 Meanwhile, put the egg yolks and sugar into a heatproof mixing bowl set on a damp cloth (to stop it wobbling) and beat thoroughly with a wooden spoon until very smooth and much paler – this will take about a minute.
3 Remove the vanilla pod from the milk (the pod can be thoroughly rinsed and dried, then used to make vanilla sugar by adding it to a large screw-top jar filled with caster sugar), then slowly pour the warm milk on to the egg yolks in a thin steady stream, stirring constantly with the wooden spoon.
4 Tip the mixture back into the pan and stir constantly over medium heat until the custard thickens enough to coat the back of the spoon. Don’t let the custard come to the boil or the eggs will scramble!
5 As soon as the custard has thickened pour it into a serving jug and serve immediately. Or, to serve the custard cold or chilled, sprinkle the surface with a thin layer of caster sugar to prevent a skin from forming, then cover the top of the jug with clingfilm. Leave to cool and then chill, if wished. Stir the custard gently before serving. The custard can be kept, tightly covered, in the fridge for up to 2 days.
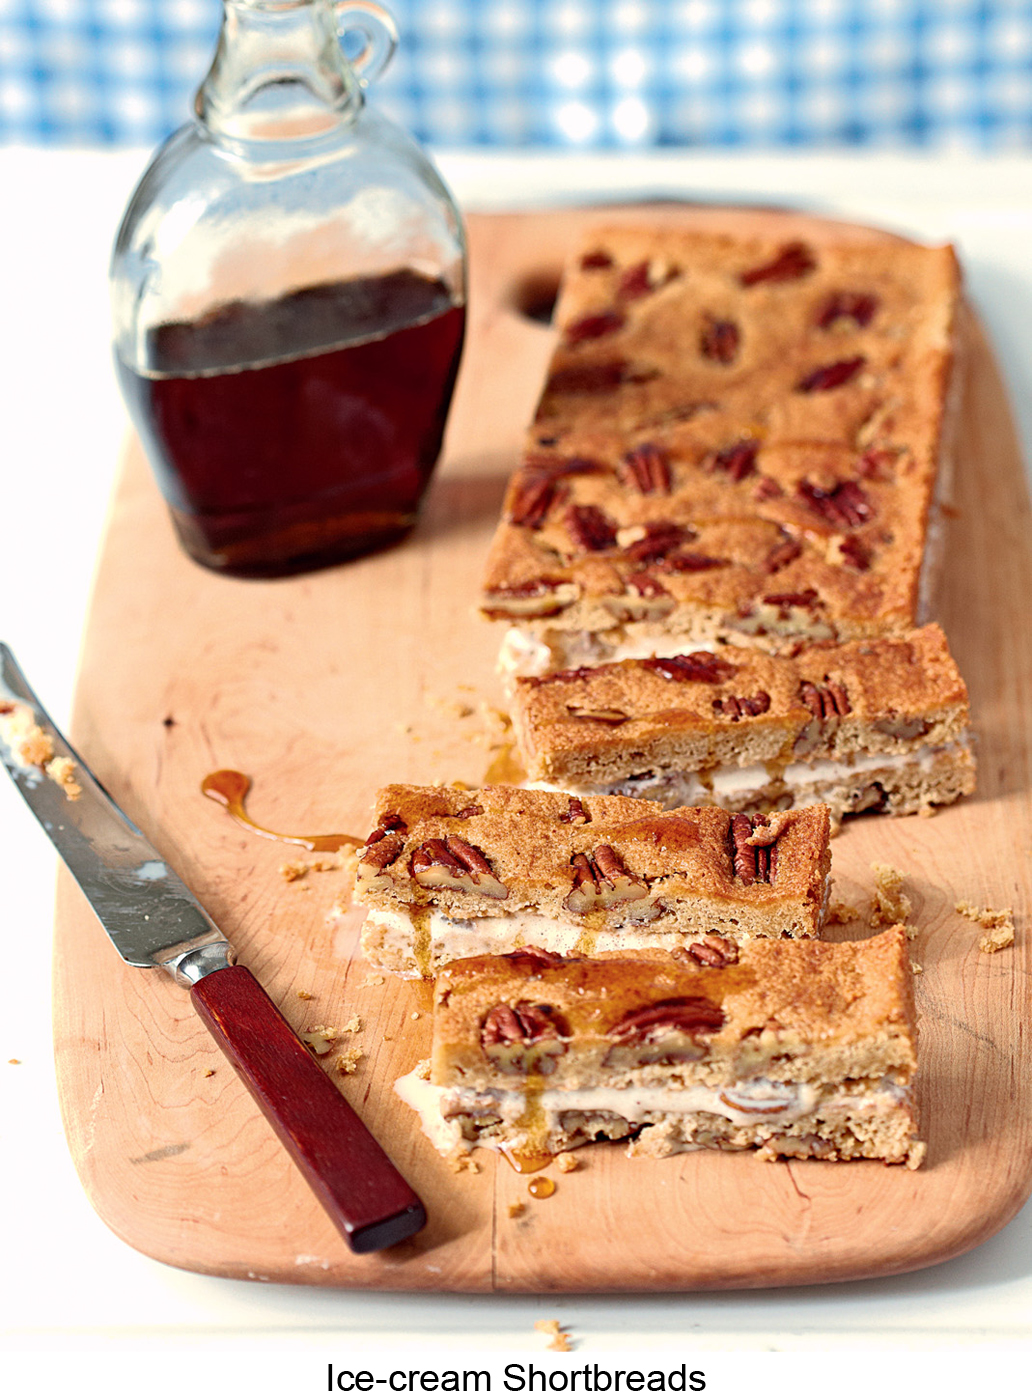
Ice-cream sandwiches are not just for the kids, or for summer days. Try this recipe, putting maple pecan ice cream between layers of butter-rich, nutty shortbread.
MAKES 12
YOU WILL NEED: 1 SWISS ROLL TIN 20 × 30CM, GREASED WITH BUTTER AND BASE-LINED
For the shortbread
200g unsalted butter, softened
½ teaspoon vanilla extract
85g light brown muscovado sugar
1 medium free-range egg, at room temperature
80g self-raising flour
pinch of salt
100g pecan halves
1 tablespoon maple syrup
To serve
1 × 500g tub maple pecan ice cream
maple syrup, for pouring
1 To make the shortbread put the soft butter into a mixing bowl with the vanilla and sugar. Beat with an electric mixer or a wooden spoon until light and creamy. Put the egg into a small bowl and beat with a fork, just to mix. Add the egg, a tablespoon at a time, beating the mixture well after each addition and scraping down the sides of the bowl from time to time. Sift the flour and salt into the bowl and mix in (if using an electric mixer, use the lowest speed).
2 Scrape the mixture into the prepared tin and spread carefully, taking it right into the corners, to make a thin but even layer. Scatter the pecans over the top – don’t press them on to the surface or they will disappear as the mixture rises while baking. Chill for 15 minutes.
3 Meanwhile, heat your oven to 190°C/375°F/gas 5. Place the tin in the heated oven and bake for 10 minutes until the shortbread is a light golden colour. Remove from the oven. Quickly drizzle the maple syrup over the shortbread, then return to the oven and bake for a further 2 minutes. Set the tin on a wire rack and leave until cold.
4 Invert the tin on to a chopping board, then lift off the tin and then the lining paper from the shortbread. With a large sharp knife, carefully cut the shortbread in half lengthways to make 2 long rectangles. Remove the ice cream from the freezer and leave until soft enough to scoop easily.
5 Set one rectangle nut-side down on a large sheet of clingfilm. Quickly spoon the ice cream on top to make an even layer. Cover with the second shortbread rectangle, nut side up, to make a large ice-cream sandwich. Wrap in clingfilm and freeze for about 2 hours until firm (it can be kept in the freezer for up to a week).
6 To serve, unwrap the sandwich and place it on a chopping board. Cut across into bars using a large sharp knife. Serve with extra maple syrup.
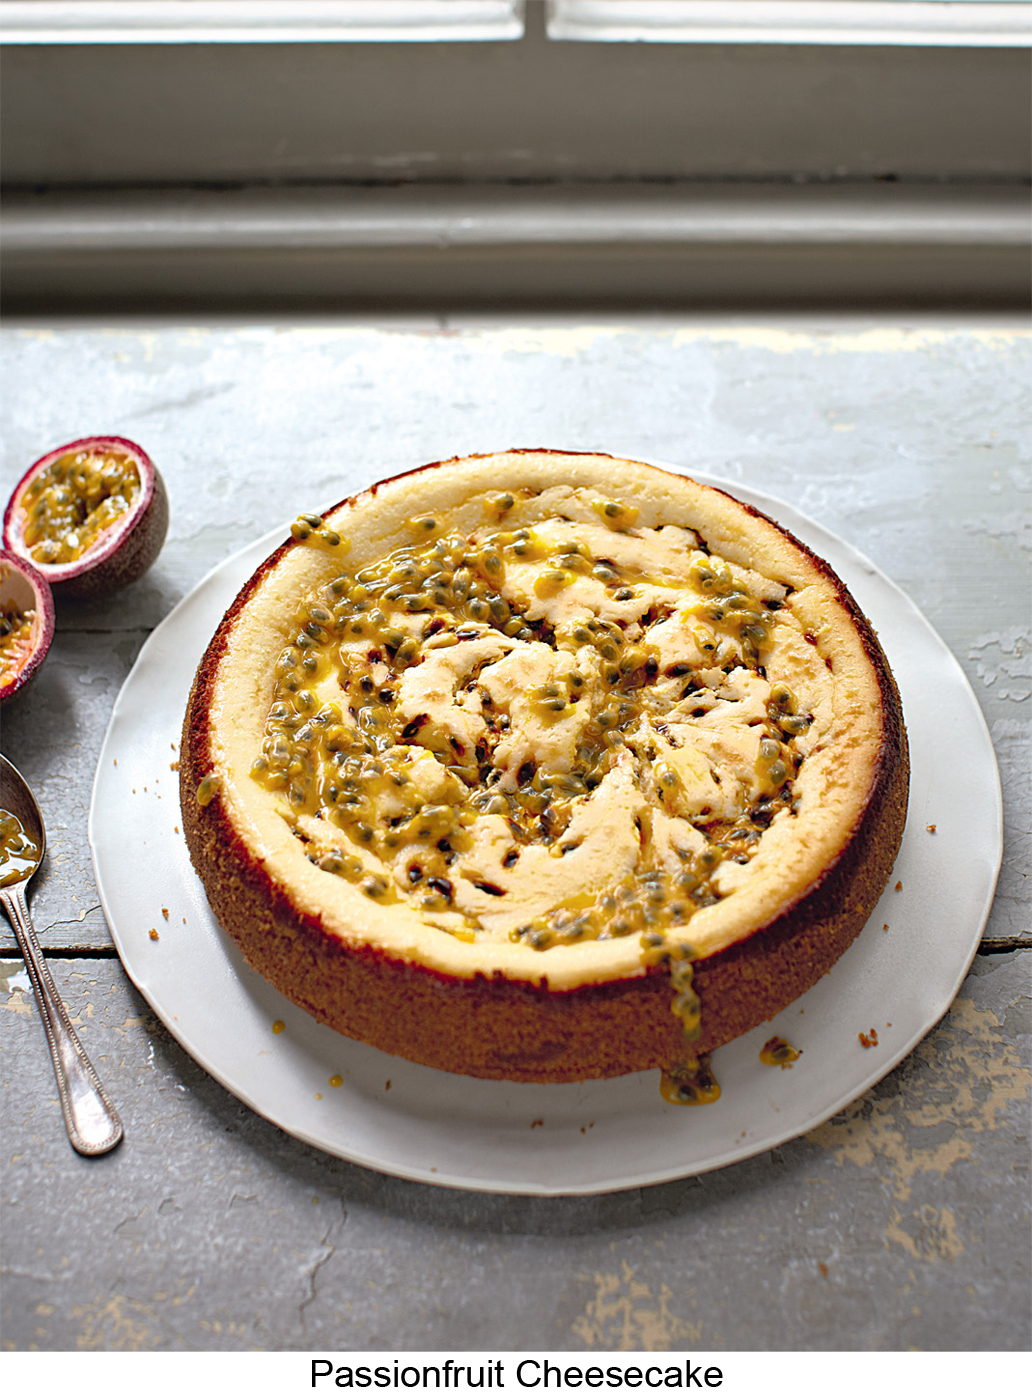
Passionfruit works well in a fresh-tasting lemony cheesecake that’s quick to put together. Baking the biscuit crust before adding the filling ensures the base will be crisp.
CUTS INTO 10
YOU WILL NEED: 1 × 20.5CM SPRINGCLIP TIN, GREASED WITH BUTTER, A BAKING SHEET
For the biscuit crust
150g digestive biscuits
50g unsalted butter
For the filling
600g full-fat cream cheese, room temperature
150ml soured cream, at room temperature
3 medium free-range eggs, at room temperature
150g caster sugar
finely grated zest of 1 unwaxed lemon
1 tablespoon lemon juice
4 passionfruits
2 passionfruits, to serve (optional)
1 Heat your oven to 180°C/350°F/gas 4. Crush the biscuits, either in a food processor or by putting them into a closed plastic bag and bashing with a rolling pin. Tip them into a large mixing bowl.
2 Gently melt the butter in a small pan (or in a bowl in the microwave), then mix into the crumbs. Tip them into the greased tin set on a baking sheet. Make a case for the filling using about a third of the crumbs for the side and the rest for the base: push the crumbs for the side towards the edge of the tin, then spread out the crumbs remaining on the base and press them down firmly with the back of a spoon to make an even layer. With the back of the spoon ease the crumbs around the edge halfway up the side of the tin, gently pressing them to firm. Once the side looks fairly even in height and thickness, go all around again pressing the crumbs firmly with the back of the spoon and making sure that the angle between the base and the sides is 90 degrees.
3 Place the biscuit crust in the heated oven and bake for 5 minutes. Remove from the oven and set the tin, still on the baking sheet, on a heatproof surface. Leave to cool until needed. Don’t turn off the oven.
4 To make the filling, put the cream cheese, soured cream, eggs, sugar, and lemon zest and juice into a large mixing bowl (set the bowl on a damp cloth so it won’t wobble). Beat together with an electric mixer. Start on low speed at first to soften the cream cheese and break up the eggs, then scrape down the bowl and whisk on medium speed until the mixture is very smooth and creamy.
5 Pour and scrape the mixture into the biscuit crust in the tin and spread evenly – the filling will come slightly above the rim of the biscuit crust.
6 Halve the 4 passionfruits and scoop out the pulp and seeds into a small bowl. Stir well, then spoon on to the middle of the cheesecake filling. Using the handle of a teaspoon, gently swirl the passionfruit through the mixture to give a marbled effect.
7 Set the tin, still on the baking sheet, in the heated oven and bake for 40–45 minutes until the filling looks set and no longer damp – the filling will have a slight wobble when you gently shake the sheet. Turn off the oven and leave the cheesecake to cool inside with the door slightly ajar for 10 minutes.
8 Remove from the oven and set on a heatproof surface. Slip a round-bladed knife (or palette knife) down between the side of the tin and the cheesecake and gently run the knife around the cheesecake to loosen it from the tin (this helps to prevent it from cracking as it cools and contracts). Leave until cold, then cover the tin with clingfilm and chill for 6 hours (or overnight if possible).
9 When you’re ready to serve the cheesecake unclip the tin side and set the cheesecake on a serving platter. Halve the 2 passionfruits, scoop out the pulp and seeds, and spoon on to the cheesecake. Store in a covered container in the fridge for up to 5 days.
A moist and deeply flavoured coffee sponge, this is made with ground almonds rather than flour, and filled with chocolate mousse and whipped cream.
CUTS INTO 8
YOU WILL NEED: 1 SWISS ROLL TIN 20 × 30CM, GREASED WITH BUTTER AND BASE-LINED
For the sponge
4 medium free-range eggs, at room temperature, separated
150g caster sugar
2 tablespoons instant coffee granules dissolved in 1 tablespoon boiling water
50g ground almonds
For the filling
150g dark chocolate (about 70% cocoa solids)
1 tablespoon water or brandy
3 medium free-range eggs, at room temperature, separated
1 tablespoon caster sugar
200ml whipping cream
2 tablespoons icing sugar, plus extra for dusting
2 teaspoons coffee liqueur or brandy (optional)
chocolate coffee beans, to decorate
1 Heat your oven to 180°C/350°F/gas 4. Make the sponge first. Put the egg whites in a large bowl and whisk with an electric mixer until stiff peaks will form when the whisk is lifted. Set aside until needed.
2 Put the sugar, coffee and egg yolks into another bowl and whisk (no need to wash the beaters) until the mixture is very thick and mousse-like and will make a ribbon trail on itself. Sprinkle the ground almonds over the mixture and gently fold in with a large metal spoon or plastic spatula.
3 Add a third of the whisked egg whites and gently fold into the yolk mixture. Fold in the rest of the whites in 2 batches. Spoon the sponge mixture into the prepared tin and spread evenly. Place in the heated oven and bake for 15–18 minutes until the sponge springs back when gently pressed in the centre. Remove the tin from the oven and set it on a wire rack. Cover lightly with a damp tea towel and leave until completely cold.
4 While the sponge is cooling, make the filling. Break or chop up the chocolate into even-sized pieces and put into a large heatproof bowl with the water or brandy. Set the bowl over a pan of hot water and melt gently, stirring occasionally. Remove the bowl from the pan and gently stir in the egg yolks.
5 Put the egg whites into a large bowl and whisk until soft peaks will form when the whisk is lifted. Sprinkle the caster sugar over and whisk again until stiff. Fold the whites into the chocolate mixture in 3 batches using a large metal spoon or plastic spatula. Cover the mousse and chill until firm enough to spread.
6 Pour the cream into a large bowl, add the icing sugar and liqueur or brandy, and whip until stiff.
7 Lay a sheet of baking paper on the worktop and dust with icing sugar. Turn out the sponge on to the paper. Spread the chocolate mousse over the sponge, then top with the whipped cream. Roll up the sponge from one long side, using the paper to lift and guide the sponge (don’t worry if it cracks). Wrap the baking paper tightly round the roulade to hold it in place, then chill for about 2 hours (and up to 24 hours) until firm.
8 When ready to serve unwrap the roulade and trim off the ends. Set on a serving platter. Dust with icing sugar and decorate with chocolate coffee beans. Serve in thick slices.
For the ideal smooth, creamy texture, the egg custard mixture must be cooked gently. Setting the ramekins in a bain-marie, or roasting tin of water, prevents the custard from overheating in the oven. Then when you melt and caramelise the sugar layer under the grill, keep checking – if this takes too long there’s a chance the custard might start to heat up and bubble through.
MAKES 4
YOU WILL NEED: 4 × 9CM/175ML RAMEKIN DISHES
500ml double cream
1 vanilla pod, split lengthways
4 medium free-range egg yolks, at room temperature
1 tablespoon caster sugar
4 tablespoons demerara sugar, to finish
1 Pour the cream into a medium pan and add the vanilla pod. Heat gently until you see tiny bubbles appearing around the edge of the pan – don’t let the cream start to boil. Stir the cream gently, then set the pan on a heatproof surface, cover and leave to infuse for 15 minutes. Meanwhile, heat your oven to 180°C/350°F/gas 4.
2 Put the egg yolks in a large heatproof bowl and add the caster sugar. Set the bowl on a damp cloth so it doesn’t wobble, then whisk with a balloon whisk for 2 minutes until the yolks become paler in colour and thicker.
3 Remove the vanilla pod from the cream (it can be rinsed and thoroughly dried, then used to make vanilla sugar). Slowly pour the hot cream into the egg yolks, while whisking gently. Once all the cream has been incorporated, pour the mixture into a measuring jug. Divide equally among the ramekin dishes.
4 Set the ramekin dishes in a roasting tin. Pour cold water into the tin so it comes halfway up the sides of the ramekins. Carefully place the roasting tin in the oven and bake for 25–30 minutes until you can see that a skin has formed over the surface of the custard – it will still be wobbly underneath.
5 Remove the roasting tin from the oven and set it on a heatproof surface. Leave to cool, then lift the ramekins out of the water and cover them with clingfilm. Chill for at least 6 hours – overnight if possible – so the custard firms up.
6 Turn on the grill to its hottest possible setting, and wait for it to get properly hot. Uncover the custards and sprinkle a tablespoon of demerara sugar evenly over the top of each one – a thin even layer will give the best results, so don’t add a bit of extra sugar for luck! Set the ramekins on the rack of the grill pan and slide it under the grill, as close to the heat as possible. Grill for a couple of minutes until the sugar has melted and turned to a golden caramel.
7 Leave the ramekins to cool for 10 minutes, then cover them lightly and return to the fridge to chill for about 1 hour. (Alternatively, melt and caramelise the sugar using a kitchen blowtorch; leave to cool and set for 10 minutes before serving.) Best eaten the same day before the caramel starts to soften.
Variation: Chocolate Brûlée
Finely chop 200g dark chocolate (about 70% cocoa solids). After removing the vanilla pod from the cream, gently reheat the cream until steaming hot (but not boiling). Add the chocolate. Leave for a minute, then stir until smooth. Continue with the recipe above.
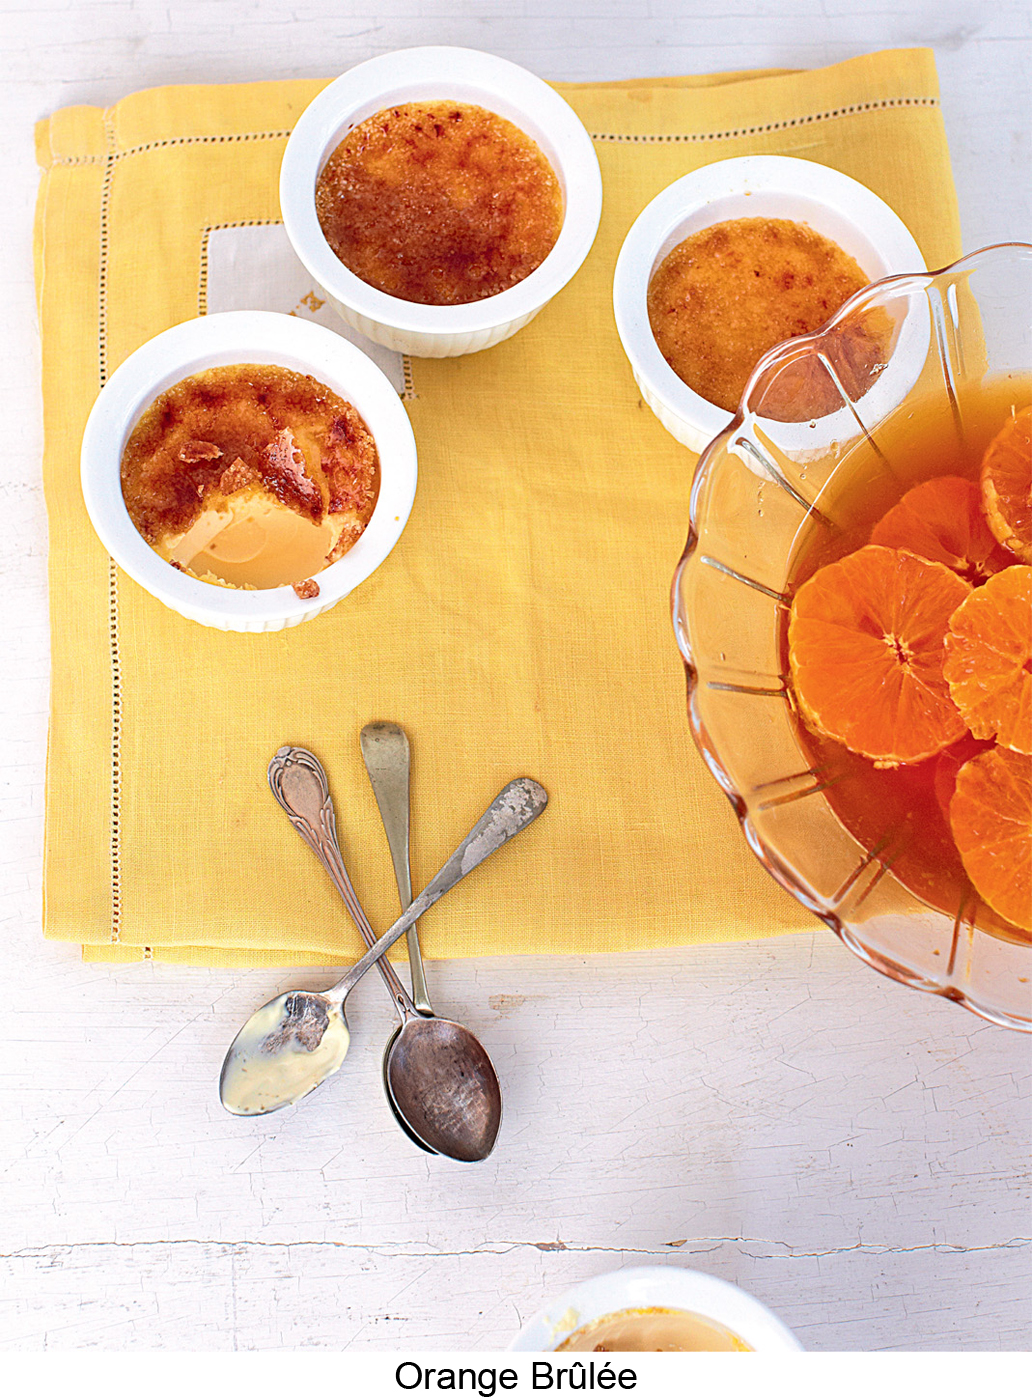
A fresh summery version of crème brûlée, this is flavoured with fragrant orange flower water and served with caramel oranges.
SERVES 4
YOU WILL NEED: 4 × 9CM/175ML RAMEKIN DISHES
500ml double cream
finely grated zest of 1 unwaxed orange
4 medium free-range egg yolks, at room temperature
1 tablespoon caster sugar
2 teaspoons orange flower water
4 tablespoons demerara sugar, to finish
For the caramel oranges
5 medium oranges (seedless if possible)
175g caster sugar
125ml water
1 Pour the cream into a medium pan and add the orange zest. Heat gently until you see tiny bubbles appearing around the edge of the pan – don’t let the cream start to boil. Stir the cream gently, then set the pan on a heatproof surface, cover and leave to infuse for 15 minutes. Meanwhile, heat your oven to 180°C/350°F/gas 4.
2 Put the egg yolks in a large heatproof bowl and add the sugar and orange flower water. Set the bowl on a damp cloth so it doesn’t wobble, then whisk with a balloon whisk for 2 minutes until the yolks become paler in colour and thicker.
3 Slowly pour the hot cream into the egg yolks while whisking gently. Once all the cream has been incorporated, pour the mixture into a measuring jug. Divide equally among the ramekin dishes.
4 Set the ramekin dishes in a roasting tin. Pour cold water into the tin so it comes halfway up the sides of the ramekins. Carefully place the roasting tin in the oven and bake for 25–30 minutes until you can see that a skin has formed over the surface of the custard – it will still be wobbly underneath.
5 Remove the roasting tin from the oven and set it on a heatproof surface. Leave to cool, then lift the ramekins out of the water and cover them with clingfilm. Chill for at least 6 hours – overnight if possible – so the custard firms up.
6 Peel the oranges and cut into very thin slices with a serrated knife. Put the slices, and any juice, in a heatproof bowl.
7 To make the caramel combine the sugar and half the water in a small, heavy-based pan. Set over low heat and stir frequently until the sugar has completely dissolved. Turn up the heat and boil rapidly (without stirring) until the syrup turns a deep chestnut caramel colour. Remove the pan from the heat. Cover your hand, then quickly pour the rest of the water into the caramel (it will splutter alarmingly). Return the pan to low heat and stir until smooth and melted. Pour the caramel over the oranges. Stir well, then cover and keep in the fridge.
8 Turn on the grill to its hottest possible setting, and wait for it to get properly hot. Uncover the custards and sprinkle a tablespoon of demerara sugar evenly over the top of each one – a thin even layer will give the best results, so don’t add a bit of extra sugar for luck! Set the ramekins on the rack of the grill pan and slide it under the grill, as close to the heat as possible. Grill for a couple of minutes until the sugar has melted and turned to a golden caramel.
9 Leave the ramekins to cool for 10 minutes, then cover and return to the fridge to chill for about 1 hour. (Alternatively, caramelise the sugar using a kitchen blowtorch; leave to cool for 10 minutes before serving.) Serve with the caramel oranges.
The brownies here are slightly firmer and less sweet than usual, to make it easier to sandwich them with ice cream. If you have only one baking sheet, scoop the second batch on to a sheet of baking paper cut to fit the sheet. When the first batch of brownies has been baked, slide them, on the lining paper, on to a wire rack to cool. Quickly cool the baking sheet under running cold water and dry it, then slide the paper with the second batch on to it and bake as before.
MAKES 12
YOU WILL NEED: 1–2 BAKING SHEETS, LINED WITH BAKING PAPER
200g dark chocolate (about 70% cocoa solids), chopped or broken up
50g unsalted butter, diced
150g light brown muscovado sugar
2 medium free-range eggs, at room temperature
½ teaspoon vanilla extract
40g self-raising flour
good pinch of salt
50g good milk chocolate, chopped into small chunks
50g pecan or walnut pieces
1 × 500g tub vanilla or coffee ice cream
icing sugar, for dusting
1 Put the dark chocolate in a large heatproof bowl and add the butter. Set the bowl over a pan of hot water and melt gently, stirring occasionally. Remove the bowl from the pan and set on a damp cloth on a heatproof surface (the cloth will stop the bowl wobbling). Stir in the sugar. Leave to cool for a couple of minutes.
2 Using a fork, beat the eggs with the vanilla in a small bowl until frothy. Check that the chocolate mixture is barely warm, then add the eggs and beat with a wooden spoon to incorporate thoroughly.
3 Sift the flour and salt into the bowl and gently stir in. Add the milk chocolate and nuts and stir in. Cover the bowl and chill for 30 minutes to firm up the mixture. Meanwhile, heat your oven to 180°C/350°F/gas 4.
4 Scoop out the mixture in tablespoon-sized portions on to the lined baking sheets; set the scoops well apart to allow for spreading. Gently flatten the mounds of dough with your fingers to make even-sized rounds about 1cm high – they will look a bit lumpy rather than neat.
5 Place in the heated oven and bake for 10 minutes until the surface of the brownies is lightly cracked and they feel just firm (the centres will still be soft – the brownies will continue cooking for a few minutes after they come out of the oven, and will firm up as they cool). Remove from the oven and place the baking sheets on a wire rack. Leave the brownies to cool before peeling them off the baking paper. Once cold, the brownies can be stored in an airtight container for up to 5 days.
6 Remove the ice cream from the freezer about 10 minutes or so before serving, to make it easier to scoop. Sandwich the brownies in pairs with a scoop of ice cream. Dust with icing sugar and eat immediately.
Old-fashioned but still a real treat! The sponge is a quick all-in-one flavoured with fresh lemon zest and syrup, and there’s more syrup in the basin to give the turned-out pudding a sticky sweet coating. Measuring the syrup is easier if you warm the spoon first. Serve with home-made vanilla custard (see the recipe here).
SERVES 4–6
YOU WILL NEED: 1 × 500ML OVENPROOF PUDDING BASIN, WELL GREASED WITH BUTTER
5 tablespoons golden syrup
For the sponge
120g unsalted butter, at room temperature
100g caster sugar
1 tablespoon golden syrup
2 medium free-range eggs, at room temperature
finely grated zest of 1 medium lemon
1 tablespoon lemon juice
130g self-raising flour
1 Heat your oven to 180°C/350°F/gas 4. Spoon the 5 tablespoons syrup into the bottom of the buttered basin.
2 Put all the ingredients for the sponge into a large mixing bowl and beat well with a wooden spoon or an electric mixer until very smooth and light. Spoon the mixture into the basin.
3 Cut a sheet of foil big enough to cover the basin generously. Butter the foil, then fold a pleat in the centre (to allow for the expansion of the pudding during baking). Lay the foil, butter side down, over the top of the basin and seal tightly under the rim.
4 Place in the heated oven and bake for 45–50 minutes until a skewer inserted in the centre comes out clean. Remove the basin from the oven and set it on a heatproof surface. Take off the foil. Run a round-bladed knife around the pudding to loosen it from the basin, then set an upturned warmed serving plate on top. Holding the plate and basin firmly together, turn them over so the pudding is unmoulded on to the plate. Serve immediately.
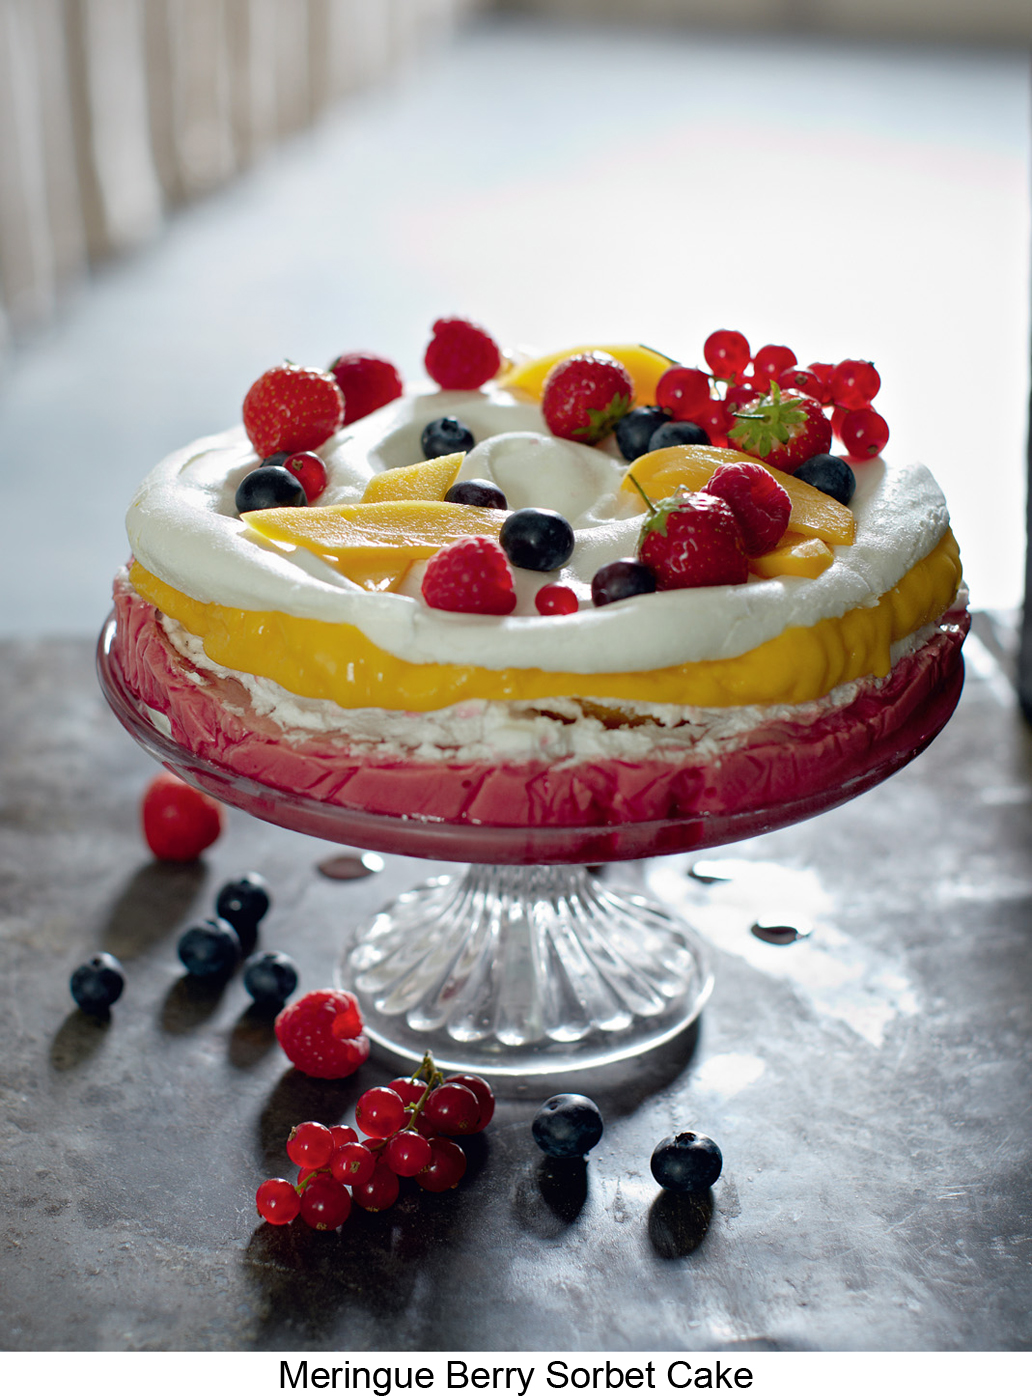
Three layers of crunchy meringue sandwiched with berry sorbets and finished with fresh fruit for a gluten-free dairy-free dessert. You can replace one of the sorbets with ice cream, such as a rich fruity berry ice cream or vanilla ice cream for a creamy flavour.
CUTS INTO 10
YOU WILL NEED: 1 × 20.5CM SPRINGCLIP TIN, LINED WITH CLINGFILM, 3 BAKING SHEETS
For the meringue layers
4 medium free-range egg whites, at room temperature
2 good pinches of cream of tartar
225g caster sugar
To assemble
1 × 500g tub raspberry sorbet
1 × 500g tub strawberry or mango sorbet
To decorate
fresh raspberries, blueberries, tiny strawberries, redcurrants and/or sliced mango
Fresh Raspberry Sauce (see here), to serve
1 Heat your oven to 120°C/250°F/gas ½. Using the base of the springclip tin as a guide, draw three 20.5cm circles on 3 sheets of baking paper. Lay the baking paper, drawn-circle side down, on 3 baking sheets (or upturned roasting tins).
2 Put the egg whites into a large mixing bowl and whisk with an electric mixer for about 30 seconds until foamy. Add the cream of tartar and whisk until the whites will form a soft peak when the whisk is lifted.
3 Whisk in 4 tablespoons of the sugar, one at a time, and keep on whisking for about a minute to make a thick, glossy meringue that will form a stiff peak when the whisk is lifted. Sprinkle the rest of the sugar over the meringue and very lightly fold in with a large metal spoon.
4 Spoon a third of the meringue into the centre of each circle drawn on the paper. Gently spread out to make an even disc slightly smaller than the circle (to allow for spreading). Place in the heated oven and bake for 1½–1¾ hours until crisp and dry. Turn off the oven and leave the meringues inside to cool.
5 About 10 minutes before assembling the cake, remove the sorbets from the freezer so they can become soft enough to scoop. Clear a space in the freezer.
6 Set one meringue disc in the base of the lined springclip tin. Spoon the raspberry sorbet on top to make an even layer. Cover with a second meringue disc and gently press down with both hands to slightly compress the layers – don’t worry if the meringue starts to crack or crumble. Cover with the second sorbet, again spooned on in an even layer. Then top with the last meringue disc and press down gently again to mould it all together. Cover tightly with clingfilm and freeze for at least 2 hours (the cake can be kept in the freezer for up to a week).
7 When ready to serve, unwrap the cake and unclip the tin. Set the cake on a serving plate. Decorate the top with berries and/or slices of mango, and serve cut into wedges with the raspberry sauce.
Quicker than a fruit pie, and better-looking than a crumble, a cobbler topping has a crunchy surface and soft, tender crumb. Using a good wild blueberry conserve instead of sugar deepens the flavours of the fruit filling and thickens the juices.
SERVES 4–6
YOU WILL NEED: 1 × 1.25–1.5 LITRE BAKING DISH OR PIE DISH
1 large Bramley apple
450g blueberries
finely grated zest of 1 unwaxed lemon
1 tablespoon lemon juice
6 tablespoons blueberry conserve
For the topping
200g self-raising flour
¼ teaspoon ground cinnamon
good pinch of salt
3 tablespoons caster sugar, plus extra for sprinkling
50g unsalted butter, chilled and diced
about 140ml single cream
1 Heat your oven to 180°C/350°F/gas 4. Peel, quarter and core the apple, then cut into slices the thickness of a pound coin. Put into a mixing bowl and add the blueberries, lemon zest and juice, and blueberry conserve. Mix everything together well. Transfer to the baking dish and spread evenly. Put on one side while you make the topping.
2 Sift the flour, cinnamon, salt and sugar into a bowl. Add the pieces of butter and rub into the flour until the mixture looks like fine crumbs. Make a well in the centre and pour in the cream. Mix into the crumbs using a round-bladed knife to make a soft but not sticky dough. Work in more cream if the mixture feels dry and stiff or there are dry crumbs in the bowl.
3 Divide the dough into 14 or 15 walnut-sized balls. One at a time, slightly flatten the balls so they are about 1cm thick but slightly irregularly shaped and knobbly – like cobblestones. Arrange on top of the fruit, higgledy-piggledy rather than in a neat pattern. Sprinkle the cobbles with sugar.
4 Place in the heated oven and bake for 30–35 minutes until the cobbles are golden brown and the fruit is tender and bubbling. Serve warm with ice cream.
A sliced brioche loaf makes the lightest of bread and butter puds, and good lemon curd adds great flavour to the creamy custard. A really easy but special pudding.
SERVES 6
YOU WILL NEED: 1 × 1.5 LITRE BAKING DISH OR PIE DISH, GREASED WITH BUTTER, A ROASTING TIN
8 slices brioche (about 220g in total)
50g unsalted butter, softened
100g Lemon Curd (see here)
30g dried apricots, roughly chopped
300ml single cream
300ml milk (whole or semi-skimmed)
35g caster sugar
4 medium free-range eggs, at room temperature
icing sugar, for dusting
1 Make sandwiches with the brioche, butter and lemon curd (there’s no need to cut off the soft crusts). Cut each sandwich diagonally into 4 triangles. Fit into the dish, placing them crust edge down, almost vertical; scatter in the apricots as you go.
2 Pour the cream and milk into a pan and add the caster sugar, then heat gently, stirring frequently, just until the sugar has dissolved (or do this in a heatproof jug in the microwave). Don’t let the mixture come to the boil. Remove from the heat and leave to cool for a couple of minutes.
3 While it’s cooling beat the eggs in a heatproof jug, or bowl with a lip, using a wire whisk or wooden spoon, just to mix. Slowly pour in the warm sweetened cream, stirring to mix.
4 Pour the custard mixture evenly over the lemon curd sandwiches in the baking dish, making sure that each one is moistened. Leave to stand for about an hour so the sandwiches can soak up the custard. Towards the end of this time, heat your oven to 160°C/325°F/gas 3.
5 Set the dish in a roasting tin and pour enough water into the tin to come halfway up the sides of the dish. Carefully place the roasting tin in the heated oven and bake for about 40 minutes until just set. Lift the dish out of the roasting tin, dust the top of the pudding with icing sugar and serve warm.
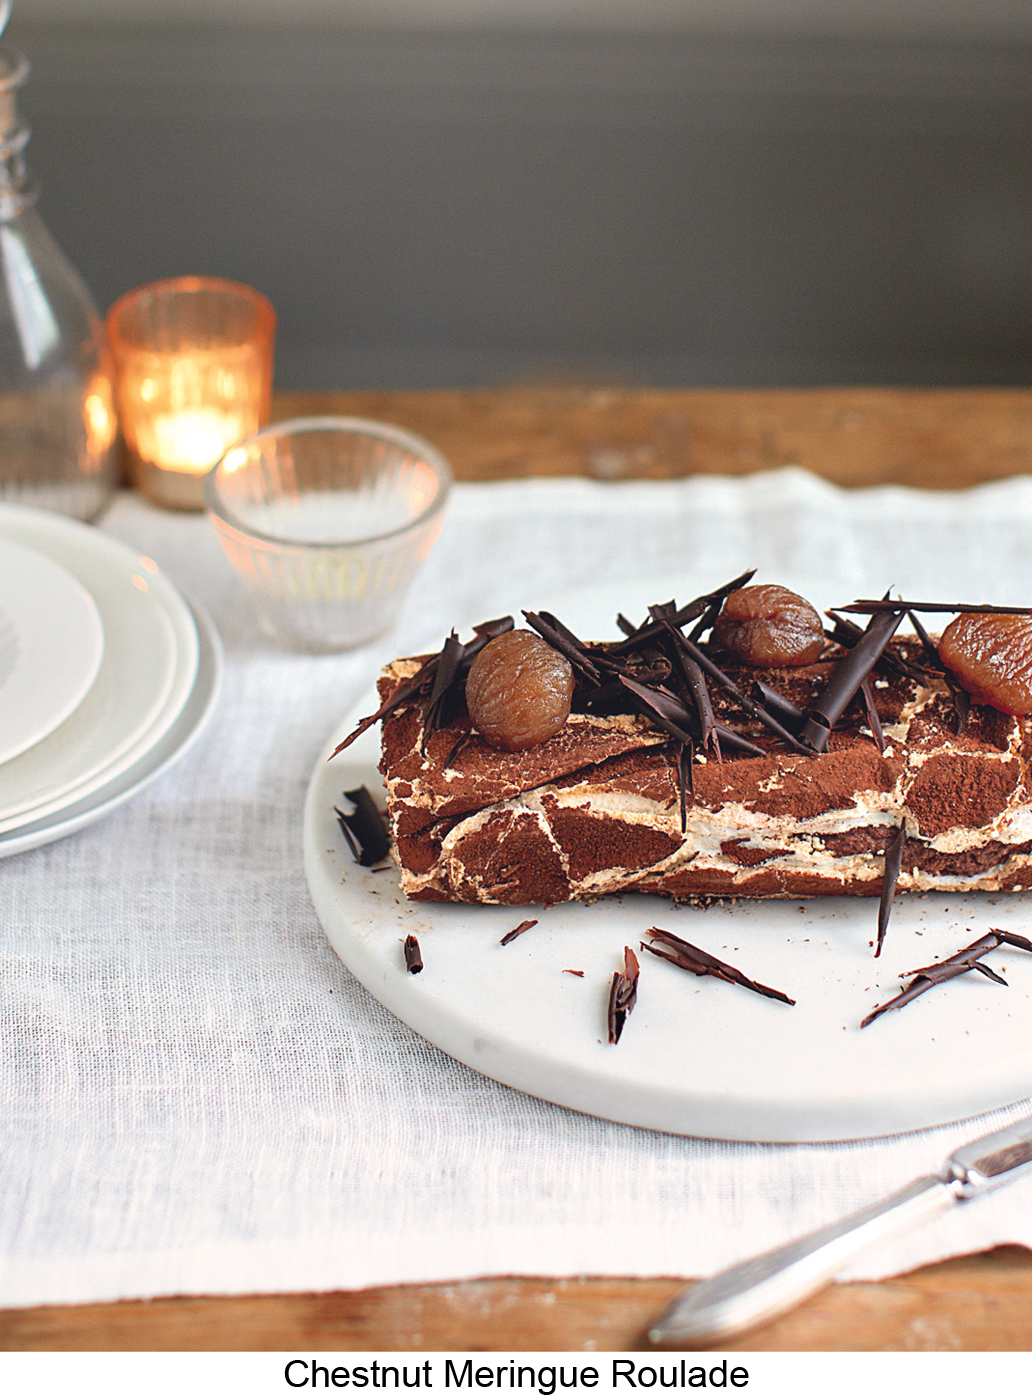
This classic combination of meringue and a bitter chocolate and chestnut filling is perfect for a celebration. You can find tins of French crème de marrons (sweetened chestnut purée) in supermarkets.
MAKES 1 LARGE ROULADE
YOU WILL NEED: 1 SWISS ROLL TIN 20 × 30CM, BRUSHED WITH VEGETABLE OIL AND LINED WITH BAKING PAPER (NOT GREASEPROOF)
For the meringue
4 medium free-range egg whites, at room temperature
large pinch of cream of tartar
225g caster sugar
1 teaspoon cornflour
1–2 teaspoons cocoa powder, for dusting
For the mousse
100g dark chocolate (about 70% cocoa solids)
200ml whipping cream
1 × 250g tin crème de marrons (sweetened chestnut purée)
1 teaspoon dark rum or brandy
To decorate
marrons glacés (optional)
grated chocolate OR chocolate curls (see here)
1 Heat your oven to 150°C/300°F/gas 2. Put the egg whites into a large bowl and whisk with an electric mixer until frothy. Add the cream of tartar and whisk until the egg whites will stand in stiff peaks when you lift out the whisk. Mix the sugar with the cornflour. Quickly whisk into the whites, a heaped tablespoon at a time, to make a glossy meringue that will form a stiff peak when the whisk is lifted.
2 Transfer the meringue to the prepared tin and spread evenly, taking care to fill the corners. Sift the cocoa powder over the top of the meringue so it is dusted with an even layer.
3 Place in the heated oven and bake for about 45 minutes until puffed, very slightly coloured and crisp to touch – the centre layer of the meringue will still be a bit soft. While the meringue is baking, cover a wire rack with a sheet of baking paper. As soon as the meringue is ready flip it over on to the paper. Lift off the tin, but allow the meringue to cool for 5 minutes before carefully peeling off the lining paper. Leave until cold.
4 To make the mousse, break or chop up the chocolate into even-sized pieces and put into a large heatproof bowl with 100ml of the cream. Set the bowl over a pan of hot water and melt gently, stirring occasionally. When the mixture is smooth, remove the bowl from the pan and leave to cool to room temperature.
5 Whip the remaining cream until thick enough to stand in soft peaks when the whisk is lifted. Leave on the worktop to come up to room temperature. Spoon the crème de marrons into a small bowl, add the rum or brandy and stir gently until well mixed. Set aside until needed.
6 When the cream and the chocolate mixture are roughly the same temperature, stir the crème de marrons into the chocolate. When thoroughly combined, fold in the whipped cream with a large metal spoon. Cover the bowl and chill for about 15 minutes until the mousse is almost on the point of setting but still soft enough to spread easily.
7 Spread the mousse evenly over the cold meringue. Roll up from one long side, using one hand to guide the meringue into shape and your other hand to lift the paper under the meringue to support the roll and pull it into shape as it rolls up – be bold and don’t worry if it cracks. Once you have a roulade use the paper around it to hold it in shape, wrapping it firmly – again, don’t worry if the filling starts to ooze out as it will soon firm up.
8 Set the wrapped roulade on a board or platter and chill for at least an hour (and up to 8 hours) before serving. When ready to serve remove the wrapping paper and decorate with marrons glacés and chocolate curls or grated chocolate, and a dusting of cocoa powder.
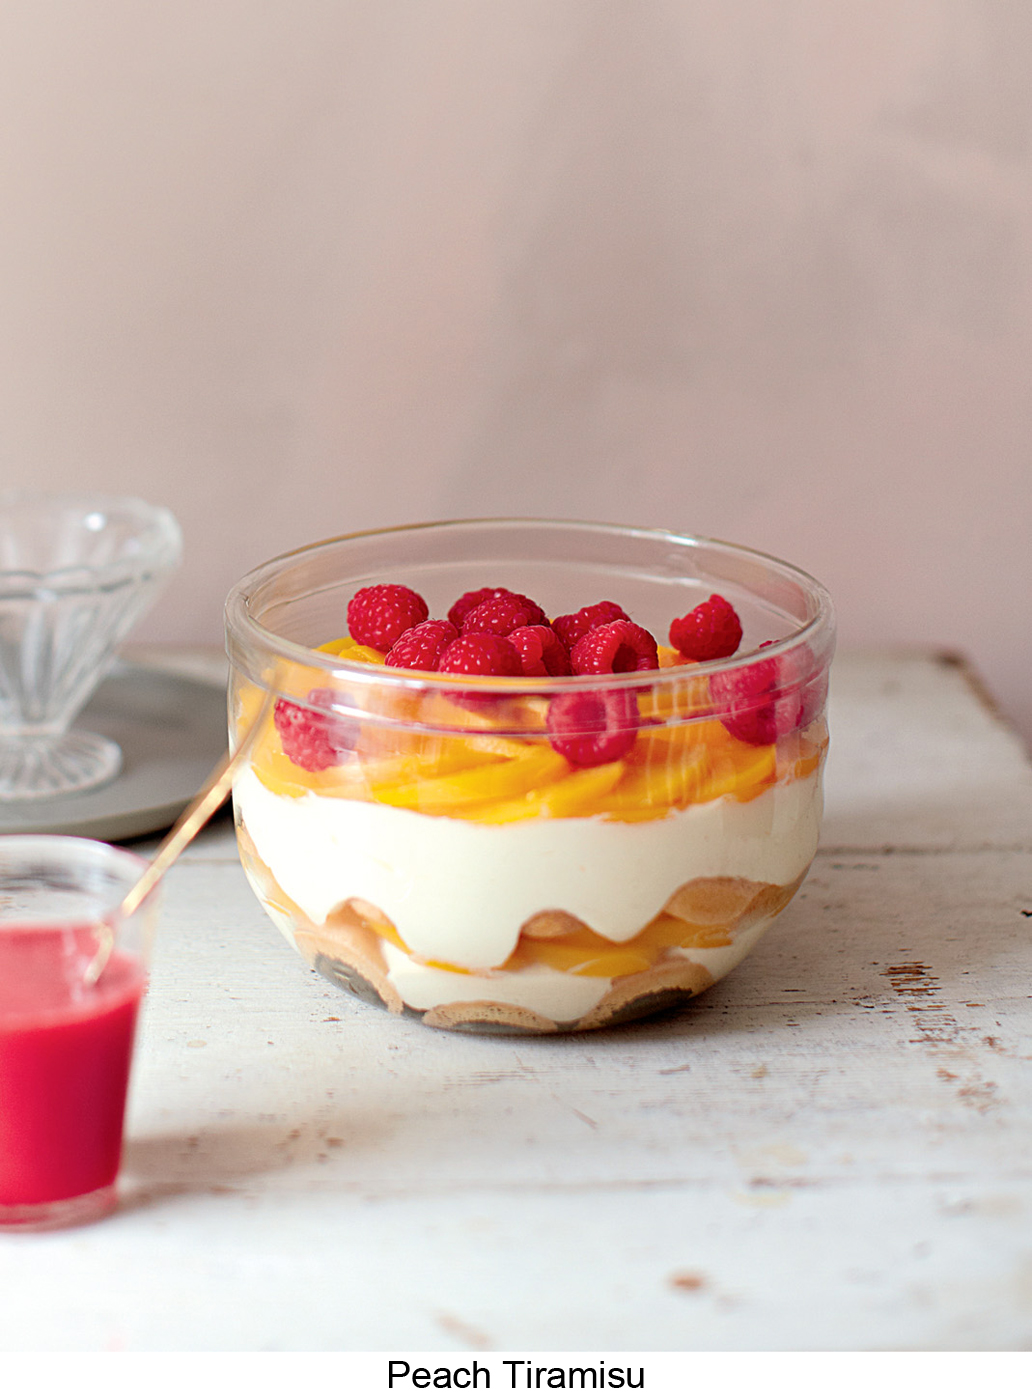
When peaches are at their very best (and cheapest) towards the end of summer, try this fruity combination – a Peach Melba cream that is half trifle, half tiramisu.
SERVES 8–10
YOU WILL NEED: 1 × 1.25–1.5 LITRE TRIFLE BOWL OR SERVING DISH
18–20 Sponge Fingers (see here) or bought sponge fingers
100ml fresh orange juice
3 tablespoons Grand Marnier or brandy
200ml whipping cream, well chilled
4 medium free-range egg yolks, at room temperature
50g caster sugar
500g mascarpone
3 large peaches
fresh raspberries and/or Fresh Raspberry Sauce (see here), to serve
1 Arrange a layer of sponge fingers in the base of the dish – trim them, if necessary, so they fit snugly. Combine the orange juice and brandy or liqueur in a shallow dish. One at a time, remove the sponge fingers from the dish and dip them in the liquid to moisten, then replace them in the dish. Save the rest of the sponge fingers and orange liquid for the second layer.
2 Whip the cream until it will stand in stiff peaks when the whisk is lifted. Cover the bowl and keep in the fridge until needed.
3 Put the egg yolks and sugar into another bowl and whisk with an electric mixer until very pale, thick and mousse-like, and the mixture will make a ribbon trail on itself.
4 Gently stir the mascarpone in its tub, just to soften it, then fold it into the yolk mixture using a large metal spoon or plastic spatula. Gently fold in the whipped cream. When thoroughly combined, spoon half the mixture into the bowl on top of the sponge fingers. Spread evenly.
5 Make a small slit in the skin of each peach near the stem. Put them in a heatproof bowl or a saucepan and pour over enough boiling water to cover. Leave for 15 seconds, then drain the peaches and slip off the skins. Cut the peaches in half and remove the stones. Cut into very thin slices with a serrated knife.
6 Arrange half the peach slices over the cream mixture in the dish. Cover the cream mixture with another layer of sponge fingers, dipped in the orange liquid to moisten as before. They don’t have to look neat but try to avoid any gaps. Spread the rest of the cream mixture on top. Finally, add the rest of the peach slices.
7 Cover the bowl and chill for 2–4 hours. Serve with fresh raspberries or a jug of raspberry sauce.
Crisp on the outside, soft in the middle, home-made sponge fingers are quick to make and taste much nicer than the commercial types. They form the basis for many favourite desserts, including trifle and tiramisu.
MAKES 20
YOU WILL NEED: 1–2 BAKING SHEETS, LINED WITH BAKING PAPER
3 medium free-range eggs, at room temperature, separated
75g caster sugar
½ teaspoon vanilla extract
75g plain flour
good pinch of salt
icing sugar, for dusting
1 Heat your oven to 180°C/350°F/gas 4. Put the egg whites in a large mixing bowl and whisk with an electric mixer until they will stand in stiff peaks when the whisk is lifted. Sprinkle half the caster sugar over the whites and whisk for a few more seconds until stiff and glossy. Set aside.
2 Put the egg yolks in another bowl and add the rest of the caster sugar and the vanilla. Whisk with the electric mixer (there’s no need to wash the beaters) until the mixture is very thick and mousse-like and will make a ribbon trail on itself. Sift the flour and salt on to the yolk mixture and fold in gently with a large metal spoon.
3 Add half of the whisked whites to the yolks and fold in quickly but gently, using as few movements as you can. Fold in the rest of the whites in the same way. You want the mixture to be fairly stiff so resist the urge to overmix as it will quickly turn runny.
4 Spoon the mixture into a large disposable piping bag, or a piping bag fitted with a 2cm plain tube. Fold over and twist the top of the bag so the mix cannot escape. If using a disposable bag snip off the end to make a 2cm wide opening. Holding the bag with one hand, and squeezing from the top with your other hand, pipe 10cm fingers on to the lined baking sheets, spacing the fingers slightly apart to allow for spreading.
5 Dust the fingers with icing sugar, then place in the heated oven and bake for 11–14 minutes until just firm and a light golden brown. (Rotate the baking sheets half way through the time, if the fingers are baking unevenly.) Remove the baking sheets from the oven and set on a heatproof surface. Leave to cool and firm up for a couple of minutes, then transfer the fingers to a wire rack and leave to cool. Once cold, the sponge fingers can be stored in an airtight container for up to a week.
A very quick, vibrant sauce you can make from fresh or frozen fruit. Serve chilled with ice cream and frozen desserts, or warm with waffles or pancakes or instead of custard.
MAKES ABOUT 300ML
250g raspberries (fresh or frozen)
1 teaspoon lemon juice
4 tablespoons icing sugar, or to taste
1 If using frozen raspberries, remove them from the freezer 15–20 minutes in advance.
2 Put all the ingredients into a food processor and run the machine to make a very thick purée. Taste and add a little more sugar if you think it’s needed. For a smoother, seedless sauce, push the purée through a fine sieve into a bowl.
3 Cover and chill until needed – the sauce can be kept in the fridge for 4 days.
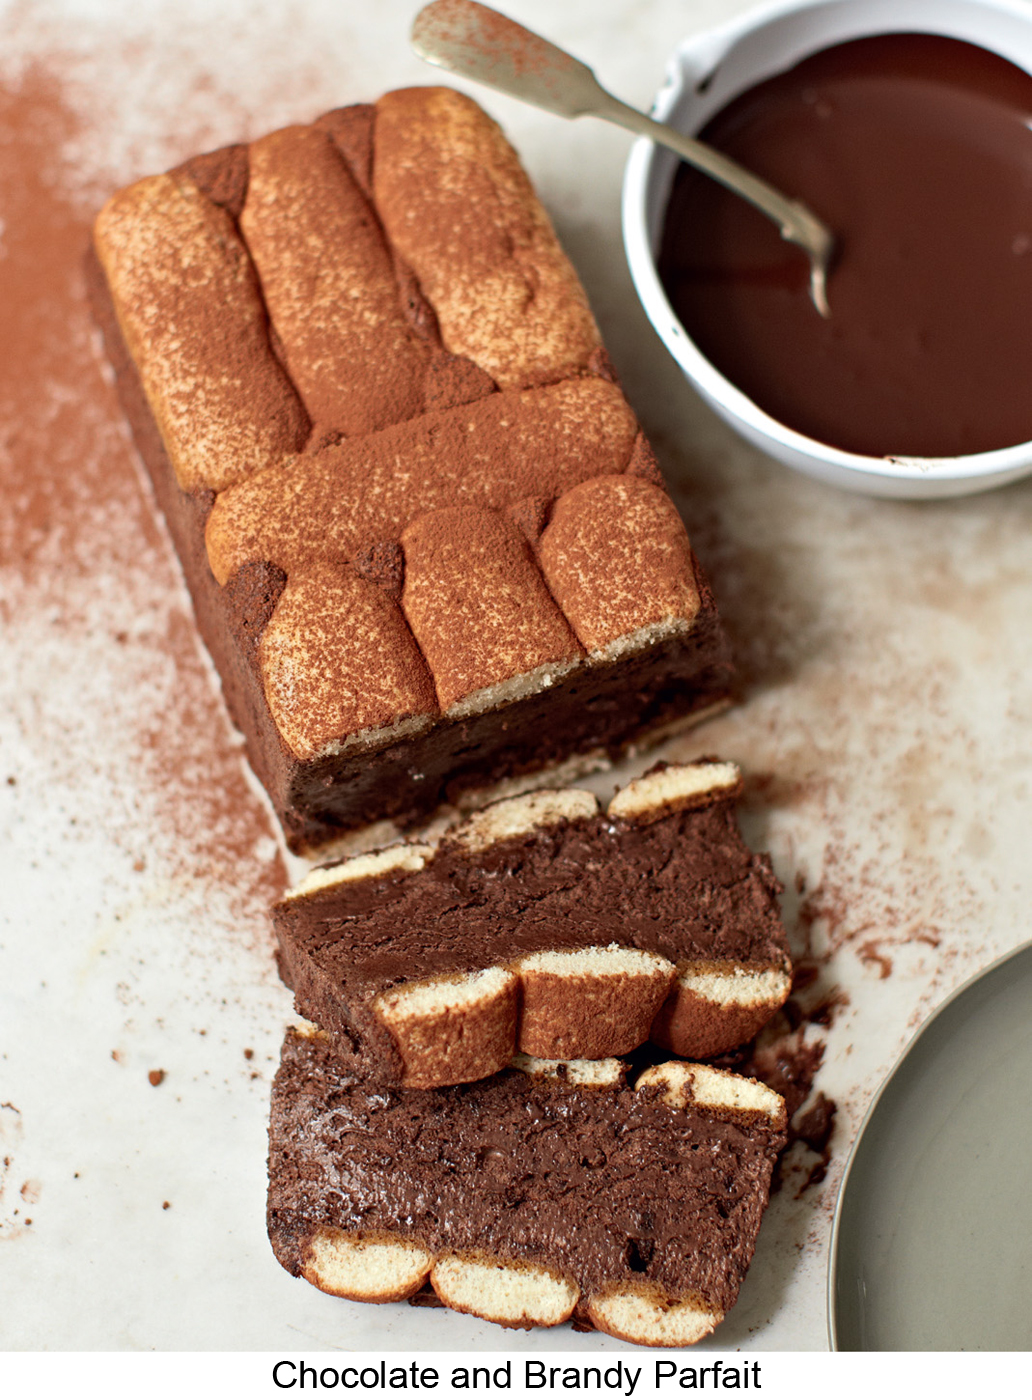
You don’t need an ice-cream maker or masses of time to make this glamorous iced dessert. Home-made sponge fingers dipped in brandy and coffee encase a light but very rich chocolate mocha mousse. You could serve it with the Mocha Sauce here.
CUTS INTO 12
YOU WILL NEED: 1 × 900G LOAF TIN (ABOUT 26 × 12.5 × 7.5CM), LINED WITH CLINGFILM
For the chocolate mousse
200g dark chocolate (about 70% cocoa solids)
200ml whipping cream, chilled
2 medium free-range eggs plus 2 yolks, at room temperature
100g caster sugar
1 teaspoon instant coffee granules dissolved in 1 tablespoon boiling water
1 tablespoon brandy
To assemble
2 tablespoons brandy
1 teaspoon instant coffee granules dissolved in 2 tablespoons boiling water
about 20 Sponge Fingers (see here)
cocoa powder, for dusting
1 Clear shelf space in the freezer, then break or chop up the chocolate into even-sized pieces. Put into a heatproof bowl, set over a pan of hot water and melt gently, stirring occasionally. Remove the bowl from the pan and leave to cool.
2 Whip the cream until it will stand in soft peaks when the whisk is lifted. Set the bowl aside on the worktop.
3 Put the whole eggs and the yolks into a large mixing bowl. Add the sugar and whisk with an electric mixer until the mixture is very pale, thick and mousse-like, and will make a ribbon trail on itself.
4 When the coffee has cooled to lukewarm add it to the egg mixture with the brandy and whisk for a few seconds until combined. Gently stir the melted chocolate, then add to the mixture and whisk until thoroughly combined. Using a large metal spoon or plastic spatula, gently fold in the whipped cream.
5 Now assemble the parfait. Mix the brandy and coffee in a shallow dish. One at a time dip the flat underside of about half of the sponge fingers into the mixture, just to moisten, then arrange rounded side down on the base of the lined tin (it looks best if the fingers run longways down the length of the tin). Trim the ends of the fingers, if necessary, so they fit snugly and cover the base completely.
6 Spoon the chocolate mousse on top and spread it evenly. Gently tap the tin on the worktop to dislodge any bubbles. Cover the mousse with sponge fingers, dipping them in the brandy/coffee mixture as before and arranging them rounded side up. Gently bang the tin again to settle the mixture, then cover the tin with clingfilm. Freeze for at least 2 hours (the parfait can be left in the freezer for up to a week).
7 When ready to serve unwrap the clingfilm and invert the parfait on to a serving platter. Lift off the tin and clingfilm lining. Dust with cocoa powder, then cut into slices with a large knife.
Home-made chocolates are always popular as petits fours. For these, a rich, dark brownie mixture is layered with either after-dinner mint thins or their ginger equivalent and then, after baking, the tiny cubes are dipped in melted dark chocolate. They look great served in tiny foil or paper petits fours cases. You can also cut larger brownies to serve for dessert.
MAKES 80 PETITS FOURS
YOU WILL NEED: 1 BROWNIE TIN OR CAKE TIN 20.5 × 25.5CM, WELL GREASED WITH BUTTER AND BASE-LINED
For the brownies
100g dark chocolate (about 70% cocoa solids), chopped
100g unsalted butter, diced
3 medium free-range eggs
200g caster sugar
100g plain flour
¼ teaspoon salt
3 tablespoons cocoa powder
20 after-dinner mint thins or ginger thins (about 200g)
To finish
500g dark chocolate (about 70% cocoa solids)
3 tablespoons syrup from the ginger jar (optional)
1–2 lumps stem ginger, drained and very finely chopped (optional)
1 Heat your oven to 180°C/350°F/gas 4. Put the chocolate into a heatproof bowl with the butter. Set over a pan of hot water and melt gently, stirring occasionally. Remove the bowl from the pan and cool.
2 Put the eggs and sugar into a large mixing bowl and whisk with an electric mixer for 3–4 minutes until very thick and foamy. Add the chocolate mixture and whisk again for a minute or so until thoroughly combined. Sift the flour, salt and cocoa into the bowl and fold in with a large metal spoon or plastic spatula.
3 Spoon half of the mixture into the prepared tin and spread evenly, right into the corners. Cover with a layer of the mint or ginger thins. Carefully cover with the rest of the brownie mixture, spreading it in an even layer, into the corners too.
4 Place in the heated oven and bake for 25 minutes until the top is firm to a light touch – the centre will still be sticky. Remove the tin from the oven and set it on a damp tea towel laid on a heatproof surface. Cover with a dry tea towel and leave to cool.
5 Once the brownie cake is cold, carefully cut it into 80 tiny cubes. Don’t worry if the crust crumbles, just press it back together.
6 To finish the petits fours, break up the chocolate and melt as before, adding the ginger syrup if you used ginger thins. Remove the bowl from the heat and set it on a towel on the worktop. Lay a large sheet of baking paper next to the bowl.
7 One at a time, briefly dip the brownie cubes in the melted chocolate (the easiest way to do this is to hold the brownie cube between 2 forks), then place on the paper. If the chocolate starts to thicken and set, set the bowl over the steaming water for a couple of minutes to gently re-melt it. Just before the chocolate has completely set, you can decorate ginger-flavoured brownies with a few pieces of stem ginger. Once the chocolate has set completely store in an airtight container and eat within 4 days.
A pretty centrepiece for a special meal or party – the meringue base, made with melted bitter chocolate, is filled with whipped cream and covered with dark red berries.
SERVES 8
YOU WILL NEED: 1 BAKING SHEET, LINED WITH BAKING PAPER
100g dark chocolate (about 70% cocoa solids), chopped
3 medium free-range egg whites, at room temperature
½ teaspoon cream of tartar
pinch of salt
175g caster sugar
1½ teaspoons cornflour
For the topping
300ml double cream, well chilled
300–400g fresh raspberries, tayberries or dessert blackberries
icing sugar, for dusting
1 Heat your oven to 140°C/275°F/gas 1. Put the chocolate into a heatproof bowl. Set the bowl over a pan of hot water and melt gently, stirring occasionally. Remove the bowl from the pan and leave to cool.
2 Put the egg whites into a large mixing bowl and whisk with an electric mixer on low speed for about 20 seconds until the whites are slightly frothy. Add the cream of tartar and salt. Whisk on full speed until the whites will form a soft peak when the whisk is lifted.
3 Whisk in half the caster sugar, a heaped tablespoon at a time, and continue whisking until the meringue is very glossy and will form a stiff peak when the whisk is lifted. Mix the cornflour into the rest of the sugar, then sprinkle over the meringue and gently but thoroughly fold in with a large metal spoon.
4 Drizzle the melted chocolate over the meringue and quickly fold through using just 2 or 3 strokes or movements to give a nice streaky effect.
5 Spoon the meringue on to the lined baking sheet and gently spread out to a disc about 23cm across and 3cm high. Use the back of the spoon to make a slight hollow in the centre. The disc shouldn’t look neat and even, so make sure there are some swirls.
6 Place in the heated oven and bake for 1¼ hours until firm to the touch – the centre will still be slightly soft. Turn off the oven and leave the pavlova inside to cool down. (Once cold the pavlova can be stored in an airtight container for up to 2 days before finishing.)
7 To assemble, set the pavlova on a serving platter. Whip the cream until stiff, then spoon into the hollow in the pavlova. Scatter the berries over the top and dust with icing sugar. Keep in the fridge until needed – best eaten as soon as possible.