This book is about making movies, whether they are dramatic features, documentaries, music videos, corporate videos, multimedia projects, TV programs, commercials, webisodes, or home videos. Actually, “movie” isn’t the right term to describe all types of productions; no single word is. You could call them “motion pictures,” but that has echoes of Hollywood hype (especially when preceded by “major”). Sometimes the name we use for a production has to do with how it’s made. For example, if you say you’re making a “video,” people will probably assume you’re shooting with a video camera, not a film camera. But often the name has more to do with how the end product is distributed. A documentary shown in a theater might be a “film,” but if you saw the same thing on television you might call it a “show” or a “program.” A two-hour drama may begin life as a “picture,” be called a “feature” when shown at a festival, a “release” in theaters, a “movie” when broadcast on television or streamed on the Internet, and a “DVD” or “Blu-ray” at a retail store.
This confusion about names reflects how diverse the many forms of production and distribution have become. There was a time when a “film” was photographed on celluloid film, edited on film, and shown on film. Though that is still possible, today a digital production will most likely be shot in high definition video, or in a 2K or 4K digital file format using a digital cinematography camera; then it will be digitally edited and released in a wide variety of digital media including professional tape cassette, DVD, Blu-ray, and hard disk drives containing digital media files for Internet streaming and downloading, digital broadcast and cable, and digital theater projection.
Because movies are now created, manipulated, and shown in all sorts of new ways, the old, hard distinctions between filmmakers, videomakers, and digital video artists no longer apply. In the wake of the digital video revolution, all approaches now pass through a computer. This is why the term workflow, borrowed from IT (information technology) to describe the careful step-by-step management of a complex project, is now used by filmmakers to talk about strategies for managing digital production, editing, and finishing.
The first edition of The Filmmaker’s Handbook was about film only. The second and third editions added analog, then digital video. In this fourth edition, the focus is shifted even further toward digital technologies. This is not because film is dead—it isn’t yet, though its future is increasingly limited. Equipment manufacturers are no longer making film cameras, and theaters are steadily converting to digital. Nevertheless, some of the largest and smallest productions are still being done with film. This book is written from the point of view that media makers will reach for whatever tools suit them best to record, edit, and display their work. Their toolset can include digital and film technologies in any number of configurations.
Which brings us back to the problem of names. Given the expansiveness of the media-making process, what shall we call the work being produced? As this is The Filmmaker’s Handbook, we’ll call the end product a “film” or a “movie.” This is for convenience only and is not meant to suggest any limitations in terms of the media, formats, or equipment used to make or distribute the production.
This first chapter is intended as an overview of the moviemaking process, an outline of techniques and equipment.
Making a Movie
The technical, creative, financial, and social aspects of filmmaking are tightly interwoven, perhaps more so than in any other art form. The more you understand about all these aspects of production, the better prepared you’ll be for the challenges of making a movie and getting it seen.
Movie production ranges from multimillion-dollar, big-screen Hollywood epics to a home video of a child’s birthday. Although movies vary widely in terms of budgets, number of personnel, and intended audiences, many of the processes used to create movies are similar for all types of productions. Moviemaking tasks can be divided chronologically into development, preproduction, production, postproduction, and distribution periods.
Fig. 1-1. Moviemaking is a collaborative art.
The development phase is when an idea grows into a project that can be produced. A topic is chosen; research is done. For fiction projects, a treatment may be written in preparation for a script. Documentaries may start as a written proposal outlining what is to be filmed. The producer draws up a budget of the movie’s estimated cost and arranges for financing. For higher-budget projects, this usually involves soliciting investors, distributors, grants, or a television contract. Low-budget projects are often self-financed, often with the hope of recouping costs after the movie is finished.
During the preproduction period, preparations are made for shooting. The crew is assembled and locations (the sites where the movie will be shot) are scouted. For fiction films, casting is done to choose actors, and all the elements of production design including sets, props, and wardrobe are determined.
The production period essentially begins when the camera rolls. This is sometimes called the start of principal photography. Since movie equipment can be expensive, it is often rented for the duration of production, or only on the days it is needed. Lower-priced gear may be purchased outright. Additional photography or pickup shots are scenes filmed separately from the main production or after the principal shooting is done. The material that’s been filmed may be viewed during production, on set, or elsewhere. The traditional film term for the footage recorded by the camera is rushes or dailies, because the film is processed and printed at the lab as fast as possible for daily viewing (these terms can also be used for digital video, which may or may not need processing before viewing). Rushes are unedited, though often not all the footage that was shot gets printed, copied, or viewed.
The postproduction period (often just called post, as in, “We’re scheduled for eight weeks of post”) generally begins once the principal shooting is completed. On many films, the editor works during production, cutting as soon as each scene is shot, which can give the director and crew feedback in time to make corrections. On other projects, editing starts after the shooting stops. Editing is done to condense what is typically many hours’ worth of raw film or digital footage into a watchable movie. It is usually in the editing room that the project can be seen in its entirety for the first time. Movies are often substantially rearranged and reworked during editing. Documentaries often find their structure and shape in the editing room, not from a preplanned script. The first edited version of a movie is the assembly or string-out (all the scenes in order). The assembly is condensed into a rough cut, which is then honed to a fine cut. When a satisfactory version is complete (called picture lock), the various stages of finishing take place. This may include scoring with original music or adding prerecorded music; sound editing (to clean up and enhance the sound track); sound mix (to balance and perfect the sound); and creating titles and any visual effects that weren’t done earlier.
When a movie that was shot on film is finished, 35mm prints can be made if the movie is intended for theatrical release. A movie shot digitally and intended for theaters can also be transferred to 35mm film; this process is sometimes called a film-out. Whether originated on film or digital media, movies meant for theatrical release are also converted to a Digital Cinema Package (DCP), a file format standardized by Hollywood for digital projection of feature films. (Whether or not a DCP is made, all movies, regardless of whether they were shot on film or digitally, are eventually distributed in some digital form.)
Finally, the movie is released or distributed—sent out into the world to find its audience. There are many types of distribution, aimed at different markets. Theatrical release is the goal of most feature films. A theatrical run may take place in first-run movie houses or smaller, specialized art houses, which are often part of a specialty chain. Television distribution may include traditional broadcast television, cable TV, or satellite. Educational or AV (audiovisual) distribution usually implies selling or renting DVDs or Blu-ray Discs or digitally streaming movies to schools and libraries. Home video release is selling or renting movies either directly to consumers or through retail outlets. Video-on-demand (VOD) and pay-per-view (PPV) are cable distribution methods that bridge the gap between television and home video sales by allowing viewers to select and/or pay individually for programming when they want it. Distribution over the Internet—including streaming and downloading of movie files to laptops, tablets, smartphones, and Web-connected TVs—is becoming a dominant form of movie distribution. Consumers and distributors both like the fact that no physical disc need be purchased or shipped; movies are following the model of music downloading, which decimated the sales of music CDs.
A given project may be distributed through all of these channels or in various combinations; moreover, because movies are increasingly distributed in a global marketplace, issues of multiple languages, technologies, and venues must be dealt with. Many decisions you make while you’re producing a movie affect what kind of distribution is possible, and you must try to anticipate distribution goals from the very start of your project.
The Moving Image
A video or film camera has a lens that focuses an image of the world onto a light-sensitive electronic sensor (see Fig. 1-4) or a piece of light-sensitive film (see Fig. 1-31). This part of the process is much like a still camera. But how do we capture movement? The impression of continuous movement in a motion picture is really an illusion. A film or video camera records a sequence of still images (frames) in rapid succession (see Fig. 1-2). In film, the standard frame rate is 24 frames per second, written 24 fps. When the images are then displayed one after another on a screen (for example, a theater screen or a TV), if the frames in the sequence change from one to the next quickly enough and the differences between them are not too great, the brain perceives smooth, realistic motion. This effect brings the magic of motion to film, video, and flip books.

Fig. 1-2. All motion pictures—in video or film—are made up of a series of still images that appear to move when shown rapidly, one after the other. (Steven Ascher)
Traditionally, this illusion has been explained by something called persistence of vision, which is based on the idea that the eye retains an impression of each frame slightly longer than it is actually exposed to it. According to this theory, when each new frame is displayed, the eye blends it with the afterimage of the previous frame, creating a smooth transition between them. There are many problems with this explanation (for example, afterimages move with your eyes if you look left or right; they don’t stay in place on the screen). A perceptual illusion called beta movement describes one situation in which viewers interpret successive still images as motion. A static shot of a ball is flashed on the left side of a screen, then on the right side, and viewers see it as moving from left to right. Think of a lighted ticker tape–style sign in a store, on which messages seem to scroll from right to left across the display as the lights flash on and off.
The full picture of how the brain and eye actually perceive motion is still under investigation. What we do know is that for a realistic viewing experience we need to create the illusion of both smooth motion and consistent illumination. If the images change too slowly from one to the next, the illusion falls apart. Instead of smooth motion you see jerky, stop-start motion, and instead of continuous illumination, the screen may appear to flicker (get brighter and darker as the images change). For more on this, see Judder or Strobing, p. 393.

Fig. 1-3. Sony PMW-F3 camcorder. Has a Super 35 sensor and records XDCAM EX internally and other formats to external recorders. Shown with Zacuto external viewfinder and follow-focus control. (Zacuto USA)
DIGITAL VIDEO SYSTEMS
Camera and Recorder Basics
We’ve just seen that the concept behind motion picture recording is to capture a series of still images and then play them back. Let’s look at how this is done in digital video.
The video camera focuses its image on the flat surface of a solid-state electronic chip that is sensitive to light. This chip is the camera’s sensor or imager. There are two types of sensor chips: CCD (charge-coupled device) and CMOS (complementary metal oxide semiconductor). CMOS is now the most common chip used in video cameras because of its versatility and lower cost and power consumption. The surface of a sensor is divided into a very fine grid of light-sensitive sites called pixels (from “picture elements”) or photosites. Each photosite in the chip acts in some ways like a tiny light meter that reads the brightness of the light at that spot. When a photosite is struck by light, it creates and stores an electric charge. The more light that strikes it, the more charge builds up (this process can be compared to a bucket filling with rainwater; see Fig. 5-25). A given sensor may have millions of pixels in a chip that is less than an inch across. To capture the whole picture, the charge at each pixel in the grid is read out at an instant in time and the output from all the pixels taken together is reassembled into the video frame.

Fig. 1-4. Video camera and monitor. The camera’s lens focuses an image of the world onto the sensor, which contains light-sensitive pixels. The camera converts the image into a digital video signal, which can be displayed on a monitor. The monitor’s surface is made up of pixels that emit light. (Robert Brun)
In the earliest days of television, the only way to preserve the image from a live TV camera was to record it on black-and-white film using a kinescope, basically a 16mm camera aimed at a TV. In 1956 the videotape recorder (VTR) was introduced, which records on magnetic tape. VTRs are sometimes called tape decks, video decks, or just decks. Later tape decks used tape in cassettes, although the term videocassette recorder (VCR) was usually reserved for machines used in the home. These days, video recording is also done to solid-state flash memory media, to hard disk drives, and to recordable optical discs. When a camera and recorder are combined in one unit, it’s called a camcorder. Today, devices capable of recording video include mobile phones, tablets, and DSLRs (digital single-lens reflex cameras), which are also called HDSLRs (high definition single-lens reflex cameras). DSLRs were originally designed to shoot still images, but like many devices these days they can now shoot both stills and motion video.
Video can be viewed on a display called a monitor. Types of flat-screen monitors include LCD (liquid crystal display), which is what many computers use, OLED (organic light-emitting diode), and plasma. Video can also be digitally projected onto a large screen using a number of technologies. The traditional analog TV was based on the cathode ray tube, or CRT, which is no longer made. For more on monitors, see p. 216.

Fig. 1-5. Videotape recorder, or VTR. Panasonic AJ-HD1400 plays and records high definition DVCPRO HD. Can also play standard definition DVCPRO, DVCAM, and DV. (Panasonic Broadcast)
Analog Versus Digital
Until the 1980s, video and audio production was done with analog equipment. In analog tape recorders, continuously changing video or audio signals are recorded as continuously changing amounts of magnetism on tape. In today’s digital recorders, the video or audio signal is digitized—converted to a set of numbers that can then be stored in various ways (for more on how digital works, see p. 227).
Though most countries have already or will soon stop broadcasting analog TV, echoes of these obsolete, standard definition analog broadcast standards survive into the digital era. They include the NTSC (National Television System Committee) standard, which was used for broadcasts in North America and parts of Asia, including Japan, South Korea, and Taiwan, and the PAL (Phase Alternating Line) standard used in the UK, western Europe, Australia, and parts of Asia and South America.1 As we’ll see below, various aspects of digital video formats depend on whether you’re in a former NTSC country or a country that used PAL. It’s worth noting that the terms “NTSC” and “PAL” properly refer only to analog formats, not digital formats that have similar frame size, even though many people use the terms loosely to mean either analog or digital.
Ironically, digital video equipment often includes analog components, such as CCD or CMOS sensors (yes, they’re analog) or analog microphone inputs on a digital audio recorder. It’s common to convert sounds and images back and forth between analog and digital forms when needed, though there is some quality loss each time you do.2 Ideally, once the video and audio are in digital form, they should remain digital for as much of the production process as possible.
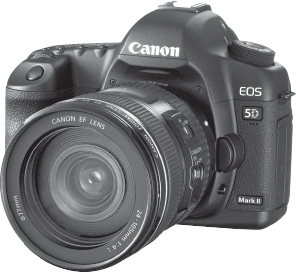
Fig. 1-6. Digital single-lens reflex (DSLR). The Canon EOS 5D Mark II played a key role in sparking the use of DSLRs for filmmaking. (Canon U.S.A., Inc.)
THE VIDEO FORMAT
Video format refers to how many lines or pixels form an image, the basic shape of the picture, how a signal is processed or compressed along the way, what medium it’s recorded onto, what broadcast standard is used, and a host of other technical aspects of how video is captured, transmitted, or reproduced. There are many formats in use today—so many that even professionals get confused trying to keep track of them all. Though video formats are defined by their key differences, they all have a lot in common. Let’s look at the ways that video formats capture images and sounds.
How Many Pixels: Standard Definition, High Definition, and Beyond
A digital video image is formed by a rectangular grid of pixels (see Fig. 5-26). Each pixel represents the brightness (and color, if any) of that part of the image. The frame is all the pixels that can be seen in the picture (these are known as active pixels). It helps to visualize the pixel grid as a set of horizontal lines stacked on top of one another, since that’s how the picture information is processed. Each horizontal line, or scan line, is a row of horizontal pixels, and the total pattern of all the lines stacked together is called the raster.
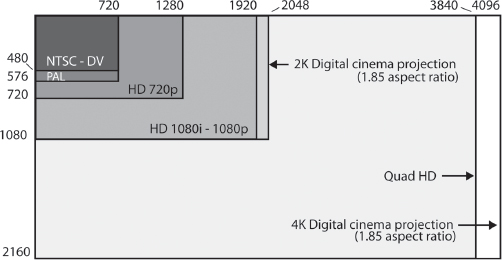
Fig. 1-7. Pixel counts in different digital formats. This shows the number of pixels in standard definition 480i (NTSC countries) and 576i (PAL countries), high definition 720p and 1080i/p, digital cinema projection in 2K and 4K, and Quad HD. Note that the number of pixels in a digital recording format is not the same as the physical size of the sensor (see Fig. 2-7). For example, if you have an HD camera and an SD camera, the sensor on the HD camera could have a smaller surface area, even though the HD recording format has more pixels (it depends on the camera). As shown here, NTSC- and PAL-based formats have different pixel counts, but when viewed on screen, the shape of their frames is actually the same (which is accomplished by using different-shaped pixels). (Steven Ascher)
Video formats differ in how many pixels and how many lines they have (see Fig. 1-7).
Standard-definition television (also called SDTV, SD, or standard def) has the smallest number of pixels of the broadcast formats. As a legacy of the analog era, there are two flavors of digital SD used in different parts of the world (see above for the specific countries).
In NTSC territories, today’s digital standard definition frame is a rectangle of about 480 horizontal lines, each 720 pixels wide (this is often indicated as 720 x 480 and pronounced “720 by 480”). In former PAL countries, the digital SD picture has 576 horizontal lines, also 720 pixels wide.
High-definition television (HDTV, HD, or high def) uses more pixels per frame. How many more? There are also two sizes of HD. The larger HD format, sometimes called Full HD, is 1920 x 1080 (1080 horizontal lines, each 1920 pixels wide). This format has a total of around 2 million pixels, or two megapixels (Mpx). A smaller HD format, usually referred to as 720p, is 1280 x 720, which is a little less than 1 Mpx. Both of these formats are worldwide standards used in both former NTSC and former PAL countries.
Why do we care about the number of pixels? As the pixel count goes up, so does the ability to record fine detail in the image, allowing for a clearer, sharper picture. Formats that have more pixels are considered higher resolution (there are other factors that contribute to resolution, as well). On a very small screen, you might not be able to see a big difference between SD and HD. But the larger the screen size, the worse SD looks: there may be an overall fuzziness or lack of detail and you may see the individual pixels, which makes the picture look “digital” and not natural. High definition formats allow you to display the image on a bigger screen while still maintaining sharpness and clarity. Bigger screens give a more cinemalike viewing experience.

Fig. 1-8. (top) When you enlarge a low-resolution image, it starts to look unsharp. You may begin to see individual pixels and unwanted artifacts like the jagged line on the edge of the nose. (bottom) When a higher-resolution image is enlarged, it retains more of its sharpness and clarity. This is one reason why high definition video looks better than standard definition, especially on a big screen. (Steven Ascher)
When it comes to an actual cinema experience—widescreen projection in a large theater—there are digital motion picture formats that use higher pixel counts than HD video. Many theaters are equipped with digital cinema projectors that can display a 2K (2048 x 1080) or 4K (4096 x 2160) image. At these resolutions, digital images rival or surpass the resolution of projected 35mm film. Cameras that can record 2K, 4K, and other resolutions higher than HD are increasingly affordable and are sought after by filmmakers who want to create images that will maintain clarity and detail on a big screen.
The trend toward larger frame sizes is taking place on the consumer side as well. Manufacturers are creating TVs and other equipment in the Quad HD format (3840 x 2160), which is a form of 4K (it has four times as many pixels as 1920 x 1080 Full HD and is just a little narrower than digital cinema 4K; see Fig. 1-7). TVs are also made in the digital cinema 4K frame size, a format sometimes called 4K2K. Ultra High Definition TV (UHDTV) is a developing 8K format (7680 x 4320) with 16 times the resolution of HD.
As discussed later in this chapter and elsewhere in the book, the potential benefits of very high resolution formats (including advantages for 3D productions) have to be weighed against the drawbacks of the large amount of data to be stored and processed, as well as questions about how much resolution is really needed for the best viewer experience in different screening environments (bigger is not always better).
Converting between formats that have different pixel counts is sometimes called scaling or rescaling. Going from low resolution to high resolution is upconverting, upscaling, or up-resing (pronounced “up-rezzing” and sometimes spelled with zs). Going the other way is downconverting, downscaling, or down-resing. When material shot in high definition is downconverted to standard definition, the footage will generally look better than material that was originally shot in SD (though results depend on the footage and the method of downscaling). Standard definition footage that is upscaled to HD will never look as good as material that originated in high def.
A NOTE ABOUT FRAME AND SENSOR SIZE. We’ve been talking about how different digital formats have different numbers of pixels (that is, different frame sizes). Keep in mind that the number of pixels recorded by a digital video format (as shown in Fig. 1-7) is different from the number of light-sensitive photosites on the surface of the camera’s sensor that capture the image (see Fig. 1-13). Confusingly, people usually refer to those photosites as pixels, even though with most cameras, the signals from several photosites are combined to form one pixel in the final recorded image. And to add another ingredient to the mix, when people talk about sensor size, they’re often referring to the physical dimensions of the sensor itself, not the number of pixels (see Fig. 2-7).
As an example, a compact video camera might capture 1920 x 1080 Full HD (frame size) using a very small 2 megapixel sensor (photosites/pixels) that’s only 1⁄4 inch across (physical size), while a DSLR might capture the same HD format with a 21 megapixel sensor that’s six times as large—almost 11⁄2 inches across. (And with a simple switch in the menu, both of those cameras are likely capable of recording in a variety of others frame sizes as well, such as 720 x 480 SD or 1280 x 720 HD.) For more on the importance of sensor size, see p. 66.
Progressive and Interlace Scanning
Many digital cameras are capable of recording using either progressive or interlace scanning (though the choice may not be available at all frame rates). When a camera uses progressive scanning, all the pixels of each frame are captured at the same instant in time (or nearly so). Progressive scanning is similar to the way a film camera exposes an entire frame at once, then moves on to the next frame. Processing one whole frame at a time is very simple, very clean.

Fig. 1-9. With the lens removed, you can clearly see the camera’s sensor. The Super 35–sized sensor in this Sony NEX-FS100 is the same as the sensor in the Sony F3. (Steven Ascher)

Fig. 1-10. Interlace. Each field contains half the horizontal video lines. When the two fields are shown rapidly one after the other, the eye integrates them into one complete frame with all the lines. As seen in Fig. 1-11, actual lines are much thinner than shown here. (Robert Brun)
Interlace scanning is an earlier method, still in wide use. Interlace dates back to the first days of NTSC when television systems were too slow to capture and transmit an entire frame at once. With interlace, only half the frame is recorded at a time.3 The camera starts at the top of the picture and works its way down, capturing odd-numbered lines (1, 3, 5, 7…), while skipping the lines in between. This is the upper field (also called the odd field). It then returns to the second line from the top and records the other half, the even-numbered lines (2, 4, 6, 8…), all the way to the bottom. This is the lower or even field.4 The two fields follow each other rapidly and together they make one frame. Since there are two fields for every frame, 30 frames per second interlace can also be thought of as 60 fields per second.
Though some producers and broadcasters still use interlace, and television viewers are accustomed to it, working in progressive scan can produce superior results.
The problems with interlace include, for starters, that you’re seeing only half the lines at a time, which means lower resolution.5 Interlace also creates various artifacts (flaws or irregularities in the image). For example, diagonal lines in a scene can end up looking like jagged stair steps on TV (see Fig. 1-11). This is called stair-step aliasing.6 Another artifact, called twitter, happens when thin horizontal lines appear to vibrate or flicker as they move up or down in the frame. This is often visible in the text of a credit roll at the end of a movie.

Fig. 1-11. Interlace artifacts. Each interlace field contains only half of the horizontal lines. In this image you’re seeing both fields together. Notice how the man in the foreground has moved between the two fields. You can see how each field has half the resolution, with obvious edge tear or combing along the edge of his shirt. The diagonal line behind the man in the background reveals an undesirable stair-step pattern called aliasing or “jaggies” (which may also occur, to a lesser extent, with progressive formats). See also Fig. 5-17. (Stephen McCarthy)
Because interlace involves capturing the first half of each frame (first field) a split second earlier than the second half (second field), you can get motion artifacts when the two halves are shown together. Figure 1-11 shows both interlace fields together as one frame. Notice how the man in the foreground has moved between the first field and the second, causing the edge of his body to have a torn, jagged look (this is called edge tear or combing). Edge tear doesn’t happen if neither the camera nor the subject moves, but when there is movement, edge tear can reduce resolution when the video is playing at normal speed, and if the video is slowed down (say, for sports replays) or frozen (for still images), edge tear can become much more bothersome.
Today we watch video on digital monitors and projectors, all of which are progressive. So interlaced material must be converted to progressive (called deinterlacing) in order to watch it. The monitor may do the deinterlacing, or it may take place at an earlier stage. Deinterlacing involves creating a single progressive frame by blending two fields together or sometimes just discarding one field and doubling the other. Deinterlacing can result in lower resolution, and artifacts like edge tear can be a real problem with some material (for more on deinterlacing, see p. 213).
With progressive formats, on the other hand, most of the problems with interlace aren’t seen at all and stair-step aliasing is minimized. Footage shot with a progressive camera plays nicely on monitors and projectors and can be posted to the Web or converted to film or converted to still images with no deinterlacing necessary. Today, digital video is distributed in many different ways, often requiring the picture to be resized, repositioned, or converted to different formats. These tasks are much easier to do at high quality if you’re working with progressive.
For all these reasons, shooting in progressive is highly recommended. As a rule, if you capture video in progressive, it’s easy to convert to interlace later if needed. It’s harder to convert interlace to progressive with good results.
Since there is still a lot of interlace video equipment around—though this is changing fast—working in progressive can require finding ways to be compatible with interlace. As an example, a common technique for recording a progressive-scan image is to embed it in an interlace pattern that can be played on interlace decks (for more on this, see Working with 24p and Pulldown, p. 601).
When all digital video is progressive (as it should be), interlace will not be missed.
The Frame Rate
The number of frames recorded each second is the frame rate, which affects how motion appears on screen. Modern digital cameras offer a choice of frame rates, although the legacy of analog broadcast systems has imposed certain standard frame rates among the choices.
The NTSC system used in North America and Japan was designed to run at 60 fields per second because the electric power in wall outlets in these countries runs at 60 Hz. The original analog, black-and-white TV signal was 60 interlaced fields, or 30 frames, every second.
In 1953, NTSC color TV was introduced, and because the color components of the new broadcast signal caused interference at 60 fields per second, the existing 30 fps frame rate was adjusted downward by 0.1 percent to reduce the problem. This made NTSC’s actual frame rate 29.97 fps, which is often used today for digital productions. For simplicity’s sake, when people talk about this rate they often round it up to 30. In NTSC countries, whenever you see a video scanning rate expressed in a whole number, that’s for convenience, and the actual rate is 0.1 percent lower. That is, 30 fps really means 29.97 fps and 60 fields per second really means 59.94 fields.
The frame rate 24 fps is a special case. When most digital video cameras in NTSC territories are set to record at 24 fps they are actually recording at 23.976 fps (often written 23.98 fps). Unfortunately, there are times when 24 fps really does mean exactly 24 fps (such as when shooting with film cameras or with digital cinematography cameras, see p. 28). To avoid confusion, it helps to be as precise as you can when talking about frame rates with members of the production team.
In the rest of the world where PAL once ruled, electric power runs at 50 Hz; the standard frame rate of 25 fps (50 interlaced fields per second) was adopted for analog video and continues to be used on many productions in the digital age. Happily, this is exactly 25 fps with no monkey business.
For more on the look of different frame rates and choosing one for your production, see Frame Rate and Scanning Choices, p. 81.
The Shape of the Video Frame
Aspect ratio is a term used to describe the shape of the picture, the ratio of the frame’s width to its height (see Fig. 1-12).
Traditional standard definition television has an aspect ratio of 4:3, which means four units wide by three units high. In video this is pronounced “four by three” and is sometimes written 4 x 3. In film, and increasingly with digital, the same thing is described as 1.33, the quotient of 4 divided by 3.
Widescreen video is 16:9, pronounced “sixteen by nine” or written as 16 x 9. Standard definition video can be either 4:3 or 16:9. All forms of HD are 16:9 (which can also be described as 1.78). Some digital productions are done at wider aspect ratios to match cinema standards of 1.85 or 2.40 (see Fig. 1-35). Digital cinema projection in 2K or 4K is often done at 1.85 aspect ratio (roughly 17:9), which is also the shape of the 4K2K format.

Fig. 1-12. The aspect ratio is the width of the frame divided by its height. Nonwidescreen video has an aspect ratio of 4:3, and widescreen is 16:9.
For more on aspect ratio, see pp. 41 and 74.
How Color Is Recorded
Inside your eyeballs are retinal cones, natural sensors that allow you to see color. One type of cone is sensitive to red light, another to blue light, and the third to green. When you look around a room, every color you see is a mix of red, green, and blue light in different proportions.
The sensors in a video camera also measure the relative amounts of red, green, and blue light in the image. Actually, a CCD or CMOS chip “sees” only in black-and-white (it measures only brightness) but it can be tricked into reading color. One method, used in single-chip color cameras, is to place tiny red, green, and blue filters over individual pixels (see Fig. 1-13). In three-chip color cameras, a beam-splitting prism behind the lens divides the incoming image into separate red, green, and blue (RGB) components and sends each to a separate sensor dedicated to that color (see Fig. 1-14).
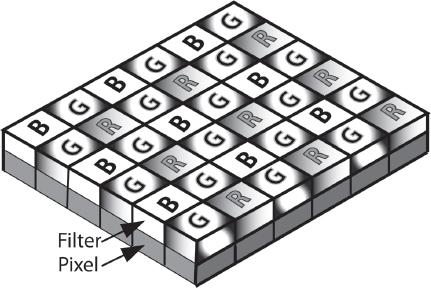
Fig. 1-13. In single-chip cameras, tiny colored filters are positioned over individual photosites (pixels) so that each one records either red, green, or blue light. In the commonly used Bayer pattern shown here, there are twice as many green pixels as either red or blue. The pixels are a bit like tiles in a mosaic, and prior to viewing the image, the data from the sensor must be “demosaicked” (also called “debayered”) to calculate full RGB color values for each pixel. For more on this, see p. 203. (Steven Ascher)
RGB, COMPONENT, AND COMPOSITE COLOR. Capturing digital video in color sounds like an easy process—just digitize and store the separate red (R), green (G), and blue (B) signals produced by the camera’s sensor. Indeed, when computers create video for, say, computer-generated imagery (CGI) special effects, they work in RGB color, in which signals representing each of the three colors are processed along three separate paths (see Fig. 5-14). Some digital cinema cameras can record RGB color (see below).
Most digital video cameras use a different method of capturing color, one that originated back in the analog era. Black-and-white TV used a single brightness signal called luminance. When color was introduced, two color-based signals, called chrominance (or “color difference”), were added. This technique of encoding the camera’s original RGB signals into one luminance (brightness) and two chrominance (color) signals still defines digital video and digital video cameras (as distinct from digital cinema cameras and their true RGB formats). The three encoded signals are called component signals; and video recording formats, whether analog or digital, that maintain separation of these signals are called component video. Digital component video formats include DV, DVCAM, DVCPRO, XDCAM, AVCHD, and HDCAM.

Fig. 1-14. In a three-chip camera, light entering through the lens strikes a prism that divides it into its red, green, and blue components. Each is captured by a separate sensor. (Steven Ascher)
Both RGB and component video process color information in separate streams; this allows the cleanest color and highest-quality image. Digital broadcast, cable, and satellite all use component signals.
In composite video, formerly the basis of analog NTSC and PAL broadcasting, the three video components are joined or encoded into one signal that can travel on a single path. Composite can be thought of as “video soup,” since all the color and brightness information, as well as audio and sync signals, are mixed together into a single electronic signal. Many digital cameras and monitors still offer composite video inputs and outputs for convenience, but using composite results in a marked loss of image quality.
See p. 207 for more on component and composite systems.
REDUCING COLOR DATA. In high-end digital cinema cameras, all of the color information captured by the camera’s sensor is recorded and displayed. Sony’s F35 and ARRI’s Alexa, for example, can output uncompressed RGB signals with no color data reduction or encoding of any kind. This is sometimes referred to as RGB 4:4:4 color.
The drawback of RGB is that it creates an enormous amount of data to be processed and stored. To reduce the amount of data, digital video cameras make use of the fact that when looking at fine details, the human eye is much more sensitive to brightness than to color.7 High-end component digital video cameras routinely throw away half of their color pixels (which reduces the color detail by half compared to luminance) and most viewers can’t see that anything’s missing—this is how we’re used to looking at digital video.
This technique of throwing away half the color information, called color sampling or color subsampling, is notated as 4:2:2. The numbers indicate that all of the video camera’s luminance signal is recorded (represented by “4”) while only half of each of the chrominance signals (“2” and “2”) is preserved. Formats with 4:2:2 color are the highest-quality digital video achievable (RGB 4:4:4 is not considered traditional video).
In order to reduce data (and cost) even further, formats designated 4:1:1 or 4:2:0 record only one-quarter as much information about color as brightness. This economical method is used in many formats, including DV, DVCAM, DVCPRO, HDV, AVCHD, and XDCAM EX. Again, in a typical viewing experience most people can’t see the difference. To be clear, the range of color values (the color gamut) in these formats is the same as in 4:2:2 video; there’s just less color information in the fine details. Greater color subsampling, however, can sometimes make it more difficult to do special effects like green-screen work (see p. 211).
For more on color sampling see p. 209.
What Do You Call That Format?
As you’ve noticed, an awful lot of numbers and letters get thrown around when talking about video. It’s easy to get confused, and the situation isn’t helped by the fact that different people use different letters and numbers to talk about the same thing.
These days, the most common notation used to describe a format is:
So, a format indicated as 1080p/24 tells us that the frame is 1080 pixels high, scanned at 24 progressive frames per second. The digital version of PAL video is sometimes called 576i/25 (576 lines high, interlaced, at 25 fps).
However, with interlaced formats, often it’s the field rate, not the frame rate, that’s indicated (remember, there are two fields for every interlaced frame). So the same PAL format can be written 576i/50. This is the convention you’ll find in this book (using the frame rate for progressive and the field rate for interlace). The digital version of NTSC video would be written 480i/60.8
In ads, articles, and equipment manuals, notation varies in small and large ways. For example, 1080p/24 may be written 1080/24p.
Sometimes people don’t indicate the frame or field rate at all. PAL may be called just 576i, since people know it runs at 25 frames per second. Or they’ll refer to Full HD as 1080i or 1080p when they want to denote the frame size without getting into questions of frame rate. Sometimes when people are talking about the motion and look of video they’ll just refer to the frame or field rate without the frame size, such as 24p or 60i.
As noted earlier, NTSC and PAL were analog formats. To talk about digital NTSC or PAL doesn’t really make sense. However, for convenience many people use these terms to refer to digital video that has roughly the same frame size and frame rate. So you’ll hear people refer to NTSC DV when they mean digital video that’s 720 x 480 at 29.97 fps.
One more usage note: the term “digital video” is used in different ways. There are many video formats that are digital and there is a particular standard definition format called DV that uses 1⁄4-inch videotape in MiniDV cassettes along with a type of digital compression also called DV. In this book, the generic term “digital video” is used to refer to all digital formats, and DV means that particular format.
No one said this stuff is simple, and don’t feel bad if you’re confused! Believe it or not, these terms will sort themselves out as you use them.

Fig. 1-15. Devices like the Steadicam Merlin can bring a gliding smoothness to camera moves. (The Tiffen Company)
WHAT IS COMPRESSION?
As time goes on, consumers and content providers expect ever-higher quality and definition from their video systems. The problem is that high definition video in its native state involves lots and lots of digital data that has to be captured, stored, and transmitted. Working with all that data can be expensive because it calls for big storage devices, fast computers, and high-speed connections for broadcasting or Internet distribution.
At the same time, consumers and content providers want formats that are affordable, easy to work with, and flexible enough to display on screens big and small.
To balance these two needs we have digital compression.
The goal of compression is to shrink digital video and audio data down to a smaller size while maintaining picture and sound quality. After images and sound have been compressed, they take up less storage space on computer disks or tape. This allows us to use smaller, cheaper camcorders (production), load more footage into an editing system (postproduction), or fit a longer movie onto a disc for playback at home (distribution).
A crude analogy to compressed video is instant coffee, which is made by taking brewed coffee and removing the water to make a powder that’s compact and easy to store. To drink it, you have to add the water back, restoring the coffee to something close to its original form and (hopefully) taste.
With digital compression, video and audio signals are compressed into a smaller package for storage and transmission. When it’s time to view or listen to them, they must be decompressed (expanded). The intent is that the decompressed video will resemble the original as closely as possible. Compression schemes are called codecs (from compressor/decompressor or coder/decoder).9
There are many different codecs in use. Some are designed to maintain the highest picture quality, others to shrink the amount of data as much as possible. Most try to do both to some extent. If you’ve ever downloaded music from the Internet you’ve worked with an audio codec such as MP3 or the superior AAC. These codecs shrink the size of the original music file to speed up downloading and allow you to store more songs on your music player. As codecs evolve, engineers are finding ways to make files smaller while maintaining better quality.
One way to compare video formats is to look at how much data they create (the data rate or bit rate). This is often measured in megabits per second (Mbps or Mb/s). For example, to record or play back uncompressed standard definition video requires about 172 Mbps, while the compressed DV format uses only about 36 Mbps.10
The amount of compression is often indicated as a ratio between the original size of the video/audio data and its compressed size. DV, as described above, is considered 5:1. The DigiBeta format uses 2:1 compression (cutting the data rate in half) for a bit rate of about 90 Mbps. HDV uses a compression ratio of about 40:1.
People often assume that the greater the compression (and thus the lower the data rate), the worse the material will look or sound after it’s decompressed. But there has been remarkable progress in recent years and some codecs that are very compressed—called lossy—are capable of astonishingly high picture and sound quality. The MPEG-2 compression that makes possible the 40:1 ratio of HDV also makes possible DVDs, Blu-rays, digital TV broadcasting, and cable, while newer, more efficient MPEG-4 codecs like H.264 are widely used in Internet streaming, in AVCHD recording, and in most DSLRs.
With some digital video codecs—called visually lossless—a side-by-side comparison of uncompressed video and the same material after it has been compressed and decompressed by the codec shows no detectable difference. Examples of these high-quality codecs include Sony’s HDCAM SR compression (MPEG-4), Avid’s DNxHD 220, and Apple ProRes 422 HQ.
Codecs that employ a high degree of compression may require a lot of computing power to get the job done, which can make working with them slow, depending on your equipment. It’s important to understand compression and have a feel for the codecs currently being used because compression plays a key role in what video format you choose to work in, what camera you use, how you edit, and how you distribute your movie.
For more on compression and individual codecs, see p. 245.
COMPARING VIDEO FORMATS
This section will serve as an outline of common video formats. For more on choosing a format and a camera to work with, see Chapter 2. If any of the terms below are unfamiliar, see earlier in this chapter and check the index.
THE EVOLUTION OF FORMATS. Like buying a computer that may be outdated a few months after you get it, when you invest in a digital video format (either because you’re purchasing gear or you’re simply using it to shoot a project) you need to remember that a new, better format may be just around the corner. The upside is that video systems keep getting smaller, cheaper, and more powerful. The downside is that formats and equipment become obsolete. The movie you shoot today may need to be transferred to another format in several years when you can no longer find playback equipment or editing software in the old format.
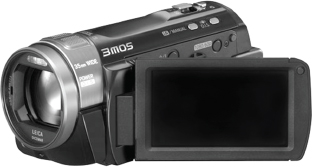
Fig. 1-16. Consumer HD camera. Panasonic SD800K records 1080p in AVCHD. Uses three 1⁄4-inch CMOS sensors. (Panasonic)
At one time, format choices were few, and camera choices centered on what size tape they recorded to. Nowadays, a single camera will offer a choice of formats, or different flavors of a given format, and may record to hard drives or memory cards. All this makes it hard to talk about formats in a simple way, and it’s not helped by the fact that by the time you finish reading this paragraph, new cameras and formats will have been introduced.
HIGH END VS. LOW END. When manufacturers design and market a piece of equipment they generally try to target a certain type of user. The user categories are not exact, but in descending order of quality and sophistication they are: digital cinema, broadcast, professional/industrial, “prosumer,” home/consumer. The assumption is that professionals will pay top prices and can handle complexity, while consumers want something cheap and easy to use. Revolutions have been made, particularly by independent filmmakers, in seizing tools intended for the lower end of the market and showing that they can produce professional-quality work. Footage shot with an inexpensive camcorder or DSLR can look surprisingly like footage from a $100,000 professional rig if it’s well shot and lit and the sound is good. On the other hand, it’s often true that you get what you pay for, and a high-end camera can provide more control and a better image. It’s not uncommon for high- and low-end cameras to be used on the same production for different scenes or situations.
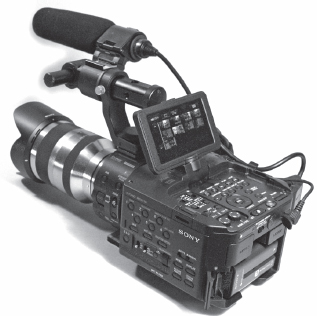
Fig. 1-17. Sony FS100 records AVCHD to memory cards and/or an SSD. Super 35 sensor (see Fig. 1-9).
When comparing formats, take a look at the data rate. Generally speaking, formats that are more compressed (i.e., that have a low data rate) are more affordable. The cameras are smaller and less expensive; you can store more material on a memory card, hard drive, or tape. The highest-quality formats tend to use the least compression (and thus have high data rates) and are often preferred when the footage will be shown on a big screen. However, when deciding on a format, bear in mind that some formats that operate at a high data rate may be within your budget and, by the same token, formats that are less expensive and more compressed may still have excellent sound and picture quality. In this flexible age, you may have several compression options since many cameras offer a choice of higher and lower data rates, and some, such as those with HDMI or HD-SDI output, can output an uncompressed digital signal, allowing you to record to a separate device with yet more compression possibilities. For more on how data rates and formats relate to camera choices and image quality, see Thinking About Camera Choices, Compression, and Workflow, p. 94.
As you’ll see in the following section, there’s a lot of competition between formats to look best “by the numbers” because filmmakers want the most resolution, the least compression, etc. The competition is fanned by manufacturers trying to market their products. The truth of the matter is that a lot of formats these days look astoundingly good and the differences between some of them may seem noticeable on paper but not to audiences watching them on screen.
STANDARD DEF VS. HIGH DEF. Today broadcasters require that programming be shot in widescreen 16:9 high definition, even if they continue to broadcast some programs in standard definition. If you want to keep the most options open for showing your finished work on television, shooting HD is mandatory. If your work is intended for theaters, you could shoot HD or, if you can afford it, consider shooting at higher resolution like 4K with a digital cinema camera.
That said, many websites stream video in standard definition (or smaller frame sizes) and video-enabled devices like smartphones display video on tiny screens, some of which can’t display high definition. So if your work is intended for these outlets, you might choose to shoot HD and downconvert to a smaller frame size in postproduction, or you might even shoot SD. Many high definition camcorders offer a choice of recording in standard definition or they can downconvert internally from HD to SD. Thanks to oversampling, an HD camera will usually produce a better-looking SD image than the image made by a comparable SD camera.

Fig. 1-18. Canon XF305 camcorder records MPEG-2 to CompactFlash cards. Three 1⁄3-inch chips with 4:2:2 color. (Canon U.S.A., Inc.)
HIGH DEFINITION DIGITAL FORMATS
As of this writing there are two common types of high definition used for broadcasting and cable: 1080i (1920 x 1080 pixels, interlaced) and 720p (1280 x 720 pixels, progressive). However, 1080p, which is at a higher quality level and data rate, is used for a great deal of production, especially at lower frame rates of 24 (23.98), 25, and 30 (29.97) frames per second. 1080p can easily be converted to 1080i or 720p for broadcast if necessary.
1920 x 1080 is also called Full HD since this is the largest HD frame. However, several HD formats with 1080 lines actually record less than 1920 pixels across; 1080i HDCAM and HDV camcorders, for instance, record only 1440 pixels across instead of the standard 1920.11 This is one of several techniques used to squeeze huge HD signals into small files and onto small-gauge tape formats.
Many consumer and professional SD and HD cameras record digital video with 8 bits of precision (also called bit depth). Some higher-end cameras can record at 10 or 12 bits, which can extend dynamic range and improve image quality, but this increases the amount of data to be processed and stored. See p. 230 for more on bit depth, and Digital Compression, p. 245, for more on the compression methods mentioned below.
All HD cameras shoot in 16:9 widescreen aspect ratio.

Fig. 1-19. DSLRs provide affordable, compact HD recording, usually with some compromises in audio quality and sometimes artifacts in the recorded picture. Shown here with slider for side-to-side movements. (Cinevate)
Digital single-lens reflex cameras that also record video, dubbed DSLRs or HDSLRs, typically record in a variety of formats. Common options include Full HD 1920 x 1080 at 30p, 25p, and 24p; 1280 x 720 HD at 60p and 50p; and standard definition 640 x 480 at 60p and 50p. When shooting stills, higher-end DSLRs generally offer the choice of capturing in the uncompressed RAW format (large, unprocessed RGB files at the highest quality, see p. 203) or the compressed JPEG format (smaller file sizes, lower quality). RAW video files are too big to be recorded by the current crop of DLSRs, so compression is required to reduce demands on processing and storage. Codecs such as AVCHD (H.264/MPEG-4 AVC: see below) are used in a number of cameras and some use M-JPEG (motion JPEG). Many filmmakers choose to transcode to a less compressed codec for editing (see p. 558). Already there are DSLRs capable of recording in higher bit rate formats for improved image quality (including versions of H.264 that use intraframe compression only, see p. 246), and filmmakers are clamoring for DSLRs capable of outputting uncompressed RAW, RGB, or component video that can be recorded externally.
HDV
When the DV format was introduced in the mid-1990s, it provided an affordable way to record compressed, standard definition video to a small MiniDV tape cassette. Ten years later HDV (High Definition Video) was introduced, using the same MiniDV cassettes as DV, with a signal small enough to be sent through the same FireWire as DV. What made this possible was the use of more efficient MPEG-2 compression instead of DV compression. HDV uses 4:2:0 color sampling, in which only a quarter of the original color samples are preserved. Manufacturers have developed HDV in different ways. Sony and Canon offer recording at 1440 x 1080 at 60i, 30p, and 24p with a data rate of 25 Mbps. Progressive recording is done with pulldown (see p. 601). Some cameras will also record to CompactFlash (CF) media cards.
JVC’s line of ProHD cameras shoot 1280 x 720 at 24p, 25p, 30p, and 60p with a video data rate of 19 Mbps. They can also shoot 1440 x 1080 at 50i/60i with a data rate of 25 Mbps. (The new line of ProHD cameras can also record in other formats.)
HDV is capable of very good image quality, but due to its relatively heavy video compression at 19 Mbps and 25 Mbps, the industry is moving toward formats with higher data rates or more efficient AVCHD codecs.

Fig. 1-20. Sony HVR-V1U. Records HDV as well as DVCAM and DV to tape cassettes and an optional external hard drive. Three 1⁄4-inch CMOS sensors. (Sony Electronics, Inc.)
AVC (Advanced Video Coding) is a family of codecs that uses H.264/MPEG-4 AVC compression, which is newer than MPEG-2 and twice as efficient. With MPEG-4 you need less data to achieve the same or better image quality as MPEG-2, which means longer recording times on a disc, media card, or hard drive. Both professional and consumer camcorders use AVC, which in some cameras is called AVCHD.
As an example of AVCHD’s versatility, Sony’s professional NXCAM line of camcorders offers a range of format choices including Full HD 1920 x 1080 at 60p, 24p, and 30p, and 1280 x 720 at 60p, with a maximum bit rate of 28 Mbps for highest quality (see Fig. 1-17). There is also an HDV-like 1440 x 1080 format at 60i. (Compared to HDV’s 25 Mbps video data rate, the AVCHD version of 1440 x 1080 is only 9 Mbps.) Like HDV, AVCHD color sampling is 4:2:0.
Panasonic’s professional AVCCAM line of camcorders also use AVCHD. At highest quality, they can record full raster 1920 x 1080 at a maximum bit rate of 24 Mbps.

Fig. 1-21. Panasonic AG-HPX500 can record DVCPRO HD and standard definition DVCPRO 50, DVCPRO, and DV to P2 memory cards. Relatively large, shoulder-mount camcorders are popular with broadcast news organizations. (Panasonic Broadcast)
AVC-Intra and AVC Ultra
Other Panasonic professional cameras record what Panasonic calls AVC-Intra. Unlike AVCHD’s long-GOP interframe compression, AVC-Intra uses only intraframe compression (see p. 246), which makes editing and processing simpler and can improve image quality. AVC-Intra provides highly efficient 10-bit encoding with quality comparable to DVCPRO HD at half the data rate, so you can get twice as much material on a P2 card. The AVC-Intra codec has two modes: 100 Mbps with 4:2:2 chrominance sampling (very high quality, comparable to D-5 HD) and 50 Mbps with 4:2:0 sampling for high quality at a lower data rate.
At the pinnacle of AVC codecs is Panasonic’s AVC Ultra, for visually lossless 4:4:4 recording of 1080p, 2K, and 4K at data rates up to 450 Mbps.
Sony’s XDCAM HD cameras record to Blu-ray–based “Professional Discs,” which in the era of tapeless acquisition offer the advantage of a physical disc that can be archived. Formats include 1920 x 1080; 1440 x 1080 for reduced data rate; and 1280 x 720. XDCAM employs MPEG-2 at a choice of three data rates: 18 Mbps (variable bit rate), 25 Mbps (constant bit rate, functionally equivalent to HDV), and 35 Mbps (variable bit rate). The higher data rates provide best quality. Color sampling is 4:2:0. The top-of-the-line XDCAM HD422 format records full raster 1920 x 1080 with 4:2:2 color. XDCAM HD camcorders are fairly compact and economical yet Sony includes them in its high-end CineAlta HD camera family.
XDCAM EX cameras are more affordable and record to SxS memory cards instead of Blu-ray Discs (See Fig. 1-27).

Fig. 1-22. Blue-laser disc cartridge used by Sony XDCAM and XDCAM HD cameras. (Sony Electronics, Inc.)
DVCPRO HD
Panasonic’s DVCPRO HD format is a 100 Mbps high definition format with 4:2:2 color and 6.7:1 compression. It uses DV intraframe compression, meaning that each frame is individually compressed for simplified editing and postproduction (see p. 246).
DVCPRO HD was the original format of Panasonic’s VariCam camcorders, which used the same-sized 1⁄4-inch tape cassettes as standard def DVCPRO camcorders. More recent Panasonic camcorders capture DVCPRO HD to P2 flash memory cards instead of to tape.
HDCAM and HDCAM SR
Sony’s HDCAM records 1440 x 1080 HD on 1⁄2-inch tape in both interlace and progressive formats. HDCAM color is subsampled at a unique 3:1:1, using 7:1 compression for a data rate of 140 Mbps. Sony’s CineAlta family of HDCAM cameras, camcorders, and decks can record at true 24p, useful for transfer to 35mm film. They can also record at 23.98 fps for HD compatibility. Other frame rates include 25p, 30p, 50i, and 60i.
HDCAM SR (superior resolution) is Sony’s highest-quality codec—recording RGB or 4:2:2 HD at 880, 440, or 220 Mbps to tape or flash memory using mild, lossless MPEG-4 compression. Like Panasonic’s AVC Ultra, HDCAM SR doubles as an HD, 2K, and 4K mastering format in post (see Fig. 14-35).
D-5 HD
D-5 HD, based on 1⁄2-inch tape cassettes, is Panasonic’s highest-quality HD mastering format with data rates up to 235 Mbps. D-5 HD accommodates all 1080-line HD formats, as well as 720-line HD formats. D-5 has been an industry workhorse tape format.
DIGITAL CINEMATOGRAPHY SYSTEMS
Broadcast television has evolved from the standard definition analog systems of the twentieth century to today’s high definition digital TV. Because of this history, what we call “video” today has inherited a set of standards for things like pixel counts and frame rates, along with a number of technical compromises.
To sidestep those standards and compromises, a newer generation of digital motion picture cameras, called digital cinematography or digital cinema cameras, has pushed beyond the limits of HD to achieve higher resolutions, higher frame rates, greater dynamic range, wider aspect ratios, and a wider range of colors. Some can be used for shooting high-resolution 3D.

Fig. 1-23. ARRI Alexa digital cinema camera. Single Super 35 sensor. Accepts standard PL-mount 35mm cine lenses. Can record RAW data, RGB 4:4:4, and other formats including ProRes. One of the most popular cameras for feature film production. (ARRI, Inc.)
Digital cinematography refers to high-quality acquisition, often in the 2K and 4K formats, for productions that previously would have been shot on 35mm film. Digital cinematography projects are often shot at 24p or 25p for transfer to film (also known as film-out) or transcoding to DCP for digital theatrical projection.
At the high end of cost and quality, digital cinema cameras like the Sony F35, Sony F65, Panavision Genesis, and ARRI Alexa emulate the size, look, and feel of 35mm motion picture cameras. These cameras contain a single large CCD or CMOS sensor identical in size to a Super 35mm film frame. Employing a Super 35–sized sensor permits the use of standard 35mm motion picture lenses for a traditional feature film look.
At the other end of the cost scale, consumer DSLRs also have large sensors and with modification can often accept 35mm motion picture lenses, which has had a significant impact on the digital cinema world.
In the middle are compact digital cinema cameras, often modular in build, also featuring Super 35–sized sensors. ARRI’s Alexa has one foot in this camp too, since it is entirely modular and can be reconfigured in several ways. The RED One camera is similar in size and modularity to Alexa, while Sony’s F3, not as modular, is lighter and considerably more affordable. Even smaller are the RED Epic and RED Scarlet, true 4K cameras about the size of a view camera for stills. Epic has been a runaway hit with those shooting 3D, who need small cameras to reduce the size and weight of 3D rigs.
Digital cinema cameras capture images in high-data-rate formats such as RAW and RGB 4:4:4 log. Neither RAW nor log output is intended for direct viewing—the images look flat and the color is desaturated. Instead, these formats are used as a “digital negative” to provide a great deal of flexibility in post for creating different looks. Motion images in 2K and 4K RAW are comparable to the unprocessed, direct-from-sensor still images captured by DSLRs in RAW mode (however, the motion images are recorded at 24 times a second). Examples include the Alexa’s 2K ARRIRAW and RED’s 4K REDCODE format (which is slightly compressed). In 4:4:4 log, the 10-bit RGB tonal values are mapped to a logarithmic curve that better approximates the eye’s response to highlight detail. A popular example is the S-Log recording offered in Sony’s CineAlta line of cameras. Both RAW and 4:4:4 log are capable of capturing an enormous range of brightness from dark to light—some cameras can handle fourteen stops of dynamic range. For more on RAW and log recording, see p. 203.
Some digital cinema cameras have smaller sensors, such as Sony’s F23, which uses three 2⁄3-inch progressive-scan CCDs to capture 1080p RGB images, or Silicon Imaging’s SI-2K Mini, which uses a single 2⁄3-inch progressive-scan CMOS to capture 2K or 1080p RGB.
The Blackmagic Cinema Camera by Blackmagic Design is as small as a DSLR and similarly priced. It can record uncompressed 2.5K RAW in the Adobe CinemaDNG file format, as well as compressed HD in Apple ProRes or Avid DNxHD.
As technology improves and inexpensive digital video cameras are sporting larger sensors, distinctions break down between “standard” video cameras and those that are appropriate for digital cinema productions. High-end cameras offer power, flexibility, and reliability for high-budget productions, but many feature films also employ lower-end cameras for certain looks or scenes. It’s worth noting that 1080p HD (which is available on many affordable cameras) is only 6 percent smaller in terms of total pixels than the 2K image projected in many cinemas today—a difference in resolution that may not be perceptible to the audience (see p. 70).

Fig. 1-24. RED’s Epic DSMC (Digital Still and Motion Camera) has a 5K, Super 35 sensor. Acquisition formats include RAW and RGB 4:4:4. Can capture up to eighteen stops dynamic range with HDRx recording. Popular for features and adapts well to 3D. (RED)
STANDARD DEFINITION DIGITAL FORMATS
Standard definition was once the only form of video, and there is still a lot of SD equipment in the world (some of it being used, a lot of it sitting on shelves). While there are some legitimate reasons to produce in SD, the future belongs to HD and larger frame sizes. Below are some standard def formats you may choose to work in, or may encounter when you want to include archival SD material in an HD production.
In former NTSC territories like North America and Japan, digital SD is 720 x 480 pixels, interlaced.12 This can be notated as 480i.
In former PAL territories like Europe, Australia, and parts of Asia, standard definition means 720 x 576 pixels, interlaced, which is called 576i.
Some cameras can embed a progressive scan image in an interlace stream (see How 24p Is Recorded, p. 84).
All SD cameras record in 4:3 aspect ratio and many can shoot in widescreen 16:9 as well.
DV (Digital Video) records a component digital image on a very small tape cassette. Introduced in the mid-1990s, DV revolutionized independent and multimedia production.
The basic DV codec (also called DV25 for its 25 Mbps video data rate) uses 5:1 compression with 4:1:1 color sampling (the PAL version is 4:2:0). The quality of the DV picture can be very good, but it depends a lot on the particular camera. When shown on large screens, DV material may show artifacts caused in part by the compression. Also, if you plan to do a lot of visual effects, the 4:1:1 or 4:2:0 color subsampling is not ideal, since it represents a loss of picture detail.
The consumer version is usually referred to as MiniDV. For broadcast and professional use, there are Sony’s DVCAM and Panasonic’s DVCPRO. Both of these formats use the same codec as MiniDV but have certain professional enhancements. The tape goes through the camcorder faster, reducing the chance of dropouts (momentary loss of recording). DVCAM and DVCPRO cameras accommodate MiniDV-sized tape cassettes and many accept a full-sized cassette shell that’s several inches larger and can hold more tape (see Fig. 2-18). Newer cameras can record these codecs to file on a memory card instead of tape. All of these formats can be copied and edited with simple FireWire connections.
Fig. 1-25. Standard definition Panasonic DVX100B camcorder. Records to MiniDV tape. (Panasonic Broadcast)
DVCPRO50 and D-9
Panasonic makes camcorders that combine two 25 Mbps DV codecs to record in DVCPRO50 (sometimes called DV50), a 50 Mbps format with superior 4:2:2 color sampling and an image quality that rivals Digital Betacam but at lower cost. Compression is 3.3:1.
Digital Betacam
Sony’s Digital Betacam (also called DigiBeta or D-Beta) is a high-quality 1⁄2-inch tape format. DigiBeta records with 4:2:2 color sampling, which makes it good for effects work, and uses 2:1 lossless compression (about 90 Mbps). Most people can’t see the difference between 2:1 and uncompressed video. DigiBeta has been used widely around the world for both production and postproduction. Often projects shot on lower-resolution SD formats are finished on DigiBeta.
STANDARD DEFINITION ANALOG FORMATS
All of these are obsolete, but there are countless hours of material recorded on them, some of which will get transferred to digital.
2-inch Quad and 1-inch Type-C
In 1956, Ampex videotape machines running 2-inch-wide tape on open reels successfully made the first electronic recordings of live broadcast TV. In 1976, 1-inch Type-C videotape format replaced 2-inch. It remained an industry workhorse into the late 1990s.
3⁄4-inch U-matic, Betamax, and VHS
The 3⁄4-inch professional videotape cassette format called U-matic by Sony was widely used for viewing film dailies and for doing offline editing. It was introduced as a consumer format but, like Betamax, a 1⁄2-inch videotape version, it failed with consumers. However, the VHS (Video Home System) format, which used 1⁄2-inch tape cassettes, launched the worldwide home video market. (For years, when people talked about “videos” VHS is what they meant.)
Video8 and Hi8
In the mid-1980s, 8mm tape was introduced. Despite smaller tape cassettes and camcorders, Video8’s image quality matched VHS’s. In the late 1980s, Hi8 (high-band Video8) brought enhanced resolution. Digital 8 cameras were hybrids, capable of playing analog Hi8 tapes and recording in DV.
Betacam and Betacam SP
For many years, Sony’s Betacam camcorders were the tool of choice for ENG (electronic news gathering). Introduced in 1982, the original Betacam format used a 1⁄2-inch cassette to record an analog component video signal. Betacam SP (superior performance) came along in 1986, improving horizontal resolution.
RECORDING TO MEMORY CARDS, DRIVES, AND DISCS
The job of a digital video camera is to turn light into digital data. How do we record and store that data? Traditionally, video was recorded to videotape only. Now other options are more widely used.
Flash Memory Cards
Many newer cameras and audio recorders are capable of recording to flash memory cards, which are reusable, solid-state storage with no moving parts. Popular types of flash memory cards include CompactFlash (CF), Secure Digital (SD), and SDHC (High Capacity); Sony’s Memory Stick and SxS; and Panasonic’s P2 cards. Flash memory cards are small, require less power than a hard drive or tape mechanism, and are more resistant to the physical shocks and dirt of a challenging location environment.
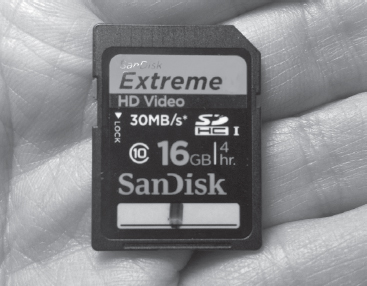
Fig. 1-26. Secure Digital High Capacity (SDHC) flash memory card. When buying cards, be sure the read/write speed is sufficient for the video format you’re recording. This card is rated at 30 MB per second. (Steven Ascher)
To record to a card, you insert it (or several cards) in the camera or audio recorder. When a card is full, you remove it and download to a hard drive or other storage device. The card can then be erased and reused.
Like recording directly to hard drives, using flash memory allows you to move quickly from shooting to editing. Cards can be inserted in a laptop’s card slot, or easily connected to any computer with an adapter. Files can be copied to the computer or in some cases editing is done right off the cards. For more on working with memory cards, see p. 90.
Hard Drives and Solid-State Drives
A hard disk drive recorder (HDD) is a portable hard drive system for recording video. Some HDDs are lightweight and can be mounted on a camera. Solid-state drives (SSDs) are similar but use flash memory instead of a spinning disk to store data. HDDs and SSDs can be set up to capture video and audio in the format used by your nonlinear editing system. The files can then be imported into the editing system much faster than tape, saving time in the editing room. This method is sometimes called direct-to-edit (DTE) recording.
In some cases, recording to an external drive may allow longer recording times, or recording at a higher resolution than permitted by a camera’s internal tape or media drive. You also may be able to record one format in camera and another to the external unit.
HDDs are also used in the home to record TV programming from cable or other sources. Another name for this is digital video recorder (DVR). DVRs generally record compressed video, using MPEG-2 or other codecs. TiVo is a well-known example.
For more on the use of HDDs and SSDs in shooting, see p. 90 and p. 115. For more on the use of hard drives in editing, see p. 238.

Fig. 1-27. Sony EX3 camcorder records XDCAM EX to internal memory cards, but can record less compressed formats when used with an external recorder such as the nanoFlash unit pictured here. In this shot, a high-capacity V-mount battery is mounted between the camera and the recorder. (George T. Griswold; Convergent Design)
DVDs and Blu-ray Discs
Digital video discs (DVDs) were introduced in the mid-1990s as a format for watching videos at home. Using MPEG-2 compression, DVDs offer component color and multiple sound tracks, and they quickly became the format of choice for distributing standard definition videos. DVDs play only standard definition video.13
The newer Blu-ray Disc (or BD) format can record and play both high and standard definition. Blu-ray Discs support 1920 x 1080 HD (50i, 60i, and 24p); 1280 x 720 HD (50p, 60p, and 24p); and SD at 720 x 576/480 (50i or 60i). They can handle a number of codecs: MPEG-2, MPEG-4 (H.264), and VC-1. Single-layer Blu-ray Discs can hold 25 gigabytes (GB) and dual-layer discs can record 50 GB, which is about five to ten times the capacity of a standard DVD. Larger capacities are expected.
Most people think of DVDs and Blu-rays as simply a handy way to watch movies. For filmmakers, these disc formats serve multiple functions. Camcorders that record directly to discs range from consumer models to Sony’s XDCAM HD camcorders that record to blue-laser disc cartridges (technically not Blu-rays but similar). Filmmakers often burn (record) video to DVDs for distribution, and also use them as a storage medium for video, audio, still images, or text. Blu-rays are increasingly popular as a low-cost HD screening format at film festivals.
Most video sound recording is done right in the camera—the sound is recorded with the picture to flash memory, tape, or disc. Different cameras and video formats have different configurations of audio channels. Most formats allow for two; some formats allow you to record four or more separate tracks. For some productions, having multiple tracks can provide great flexibility, since you can assign different microphones to different channels. When it comes to distribution, having four tracks allows you to send out a movie for international use in two different versions (for example, a version with narration and one without). Regardless of what format you use to shoot your movie, postproduction almost always involves transfer to different formats for finishing. So even if you shoot your film with a two-channel camera, you could release in various 5.1-channel formats (see p. 669).

Fig. 1-28. Documentary crew. The sound recordist carries a boom microphone and a mic mixer, shown here connected to the camera by a cable. (Bob Corkey)
Most camcorders have a microphone (also called a mic—pronounced “mike”) built into the camera or mounted on it. On-camera mics are simple and convenient, but often result in poor sound, since the microphone is typically too far from the sound source for optimal recording. Professionals generally use separate mics, which can be placed nearer the subject. The audio from the mic may be fed to the camcorder through a cable or by using a wireless transmitter. When there’s a sound recordist on the crew, microphones are usually fed first to a mixer, which allows easy monitoring of sound levels and blending of multiple mics. Recording sound in the camera along with the picture is called single system recording.
Sound may also be recorded double system (sometimes called dual system), which means using a separate audio recorder. This may be done for a feature or concert film to achieve the highest quality, or because multiple audio tracks are needed. Sometimes this is done because the camera or format has poor recording capability—many DSLRs, for example, record much lower quality audio than video, so a separate recorder can make a big difference. Before you can work with the footage, sound from the audio recorder has to be married to the picture and synchronized (synced up). This is usually done in the editing system prior to editing.
See p. 417 for more on audio for video camcorders.
VIDEO EDITING
Digital Nonlinear Editing
Virtually all video and film editing today is done with a nonlinear editing system (NLE). A nonlinear editor is computer software that allows you to edit and manipulate video much like the way a word processing program allows you to write, cut, paste, and format text. In nonlinear editing, video and audio data is stored on hard drives for instant access. A nonlinear editing system includes a computer, hard drives for storage, and often an external monitor for viewing. It can also include a video deck if material was recorded on tape in the field. NLEs range from professional systems, with all the bells and whistles that cost thousands of dollars, to simple programs like Apple’s iMovie, which consumers can run on a basic laptop.

Fig. 1-29. Nonlinear editing. Most NLEs can be run on a laptop pretty much anywhere. (Avid Technology, Inc.)
Nonlinear editing gets its name because it is unlike older tape editing systems that forced you to start at the first shot of the movie and edit in a straight line (linearly) to the end. With nonlinear systems you can work on any scene at any time, with the freedom to expand, shorten, or change it as you like. Nonlinear systems make it easy to do complex sound editing and processing. In fact, there are nonlinear systems specifically designed for sound work, which are called digital audio workstations, or DAWs.
Compared to traditional tape or film editing, nonlinear editors make it much easier to try ideas and incorporate complex graphics and effects. The downside is that indecisive moviemakers may get trapped in a morass of endless possibilities.
WORKING WITH AN NLE. To begin editing on an NLE, you load the footage from the camera onto the editing system’s hard drives. If the camera you used in the field recorded to file-based media like CompactFlash, SD cards, or hard drives, then loading that material into the NLE is called ingesting, importing, or transferring. If the camera recorded to a digital tape format, then loading that material into the NLE is called capturing. Any video or audio material recorded to analog tape has to be converted to digital form before it can be stored on the NLE; in this case bringing in the footage is called digitizing.14
Sometimes the total amount of footage you shot exceeds the storage capacity of your system’s computer drives. When this happens, you can work on material in smaller chunks. Another approach is to import the footage at a lower resolution, which sacrifices image quality but increases the system’s storage capacity. Some systems can work with proxy images, which are of very low resolution.
How you work with an NLE depends in part on the resolution of your original footage, how powerful your editing system is, and what you plan to do with the finished movie.
For example, if you’re working on a school project, you might shoot with a DSLR camera and do all your editing on a low-cost NLE. Even basic NLEs can do video effects, create titles, and do some degree of sound balancing or mixing. A finished movie can then be exported from the system as a file for the Web, burned to a DVD or Blu-ray, or recorded to tape.
However, if you’re doing a project for broadcast, you might do the majority of your editing on a midpowered NLE, then finish the project on a high-end NLE that’s better equipped for color correction, graphics, and output to high-quality tape formats if needed. This way of working is known as an offline/online workflow. The offline NLE is used to find the movie’s structure and put the shots in their proper order. Fine-tuning the color and sound are usually not top priority during the offline edit. After the offline is done, you move the project to a post facility with an online NLE that has all the scopes, monitors, and decks needed to do the final polish.
The audio may be sent to yet another system for mixing (usually a DAW in a specialized sound studio), then brought into the online system or recorded directly to the final file or tape.
Another situation that calls for an offline/online approach is when you’re working in a high-resolution format that exceeds the capabilities of your NLE: for example, if you’ve shot in a 4K RAW format and your NLE lacks the storage capacity or processing power to handle such large files. In this case, you might downconvert to a lower-data-rate file format such as Apple ProRes or Avid DNxHD to do your offline edit. After you complete the offline edit, you then move to an online system with fast drives and conform the 4K material to the edit you created in the offline.
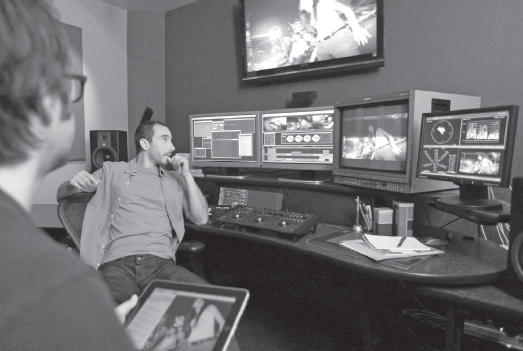
Fig. 1-30. An online editing suite in a post house includes an NLE and external video monitors and scopes. Avid Symphony high-end system. (Avid Technology, Inc.)
Editing on Tape
For many years, all video cameras recorded to videotape, and video editing was done by rerecording from one piece of tape to another. Traditional tape editing has now been replaced by the nonlinear editing systems just discussed. Nevertheless, tape is still used for shooting and it is also used after editing to store the finished movie. Many terms and concepts of nonlinear editing come from tape editing, so it’s helpful to understand a little about it.
The idea of tape editing is based on using two tape machines. One is a player, in which you put the footage from the camera. Using an edit controller—a device with frame-accurate control of both decks—you find the first shot you want to use. You then play it on the play deck while rerecording it on the record deck, which contains the editing master tape. Once that’s recorded, you move on to the next shot. This way, you build up the movie on the master tape, linearly, one shot at a time.
The concept of offline/online editing got its start with tape editing but with tape it’s done differently than with nonlinear. The early computer-controlled (“online”) editing systems used expensive, high-quality tape machines—too expensive for long-form projects. So, to first do an offline tape edit, the source tapes are dubbed (copied) to a lower-cost format. These offline tapes are called the worktapes, which are then edited with cheaper, lower-quality offline tape decks.
When you’ve structured the movie in the offline edit, the system generates a list of every shot you used. This is called an edit decision list, or EDL. The EDL is brought from the offline system to the online system, where the movie you created in the offline edit is reconstructed using the high-quality original camera tapes.
Tape-to-tape editing is rare today, but editing from an NLE to a tape machine is still common: for example, when outputting the finished movie from an NLE to create a master tape for later duplication.
For more on nonlinear and tape editing, see Chapter 14.
FILM SYSTEMS
The Camera and Projector
As discussed earlier in this chapter, the principle behind motion pictures is to record a series of still frames rapidly—one after another—and then display them on a screen rapidly, one after another (see p. 4).
The film camera works by focusing light from the scene being photographed onto a small rectangular area of photographic film. After each rectangle (frame) is exposed to light, a shutter blocks off the light. The camera’s claw then pulls more unexposed film into position and holds it in place. The shutter opens again, allowing light to strike the fresh frame of film. This stop-start process is called the camera’s intermittent movement. The camera is loaded with a roll of film that may be 50 to 1,000 feet long. Each camera roll records thousands of frames.

Fig. 1-31. The camera and the projector. The camera (left) draws in light to capture an image of the world on film; the projector (right) throws the image back onto a screen. (Carol Keller)
Fig. 1-32. The shutter and intermittent movement. (A) The claw holds the film in place during exposure. (B, C) The shutter rotates to block light from the film while the claw moves up to pull down the next frame. (D) The claw freezes in position to hold the next frame steady for exposure. (Carol Keller)
The film projector operates on the same principle, but rather than focusing light from the original scene onto the unexposed film, it projects the developed image onto a white screen using a bright lamp placed behind the film frame. As long as the projector runs at the same speed as the camera, motion will appear normal. Sometimes cameras are run at a higher speed so that motion will appear slowed down (slow motion) in projection. See p. 257 for more on camera speeds.
The Film Format
While all film cameras expose images in essentially the same way, the size and shape of the images produced vary with the camera type. The first movies, made in the 1890s by Thomas Edison, were shot on cellulose nitrate–based film that was about 35mm wide. Nitrate film is highly flammable and can become explosive as it deteriorates with age. Much of the first version of Robert Flaherty’s Nanook of the North was destroyed by a fire (though the fire’s cause is debated). Nitrate was replaced in the early 1950s by the more stable cellulose acetate, or “safety film,” which today has been somewhat replaced by indestructible polyester. The 35mm gauge remains the most commonly used in theatrical filmmaking.
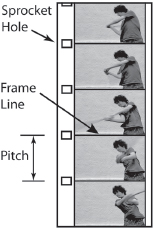
Fig. 1-33. Each still image on the film is called a frame. Successive frames are divided by a frame line. The claw advances the film by engaging a sprocket hole, or perforation (perf). The pitch is the distance between perfs. Various formats have a different number of perfs in different positions.
In the 1920s, 16mm film was introduced as an amateur format. The area of the 16mm frame is only one-quarter that of the 35mm frame and when they’re projected side by side, it looks grainier and less sharp. By the 1960s, 16mm became widely used in professional filmmaking. In the 1970s, Super 16 was developed. Unlike regular 16mm, Super 16 has only one row of perforations. By extending the image almost to the edge of the film into the area formerly occupied by the second set of perforations, Super 16 allows a 40 percent larger image to be recorded for each frame (see Fig. 1-39).
In 1932, 8mm cameras were introduced that recorded an image half the width of 16mm, on film that had twice as many perforations (Double 8mm or Regular 8mm). In 1965 Kodak introduced Super 8 film that was 8mm wide, but with smaller, repositioned sprocket holes that made room for an image 50 percent larger than regular 8mm. Super 8 was preloaded into easy-to-use cartridges. Once the prime format for home movies, Super 8 now has limited use among artists and music video producers.

Fig. 1-34. Comparison of film formats. At left are different formats that can be recorded on 35mm motion picture film. With 35mm still film (shown at right) the width of the frame runs along the length of the film, instead of across it as it does with movie film. This is why the “full-frame” 35mm SLR and DSLR image format is larger than 35mm motion picture formats. With both Super 8 and Super 16, a different configuration of sprocket holes allows a larger recording area than their “regular” counterparts.
Aspect Ratio and Film
A film’s format refers to the width of the film material itself (the film gauge), as well as the size and shape of the image that’s recorded on it. The 16mm and Super 16 formats use film of the same gauge (16mm), but the size and shape of their frames are different. The shape of the frame is described by the proportions of its rectangle: the width of the frame divided by the height is the aspect ratio (see Fig. 1-12). A rectangle four units wide and three units high is the standard for several formats (including regular 8mm, Super 8, 16mm, and traditional standard definition video). This aspect ratio is 4:3 (“four by three”). In the film world, that ratio is expressed as 1.33:1 and spoken as “one three three to one” (often written 1.33 and spoken as “one three three”).
In 35mm, the full frame for sound film has an aspect ratio of about 1.33:1 and is called Academy aperture, named for the Academy of Motion Picture Arts and Sciences, which defined it. Though the Academy frame was standard for feature films in the early twentieth century, it is no longer used for films shown in theaters. Theatrical features are generally widescreen, with an aspect ratio of at least 1.85:1 and often as wide as 2.40:1.
For more on aspect ratio and widescreen formats, see p. 74.

Fig. 1-35. Some common film aspect ratios (also used in digital productions). Different aspect ratios call for different approaches to image composition.
COMPARING FILM FORMATS
As a rule of thumb, as the size of the format increases, so do the cost, the image quality, and the size and weight of the camera. When a large area of film emulsion is used for each exposure, the grain and imperfections of the film detract less from the image. In the 35mm camera, about 12 square inches of film are exposed each second; in 16mm only about 21⁄2 square inches are used.15 When a 16mm frame is projected on a modest eight-by-ten–foot screen, it must be enlarged about 100,000 times. To fill a screen of the same size, a Super 8 frame must be magnified more than 300,000 times. This is why theatrical features that are not shot digitally are usually shot on 35mm or 65mm film. For more on how format size affects picture quality, see p. 60.
The film image is affected not only by the format but also, in order of increasing importance, by the particular camera being used, the lenses, and the choice of camera negative (called film stock or raw stock). A film camera will produce vastly different results depending on choice of both film stock and processing.
Color negative film stocks are used for most professional productions shot in film. Upon developing, negative stocks render a scene with reversed tonalities and colors; that is, what was light in reality is dark on the negative, what was green in reality is magenta on the negative (see Fig. 7-2). When the camera original (the film that actually went through the camera) is negative, it must be printed on positive film stock to be viewable in a projector. Much less commonly, films can be shot with reversal film stocks. Like slides in still photography—also reversal—they show a normal image as soon as they’re developed.

Fig. 1-36. Relative frame sizes of various film formats. The solid diagonal line shows that three of the formats have the same aspect ratio. The dotted line shows that Super 16 and 35mm 1.85 projection have nearly the same aspect ratio.
As noted earlier, most productions that are shot on film are scanned to a digital format (called a digital intermediate, or D.I.) from which digital files and film prints can be made for distribution and screening.
Super 8
Super 8 is becoming obsolete and most equipment is only available secondhand. The people still shooting on Super 8 are students, enthusiasts who relish the particular look and feel of Super 8, and sometimes filmmakers who use it to test film stocks prior to shooting in a larger format. Super 8 footage has found its way into music videos, commercials, and feature films. Sometimes a rough, grainy image is desired, perhaps as a stylistic touch or to simulate the look of old movies. Instead of trying to degrade a 16mm or 35mm image, filmmakers may shoot on one of the grainier, more contrasty Super 8 stocks.

Fig. 1-37. Beaulieu Super 8 sync-sound camera. (Pro8mm, Inc.)
Traditionally, Super 8 shooting was done with reversal Ektachrome or the now-discontinued Kodachrome, both of which could be projected directly without making a print. Pro8mm in Los Angeles has created a line of color and black-and-white negative and reversal stocks by using a film-cutting machine to load professional 35mm film emulsions into Super 8 cartridges.
Rather than edit or distribute films in Super 8, most people transfer to video and/or blow up (enlarge) to 35mm.
16mm and Super 16
During its life span, 16mm has gone through enormous changes. Starting as an amateur format (once considered “spaghetti” by pros), the portability of 16mm cameras made them the tool of choice for TV news and documentaries and later for low-budget features, animation, and avant-garde films. Today, standard 16mm is pretty much dead, but Super 16 is still used for some higher-budget documentaries, made-for-TV movies, and low-budget features. With newer, technically advanced color negatives, Super 16 is capable of a rich image that rivals 35mm.
As a distribution format, 16mm has pretty much disappeared. Films that originate on Super 16 are transferred to digital or are blown up to 35mm for distribution. The Super 16 frame has an aspect ratio of 1.67:1, which is very close to widescreen video’s 16:9, so a transfer to HD or widescreen SD formats can be done with negligible cropping (see Fig. 1-39). When blowing up to 35mm, you can create prints at 1.66:1 or the much more common 1.85:1. For more on blowups from 16mm and Super 16, see p. 708.
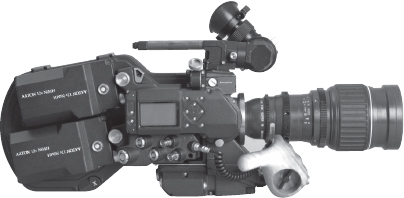
Fig. 1-38. Aaton Xterà Super 16 camera. Versatile and well balanced for handheld work. (AbelCine)
35mm
35mm dates back to a collaboration between Thomas Edison’s laboratory and George Eastman’s Kodak in the early 1890s. Early 35mm motion picture cameras were hand-cranked and relatively compact. As late as the Vietnam War, wind-up 35mm Bell & Howell Eyemos with 100-foot loads found favor with combat cameramen.
Fig. 1-39. Blowing up 16mm film to 35mm. (top) When regular 16mm is blown up to 35mm, the image must be significantly cropped, losing the top and/or bottom of the frame. (bottom) By using the area normally reserved for the optical sound track, the Super 16 frame closely approximates the 1.85:1 widescreen aspect ratio. Very little of the Super 16 image is lost when a blowup or transfer to HD is done. (Steven Ascher)
Motorization and larger 400-foot and 1,000-foot loads, along with heavy sound dampening, produced generations of large, heavy 35mm cameras. Added bulk includes weighty PL or Panavision mount lenses, video assists, and many attachments.
As a result, traditional 35mm cameras have been cumbersome and expensive. These cameras are usually supported on tripods or dollies because of their considerable size and also the importance of having a steady image on a large theater screen. The newer generation of lighter, hand-holdable sync-sound 35mm cameras like Aaton’s Penelope (see Fig. 2-20) and ARRI’s Arricam Lite, along with stabilization devices like Steadicam (which enables the operator to carry the camera smoothly; see Fig. 9-48), provides greater mobility and allows more nimble filming techniques to be used in feature films. (Steadicams are also used with digital camera systems.)
In general, the highest-quality equipment, techniques, and lab services have been available for 35mm production, for which film budgets usually run in the millions. Due to the bulkiness of the equipment and the complexity of projects done in 35mm, crews of about eight to more than a hundred persons are employed.
The standard 35mm frame is four perforations high. In the days of silent cinema, a boxy 1.33:1 image occupied all the available space between the perforations along each side. With the advent of sound in the early 1930s, the Academy of Motion Picture Arts and Sciences standardized a slightly scaled-down frame of the same shape, which it offset to the right in order to accommodate a sound-on-film track along the left edge. This reduced frame became known as the common “Academy” format, prevalent until the arrival of widescreen formats (see Fig. 1-34).
All 35mm motion picture formats position or squeeze their image between the right row of perfs and the protected sound track area to the left, with one exception—Super 35. Super 35 was “created” in the 1980s in order to take back the sound track area for the purposes of exposing a 32 percent larger image. It is, in effect, the original silent image reclaimed. As such, it is only a production format. There are no Super 35 projectors. Super 35 must be scanned digitally, then either recorded back to film as a scaled-down frame, making room for the standard sound track of conventional film projection, or output to a DCP (Digital Cinema Package).

Fig. 1-40. 35mm camera. Panaflex Millennium. (Panavision, Inc.)
Some 35mm cameras are set up for the three-perf 35mm format, which uses a frame that is only three perforations high. Because less film is needed for each frame, this results in a 25 percent savings in the cost of film stock and processing. This format is well suited to 1.78:1 (16:9) capture and is popular for production of TV series. Three-perf looks the same as four-perf when transferred to 16:9 digital formats and can be printed to the standard four-perf format for film distribution at the conventional 1.85:1 aspect ratio.
Less common is two-perf 35mm. Two-perf was introduced as the Techniscope format in the early 1960s. This was done because the anamorphic lenses needed to horizontally squeeze a panoramic 2.40:1 frame (also called CinemaScope, or ’Scope) into a squarish four-perf 35mm frame are much heavier and optically slower than conventional lenses for 35mm cameras. Why not instead use a regular 35mm format lens, shoot on a two-perf 35mm frame that has half the normal height and a 2.40 aspect ratio to begin with? The result could be printed and projected as conventional CinemaScope. Benefits include a 50 percent cost savings in film stock and processing and mags that last twice as long. Not bad.
A number of classic films were shot in two-perf, including George Lucas’s American Graffiti and spaghetti Westerns such as The Good, the Bad, and the Ugly. Today the digital intermediate process makes it a snap to scan a two-perf original 35mm negative, then record it back out to a squeezed four-perf 35mm negative. Aaton’s Penelope, mentioned above, switches easily between three- and two-perf pulldown.
Large Formats
There are a number of widescreen formats used primarily for feature films. Some high-budget films are shot in 65mm, which is then shown in theaters using 70mm prints (the added width is used for sound tracks). Lawrence of Arabia and 2001: A Space Odyssey demonstrate the stunning detail and rich image of this format. The 65mm negative is reduced to 35mm for smaller theaters.
Even larger are the IMAX and OMNIMAX formats, which run 65mm film horizontally through the camera, creating an image that spans fifteen perforations per frame instead of 65mm’s five. These are shown on huge, enveloping screens in specially constructed theaters. (OMNIMAX is designed for domed screens.) The image is spectacular.
SOUND RECORDING FOR FILM
Virtually all films have sound tracks; even silent films were intended to be shown with musical accompaniment. Unlike video cameras, which typically record audio right in the camcorder, today’s film cameras do not record sound. Instead, a separate audio recorder is used that captures audio to memory cards or hard drives. As noted earlier, using a separate audio recorder is called double system or dual system.
Fig. 1-41. Recordist’s sound cart including mic mixer and digislate. (Pawel Wdowczak/Denecke, Inc.)
Before portable recording equipment became available, most sound films were made in the studio under controlled conditions. The soundstage was acoustically isolated from distracting noises. When it was necessary to film on location, there was usually no attempt made to record a high-quality sound track. Instead, the film would be looped afterward in the sound studio. Looping, sometimes called dubbing, involved cutting scenes into short, endless loops that the actors watch while respeaking their lines. Today, dialogue replacement may be done to fix sound that was badly recorded, or when the dialogue is to be rerecorded in another language. ADR (automatic dialogue replacement) is now done with more sophisticated digital equipment.
In the 1950s, advances in magnetic tape recorders made it practical to record sound on location. From the 1960s through the 1980s, classic portable 1⁄4-inch reel-to-reel recorders made by Nagra and Stellavox were the rule. By the 1990s, lightweight DAT (digital audiotape) cassette recorders were in common use on film sets. Today, all double-system sound is recorded using digital file-based recorders that capture audio to flash memory cards or hard drives.
The smallest, least expensive film cameras are noisy and are intended for shooting without sound (though sound can be added later). These cameras are sometimes called MOS (see p. 258), or wild cameras. Confusingly, the term silent camera is sometimes used to mean an MOS camera, and sometimes means one that is quiet enough to be used for sound filmmaking. Audible camera noise on the sound track can be disastrous, especially in nondocumentary projects. Most good sound cameras are extremely quiet.
Synchronous or sync sound, also known as lip sync, matches the picture in the way you are used to hearing it: when the actor’s lips move on the screen, you hear the words simultaneously. Nonsynchronous or wild sound is not in sync, or matched to the picture, in this way. Some films use wild sound exclusively, such as those that have only narration and a musical background.
Because sync sound requires precise alignment of sound and picture, only film cameras equipped for sync-sound work can be used. Sync-sound cameras are crystal controlled (crystal sync) to operate at a precisely fixed speed (usually 24 fps). In the days of analog tape recorders, only specially equipped recorders like the Nagra could be used for sync filming, but with today’s digital audio recorders “sync drift” is usually not an issue.
In double-system recording, the camera and sound recorder are generally not attached to each other, so the microphone can be positioned close to the sound source for good recording, regardless of where the camera is. See Chapters 10 and 11 for more on sound recording.
FILM EDITING
From the beginning of filmmaking, movies were edited by cutting rolls of film into pieces (individual shots), arranging the shots in the desired order and length, and reattaching them into rolls. Celluloid film was literally cut and spliced back together, which is why editing is also called cutting.
In the 1990s, a sea change took place in the way films are edited. Instead of cutting on film—using film editing equipment—filmmakers today transfer their film footage to a digital format and do their editing with computer-based, nonlinear editing systems (NLEs; see p. 36 and p. 544). Nonlinear video editing has myriad advantages over editing on film: you have much more control; you can try out visual effects, create titles, do more sophisticated sound editing, and easily output video copies of the edit when you need them.
Given the benefits of digital editing, why would anyone still cut on film? Film schools may encourage cutting on film to learn film craft. If you’re making a movie that will be shown on film in theaters, working with film may give you a better sense of what it will eventually look like on screen; however, this argument is weakening with the growing prevalence of digital distribution.
When a production is to be shot on film and edited in a digital system, there are many options and technologies available. The process can be fairly simple or quite complex depending on what route you choose.
During the production of the movie, the film that actually went through the camera—called camera original film, or original camera negative (OCN)—is sent to the laboratory to be processed and then transferred to digital. When the transfer comes back, it is called digital dailies, video dailies, or rushes (because on big productions it’s rushed back and viewed every day; small films may not get such good service).
Sound recorded in the field must be combined with the picture, and lined up properly so that the sound and picture are in sync (called synchronizing the rushes or syncing up). Syncing may take place when the dailies are transferred to video or afterward in the editing system.
Once the dailies are loaded into the NLE and the sound is in sync, editing can begin. Working with an NLE to edit a movie that was shot on film involves most of the same procedures as editing a movie shot on video. There may be certain differences stemming from the frame rate, how the audio is handled, and how the project will be finished.
When you’re done editing, there are several options for finishing and distributing the movie—depending on whether the original camera negative was transferred by telecine or film scanner, and to which format.
Traditional Film Editing
Even though few projects today are edited the traditional way and once-iconic film editing equipment is relegated to museums, it’s useful for filmmakers to understand something about conventional film editing, since most of the concepts—developed over a century of filmmaking—are still employed, even if in digital form. An understanding of the basic process of classic film postproduction will also help you appreciate what went into the making of every classic film you admire.
In traditional film production, the camera original footage is sent to the lab for processing and then a workprint is made—that is, a positive print of the original negative. The workprint is sent back to the production as dailies; this prevents damage to the original, which is stored at the lab.
Fig. 1-42. Traditional film editing. (top) Sound recorded in the field (represented here with a 1⁄4-inch tape deck) is transferred to sprocketed magnetic film for editing. (bottom) The mag film can then be edited with the picture in frame-for-frame correspondence. Most of the equipment shown here is now rarely used. (Carol Keller)
In preparation for editing, the sound recorded in the field is rerecorded or transferred to magnetic film, also called mag, mag stock, stripe (in 35mm), or, in some cases, fullcoat. Mag has the same dimensions and sprocket holes as 16mm or 35mm picture film, but it has a magnetic oxide like that used in sound recording tape. Editing is then done with two strands of material (picture and sound) that are both sprocketed and can be lined up, frame for frame. Before editing, the dailies must be synced up. This is usually done by cutting and placing the mag alongside its corresponding workprint. Once the rushes are in sync, the two strands are then edge coded by mechanically printing the same ink numbers on the edge of each strand. Edge code allows pieces of sound and picture to be quickly identified and put back in sync at any point in the editing process.
During editing, sound and picture can be freely cut and combined. Multitrack editing machines can play two or more sound tracks in sync with the picture. After editing is complete and the picture is locked, a sound mix is done to rerecord all the various sound tracks onto one final track. The pristine camera original is cut to match the edited workprint (called negative matching or conforming). Prints can then be made directly from the original negative or from a duplicate negative (dupe neg).
Simple image transitions are done while making the print—such as dissolves (where one image melds into another) or fades (where the image appears from or disappears into darkness). Today, more complex effects are done digitally, and a new piece of film with the effect is edited into the film. Traditionally, these effects were called opticals and were done in a separate step using an optical printer. Color correction (also called grading) is done by a color timer (or grader), who views each scene in the film and estimates the correct printer settings for red, green, and blue exposure.
Typically, lab personnel do the color corrections and then the director and/or director of photography views them in the first answer print. Any adjustments are then made and corrected prints are struck. After all the adjustments are done, a release print is made. The sound track is now combined with the picture; prints with sound tracks are called composite or married prints.
For more on working with film in postproduction, see Chapter 16.
SHOOTING DIGITAL VERSUS SHOOTING FILM
Many younger filmmakers know the convenience of digital and have never experienced film, so perhaps the question should be: what are the reasons not to shoot digital?
One of the key reasons would be that you like the look of film. This is discussed more in later chapters. Film has a distinctive feel, with a rich history of associations. While high-end digital cinema cameras like the ARRI Alexa can capture much of that look, there are still differences (and many digital cameras perform far worse than those top-of-the line models). Film stocks capture a tonal range that easily surpasses many digital cameras.
On a per-minute basis, film can be a lot more expensive than digital. That is, a hard drive that can store an hour of HD direct from the camera costs far less than sixty minutes of film, especially when you add up the costs of film stock, processing, and transferring the film to digital for editing. However, when you consider the whole budget, film isn’t always much more expensive. For example, on a per-day basis, you may be able to rent a film rig for much less than a high-end digital cinema camera. So if your production will take place over many days, there may be savings in equipment rentals if you shoot film. Similarly, if you can be frugal in how much footage you shoot (say, restricting yourself to only a few takes for each shot in a drama), the higher cost of film won’t be as much of a problem. Students can get a lot of benefit from the discipline of shooting film, and the planning and control it requires—skills you may not get if you shoot only digital (for more, see The Shooting Ratio, p. 360).
On some shoots, film cameras can have an advantage for being a simpler technology that may hold up better in extreme conditions. They’re less susceptible to overheating, generally consume less power, and don’t require data management in the field.
Another consideration is that film is a firmly established technology that hasn’t fundamentally changed in years. Digital, on the other hand, has been going through a period of explosive growth, and today’s hot formats are likely to be obsolete before long. One argument for shooting film is that a production shot on celluloid may have better shelf life and adapt better to new digital technologies as they come along. When it comes to long-term archival storage, it’s hard to guess how many years in the future any particular digital recording—whether it is stored on videotape, hard drive, or disc—will still be playable. That said, different film stocks age better than others, and the storage environment plays a key role in film preservation.
Of course, as this is being written, film labs are dropping like flies, and the survival of even major film manufacturers is in question. So, by the time you read this, shooting in film may not be a viable option. A very sad thought after such an astonishing history of work.
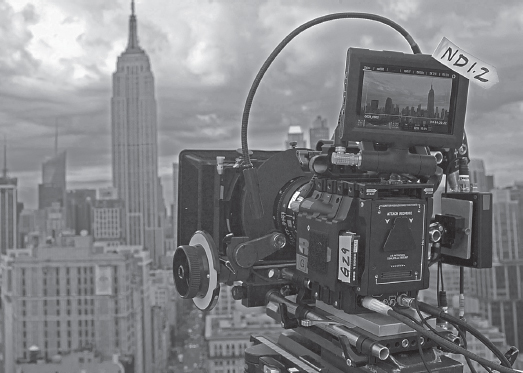
Fig. 1-43. The digital present looks out over the analog past. (RED)
1. In France and Russia, video was produced in PAL but broadcast in SECAM (Séquentiel Couleur à Mémoire), which has the same frame rate and number of lines.
2. There can also be quality loss when converting between different digital formats.
3. If you think about it, broadcasting half frames to cut bandwidth in half was the original form of video compression.
4. In many formats, like DV, the lower fields are recorded first. See Interlace and Field Order, . 600.
5. Though only half the pixels are seen at once, the resolution isn’t cut in half—it’s slightly better than that (about 70 percent of the full progressive resolution).
6. The term aliasing may also be used to mean any kind of distortion caused by not having enough digital samples to accurately record picture or sound.
7. The eye registers most picture detail in the green part of the color spectrum, and green makes up over 70 percent of the luminance signal.
8. As mentioned on p. 15, in NTSC countries whole number frame rates are used for convenience, but the actual rate is .01 percent slower. So 60 fields per second is really 59.94.
9. Sometimes a codec is a software-only mathematical formula called an algorithm, and sometimes the algorithm resides in a computer chip.
10. Most people think DV uses a bit rate of 25 Mbps, but this represents only video data. A full DV stream also includes audio, timecode, and other data.
11. These formats record using nonsquare pixels that are expanded to standard square pixels on playback, filling out the 1920 width.
12. ITU-R 601 video, used for conventional NTSC broadcast, is 720 x 486.
13. It is possible to put an HD video file on a DVD, but not for playback in a typical DVD player.
14. Not all nonlinear editing systems are set up to digitize analog material.
15. This is comparing 35mm Academy frame to regular 16mm. Standard 1.85 aspect ratio 35mm film exposes about 9 square inches each second.