There used to be a time in our house each day that my husband referred to as the “Magic Hour.” The Magic Hour was when I had come home super hungry after a long day at work and couldn’t figure out what to have for dinner. The frantic downward spiral would start off with me saying things like, “It takes too much time to cook!” and “Why don’t we ever have groceries?!” and would eventually progress to “It’s too late to order delivery!” and “Well, what do YOU want to eat?”
He was being sarcastic, of course, because this hour was the opposite of magic. It was terrible. I’m not the nicest when I’m hungry, and back then I was also in a lot of pain. Not to mention, I had zero idea what to do in the kitchen, which only deepened the spiral.
After a few epic Magic Hour meltdowns, I would plan a weekend trip to the grocery store and imagine the amaaazzzing experience it was going to be. I pictured myself floating through the aisles and getting inspired by all of the interesting ingredients that I saw. I would leave with a cart full of delicious, healthy food that would feed me for the whole week. I was going to be prepared! It was going to be awesome! But in reality, I’d get to the store, feel overwhelmed by indecision, get frustrated with myself for not making a list ahead of time, and leave nearly empty-handed (except for an apple or two).
When I shifted to eating more real food and slowly started becoming more comfortable and confident at the store and in my kitchen, I began to notice a trend in the ingredients I was consistently buying. I also noticed that these same ingredients were saving me from having Magic Hour meltdowns. If I had these ingredients, plus some fruits and veggies, I could always throw something together for dinner.
I took stock of these items and they became my Top 10 Pantry Ingredients. I made sure to have them on hand at all times. When I headed to the grocery store, I’d do a quick scan, and if one was missing, I’d make sure to replace it.
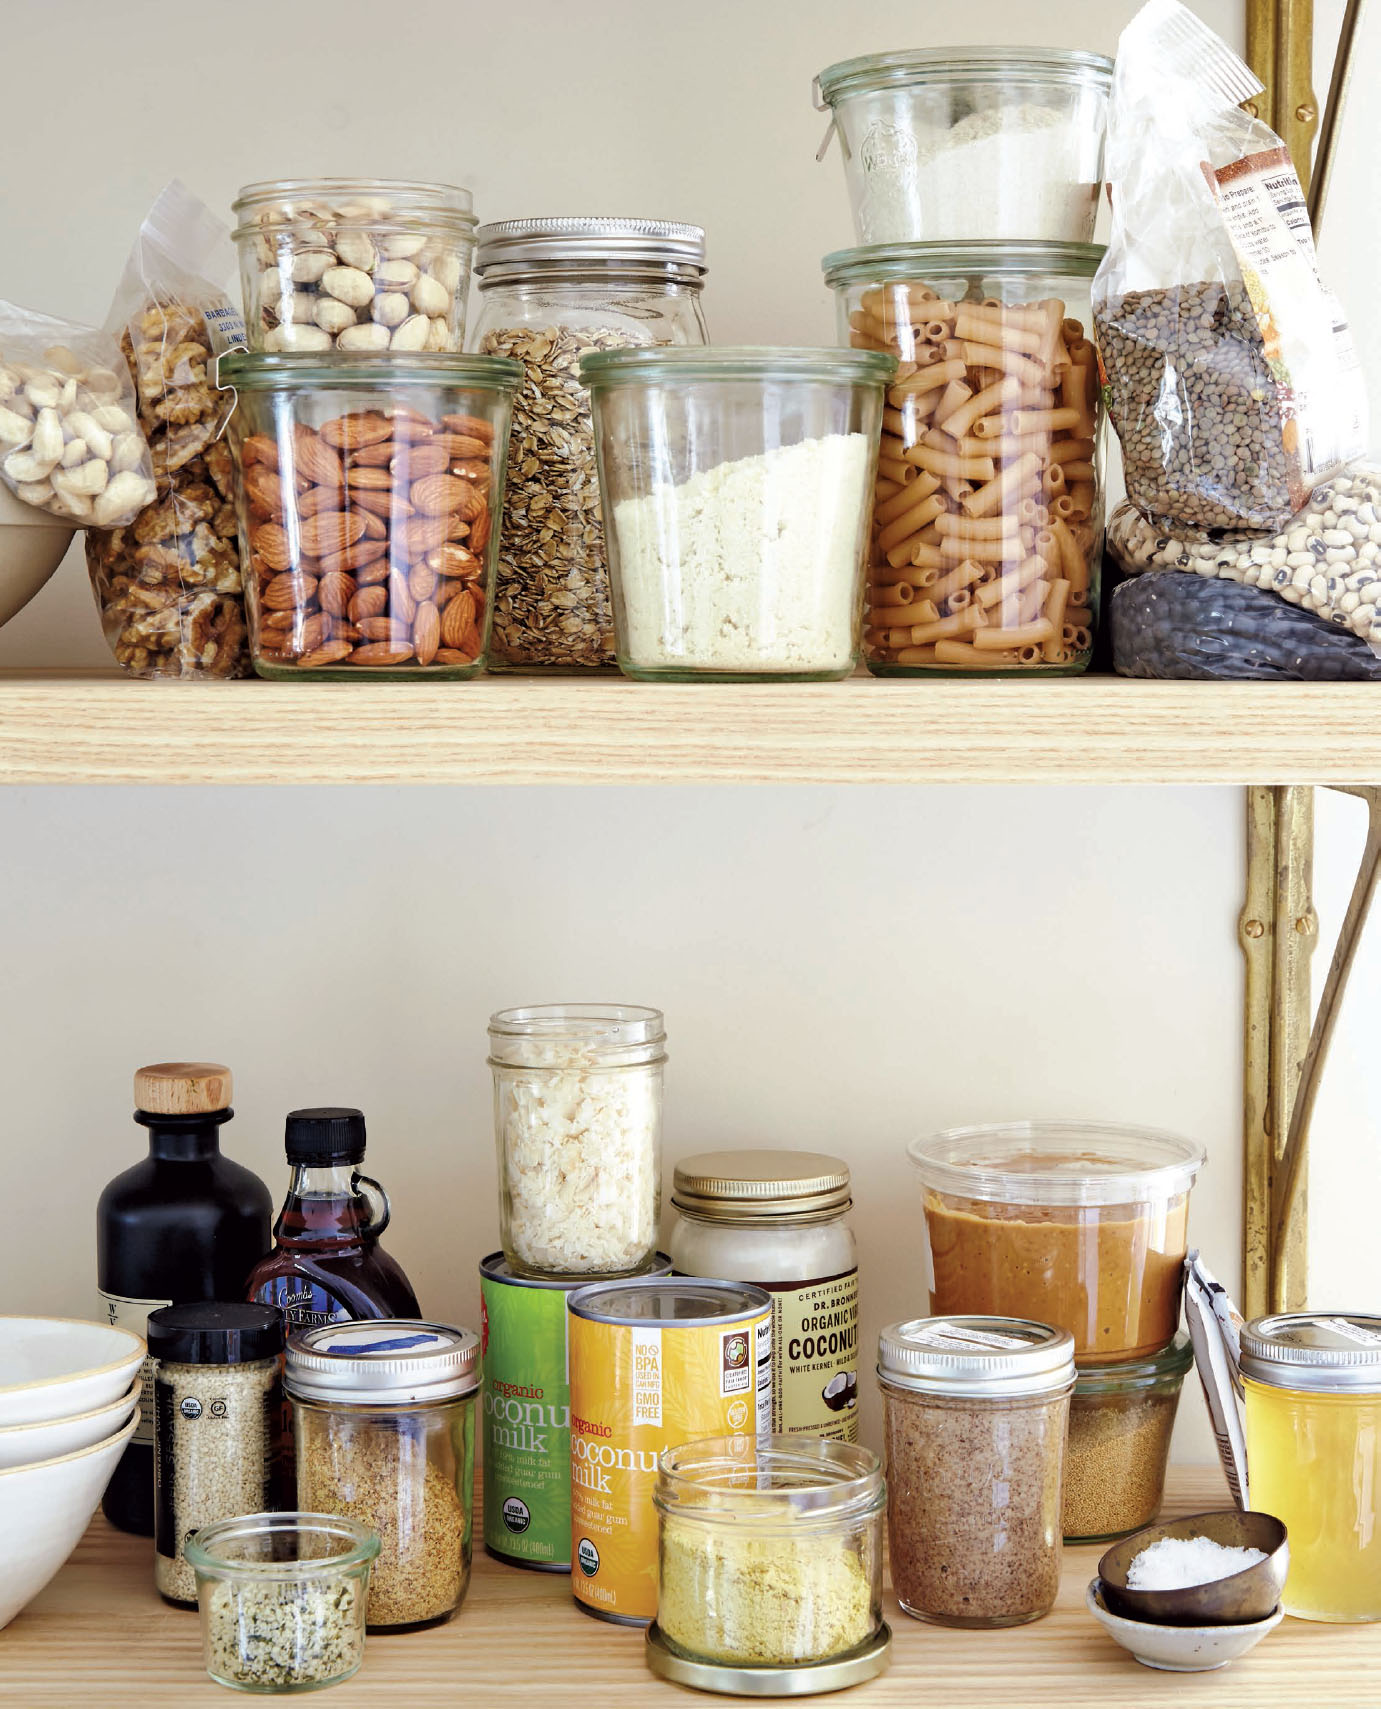
The list below isn’t a comprehensive inventory of my pantry. It doesn’t account for all the seasonings, sauces, and crunchy snacks I love to buy. But these pantry essentials are the very best place to start. Scoop them up at the store, get the hang of cooking with them, and then start to create your own list of essentials for your kitchen. Once you have them (plus lots of fruits and veggies), the Magic Hour might actually become . . . magical.
Top 10 Pantry Ingredients (+ 2)
![]() Gluten-Free Flours
Gluten-Free Flours
Wheat flours may be the most common, but there are a lot of flours that happen to be gluten-free, which is pretty awesome. They’re great to have on hand for pancakes, cookies, and to use as a thickening agent in some recipes. There are so many gluten-free flours to choose from, it seems that every time I go to the store, I find a new one to experiment with: brown rice, buckwheat (gluten-free, even though it has wheat in the name), almond, oat, chickpea (garbanzo bean), coconut, amaranth, millet, quinoa, teff, and masa harina flour.
Because there are so many, I chose just a handful to use consistently in my recipes: almond, chickpea (garbanzo bean), brown rice, and masa harina. All of the flours I call for are gluten-free, but if you eat gluten and want to experiment with more whole flours, spelt and barley are good places to start.
Favorite recipes using gluten-free flours: Blueberry Corn Cakes, Saag Plant-neer, Chocolate Chunk Cookies.

![]() Plant-Based Milks
Plant-Based Milks
Plant-based milk can be used as a direct swap for dairy milk in most recipes, as well as anywhere else you’d usually use dairy milk. I prefer buying unsweetened milk because it’s more versatile and can be used for a wide variety of dishes. Almond milk and rice milk are great for everything from cereal to mashed potatoes. Coconut milk brings a rich creaminess to desserts and smoothies. Other dairy-alternative milks include hemp, cashew, pistachio, and hazelnut. Most store-bought plant-based milks are shelf-stable and don’t need to be refrigerated, so you can stock up and make sure to have them on hand at all times. When purchasing nonrefrigerated milks, do an extra-good job of reading the labels carefully. Avoid those that contain an additive called carrageenan and added sweeteners. You can also make your own nut milks at home (see this simple recipe).
Favorite recipes using milks: Nutty Banana Smoothie; Jalapeño Corn Bread; Roasted Potato, Corn, and Leek Chowder.
![]() Nuts and Seeds
Nuts and Seeds
Protein-packed nuts and seeds are a plant-based cooking must. Cashews are the secret to making creamy sauces. Chia can be used as a thickening agent and binder for pudding and jams. And throwing some roasted nuts or seeds in a salad adds texture and always makes it feel a bit more finished. In the pages ahead, we’ll also be experimenting with making our own nut butters (which is surprisingly easy and requires only one base ingredient: nuts). I suggest stocking up on a variety of nuts—raw and unsalted whenever possible—not only for cooking, but for snack attacks, too. Just a handful can really fill you up.
There are so many nuts and seeds to explore. Most of the ones listed here are readily available at the grocery store and online. Pick something you’ve never tried before and start playing in the kitchen. Nuts: almonds, pistachios, pecans, walnuts, hazelnuts, Brazil, and pine. Seeds: chia, hemp, pumpkin, sesame, flax, sunflower, quinoa, and amaranth (both quinoa and amaranth are often classified as grains, but they’re technically seeds).
One last note: many of us have a hard time digesting raw nuts—they can cause a bloated stomach and can make us feel heavy in the middle. The best way to avoid this is to soak them first. This neutralizes their naturally occurring enzyme inhibitors, which allows for better digestion and easier absorption of nutrients. Begin by soaking the nuts and seeds in water with a little salt for seven to twenty-four hours, then press the water out with a towel. You can eat them right away or dry them out in an oven set at the lowest temperature or in a dehydrator (this can take up to twenty-four hours). If your budget allows, you can also buy nuts and seeds that have already been soaked (or “sprouted”).
Favorite recipes using nuts and seeds: Chilaquiles with Cilantro Cream, Chocolate Cashew Butter, Creamy Mushroom Lasagna.
![]() Tahini
Tahini
If you’ve ever eaten hummus or baba ganoush, chances are you’ve had tahini. It’s a creamy paste made from sesame seeds that has a consistency similar to almond butter. And just like almond butter, it’s one of the most versatile ingredients in my pantry—I use it all the time in dips, as a base for salad dressings (just add a little lemon juice, salt, and water), and even desserts. The first time you try it, you might be a little surprised by the taste. Even though it looks like almond butter, it’s slightly bitter, but bitter in the best possible way! Its unique flavor and versatility make this ingredient a pantry staple.
Favorite recipes using tahini: White Bean Buffalo Hummus, Daniel Holzman’s Chopped Vegetable Salad, Tahini Ball Balls.
![]() Natural Sweeteners
Natural Sweeteners
These days there is a growing awareness of the dangers of sugar—especially refined sugar. Thanks in part to some large-scale public health campaigns, we know that sugar is contained in just about every processed food and beverage out there—and that Americans are overdosing on it as a result. In fact, the FDA is so concerned about our sugar consumption that shortly before this book went to press, they released new guidelines mandating that added sugars must appear in a separate line on food labels.
Sugar has been linked to a number of health problems, from obesity and diabetes to heart disease and cancer. And while added and refined sugars may be the worst culprits, let’s be clear about one thing: whether natural or refined, sugar is sugar. It’s definitely an ingredient to use in moderation.
But when we do want something sweet, whole, unprocessed, and natural sugars are the best options. The body processes these types of sugar differently than refined sugars, and some natural sugars even offer their own nutritional benefits. In this book, I use dates, raw honey, and maple syrup as sweeteners—I think they’re the easiest to find and most versatile to cook with. Dates magically turn to caramel when blended with a little bit of salt. Maple syrup is a great replacement for refined sugar in baking. Raw honey can transform a boring bowl of oatmeal into a delicious bowl of goodness. When it comes to honey, I always recommend buying raw honey. Raw honey isn’t processed or heated—which means that you’ll still get all the good stuff (the vitamins and antioxidants) that is lost during the heating process. Other choices for natural sweeteners include brown rice syrup, stevia, coconut sugar, and monk fruit sweetener.
All of that said, there are a few recipes in this book that call for dark or dairy-free chocolate—and chocolate typically contains cane sugar. Yes, I know I just said natural sweeteners are best. They are. But remember what I said earlier about not being perfect? Apply that logic here.
When you do buy dark chocolate, aim for 70 percent or higher cacao. Do your best to find varieties that contain only dark chocolate with a touch of sugar, some vanilla, and any additions you love (almonds, peppermint, dried fruit, etc.). And if you can find dark chocolate without sugar, even better!
Favorite recipes using natural sweeteners: Baklava-ish Toast, Kale Avocado Salad, Honey Peppermint Cups.
![]() Beans and Lentils
Beans and Lentils
Beans and lentils are an easy source of protein for so many plant-based meals. From veggie tacos to soups and dips, beans and lentils come in super handy on busy weeknights. Bean purists will tell you to never buy canned beans because they don’t taste as good as beans you’ve soaked and cooked yourself. And it’s true, the homemade versions often do taste better than their canned counterparts. But I see no shame in grabbing a few cans of beans to throw together a chili for your family or a quickie dip for entertaining. Most times you won’t know the difference. In the recipes that follow, you’ll see that I do use canned beans, but you always have an option to substitute with ones you prepare at home (especially if you are one of those aforementioned bean purists).
If you do go the canned route, look for BPA-free cans and check the ingredient list to make sure there are no “flavorings,” soy additives, or sugars. You just want the beans with salt or kombu (kelp) if you like it. Always make sure to drain and rinse canned beans thoroughly under cold water before using.
Personally, I always cook my own lentils, and I do simmer my own black-eyed peas—I swear, they taste so much better than the canned ones. But you do what works for you. I suggest you start your own little bean and lentil test kitchen to decide what you prefer. There are so many options to try. Beans: black, pinto, kidney, fava, great northern, white, lima, black-eyed peas, cannellini, chickpeas (garbanzos), and cranberry. Lentils: black (beluga), green (Puy and French), red, yellow, brown, mung, and split mung (these are both called “beans,” but generally are classified as lentils).
In addition to using straight-up beans and lentils, you can also find some pretty delicious noodles made from them. Mung, black bean, and red lentil pastas are among my favorites and work great with veggie stir-fries or tossed with pesto sauce and veggies.
Favorite recipes using beans and lentils: Vinson Petrillo’s Fresh Chickpea Spread with Crispy Black Olives, Tomato and White Bean Panzanella, Corn Cakes with Black Bean Spread.
![]() Gluten-Free Grains
Gluten-Free Grains
Grains are the perfect way to add heartiness to your meal. If I know I’ve got a busy week ahead, I’ll make a batch or two to have them ready to go—some oats soaked with almond milk for breakfast or a big batch of brown rice that just needs some fresh veggies and a really great sauce. All the grains used in this book are gluten-free, but if you have a sensitivity to gluten or celiac disease, always read the label to ensure they aren’t packaged at the same plant as products containing gluten.
Grains that are gluten-free include rice (brown, black, jasmine, basmati, Arborio), millet, sorghum, oats, teff, and corn. Grains that are not gluten-free but are still whole include spelt, whole wheat, farro, bulgur, and rye.
As with beans and lentils, a lot of manufacturers are making great gluten-free pastas from grains. After trying them all, I’d have to say brown rice pasta is my favorite in terms of tasting the most like the “real thing.” It cooks quickly, doesn’t get mushy, and has a consistency similar to the spaghetti you grew up with. Tinkyáda is my favorite brand and comes in lots of cool shapes and sizes—they even have lasagna noodles.
Just like nuts, grains can be soaked to make them more easily digestible. Some diets suggest restricting grains due to the belief that our bodies are not designed to properly digest them. This might be the case for some people, but see what works for you. If brown rice makes you bloated, try soaking it before giving it up. If it still makes you look like you’re in your second trimester, move on to a different grain (or seed) and find one that your body agrees with.
Favorite recipes using whole grains: Crunchy Chunky Granola, Spicy Broccoli Rice, Pistachio Coconut Squares.
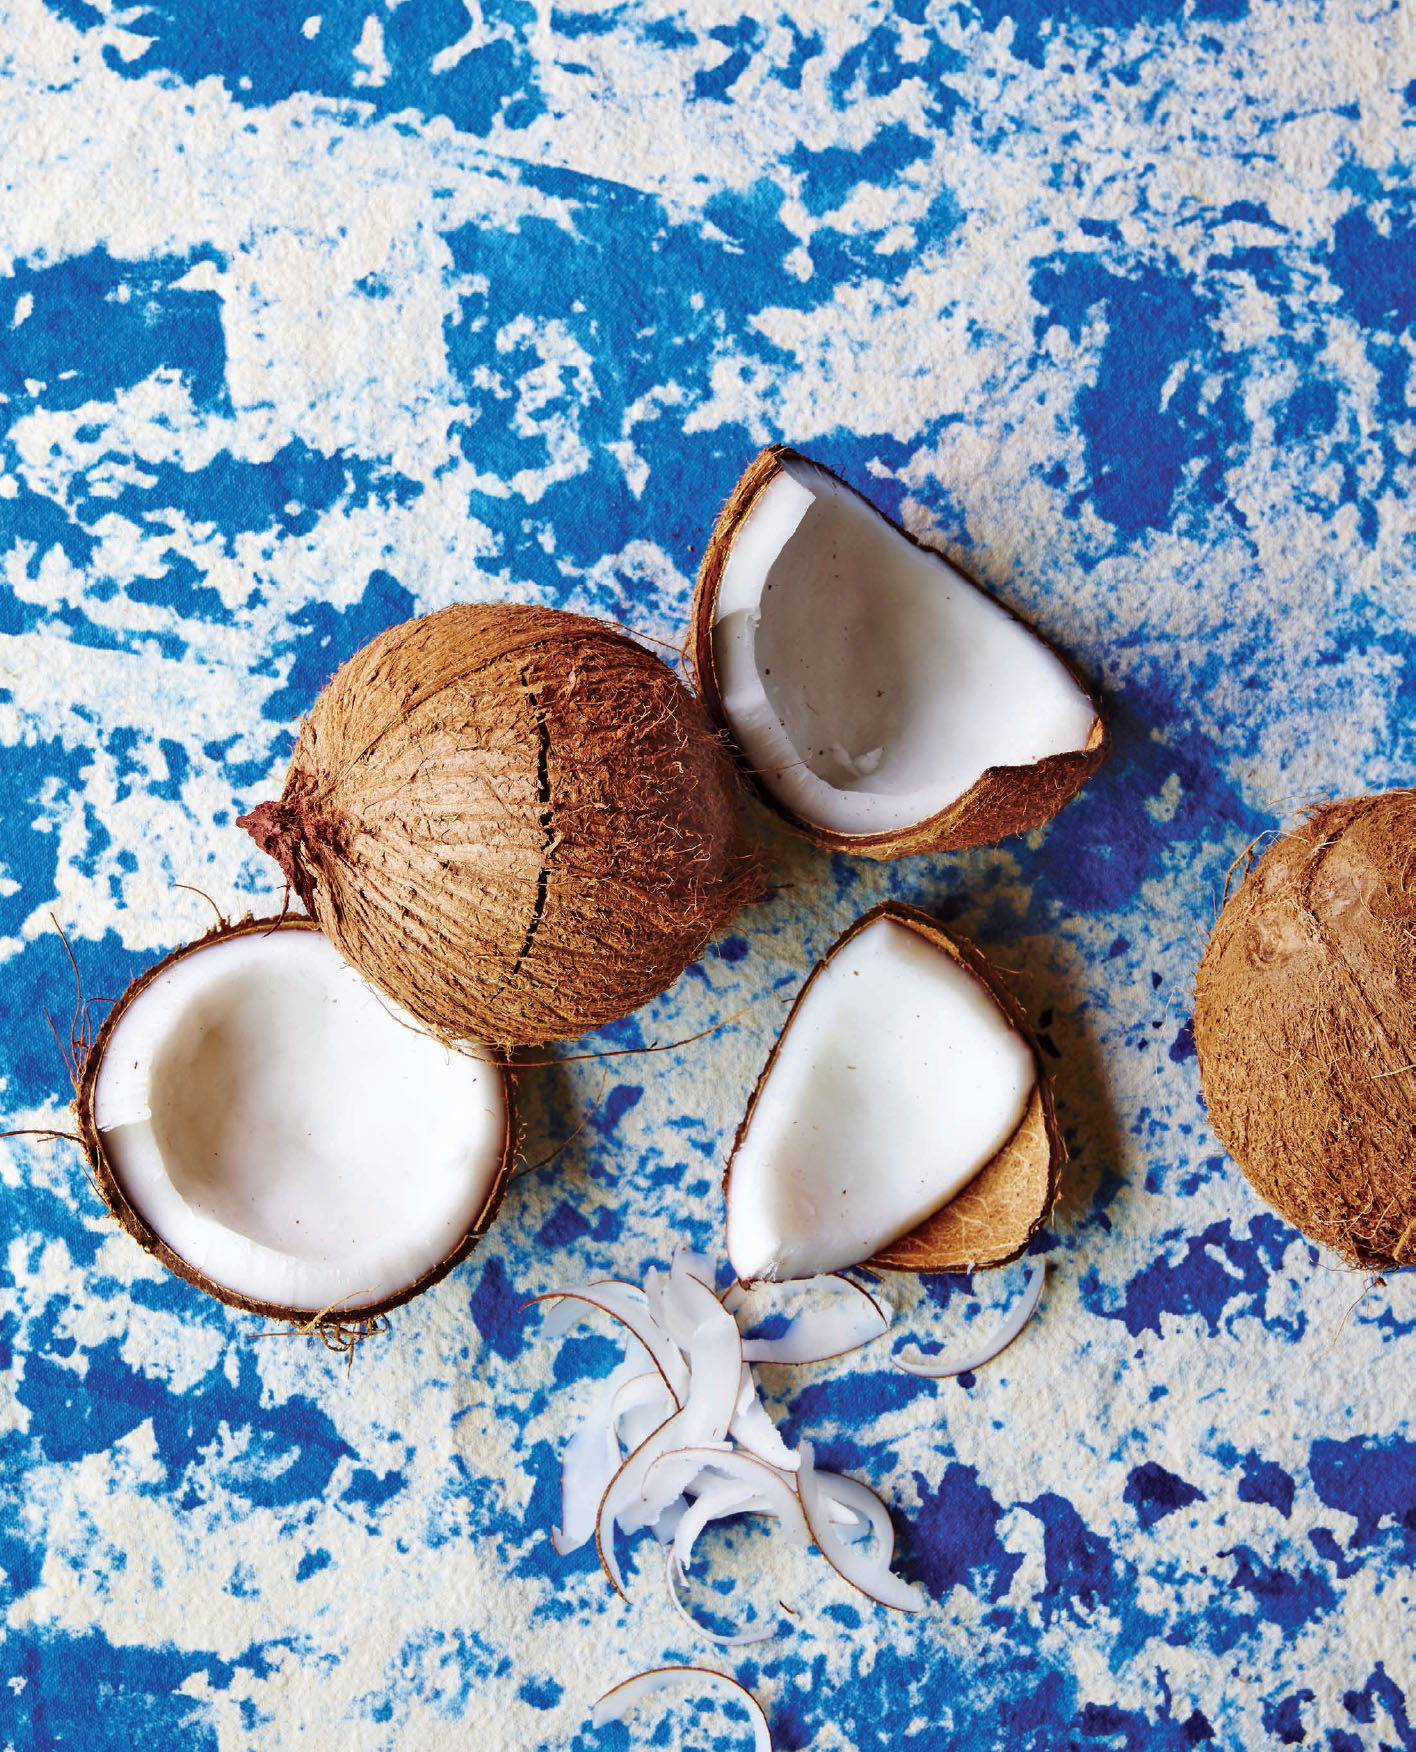
![]() Coconut
Coconut
It’s pretty amazing how one kooky-looking plant can do so much in the kitchen. Inside that hairy little shell are tons of healthy and delicious ingredients.
Coconut milk has become a staple in plant-based cooking, not only because its rich and creamy texture makes it one of the best stand-ins for dairy milk, but also because it contains a nice serving of healthy fats. It can be used in everything from chia pudding to overnight oats to curries to whipped cream. When using it for baking and desserts, canned full fat works best (especially for whipped cream). For curries and savory dishes, you can use light—but I generally stick to full fat for most recipes because it produces a richer result and it’s usually the only fat I’ll be using in the dish.
Coconut water is super hydrating and rich in electrolytes. It’s my go-to for smoothies, refreshing coolers, and making fruity ice pops in the summer. I also have a friend who swears that it’s the perfect hangover cure. Keep that in mind for the next time you overdo it on the tequila.
Unsweetened shredded coconut and coconut flakes are incredible for plant-based baking, desserts, and even breakfast. They add texture to cookies and make a great topping for oat-meal and ice cream.
Coconut oil has become my generation’s duct tape: it can do anything, and you can find a hundred ways to use it. I’m not kidding—I actually just saw an article the other day titled “101 Ways to Use Coconut Oil.” It’s great for roasting and sautéing vegetables or adding to smoothies, and it can be used as a substitute for butter in baking. Outside of the kitchen, it makes a pretty great skin care ingredient, too.
When you buy a jar of coconut oil, the oil will most likely be solid. But for the recipes in this book, you’ll want to use it in its liquid form. Luckily, coconut oil is pretty sensitive to heat and melts quickly. Put a tiny bit in the palm of your hand, and you’ll see what I mean. To turn solid coconut oil into liquid, you can melt the amount you need in a small pan or run it under hot water. In the summer months, you might not even need to melt it at all. Like I said, it’s very sensitive to heat!
Favorite recipes using coconut: French Toast Sandwich with Cinnamon Cardamom Syrup, Creamy Succotash, Julia Turshen’s Strawberry Granita With Coconut Whipped Cream.
![]() Seed and Nut Butters
Seed and Nut Butters
When I have time, I like to make my own nut butters—but let’s face it, a jar of almond butter can save you when all you have in the fridge is some sliced bread or you need to whip up a last-minute dessert to bring to a dinner party. Also a spoonful slathered on a piece of celery or apple always seems to take the edge off pre-dinner hunger.
Most grocery stores offer a pretty great variety of nut and seed butters—almond butter, cashew butter, and hazelnut butter. If you’re allergic to nuts, sunflower seed butter is a great alternative (and is pretty tasty even if you aren’t allergic to nuts). When you’re shopping, stay away from brands that include additives and sugars. Purchase varieties that list nuts and maybe some salt as the only ingredients.
You might have noticed that I didn’t include peanut butter in the list above. No, it’s not because peanuts are actually a legume (little trivia bomb for you). I didn’t include it because, like gluten, peanuts are the subject of heated nutritional debate. The anti-peanut camp says that peanuts contain a naturally occurring fungal toxin that can be carcinogenic and that peanuts contain a high percentage of omega-6 fats, which can cause inflammation. The pro-peanut camp says that as long as the peanut butter is organic and eaten in moderation, it’s perfectly safe and offers a great source of protein. Personally I eat peanut butter from time to time, but 90 percent of the time, I stick with almond, cashew, and hazelnut butter. In most of my recipes, I recommend using one of these nut butters—but if you’ve got some natural peanut butter that will work in a pinch, do you.
Favorite recipes using seeds and nut butters: Chia Fruit Toast, Easy Red Curry Veggie Bowls, Coconut Date Pinwheels.
![]() Veggie Broth
Veggie Broth
Homemade or store-bought, I always recommend keeping broth on hand to add flavor to a variety of dishes or use as a base for soups. You’ll also notice in some recipes that I use veggie broth in place of oil to sauté vegetables. It adds a little extra flavor to your veggies, and I try to use less oil whenever I can.
When buying packaged broth, make sure to read the label and purchase the types without additives like MSG and dyes. And if you’re trying to cut back on sodium, find low-sodium broth.
If you plan on making your own veggie broth, keep a little veggie scraps bag going in your fridge. All those pieces of onions, garlic, mushrooms, and green stems left on your cutting board can be thrown in a pot with water, salt, and a little kombu to make homemade broth. Freeze the broth in baggies or ice cube trays in your freezer for quick use.
Favorite recipes using veggie broth: Spicy Broccoli Rice, Roasted Cauliflower and Fennel Soup, Mashed Potato and Gravy Bowl.
PLUS . . .
These two ingredients were in the running for the Top 10, but for one reason or another got bumped by another ingredient. I wanted to make sure to include them, though, because they’re still an integral part of my pantry, and you’ll be seeing them a lot in the recipes that follow.
![]() Nutritional Yeast
Nutritional Yeast
If you’re new to plant-based cooking, this ingredient is probably going to be the most unusual one in the book. Before I changed my diet, I had never even heard of it. But now it’s always stocked in my pantry.
Nutritional yeast is a deactivated yeast that looks a lot like fish food. It has a deep yellow hue and is sold in large flakes or in a powdered form. Don’t be scared—it really is the best way to add a salty, cheeselike vibe to pastas, soups, and popcorn. And I don’t know about you, but I never want to say goodbye to cheese vibes.
Many nutritional yeast brands fortify their flakes with B12, a critical vitamin for healthy cells and brain function. It’s the one vitamin that you’re not going to be able to get from plants. It can only be found in animal products, so I like to buy the fortified brand to get all the extra B12 I can. If you decide to go mostly or go all in on plant-based eating, your nutritional yeast won’t be enough, and you’ll need to take a B12 supplement. Regardless of your diet, I suggest getting your B12 levels tested next time you see your doctor. Deficiency in B12 can lead to fatigue, moodiness, depression, and other serious issues.
My favorite brand of nutritional yeast is Kal; it’s non-GMO and has the extra bonus shot of B12 added.
Favorite recipes using nutritional yeast: Creamy Grits with Avocado and Hot Sauce, Herb Fries, Roasted Asparagus and Tomato Pasta.
![]() Tamari
Tamari
OK, this might be the other ingredient you aren’t familiar with—but this one is super easy to explain: Tamari is gluten-free soy sauce. Soy sauce has gluten?! Yes, I was surprised, too. But almost all commercial soy sauces contain wheat, and a lot of them also contain caramel coloring and corn syrup.
Tamari can be used exactly the same as you would traditional soy sauce and in new ways that aren’t as traditional. I love using it to add an extra layer of flavor to curry sauces, and when I’m sautéing mushrooms, I always add a splash to kick up the umami factor.
My favorite brand of tamari is San-J. Not only is it delicious, but you can find it at most grocery stores, they make an organic option, and the ingredient list is short and sweet (water, organic soybeans, salt, organic alcohol to preserve freshness).
If you have an allergy to soy or do not include it in your diet, coconut aminos are a great substitute for tamari.
Favorite recipes using tamari: Mexican Fried Rice Nachos, Creamy Butternut Squash and Lentil Tacos, Thai Coconut Soup.
Navigating the Store
Over the years, I’ve helped a lot of friends and family members find their One Part Plant groove. When they tell me they’re ready to eat more plants, I get excited and send them recipes, lend them my favorite cookbooks, share my pantry essentials, and even host little powwows to address all their burning plant-based questions. They leave armed with everything they need know, and they’re excited to get started.
And then they go to the grocery store. Alone.
When they hit the store for the first time, my phone starts buzzing. “Where do you find tahini? I’ve looked everywhere!” “No one at this store has ever heard of tamari!” and “Why are there so many kinds of lentils? That’s a rhetorical question. But really, why are there so many kinds of lentils?”
I’ve been there. I was just as confused about where to find plant-based staples at the beginning of my OPP journey. But I want to make this transition as easy as possible for you, so I’ve compiled a handy little grocery store guide to get you started.
When you simply can’t find an item at your local store, I recommend buying it online. I do that a lot. There are a lot of great retailers that sell plant-based essentials—Vitacost.com, Thrivemarket.com, and Woodlandfoods.com are three of my favorites—and of course Amazon will pretty much always have everything you’re looking for. You can also check out the SHOP section of my site to see my favorite brands and pick up some things there.
Every retailer is a little different in terms of how they stock their aisles, but the following cheat sheet is generally pretty accurate.
Finding Your Pantry Essentials: A Grocery Store Map
![]() Gluten-Free Flours: You can either find them in the baking aisle with the rest of the flours or in a specialty aisle that carries gluten- and dairy-free products. This aisle is most commonly called “alternative,” “natural,” or “special diets.”
Gluten-Free Flours: You can either find them in the baking aisle with the rest of the flours or in a specialty aisle that carries gluten- and dairy-free products. This aisle is most commonly called “alternative,” “natural,” or “special diets.”
![]() Plant-Based Milks: Plant-based milks are usually found in the cereal aisle, unrefrigerated, although I’ve seen them popping up more and more in the dairy case, too. My favorite brand of almond milk is Califia (it’s carrageenan-free) and it can be found next to the dairy milk in most stores.
Plant-Based Milks: Plant-based milks are usually found in the cereal aisle, unrefrigerated, although I’ve seen them popping up more and more in the dairy case, too. My favorite brand of almond milk is Califia (it’s carrageenan-free) and it can be found next to the dairy milk in most stores.
![]() Nuts and Seeds: The bulk aisle is the best place to go for nuts and seeds because you’re able to select exactly what you need, and oftentimes the value is better. Some stores devote a whole section to nuts, usually in the snack aisle. Just be sure to read the labels carefully: you want to buy raw, unsalted nuts. Skip any that contain sweeteners, spices, or additives.
Nuts and Seeds: The bulk aisle is the best place to go for nuts and seeds because you’re able to select exactly what you need, and oftentimes the value is better. Some stores devote a whole section to nuts, usually in the snack aisle. Just be sure to read the labels carefully: you want to buy raw, unsalted nuts. Skip any that contain sweeteners, spices, or additives.
![]() Tahini: Tahini can usually be found in the peanut butter section with the other seed and nut butters. You’ll most likely spot it on the bottom shelf. If it’s not there, look for it in the “international” aisle. If you have access to a Middle Eastern market, you’ll have no problem finding it there. There are also a handful of boutique and small-batch tahini brands—Soom and Seed + Mill are two to check out. Sometimes they are a little pricier than the kind you’ll find at the grocery store, but worth the splurge if you start becoming a tahiniaholic and want to drizzle it on everything.
Tahini: Tahini can usually be found in the peanut butter section with the other seed and nut butters. You’ll most likely spot it on the bottom shelf. If it’s not there, look for it in the “international” aisle. If you have access to a Middle Eastern market, you’ll have no problem finding it there. There are also a handful of boutique and small-batch tahini brands—Soom and Seed + Mill are two to check out. Sometimes they are a little pricier than the kind you’ll find at the grocery store, but worth the splurge if you start becoming a tahiniaholic and want to drizzle it on everything.
![]() Natural Sweeteners: Maple syrup and raw honey are almost always in the baking aisle. Another great place to find them—usually locally sourced versions—is at farmers’ markets. Unlike the grocery store brands, small-batch versions of honey might not be labeled as “raw,” but they usually are—just ask to be sure.
Natural Sweeteners: Maple syrup and raw honey are almost always in the baking aisle. Another great place to find them—usually locally sourced versions—is at farmers’ markets. Unlike the grocery store brands, small-batch versions of honey might not be labeled as “raw,” but they usually are—just ask to be sure.
Dates are tricky to find sometimes. If your store has a bulk foods section, head there first. If there are no bulk bins, you can often find dates in an aisle with other dried fruits and nuts. You might also find them hiding out in the produce section—at my local grocery store, they are sitting in a box above the bananas. I’ve even seen them in the refrigerated section with the cut/prepared fruit.
Buy dates that are fresh, plump, and soft. They should be a little shiny looking.
If you’re not able to find super soft and shiny dates, you can always soak them in hot water before using them in recipes.
![]() Beans and Lentils: Just like nuts, I recommend buying dried beans and lentils by weight in the bulk foods section. If your store doesn’t have a bulk section, you can usually find bags of dried beans and lentils in the rice aisle. If you’re buying canned beans, they’re usually stocked with the canned veggies.
Beans and Lentils: Just like nuts, I recommend buying dried beans and lentils by weight in the bulk foods section. If your store doesn’t have a bulk section, you can usually find bags of dried beans and lentils in the rice aisle. If you’re buying canned beans, they’re usually stocked with the canned veggies.
![]() Gluten-Free Grains: The bulk foods area usually has a wide selection of grains such as quinoa, amaranth, and brown rice. If bulk isn’t an option, you can find a nice variety of packaged grains in the rice aisle.
Gluten-Free Grains: The bulk foods area usually has a wide selection of grains such as quinoa, amaranth, and brown rice. If bulk isn’t an option, you can find a nice variety of packaged grains in the rice aisle.
![]() Coconut: Canned coconut milk is usually located in the “international” or “Asian” section of the store. Occasionally, you may find it in the baking section. Coconut oil is most likely shelved with all the other oils, but it, too, can sometimes be found in the baking section (not to be confused with coconut butter). Coconut flakes/shreds are usually available prepackaged in the baking section, but check out the bulk bins, too—the prices may even be better. Either way, always opt for unsweetened coconut.
Coconut: Canned coconut milk is usually located in the “international” or “Asian” section of the store. Occasionally, you may find it in the baking section. Coconut oil is most likely shelved with all the other oils, but it, too, can sometimes be found in the baking section (not to be confused with coconut butter). Coconut flakes/shreds are usually available prepackaged in the baking section, but check out the bulk bins, too—the prices may even be better. Either way, always opt for unsweetened coconut.
![]() Seed and Nut Butters: These can be found in the peanut butter aisle or sometimes in the “special diets” or “natural foods” aisle. Some grocery stores also have the option to grind your own nut butter, which is a great choice—you know there is nothing in it but the nuts themselves.
Seed and Nut Butters: These can be found in the peanut butter aisle or sometimes in the “special diets” or “natural foods” aisle. Some grocery stores also have the option to grind your own nut butter, which is a great choice—you know there is nothing in it but the nuts themselves.
![]() Veggie Broth: Broth—both in cartons and cans—is usually located in the soup aisle. Look for organic broths and be sure to scan the label for additives like MSG, high-fructose corn syrup, and autolyzed yeast extract.
Veggie Broth: Broth—both in cartons and cans—is usually located in the soup aisle. Look for organic broths and be sure to scan the label for additives like MSG, high-fructose corn syrup, and autolyzed yeast extract.
![]() Nutritional Yeast: You can often find nutritional yeast in the “special diets” or “natural” section or in the vitamin aisle. If you find it in the vitamin section, you might have to commit to a large tub, which might seem a little pricey, but it will last you a very long time. Some grocers may not carry it at all, but you can easily find nutritional yeast at a health food store or online.
Nutritional Yeast: You can often find nutritional yeast in the “special diets” or “natural” section or in the vitamin aisle. If you find it in the vitamin section, you might have to commit to a large tub, which might seem a little pricey, but it will last you a very long time. Some grocers may not carry it at all, but you can easily find nutritional yeast at a health food store or online.
![]() Tamari: Tamari can be found with the other soy sauces in the “international” or “Asian” aisle.
Tamari: Tamari can be found with the other soy sauces in the “international” or “Asian” aisle.
Herbs and Spices: The Other Pantry Staples
![]()
If you’re new to cooking (plant-based or not), salt and pepper might be the only seasonings in your pantry. That’s OK! You have two of the most important ones, and we’ll start building from there. I’m not going to ask you to go out and buy one of those crazy twenty-four-piece spice sets (unless you want to). I just want you to get some basics as you work your way through these recipes—cinnamon, cumin, chili powder, red pepper flakes, thyme, and turmeric are a great place to start. When you’re cooking with plants, herbs and spices really bring everything together.
If you have been cooking for a while, do me a favor—head over to your spice rack and take stock of what you’ve got. If you’re rocking cinnamon that you’ve had since college, it’s time to replace it (unless you graduated a few months ago, in which case, way to go!). Using spices and herbs past their expiration date won’t hurt you, but it also won’t add a lot of flavor to your food. Some spice experts say that you should replace your spices every six months, and others say two years is fine. I fall somewhere right in the middle—I try not to hold on to spices for longer than a year or so. No matter when you decide to replace them, do a quick inventory before your next trip to the grocery store. Check the expiration or the “best by” dates and replace them as needed. You want your spices and herbs to be as potent as possible. Your taste buds will thank you.
Salt to Taste and Some Other Important Notes on Seasoning
My taste buds have changed dramatically since I started eating a plant-based diet. For all you former smokers out there, you know exactly what I’m talking about. When you quit smoking, your once-dulled senses of smell and taste become sharper and more perceptive. Suddenly food has more intense flavor. When I cut out all the processed foods and candy, I had a similar awakening. Everything I ate tasted different. Whole foods (read: vegetables) that I was never excited about were quickly becoming my favorites. They actually tasted good. And processed foods—with tons of sweeteners and salt—suddenly tasted not so good.
In fact, I developed some pretty major salt issues. Before I went plant-based, I couldn’t get enough salt. Now if someone overdoes it just a little, I’m a Salt-Sensitive Sally. It’s a known fact in my house that I’m a serial underseasoner. To my friends and family, there’s never enough salt in the dishes I make, when to me, they taste just right. I’ve learned not to take it personally when someone adds a hearty pinch of salt to something I’ve cooked for them. Everyone’s taste buds are different when it comes to salt.
Because of this, I’ve left the salt quantities open in most of my recipes so that you can salt it up just the way you like it. When it comes to baking, though, I’ve given you exact instructions and wouldn’t suggest deviating from those.
Along the same lines, I’ve also left the measurements for citrus and vinegar open, as everyone’s preferences for acid or sourness differ, too. I suggest starting with a little at a time, tasting, and adding more as you go.
If you’re a new cook, don’t let the lack of specific measurements freak you out. When I first started cooking, I would follow recipes to a T, and lots of times, I just didn’t like the way they turned out. It wasn’t because the recipes were flawed—it was about my palate and what tastes good to me. If you’re going to spend the time to make one of my recipes, I want you to love the results. Add more red pepper flakes if you want some extra heat or add another half of a lemon if you need more acid. Don’t be afraid to experiment in the kitchen. Take liberties with my recipes and figure out what tastes best to you.
What Kind of Salt Should I Use?
![]()
You may notice that any time you see me call for salt in this book, I’m using sea salt (Celtic sea salt is my favorite). I highly recommend investing in a good-quality sea salt and ditching the traditional table salt that most of us grew up with. Why? Well, for starters, it tastes better. It’s richer and it makes dishes more flavorful. Second, it’s the more whole and natural option, and it contains trace minerals that are good for our bodies. Regular table salt is processed and oftentimes contains chemicals or additives that help prevent it from caking. If you’re willing to spend a little more on one pantry staple, I would make salt the one. A good-quality sea salt really will make a difference in your cooking.
Label Reading 101
![]()
I’m a pretty hardcore food label reader these days. But only a few years ago, the concept was foreign to me. I’d never read a single label—with the exception of scanning the calorie and fat grams. There’s no fat in this giant bag of gummy worms? AWESOME. I can eat the whole thing! What I wasn’t seeing was that those gummy worms were full of sugar, artificial coloring, and ingredients that I couldn’t even pronounce. Ingredients that were making me sick.
I don’t want you to become an OCD label reader who’s scared to buy anything that’s not perfect—but I do think it’s really, really important to read the ingredients label on all packaged foods, especially since the words used on the front of a package can often be misleading.
Here’s what to look for:
![]() It’s a good first step to see if the food in question is actually the food it is marketed to be. So many foods on grocery store shelves are imitations of the real thing. For example, let’s look at one of the most popular brands of what we consider “maple syrup.” It’s one that most Americans grew up with and still eat today. It doesn’t even contain any actual maple syrup! Here’s the ingredient list: high-fructose corn syrup, corn syrup, water, salt, cellulose gum, molasses, potassium sorbate (preservative), sodium hexametaphosphate, citric acid, caramel color, natural and artificial flavors. It’s absolutely insane. An ingredient list for maple syrup should consist of two words: maple and syrup.
It’s a good first step to see if the food in question is actually the food it is marketed to be. So many foods on grocery store shelves are imitations of the real thing. For example, let’s look at one of the most popular brands of what we consider “maple syrup.” It’s one that most Americans grew up with and still eat today. It doesn’t even contain any actual maple syrup! Here’s the ingredient list: high-fructose corn syrup, corn syrup, water, salt, cellulose gum, molasses, potassium sorbate (preservative), sodium hexametaphosphate, citric acid, caramel color, natural and artificial flavors. It’s absolutely insane. An ingredient list for maple syrup should consist of two words: maple and syrup.
![]() Ditch the sugar. OK, before you call me out, I know maple syrup is sugar. When I say to ditch sugar, I’m referring to all of the processed sugars that are added to everything from pasta sauces to boxed teas. Once you start looking, you’re going to be shocked by how often sugar turns up as an ingredient in your food. Also be warned that sugar goes by a lot of different names. These are most common: sucrose, high-fructose corn syrup, dextrose, and maltose.
Ditch the sugar. OK, before you call me out, I know maple syrup is sugar. When I say to ditch sugar, I’m referring to all of the processed sugars that are added to everything from pasta sauces to boxed teas. Once you start looking, you’re going to be shocked by how often sugar turns up as an ingredient in your food. Also be warned that sugar goes by a lot of different names. These are most common: sucrose, high-fructose corn syrup, dextrose, and maltose.
![]() Look for real foods with names you actually recognize. Highly processed ingredients and chemicals aren’t real food, and it’s crazy that food companies are passing them off as if they are. They can cause a host of problems for the body, some of which we might not yet be aware of. Outside the US, many of these ingredients are banned, but in the US food manufacturers haven’t stopped using these dangerous ingredients.
Look for real foods with names you actually recognize. Highly processed ingredients and chemicals aren’t real food, and it’s crazy that food companies are passing them off as if they are. They can cause a host of problems for the body, some of which we might not yet be aware of. Outside the US, many of these ingredients are banned, but in the US food manufacturers haven’t stopped using these dangerous ingredients.
Avoid buying any packaged foods that contain the most common culprits: monosodium glutamate (MSG), artificial sweeteners (aspartame, a.k.a. NutriSweet), high-fructose corn syrup, and food dyes (ingredients that start with red, blue, and yellow, and are followed by numbers are not good).
Bottom line: if you’re unsure about an ingredient, look it up. The Environmental Working Group (EWG) has an incredible resource on their website called Food Scores (ewg.org/foodscores) where you can search more than eighty thousand foods and get a safety rating in seconds. It’s an invaluable guide for beginners and even for those who think they know it all.