For the tutorials in this section, you need a Flash animation to practice on. There's one ready and waiting for you on the Missing CD page at www.missingmanuals.com/cds. The file is named 01-1_First_Animation.fla.
Note
In case you're wondering, the number 01 at the beginning stands for Chapter 1, and the -1 indicates it's the first exercise in the chapter. Other Missing CD files for this book are named the same way.
Download the file 01-1_First_Animation.fla and save it on your computer. You may want to create a FlashMM folder in your My Documents or Documents folder to hold your Missing Manual exercises. Launch Flash, and then choose File→Open. When the Open dialog box appears, navigate to the file you just downloaded, and then click Open. When you open a document, the Welcome screen disappears. Flash shows you the animation on the stage, surrounded by the usual timeline, toolbars, and panels. If you're using the Essentials workspace, it should look like Figure 1-12.
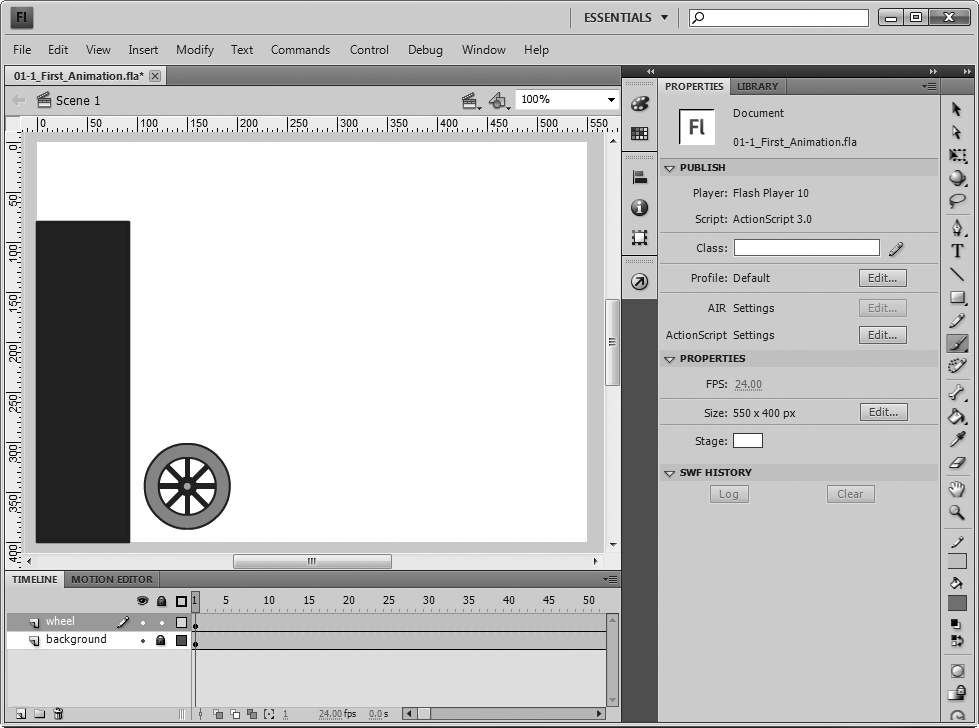
Figure 1-12. After you open the exercise in Flash, your screen should look like this. At the bottom, the timeline shows two layers—one named background and the other wheel. The stage shows (surprise, surprise) a background and a wheel. To the right, the Properties panel displays the properties for the document.
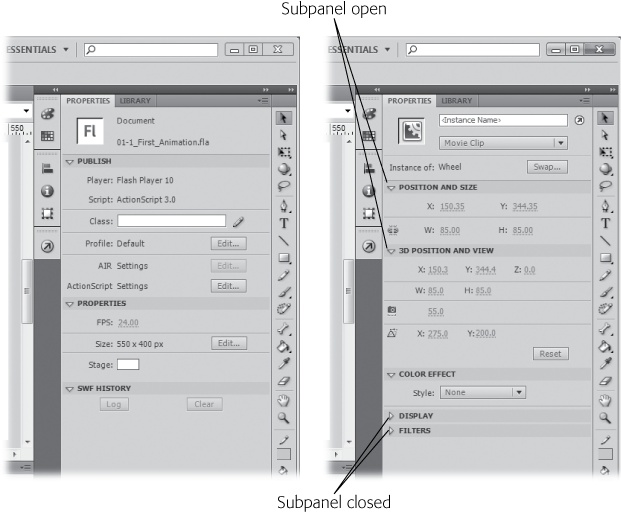
The Properties panel appears docked to the right side of the stage when you open a new document. As shown in Figure 1-13, it shows the Property settings for objects. Initially, it shows the properties for the Flash document itself. Click another object, such as the wheel, and you see its properties. Why are properties so important? They give you an extremely accurate description of objects. If you need to precisely define a color or the dimensions of an object, the Properties panel is the tool to use. It not only reports the details, but it also gives you the tools to make changes, as shown in this little exercise:
At the top of the Tools panel, click the Selection tool (solid arrow).
As an alternative, press V, the keyboard shortcut for the Selection tool.
Click the white part of the stage.
The Properties panel shows the properties for your Flash document. At the top, you see the word Document and underneath, you see the filename.
Click the triangle button to open the Properties subpanel.
The button works like a toggle to open and close the subpanel. The subpanel displays three settings: FPS (frames per second), Size, and Stage.
Click the white rectangle next to Stage.
A panel opens with color swatches.
Click a color swatch—any color will do.
The background color of the stage changes to the color you chose.
Click the wheel.
Information about the wheel fills the Properties panel. The wheel is a special type of object called a Movie Clip symbol. You'll learn much more about Movie Clips and other reusable symbols in Chapter 7.
Note
You may notice that you can't select anything else in this document. That's because they other objects are in the background layer, which is locked. (For more details on locking layers, see Locking and Unlocking Layers.)
In Flash, the size of your stage is the actual finished size of your animation, so setting its exact dimensions is one of the first things you do when you create an animation, as you'll see in the next chapter. But you can resize the stage at any time.
Here's how to change the size of your stage:
With the Selection tool, click on a blank area of the stage (to make sure nothing on the stage is selected).
Alternatively, you can click the Selection tool and then choose Edit→Deselect All.
In the Properties panel, open the Properties subpanel, and then click the Edit button.
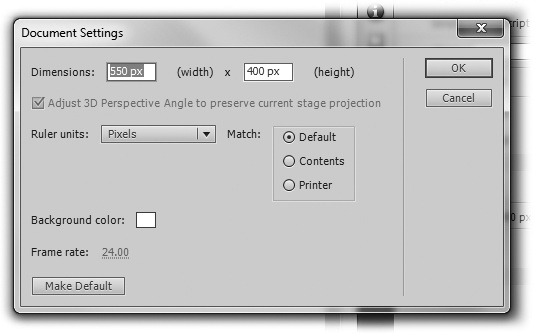
The Document Settings window appears, as shown in Figure 1-14. At the top of the window are boxes labeled Dimensions. That's where you're going to work your magic.
Figure 1-14. The Document Settings dialog box puts several related settings in one place. At the top are the document's dimensions. In the lower-left corner are settings for the stage's background color and the frame rate. Click "Ruler units" to choose among Inches, Points, Centimeters, Millimeters, and Pixels.
Click in the width box (which currently reads "550 px"), and then type "600".
You can change both the width and the height. The changes won't take place until you click OK. So if you have second thoughts and don't want to make any changes, then just click Cancel.
Tip
If you want to change the stage back to its original dimensions after you've clicked OK, you can do that by choosing Edit→Undo or pressing Ctrl+Z (⌘-Z on a Mac). Undo works like it does in most programs, undoing your last action, and you can press it multiple times to work your way back through your recent actions.
Click OK when you're done.
The stage resizes according to your instructions.
When your Flash project gets big or complicated, you may want to focus on just a portion of the stage. If you've used other graphics programs—from Windows Paint to iPhoto or Photoshop—there's not much mystery to the process. In the Tools panel, click the Zoom tool, which looks like a magnifying glass (Figure 1-15). Initially, the Zoom tool shows a + sign, meaning it's all set to zoom in. Click any spot you want to zoom in on, and you get a closer view. As an alternative, you can click and drag over an area to zoom in with more precision. As you drag, a rectangle appears to mark the area of interest.
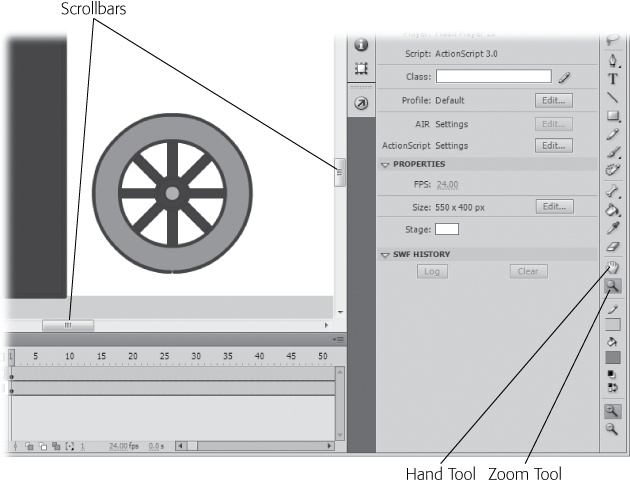
Figure 1-15. Choose the Zoom tool and then click on the stage to zoom in on your Flash document. Hold the Alt (Option) key down to zoom out. Once you're zoomed in, you can move around using either the scrollbars or the Hand tool (H).
Using the Zoom tool, you can get so close that you see individual pixels in your artwork. Very handy for some operations. Once you're zoomed in, you can use the scroll bars at the right and bottom of the stage to reposition the stage in the viewing area. Even easier, choose the Hand tool (H) and then click and drag the stage within the viewing area.
Want to zoom out? Hold down the Alt (Option) key as you use the Zoom tool. Each time you click, you see more and more of the stage. Directly above the stage is the Edit bar. (If you don't see it, then select Window→Toolbars→Edit Bar.) A menu on the Edit bar sets the Magnification or Zoom property as a percentage, as shown in Figure 1-16.

If you've followed along in the exercises up to this point, you deserve a taste of the Flash magic to come. Enough studying panels and tools—Flash is an animation program. It's time to make something move, or more precisely, to make something bounce. With the help of a little feature called Motion Presets, it's easier than you think:
In the Magnification menu, choose Fit in Window.
This gives you a view of the entire stage.
With the Selection tool (V), drag the wheel to the top of the stage.
All the parts of the wheel (tire, spokes, hub) move as a single unit because they're grouped within a Flash symbol, called a Movie Clip.
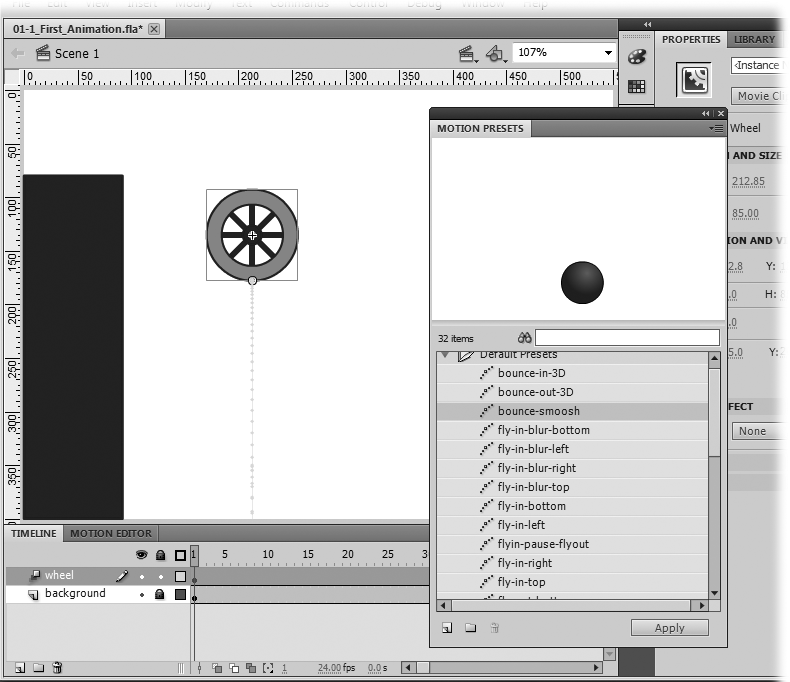
A floating panel appears, as shown in Figure 1-17. Motion Presets are covered in detail on Applying Motion Presets, but for this exercise, you just need a couple of basic steps.
Click the triangle next to Default Presets.
The Default Presets folder opens, showing many predesigned motions.
Click the words "bounce-smoosh".
At the top of the panel, the preview window gives you an idea how the bounce-smoosh preset works.
Make sure the wheel is selected on the stage and that bounce-smoosh is selected in the Motion Presets panel, and then click the Apply button.
A green line appears hanging from the bottom of the wheel. This line is called the motion path, and it shows you how the wheel will move over the course of the animation. In the timeline, the wheel layer turns to blue to indicate that it's now a motion tween.
Close the Motion Presets panel.
That's all it takes to animate the wheel, so you might as well close the Motion Presets window. You can always bring it back later if you want to try out some of the other presets on the wheel.
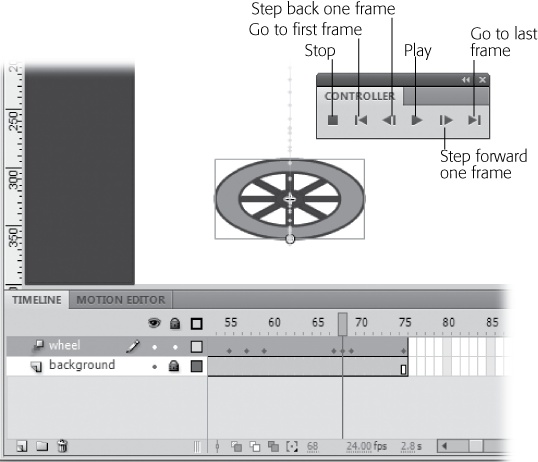
Naturally, after you've animated an object in Flash, you want to see the results. You'll be checking your work frequently, so Adobe makes it easy to play an animation. Just press Enter (Return), and your animation bounces and smooshes as advertised. In the timeline, notice how the playhead moves along frame by frame as your animation plays. You can see your animation at all the different stages by dragging the playhead up and down the timeline—a process sometimes called scrubbing.
The Controller toolbar mentioned earlier in this chapter is a tool devoted to animation playback. Choose Window→Toolbars→Controller, and a small toolbar appears with standard DVD-like controls (Figure 1-18).
Saving your work frequently is important in any program, and Flash is no exception. You don't want to have to go back and recreate that perfect animated sequence because the power went out. The minute you finish a sizable chunk of work, save your Flash file by pressing Ctrl+S (⌘-S). The Save command also appears on the menu bar: File→Save. Both maneuvers save the animation with the current name. So, if after following the exercises in this chapter, you use the Save command, you end up with a single Flash document using the original filename: 01-1_First_Animation.fla.
If you want to save the file under a different name, use Save As or Ctrl+Shift+S (Shift-⌘-S). A standard window opens where you can choose a folder and give your document a name. When you use Save As, you end up with two documents, the original and one saved with the new name. The newly named document is the one that remains open in the Flash workspace.
If you close a document (File→Close) after you've made changes, Flash automatically asks if you want to save it. You're given three options. Choose Save to save your work and close the document. Choose Don't Save to close the document without saving your work. Choose Cancel if you don't want to save and you don't want to close the document.