While symbols let you reuse images and series of frames, templates let you reuse entire Flash documents. In this section, you see how to use Flash's prebuilt templates and how to create your own. In Flash CS5, templates are helpful in several ways:
Use Adobe's predesigned templates as a project starting point. For example. the Advertising templates start you off with the stage set to web advertising standards like 120 x 600 Skyscraper or 234 x 60 Half Banner. Among the Media Playback templates, you'll find templates to create photo albums.
Use Adobe's predesigned templates as learning examples. The Animation and Sample Files templates show how to use advanced techniques such as tweens, masks, and easing. These are working examples, which you can learn from by experimenting and analyzing them (as of this writing, these templates contain no written instructions). Still, if you want to learn how to create random effects with ActionScript, you can study the code in the Scripted Rain or Scripted Snow templates.
Create your own templates to save time and ensure consistency. Suppose you create marketing animations for display on your corporate website. You always use your company's logo and copyright notice, the same stage size and color palette, a copyright notice, the same sound clips of your CEO speaking, and the same intro and credit scenes. By creating a template with these elements, you can save yourself a lot of time, and you ensure consistency among your animations (highly important in certain corporate circles).
Flash CS5 comes with a bunch of templates all ready for you to customize. You see them on the welcome screen (Figure 7-28) when you start Flash (or choose File→New and then click the Templates tab). While they're obviously not specific to your particular company or project, they can save you time on a lot of basic animations, including banner ads, slideshows, and presentations. They're also great examples for learning new Flash skills. Here's a quick rundown of the major template categories.

Figure 7-28. When you first start Flash, the major template categories are displayed on the welcome screen. If you don't see the welcome screen when you start Flash, you can always open a template using the File→New command and then clicking the Templates tab.
Advertising templates are sized according to web advertising standards. Other than setting the stage to a specific size, they don't provide that much help.
Animation templates are more helpful both as a starting point and as learning examples. You'll find working buttons and examples of graphic masks—a method where part of an image that's concealed is gradually revealed. There examples showing use an ease—that is, how to create an effect that starts off at one speed and then increases or decreases. The Animation templates also include several examples that include random movement and timing.
Banners holds templates similar to the ones in the Advertising group. There are fewer examples, but they include some ActionScript programming. For example, the 160 x 600 Simple Button AS3 template includes code to link to a web page.
Media Playback templates come in two flavors—photo album templates (always popular) and TV title-safe templates. The TV templates give you a presized stage, with rectangles marking the safe areas for titles and action. If your work goes outside the safe area, some TVs may not display all your beautiful animation.
Presentations are predesigned to help you create PowerPoint-style presentations in Flash.
Sample Files are a grab bag of templates that are great learning tools. You'll find examples that use Flash's IK Bone tool (Figure 7-29).

Figure 7-29. Templates in the Sample File group can help you master specific tools and techniques. The IK Stick Man Sample shown here shows how to use Flash's Bone tool (page 318).
Note
Flash's templates are useful—if you can figure out what they're supposed to do and how to customize them. You're at the mercy of the people who created the templates. If you're lucky, they provided a helpful name and description that appears in the dialog box where you choose a template. If you're very, very lucky, they provided instructions, comments, and notes in the template itself.
Starting a document from a template is similar to opening an existing document. There's one big difference, though. When you use a template to create a new document, the original template remains untouched. It's as if you opened an existing document and immediately used Save As to save it under a new name. Here are the steps to use one of the prebuilt templates that come with Flash:
Select File→New.
The New Document window appears.
In the New Document window, click the Templates tab.
The New from Template window opens (Figure 7-30).
In the Category box, select Animation.
Several animation templates appear selected in the Templates box.
At the top of the list, click Animated Button Highlight.
The Preview window shows the stage for the selected template. Sometimes you won't see anything but the shape of the stage. For the Animated Button Highlight, you see the button. The description gives you some hints about the template and what it is designed to do.
Click OK.
Flash opens the template, and you're ready to roll. Several of the prebuilt templates have instructions, and so does this one. They're in the top layer of text on the stage. After you've read the instructions, you can delete or hide the layer. These instructions explain how to change the button's appearance and behavior.
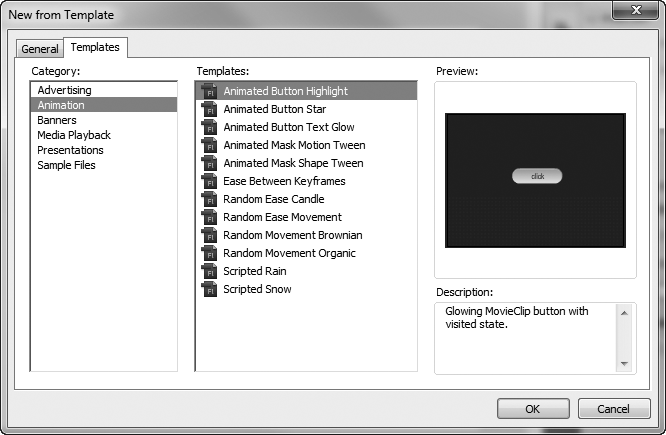
Figure 7-30. Flash offers a ton of templates you can use to jump-start the animation process. They don't all come with descriptions or instructions, but you can find hints within the template file. This section shows you how to customize the Photo Slideshow template to create a spiffy slideshow in just a couple of minutes.
With many templates, the best way to start is with a test drive. Watch the animation, then examine its timeline, symbols, and any ActionScript code that makes it work. In the Animated Button Highlight template, press Ctrl+Enter (⌘-Return) to see how the animation works in the Flash Player test window. It's pretty basic: There's one big button on the center of the stage labeled "click." When you mouse over the button, its appearance subtly changes—it starts to blink. Click the button, and its appearance changes again—it stops blinking and has a pressed-down appearance. The Output panel down near the timeline reads, "Button clicked."
Close the Flash Player window and go back to the stage. Click the Timeline tab, and you can start to explore the mysteries of this template. For example, select the button on the stage, and then check out the Properties. You see the button is a movie clip symbol rather than a button symbol. Double-click the button on the stage, and it opens so you can see the timeline for the symbol, as shown in Figure 7-31. This particular template uses some Flash tools that you'll learn about later in this book: ActionScript (Customizing the Video Playback Component) and timeline labels (Working with Labeled Frames). But that's one of the cool things about templates—you don't have to know exactly how they work to use them. In many cases, you can make simple modifications without getting knee-deep in the mechanics.
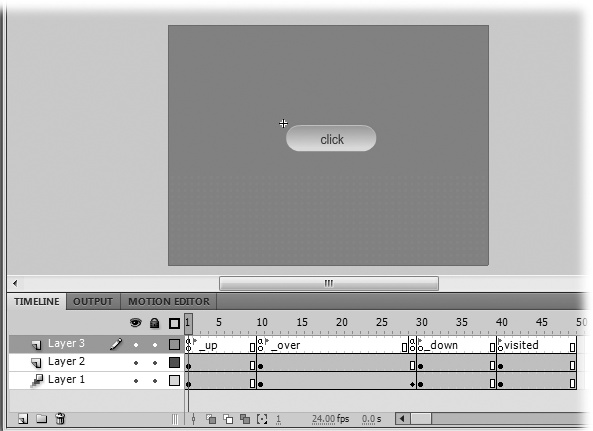
Figure 7-31. Open the button symbol in the Animated Button Highlight template, and you see why the button behaves the way it does. Layer 3 contains ActionScript code and timeline labels. Layer 2 holds the text that appears on the button. Layer 1 holds the button shape with the color changes that display the highlights.
The Simple Photo Album template (Figure 7-32) is a perfect example of a template you can use without completely understanding all the ActionScript code and other techniques that make it work. You can even customize it, which this section shows you how to do.
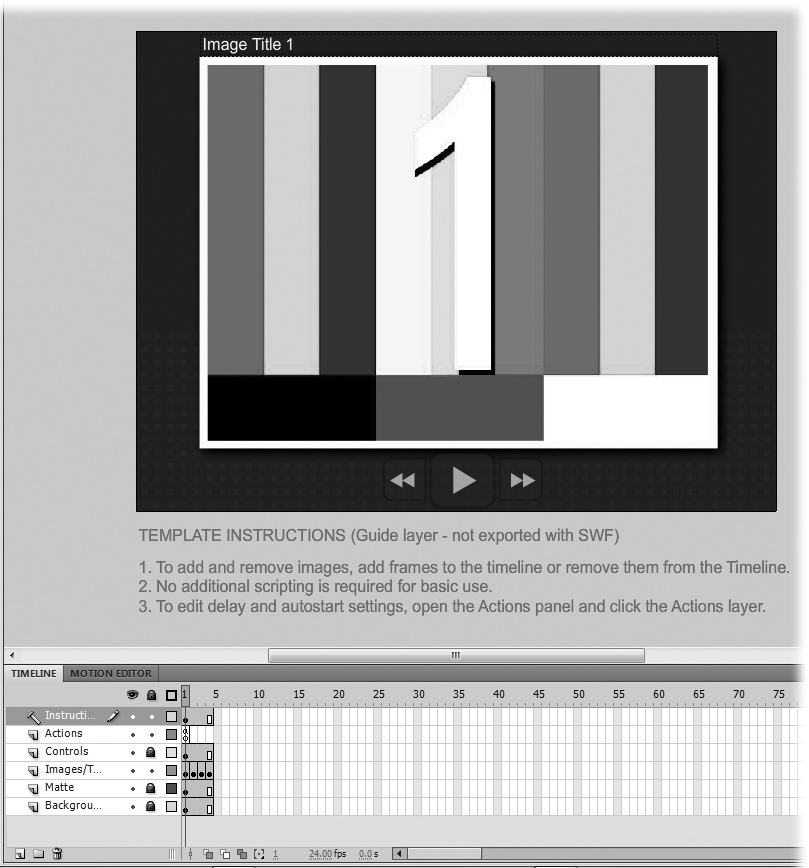
Figure 7-32. The Simple Photo template displays photos one by one. Your audience can move through the photo collection using the Play/Pause and the Back and Forward controls. It's a perfect example of a template that can be used for many different projects.
Here are the steps for customizing the template with your own photos:
Choose File→New→Templates and then, under Category, choose Media Playback. Under Templates, choose Simple Photo Album, and click OK.
The template opens, showing text, buttons, and an image. The brief instructions for using the template appear in red below the stage.
Press Ctrl+Enter (⌘-Return) to test the animation.
Flash Player shows an image that looks like video color bars with the big number 1. The text above the image says "Image Title 1." Three familiar-looking buttons control the animation. The center button is a Play/Pause button, and the other buttons move the album forward or backward one image.
Close the Flash Player window.
When Flash Player closes, you're back in Flash Professional.
In the timeline, click the Show/Hide button for the instructions.
A red X appears when the instructions are hidden.
Click the Show/Hide button for the Controls layer.
A red X appears when the three control buttons are hidden. When you're investigating a new template, you can learn what's on each layer by toggling the Show/Hide button for each layer. In this case, you learn that the controls are on one layer and that the images and text are on the Images/Titles layer. The Matte layer is a rectangle that's partially hidden by the image. When the image is visible, it looks like a border around the image. The background creates the dark-gray stage color.
Drag the playhead to Frames 2, 3, and 4.
Each frame on the timeline corresponds with one of the images. That means you can swap your own images for the numbered color bar pics.
Move the playhead to Frame 1, and then click the color bar image on the stage.
When the image is selected, the Properties panel shows that it's a bitmap, and it's an instance of image1.jpg.
Examine the Position and Size properties.
Adobe may change the templates from time to time, but the position is probably something like X: 70 and Y: 35. Those settings indicate the position of the upper-left corner. The size properties are probably about: W: 500 and H: 376. If you want to add your own pics, they should be about the same size or at least the same proportions: 500 x 376 pixels.
Prepare your own images for a new album.
You can resize photos or images within Flash, but you'll probably have best results if you crop your images before you bring them into Flash using a program like Photoshop, The GIMP, or iPhoto.
Choose File→Import→Import to Library and then select your photos and click Open.
Shift-click or Ctrl-click to select more than one photo for importing. After you click Open, the Import to Library window closes, and your photos are added to the Library.
In the Library, select your photos and drag them to the Sample Images folder.
Click to open the Sample Images folder, and you can see the individual color bar photos. You might as well put your own pics in there, too, as shown in Figure 7-33.
Select the instance of image1.jpg on the stage.
Make sure the playhead is on Frame 1 in the timeline and the Properties panel says "Instance of: image1.jpg" as shown in Figure 7-34.
In the Properties panel, click the Swap button.
The Swap Bitmap window opens.
Open the Sample Images folder and select one of your new images and then click OK.
Your image appears on the stage. If it doesn't look exactly right, you may need to tweak the size or position settings.
Set the size and position to match the settings you noted in step 8.
This example had a position of X: 70 and Y: 35 and a size of W: 500 and H: 376.
Repeat the swapping process for each photo you want to add.
Each frame should display one of your photos.
For each frame, double-click the top title and type your own title for the image.
You can double-click with the Selection tool (V) to open the text for editing.
Press Ctrl+Enter (⌘-Return) to test the animation.
Your customized animation plays, showing your own photos and text.

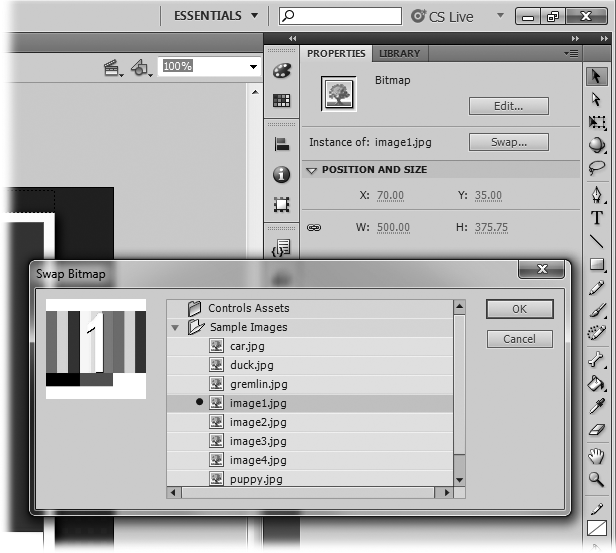
Figure 7-34. Flash makes it easy to replace one Library symbol for another. Select the symbol on the stage you want to replace and then, in the Properties panel, click the Swap button. A new window appears, like the Swap Bitmap window shown here. Choose your replacement symbol from the list.
The preceding steps work great if you want to create a photo album with exactly the same number of pics as the template. Suppose you want to add one more image to the album. You can do that easily and without digging into the ActionScript code that makes the album work. All you have to do is extend the timeline in a few places.
The top two layers in the timeline are named Instructions and Actions. You can delete the Instructions layer once you're done reading it. The Actions layer holds the ActionScript code for the album. You can learn more about writing your own code on Customizing the Video Playback Component, but for now, you can leave the Actions layer the way it is. The next layer moving down is the Controls layer. You want the Play/Pause and Forward and Back controls to appear with every photo, so you need to extend the Controls layer. Select Frame 5 and then press F5 to insert a frame (Inserting and Deleting Keyframes and Frames). Do the same for the Matte layer and the Background layer. You need a new keyframe in the Images/Titles layer because you want both to change, so press F6. The newly created keyframe holds that last image and title in the album. All you need to do now is swap them for the new photo. You can repeat this process to add as many photos as you want to the album (Figure 7-35).

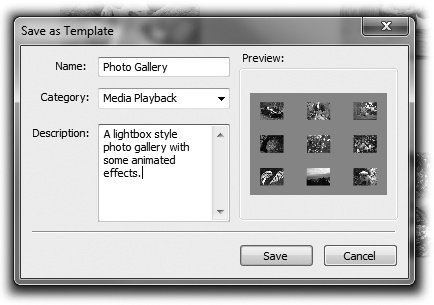
Once you start cooking in Flash, you'll have a bunch of animations that you want to turn into templates. As they say, why reinvent the wheel? Templates are great timesavers, and it's easy to create your own. For now, you may want to experiment with a file from the Missing CD (www.missingmanuals.com/cds), such as 07-5_Photo_Gallery.fla. This example, shown in Figure 7-36, is a lightbox-style photo gallery. Click a thumbnail image, and it flips around a bit and then fills the stage. Another click, and the photo shrinks back to a thumbnail. The gallery holds nine photos total. If you save the photo gallery as a template, you can open it and swap the sample photos with your own masterpieces.
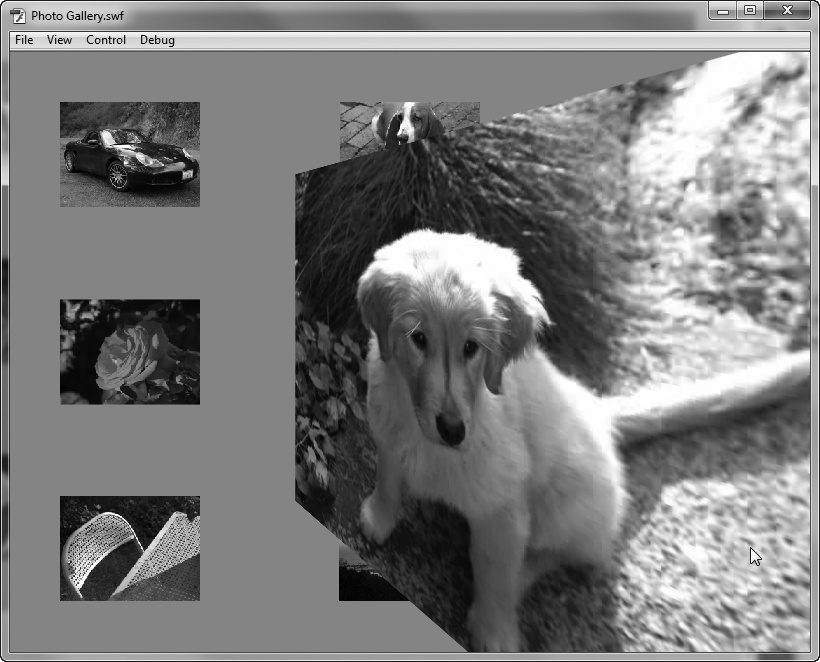
Figure 7-36. The Photo Gallery template is another predesigned Flash document that you can download from the Missing CD. Follow the steps in this section to turn it into a reusable template. Then you can swap the gallery photos with your own.
First, open the standard .fla file. It's all ready to go, and it even has some instructions in the top layer that appear above the stage. If you want to see the photo gallery in action, press Ctrl+Enter (⌘-Return).
To save the Flash document as a template, choose File→Save As Template. A dialog box appears with a warning that explains that the "SWF history" will be cleared when the file is saved as a template. Go ahead and click the Save As Template button. The next thing you see is the Save as Template box shown in Figure 7-37, where there's room for a Name, Category, and Description. The Preview window shows the stage for the template. Fill in the details you want, and then click Save. Flash saves your file as a template. The next time you choose File→New and click the Templates tab, you'll see your saved template along with all the others.