
The seasons are what a symphony ought to be: four perfect movements in harmony with each other.
—ARTHUR RUBINSTEIN
Nature Observation and Collection Walk
Nature’s Colors Scavenger Hunt
Seasonal or Holiday Pass-the-Drawing Game
Simon Says! Drawing for Every Season
Double-Doodle through the Seasons
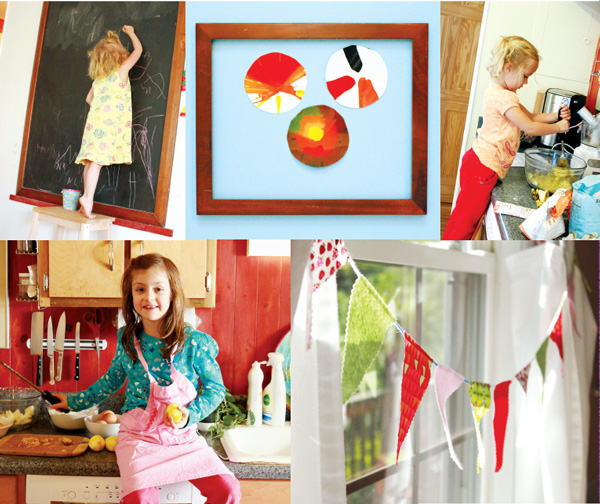
NATURE’S SEASONAL CYCLES continually surprise and inspire us all, young and old, but they are all the more exhilarating when witnessed with and through the eyes of a child. Seasonal changes are ideal for introducing children to visual arts and natural science, both of which begin with observation. As spring approaches, we delight in the unfurling of tiny leaves and fragrant blossoms. In summer a frenzied flora and fauna work hard, both competitively and harmoniously, to live out the best of the warm days and complete their life cycles. With autumn, the world experiences a beautiful death—a decay made so lovely that we can’t help but fall for it anew each year. Winter returns with chilly dormancy, balanced by a warm indoor flurry of crafting, baking, holidays, and celebrations.
In my home we celebrate the cycles of the year by surrounding ourselves with the colors of the seasons, the flavors we mix up in the kitchen, beautiful seasonal picture books that capture the imagination and complement the mood, and the crafts we create, rotating and recycling as the seasons switch gears. Some crafts and activities are so exclusive or perfectly suited to the season that we celebrate them solely at that time of the year. Pumpkins. Candy canes. Easter eggs. Others are flexible favorites that can be enjoyed anytime, modified for each season as appropriate. Think playdough, scented and colored to match the season; suncatchers using natural materials; and drawing activities where any theme is fair game.
This is a chapter of just such flexible favorites that we find ourselves turning to again and again and simply adapting to the season at hand.
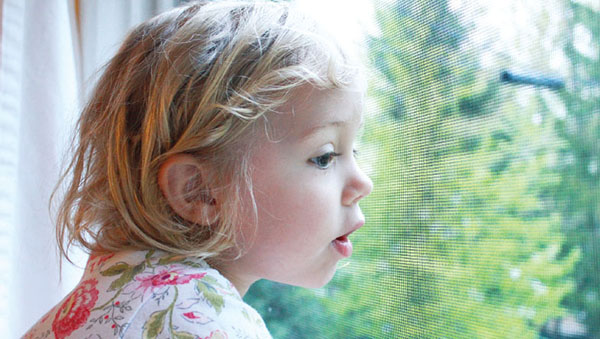
Observing and learning about the natural world as it morphs through the year form the foundation for our understanding of the cycle of the seasons. Young or old, when we take the time and let ourselves truly see—and young children, with their natural curiosity and lack of filters, are great companions for this endeavor—we will find miracles, surprises, and astounding beauty in the smallest nooks and crannies as well as in the grandest of vistas. Inspired by the ever-changing, ever-cycling natural world, my family and I take seasonal nature walks or scavenger hunts and later incorporate the treasures we find into our creative activities, or we display them on our nature table.
NATURE OBSERVATION AND COLLECTION WALK
Take nature walks year-round to observe the changes around you and to collect tokens of the season for your nature table (see page 11) or for arts and crafts projects.
MATERIALS
Big pockets and a basket or bag for holding the nature treasures you find
Camera or sketchbook and pencil for capturing images and ideas (optional)
INSTRUCTIONS
1. Take your nature walk close to home (backyard or neighborhood) or farther afield (take a drive to the countryside or go for a hike in the woods).
2. Explore and observe while you walk. Slow down and really look. See if you can spot the mushrooms half hidden among the leaves, the little grasshopper or snail, the shy birds hiding in the brush.
3. Collect treasures for your nature table or crafting, including leaves, flowers, rocks, acorns, shells, pinecones, seedpods, and more. (Make sure it’s okay to collect where you are; it might not be permitted at an arboretum, for example.)
Growing up in rural Oregon with a naturalist for a mother, my siblings and I were introduced early to the wonders of wildlife of all kinds. Mom went into raptures over pileated woodpecker sightings, I brought a black widow spider for show-and-tell as a kindergartener (the teacher was not pleased), my sister was always the first to see the elusive deer at dawn and dusk, and my brother kept a baby possum on his shoulder. While you shouldn’t feed or adopt wild animals, for many reasons (a memo my brother didn’t get when choosing to care for the orphaned possum), observing insects, birds, and mammals is rewarding and educational.
BIRDS
Birds are wonderfully rewarding to observe and easy to attract around your house with feeders, birdbaths, birdhouses, and native plants. You can attach special feeders to your window with suction cups or install them in other ways within easy view of some of your main windows. (We especially love being able to watch the birds at our thistle and hummingbird feeders from our dining table.)
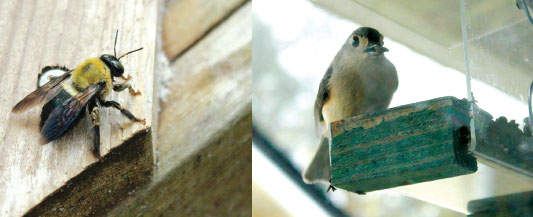
In the spring, you can encourage nesting by putting out cotton batting, string, and other materials they can use in building their nests.
Keep a bird guide handy and look up the birds you spot. We like The Sibley Guide to Birds by David Allen Sibley, but there are also many other well-respected bird guides to choose from. You can also learn more about birds by reading books such as An Egg Is Quiet by Diana Hutts Aston and Crinkleroot’s Guide to Knowing the Birds by Jim Arnosky.
Start a feather collection. My older daughter has a box full of feathers—some local, some sent to her by Grandma, three thousand miles away.
Providing food and cover in the form of native plants is an especially helpful and effective way to attract birds. Unlike modern hybrids, native plants have been around for thousands of years and therefore attract local populations of birds, insects, and other wildlife. Some animals depend on them, and because they are suited to your locale, they often require little care. You can get native plant suggestions from botanical gardens, arboretums, local birder groups, and local chapters of the Native Plant Society.
INSECTS AND OTHER INVERTEBRATES
Keep a butterfly and bug watch to see how many different kinds live in your yard or neighborhood.
See how close you can get (be quiet and use slow movements) to a butterfly, beetle, spider, or praying mantis and how much detail you can observe. Can you draw it in a nature journal? Or look it up in an insect field guide?
Use a magnifying glass for roly-polies (pill bugs), worms, caterpillars, and others that don’t move quickly.
If you catch a butterfly or a firefly and put it in a jar for close observation, make sure to add airholes at the top and to release it within an hour.
The dead, brown flower stalks in your garden can provide bug homes in the cold months. If you dislike leaving the unsightly stalks over winter, you can tie neat bundles of them with jute twine and stand them up at the back of your garden: insect apartment houses.
MAMMALS AND TRACKS
Depending on where you live, you may regularly see rabbits, raccoons, beavers, possums, groundhogs, deer, elk, and even bear. Or you may see them only when you visit your local nature center or zoo. Either way, make a point to learn more about the mammals around you through observation and reading. Are the animals nocturnal or diurnal? What kinds of food do they prefer? What are their habitats? Do they hibernate during the winter? What are their seasonal habits?
Subscribe to a wildlife publication aimed at children, such as National Geographic (Kids or Little Kids, depending on your child’s age), Ranger Rick and Ranger Rick Jr., Click, and Zoobooks.
You can learn a lot about animals from their tracks. On a camping trip, take a slow tour around your tent in the morning, with an eye for tracks made during the night. How close did an animal get? Do you know (can you guess?) what kind of animal it was? Was it alone or not? To learn more about animal tracks, read Tracks, Scats, and Signs by Leslie Dendy or Wild Tracks! A Guide to Nature’s Footprints by Jim Arnosky.
SPRING
Observe: birds building nests and carrying materials back and forth in their beaks, ducklings following closely behind their mother, fuzzy chicks cheeping, knock-kneed foals, and trees changing daily—flower and leaf buds bursting open and growing larger by the day, colors deepening as the season progresses
Listen: birdsong heralding the return of warm weather, rain falling (how does it sound on the roof? on the grass? in the leafy tree canopy? on the car? on the umbrella?)
Smell: the earth after a rain, the heady fragrance of a lilac in full bloom
Taste: the sharp taste of fresh greens, oniony chives chopped into an omelet, the first juicy strawberries straight off the plant, rhubarb baked sweet and tangy in a flaky piecrust
Feel: the splash through a mud puddle, the fuzzy chick cupped gently in your palms, a hole in the garden soil scooped out with bare hands, the pussy willow on your fingertip, the warmth of the sun on your skin when the air is still cool
Collect: fiddlehead ferns to sauté, flowers for a bouquet or to press for crafts, eggshell fragments under birds’ nests
SUMMER
Observe: butterflies sipping nectar from purple coneflowers and phlox, bees busy pollinating the plant world, ants marching ceaselessly, dandelion fluff scattering on a wish, all the colors of the rainbow represented in the flowers in bloom, and hummingbirds hovering, diving at each other, and (rarely) alighting on a branch
Listen: birdsong as the earliest and gentlest of alarm clocks, thunderstorms, the excitement at baseball games, lawn mowers across the neighborhood, the loud buzzing of cicadas, the annoying hum of mosquitoes
Smell: freshly mown grass, mint crushed between your fingers, salty sea air
Taste: watermelon, juicy sweet cherries, sun-ripened tomatoes paired with fresh mozzarella and basil, fresh blueberries eaten by the handful, creamy cold vanilla ice cream
Feel: warm summer rain, grass and shifting sand under bare feet, the heat of the sun
Collect: seashells, sea glass, driftwood, special rocks, animal tracks (captured as a photograph or plaster cast), the shed skin of a snake or cicada
AUTUMN
Observe: trees changing their garb at different rates into different colors, leaves dancing through the air with every gust of wind, squirrels on a mission to collect nuts, spiderwebs woven overnight and glistening with morning dew
Listen: wind whistling, leaves crunching dry underfoot, crickets chirring, the “whoo-whoo” of an owl at dusk
Smell: pumpkin pie spices, dry dusty leaves, and earthy decay
Taste: crisp sweet apples, fresh-baked pumpkin muffins, salty roasted pumpkin seeds, hot mulled cider, meaty walnuts
Feel: the thick layer of a sweater after a summer of bare arms, leaves crumbling between fingers, the warmth of a bonfire on face and hands
Collect: acorns, autumn leaves, pinecones, seedpods
WINTER
Observe: birds on the feeders or scavenging the remains of seeds and dried berries from the garden, icicles reaching down from the eaves, frost patterns across the windowpane, snow falling, flickering candlelight, footprints and animal tracks in the snow
Listen: the crunch of snow underfoot, the quiet after a snowstorm, Christmas carols, the crackling of a fire in the fireplace
Smell: the wonderful fragrance of a fresh Christmas tree, cookies baking in the oven, yeasty bread rising
Taste: peppermint candy canes, tangy cranberry sauce paired with savory turkey, hot chocolate after sledding
Feel: the snow giving way as you swing your arms and legs wide in a snow angel, the steamy warmth when coming in from the cold, the cozy comfort of being inside while a winter storm rages outside
Collect: snowflakes on black construction paper, the longest icicles
OUR FAVORITE BOOKS ABOUT THE FOUR SEASONS
Seasons by Anne Crausaz
The Seasons of Arnold’s Apple Tree by Gail Gibbons
Our Seasons by Ranida T. McKneally
A Time to Keep: The Tasha Tudor Book of Holidays by Tasha Tudor
NATURE TABLES
Display the elements and mementos of the season that you find on your nature walks, along with your seasonal arts and crafts—at least the smaller ones. A special table or shelf that is at child level yet not needed for regular household use is ideal. Keep a magnifying glass handy for viewing details.
SPRING NATURE-TABLE IDEAS
Flowers
Pussy willows
Potted bulbs
A pretend bird’s nest
Robin’s egg fragments

Forsythia stems to force indoors (that is, to speed up their blooming by putting them in water inside where the air is warm)
Dyed eggs (see page 54)
Pretend eggs, purchased or handmade
Animal figurines (lambs, chicks, foals, ducklings)
Leafy branch
Drawings or paintings of eggs, nests, birds, and flowers
People figurines
Play silks or fabric in pastel colors
SUMMER NATURE-TABLE IDEAS
Flowers
Seashells
Sand
Sand-castings (see page 163)
Tree branch with green leaves
Drawings or paintings of suns, butterflies, fish
Animal and people figurines
Play silks or fabrics in bright colors
AUTUMN NATURE-TABLE IDEAS
Colorful fall leaves
Pinecones
Acorns
Pumpkins, squash, gourds
Jack-o’-lanterns (see pages 197–201)
Seedpods
Feathers
Drawings or paintings of leaves, pumpkins, squirrels, Halloween, harvest
Animal and people figurines
Play silks or fabric in oranges, reds, browns, or yellows
Pine boughs
Pinecones
Potted bulbs
Rocks
Crystals
Drawings or paintings of snowmen, snow scenes, penguins
Paper snowflakes
Animal and people figurines
Play silks or fabrics in white, pale blue, gray
NATURE’S COLORS SCAVENGER HUNT
Take the opportunity to really notice the palette of the season with color-themed scavenger hunts.
PAINT CHIPS SCAVENGER HUNT
INSTRUCTIONS
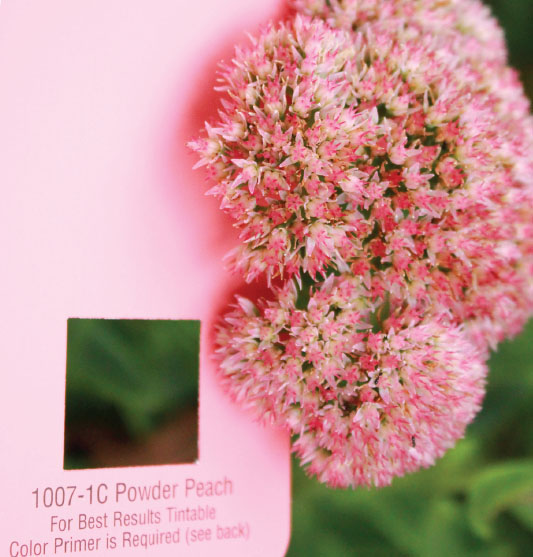
Pick up some paint chips (color sample cards) in the colors of the season at the paint or hardware store, and see if you can match each color with items you find on your nature walks or around your backyard.
PHOTOGRAPHY SCAVENGER HUNT
INSTRUCTIONS
1. On a piece of paper, make a list of all the colors you’d like to find. In spring the list might include the colors of the flowers starting to bloom or the grass and leaves returning; in the fall, the list might include the colors of the turning leaves. Take a look at the colors emerging in your area.
2. Set out on a walk around the backyard or on an excursion farther away (a botanical garden or a drive through the countryside) and observe the colors all around you while looking for those on your list.
3. Take photos of the colors that match your list. If desired, you can get prints made and create a collage or scrapbook with the seasonal colors and images.
Some crafts are so loved, yet basic, that we like to do them around the year, simply adapting them to the season or holiday as appropriate or desired. This includes nature crafts, such as nature suncatchers, which we make all year-round, varying them with the leaves and flowers available at the time. And playdough, which my kids never get tired of. We enjoy mixing up new batches with the scents and colors of the season. Stones are popular with children as canvases for paint, and they easily inspire a number of seasonal craft projects.
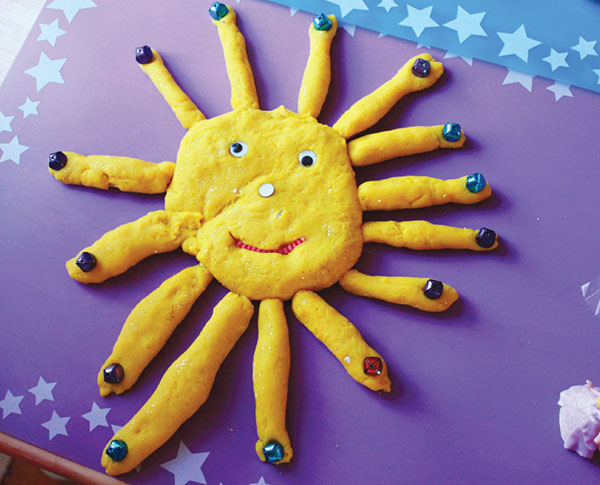
Our favorite, basic playdough recipe is easily adapted for any season or holiday by varying the color and adding glitter, essential oils, or spices.
INGREDIENTS
5 cups water
2½ cups salt
2 tablespoons cream of tartar
Food coloring or liquid watercolor paint (not glitter liquid watercolors)
Large pot
8 tablespoons vegetable oil
5 cups all-purpose flour
Wooden or other strong spoon
Glitter (optional)
Essential oils (optional)
INSTRUCTIONS
1. Mix the water, salt, cream of tartar, and food coloring in a large pot.
2. Cook the mixture on medium-low heat, stirring regularly until it is hot.
4. Stir in the flour, 1 cup at a time, mixing between each addition with a wooden or other strong spoon.
5. Continue to mix until the playdough pulls away from the pan and is no longer sticky. Pinch it between your fingers to test it.
6. Place the dough on the counter, let it cool a bit, and then knead. Note: This is the time to add glitter or essential oils. Simply place the additions in a well in the center of the playdough, then knead the dough thoroughly to mix.
7. Store the dough in an airtight bag or other container at room temperature. It will keep for months.
SPRING
Make lavender playdough by adding a small amount of purple food coloring (or liquid watercolors) and a few drops of lavender essential oil to a batch of basic playdough. You can also add dried lavender and glitter, if you like. The lavender color and scent of this playdough make us think of spring. Use it to make flowers, nests, eggs, and birds.
SUMMER
Make a lemonade playdough by adding a small amount of yellow food coloring (or liquid watercolors) and a few drops of lemon essential oil to a batch of basic playdough. The fresh lemonade smell of this playdough makes it perfect for summer! Use it to create suns, cupcakes, and sea creatures.
AUTUMN
Make pumpkin pie playdough by adding small amounts of red and yellow food coloring (or orange liquid watercolors) and 2 tablespoons of Pumpkin Pie Spice Mix (see page 221) or cinnamon to a batch of basic playdough. Use this playdough to make jack-o’-lanterns (page 198), monsters (with googly eyes and pipe cleaners), or anything else.
WINTER
Make candy cane playdough by mixing two batches of basic playdough; add a small amount of red food coloring (or liquid watercolors) to one batch and leave the other white. Add some glitter and a few drops of peppermint essential oil to both. Make snakes from each color and twist them together for candy canes, or make Candy Cane Playdough Gifts (see page 259).
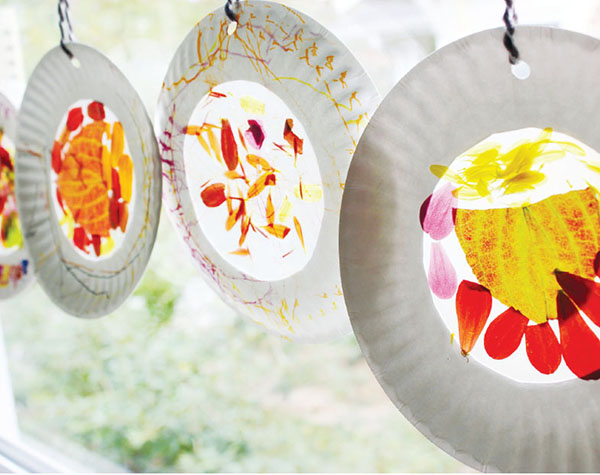
Flower petals and leaves are attached to transparent contact paper in these colorful suncatchers, which are great for dangling in a sunny window or on the porch. You can create all-over random patterns, circular mandalas, faces, or other images with this technique. Select bits of natural materials that are in keeping with the season. Note: Your flowers and leaves will lose some color over time. Use this as an opportunity for observation and discussion with your kids.
MATERIALS
Scissors
White paper plates (the thin, cheap kind work best)
Transparent contact paper (also called sticky-back plastic)
Flowers and leaves
Hole punch
Yarn or ribbon
INSTRUCTIONS
1. Cut the center out of your paper plate.
2. Fold a piece of contact paper in half and cut out a full circle that is ½"–1" larger than the hole in the paper plate. You should now have two circles of the same size.
3. Pull off the paper backing of one of your circles and adhere the contact paper to the back of the paper plate, sticky side facing the side you would eat from.
4. Press flower petals, small leaves, and leaf pieces to the sticky side of the contact paper, arranging them in any design desired
5. When you’re satisfied with your design, press the second contact-paper circle over the arrangement, sticky side down, to sandwich them between the two pieces of contact paper.
6. Punch a hole through the paper plate at the top of your suncatcher. Thread a length of yarn through the hole and tie it to form a loop.
7. Hang the suncatcher in the window and admire it when the sun shines through.
SPRING
Use new green leaves and ferns as well as spring flowers.
SUMMER
There is a kaleidoscope of flower colors to choose from now.
AUTUMN
Use chrysanthemum flowers and the vivid autumn leaves.
WINTER
Try the leaves of evergreens (or houseplants) and the blossoms from late-winter blooming shrubs such as witch hazel and forsythia.
NATURE STAINED GLASS WINDOWS
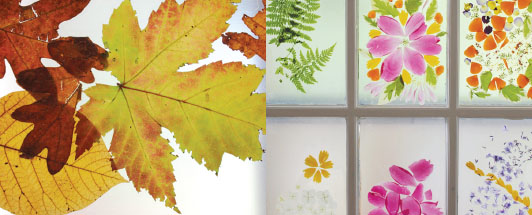
Be creative in the way you bring nature into your home. Not only can you have bouquets on your table, but you can also put flowers on your windows for a colorful but natural stained glass effect. See the seasonal variations for the Nature Suncatchers above for ideas here. Note: Your flowers and leaves will lose some color over time. Use this as an opportunity for observation and discussion with your kids.
MATERIALS
Scissors
Transparent contact paper (also called sticky-back plastic)
Flower petals and leaves
INSTRUCTIONS
1. Choose the window you’ll use. A multipaned one is effective but not necessary.
2. Cut the contact paper into pieces to fit each pane. If you’re using a window that doesn’t have multiple panes, you can cut one or more large sheets of contact paper to span the width of the window or just do a small section.
3. Pull the paper backing off the contact paper and tape each piece, sticky-side up, to your table or work surface.
4. Arrange flower petals (not the whole flower unless they’re very small and flat) and leaves, as desired, across each piece of contact paper, making sure to leave ample contact paper uncovered to stick to the window.
5. Remove the tape and adhere the sticky side of each stained glass panel to a windowpane. Continue until all panes are covered.
6. Stand back and admire the color of the flowers and leaves as the light shines through.
7. To remove your stained glass, simply peel the contact paper off the window. Use window cleaner or soap and water to remove any flower and leaf residue from the windows.
MELTED-CRAYON SUNCATCHERS
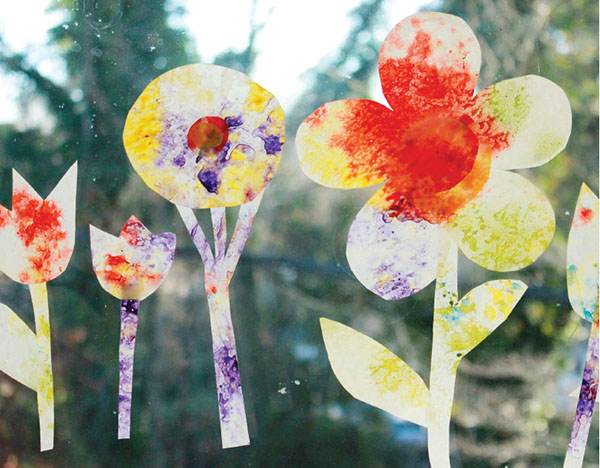
Melted-crayon suncatchers are a favorite for hanging in the window. They can be made with any colors and cut into any shapes, perfect for adapting to different seasons and holidays. We especially enjoy using autumn leaves in the fall and shaping hearts around Valentine’s Day.
MATERIALS
Cheese grater
Crayons
Bowls or muffin tin
Iron
Wax paper
Ironing board
Newsprint or any cheap paper, such as copy paper
Scissors
Hole punch
Yarn or string
INSTRUCTIONS
1. Grate the crayons, keeping the colors separate in bowls or muffin tin sections.
2. Preheat the iron on the cotton setting; make sure to turn off the steam.
3. Cut a length of wax paper. Fold it in half, making a crease at the center. Unfold it again and lay it out on your work surface.
4. Sprinkle grated crayons over one half of the wax paper. Fold the other half on top to cover the crayon.
5. Carefully set the wax paper sandwich on your ironing board between layers of newsprint (the newsprint will protect your iron from being damaged by the melting crayon). Iron the sandwich enough to melt the crayon.
6. Make as many as desired. Replace the newsprint as it gets oily and crayon covered.
7. Cut shapes out of the melted-crayon stained glass sheets. You can cut freehand or use a cookie cutter or a computer printout as a template.
8. Punch a hole through the top of each melted-crayon suncatcher. String yarn through the hole and tie the ends to create a loop to use for hanging the suncatcher in a sunny window.
SPRING
Colors: yellow, pink, light green, lavender
Shapes: birds, flowers, Easter eggs
SUMMER
Colors: blue, green, orange, yellow, fuchsia
Shapes: butterflies, flowers, sea creatures
AUTUMN
Colors: orange, red, gold, brown
Shapes: autumn leaves, pumpkins, jack-o’-lanterns, acorns
WINTER
Colors: red, white, green, silver, gold
Shapes: stars, hearts, snowflakes, pine trees
EMBROIDERY AROUND THE YEAR
Embroidery is a basic sewing activity that can be enjoyed at any level, from complete beginner to accomplished needleworker. We especially like to embroider holiday and seasonal themes as decorations and gifts.
MATERIALS
Embroidery hoop
Fabric of your choice (burlap, muslin, cotton, felt)
Water-soluble marker (available at sewing and craft stores) or permanent Sharpie marker
Dropper (optional)
Rubbing alcohol (optional)
Embroidery floss
Embroidery needle
INSTRUCTIONS
1. Separate the two halves of the embroidery hoop and lay your fabric over the inner half. Press the outer embroidery hoop section over the fabric and the inner half, turning the screw to tighten the hoop. Pull the fabric taut as you tighten. Trim the fabric around the hoop, leaving a couple of inches.
2. Beginners may find it helpful to draw a simple design on their fabric and use the lines as sewing guides. If you want the lines to wash out, use a water-soluble marker. If you don’t mind permanent lines or you like to incorporate generous amounts of drawing with a little bit of embroidery (as my four-year-old does), then use permanent Sharpie markers. Note: To create an interesting tie-dye effect while retaining your child’s drawn lines, use a dropper to drip small amounts of rubbing alcohol over the Sharpie drawing and watch the color spread. Let the fabric dry before beginning embroidery.
3. Thread the needle with the desired color of embroidery floss, adding a double knot at the end. Poke the needle through the fabric, from the back to the front, and pull all the way through so that the knot rests against the back of the fabric.
4. Beginners will find it easiest to start with the basic running stitch, poking the needle and thread in and out along the design line, and having roughly the same amount of thread showing on the top as on the bottom. For those ready to try different stitches, you can search online for basic embroidery stitches or pick up a book, such as Doodle Stitching: Fresh and Fun Embroidery for Beginners by Aimee Ray and Sewing School: 21 Sewing Projects Kids Will Love to Make by Amie Plumley and Andria Lisle.
5. As you get close to the end of a piece of thread, tie a double knot at the back of the fabric and cut off the extra thread. Thread a new length of embroidery floss onto the needle, add a knot, and poke the needle through, picking up where you left off. Continue embroidering until you are finished with your design, again adding a knot on the reverse to hold your stitches in place before cutting off the extra thread.
6. Display your embroidered design in the hoop (a few embroidery hoops grouped together on a wall look lovely). Alternatively, you can remove the fabric from the hoop and either frame it or sew it into a pillow or ornament.
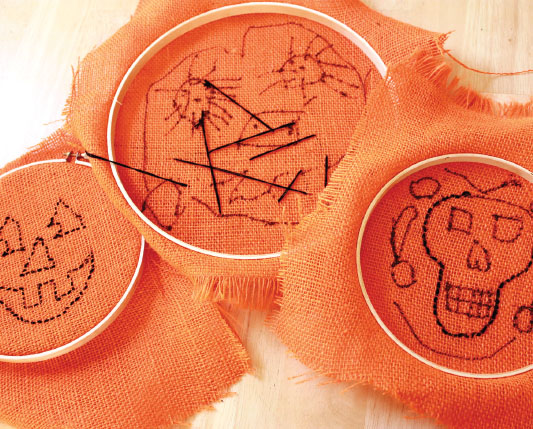
SPRING
Fresh new leaves and flower buds, Easter themes, clouds and raindrops
SUMMER
Rainbows, flags, ocean waves, octopus, sun rays
AUTUMN
Acorns, squirrels, owls, Halloween themes
WINTER
Christmas themes, snowflakes, sled, polar bear, penguin, heart
DECORATED ROCKS
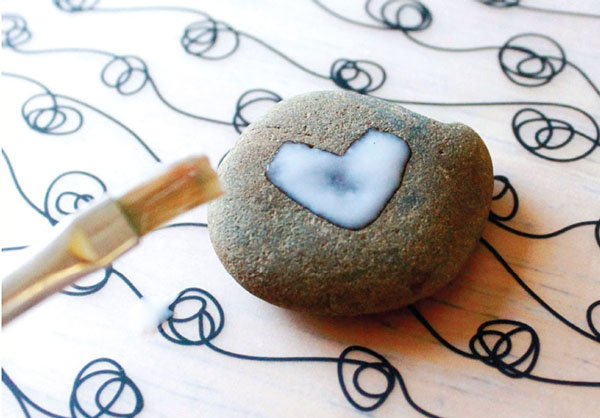
Affix small nature items or craft materials to rocks with Mod Podge or glue. These make novel seasonal centerpieces or additions to the nature table.
MATERIALS
Smooth pebbles and rocks
Paintbrush
Mod Podge or glue
Small nature items (dried leaves or flowers) or craft materials (fabric, decorative paper, washi tape, aluminum foil, or glitter)
Acrylic paint (optional)
Paint pens or Sharpies (optional)
1. Wash your rocks and let them dry thoroughly before beginning.
2. Use a paintbrush to brush a layer of Mod Podge on the top of a rock.
3. Lay one or more of your nature items or craft materials faceup on the wet Mod Podge. (If you are using washi tape, there is no need for the Mod Podge. It will stick on its own.)
4. Brush another layer of Mod Podge over the surface, covering both the item and the top of the rock.
5. Repeat with as many rocks as desired.
6. Let the rocks dry completely, then use them for pretend play, a centerpiece, or a seasonal nature table.
SPRING
Pressed flowers
Fabric, paper, or washi tape in pastel colors and/or spring shapes
Paint oval rocks like Easter eggs
Paint oval rocks to resemble robins’ eggs or other birds’ eggs; use paint or paint pens for speckles.
Wrap a rock in lace
SUMMER
Fabric, paper, or washi tape in bright colors and/or summer shapes
Paint or draw shells or sea creatures
Attach fabric or paper butterflies and flowers
Find larger rocks and paint doors, windows, roofs, and so forth on them; nestle them in the garden for your fairies and elves
Doodle with a paint pen or Sharpie
AUTUMN
Small colorful autumn leaves, pressed and dried
Washi tape jack-o’-lanterns
Paint rounder rocks as pumpkins and jack-o’-lanterns and longer rocks as ghosts
Use paint pens or Sharpies to decorate a rock with a sugar skull motif (colorfully decorated skulls are used in Mexico to celebrate the Day of the Dead)
Make rock monsters with the addition of googly eyes
WINTER
Add pretty little fabric hearts
Paint a heart or star on a rock with glue, then sprinkle it with glitter, shaking off the excess
Make a rock snowman by carefully stacking three rocks and adding facial features and buttons with a paint pen or Sharpie
Doodle snowflakes on rocks with a white paint pen
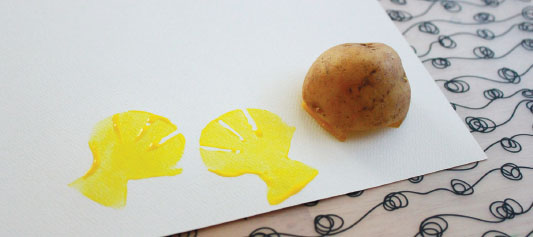
Potato printing is a classic, simple craft for children that can be used to create cards, decorations, ornaments, abstract art, wrapping paper, or even an Advent calendar (see page 242).
MATERIALS
Sharp knife
Potatoes
Paint (tempera or BioColor, or water-based printing ink)
Plate or small bowl
Heavy paper or poster board
Glitter (optional)
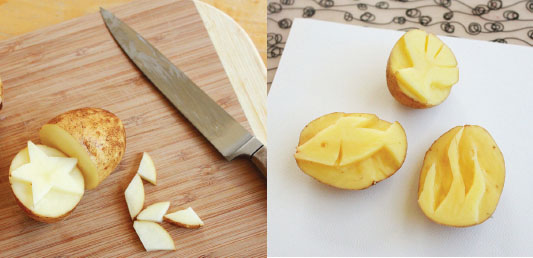
1. First, adults prepare the potato stamp by slicing a potato in half and then carving an image into the flat surface. Put an entire image on one potato half or carve components on separate potatoes, such as a tulip blossom on one, a stem on another, and a leaf on yet another.
2. Pour a thin layer of paint on the plate.
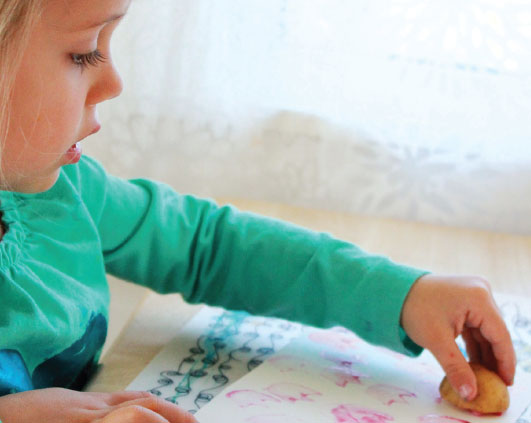
3. Your child can then press the potato stamp first in the paint, then firmly on the paper. Lift the potato to reveal the print.
4. Sprinkle glitter over the wet paint if desired.
5. Continue to print with additional images and colors as desired.
SPRING
Easter egg
Duckling
Fiddlehead
Daffodil
Tulip
Leaf
SUMMER
Stars and stripes (for a flag)
Octopus
Seashell
Sun
Fish
Butterfly
Sailboat
AUTUMN
Jack-o’-lantern
Pumpkin
Leaf
Bat
Ghost
Skull
Owl
WINTER
Stars
Heart
Ornament
Christmas tree
Simple snowflake
Wrapped gift
Angel
Art is always appropriate, no matter the season. Drawing, painting, and other art activities are so open-ended that they can, of course, be done at any time of the year. And while there is no need to paint with orange just because it’s October or draw the Easter bunny in March, you can adapt any art activity to the season or holiday with a choice of colors or images. Whether playing a family drawing game or creating salty watercolors, art is a fun way to incorporate the images and ideas around us, from bugs and cars to jack-o’-lanterns and valentine hearts.
SEASONAL OR HOLIDAY PASS-THE-DRAWING GAME
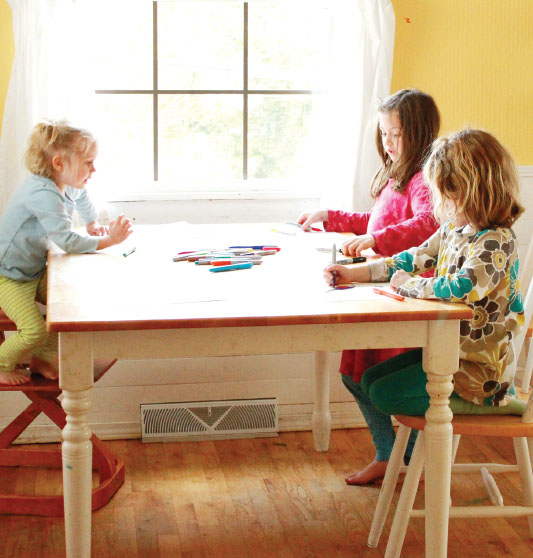
Draw with your child or in a group. This back-and-forth drawing technique makes for a fun bonding activity and also allows each participant both to inspire and to be inspired. The use of seasonal or holiday themes means that there is a ready mental library of images to draw from (you can also refer to the seasonal ideas below). With older children, you can experiment with a timer (1–2 minutes per turn, for example).
MATERIALS
Paper
Drawing tools, such as markers, colored pencils, or crayons
INSTRUCTIONS
1. Provide everyone with a sheet of paper and one or more drawing tools. Each person draws something related to the current season or holiday on his or her paper, then passes it to the left (if playing with three or more) or swaps papers (if two are playing).
2. Participants draw another image on the paper they received, then pass or trade again.
3. Continue to draw and pass as long as desired and then share the completed works of art with each other.
SPRING
Easter themes, birds, the garden, the farm, spring, fairies
SUMMER
Flowers, the garden, the woodland, the beach, the ocean, insects, Independence Day–related themes
AUTUMN
Falling leaves, the woods, mushrooms, Halloween themes, haunted houses, Thanksgiving themes, turkeys
WINTER
Snowflakes, snowmen, Christmas themes, Christmas trees, the Nativity scene, Santa Claus, Valentine’s Day themes
SIMON SAYS! DRAWING FOR EVERY SEASON
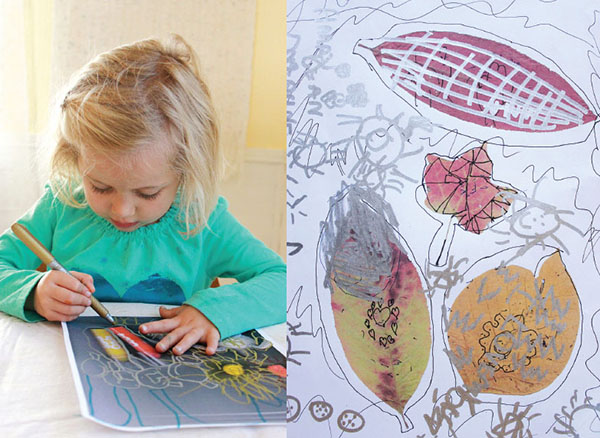
Players take turns giving the drawing instructions. This game is a variation of a Simon Says drawing game we like to play that can be done without the copy machine used here.
MATERIALS
Leaves, flowers, or other relatively flat seasonal items
Color copy machine (or your home printer, but if you don’t have one, head to the copy shop for the first part of this activity)
Pens or markers (metallic Sharpies are especially effective over dark-colored areas)
1. Assemble an assortment of leaves or seasonal items facedown on the copy machine glass and make a color copy. Repeat with other combinations. (Each person might like to arrange and copy his or her own selection.)
2. Sit down around a table with the other players, each with his or her own color copy and drawing tool.
3. Players take turns giving each other drawing instructions (zigzags, a squirrel, ten dots, a jack-o’-lantern, and so on). Each player draws on her or his color copy, on or around the images, to create a collage-like seasonal tableau.
4. Keep going around the circle a few times, making additions to your drawing, until the group is ready to stop.
5. Share the finished drawings.
SPRING
Copy: ferns, new leaves, flowers, dress-up bunny ears, a piece of lace, your hand, a puzzle piece
Draw: patterns, doodles, flowers, worms, rain, birds, a nest, Easter eggs, bunnies
SUMMER
Copy: flowers, leaves, a paper boat, shells, rocks, a postcard from the beach, a favorite animal figurine
Draw: patterns, doodles, fish, boats, shells, flowers, butterflies, bees, dragonflies
AUTUMN
Copy: autumn leaves, acorns, seedpods, a pumpkin drawing, a small model skeleton
Draw: patterns, doodles, jack-o’-lanterns, ghosts, scarecrows, squirrels, acorns, owls
WINTER
Copy: pine bough, rocks, a doily, a scrap of patterned fabric, a cookie cutter, a Christmas ornament
Draw: patterns, doodles, hearts, snowflakes, snowmen, mice, Christmas trees, stars, sleds
DOUBLE-DOODLE THROUGH THE SEASONS
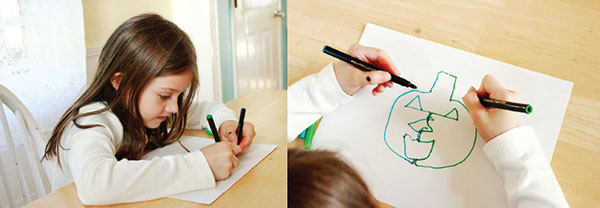
This unique drawing activity uses both hands, making it especially good for developing both sides of the brain. Besides, it’s fun! Any image that is mostly symmetrical is fair game for this drawing activity. Try a person or a face or any of the seasonal suggestions below. Of course, you can also simply create an abstract double-doodle.
MATERIALS
Tape (optional)
Paper
Two markers
INSTRUCTIONS
1. Tape the paper to the table to hold it in place (optional, but helpful for younger kids especially).
2. Holding a marker in each hand, place the tips side by side at the center of the paper. Begin drawing with both markers at the same time, creating a mirror image. For example, when the left marker is heading left to the edge of the paper, the right marker should be heading right to the other edge of the paper. When one marker is heading toward the center, the other should be as well.
3. Continue until your drawing is complete. This is just as fun for abstract doodling as it is for creating realistic images.
SPRING
Bunnies, Easter eggs, flowers
SUMMER
Butterflies, fish, flowers, starfish, suns, trees
AUTUMN
Jack-o’-lanterns, ghosts, skeletons, haunted house, leaves, owls, bats, spiders
WINTER
Snowmen, Christmas trees, stars, hearts, bears
SALTY WATERCOLORS AROUND THE YEAR
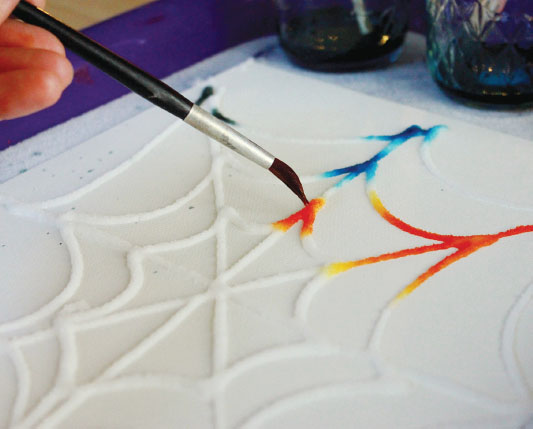
Salty watercolors are one of our very favorite art projects, and we’re usually ready for another round every few months or so.
MATERIALS
Bottle of white glue
Card stock or watercolor paper
Salt (buy one or two cheap containers of table salt, such as Morton’s)
Large baking dish or dishpan
Paintbrush
Liquid watercolors
1. Draw a design or picture by squeezing glue onto the card stock. Younger children will likely make abstract designs; older ones may draw more realistic pictures.
2. Sprinkle the glue picture liberally with salt, tipping off the excess. This is best done over a large dish.
3. Dip a paintbrush into liquid water-colors, then touch it lightly to a salt-covered glue line. Watch as the paint travels along the line!
4. Continue with more paint and colors until the entire picture is painted as desired.
SPRING
Flowers, gardens, rabbits, chicks, Easter eggs, nests, birds
SUMMER
Frogs, bees, butterflies, octopuses and squid, boats, flags, fairies
AUTUMN
Leaves, jack-o’-lanterns, pumpkins, trees, spiderwebs, spiders, bats, skeleton
WINTER
Snow scene, reindeer, snowmen, snowflakes, stars, Christmas tree, elf
MELTED-CRAYON ROCKS
“Paint” small rocks with crayons. The crayons melt as they touch the hot rocks, creating vibrant small-scale artworks. Choose colors or draw themes related to the seasons.
MATERIALS
Small, smooth rocks
Baking sheet
Oven
Towel or mat to protect your table
Aluminum foil
Crayons (to protect fingers, do not use short stubs)
Oven mitt or mitten (optional)
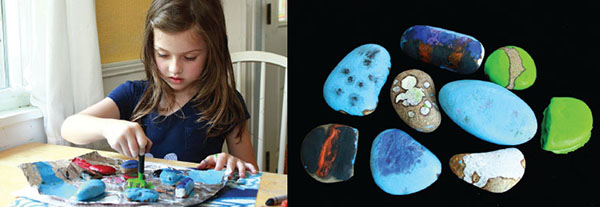
1. Wash and dry your rocks. Place them on the baking sheet and heat them in a 350°F oven for 10–15 minutes.
2. Protect your work surface with a place mat or towel covered with a sheet of foil.
3. Adult job: move one or two hot rocks at a time to the protected work surface. Make sure your child understands that the rocks are hot and that the child needs to be careful not to touch them with his or her fingers. (Put an oven mitt or winter mitten on their nondominant hand if desired.)
4. Press the tip of a crayon to a hot rock and watch as the crayon melts. Move the crayon around the rock slowly, letting the crayon melt as you work. Experiment with different colors and designs.
5. Let the rocks cool. Use the melted-crayon rocks for decoration or for pretend play.
IDEAS FOR PLAYING WITH MELTED-CRAYON ROCKS
Form letters, numbers, and designs.
Use as pretend food (great for cookies and candies) in a play kitchen or store.
Decorate sandbox cakes and mud pies (see page 160).
Use as special hopscotch markers (see page 134).
Use in counting and number games.