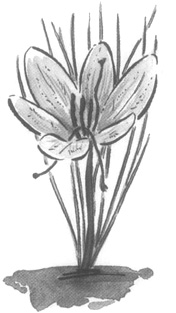
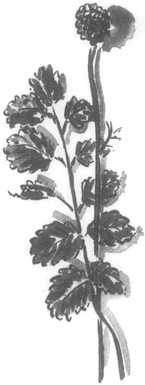
Of all the garden herbs, there are probably more varieties of mint than any other (except perhaps for the equally wonderful thyme). You’ll no doubt find more than one or two that you simply can’t live without and that you cannot buy in any market. They come in sizes from tiny little scented mats of Corsican mint—which makes pungent emerald trails between stepping-stones, but is not considered an edible—to the graceful, 2-foot stalks of spearmint and peppermint that most of us know. Maybe your favorite will be lavender mint, or chocolate mint, or maybe lemon balm. One of the great pleasures of having a garden is sharing its bounty with friends, and so far we haven’t found a single person who isn’t enchanted with a spur-of-the-moment snipping from a mint plant. If it’s one of the more unusual varieties, your gift is all the more special.
We tend to think of mint in terms of beverages, especially mint tea, but it actually has many culinary uses. Numerous ethnic dishes are seasoned with mints of different kinds. Spearmint and peppermint are grown commercially in great fields and harvested to extract the essential oils that flavor gum, candy, toothpaste, soaps, lotions, medicines, tea, and other drinks. To be anywhere near a field of mint when it is being harvested is a genuine delight as the wonderful scent saturates the air.
In your container garden, we suggest you grow mint where you can brush against it as you walk past, where you can reach out and touch the plant and smell the scent it leaves on your fingers.
Position a container near your favorite sitting nook so you can pick a few leaves to drop into your tea or lemonade, or just pick a sprig to brush against your face. It calms the nerves and soothes the body after a busy day.
Mint Basics. You can always tell if a plant is in the mint family because it has square stems. Most mints are hardy perennial plants that spread by underground stems, which root all along their length and send up new growth from buds along the stems. In winter the plants often die back to the ground, and if you’re not expecting this you may think they’re dead. The underground stems are still vigorous, however, and come spring you’ll see hundreds of tiny leaves popping up.
Many mints also self-sow if they are allowed to flower and make seeds. (Lemon balm is notorious for this.) In moist, fertile conditions mints can be quite invasive; with no effort at all, they’ll grow underneath a sidewalk and come out the other side. Gardeners are often advised to confine them to containers, even in a traditional in-the-ground garden.
Mints grow very happily in pots and make a desirable addition to your container garden. And because of the many leaf shapes, colors, and textures, a grouping of three or four plants can almost be a garden in itself. Mints are easy to grow, and as long as they get plenty of moisture and regular haircuts, they are excellent compact foliage plants. They tend to die out in the middle after about two years. At that point it’s a good idea to unpot them, cut out and discard the old roots, and start new plants from the youngest roots, which collect around the edges of the pot. This way you can keep mint plants going for years.
Planting. Start with small plants, because seeds are too slow. Choose an interesting container and fill it with an all-purpose potting mixture. It’s best not to grow mint in a mixed container with other plants, as the roots tend to take over and can crowd out less vigorous neighbors. But mints are very acceptable specimen plants grown individually in their own pots. For a mixed garden, group individual pots together in a larger container. Just remember to label each plant; many of them look so much alike that after a few years you can’t tell which is which.
Success with Mints. There’s an old story about an elderly English noblewoman and her equally elderly gardener. As they strolled around her estate debating what to plant for the coming season, the duchess murmured something about wanting to add a new mint but worried that it would entail too much work for her frail employee. “You know how we grow mint, don’t you, madam,” the gardener replied with a straight face. “We just plunk it in the ground and step back out of the way.”
And we container gardeners do the same: plunk it in a pot and step back. There are no magic tricks needed to grow good mint. With plenty of moisture and some shade during the hot part of the day if temperatures really soar, mint will generally do well. Mints aren’t heavy feeders; in fact, the leaves have more intense flavor if they aren’t so vigorously fertilized that they grow big and lush. Get the plants started in the spring with a drink of a balanced fertilizer, then again in mid summer. This is usually enough, but if you see the plants beginning to slow down or fade in color, go ahead and feed them again.
Left to their own devices, mint plants have a tendency to get lanky and threadbare, especially at the bottom. This doesn’t interfere with their utility, but it is unattractive. The solution is simple: cut them back, heavily if need be. They will quickly put out new growth, restoring a tidy, compact look.
Most mints are hardy, and can be left outside in a moderately protected place throughout the year. A few are more tender, so check with your nursery expert or read catalog descriptions to find out if yours should be brought in for the winter.
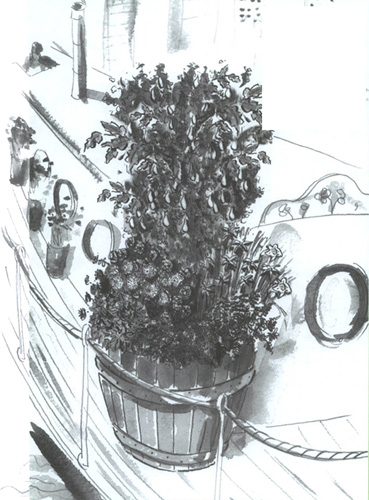
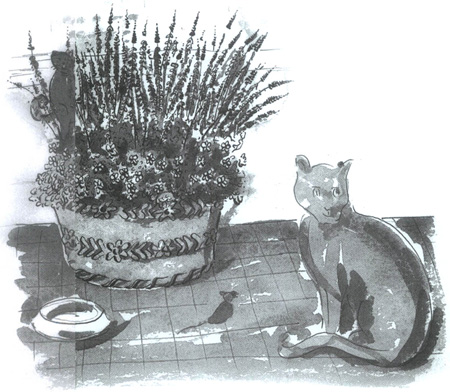
Cat lovers will especially appreciate this garden designed to celebrate their passion. Even if circumstances prevent you from having a cat at the moment, a Cheshire Cat garden will remind you of why you love them. And those with only a passing feline interest will find it appealing for another reason: it’s a tiny garden that works very well in a small space. It will do nicely in one medium-size container, say 18 to 24 inches wide.
Begin with a treasure just for the cat: catnip. Sometimes people are surprised that catnip starts out as a living green entity, but in fact it’s nothing more, or less, than the leaves of a pretty plant in the mint family. And with its upright growth form, it will make a nice centerpiece for your garden. Catnip has the typical square stems of all mints, and grayish green leaves that are slightly fuzzy to the touch and fun to caress—just like your cat. Starting in late spring and lasting all through the summer, it produces tall spikes of small white or lavender flowers. Catnip is grown just like the other mints, and like them will die to the ground in winter and resurface in the spring. Dry the leaves for your cat’s wintertime pleasure. Then, if you’re handy with a needle, sew up a small sack and stuff it with your own dried catnip.
Did you know that catnip also makes a soothing tea for the cat’s owner? It has a pleasant, lemony flavor and contains a very mild, very safe sedative; adults can enjoy it just before bedtime to help them fall asleep.
A word of caution: if you have a cat and this container garden is anywhere within leaping range, the cat will find the catnip and wallow around in it in cat-ecstacy, seriously scrunching the garden in the process. It might be prudent to start a separate container of catnip to entice kitty away from your garden. Or you may decide it was all for the cat’s benefit anyway, and let her have it.
Another alternative is to substitute catmint. It’s a close cousin to catnip, which it resembles in many ways, but catmint is somewhat less attractive to cats. With soft purple flowers in tall spikes that stay on the plant a long time, it’s a favorite border plant in traditional gardens and will look equally lovely in your container garden. It, too, makes a delightful tea.
To balance the upright habit of the catmint or catnip, put several small plants of Curly Golden marjoram along the edges of the container and allow them to trail over the sides. This marjoram has crinkled round leaves that will remind you of a cat’s fur, and its golden color is a fine complement to the purple flowers.
Here and there among the marjoram and beneath the catnip, plant as many pansies as you can fit in. Choose the ones whose flowers look like kittycat faces.
As a final touch, for sheer whimsy and to remind you of what this garden is all about, place a wooden or ceramic figure of a cat in your container. It will make you smile all winter when the garden is resting.
Harvesting. Harvesting mint is a simple matter of picking a few leaves whenever you need them. Pinch off new tips and use them to garnish a salad or drink as needed; the stem will send out new branches at the pinch point. A few leaves steeped in a pot of black tea are wonderful; fresh leaves skewered to a slice of fruit make a jaunty garnish for a cold drink.
If you are going to dry mints, pick them just before they flower. You can use the mint flowers, too, but the flavor and essential oils are best before the flowers open fully. If your plants get ahead of you and grow lots of tall stalks, which some are likely to do, just cut them and use them in bouquets to scent the room, or set a basket of mint in the bathroom as an air freshener. Lemon balm is especially pleasing for this last use. New growth will almost immediately come up from the roots to replace anything you cut off.
Varieties. Among the best for flavoring drinks or making tea are the old standards: spearmint, peppermint, and lemon balm. Lavender mint is delightful: its flavor is lavender and mint mixed together.
Chocolate mint, actually a form of peppermint, will send chocolate lovers into ecstasy. Bergamot mint, also known as orange mint, tastes like Earl Grey tea. Apple mint has large, fuzzy leaves and a soft flavor that will remind you of apples. It blends very well with spearmint or peppermint, whose sharpness it pleasantly dilutes. Cut stems are often used in floral arrangements.
Pineapple mint really does taste and smell like pineapple, and with its creamy variegation, it is one of the prettiest. Check out herb farms and specialty nurseries for these and other delightful mints.
Bergamot, bee balm, Oswego tea, horsemint—monarda is one of those plants with so many names you wonder what to call it. It is native to the eastern and central parts of the United States and was long used as both beverage and medicine by the Oswego Indians. They introduced it to the early European settlers for making a delicious and fragrant tea, and so it became known as Oswego tea, an essential plant in the colonial kitchen garden. One of its other names comes from its resemblance to the scent of bergamot, a citrus fruit very similar to oranges, which grows in the Mediterranean; and another from the attraction it holds for bees.
The original native plant has brilliant scarlet flowers, and hybridizers have developed many other strains so that there is now a wide range of colors, from deep burgundy to several shades of red, pink, violet, and white. The fragrance is almost as complicated as its many names. To some monarda smells citrusy, to others it hints of basil and mint. If you think it smells like Earl Grey tea, you’d be absolutely right, as this herb has much the same aroma and taste as the bergamot fruit that flavors the famous tea blend.
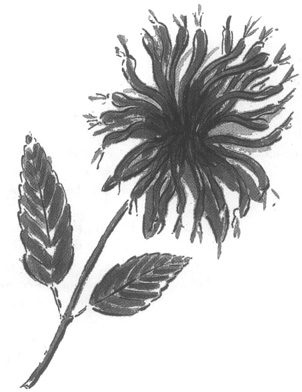
Aside from the fragrant tea, the chief delight of growing monarda is its flowers, which are larger than those of most herbs and add a strong note of color, especially the bright red variety. The blooms have a shaggy, unkempt appearance that has its own funky charm. When you look closely, you see that the flower head is actually a mass of narrow, tube-shaped flowers that hang loosely from around the oversize center. They are handsome in fresh bouquets, and dried flowers retain their fragrance nicely, making them a good additive to potpourri or dried flower crafts. Monarda is a wonderful hummingbird and bee plant, and will likely be one of the most interesting-looking plants in your garden.
Monarda Basics. Monarda is a hardy perennial that thrives in moist, fertile soil and warm temperatures. It starts out in spring with a low mat of what look like little individual plants with a reddish tinge and a soft velvety look. But it soon sends up square stalks similar to mint, sometimes 2 to 3 feet tall. The pointy, fragrant leaves have just a hint of downy fuzz to them; the varieties with dark red flowers often also have a reddish cast to the leaves, which is very attractive. It’s the leaves that you steep in hot black tea to make your own herbal version of Earl Grey tea. Most varieties of monarda bloom in July and August; if you clip off the flowers, sometimes you’ll be rewarded with side branching and a second bloom.
Planting. We wholeheartedly recommend that you start with young plants, to be sure you get flowers right away. You might even want to buy your plants later in the season, when they’re in bloom, so you can choose the color you like best.
Monarda can be grown as an individual plant in its own container, or it can be put in with other plants in a large tub or pot. Since it is fairly tall, give it a place at the back of a container, or use it as the tall focal point in a round one that will be viewed from all sides.
By mid summer, monarda will likely have lost its bottom leaves, giving it a skinny, bare-legged look. Hide the bare legs by tucking in some smaller plants at the base. Sweet woodruff is a good choice.
Success with Monarda. Give monarda plenty of water, and feed it with an all-purpose fertilizer such as 16-16-16 about once a month, beginning when the first new leaves start growing in the spring and continuing until the end of summer. The monarda root system isn’t very deep but it is spreading, so you’ll need to keep an eye on your plant after the second year and divide it so it doesn’t crowd out other plants you may have planted with it.
The only problem you are likely to have with monarda is that late in the season it is prone to powdery mildew. Use the baking soda solution described in Chapter 6.
Harvesting. Pick off leaves to use in tea as you need them. Cutting the whole stalk back will stimulate new foliage to grow. When the flowers are just at their peak, cut them for use in salads; and cut those just over their peak for drying.
Varieties. If you’re hoping to attract hummingbirds, choose the monardas with scarlet or red flowers. Cambridge Scarlet is a reliable older variety, with scarlet flowers on extra-leafy spikes. Adam is another good scarlet, and Jacob Kline is a newer scarlet type with good mildew resistance.
Pink varieties include Croftway Pink and Granite Pink; Marshall’s Delight, another good pink variety, has the extra advantage of being more mildew-resistant than the others.
Violet Queen, also mildew resistant, is a good strong violet hue.
Not much bigger than your thumb from head to tail, hummingbirds are one of nature’s small miracles. Because they are so tiny, they must feed almost continually, and so their entire existence is a never-ending search for the flower nectar that is their sustenance. They zip from one spot to the next so fast we humans can’t follow with our eyes, and then, when they find a likely blossom, they hover in midair to dip their long beaks down into the honey-rich heart of the flower.
Their tongues flick into the nectar an average of 13 times a second. While feeding, they keep themselves in position by rapidly beating their little wings; 60 beats per second is common, and some species hit 80 without even trying. The wings beat so fast that all we humans can see is a blur, but we can definitely hear the high-pitched humming sound it creates.
Hummingbirds’ beaks are long in relation to the birds’ overall size, and so they are instinctively drawn to flowers that have a deep, narrow throat with the nectar concentrated at the base. They have no sense of smell and find the flowers only by color; in one of those quirks of nature we may never fully understand, they are especially attracted to the color red, for it is the only color they see clearly.
This garden is filled with plants that attract hummers, as they are affectionately called. All have the deep-throated flowers that the birds need, and it is not by accident that all the flowers are in shades of red.
To prime the pump, so to speak, we suggest that you suspend a commercial hummingbird feeder from the trellis late in spring, when the birds are building nests and establishing their feeding pattern. Look for a feeder that has a wasp screen and lots of red color so you don’t need to dye the sugar water. Fill it with syrup made of one part sugar to four parts water, and replace with a fresh batch every three or four days.
Growing up the trellis are scarlet runner beans. This old-fashioned favorite produces masses of bright red-orange blossoms; many people grow them just for the flower show. But when the flowers fade, the long, fat bean pods begin to form. You can either pick them when very small, which keeps the flowers coming, or leave them on the vine to reach mature size. If you let them dry on the vine, the pods become mottled gray and papery, and inside this wrinkled exterior you’ll find a glorious surprise: the beans themselves are large, meaty, and beautifully colored, shiny black with magenta swirls.
Planted with the beans are several plants of monarda, commonly known as bee balm. These herb plants, with their sassy, funky flowers, will fill in the bottom few feet of the bean vines, which tend to look bare-legged and straggly by midseason. The leaves make a nice tea, and the flowers are great fun as a garnish. Start with plants instead of seeds so you’ll have flowers the first year. These perennials are quite hardy.
In recent years breeders have developed monardas with flowers in several shades of pink, but bright red is the standard color and that is what you want here. The flowers are quite distinctive. From a few feet away the flower head looks like a shaggy puffball, but if you examine it more closely you’ll see that it is composed of masses of long, thin individual flowers—just the shape that hummingbirds love.
By the way, monarda is known as bee balm because it’s very attractive to honeybees as well as hummingbirds. Bees are well-trained, industrious pollinators, and anything you do to encourage them to spend time in your vegetable garden is a good thing. Don’t panic when you see them, and for heaven’s sake don’t kill them.
Alongside the monarda, put several plants of pineapple sage. The leaves are intriguing, with tastes of both sage and pineapple, but our chief interest here is the remarkable flowers. Long, slender, and an astonishing scarlet color, they are perfect for hummingbirds. This variety of sage blooms quite late in the year and is atypically tender, so gardeners in colder climates seldom get to see the flowers. But if your weather is cooperative, or if you have a gambler’s soul, pineapple sage is definitely worth a try; worst case, you’ll get to enjoy the delightful leaves.
Providing the third tier for this arrangement are tuberous begonias. The flowers are flat (rather like camellias) and so not good for nectar as far as the hummingbirds are concerned. But if you choose begonias with flowers in shades of red, deep pink, and red-orange, the birds will be attracted to your garden by their incandescent color. For your own pleasure, look for the hanging-basket types rather than the upright form, so their showstopping colors will spill over the edge of the container. Begonias do well in filtered shade, which will be graciously provided by the beans and the monarda.
At the end of the season you’ll have to remove the dead bean vines (clip them at ground level) and, in many regions, the bare sage plants as well. Depending on your climate, you may also have to dig up the begonia tubers for storage. Try not to disturb the roots of the monarda, which will stay in place through the winter.
Even if hummingbirds don’t come calling, your garden will produce a wonderful bounty: delicious dried beans (great for winter soup), delicately beautiful edible flowers for a surprising sorbet (see page 358), a wonderful cooking herb, and the makings of a soothing herbal tea. But if you do succeed in tempting the birds, you will have a front-row seat at one of nature’s most entertaining shows.
Anyone of Italian or Greek descent, or anyone who loves Italian or Greek cooking, immediately associates these cuisines with oregano. Pungent, peppery, savory oregano is essential in everything from spaghetti and pizza sauce to zucchini and eggplant dishes. It’s a natural in any recipe that includes tomatoes.
Oregano has been in cultivation so long, both in the ancient world and in this country, and passed around so often by gardeners and cooks, that a deeply tangled taxonomic thicket has developed. Is Origanum vulgare the “true” oregano? What is the best oregano: so-called Sicilian oregano, or Greek, or some other species, or a cross with the similar-tasting marjoram? These are questions that may cause purists and botanists to furrow their brows, but don’t let the debate bother you. Let your nose be your guide at the garden center. Run your hand along the foliage of the various choices and buy the one you love best.
Though a favorite of chefs, oregano can also be appreciated as an ornamental plant. It’s a member of the mint family (“family” in botanical terms is the equivalent of “extended family” in human terms), so expect a lush plant with substantial, attractive leaves on all sides of the characteristic square stems. In addition to the plain green type, there are varieties with especially colorful leaves: a soft golden shade, or green rimmed in white. These are handsome in combination containers with other herbs and flowering plants.
Even the flowers are showy. If you grow the plants outdoors, bees as well as butterflies may be drawn to them. Several types are favored for their fascinating blooms. Although grown primarily as ornamentals, they can still be used in cooking; try their flowers as a garnish.
Oregano Basics. Oregano does beautifully in containers, staying relatively compact (the trimmings you take for the kitchen will also help keep it that way) and requiring little fuss. It must have well-drained soil and should never be overwatered. Place it in full sun for best appearance and flavor.
Gardeners in dry, mild climates have the best luck with this splendid herb. It struggles in long periods of cool and rainy weather, and in areas with high humidity (humid weather or poor air circulation around the containers encourages disfiguring fungal disease). Although oregano is fairly hardy, it will not survive bitter cold. You should probably play it safe and either mulch the containers well when the weather turns frosty or bring the plant inside to a bright windowsill for the winter months.
Planting. Oregano is seldom raised from seed, not because it is a poor germinator but because it is so variable. It hybridizes readily, and there’s no telling exactly what the resulting seed will produce (in addition, some seed is sterile). So start with a small plant, from either a mail-order nursery or a well-herbed garden center.
Shop for plants in the spring, and don’t worry if they seem small; they are fast growers, and spread out quickly.
To distribute plants of your favorite varieties to friends, divide mature specimens or take cuttings, which is what professional nurserymen do.
Success with Oregano. The best fragrance and flavor, and the richest foliage color, occur when pots of oregano receive plenty of warm sunshine. For brand-new plants, fertilize when you transplant them into the permanent container; for established plants, fertilize once early in the growing season. Don’t overwater, and don’t let the pots stand in saucers of water; that’s a sure route to root rot. Early in the season, take a look at the overall shape of the plant and do a light pruning to tighten it up, if needed.
Unhappy plants sometimes get attacked by spider mites, aphids, or other insect pests. The best course of treatment is prevention—that is, raising healthy plants. As you snip bits of oregano for cooking, check the leaves for any sign of damage. Review Chapter 6 for controls.
Harvesting. Liberal harvesting doesn’t set oregano back. In fact, the more sprigs you snip, the bushier the plant grows. Use the leaves dried or fresh. The famous cookbook author Craig Claiborne said he found that dried oregano actually had “more character” than fresh.
Varieties. Warning: in the nursery trade, oreganos are frequently confused, so it’s not easy for us ordinary folks to know if a particular plant is correctly labeled or accurately described. Our best advice is to sample anything that intrigues you in a catalog description, or visit a well-stocked garden center and choose on the basis of your own impressions.
The basic oregano, the common wild plant, is Origanum vulgare. Aficionados say it is not as flavorful as some of its subspecies, notably O. vulgare hirtum, sometimes also labeled O. heracleoticum. This is the one that nursery people usually mean when they speak of Greek oregano. It has superlative flavor, and is indeed the favorite of Greek cooks, but it’s also the classic choice in Italy.
Another outstanding variety for culinary use is the one known as Sicilian oregano, which is actually a cross between an oregano and a marjoram. It has white flowers and very good flavor.
Ornamental oreganos are less fragrant but still edible. Of those that do well in containers, two are especially beautiful. The cultivar Herrenhausen has masses of tiny purple blossoms clustered along the stems. The long-lasting flowers are deep and rich in color but with a brightness that is especially appealing. They look lovely in fresh flower bouquets, and dry beautifully. The stems of this plant are essentially upright, rather than trailing, but they form a graceful spray that is lovely in containers.
The other charmer is Kent Beauty, a cultivar of O. rotundifolium. Its primary appeal is its unique soft pink flowers, which form at the very end of the stems and look very much like the flowers of hops. Because of these lovely blooms and the trailing foliage, this one is very popular for hanging baskets. It is not, however, hardy enough to stay outside in winter in most of the country. Bring it indoors, and keep it on the dry side.
Dried parsley flakes are a common item on many a spice rack, but they are a very poor substitute for the fresh version. The flavor and texture of fresh parsley make it seem like a completely different herb, aromatic and sharp. Modern cooks are using it by the handful. When a dish needs a little something, many of us try chopped fresh parsley as a flavor booster instead of salt. Plant enough so you can really use it.

If you’re one of those people who think of fresh parsley in one way only—as that green frilly thing perched on the edge of the plate at sandwich shops, usually returned untouched at the end of the meal—you owe it to yourself to try it as a cooking herb. It is full of flavor (not to mention vitamins and breath-sweetening chlorophyll), and if not overcooked retains its bright green, perking up many dishes with color as well as taste.
In the garden, parsley is a handsome and versatile plant that works well in many combinations. The rich green foliage is a nice foil for many other colors, and the small, tidy shape makes it a good choice for tucking in wherever a spot suddenly becomes empty. Use it freely to help tie together the look of a mixed pot, or plant it as a border around the edges of a large container. It’s almost like garnishing your containers with parsley.
Parsley Basics. Parsley belongs to the plant family known as Umbelliferae. It’s a valuable family for cooks to become acquainted with because it comprises so many herb plants: anise, chervil, cilantro, dill, fennel, and sweet cicely. Carrots are also umbellifers, and so is a wildflower you have doubtless seen many times: Queen Anne’s lace. Think of the flower of Queen Anne’s lace, like an umbrella opened up but held upside down so that it would catch water rather than repel it, and you have the key distinguishing trait of this family.
In addition to the curly parsley that you push around on your plate at the diner, there are several other types, interesting to know about and interesting to try in your garden. One type is called flat-leaf or Italian parsley. It looks very much like a large, dark green version of cilantro, but with the distinctive parsley taste. Many people consider the flavor of flat-leaf parsley superior to that of the curly type.
You may also enjoy experimenting with the so-called double-curled and triple-curled types. These are not as tightly frilled as curly parsley, but they’re also not totally flat. The flavor is approximately the same, so the main appeal is visual. For your mixed container you might simply prefer the look of one over the other. All these types have the same basic growing requirements and uses as the curly varieties.
Although we grow it as an annual, parsley is botanically a true biennial, meaning that it takes two years to go through a full life cycle. In the first year from seed, it is a small, leafy plant, and this is the foliage we cut and use. As long as a small amount of foliage in the very center of the plant is left in place and the long, carrotlike taproot is not disturbed, the plant lives over the winter. The following spring a tall flower stalk shoots up from the center of the foliage, and ultimately produces seeds. At the end of the second growing season the plant dies, first scattering its seeds to begin a new cycle next year. In the second year, the foliage is coarse and unappetizing, so gardeners who are also cooks tend to start anew with first-year plants each spring.
Planting. Parsley seed is slow and erratic to germinate, and even commercial greenhouse managers have to soak the seeds overnight before planting. We suggest you take the easy route and buy plants at the garden center.
Select young plants that are small and appear to be growing vigorously (the color will be bright green and healthy looking). Plants that are large or crowded in the nursery pot are difficult to transplant; in your container they will simply sit and sulk, unhappy about their root disturbance.
Parsley is a good cool-season grower, so often the plants appear at the garden center early in spring. Go ahead and transplant them into your container whenever it’s convenient; they can even take a light frost without damage. Parsley isn’t particularly fussy about the soil it grows in, as long as it isn’t waterlogged, and will usually do just fine with whatever conditions are available. It’s one of the least demanding plants you can grow.
Success with Parsley. Give parsley a sunny to partially shady spot, and it will be happy. In fact, it’s one of the herbs that will take more shade than most and still give lots of nice foliage. Again, the most serious error you can make is creating waterlogged conditions (a combination of too much watering and soil that drains poorly).
Harvesting. Parsley can be harvested anytime there are enough leaves on the plant to give you what you need without cutting off all the foliage. It’s a good idea to have several plants to cut from so one doesn’t get overharvested.
Parsley is a cut-and-come-again herb, and will continue to produce leaves all season. Cut the oldest leaves first, leaving the center leaves to grow. Fresh parsley, chopped or minced, is wonderful in salad dressings, dips, soups, potato dishes, baked fish, or chicken—in fact, it is one of the most versatile cooking herbs we have.
Varieties. Green River is an extra-hardy curly type that doesn’t lose its curl even in heat; it’s one of the most flavorful and one of the best for drying, if you have more than you can use fresh. Gigante d’ltalia, a very large, old variety from northern Italy, is a good choice for flat parsley. It has a more robust flavor than some, and is especially good in salads and when teamed up with fresh tomatoes. It’s taller than most parsleys, a foot or more in height, and so probably should go in the center of your container.
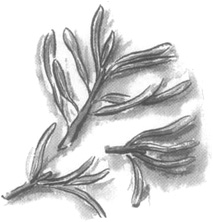
Few plants are as easy to grow in containers, or as satisfying, as rosemary. Herb lovers have dozens of varieties to choose from; some sprawl and drape, some form jaunty little bushes, and certain upright ones lend themselves to training into fun or elegant topiary displays (see page 245). Rosemary’s pliable stems are always thickly lined with fragrant, needlelike leaves, and the flowers, though small, are quite pretty, usually in shades of blue but occasionally white or soft pink.
That evocative, almost piney fragrance is the reason this herb is so beloved. You will discover, if you visit a well-stocked nursery, that there is some variation in scent. Gently run your hand along different branches and smell your fingers, then pick the variety you like best.
Although rosemary leaves dry and freeze well, the flavor they impart to certain dishes when fresh is incomparable. Add them to roasted meats, game, and poultry. Simmer them in tomato-based sauces. Toss rosemary into ratatouille or steamed squash or beans, or sprinkle it, finely chopped, over a fruit salad. You can even bake it into bread; it’s wonderful in foccacia.
Rosemary Basics. In nature rosemary favors dry, sunny locations. Put your pot in full sun, and don’t worry if it gets lots of reflected heat from your patio or courtyard walls; rosemary loves such conditions.
Don’t, however, neglect water. One of the main causes of death is drying out, and the plant will not recover if you discover your error too late. And when you water, include a little liquid seaweed fertilizer. Rosemary plants adore this food and respond with lush, beautiful growth.
Rosemary is a perennial herb, and will last for many years as long as you can give it some assistance during the winter. This is not a cold-tolerant plant. It can remain outdoors to about 25°F; below that, it’s at risk. So unless you live in a mild climate, your best bet is to bring the rosemary indoors when temperatures dip, and keep it there until well into the following spring. Many varieties of rosemary are winter bloomers, so that’s a nice indoor bonus.
When you bring rosemary indoors, be extra conservative with water. Growth naturally slackens at this time of year, and the plant’s needs will change in its new environment. So keep an eye out for the first few weeks, until you get a sense of what the plant needs. Also, hold off on the fertilizing until early spring.
Planting. Rosemary is rarely raised from seed. For one thing, it takes forever and a day to grow; for another, the many different varieties are best propagated by cuttings. If someone you know has one you covet, ask to take a cutting or two in early summer from fresh growth. Once it has rooted, transfer it carefully to its permanent container and don’t move it again. Rosemary doesn’t enjoy being transplanted. If you buy small plants from a nursery in the springtime, move them—gently—into a permanent pot as soon as you can.
This herb isn’t especially fussy about soil quality, but your potting mix should drain well to head off the potential for root rot. Add a touch of lime; in nature rosemary grows in slightly alkaline conditions.
Success with Rosemary. The real challenge with raising rosemary in containers is watering. Neglect it and the plant, unforgivingly, dies. Overwater, and the roots rot; again, the plant dies. Here are a few tips. Choose a clay pot, which is porous and wicks water away from the root system. Fill it with a well-draining mix, one that includes some sand or a high proportion of perlite. Then, after you water, remove the dish under the pot and toss away any excess liquid. If the plant is in a very hot, sunny spot, spritz the foliage every now and then.
It’s not common for rosemary to experience pest problems, but you should check the plant occasionally, particularly if other potted plants in your collection have problems. Powdery mildew occasionally appears; see Chapter 6 for controls.
Harvesting. You can snip off foliage bits at any time. The newer, younger growth at the tips is softer and tastier. As a rule of thumb, try not to remove more than one-fourth of a branch’s length at any given trimming.
To dry, simply lay out the stems—not touching one another—on paper or a screen in a warm dry place. After a few days or a week, store them as is, or strip off the leaves. To retain maximum pungency, keep your harvest in an airtight container in a dry place.
Varieties. Browse the pages of any good herb catalog, or if you can, visit a nursery that is known for a broad selection. You can try different ones in different years, or combine two or more in the same container, all in the name of finding your favorites.
If you want plants that drape over a pot’s side, look for Severn Sea or Mrs. Howard’s. Both are robust trailing varieties, with medium blue flowers, and grow rather rapidly. They are also good for topiary because of their lanky, flexible stems. Lockwood de Forest is another fine trailing variety with lavender blue flowers and especially dark green foliage. For an upright-growing rosemary, Tuscan Blue is the classic choice, though there are many others. Arp, a medium-size rosemary with a mostly upright habit, has light blue flowers and gray-green foliage. Many experts believe it is more cold-tolerant than most others.
At their ultimate, topiaries are large landscape shrubs that have been trained and pruned into very unshrublike shapes—geometric forms or fanciful animals or sometimes even green versions of statuary. You’ve probably seen them in the large formal gardens that seem to be the setting of so many romantic movies that take place in nineteenth-century England.
At the level of container gardens, topiaries are of necessity smaller and usually simpler. Whether or not you find the idea appealing is a matter of personal preference, but if you should want to try your hand at it, here’s the basic process.
1. It is much easier to train a plant that naturally produces long, rambling, flexible stems. Rosemary stems, when they are young, are just about perfect. Marjoram is another good choice.
2. Decide on the shape you want. In large garden centers it is possible to purchase wire forms designed specially for topiary, either abstract shapes or small animals. Insert the form in the container, and plant several very small plants at well-spaced points around it. As they begin to grow, help them catch onto the wire and wrap around it, with a bit of string or fine wire if need be.
3. If that’s too cute for you, you can also do a very nice topiary without the forms. One classic look is patterned after a basket. Take a large container and insert a length of stout wire or thin bamboo; shape it into an arch, like the handle of a basket. Position a small plant at each end, and train them to grow around the handle. You can make a very handsome mixed planter with herbs on three levels: rosemary handles; sage, tarragon, or dwarf lavender upright in the basket; and several varieties of thyme spilling over the sides. This would be a wonderful gift for a friend who enjoys cooking with fresh herbs.
4. Another popular technique is to train one sturdy plant into what is known as a standard: a single specimen shaped like a miniature tree. The lower branches are completely removed to create a bare lower stem that mimics a tree trunk. Then the upper part of the plant is allowed to grow, but shaped into a round ball or a more free-form tree shape. Sometimes you see roses done this way and marketed as tree roses. A pair of matched pots containing the same variety of plant, flanking a front doorway, is a classic look.
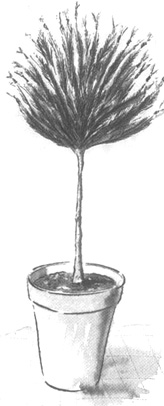
Rosemary is easily trained into a topiary or a standard, as shown here.
With most culinary herbs, we’re primarily interested in the leaves, sometimes the seeds, and occasionally, as a bonus, the flowers. Other plants used to flavor foods are harvested for their roots, bark, flower buds, berries, seedpods—the spices of the world. But in only one case that we can think of is the raison d’être such a tiny element: one specific part of the plant’s flower.
It’s time for a short detour into the sex life of plants.
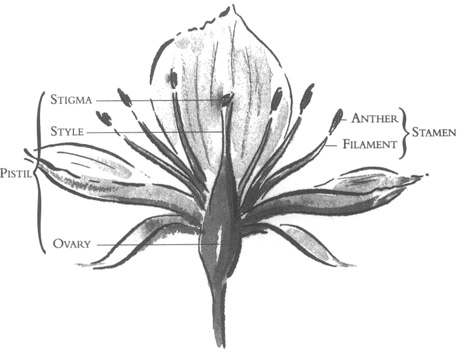
All flowering plants have a sophisticated reproductive system, with male and female organs built into their flowers. The male parts, called stamens, produce pollen. The female organ is called a pistil, and it is composed of three separate elements: the ovary, tucked away in the base of the flower; the stigma, the very top part of the pistil, which catches the pollen; and the style, the thin stalk connecting the stigma and the ovary.
When the pollen (the male seed) is ripe, it becomes loose so that when a visiting bee, attracted by the bright flowers of the petals, brushes against it, some pollen is transferred to its legs. Then, as it crawls around in search of nectar, it transfers some of the pollen to the sticky stigma, whence it travels down the style to the ovary, fertilizing the ovary for the production of viable seeds. Thus life goes on.
That’s the basic process, and an extraordinarily clever design it is. In the case of saffron crocus, however, there is one minor twist. The very unusual structure of this flower’s stamens and pistil inhibits the transfer of pollen, and so the plant does not set seed. The crocuses are propagated from bulbs that naturally divide underground.
Fortunately, though, the crocus flowers still contain the reproductive parts. The pistil of the saffron crocus flower has one style that branches into three separate stigmas. They are bright orange, relatively large in comparison to those of most plants, and droop downward outside the flower petals. It is those stigmas that we call saffron.
Commercial saffron is the world’s most expensive spice because of what it takes to grow and harvest it. Each plant makes one or occasionally two flowers a season; that’s three or maybe six stigmas per plant. The flowers are picked by hand (backbreaking work) and the stigmas plucked out, again by hand, and dried. It takes 75,000 flowers to make one pound of dried saffron.
So is it worth growing a few flowers for the small amount of saffron you would harvest? Actually, yes. For one thing, it takes only a few threads of saffron to flavor a dish of paella or bouillabaisse. For another, you get to enjoy the pretty lavender-colored flowers that bloom in late fall. And think of how smug you’ll feel.
Almost everyone is familiar with crocus flowers. In the early springtime they’re among the very first splashes of color in an otherwise bleak landscape, sometimes bursting through the snow with a yellow or purple hello. But not everyone realizes that there are also fall-blooming crocuses, and the saffron crocus is one of these (see the important box on page 249). Except for the characteristic bright orange stigmas, it looks very much like a soft purple spring crocus, both flower and foliage. So when you choose to grow the crocus for the saffron, you have the bonus of beautiful flowers during a part of the year when most other flowers have passed.
The saffron crocus is native to the areas around the central and eastern Mediterranean that we now call the Middle East, where its main commercial growing areas still exist. From there it spread westward to the ancient cultures of Greece and Rome, and eastward to India and China as part of the spice trade. The plant was brought to Spain in the eighth century by the Arabs; from Spain it spread across continental Europe, and eventually to England.
In 1699 the English botanist John Evelyn wrote of saffron: “Those of Spain and Italy generally make use of this flower, mingling its golden tincture with almost everything they eat.” This is still largely true today, for saffron is best known in dishes that we associate with Mediterranean countries: paella and arroz con pollo from Spain, bouillabaisse from France, and risotto Milanese from Italy. (Notice the special affinity between saffron and rice.) All those dishes get both a “golden tincture” and a very distinctive, exotic flavor from just a few threads of saffron. Luckily, a few threads is all you need.
Note: be very sure that you are buying Crocus sativus and not Colchicum autumnalis, a flower called the autumn crocus, which is extremely poisonous (see box).
Saffron Basics. Saffron crocus, like all crocuses, grows from a bulb. It blooms in October and November, with flowers in shades of lilac or purple. Like their springtime namesakes, these crocuses open in the sun and close on wet and cloudy days. When the blossoms fade, that’s the time to gather the stigmas. Once the flowers are past, the plant sends up its foliage: spiky, narrow dark green leaves.
This is one of Mother Nature’s contrary plants: it goes dormant in summer and grows its foliage in winter. Where winters are mild, the crocus has no problem. But a heavy snow would totally cover the new foliage, preventing the production of chlorophyll, and the plants would die. Solution: if you live in a very cold climate, bring the container inside in the fall and let the plants finish their flowering on a windowsill. Move them back outside as soon as you can in the spring.
When the foliage dies back in summer, stop watering. Your goal is to let the plants move into dormancy naturally. In the fall, when moisture and cooler temperatures return, a new season of flowering begins.
Planting. Bulbs are easy to plant. Use a basic potting mix and fill the pot half full. Sprinkle about a tablespoon of bulb food or bonemeal over the soil for every three bulbs you plant. Cover the bulb food with an inch or two of potting mix, then set in your bulbs, spacing them an inch or so apart with the pointed end up. Cover them with 3 to 4 inches of the potting mix, and water to settle it all in. Add a little more soil if the tips of the bulbs are exposed.
Because saffron crocus bulbs, like other bulbs, will multiply, you may not want to put them in with other plants if the container is small. Also, don’t forget that you will want a container that you can move inside if you live in a very cold climate.
In any case, you’ll need to unpot the bulbs every year or two and divide them; as the bulbs multiply, the pot can get overcrowded and the plants will stop blooming. Do this in mid to late July, when the plants are dormant. Simply plant the new bulbs in another pot and have that much more delicious saffron to harvest.
Success with Saffron. As long as you switch your mind over to the plant’s timing—blooming in autumn, growing new foliage in winter, going dormant in summer—you’ll find this an easy plant to grow.
Each year in summer add some bulb food and fresh potting soil, even if you don’t think it’s time to divide and repot the bulbs.
Harvesting. When the stigmas of the crocus flower are fully ripe and bright colored, pick them carefully. Use a small tweezers to hold them while you clip off each one with small scissors, and lay them on a glass dish or paper plate to dry. Saffron can be used fresh, but the flavor is best and more concentrated when the stigmas are dried. Store dried saffron in a closed container that is clean and odorless (most plastic has an odor). Dried saffron is adversely affected by sunlight, so store it in a dark glass jar or keep it in a cupboard.
Varieties. There is just one species, the inimitable Crocus sativus.
In ancient times, when all diseases and their cures were mysteries, it was believed that evil spirits hovered over the cradles of newborns, ready to take them away when the parents’ attention was diverted. To protect baby boys from death, they were swaddled in blue clothes; blue, the color of the sky, was thought to shield the baby from the evil spirits. Girls, considered the less valuable of the species, were given no special protection. At some later time, perhaps reflecting a more balanced view of humanity, a new childbirth legend developed: baby boys were born in a cabbage patch (think of the blue-green foliage of many cabbages), and the more delicate baby girls were born tucked inside the petals of beautiful pink roses.
Pastel colors are comparatively uncommon in a vegetable garden. But those who love them should not be shortchanged, as girl babies of long ago were, and so we put together herbs, flowers, and vegetables in this container garden that celebrates the color pink.
We want to achieve a sense of lush beauty: a container garden spilling over with beautiful plants, showing at least some pink in every season. This is the place for your prettiest container, perhaps one of the new molded foam types that are so wonderfully lightweight but look like elegant stoneware or antique terra-cotta.
In the center, the beautiful Marshall’s Delight monarda; unlike the more common red flower, this monarda has soft pink blossoms. A perennial, it blooms in summer and gives you both interesting flowers and leaves for a refreshing tea. For best results, plant it in a smaller pot and sink that pot inside the larger container; the hidden pot will help contain the plant’s vigorous root growth, leaving room for other plants.
In a circle at the base of the monarda, alternate clumps of Forescate chives and seedlings of Ruby Swiss chard. The stems of the chard are a deep magenta color that glows like neon when the sun hits it, and this variety of chives has bright pink flowers. The chard will be at its peak in late spring; when it starts to bolt in hot weather, pull it out, giving the chives more room. By mid summer the monarda gets bare at the ankles, and the pretty arching spray of the chives will cover them nicely.
Just outside the circle of chard and chives, put several small plants of tricolor sage and pink-flowered dianthus. The sage has green leaves boldly streaked with creamy white and rich pink. The dianthus, also known as pinks, couldn’t be a better choice for this all-pink garden. As they grow during the season, the two plants seem to blend into one—a very lovely plant with richly colored foliage and bright flowers.
In the outermost circle, close to the rim of the container, start the season with as many pink-flowered pansies as you can fit in. They will wilt with the heat of summer, and you’ll want to either take them out or cut them back severely. This opens up room for the sage and dianthus, which will be coming into full growth about that same time. With a bit of luck, the pruned-back pansies will flourish again in the fall, giving you one last blush of color before the season ends.
If you still don’t have enough pink, think about adding scented geraniums for next year. And of course roses, for all the new baby girls.
Attractive and fragrant, sage gives you the best of both worlds. The plain species (Salvia officinalis) sports handsome silver-green leaves, but there are lots of cultivars and some of them provide splashes of color from apple green to gold to deep purple. These add cheer to any container when planted with each other or as a complement to other herbs or flowers. Draw near and rub the soft, textured leaves, and a warm, rich, almost lemony, almost minty scent envelops and seduces you.
If you love to cook, homegrown sage is a must. Its unique flavor enhances so many dishes, particularly the foods of autumn. Mix it into your Thanksgiving turkey stuffing, stir it into beef-and-carrot stew, or sprinkle it over mushroom risotto. Its flavor enriches marinades, omelets, steamed vegetables, even apple pie. Sage holds up pretty well in cold weather, so you should be able to slip outside and cut what you need right on the spot. If you dry the leaves, their flavor changes slightly and becomes a touch more pungent.
Rose Marie says: For a long time I never cooked with sage because the dried herb has a certain mustiness that always put me off. But in spite of that I found myself repeatedly planting it because I like the look of the plants, especially those with purple or golden leaves. Then I became curious about sage tea, which was once so highly regarded by the Chinese that they traded their own fine China tea for it. Sage tea is really quite delicious. To try some, place two or three golden sage leaves in a white china cup and let them steep for two or three minutes. Enjoy the fragrant tea and the pretty patterned leaves in the cup. Of course, now I often cook with sage—but only with the fresh leaves, which I can harvest a few steps from my kitchen door.
Sage Basics. All the sages are a cinch to grow, asking only for a good potting mix that drains well. Water when the mix looks dry, and don’t let it get soggy.
Midway through summer or toward the end of it, sage plants may send up flower stalks. The color varies from pink to white to purple to blue, depending on the cultivar. If you like the way the flowers look, of course, let them be. Sage flowers are a favorite of honeybees (which are cherished by all vegetable gardeners) and make an incredible herb vinegar, turning white wine vinegar a glorious magenta. But if you’re growing sage mainly for your kitchen, snip off the flowers so the plants can’t go to seed and foliage production can continue unabated. Also, as you harvest or prune leaves throughout the growing season, you’ll be forcing the plant to grow more compactly, which looks better.
Unless your winters are severe, you can usually keep pots of sage outdoors (when in doubt, bring them in). Prune plants low each spring when warm weather returns, and a flush of new growth should follow. Be forewarned that sage does not have a long life span. You’ll likely get only two or three seasons out of a plant before it becomes woody at the base and produces fewer and fewer leaves. So be prepared to start over with cuttings or new plants every few years.
Planting. Sage is not often raised from seed, partly because most gardeners want the interesting cultivars, which are best grown from cuttings. Also, sage seed tends to germinate poorly and the plants that finally appear grow slowly.
Your best course, then, is to buy young plants in the spring. If your local nursery has a disappointing selection, check out mail-order nurseries or take cuttings in the fall from varieties you like.
Sage is not fussy about soil, though you shouldn’t subject it to a heavy mix that drains poorly. Instead, add a handful of sand or extra perlite or vermiculite to a commercial potting mixture. Sage thrives and looks great in clay pots, which also wick moisture away from the roots.
Success with Sage. Sage is a dry-land plant; it does best with plenty of sunshine and in well-drained soil. The leaves of some kinds are so pretty that you might be tempted to include one or more in a combination planter built around a color theme. Be careful, though, not to combine sage with water-loving plants, or you may not be able to keep everyone happy.
Pests never seem to trouble sage; they’re no doubt repelled by the strong fragrance we find so appealing.
Harvesting. Clip off a few branches strategically around the plant so it doesn’t look butchered or lopsided. Pinch off the leaves and discard the stems. To use fresh, mince leaves with a very sharp knife, or use them whole. Add midway through a recipe, so they have time to release their flavor but don’t completely lose their texture.
To dry the leaves, put them in a warm, dark spot on paper or a screen. Their color will fade and they’ll curl a bit and become brittle, so when you gather them up to put in jars, handle them gingerly. Or go ahead and pulverize them between your fingers. Fully dried leaves when crumbled become a fluffy mass that can be measured out by teaspoonfuls in the kitchen. The flavor of dried sage leaves is a touch more pungent or bitter than that of fresh ones.
Varieties. A classic variety, the one used by commercial producers of packaged dried sage, is Holt’s Mammoth. It has large gray-green leaves with a clean, noncamphorous flavor, and produces masses of soft blue flowers in late spring. As for the colorful-leaved cultivars, some of the best are purple sage (Purpurascens), golden sage (Icterina), and the justly popular Tricolor, splashed with green, cream, and pink. Unfortunately, Tricolor tends to be shorter-lived than other varieties, but it’s so lovely you won’t mind replanting it.
In addition, there is one very special type so unique that we give it special billing here: pineapple sage.
GROW AS: tender perennial
PLANT SIZE: 2 to 3 feet tall, 1 to 2 feet wide
START WITH: transplants
HARVEST SEASON: fall
SUN REQUIREMENTS: full sun
MINIMUM SOIL DEPTH: 8 inches
Something of a novelty in the world of sages, pineapple sage takes no special trouble to grow and promises a range of culinary treats. The plant emits an irresistible sweet-ripe-pineapple aroma that you and visitors to your garden will enjoy from a foot or two away. Both the leaves (which are light green and a little bit fuzzy) and the amazing red flowers (long, thin, and shaped like a medieval trumpet) are fragrant and edible. And they really do taste and smell like pineapple.
The entire plant is beautiful with a reddish theme: the stems have a red hue, the leaves are rimmed in red, and the flowers, when they finally appear, are a dazzling scarlet. Leaves and flowers contribute their novel, sweet flavor to everything from fruit salads, pork, chicken, and rice dishes to jams and jellies. Add a few sprigs to lemonade, iced tea, or homemade piña coladas. Or dry some for use in sachets or potpourri.
Pineapple Sage Basics. Even though its appearance is so different from the other sages’, pineapple sage needs much the same growing conditions. Like other sages, it prefers well-drained soil, but it does require more water than its cousins and should never be allowed to go completely dry. On the other hand, look out for root rot caused by overwatering.
The chief delight of this plant is its astonishing flowers, but a minor catch-22 is at work here. Pineapple sage sets flowers in response to short day length, so in the north it is a late bloomer, sometimes so late that cold weather threatens the tender plant by the time it comes into bloom.
This is not a problem for gardeners in mild climates, who can leave the pots out on their patio or deck and may get to see late-browsing bees, butterflies, and even hummingbirds stop by to sample the sweet nectar. But since pineapple sage cannot tolerate freezing weather, it will have to be brought indoors in climates where a winter freeze is inevitable. Make sure it gets a sunny spot on a windowsill or in a heated sunroom. It makes a gorgeous houseplant; the scarlet flowers, coupled with the pineapple fragrance, are wonderful to enjoy while the snow flies outside. In a heated room the pot may dry out faster than it did when outside, so keep an eye on soil moisture.
Inside or out, it is good practice to cut the plant down to several inches after blooming is over so it will greet spring with fresh growth.
Planting. Seeds are not widely available, so you probably will have no choice but to start with young plants. Even then you may have to search specialty nurseries to find them, but it’s a worthwhile search. Plan ahead for moving the containers indoors in cold-winter areas.
Success with Pineapple Sage. This is not a sage you can plant and neglect. You’ll need to hover over it year-round. In addition to plenty of sunshine, pineapple sage requires regular watering but should never be left in standing water or the roots will rot. However, it seems to tolerate dry weather more than most plants. When it begins setting flower buds, keep up with the watering, both to maintain good flowering and because plants are especially thirsty when blooming.
Harvesting. Like other sages, pineapple sage benefits from a little pruning to keep it shapely, and this is your opportunity to harvest some of those tasty scented leaves. They make a novel garnish for drinks or salads, and are best consumed fresh, as dried leaves lose most of their potency.
The fragrant flowers are also edible. Pinch them and use immediately so their scarlet color can be appreciated. Sprinkle them into a holiday punch bowl, press them into cake frosting, or add them to soft cheese as an appetizer.
Varieties. The basic species, Salvia elegans, has scarlet flowers. The cultivar Frieda Dixon has blossoms in softer colors: coral red to salmon.
In a world of herbs intended as seasonings, salad burnet is something different. Although it looks like an herb, grows as easily as many other herbs, and is fragrant and delicious, it almost seems to belong to the vegetable tribe. Why? Because its leaves—the young ones, especially—taste uncannily like cool, crisp cucumber. And they are ready to enjoy well before your vegetable garden will have any ripe cucumbers to offer.
Salad burnet, or burnet, as it is also known, is a natural for salads, of course. Strew fresh-picked, loosely chopped leaves over an ordinary lettuce and tomato salad, and surprise and delight everyone at the table. Creative cooks also like to add it to coleslaw, plain yogurt (as a dip or side dish), and herb butters. It also enhances cold summer soups; imagine how delicious it would be garnishing vichyssoise or added to gazpacho. If you’re making Bloody Marys or Virgin Marys a sprig of salad burnet would be an intriguing garnish and conversation piece (granted, it’s floppier than the traditional celery stick).
This is a charming little plant, with delicate, lacy leaves on short stems that grow in a rosette shape. The flowers are small but adorable: little lime green globes that spray out tiny pink pistils at all angles.
Salad burnet is an early-season herb, best used while young. In any case, it can be enjoyed only by those who grow it, for this is definitely a fresh-only herb. Dried leaves are a disappointment; they lose all color and flavor. The only way to preserve salad burnet’s wonderful taste beyond the season is to steep the foliage in vinegar to make a cucumber-flavored infusion. Use it in salad dressing, and save a few bottles for holiday gifts.
Salad Burnet Basics. A perennial that keeps its leaves in all but the coldest months, burnet is an easy-going plant. It thrives in sunshine, likes its soil slightly alkaline, and doesn’t require much water or coddling. To keep a steady supply of young leaves coming on, you’ll want to clip the plant regularly. Once it goes to flower, the flavor diminishes.
This plant has been in cultivation for a long time. Its wonderful flavor accounts for at least some of its enduring popularity, but the fact that it is widely adaptable certainly doesn’t hurt. It grows in almost any soil except heavy clay or acidic ones. It likes full sun best, but tolerates some shade, and is never troubled by pests or diseases. Burnet withstands periods of neglect and is extremely hardy; in fact, it can stay outdoors all year long in all but the harshest climates, so long as the container itself is frost-hardy. In short, it is a low-maintenance perennial plant.
One caution: salad burnet does not like to be moved around because it develops a taproot that gets longer with age. So choose a deep pot.
Planting. This plant is no trouble to raise from seed, either purchased from a catalog or gathered from someone else’s plant in autumn. You can start the seeds in either autumn or spring. Sow seeds in a seed-starting mix, cover with a light dusting of the mix, then set in a warm spot (70°F or so). Germination generally occurs in a week to 10 days. Move the seedlings into their permanent pot as soon as it’s practical, so you won’t disturb the developing taproot.
Or avoid the issue from the outset by sowing directly into the chosen pot; the seedlings may look dwarfed at first, but will be overflowing their bounds by summer’s end. And be forewarned that if you allow your plant to develop those little flowers and go to seed, you’ll have volunteer seedlings in the pot next year, as well as in adjacent pots and any nearby dirt.
If you buy seedlings from a nursery, go for the smallest ones you can find (so long as they are well rooted, of course). At home, transplant promptly so they can develop that taproot without inhibition.
Success with Salad Burnet. Despite its wispy, fernlike foliage and delicate little flowers, salad burnet is a pretty tough plant, able to survive drought and neglect. Again, to get the most attractive plant, not to mention the tastiest harvest, you should grow it in soil that is neutral or even a touch alkaline. It really doesn’t like acidic soils.
Make sure your potting soil drains well, and water sparingly. A soggy salad burnet plant develops crown rot and struggles or even dies.
Harvesting. The younger the leaves, the more pronounced and delicious the cucumber flavor. So begin clipping in early summer. When you notice the plant sending up flower stalks, pinch them off to force the plant to concentrate on making more foliage instead. Despite your best efforts, however, the foliage does coarsen and the flavor diminishes as the season goes on.
This is an herb you must use fresh. Dried leaves curl up, turn brown, and lose all flavor.
Varieties. Just one basic species: Sanguisorba minor.
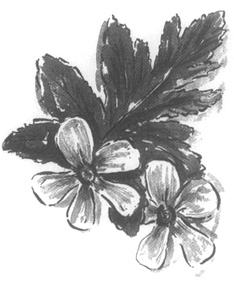
We’re not talking here about the familiar window box “geraniums” (which are actually pelargoniums), the ones with large flower heads in assertive colors, although they are relatives. We’re also not talking about true geraniums, the fluffy bedding plant gardeners call hardy geranium. Scented geraniums are something else entirely, and they are wonderful indeed. The flowers are dainty and pretty but not especially noteworthy. The real joy of these plants, and the whole reason for growing them, is the amazingly aromatic leaves.
You can find scented geraniums with the aroma of rose, lemon, lime, apple, orange, apricot, peppermint, lemon balm, nutmeg, coconut, ginger, eucalyptus, and camphor—to name a few. The array of possibilities is staggering, and plant breeders are continually introducing new cultivars to feed the demand from enthusiasts.
Scented geraniums, rich with spicy, fruity, and floral fragrances, have been around for hundreds of years. It’s likely your grandmother grew some on her front porch. In the winter she would prune them back and bring them into the house to grow on a windowsill or in a sunroom, as they would be killed by a hard frost. You’ll have to do the same with yours if you live in zone 8 or colder. But these plants smell so good you’ll be glad to have them inside with you, placed where you can brush against them to release their intriguing scents.
If you enjoy reading old cookbooks, you may know that at one time the leaves of rose-scented geraniums were used to line cake pans to impart their flavor to the cake. The leaves were often steeped in tea as well, so that when you sipped from your cup you could actually taste the scent of roses. And jellies flavored with scented geraniums were a real treat. All these old-fashioned delights are possible today for gardeners who discover the joy of growing scented geraniums. Do remember, however, to remove the leaves before eating or drinking.
The fragrance is in the foliage, and the best way to experience it is to rub the leaves between your fingers. When you do that, you also become aware of the great variety in shape, color, and texture of the foliage. One geranium may have downy soft, velvety leaves as big as your hand, while another has such finely divided foliage it reminds you of a fern. Some leaves are shaped like a child’s hand, others like a maple or oak leaf, and quite a few have brownish or burgundy patterns in the center. One lemon-scented variety has small, nickel-size leaves with ruffles around the edges.
All scented geraniums have blooms, but they are usually small and pale-colored, not of much significance. Occasionally you may run across one that has a really gorgeous little flower, and then you have a plant with a double bonus. One example is Snowflake, named for the creamy white splotches on the leaves that make the plant look as if it had been snowed upon, and bearing large clusters of light mauve flowers.
Scented Geranium Basics. These are perfect for that hot, dry spot where other plants seem to shrivel. They have fairly small root systems and do well in smaller pots than you’d think; even when root-bound, they just seem to keep on going. Geraniums are also drought-tolerant and can be revived from a wilted state with a good soaking.
On the opposite end, they will not survive a hard freeze and must be brought inside in freezing weather. Since they are quite leggy growers, you’ll need to do some drastic pruning at summer’s end or they may become too large to fit in your space. If space is really limited, a better alternative is to take cuttings and root them in damp soil or a glass of water, and discard the old plant.
Planting. Soil requirements are simple; a basic potting mix with a little sand added is fine. The soil should be slightly on the alkaline side, rather than acidic. For small plants, a 6- or 8-inch pot is probably adequate, but larger specimens such as Chocolate Mint need a larger pot; the problem is not so much the roots but the fact that the pot will become so top-heavy it will tip over. A mulch of pretty stones or small pieces of lava rock spread over the soil will help give weight and balance to a large plant.
The smaller scented geraniums can be grown in mixed containers with other plants. Plant them with other herbs that like the same growing conditions, such as lavender, rosemary, sage, and thyme.
Success with Scented Geraniums. Heat, sun, and water is the combination needed to grow these plants: heavy on the heat, moderate on the sun, and light on the water. Let the containers dry out slightly between waterings, to help flavors and scents develop. Overwatering is about the worst thing you can do, as scented geraniums don’t like to have wet feet.
If during the course of the summer your plant needs pruning to keep it to a manageable size, cut back one or more of the stems all the way to the base. Then remove all but the top leaves (keep the leaves you remove for tea or whatever), and push the almost-denuded stem into a pot of moist soil to root for a new plant. Be sure to label your plants, especially the cuttings you take, as sometimes the scents are similar and the plants often look alike.
Harvesting. Just pick the leaves as you need them for tea, for baking, for jelly, or for the sheer pleasure of having one to rub against your cheek. Leaves can be dried and stored for later use, or added to potpourri. A few tossed into a drawer of linens will give them a lovely scent.
Varieties. The three most popular types are the mint, lemon, and rose varieties, and there are quite a few cultivars of each. Chocolate Mint is a large plant with velvety leaves and a hint of chocolate in its fragrance. Snowflake, mentioned above, has the fragrance of both rose and mint. Mabel Gray is the best of the lemon types. Prince Rupert is a large, sturdy plant with an intense lemon fragrance; very nice for teas and jellies.
But probably the all-time favorites of nostalgic gardeners are the rose-scented geraniums. Two suggestions, among many: Attar of Roses and Old-Fashioned Rose. These make heavenly herbal tea.
Shorter than sugar cane and prettier than a sugar beet, the plant called stevia (also known as sugar plant or sweet herb of Paraguay) has a sweetening agent that is many times sweeter than sugar, with zero calories. This is why stevia has gained such popularity in the diet-conscious United States in the last few years.
Stevia is native to the mountains of Brazil and Paraguay, and the people who live there have used it as a sweetener for centuries. But it wasn’t until the 1800s that it became known in Europe, and during World War II the British used it as a sugar substitute when real sugar was rationed. Japan began growing stevia after the war and is now a major grower; stevia is approved for use as a sweetener in many food products and soft drinks there. It has not yet been approved by the USDA as a tabletop sweetener (the powdered extract) in the United States, but it can be sold in various forms in health-food stores as a “dietary supplement,” and you can certainly buy the plants and have your own supply of perfectly legal, completely safe, no-calorie sweetener.
Stevia Basics. In its native habitat, stevia is a perennial plant that grows wild in rather infertile, sandy soil along the edges of streams and marshes, which tells us it isn’t very fussy about its growing conditions. Without pruning, it gets to be about 2 feet tall, branching from the main stem into a bushy little plant with small leaves and hairy stems. It’s not particularly impressive in appearance, but that’s not the point. The first time you nibble a leaf, we guarantee you’ll be impressed.
In most climates stevia must be brought inside for the winter, or be grown as an annual, because it won’t survive even a light frost. You can take cuttings from the main plant and root them in a glass of water or a pot of damp, sandy soil to grow inside over the winter.
Planting. Plant stevia in a pot by itself, to facilitate moving it indoors for the winter. Any basic potting mix with a neutral to slightly acid pH is fine. Small plants sometimes start slowly, but be patient and they’ll soon take off.
Success with Stevia. Once the plant is growing well, set the pot where it will get full sun all day, with a little filtered shade during the peak of the hottest summer days. Otherwise, heat is stevia’s friend. Position the container in such a way that the plant can lean on its neighbors for support. Wind and rain can cause the brittle stems to break.
A monthly feeding of a balanced plant food such as 20-20-20 will keep stevia happy all summer. Watering requirements are also basic: water well when the top inch or two of soil feels dry to your fingers. If the plant seems to be wilting, check for moisture. Water with tepid water, not cold, and move the plant to a warm, shady place until it perks up. If the soil feels really wet and the plant is still wilting, you may have a drainage problem. Check that the drainage holes aren’t plugged, and move the pot out to a shaded, breezy spot where the excess moisture can evaporate. In winter, reduce watering.
Stevia is no more or less susceptible to insect damage than other plants, but aphids do seem to go after it.
When growing stevia inside, give it lots of bright light and good air circulation. A sunny south-facing window is best, but a west window will do. In short-day climates with less than 12 hours of good strong light, use grow lights. And if your plant suddenly dies, don’t despair; it probably wasn’t your fault.
Harvesting. Regular harvesting will keep stevia from getting long, lanky growth. Snip off fresh leaves or little sprigs whenever you wish to sweeten your tea or lemonade, or to sprinkle over fresh fruits. The leaves are good and sweet all year round, but the sweetness often becomes even more concentrated in late summer, when small flower buds are just beginning to form. You may think, then, that the flowers are a good thing, but in fact they have the opposite effect: they take the life and vigor out of the plant. When you see a tight cluster of buds in the leaf axils (the axil is that “V” formed where the leaf is attached to the stem), it’s your cue to act. Use small scissors or your fingers to pinch out the flower buds.
In early fall, cut back the plant to three or four leaf clusters, and then bring the pruned plant inside for the winter to continue growing. (Of course, you will harvest the leaves from the pruned-off stems.) If indoor growing space is limited, you can pull up the whole plant, pick off the leaves, and dry them all at once for a year’s supply of sweetener. To dry stevia, just spread the leaves out on paper plates or newspapers until they’re crisp and crumbly. They can then be pulverized into a powder with a mortar and pestle, or in a spice or coffee mill, and stored in a glass container with a tight-fitting lid.
You’ll have to experiment with stevia to determine exactly how much to use because the degree of sweetness will vary depending on how or where the plant is grown, but figure that between 1 and 3 teaspoons will equal a full cup of sugar—and with no calories!
Varieties. Just one species: Stevia rebaudiana.
Sweet woodruff is not usually considered an edible herb, but it is nonetheless a valuable addition to your garden, for it is a very pretty ornamental and the dried leaves have many pleasant household uses.
The plant contains a chemical ingredient that gives it a vanilla fragrance, and this is much more pronounced once the leaves have started to dry. This fresh, sweet smell made woodruff a favorite strewing herb. In times before modern sanitation, particularly aromatic herbs were strewn on the floor in houses and public meeting halls and allowed to dry before being swept up, to help eliminate unpleasant odors.
Sweet woodruff has a place in the modern herb garden as an endearing ground cover, and is especially valuable because it is one of the few plants that truly thrive in shady conditions. It quickly spreads to become a low carpet of extremely attractive dark green leaves. In late spring it is covered with clusters of tiny white starlike flowers on stems that rise above the foliage, like a layer of lace floating above the green carpet. In Europe these flowers are traditionally added to Riesling wine to make a festive punch called May Wine, sometimes served with a few wild strawberries added to the punch bowl.
With its invasive roots, sweet woodruff can take over a large area in an open garden if not controlled. Confined to a pot, it will drape over the rim and help soften harsh edges. Grow this comely plant as a petticoat under taller plants such as monarda, or as a pretty ground cover under your container fruit trees, where it will be happy in the shade created by the trees.
Sweet Woodruff Basics. Woodruff forms a dense mat, spreading in all directions by sending wiry roots under the surface of the soil and also by self-sowing. In mild climates it stays at least partially evergreen all year, but in most areas it dies back to the ground in winter. Fear not; it is a really tough character and will come back with the spring tulips.
Planting. Buy small pots of sweet woodruff at the garden center in the spring, or get a start from a friend who has a patch of it in his or her garden. Just take a sharp knife and cut out a square or plug, much as you’d lift a square of cornbread out of a pan. Make a shallow depression in the soil of your container and press the plug into place. Keep it moist and shaded until the roots take hold, which usually takes only a few days, and it’s on its merry way.
Success with Sweet Woodruff. This is a native woodland plant in some parts of the country, growing wild on the damp, shady, humusy forest floor. In your container you would do well to strive for the same conditions: a loose, airy potting mix with lots of organic matter and even moisture.
Regular watering is important. If allowed to dry out or get too much sun, sweet woodruff will turn dry and burnt looking. It doesn’t seem to need much in the way of fertilizer, but an application of fish emulsion or liquid seaweed in the spring as new growth begins would get it off to a good start.
If your woodruff begins to look a little shopworn late in the summer, just shear it back with scissors and give it plenty of water, and it will reward you with fresh, new growth, although it won’t flower again until next spring. If it is really looking peaked and unhappy, feed it with a solution of fish emulsion. Otherwise, you can just sit back and enjoy it.
Harvesting. Sweet woodruff is easy to harvest. All you have to do is give it a haircut with household scissors, leaving only about an inch or two of stem so new foliage will grow.
Dry the foliage and use it in potpourri and sachets, or to stuff a pillow for a sweet-smelling night’s sleep. In times past a special woodruff-stuffed pillow was made for a young woman’s wedding night. Sprigs of the foliage laid in the linen closet will impart their light vanilla fragrance for a long time, and a friend of ours keeps a few branches in the back window of her car, replacing them every couple of weeks, for a natural deodorizer.
Varieties. There’s only one species: Galium odoratum.
Tarragon is a wonderfully pleasant, great-tasting herb that is best used fresh. It has an elusive flavor that reminds you a little of basil, slightly hinting of fennel, with a little bit of licorice, but in the end it is uniquely tarragon.
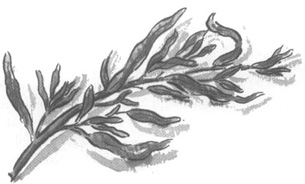
The leaves are on the small side, about an inch long and a quarter inch wide, and angle upward from the stems. Older mature leaves are darker and have a faint pearlescent sheen, while new leaves are a bright medium green. This is a small, upright, and fairly delicate looking plant that doesn’t take up a lot of above-ground room in a container.
Tarragon is the herb for chicken. Try stuffing several good-sized sprigs and a few lemon slices into the cavity of a roasting chicken. Or lay a few sprigs on fish fillets while they bake. Tarragon vinegar is the most popular herbal vinegar for good reason: it’s superb. Once you get a taste of this herb in its fresh state, you’ll find yourself looking for other ways to use it.
Tarragon Basics. Two different plants are called tarragon, but one of them, Russian tarragon, does not deserve the name. It is harsh and coarse tasting, and if you have tasted only this form of tarragon, you would think we’d lost our minds to be praising it as a culinary herb. True tarragon, or French tarragon (Artemesia dracunculus), is the one used for cooking. To make sure you’re getting real French tarragon, pinch off a tiny piece of leaf and taste it. You should get a little sizzle on your tongue.
Russian tarragon is grown from seed.
French tarragon does not produce viable seeds; you can buy only small plants, propagated in a nursery by cuttings from a mother plant. If you see a packet of seeds marked tarragon, it’s certain to be Russian tarragon.
French tarragon is a perennial that goes dormant in winter (for the exception, see box). The roots spread underground to make good-size clumps up to 2 feet across, sending up new stems to form a small bush with semi-woody stems. You’ll probably never see French tarragon flower, as it’s usually cut and used before it has a chance to bloom. In any case, the flowers are insignificant.
This is one of the Mediterranean herbs, happiest growing in sunny, dry places. If possible, give tarragon a hot spot where it can get some extra heat reflected from a building or a cement or stone structure. This would be the perfect plant to grow in a stone trough or in a container set on the south side of a building up against a cement foundation.
Planting. Compost and sand added to a basic all-purpose potting mix would make a good combination for tarragon. The soil needs to drain well, as wet soil will cause the roots to rot. (Think of the rocky, dry soil of Mediterranean hillsides.) If possible, use a container that retains heat.
Be a little patient with tarragon, as it takes longer than other herbs for the roots to reestablish and settle in after transplanting. Be sure the soil is gently firmed around the roots, and mulch lightly with a handful of fine peat moss.
Success with Tarragon. Tarragon does very well in containers. The two keys are to give it a good warm spot in the sun, and not to overwater. Water it lightly after planting to help it get established, then let the soil dry between soakings. Regular snipping will keep the plant neat. Tarragon is a heavy feeder and likes slightly alkaline soil; regular applications of fish meal fertilizer take care of both needs.
Once a year, check to see how much the roots are filling the pot. Tarragon roots tend to intertwine; the species name, dracunculus, means “little dragon,” a reference to the twisted pattern of the roots. In one season they can fill the pot and will actually choke themselves out in the second season. So repot and divide tarragon once a year. Do this in the spring, after it’s been growing inside for the winter (see the box at right), and pass some on to friends.
Harvesting. Cut the top 4 to 6 inches of the stems to use fresh in your kitchen. This will also help stimulate new growth from the sides of the main stem, and will serve to keep the whole plant neat and compact.
Dried tarragon leaves lose most of their really good flavor and fragrance, so it’s best to freeze any extra leaves you want to save for future use. Place them on a cookie sheet and freeze them, then put them into plastic bags to store in the freezer.
Tarragon’s light flavor is dissipated by long cooking, so generally it is added toward the end of the cooking period. Many cooks stir in the chopped herb when the cooking is finished, and then allow the dish to rest for a few minutes while the tarragon does its magic. (Incidentally, if your recipe calls for adding herbs or other flavorings at a certain point in the cooking process, there is usually a very good reason for those instructions.)
Varieties. As we said, use only French tarragon, Artemisia dracunculus. Don’t even be tempted to try Russian tarragon. There is, however, another plant that isn’t tarragon at all but is actually a very good mimic: Tagetes lucida, a type of marigold, sometimes called Mexican tarragon. It is a very acceptable substitute for gardeners in the Deep South, who would otherwise have trouble keeping tarragon through the winter. Because true tarragon needs a resting period of cold weather before the next season’s growth develops, it is difficult to grow in truly frost-free areas. Gardeners in hot climates will need to treat French tarragon as an annual, or try Tagetes lucida, which is perennial in frost-free areas.
Mexican tarragon gets to be 1½ to 2 feet tall, and produces small, single, deep yellow flowers in clusters rather late in the season. It likes regular, well-drained potting soil, and established plants should be fertilized once a month during the growing season. After a few years, the plant will need dividing; do it in early spring when new growth is showing. Use a sharp knife to cut all the way through the root ball. Replant and keep well watered until you see it begin to grow. The taste is much like that of French tarragon, with a strong scent and flavor of anise. Some people think it is stronger than tarragon, so start with a small amount when cooking, and then adjust for flavor.
Even if your climate is cold enough to be favorable to growing true tarragon, you may decide to grow this marigold as well, for the novelty and for the pleasure of its bright flowers. In that case, you can carry it through the winter by repotting it into an individual container and bringing it inside.
In a small Chinese village some 5,000 years ago, the servants of the village priest were boiling water for the household, as the priest was a very wise man and he believed that water that had been boiled was healthier. The large cauldron was in the courtyard of the residence to minimize the risk of spreading fire to the sleeping quarters, and nearby was a small tree, one of many that grew wild in the area. On this day, some of the leaves from the tree fell into the cauldron. The water changed color, and a pleasing aroma filled the air. The priest, no fool, had one of the servants taste the liquid, and when the servant did not die, he drank a cup himself. That is how man came to discover the pleasures of brewed tea.
The more frantic our days become, the more we yearn for quiet moments of respite. For many people, one favorite way to steal such a moment is with a cup of steaming tea. Snuggled up on the couch, both hands holding the hot mug up close to our nose, we can literally feel the tensions melting away as we breathe in the haunting aroma. It almost seems as if there is some magical ingredient in those tiny flakes, something soothing and seductive.
Maggie says: A few years ago I wrote a book about tea and tea parties, and in planning what to include I talked to many people about their love of tea. I came away with the strong sense that simply holding a teacup and feeling its warmth begins an automatic process of decompression. All our worries fade into the background, and our minds simply refuse to hold any static; we couldn’t solve a problem even if we wanted to. The hectic world will be back soon enough, but for now there is room only for peace.
Imagine how much more satisfying your cup of tea would be if you brewed a pot from your own special blend, made from tea leaves and herbs you grew yourself.
The design of this garden is intended more as an idea starter than a specific plan. It includes an actual tea plant, just like those grown in China and India, plus several tea herbs for you to choose from. Although we suggest a few plants here, we hope you will experiment with others, too, and have fun trying out several combinations of herbs or tea and herbs.
When you come up with a blend that especially pleases you, christen it with a meaningful name (Terry’s Tea, Magical Mint Medley, Duke of Earl Grey) and share it with friends.
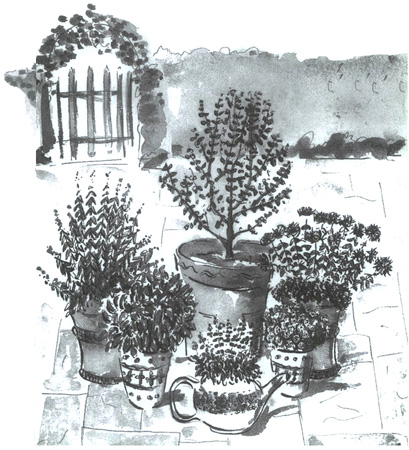
Several mail-order companies listed in the Appendix of this book sell small bags that you can fill with dried leaves and seal with an ordinary iron. A small basket of your special teabags would be a cherished gift.
Aside from herb teas, all the tea in the world comes from one specific plant: Camellia sinensis. This was the small tree growing in the priest’s courtyard. It is indeed a camellia, part of the same genus that gives us the beautiful flowers, but its value is in the tiny new leaves, not the blossoms. C. sinensis is native to the Far East—China, India, Sri Lanka, Siberia, Indonesia, and other parts of Asia. When tea is grown in different locales, with varying soils, altitudes, and weather patterns, the leaves acquire slight differences in taste; these geographic origins have thus become the names of different types of tea, for example, Assam, Darjeeling, and Ceylon. You are, therefore, completely justified in giving the tea you grow a name that is yours alone.
Don’t be surprised that you can grow tea in your container garden. It’s a pretty hardy plant, and lends itself nicely to container growing. At tea plantations the plant is a small tree or large shrub, but in your container it will remain a manageable size. You won’t get a huge harvest from one plant, but it’s fun and satisfying to grow and gives you something special to share with your tea-loving friends.
A tea plant is not a common item, but sometimes you can find one at very large garden centers or mail-order nurseries. Purchase a young plant, not seeds. Plant it in its own container, using a potting mix that you have liberally amended with shredded peat moss, commercial compost, or both. These amendments provide two qualities important to tea plants: they hold moisture, and they make the soil acidic. The roots of the plant are close to the surface, so you’d be smart to cover the soil with loose moss or other mulch to hold in moisture. For the same reason, tea is not a good companion plant; it does best in its own pot, where the roots don’t have to compete.
Feeding with a basic all-purpose fertilizer once a month is a good idea; if you notice that the plant is not sending out new growth in the spring or flowering in the fall, that’s your cue to add fertilizer. Your tea plant is a perennial and moderately hardy, but will need protection when the temperatures drop to about 25°F.
In late fall and early winter, small and very fragrant flowers appear. Most are white, although the cultivar Blushing Maiden has pink flowers; both white and pink flowers have large clusters of attractive, bright yellow stamens. Harvest tea in the spring. The classic instructions are “take two leaves and a bud”—in other words, harvest just the outermost tips with the newest growth. Of course, continual harvesting and tip pruning will encourage new leaves and buds. The harvested leaves can be used as is, in which case what you have is green tea, or they can be spread out to dry for the more familiar black tea.
Herbal tea is something totally different. The term denotes a beverage made from plants other than C. sinensis, principally those we normally think of as herbs. Drawing from a long tradition of herbal medicine, many people believe that herbal teas contain various healthful constituents that benefit body and soul. The scientific evidence is mixed, but without doubt caffeine-free herbal tea is delicious and calming, and that’s enough for us.
For the rest of your tea garden, select one or more herbs commonly used for beverages. Think about the commercial herbal teas you have enjoyed, and choose plants accordingly. For example, if you like mint teas you have many wonderful varieties to explore, from old favorites like spearmint to new tastes like orange bergamot or chocolate mint. You might enjoy having a collection of several different mints, but if you do so, grow each one in its own container.
If you like lemon in your tea, you can get the same taste by adding dried leaves of lemon verbena. If you love Earl Grey tea, you may want to grow and dry monarda, which adds a similar taste when mixed with regular tea. Or try German chamomile for your very own bedtime tea. The leaves of a specialty thyme (lemon or lavender thyme, for instance) give a warm spiciness to your tea blend. Finally, be sure to include a small container planted with stevia, a plant whose leaves will astound you with their sweetness (400 times sweeter than granulated sugar).
The monarda and the thyme can be planted together, especially if you choose a thyme that will spill over the sides below the more upright monarda. For various practical reasons, all the other herbs work best in separate containers. The stevia and the lemon verbena need to be moved indoors in the winter. The mints have such invasive root systems that they crowd out anything planted alongside them. And the chamomile, an annual, will need to be replanted each spring.
Place the container holding the tea plant in the center, in a place of honor, and arrange the smaller containers around or in front of it in whatever fashion takes best advantage of your space. Use a series of small pedestals to elevate the containers at various heights, creating a staggered effect, so that the plants at the lower levels hide the bare sides of the larger containers. And if in your travels you come across an old tea kettle, plant one of your mints in it and make it a focal point.
You undoubtedly know that thyme is an herb that goes with almost anything: from fish and pork to soups, stews, and chowders; in sauces, gravies, and stuffings; and with vegetables fresh or steamed. But if you’ve never tried it fresh, you haven’t lived. Homegrown leaves radiate a memorable, intense aroma that is sweet yet slightly piney. They’re equally wonderful freshly snipped or recently dried (provided they’re stored in a dry, cool place so they don’t lose their punch).
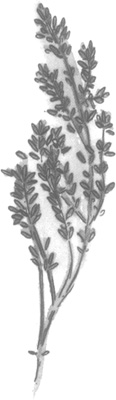
Container gardeners can rejoice in this easygoing herb from springtime well into the fall, for thyme takes eagerly to life in pots, either on a sunny windowsill or outside on a deck or balcony. The roots are relatively shallow, so you don’t need a big or deep pot. The common thyme, Thymus vulgaris, forms a tidy little shrublet no more than a foot high. If you prefer a thyme that spills attractively over the edge of a pot, perhaps for a hanging basket display, grow a creeping thyme, of which there are many. And there are dozens of other intriguing variations, including thymes that smell like lemons, caraway, and even coconut.
But the common species is terrific in its own right, and utterly dependable. Make sure your potting mix drains well so there is no danger of the roots languishing in standing water; thyme is drought-tolerant and needs only occasional drinks in hot spells. It’s hard to imagine an easier herb to grow: you basically won’t have to worry about watering, fertilizing, or insect pests. And you can trim off sprigs as needed throughout the growing season, without damage.
One trait all thymes share is their small leaves. If you’re looking at a small plant you can’t immediately identify beyond knowing it’s some kind of herb, and it is covered with masses of teeny-tiny leaves, it’s a safe bet that it’s a thyme. In the spring many thymes are covered with dainty flowers in white, pink, lavender, or mauve, all lusciously soft pastels. In your outdoor garden, expect lots of honeybees; they adore thyme’s blossoms. In fact, thyme is a favorite of beekeepers because the resulting honey is wonderfully aromatic.
Thyme Basics. This ancient herb originally hails from the dry, rocky hills of the Mediterranean countries, so we know it’s a sun lover and doesn’t need especially rich soil. Water sparingly, and don’t fertilize or otherwise fuss over the plants.
Thyme is hardier than some other Mediterranean herbs and can spend the winter outside in most areas with the protection of a light mulch. It does have a tendency to become woody and raggedy over a few seasons, however. You can stave off this natural maturing process for a while by continually harvesting the stems so young ones are always coming on, or by digging out and dividing the plant each spring. But eventually the stems near the base thicken and the interior of the plant becomes open and bare, and it is time for replacement.
Planting. To raise thyme from seed, sow indoors in a light seed-starting mix in early spring, cover with a very light sifting of sand, and keep the flat or pots in a warm spot. Germination will occur in a week or two. Be careful not to plant the tiny seeds too thickly, or you’ll have to do a lot of thinning.
Once they’re a few inches high and well rooted, the small plants can be moved to the pots that will become their permanent home. They’ll be fine on a windowsill even if chilly winds are still blowing, or you can safely set them outside when the last of the hard frosts is over.
You may, however, find it more convenient and more satisfying to buy small plants from a nursery, especially once you become acquainted with the many wonderful varieties. We bet you’ll find yourself wanting many different kinds of thyme, rather than many plants of one kind. When you get your prizes home and are ready to transplant them into their permanent containers, be gentle with the fine, dense roots.
Thymes combine well with other plants and with one another. So start collecting; just remember to label them so you can tell them apart later.
Success with Thyme. Because thyme is a dry-land native, its main vulnerability is too much water. The plant will let you know; watch out for lower leaves blackening and dropping.
Avoid root rot by growing the plants in a well-draining mix that contains a little sand. Avoid crown rot by either watering from the bottom or carefully directing the spout of the watering can to the side of the pot, not right on top of the plant.
Although thyme is fairly hardly and can survive mild to moderate winters with no problems, you will have to take precautions in very cold areas. Wrap the pot, add a layer of mulch, and hope for the best. Or bring the pots indoors, but avoid the temptation to overwater.
Harvesting. You can harvest stems at almost any time during the growing season, but the natural oils that give thyme its bewitching flavor are at their peak right as the plant is beginning to flower. Pinching off the flowers as they develop prolongs this period.
When cutting off stems, take only a third to half off any given branch. Use this as your opportunity to groom and shape the plant; it will recover quickly from such judicious pruning.
Don’t do any drastic harvesting late in the season; this stimulates the plant to put on a flush of soft new growth, which is easily damaged by cold temperatures.
Dry the stems in a warm spot out of direct sunlight. The stems are rather twiggy, so winnow them out by rubbing the dried leaves off with your fingers. Store the leaves in an airtight jar in a cool, dry place, and use dried thyme within a few months; after a year or so, the flavor begins to fade.
Another great way to preserve the harvest is to infuse white wine vinegar with fresh thyme clippings. Let them steep for a few weeks before uncorking and using on green salads, in potato salads, or in marinades (see the box on pages 257 to 259).
Varieties. There are dozens of different thymes, and the most intriguing selections can be found at nurseries that specialize in herbs. If you can’t visit and sniff each one, rely on catalog descriptions and experiment with those that entice you. You really can’t go wrong. Here is but a handful of what is available.
Bushy French thyme is just a bit sweeter than English thyme and has lovely gray-green foliage (both are varieties of the basic species, Thymus vulgaris).
Caraway thyme (T. herba-barona) and nutmeg thyme (T. herba-barona Nutmeg) are similar; some herb specialists consider them the same plant. They have a creeping growth habit. The spicy leaves emit a true caraway or nutmeg scent, and make a delicious flavoring for roast beef or pork, cheese bread, and herbal butter.
Lemon thyme (T. x citriodorus) forms a small bush with lemon-infused foliage. Try it with veal or roast chicken, in chicken salad, or sprinkled fresh over lightly steamed and buttered green beans. You might prefer one of the attractive variegated forms: Lemon Silver thyme has silvery leaves, and Golden Lemon thyme has green leaves edged with yellow.
Creeping thyme, also called mother-of-thyme (T. praecox arcticus), forms a low-growing mat of dark green foliage. The similar T. serpyllum also comes in an attractive yellow-leaved form called Aureus.
Because thyme so readily—some say promiscuously—crosses with other varieties, new strains constantly appear on the market. If you have the good fortune to visit a large herb nursery, be sure to explore the many different varieties. You may find thymes whose fragrance mimics oregano, lavender, orange, coconut, and a slew of other plants, and you are almost guaranteed to find several you can’t live without.
Bursting with vegetables, herbs, and edible flowers in golden colors, this garden celebrates the sun, echoing in a small way the extraordinary attention it has received from civilizations past.
Without sunshine, there could be no life on Earth. Remember learning about photosynthesis in high school biology? Its a fairly simple bit of chemistry, with truly profound implications.
When sunlight touches a plant, a chemical reaction is triggered in which the chlorophyll stored in the plant’s leaves, the water in its cells, and the carbon dioxide that the plant has absorbed from the air all interact to convert the energy from the sun into organic energy in the form of simple carbohydrates, or sugars. The plant uses these sugars to nourish its growth; in other words, it manufactures its own food. Happily for us, the plant makes more than it needs, and the rest is converted into more complex carbohydrates and stored in various parts of the plant: roots, stems, and fruits. When we eat those plants (or feed them to our livestock), we’re enjoying the end result of a chemical process that began with sunlight.
One by-product of that photosynthetic process is the release of oxygen. Thus green plants give us not only the food we need to sustain our bodies, but the very air we breathe.
This science has been understood only recently, as human history goes. Yet thousands of years ago, people had an intuitive understanding that the sun was the source of all life. That’s why the myths of many ancient civilizations designate the sun god as the most powerful of all, and why in some societies the sun itself was worshiped. The classic image of the sun as a powerful god, riding across the sky in a chariot pulled by four white horses and making the corresponding journey across the underworld at night, was as good an explanation as any for the rising and setting of the sun, for sunlight and for darkness. Today we know much more about the star that is our sun, but the magic and majesty of it are no less awesome.
As a token of homage to the sun that gives us everything—food, warmth, light, and a happy disposition—we offer this small garden of sunshine.
Start with a large container, such as a half wine barrel. Paint it sunshine yellow if you wish. Fill it with rich potting soil, and work in some all-purpose fruit/vegetable fertilizer (in 1:2:1 proportions; see page 67).
The largest plant will be a yellow-fruited tomato. Two possibilities are Yellow Pear and Gold Nugget. The pear tomato is hugely popular with children and delightful in salads, but as an indeterminate plant it tends to be big and sprawly and needs attention (and preferably a trellis of some kind) to keep it in bounds. Gold Nugget, a determinate variety, has more restrained growth with sweet-tasting golden yellow cherry-size tomatoes. Put the tomato at the rear of the container if it is to be positioned against a wall, or in the center if you can walk all around it.
In front of the tomato, arrange the other plants by height so that you create tumbling tiers of yellow. The second tier will be a mix of calendula, with its bright yellow-orange blossoms that open and close with the sun, and small yellow daylilies; you can’t go wrong with long-blooming Stella d’Oro. The daylilies are perennial; calendula is a self-sowing annual. Over time, the maturing daylilies will spread and may need dividing to make room for more calendulas. To honor the strong connection that calendula has with the sun, and also to keep the daylilies healthy, it’s worth the small effort to do this.
The third tier consists of yellow-tinged herbs, low-growing and spreading, spilling over the sides of the container. Several of the most popular culinary herbs have variegated cultivars, with yellow splashes, stripes, or edges on the green leaves; possibilities include Golden sage, Golden Curly marjoram, and Golden Lemon thyme. Choose the ones that you like to cook with. All these are perennials, so you’ll be enjoying them for years.
At the end of the season, the only problem you may have is what to do with the tomato plant. It will have produced a long and sturdy root, and removing it carelessly can damage the roots of the other plants in that same container. Try this: slice off the main stem right at the soil line and discard it. Slowly dig out the root; if it doesn’t come easily, leave it in place. Next spring, when the daylilies are beginning to leaf out, the tomato root will have died thoroughly and will probably surrender without a fight.