CHAPTER 7
VEGETABLES
A recurring theme of this book is that people who grow their own vegetables enjoy multiple benefits: not only is the food fresher and tastier, and conveniently located just a few steps from the kitchen, but gardeners can enjoy unusual varieties that are not widely available. What’s more, gardeners have the fun of watching the entire growing process and the satisfaction of knowing that they had a role in it.
None of this qualifies as news, of course. All vegetable gardeners know it is infinitely more satisfying to make a delicious meal using produce they grew themselves. In earlier times in our history, people had little choice in the matter. Our great-grandparents might smile if they could hear us make such a fuss over beans or lettuce from our garden, but we know that as delicious as they are, homegrown vegetables are a rare treat today, repaying us many times over for our small effort.
In this section we present an array of vegetables that are appropriate for container gardens, including some tried-and-true varieties and some that may be new to you.
One thing you should keep firmly in mind is that across the board your final yield from a container garden will be smaller than what you would get from a comparable number of plants in a traditional, in-the-ground garden. On the other hand, you do get vine-ripened tomatoes and gourmet salad greens and luscious edible flowers and all the chives any normal person could possibly use. And that’s good enough.
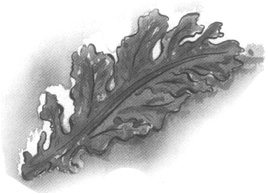
If the only fresh beans you’ve ever eaten came from the supermarket, you are in for a treat. Growing them yourself has it all over store-bought, and not just because of freshness. For one thing, you won’t have to be limited to the standard green variety. For another, the plants are handsome and can be used (the pole types, that is) as a living curtain outside a window or as a windbreak for a windy balcony.
Yet another bonus is that the beans themselves are preceded by pretty little flowers, which are also edible and make a charming garnish, especially the lilac blossoms of purple-podded types and the bright red flowers of scarlet runner beans. And beans are among the easiest vegetables to grow. All in all, they are a very satisfying choice for your patio garden.
Bean Basics. All beans belong in one of two big categories: pole and bush; there are several types within each category, and many varieties of each type. Pole beans are long vines, 8 feet tall or more, and need vertical support. Bush beans are short, stocky plants that do not need support. Both types are very appropriate for container growing, but you do have to know which type you have, so pay attention to the mail-order catalog description and the information on the seed packet. If you plant pole beans without some kind of trellis to grow on, pretty soon you’ll have a big mess. All other things being equal, bush types produce beans earlier than pole beans, but pole types continue to produce over a longer period of time.
Planting. You will almost never find baby bean plants for sale, so you have no choice but to grow beans from seed. The seeds are large and easy to handle, germinate readily, and grow quickly. Some pointers to keep in mind:
1. Plant seeds directly in the container, but wait until the weather is really warm (with nighttime temperatures of 60°F).
2. For pole beans, put a cluster of three or four seeds in front of each vertical member of your trellis. (In many books, this cluster is called a “hill,” a term that has nothing whatsoever to do with height.) For bush beans, space individual seeds 4 inches apart. In both cases, plant the seeds approximately 1 inch deep and cover lightly with potting soil or moist peat moss.
3. All beans (peas, too) will benefit from a preplanting treatment with an inoculant. Functioning like a booster shot, it enhances the plant’s natural ability to convert nitrogen from the air into nitrogen in the soil, which is important because nitrogen is one of the three primary nutrients that plants need for vigorous growth.
The long and the short of it is, beans that are inoculated grow stronger and produce more beans. Inoculant comes in the form of a powder, which you dredge the seeds in before planting. It also comes in the form of granules, which you sprinkle directly into the soil along with the seeds.
Success with Beans. Beans are quite easy to grow. Not many diseases haunt them, and insect pests are minimal. (An exception is the fava bean, which aphids love.)
Your biggest concern should be watering. Beans do best with a steady, even amount of moisture. If your summers are hot and dry, check the soil every day. Never let it go completely dry, or the plants will simply shut down. Once the first tiny beans form, begin a regular program of fertilizing.
Harvesting. First the pretty little flowers wither and dry, then overnight, or so it seems, there’s a miniature bean where the flower used to be. The first time you notice it, it’s maybe an inch long and about as big around as a baby’s shoelace. The next thing you know, it’s a full-size bean, and pretty soon they’re coming on faster than you can count.
It’s very important to keep the beans harvested. Left too long on the vine, not only do the pods become tough but the plants stop producing.
Use two hands for harvesting. Grasp the stem with one hand and gently pull the beans away with your other hand, using an upward motion. Don’t yank; bush beans, which are shallow-rooted, may come up out of the dirt, and pole vines may be ripped off the trellis.
Over the full growing season, you can expect to harvest approximately 1 gallon of beans (the full pods) from each plant of the bush type, and 1 to 2 gallons from each pole plant, including favas. For those beans that you shell (and discard the pods), the actual yield will obviously be less.
Varieties. One of the hardest things about beans is also the most fun—becoming acquainted with all the wonderful types and varieties. If you had a large farm garden, you could grow some of everything, but with container gardens you are forced to choose. It’s important, therefore, to pay attention to key words in the catalog description, and to make your choices based on what is most important to you: taste, color, growing period, and so forth.
Here are the basic types, and suggested varieties of each:
• Snap beans. Also known as string beans, these are your basic green bean.
For pole beans, we like:
Blue Lake (60 days). Stringless, tender pods with excellent flavor; long yielding.
Kentucky Blue (65 days). All-America Selection. Long, straight pods combine flavor from two classic varieties: Kentucky Wonder and Blue Lake. Vigorous and productive. Needs a hefty trellis.
Cascade Giant (60 days). Long, tender pods are light green streaked with scarlet and purple, and have a unique meaty flavor. Produces an early harvest at base of plant, with later crop on vines.
For bush beans, we like:
Blue Lagoon (60 days). Fine flavor, very productive, and a concentrated harvest from compact plants.
Bush Blue Lake (60 days). Same classic flavor as the pole type.
Tendercrop (54 days). Vigorous, good flavor, and very popular.
• Purple-podded beans. A variation on regular green snap beans, these are green on the inside, but the exterior of the pod is an amazing rich purple that turns green when cooked. The flowers are lovely, in shades of lilac and lavender. Again, both bush and pole types are available:
Purple Queen (bush, 52 days). Beans are flavorful and a uniform deep purple. Leaves and flowers also have strong purple coloring.
Purple Peacock (pole, 60 days). Vigorous, productive vines make an attractive summer screen.
• Italian beans. Compared to standard snap beans, Italian pods are wider and flatter, almost as if pressed in a book. You can eat them as young snap beans or let them get larger and shell them. Romano (70 days) is a good pole type; Varoma (58 days) is one of several flavorful bush varieties.
• Wax beans. In a three-bean salad, these are the yellow ones.
Two good bush varieties are:
Roc d’Or (54 days). Productive, superior flavor, and tolerant of cool, wet growing conditions.
Gold Crop (56 days). Stringless, tender, with good flavor; sets pods well in hot weather.
• Scarlet runner beans. A longtime favorite for the brilliant red flowers, but also valuable for the beans themselves, which can be either eaten fresh or left on the vine to dry. The term “runner” implies a vine, and most scarlet runner beans do grow as vines, but these are not the same as pole snap beans; they are their own species. Runner beans can be started sooner than regular snap beans, and thrive where summers are on the coolish side, like New England or the Pacific Northwest. The cheerful flowers look splendid in a salad or garnishing a bowl of steamed spinach.
These beans are lusty growers, with large, lush, dark green leaves; the vines will quickly cover a trellis or wall, giving you shade or a screen in addition to perky flowers and tasty beans.
For pole types, good varieties include:
Scarlet Emperor (70 days). Fully mature pods are 10 to 12 inches long, but for best table quality and a steady production of red flower sprays, pick beans before seeds begin to swell, when they are about 7 to 8 inches in length.
Painted Lady (90 days). The beautiful flowers have a scarlet hood and white base.
The terminology is confusing, but there are also bush runner beans that don’t form runners. A nice one is Dwarf Bees (80 days). This dwarf variety, only 18 to 24 inches tall, needs no staking. Like all the runner types, it produces brilliant flowers and tasty beans. Seeds may be somewhat hard to find.
• Filet beans. Tiny, delicate beans also known by their French name, haricots verts. Filet is a particular type of bean, not, as some people think, an immature snap bean. We recommend the variety called Straight ’n Narrow (53 days), a compact bush type.
• Dried beans. Kidney beans, black beans, black-eyed peas, garbanzos—all the ones we normally buy as dried beans—can also be grown at home. With the limited space you have for gardening, however, you might decide it’s easier to buy dried beans at the supermarket.
• Lima beans. The southerners’ favorite, for good reason: limas need a long growing season. If your growing season is short but you love the taste, try a bush type, which matures faster.
Two good ones are:
Thorogreen (68 days). Vigorous 18-inch plants bear till frost.
Fordhook 242 (85 days). High yielding, heat tolerant, and easy to shell.
• Fava beans. The sweetly fragrant flowers of fava beans make them a welcome addition to the culinary container garden. The individual beans are very large (their other name, broad bean, is quite apt) and have a dense, meaty texture. Rich in protein, fresh and dried favas have long been a favorite of European families, and in recent years the fresh beans have become popular with gourmet cooks here. If you want to try them fresh, growing your own is your best bet. Unlike limas and even snap beans, favas prefer cool, damp weather; plant them in spring, about the same time as peas. The plants grow to about 3 feet tall, so a short trellis is a good idea.
Aphids can be a problem in the spring. One easy control is to just pinch off the growing tips where they tend to cluster. This has the advantage of forcing plants to put energy into maturing the crop of newly set beans. Harvesting occurs at several stages: pick the first pods when no more than 4 inches in length and beans are slim and flexible. Cook like snap beans, either whole or sliced. When the pods gain size and begin to droop, they are ready for eating as fresh shell beans. Steam for three to five minutes, then serve hot with butter or cooled for salads. If the seed coat on the bean has matured, slip it off before serving. At season’s end, allow the beans to dry and store for soups.
A few people of Mediterranean heritage have a rare genetic allergy to favas. If you have never eaten them, start with a very small portion to see if they agree with you.
Good varieties are:
Broad Windsor (75 days). Large beans, four to five per pod, with good flavor.
Aquadulce (85 days). Hardy; in mild-winter climates, plant in fall for a spring crop.
Theme Garden
A Kid’s Garden
Talk to any longtime gardener, and you’ll find a common theme: almost all of them started gardening as a child. They speak with great fondness of summer days in the garden, working alongside their parents, their grandfather, a favorite aunt; they smile at the memory of pulling up their very first radish, eating sun-warmed tomatoes right there in the garden patch, surviving their first encounter with a ferocious-looking hornworm.
Of course, childhood experience isn’t a prerequisite; many people first discover the pleasure of gardening as adults. But the reverse is universally true: anyone who learns about gardening as a child is hooked for life, even if circumstances sometimes intervene. By introducing children to gardens, you’re equipping them for a lifetime of enjoyment. And even without that lofty parental goal, helping children start their garden is its own reward because they have so much fun and you have the even greater pleasure of watching their enjoyment.
Children are naturally attracted to small things of all species; just think how they go silly over new puppies or fuzzball kittens. They exhibit that same sense of delight when a seed they planted with their own hands breaks through the soil and pokes its head up to say hello.
Containers provide the perfect way to start children gardening because the very chores that make them lose interest in larger gardens are practically nonexistent in containers. For maximum success:
1. Let the kids make the decisions about what to plant, based on what they like to eat, but point them toward varieties that grow fast.
2. Set them up with their own container and gear; as much as possible, let them do the work.
3. Be flexible, and don’t expect picture-perfect results.
We suggest two gardens here: one for toddlers and one for older children.
A GARDEN FOR TODDLERS
Everything in this garden is easy to grow and produces the good stuff at a young child’s eye level.
Easter Egg radishes are a blend of several varieties in one seed packet, producing radishes in different colors: white, red, pink, and lilac. Harvesting them is always a surprise; you never know what colors you’ll get.
Thumbelina carrots are small and round, rather than long and skinny. Even children who don’t usually like carrots like these because of the fun shape.
Pansies are especially attractive to small children if they can see a cat’s face in the flower. This mimicry is most obvious with bicolor or tricolor flowers, in small or medium sizes. Very large flowers in solid colors are quite pretty, but they don’t look like kittens.
Wee-B-Little pumpkins are perfect jack-o’-lantern miniatures, about 3 to 4 inches across. The plant grows as a semi-bush, and will basically fill the container by mid summer. If several children claim this garden, you might want to let them create “autographed” pumpkins. When the fruits are about the size of a baseball, have each child write his or her name on a pumpkin with a felt marker. Then you go over the writing with a nail or the tip of a sharp knife, cutting lightly down through the skin. The cuts will scar over, and each mature pumpkin will be personalized.
Start with a container at least 18 inches wide. In early spring (as soon as pansies show up at the garden center), set out pansies and sow seeds of radishes and carrots. It’s okay if the seeds get mixed together; in fact, many people deliberately plant radishes, which germinate very quickly, in with other, slower seeds to keep the soil surface loose. The radishes are ready to eat in less than a month; as they come out, space is opened up for the carrots. The pansies will still be looking cute through early summer.
In early June plant a few pumpkin seeds in the center of the container. Or, if your growing season is short, start seeds indoors in early May and transplant into the container in June. In either case, by mid summer the plant will stretch across the entire container, which is okay because everything else has been harvested. The pumpkins start forming in August, and are ready for decorating the table (or eating) by Halloween.
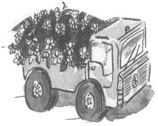
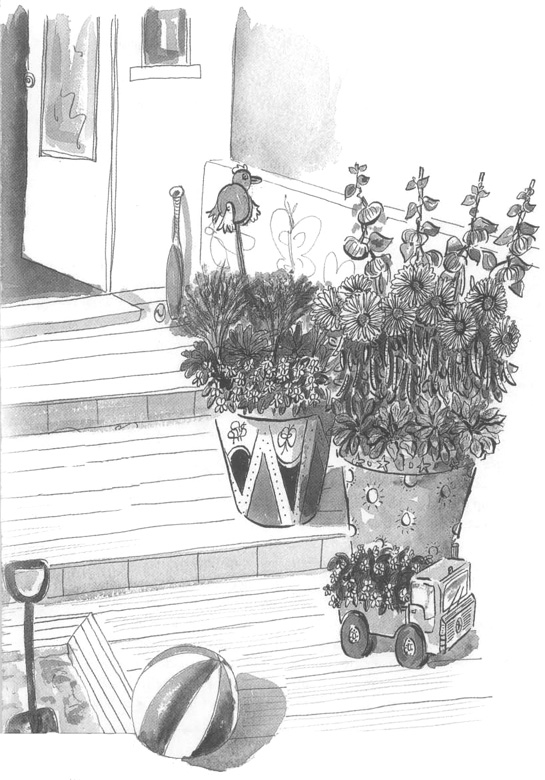
As an alternative, if your kids have an old toy dump truck or something similar that they no longer use, plant a few pansies in the truck’s bed and set the truck right on top of the container. As the pumpkin vine grows and threatens to overtake the whole container, move the truck down to the floor and keep it watered; in the fall, when the temperatures turn cool, the pansies will put on another burst of flowers.
To add a playful element that will keep children entertained and also keep birds away, search out a colorful whirlygig. Older wooden ones in antique stores are very endearing, and very dear. New ones can be charming, and even the inexpensive plastic versions captivate young children with their movement and bright colors.
A GARDEN FOR OLDER CHILDREN
Children who enjoy eating sunflower seeds as a snack get a big kick out of growing the flowers and seeing the seeds form in autumn. And if your mental image of a sunflower is something 10 feet tall, you’ll be glad to know about dwarf varieties. Three good ones are Teddy Bear, Sunspot, and Big Smile dwarf sunflowers. They seldom top 2 feet—just the right height for a child, and for a container.
Purple-podded beans are remarkable for their color; the outer skin of the pod is a dark purple that turns green when cooked. The taste is the same as regular green beans’, which means the children either will or will not like to eat them, but kids are guaranteed to enjoy the magic show when the beans turn color. They are available in pole and bush forms, but choose a bush type for this garden.
Jack-Be-Little pumpkins are perfect pumpkins in miniature, 3 inches across and 2 inches high. Their tiny size is especially appealing to very young children, but we’ve chosen this variety for older children because the pumpkins form on a vine and thus need to be on a trellis, too high for toddlers to watch them growing.
This garden works well in a medium to large container, 14 to 18 inches in diameter. Position a strong trellis at the rear for the pumpkin vine to climb.
Easter Egg radishes, described above, can be planted and harvested several times from March through May. In late May, plant bean and sunflower seeds in among the last of the radishes, and pumpkin seeds just in front of the trellis legs.
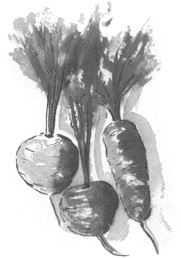
In almost every respect, beets are a perfect choice for the container garden: they’re easy to grow and fast to mature, they don’t take up much room, they can be resown for several harvests per year, they don’t need a lot of maintenance, they taste significantly better than canned, and you can eat the entire plant.

The only drawback seems to be that for whatever reason, people don’t think of growing them. But even if beets are not high on your list of favorites, we urge you to include them in one of your containers for all the reasons above, and two more: you’ll get to enjoy the tops, which are wonderfully rich, smooth-tasting greens, and you can grow delightful varieties you’ll never find in a supermarket.
Beet Basics. From one plant you get two crops: the round red root that you envision when someone says “beet,” and the leaves that grow above ground. The most reliable way to find beet greens is to grow them, for even fresh beets in the supermarket often have the tops chopped off. Very young, tender leaves are wonderful raw in a salad, and older leaves can be cooked like spinach; even people who don’t usually like cooked greens often enjoy beet leaves, with their soft, mellow flavor.
Planting. Beets are a cool-season vegetable, which means you can start them early in spring and resow several times, up till early summer, and then again in late summer for a fall/winter crop. In very general terms, that means mid March to early June for the first sowings, then again during the first three weeks of August for the second crop. You can even start seeds indoors ahead of time, should you get garden-restless in February. Germination takes one to two weeks.
To speed germination, soak seeds overnight, then plant directly in the potting soil ½ inch deep and 1 inch apart. The hard, bumpy seeds are actually clusters of several seeds, so you’ll get several seedlings sprouting from each one. When the seedlings are about 2 inches tall, thin away all but one in each cluster. (Rinse the thinnings and add them, whole, to any mixture of sautéed greens.)
Success with Beets. The secret of tender, tasty beets is to keep them growing fast, and that means consistent watering and fertilizing. Add a balanced fertilizer once a week, and keep a close eye on soil moisture. If the soil dries out, or if there is an alternating pattern of too dry, then too wet, the beets will become tough and woody.
Harvesting. Start harvesting the roots when they are about an inch in diameter; to get an estimate of size, brush away the soil from the shoulders of one plant. Beets have a very cooperative nature: they are ready to eat when very small, but they also keep growing without loss of quality. If you make a second sowing in August, you may well be harvesting fresh beets right through the winter.
To cook beets (the roots, that is) without their bleeding, leave about an inch of stem in place and add a tablespoon of vinegar to the cooking water, When the beets are done, slip off the peel and the stem ends. For full, deep flavor, try baking beets in the oven.
Varieties. The classic beet is round and red, but that’s only the beginning of the story. The fun part of growing beets is having access to unusual types: beets that are long and thin like carrots, or golden yellow, or pink-swirled inside like candy.
Scarlet Supreme (50 days). Outstanding on almost every front: it matures earlier than others, produces lots of bright green tops, and is sweet and tender.
Golden Beet (55 days). Another heirloom type, with a sweet-tasting root that is a lovely golden yellow and dark green leaves with yellow ribs. Popular with gourmet cooks because the color doesn’t bleed. Plant more thickly than other varieties, to compensate for lower germination rate.
Detroit Dark Red (55 to 60 days). This standard, classic red beet is an heirloom variety, and the most popular for home gardens.
Chioggia (55 days). This heirloom variety produces roots with a pretty pattern of concentric circles of red or pink, alternating with circles of white or cream color. Grated raw into salads, they add a zap of color and texture; the flavor is unusually sweet.
• Cylindrical beets. These are a perfect example of the joy of growing your own food: you can have an unusual treat with no more effort than is involved in growing the ordinary kind. Rather than the familiar round globes, cylindrical beets are long and slender, like a carrot if carrots were beet red. Because of this narrow shape, they need less growing room; in the same amount of container space, you can get up to four times the yield. Another nice feature is that the mature beets can be sliced crosswise into rounds of uniform size for a very attractive salad presentation.
The downside is that they are a bit slower to mature; you might think about growing some of both types for a long, delicious harvest.
Two very nice cylindrical varieties are Formanova and Forona, both 60 days. If you plan to try these, use a slightly deeper soil depth than for round beets: 8 inches minimum.
Fresh, sweet tidbits with a true carrot taste, frilly foliage that is pretty in its own right, and delightful varieties that have never seen the inside of a supermarket—are those enough reasons for growing your own carrots? If not, think of them as a way to introduce children to gardens, with a vegetable they probably already like in shapes they never saw before. Adults who think a carrot is carrot is a carrot will change their minds when they first taste one that is truly fresh.
Carrot Basics. It’s a bit of a challenge to sort out all the choices among carrots because of the way they are named. Seed catalogs describe individual varieties as being, for instance, “a Chantenay type” or “early Nantes.” Chantenay and Nantes are names of older varieties that have now become generic terms for different types of carrots; the distinguishing trait is their shape. Long and thin Imperator is the one you usually find in the supermarket. Chantenays are tapered, with a broad top and pointed tip, and can grow to very large size. Danvers are also tapered, a bit smaller. Nantes types have straight, untapered sides and blunt ends. Two other generic types, with more logical names, are round and finger carrots, and they are what you would think: round like golf balls, and finger-shaped. Rounds, fingers, and Nantes are best for containers.
Planting. Carrots germinate best when the soil is 70° to 80°F, but they can be started much sooner, as long as temperatures don’t sink below 45°F. The seeds are quite tiny, and in cooler weather they take a long time to germinate; in the meantime, it’s essential that they be kept moist. Carrots don’t transplant well, and so must be sown in place. All this adds up to something of a challenge when it comes to getting them started. Here are some tips:
1. Make a mixture of carrot seeds and radish seeds, and plant the mixture; the radishes germinate rapidly, keeping the potting soil loose for the teeny carrot seedlings and serving as place markers. Check the soil every day; add water if needed. Use a gentle mist so you don’t dislodge the seeds. Keep the moisture level up even after the radishes begin to grow; the carrot seeds still need it, and it will keep the radishes tender and crisp.
2. Alternative for different taste buds: mix one part carrot seeds with three parts bok choy seeds. In 30 to 45 days, depending on the variety, you’ll be harvesting the bok choy and the carrots will be just developing; as the bok choy comes out, it opens up room for the growing carrots.
3. If you’d rather not mix things, sow the carrot seeds alone (about ¼ inch deep) and take extra measures to keep them damp. Cover the seeds with wet burlap, a thin layer of sphagnum moss or peat moss that you presoaked, or even something like damp paper towels if that’s all you have. Keep the covering layer damp, and keep checking underneath; at the first sight of feathery green seedlings, remove the covering.
Either mixed or plain, you can continue sowing carrot seeds in batches for an extended harvest season. It doesn’t have to be a precise system: when you’ve pulled up about half your carrots, plant some more.
Because the seeds are so small, you cannot help but plant them very thickly, which means that you’ll need to do some serious thinning once the tops are about 2 inches high. For long, slender types, thin seedlings to ½ inch apart; the round ones need more room, about a 1-inch spacing.
Rose Marie says: With these root crops you don’t have to be too precise about the thinning. Just keep getting in there and picking out the largest ones, which creates room for their smaller brothers to grow. The first tiny thinnings can be added whole to salads—the tender young foliage is good to eat. Just rinse, and pinch off the threadlike root at the growing tip.
Success with Carrots. Once you get past the germination challenge, carrots are extremely easy to grow. Keep them watered and fertilized with a balanced fertilizer, and you can turn your attention elsewhere.
Harvesting. You can start harvesting anytime the carrots reach the size you want. There is no particular trick to it; just be sure you have a firm grip on the stems, near the shoulder of the carrot root.
If you sow in the summer for a winter crop and carrots are still growing when the weather turns cool, you can leave them in place and have the fun of pulling fresh carrots at Thanksgiving. Cover the soil with protective mulch in very cold areas; sphagnum moss, this time in a thick layer, will work fine.
Varieties. Two round ones we like for containers are Thumbelina (60 days), an AAS winner, and Parmex (70 days). Both are sweet, bite-sized treats that make children smile.
Scarlet Nantes (70 days). A - Nantes carrot, approximately 6 inches long. Touchon (75 days) is an heirloom Nantes type that is nearly coreless and very juicy.
Little Finger (65 days) is a Nantes type in shape but smaller overall, like your little finger. Minicor (55 days) is very similar.
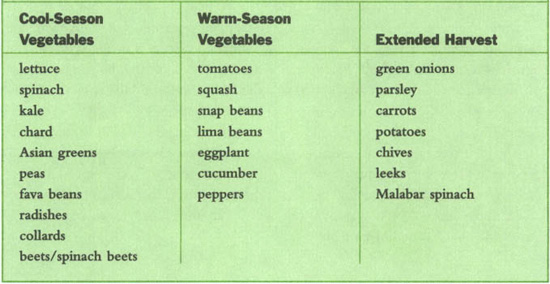
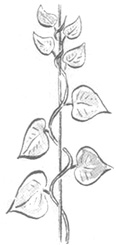
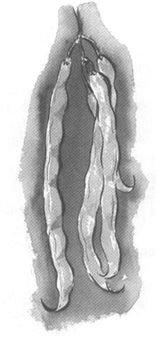
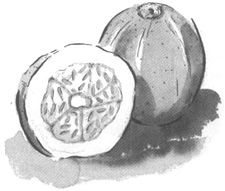
Cucumbers that are allowed to grow on the vine until they are just-right ripe have a rich, full, cucumbery taste that is as different from supermarket cucumbers as a fresh pineapple is from a picture of a pineapple. If you love cucumbers, you’ll want to grow your own, for that wonderful flavor and for the unusual varieties available (lemon cucumber is pictured above). Just remember: they do take up room—more than, say, carrots—so be prepared.
Cucumber Basics. In the minds of people who sell us the seeds, cucumbers are grouped into two large categories, based on how they are used: picklers and slicers. Picklers are short, stubby, and bumpy. Slicers are the familiar long green vegetables that we slice raw for salads and crudités. Many catalogs group into another category the types known as “burp-less,” specially bred to eliminate the enzymes that make digestion difficult for some people (burpless is also the name of a specific variety, as well as the name of a subcategory). And some catalogs create a separate category for Asian cucumbers, which are unusually long and thin, mild, and crunchy.
Deep in their genes cucumbers are vines, but plant breeders, constantly searching for new items to offer customers, have developed several types that maintain a compact bush shape. The vine types need to be grown on trellises, the bush types do not; be sure you know which you are getting. In catalog descriptions and on seed packets, bush types will be indicated as such; the vining types may not say anything in this regard.
Planting. Cucumber plants are heat lovers; they simply won’t germinate until the temperature hits 70°F. For direct sowing, wait until the weather, and thus the soil in your container, is really warm. Plant six to eight seeds in a cluster, about ½ inch deep; when they have two sets of true leaves, thin to the strongest two or three seedlings. Pinch the others off at the soil line to avoid damaging the roots of the keepers. Be ruthless about doing this; it really is important.
Cucumbers grow so fast once they get started, it usually doesn’t help much to start them indoors. However, if you find small transplants at the garden center, you can plant them in your containers a bit early with some nighttime protection; see page 55 for ideas.
Success with Cucumbers. Consistent water and lots of fertilizer—that’s the secret to success. You are going to be surprised at how fast cucumber vines grow when the weather is to their liking. To support that growth, especially once they start setting fruit, give the plants a balanced fertilizer once a week and make sure the potting mix never dries out—that’s what produces cucumbers that are bitter, hollow, or otherwise unpleasant.
To help hold moisture in the soil, cover the surface with a light mulch of peat moss or florist’s decorative moss. This has the extra benefit of keeping any surface roots from drying out.
Cukes do extremely well trained to a trellis (see Chapter 4 for ideas). In a 20-inch container with a 4-foot demicage, you could plant up to six cucumber vines. Not only do you get maximum use of your space, but long, thin varieties like Suyo Long or Sweet Success grow into an attractive straight shape, instead of being twisted and curled.
Cucumbers are susceptible to a large array of plant diseases, most of them caused by pathogens that live in garden soil. As you study seed catalogs you’ll see that breeders have been hard at work developing disease-resistant varieties. In containers you’ll miss most of those problems, but you could very well encounter powdery mildew late in the season; see page 76 for treatment.
Harvesting. With cucumbers we get an easy lesson in one of Mother Nature’s fundamental principles: the goal of a plant is to reproduce itself. Annuals, which have only one season in which to do so, have an innate drive to produce seeds. One cucumber is a veritable seed factory; all you have to do is slice one vertically to realize how many seeds are inside. If we leave that one fruit on the vine, all the seeds will reach viable size, and the plant, having done its job, will stop producing cucumbers. But if we interrupt that cycle and pick the fruit before the seeds inside are mature, the plant will desperately make more cukes.
The moral of the story: pick cucumbers while they are small and tender, or the vines will shut down. Be vigilant; in the height of summer, the fruits grow astonishingly fast. If one gets away from you (you’ll know it’s overmature if you see yellow skin), remove and discard it.
Most cucumber plants produce both male and female flowers; the male flowers, which sit at the end of a short stalk, appear first, several days before the first female. Don’t be surprised when the first flowers fall off without showing any signs of producing fruits; those are the males. Female flowers have a small bulge behind the flower, where it connects to the stem.
Varieties. The whole point of growing pickling cucumbers is to make pickles, but it’s necessary to grow a lot of cucumbers to make that project worthwhile—more than you can reasonably grow in a container. We’re going to assume you’re more interested in growing the slicing type, and there are many fine varieties to choose from.
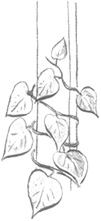
Lemon (60 days). Almost everyone laughs with delight the first time they see a lemon cucumber, so different is it from the classic, long green item. Very reminiscent of lemons in size, shape, and color, they nonetheless taste like cucumbers, with a mild, almost sweet flavor. This is a very old heirloom variety, first introduced more than 100 years ago. Harvest lemon cukes while they’re small and show just a trace of yellow at the blossom end. They need a trellis.
Suyo (62 days). These wonderful Japanese-style cucumbers are just as easy to grow as the ordinary kind, and the results are extraordinary: the long, slender fruits are crisp, not very seedy, and quite delicious—a real conversation piece. They need a strong trellis.
Salad Bush (57 days) is an All-America Selection with good disease resistance and the perfect shape for containers: short, very productive vines. Cucumbers are about 8 inches long, with smooth, dark green skins. Fanfare (63 days), another All-America winner with a compact growth habit, is very appropriate for containers. Good yield of slender, extra-crisp fruits.
Sweet Success (50 days) is an example of a fascinating development in plant breeding: gynoecious cucumbers, with self-pollinating, all-female flowers. The fruits are seedless (or virtually so; you may see the faint outlines of undeveloped seeds inside). If they are grown side by side with regular cucumbers, some cross-pollination occurs and seeds will form in these “seedless” fruits. But if you harvest them early, while they are young and tender, the seeds will not have developed to a noticeable stage. Sweet Success is an All-America Selection, and produces a steady crop of slender, 10- to 12-inch cucumbers. They need a trellis.
Theme Garden
Country Kitchen in the Round
Gardening is as subject to trends as any other human endeavor. Spend some time in your local library’s periodicals room, browsing recent issues of several gardening magazines, and you’ll soon realize that you’ve seen the same general topics over and over. What makes gardening trends so interesting is the frequency with which the newest “hot topics” turn out to be very old ideas.
Take kitchen gardens, for example. A few years ago, they were the trend du jour in gardening publications; there was even a mild flurry about the elegant French version of a kitchen garden known as the potager. The ultimate kitchen garden is a happy, floriferous mélange of good things to eat, all growing lustily together: vegetables and herbs side by side with flowers and fruit trees. Our great-grandmothers grew their food just this way, and they never thought to call it anything special.
Today most gardeners would love nothing better than to have their great-grandmother’s garden, but many of us simply do not have the space. It is for these admirers of country gardens and country cooking that we designed this particular container garden, which provides a great bounty of good food in a small area. In a circle just 5 feet across, an astonishing variety of edibles can be grown. To put it another way, in a space no bigger than many kitchen tables, you can have an entire kitchen garden bursting with all the good things you like to eat.
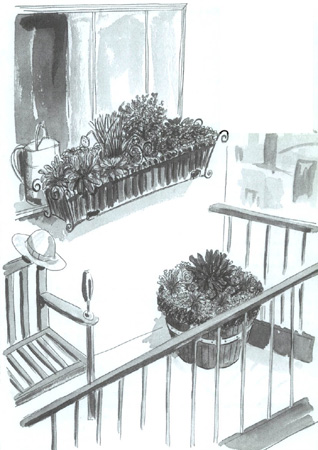
What makes this garden work so well for so many situations is that it is planted in six different containers, so you can arrange them in whatever configuration best fits your garden site. In the drawing here, for instance, the pots are arranged in a semi-circle against the wall, and the tomato uses the fence as a support. You can also move them during the season, as the sun and weather patterns change. This is a very flexible concept, so we’ll give only general suggestions before turning you loose to plant whatever you truly love.
POT 1. In the center, in full sun, a large (24-inch) container. Sturdily staked in the middle of the pot is one luscious tomato. On the edges, plant your favorite cucumber and some trailing nasturtiums. As an option, encircle the entire container with a wire trellis made from concrete reinforcing wire with a 6-inch grid. It should be tall enough to extend another 24 inches or so above the rim. It supports not only the tomato and the cucumber in the large container, but some of the other containers’ plants as well.
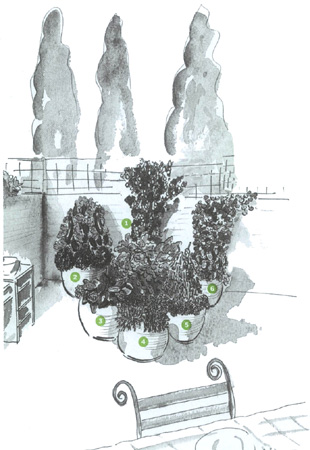
In a circle around Pot 1 are five smaller containers, 14 to 18 inches in diameter, with assorted plants. Here are some suggestions.
POT 2. One or two Asian eggplants at the rear, with three or four basils on the outer edge. Place this pot in full sun.
POT 3. One sun-loving summer squash, fronted with lettuce. By the time the summer heat knocks out the lettuce, the squash will be at its prime.
POT 4. Climbing nasturtiums at the rear, peppers near the front; this is another sun lover.
POT 5. Bush peas on the inside, lettuce circling the outer edges. Bush peas don’t absolutely need a trellis, but will appreciate the extra support. Around the first of July, direct-sow seeds of bush beans in among the pea plants; by the time they germinate, the peas will be ready to come out (cut off at ground level and leave the roots in place). This container can go on the shady side of your circle.
POT 6. A small herb garden for fans of Paul Simon: parsley, sage, trailing rosemary, and thyme; sun or part shade.
If you add the wire trellis to the center container, many of the plants in the smaller containers will grab onto it. This is fine if you don’t plan to move anything later on, but if you do, you can accomplish the same results by using individual short trellises in the smaller containers. In particular, pots number 2, 4, and 5 would benefit from a bit of trellis support.
Very few people are ambivalent about eggplant. Either you like it or you don’t, and if you don’t, then you’re not likely to develop a fondness for it just because you grew it with your own hands. But if you do like it, or if you’re ready to try something new, the small Japanese or dwarf varieties are terrific—beautiful while they’re growing, delicious when cooked.
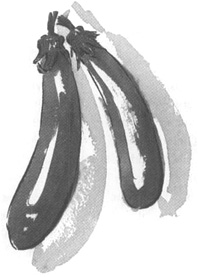
If you’ve never seen eggplants growing, you’re in for a treat. The plants are extremely attractive, with elegant leaves, pretty little flowers, and rich, lustrous fruits that may be regal purple, ivory, lavender, blush pink, or lime green, depending on the variety.
Eggplant Basics. It’s convenient to think of eggplants in two major groups: the familiar fat shape, and the long, slender Asian types. Seed merchants have provided us with many choices, including smaller, miniaturized versions in many luscious colors.
Planting. These are hot-weather plants, and need temperatures of at least 75°F to germinate. Germination takes two to three weeks; add another couple of weeks to reach transplant size, and then another two to three months to start producing the fruits. It’s clear, then, that you won’t have time for direct sowing. If you are lucky enough to have a garden center stocked with unusual vegetable varieties, you can buy your eggplant transplants in May and June. But if you don’t, your only choice is to start seeds indoors ahead of time.
Backtrack eight weeks from the time when daytime high temperatures usually reach 80°F in your area. Plant seeds ¼ inch deep in peat pots or pellets; keep the tray very warm (see pages 57 to 58). Depending on your climate, you may have to move the seedlings into larger, intermediate pots before the soil outside is warm enough to receive them. Be sure to harden off the seedlings (see page 60) before planting outside.
To give the babies the best chance, keep containers in full sun and cover with black plastic a few days ahead to really warm up the potting soil. For the first couple of weeks, when nighttime temperatures are not reliable, you may need to provide some protection for the tender plants. Blanket them with plastic sheeting, held up off the plants with short stakes; or cover them with milk-jug cloches (see page 47) at night.
Success with Eggplants. Your biggest problem will be timing—getting transplants into the container when the weather is ready. Otherwise, eggplants are generally hardy plants that present few troubles for the container gardener. Occasional problems include aphids, flea beetles, or Colorado potato beetles (eggplants are in the same family as potatoes), but all are manageable (see Chapter 6). Raising the containers up off the floor seems to help deter flea beetles.
Put the container in your sunniest location, keep the soil moist, and fertilize every two weeks. If the roots are warm, you’ll have a little eggplant factory at work.
Harvesting. Eggplants that are overmature are not very appealing; if anything, you may want to pick them a bit ahead of time. The outside skin should still be glossy and smooth. Cut off each eggplant with clippers or a sharp knife, taking a bit of the stem. To keep the plant producing, it’s important to keep up with harvesting. If even one fruit sets seed, the plant will slow down significantly.
Varieties. Traditional varieties, the ones that produce the familiar big, round, dark purple eggplants, don’t work very well in containers: the eggplants they produce are simply too large and too heavy. Fortunately, we have other varieties to explore.
Two general categories of eggplant are excellent for containers: the Asian types, which are by nature long and slender, and the dwarf varieties, which are the traditional oval shape but much smaller.
• Asian type. Ichiban (61 days) has long, slender, dark purple fruits—the classic Japanese eggplant. Asian Bride (70 days) has a similar shape as Ichiban but a different color: a delicate white with beautiful lavender streaks. Green Goddess (63 days) is an extremely productive type with fruits that are 8 inches long, 2 inches in diameter, and a knockout color: lime green. Neon (65 days) is a modified Asian type, with medium-long fruits slightly swollen near the end. It is well named: the outer skin is a rich, intense, deep pink that glows like neon against the bright green leaves.
• Dwarf varieties. Bambino (75 days) produces lots of small round fruits, 1 to 1½ inches in diameter, deep purple in color. It is particularly good for containers because the plant itself is smaller than most. Little Fingers (65 days) has dark glossy purple fruits, short and slender, 3 to 4 inches long.
Rosa Bianca (75 days) has roundish fruits, rather like a softball that got squashed at one end, and mild flavored, but the real delight is their gorgeous color: soft lavender streaked with white is an heirloom variety from Italy.
Comprido Verde Claro (72 days) has small and slender fruits, 3 to 4 inches long, and notable for their amazing color: leaf green at first, gradually turning orange.
The virtues of greens are many: they are easy to grow, thrive in almost any kind of weather, excel in containers, produce a crop quickly, and provide more vitamins per square inch than anything in the garden. But like many things that are good for us, they are often overlooked by gardeners as being not particularly glamorous. That’s a shame, because many of these plants are beautiful to look at and contribute delicious, unusual flavors to the dinner table. Southern European gardeners have built their cuisines on these easy-to-grow, nutritious powerhouses, and American cooks are now beginning to wise up.

Note that in this section we’ve included the green leafy vegetables that are usually eaten cooked (except for spinach, which has its own section). The specialty greens that usually go raw into salads are found in the Lettuce section. We admit that the distinction is subtle and a bit arbitrary, and some items could as well go in one section as the other. If you don’t find something you expect to see here, check under Lettuce or Spinach.
Rose Marie says: My Greek grandmother loved going out to her field to harvest mustard greens, fresh and tender with a little bite. She prepared an endless variety of cooked salads: single or mixed greens, coarsely chopped and sautéed briefly in olive oil, then served with wedges of fresh lemon. Delicious hot, cold, or warm.
Greens Basics. Speaking in general terms, which we have to do in this consolidated section, greens are cool-season vegetables that are grown for their leaves. One very cooperative trait is their long period of productivity: they germinate just fine in cool weather, keep producing during the summer, when lettuce and spinach wimp out, and go on through fall without blinking. Even a light frost doesn’t bother them—in fact, many people think frost improves the taste—so they can continue into the winter and even winter over in temperate areas.
Planting. As soon as nighttime temperatures are no longer cold enough to freeze your container soil, you can direct-sow seeds for these greens. The seeds are generally quite small, and thus should be planted only about ¼ inch deep. Because small seeds are difficult to space evenly, you’re bound to get lots of baby seedlings that will need thinning; if you like, you can replant the thinnings into another container. As a group, greens transplant very successfully, so you can start seeds indoors three to four weeks before your spring frost date to get a jump on your first planting.
Because greens do transplant easily, you’re also likely to find some of the better-known types for sale as young transplants at your garden center early in the season. This is a good way to go with these plants: you get the benefit of someone else’s greenhouse work, but you don’t have to worry about the weather being too cool to set out plants, as is sometimes the case with other vegetable transplants being sold at the same time.
Success with Greens. If you want tender, succulent greens, keep the plants growing fast. That means lots of water and steady fertilizing; since it’s the foliage you’re interested in, use fish emulsion or a fertilizer high in nitrogen (the first number). Most greens are relatively trouble free, but you may have to contend with slugs and snails in the spring and aphids in the summer; see Chapter 6 for controls.
Harvesting. All these plants can be harvested when they are still quite young, and you’ll have baby chard or baby bok choy or baby whatever, just like the baby vegetables you’d pay a pretty penny for at the gourmet greengrocer. Otherwise, keep them growing fast for tasty full-size leaves. Take care, however, not to let them get too large. Most of what shows up in the produce aisle is overgrown, giving nongardeners a false impression of what these plants really taste like. If some of the oldest leaves on your plants get too big and tough, just remove and discard them to keep newer growth coming on.
Harvest the outermost leaves, just enough for tonight’s supper, and your plants will keep producing. Pull away the leaves or slice the stalks at the base with a sharp knife. The technique for kale and collards is a bit different: if you slice leaves from the crown (the center of the plant), the plant will form new branches with more new leaves; use a knife for a clean cut.
Varieties. We offer just a few suggestions for each of the plants, even though many of them have many varieties and all are very fine container plants. Spend a few minutes with seed catalogs, and you’ll realize the astonishing range of intriguing possibilities. The reputation of leafy greens as unglamorous country cousins will be banished once and for all. Most plants in this chapter belong to the cabbage family and share significant family traits; once you have experience with one, you can confidently grow its relatives.
• Swiss chard. Botanically, chard is a first cousin to beets, but gastronomically it’s closer to spinach. It sends up tall, upright leaves on thick, succulent stalks; both the leaves and stalks are delicious. The crinkly leaves are larger than spinach and the taste is more robust, what some people describe as earthy. Chard is a vitamin factory that just keeps going from spring till frost, and even through to the next spring in mild-winter areas. But when all is said and done, the main reason we’re attracted to it is its looks: chard plants are some of the most beautiful vegetables you’ll ever see. Don’t be surprised if your visitors mistake them for a rare specimen of some exotic ornamental.
Two long-familiar types are red chard and white chard—a reference to the color of the stems. Fordhook Giant (60 days), the classic white chard, has been grown in America since 1750; Ruby Red (60 days), sometimes sold as Rhubarb Chard, is also an heirloom variety, having debuted in 1857. Several other varieties are offered by seed catalogs, all of them fine, but a real treat is the new type called Bright Lights (55 days), an All-America Selection for 1998. What makes this such a stunning variety is the brilliant colors of the stems: they may be hot pink, orange, red, golden yellow, purple, white, or magenta-and-white striped. Each color is so richly luminous it seems impossible.
Maggie says: One summer, I constantly found my neighbors gathered at the edge of my patio, gazing at the containers of Bright Lights chard and whispering to each other. It was so much fun, I could hardly bear to harvest any of it.
Johnny’s Seeds, which introduced Bright Lights, now has isolated the yellow strain in a new variety named Bright Yellow (60 days).
The color of the stem stays true through light cooking; you can also harvest leaves while they are still young and slice the colorful stems crosswise like celery for a salad surprise.
• Collards. Anyone raised in the South is familiar with “a mess of greens,” which invariably means collard greens. Collards are large plants whose upright blue-green leaves taste somewhat like cabbage. They are very closely related to kale (see below), but because they tolerate heat better, collards are the greens of choice in the South. Like other cabbage family members, collards grow nicely in cool weather, and a summer planting will produce a fall crop that collard lovers swear tastes better when “sweetened” by frost. The classic variety is Georgia (80 days). Vates (80 days) is very similar.
• Kale. You’ve seen kale in the supermarket: the large, dark blue-green, extremely frilly leaves next to the cabbage. You’ve also seen decorative versions in the garden center, perhaps labeled “ornamental cabbage”: very pretty curly rosettes with a blush pink or lavender center. (Yes, you can eat them, although the taste is mediocre; they also make fine garnishes.) But you may not have seen the flat-leaved, nonfrilly types that are such nutrition-packed standouts in the home garden. “Flat” is a relative term in this case—not as flat as, say, the leaf of a maple tree, but side by side with the supermarket kale, curled within an inch of its life, you would definitely see a difference. Kale is delicious cooked like spinach or, in true Italian fashion, sliced into hearty soups.
Among our favorites are two very handsome kales that are heirlooms: Red Russian (50 days) is thought to have been brought to North America across the Bering Strait by Russian traders around 1850. The leaves resemble the foliage of oak trees but are much larger; the plants reach a height of 2 to 3 feet. The basic color of the leaves is a grayish green, but in cold weather, which kale survives very nicely, the stems and veins turn a beautiful lavender color. Lacinato (62 days), an Italian heirloom also known as Black Tuscan, sends up very dark green leaves with a puckered surface and edges that curl under. Overall, the plant grows in a fountain shape, 2 feet tall, and looks stunning as the centerpiece of a container garden.
Dwarf Blue Curled Scotch (55 days) has the deeply frilled leaves that you expect from kale, in the more traditional rounded shape; a real knockout of a plant.
• Mustard. It is all but impossible to draw a sensible line between American mustards and the many Asian greens that are also mustards. Let us begin with Southern Curled (48 days), an heirloom dating from the 1740s, which produces the hearty-flavored leaves traditionally favored in the South. It is particularly attractive paired in a container with Red Giant (45 days), which has a sharper flavor and a scrumptious coloration: dark green leaves overlaid with a translucent purplish red.
Osaka Purple (45 days) is quite similar but smaller overall. Both of these red mustards are heirlooms, and because of their colors make a very nice accent in mesclun salads.
For a gentler taste, we like Tendergreen (45 days); this heirloom variety is sometimes called mustard spinach, and aptly so, for the flavor is somewhere between the two. It is slower to bolt and go to seed than other mustards, another nice feature.
• Asian greens. With the popularity of stir-fry dishes and our unflagging enthusiasm for healthy eating, Americans have fallen in love with Asian foodstuffs. Catering to those interests, many supermarkets now carry a nice variety of Asian greens; however, sometimes you have to buy more than you can use, and then eventually you’ll have a slimy green mess to get rid of. How convenient it would be to have a supply of these wonderful green vegetables right outside your door, always ready, always the right amount.
Bok choy (also spelled pac choi or pak choi—same thing), perhaps the most familiar Asian vegetable after Chinese cabbage, is very easy to grow in containers. The large white stems are sweet and crunchy, the small, dark green leaves are tender and mild-flavored. Among several fine varieties we especially like are Mei Qing Choi (45 days), a dwarf type that stays small, and Joi Choi (45 days), a vigorous producer that does well in both warm and cool weather.
Also try komatsuna (40 days), very leafy with just a hint of tanginess in its taste; Green in Snow mustard (50 days), with tasty leaves and an irresistible name; Chinese kale (50 days), also known as Chinese broccoli and by its Chinese name, gai lohn, which sends up lots of edible flower stalks; tat soi (45 days), with very dark green leaves that grow in a flat rosette shape—very pretty; and mizuna (35 days), a rounded, frilly rosette that is delicious steamed like spinach and also wonderful fresh in salads. It isn’t afraid of cold weather, and also can sail through summer heat if kept well watered.
Maggie says: The first year I grew mizuna, it was love at first sight. The leaves are bright green and very frilly, with slender, juicy white stems. It grows in a soft mound that is especially beautiful when you’re looking down on it. The whole plant is so pretty I would happily grow it just for looks if I didn’t know how great it tastes. And I must have very stupid slugs in my container garden, for they ate the boring old regular lettuce and left the mizuna alone.
If the Garden Fairy challenged you to limit yourself to just one container with edibles, and in it you could plant only one item, you could not go wrong if you chose lettuce. In fact, lettuce may be just about the perfect container vegetable: easy to grow, with a short time to harvest, lovely to look at, and just exactly the type of thing you want to be able to pick fresh for each salad. The one drawback to growing lettuce—that it doesn’t like hot weather—is actually a bit more manageable in containers because you can pick up your garden and move it into the shade.
Lettuce Basics. Looking through some of the catalogs, it’s easy to feel befuddled by the sheer number of lettuce offerings; but when you consider that more than 800 varieties are recognized in the United States alone, the range of catalog varieties is actually rather modest.
Generally speaking, lettuce is grouped into four categories based on shape. Romaine lettuce makes tight heads of long, narrow, crisp leaves. Butterheads form rosettes of very tender leaves with a small, loose head at the center. One early variety was named Bibb, in honor of its developer, and today that has become a generic name for the whole category. Crisphead lettuces have a large, tight ball of a head inside looser outer leaves; Iceberg is one variety. Looseleaf lettuces do not form a head of any kind, just layers of individual leaves in an overall rounded shape.
Each type has its charms, and if you had unlimited space we would encourage you to grow some of everything. But for container gardens we advise you to stick with the looseleafs, primarily for economy of space. Unlike the other three types, which are harvested one entire head at a time, looseleaf lettuces can be harvested one leaf at a time. Thus you can pick just enough for tonight’s salad and leave the plant to keep producing more. Also, most looseleaf lettuces are cut-and-come-again plants: snip off leaves and others grow in their place. But we wouldn’t be making this recommendation if the looseleafs weren’t also outstanding in other important respects: taste and looks.
Planting. Lettuce is most definitely a cool-season plant; it germinates better, and grows better, in cool weather. Even though breeders have worked hard to bring us varieties that handle warm weather better than some others, the improvement is relative, and you should still think of lettuce as a spring and fall crop.
If you can find a good selection of lettuce starts at the garden center, by all means use them; it will make your life considerably easier. However, some of the very best varieties can be obtained only as seeds.
Start seeds indoors about a month before your spring frost date, and move the seedlings outdoors after hardening off (see page 60), when they are 1 to 2 inches tall. Try to do this on a cloudy day, and provide the seedlings with some shade the first few days.
Direct sowing in spring is an easy alternative in mild or temperate parts of the country, for the seeds germinate readily at temperatures as low as 40°F. (In fact, there are reports of seeds germinating on melting ice.) For a steady supply of lettuce, make several sowings two to three weeks apart. As the seedlings grow, gradually thin them until you have about a 6-inch spacing.
If you have some containers with potting soil from last year, and it’s so early in the year that you haven’t planted anything else yet, loosen up the soil surface and sprinkle on a few lettuce seeds; they’ll be up and going while you’re still deciding on your summer plans.
To grow lettuce in the cool days of autumn, you need to sow seeds in late summer—which is a problem because the seeds don’t germinate well in hot weather. To get around this, simply prechill the seeds and the potting soil. You can chill the seeds by refrigerating them for seven days in a zip-top bag mixed with a small amount of moist potting soil. Or if you have some seeds left over from the spring, put the partially used packets into a moisture-proof container and store it in the refrigerator or freezer until late summer. When you’re ready to plant, water the potting mix well (this has the effect of chilling it) in the evening, and plant your seeds in that damp, cool soil.
Success with Lettuce. Lettuce turns bitter when the soil dries out; keep the plants evenly moist, and they’ll grow fast and sweet. Cool, damp environments are perfect for lettuce—and for slugs. Be vigilant, and use the controls suggested in Chapter 6 if you see their trademark: big holes in your leaves and silvery trails on the soil.
One final problem: in hot weather lettuce will bolt. That’s the term for a sudden spurt of growth—where once there was a nice pretty mound of lettuce, there’s a very long stem with just a few leaves, and it seems to have happened overnight. It’s as if you reached deep down inside the plant, grabbed an invisible center knob, and pulled upward. Instead of being tight together, the leaves are spaced out all along the stem. Eventually the plant will flower and make seeds, but in the meantime it is basically worthless, for the leaves now have a very bitter taste. Pull out the plant and make way for the next crop.
Slow-bolting varieties have been developed (some catalogs list them under Summer Lettuces), and they are modestly successful. You can also help by providing some shade for your lettuce plants during hot weather. But the only sure way to prevent bolting is to grow lettuce in the cool “shoulder seasons” of late spring and early fall.
Harvesting. The beauty of loose-leaf lettuces, as we have said, is that you can just take a few leaves without pulling up the entire plant. Work from the outside in; grasp the bottom of a leaf (its stem end) and pull it off with a sideways motion. If you are growing mesclun or salad mixes (see pages 114 to 115), use scissors to snip off as much as you need, in the cut-and-come-again technique (see page 112). And don’t forget that the larger seedlings that you pull up for thinning can be eaten as “baby lettuce.”
Varieties. One of the earliest, most reliable, and tastiest lettuces is also one of our oldest: the heirloom Black-Seeded Simpson (45 days) has been cultivated in America for more than 100 years. It’s a bright, clear green, with pretty ruffly leaves, and tolerates heat better than many others. It is too delicate to survive shipping to market, so only home gardeners can enjoy this tasty lettuce.
Deer Tongue (60 days) is an even older heirloom, dating from the 1740s; the name comes from the shape of the leaves, extended triangles. A very attractive variation is Red Deer Tongue, with red-tipped leaves.
Oak Leaf (40 to 45 days), another heirloom, is also named for its leaf shape. Over the years breeders have developed several variations on the oak leaf theme, so that the word has come to be used generically as well as for a specific variety.
Among these “oak leaf types” are some real beauties. Salad Bowl (50 days), an All-America winner, and Red Salad Bowl (50 days), with green and red leaves respectively, make a nice pairing. Brunia (50 days) is mostly green, with bronze coloration on the tips. They make a handsome trio.
Red Sails (55 days) is extremely beautiful, easy to grow, and slow to bolt: no wonder it was named an All-America Selection. The leaves are bright green at the base, gradually blending to a rich red near the edges; viewed from above, the whole plant seems a striking burgundy red, a color that becomes more vibrant with maturity. A good choice for fall as well as spring.
Lollo Rossa (55 days) is like no other lettuce. The outer edges of each leaf are very heavily frilled, so much so that looking at the plant, you cannot see down into the center. The entire plant is exquisitely decorative, all the more so because of its beautiful coloration: bronze red over bright green. The plants grow into compact, well-rounded mounds that make a handsome border around the rim of a large container. Be prepared for your visitors to go nuts over this one. Two traits you should be aware of: this variety is prone to bolting, and it also responds well to cut-and-come-again treatment; the latter takes care of the former.
For a stunning color palette, combine Lollo Rossa with two new varieties: Lollo Bionda, with soft green leaves, and Impuls, a dramatic cranberry red.
OTHER SALAD GREENS
As American tastes become more sophisticated and interest in healthful eating habits continues to grow, we have seen a great surge of interest in some of the more unusual greens for salad. In fact, in many larger cities it is no longer noteworthy to find once-rare items like arugula and mâche in the neighborhood supermarket.
No longer rare, maybe, but still pricey. Grow these gourmet greens yourself—for thriftiness, for freshness, and for the sheer fun of it.
Most of these salad greens are like lettuce in their growing needs. They do well in cool or moderate temperatures, not so well in very hot weather. Most are cut-and-come-again plants. In all likelihood you’ll have to order seeds, but generally you’re spared the agony of sorting through many varieties because catalogs tend to offer just one or two choices. Start seeds indoors around February, or direct-sow in containers starting in March, or both. Keep them well watered, watch for slugs, create some shade in mid summer, and enjoy.
• Arugula, also known as rocket (42 days). The plant is not among the most gorgeous, but who cares—we’re not after looks but taste. The pleasantly sharp tang is unmistakable and unsubstitutable. If you love that taste, you’ll want to grow your own. It’s quite easy and extremely convenient, since you can simply pluck off leaves as needed. Like most other salad greens, arugula is susceptible to bolting in very hot weather, but all is not lost. The leaves get more pungent after bolting, and the pretty little edible flowers add a touch of spiciness to salads.
New on the American scene is Italian Wild Arugula (55 days), also called Rucola, a hot-weather substitute. It’s actually a separate species from regular garden rocket but has a similar flavor—that robust, piquant taste we associate with arugula—and stands up to summer heat. The leaves, stems, and flowers can all be used in salads, although you can extend the harvest period if you continually cut back the plant to hold off flowering.
• Endive, escarole. These two plants are virtual twins in a genetic sense, although they look very different. Both are bitter-tasting, though not unpleasantly so.
Endive is familiar and easy to recognize: very frilly, almost lacy leaves with long white stems. It is not Belgian endive. Leafy endive is very popular in France, where it is known as chicorée frisée, and Americans have adopted frisée as a synonym for endive (it means “curly” and is the source of our word “frizzy”). The white stems are crisp and succulent, and longer than you would find on, say, a ruffled lettuce leaf.
Commercial growers cover the center of the plant to make more of the stem area white and also to soften the taste, a process called blanching. You can easily do this yourself if you care to: either tie the leaves together at the top or cover the center of the plant with a plate or something similar. Both methods block sunlight from the heart of the plant, thus preventing the photosynthesis that turns plant material green.
A classic endive variety is Green Curled Ruffec (90 days), an heirloom. Très Fine Frisée (60 days) is a real charmer, a 6-inch miniature with mild flavor and extremely lacy leaves.
Escarole is a broad-leaved endive (or endive is a narrow-leaved escarole, depending on your perspective). Broadleaf Batavian (90 days) is an heirloom variety dating from the mid 1860s.
Both escarole and endive belong to the chicory family, and in that group are the plants whose roots are roasted, ground, and added to coffee in New Orleans. Also in the family is the salad green with the bright red heart—radicchio, described below.
• Mâche, also known as corn salad and lamb’s lettuce, is quite popular in Europe and is becoming more familiar here. It has a mild flavor that many describe as nutty, and is so hardy it can be sown in early fall for a winter salad green. This is one of those plants for which we recommend keeping seeds around; whenever you have a vacant patch in a container, tuck in a few.
Blonde Shell-Leaved (50 days) has small, round leaves that are slightly cupped, like shells. Large-Seeded Dutch (50 days), with large leaves, is very productive.
• Purslane. Two different plants, with no other botanical relation aside from their common names, are called purslane.
Winter Purslane (40 days), also known as miner’s lettuce, has a fresh taste and juicy texture. Sow seeds in late summer for fall and winter. It has a distinctive leaf pattern: two small leaves, approximately heart-shaped, are joined in pairs at their base, making a ripply edged funnel that encloses a small white flower. Snip off what you need, and new growth soon follows.
Golden Purslane (50 days) produces fleshy, succulent leaves with a tart, tangy taste and an upright growth pattern; it thrives in hot weather, and is sometimes called summer purslane. Both purslanes have been considered weeds by some misguided souls who don’t know what they’re missing.
• Radicchio. Enormously popular with chefs and creators of “designer” salad mixes, the brilliant red radicchio deserves a place in every garden. It has a toothy texture, a zippy, tart taste, and knock-your-socks-off color. For visual impact, nothing else will do.
Rose Marie says: The slightly bittersweet juiciness of these greens is absolutely addictive.
Traditionally, radicchio has been grown in a two-step process: seeds planted in spring produced a large head of green leaves by summer’s end; that head was sliced off a little above ground level and in a few weeks small heads sprouted around the decapitated stem. In the cool days of autumn, the small new heads developed the strong red color that, for Americans at least, today defines this vegetable.
In recent years, new varieties have been developed that produce a red head without the extra step, although sometimes it is hidden inside an outer covering of green leaves. Some catalog descriptions point out certain varieties that do not require “cutting back,” meaning one-step production.
Milan (78 days) is one of the most reliable varieties of a vegetable that, despite the best efforts of skilled seedsmen, is still not entirely predictable. Firebird (74 days) is described as an excellent variety for those who haven’t grown radicchio before.
Castelfranco (85 days), an heirloom, forms heads without being cut back, as does Chioggia (60 days).
Theme Garden
The Salad Basket
The next time you’re in the supermarket, trying to select the prettiest lettuce from all those displayed before you, think about this: the lettuce was grown in a farmer’s field that may be 100 miles away, if lettuce is in season in your region, or 1,000 miles away if it is not.
Once harvested from the field, it was taken to a packinghouse, where it was cleaned and packed in boxes bearing the packer’s brand name. The packer sold that lettuce to a broker, who also buys lettuce, along with all kinds of other produce, from other packers. The broker used a refrigerated truck to bring the produce to your area. Once it arrived, the broker’s representative sold the lettuce either to a local wholesaler, who then sold it to your market, or to a supermarket chain. The supermarket chain received it at its distribution center, and later moved it into the individual stores.
Where it sat for an unknown period until you came along.
At home, you put the lettuce into your refrigerator. You will use some for tonight’s dinner, but you almost never use it all; the rest will stay until you finish it or it turns to green slime, whichever comes first.
Now consider this alternate scenario: instead of dragging yourself to the market to buy ordinary lettuce that may be as much as five days old and that is almost certain to be more than you need, you step outside onto your patio or balcony or you open the window to your window box. From your container garden of beautiful salad greens, you pick just enough for tonight’s salad. You choose two kinds of lettuce, maybe bright green Simpson and burgundy Red Sails, some arugula, a few leaves of escarole, and a bit of fresh chives. They are fresher than fresh and have not been sprayed with dubious chemicals; they look beautiful and taste fabulous. Tomorrow you can do it all again, with a completely different combination of tastes.
We think salad greens are just about the perfect container edible. They are dead easy to plant (just sprinkle the seeds on the soil in your container), grow quickly, and have a terrific ratio of produce to growing space since you eat the whole plant, not just its fruit. Size is not a determining factor: you could have a tiny salad garden in a window box, a large medley of greens in a wine barrel, or anything in between. You can grow unusual salad greens, including many gourmet types that are not commercially practical and thus can be enjoyed only by home gardeners, just as easily as you can the more prosaic ones.
In your salad garden you can feature any of the delicious things you like to put in your salads. Here we suggest only two combinations, but many other possibilities will come to you as you scan through this book. You might want to include some of the many kinds of lettuce, spinach and spinach alternatives, mustard greens, beet greens, Swiss chard, kale, mâche, escarole, endive, arugula, the wonderful Asian greens, scallions, green garlic, chives, even salad flowers like nasturtiums.
THE CLASSIC SALAD BASKET
This selection fits nicely in a rather small round container or a window box. Plan an arrangement built around the various heights of the plants. In the center, the two tall plants: scallions and chervil. The chervil will get about a foot tall, the scallions a bit shorter. Around these two, set out two different kinds of lettuce chosen for their contrasting shape, color, and texture. One suggestion: Black-Seeded Simpson, a bright green looseleaf lettuce with frilly leaves, and Red Deer Tongue, with smooth, triangular-shaped leaves tipped in red. In a round container, you might want to do one circle of green and one of red, or intermix the two. In a rectangular window box, put the two tall plants in the center and the two lettuces arranged down both sides.
The anise-tasting chervil leaves are a delightful addition to salads. Chervil usually has to be started from seed because nursery plants are rare. Sow the seeds right in the final container, starting as early in spring as you possibly can (as soon as the soil is no longer frozen). You can plant scallion seeds at the same time, although transplants are not hard to find and will get your garden off to a fast start. Lettuce transplants are a common sight in garden centers in the spring, but to be sure of the varieties you have selected, your best bet is to order seeds and start them indoors early (see pages 54 to 60).
The lettuces will be at their peak from mid spring through early summer; once hot weather arrives, they will bolt (shoot up tall and spindly, with bitter leaves) and nothing you can do will stop it. The chervil will last somewhat longer, but eventually it bolts also. The scallions will remain all season, and in fact will multiply for next year as long as you don’t harvest them all. When the lettuce and chervil have passed their peak, pull out the plants and replace them with hot-weather crops (see page 79 for weather-specific lists).
A WINTER SALAD BOWL
Many salad vegetables grow best in cool weather. Often gardeners think in terms of spring—probably because they are so eager to get going after the winter—but they shouldn’t overlook the possibilities of fall gardens. In milder climates, those gardens can extend well into the winter months. With that kind of climate in mind, we suggest the following winter salad garden. This garden works best in a round container, medium size to large, but you could also use a window box as long as it is a fairly good size. Sow seeds or set out transplants in August, and you could be serving fresh salads from your garden as late as Thanksgiving.
Imagine a circle made of four rings, like a bull’s-eye target; you’re going to fill those rings with plants in alternating green and red colors. In the very center, one mizuna plant. This Japanese beauty is delicious as a cooked vegetable or raw as a salad green, and it is exquisitely beautiful. Its bright green leaves are extremely feathery, on long, crisp white stems, and they arch outward from the center in a pretty rosette that gets wider as the plant grows. Harvest the older (that is, outermost) leaves to retain the soft mounded shape.
Arranged in a circle around the mizuna, plant several radicchio plants with their red and white swirls. Search out one of the varieties that do not require cutting back (see pages 114 to 115), so that you can plant these gorgeous red globes at the same time as the rest of your winter garden.
The next circle contains two types of greens, planted alternately: arugula and winter purslane. Their textures and leaf shapes make a nice contrast with each other, and their bright green color is a terrific foil between two rings of red: the radicchio on the inner circle, and the burgundy lettuce on the outside. Arugula, with its strong bite, gives a real punch to a mixed-green salad. Winter purslane, less well known in the United States, has a milder taste, a juicy texture, and unusual, very attractive leaves.
The outermost circle is planted thickly with Lollo Rossa lettuce. The leaves of this type of lettuce are very unusual; all the outer edges are very tightly frilled and dramatically colored, green overlaid with bronze. A new cultivar called Impuls is bright cranberry red rather than bronze. Placed around the edge of the container as a border, they create the effect of a frilly crinoline petticoat or a ruffle on a tablecloth. As the weather turns cool, the coloration gets stronger and brighter, making this lovely lettuce the perfect finishing touch for a wintertime salad garden.
This chapter is not about growing those big fat whoppers that make you cry when you slice them. Buy those at the store. In a home garden, onions take a very long time in ideal conditions to reach that mature size, and then you have to cure them, and then you wonder why you bothered because they’re just like what you could have bought for pennies at the supermarket. In containers the question is even more dicey, since that space cries out to be filled with something more special, more appropriate.
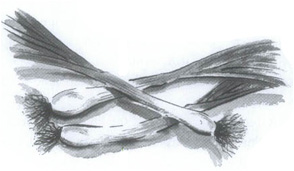
This is not to say, however, that your container garden must go onionless. With scallions, leeks, and green garlic, you can achieve, in just a speck of growing space and within a reasonable time frame, that wonderful tingling taste for which there is no substitute. And you get a bonus: a green and pungent garnish for your mashed potatoes.
Basics. All three plants described in this section are members of the greater onion family, the alliums. (Chives belong to that same family, but since most people think of chives as an herb, we placed them in the Herbs chapter.) The various alliums are similar in some ways and different in others. One similarity is the way they grow: a young plant, grown from a seed, sends up long, slender spears of green foliage (you wouldn’t really think of them as leaves). Then, after enough time has passed, the part underground begins to develop into a rounded bulb and the green tops stop growing. Eventually the tops turn yellow and die down, and the underground part is ready to be harvested and dried; and then you have a full-fledged onion or a head of garlic.
All well and good, except that the full cycle takes a very long time. Essentially what we are doing in this section is interrupting that cycle midway through—when the plants still have succulent, flavorful green tops.
Planting. Since the planting techniques for the three vegetables are different, they will be described individually below.
Success with Onion Family Members. These are among the easiest vegetables to grow in containers, with little chance of serious diseases or plant pests. In fact, many organic gardeners plant garlic and onions in with pest-prone vegetables, for there is some evidence that the strong aroma repels harmful insects. Regular watering is important, and you need to be careful not to disturb the shallow-rooted plants by yanking out neighboring weeds or other vegetables planted alongside them, Otherwise, these plants are pretty undemanding.
Harvesting. Specifics are described below, but basically all three vegetables can be harvested whenever you’re ready for them.
SCALLIONS
First, some terminology. A scallion, often called a green onion or a spring onion, can be either (1) an immature regular onion or (2) a specific type known as a bunching onion. If you plant seeds or sets of regular onions and harvest them while they’re very young and haven’t yet formed a big fat bulb, you’ll have what most people call scallions. Bunching onions have long, graceful green tops and slender white bottoms that never develop into a wide bulb—again, most people’s idea of scallions. Many seed catalogs list these varieties together under “Bunching Onions or Scallions.”
Because of their growth pattern, true bunching onions are actually perennials. Each seed produces a cluster of seedlings that eventually grow into a bunch of green onions that can be harvested all at once by the handful or one at a time. If you leave some in the ground, each one will divide at the base and new onions will grow to replace the ones you removed—ergo, a perennial.
Planting. For bunching onions, plant seeds indoors a month before the spring frost date, or direct-seed in very early spring. The seeded area needs to be kept lightly moist and otherwise undisturbed. The sprouts are very tiny, like green threads reaching upward. When transplanting seedlings into your container, think about whether you might want to keep some through the winter for next spring; if so, winter care will be easier if you put them in their own pot.
The traditional way that bunching onions are grown accentuates their long white shanks, and this is easy to do in your container. As the seedlings grow, mound soil up around the base, blocking out the sunlight. Continue this process as long as it is practical.
To get scallions from regular onions, you have three planting choices: you can grow onions from seeds (treat just as described above for bunching onion seeds), from baby plants (which you can buy via mail-order as well as at garden centers), or from onion sets (which are very small onions, about the diameter of a dime, grown last year and harvested at this small size specifically for this purpose). You’ll have faster results from transplants or sets, and with sets there’s the extra advantage of being able to space out the planting over several weeks for a staggered harvest.
Harvesting. You can start harvesting either bunching onions or young onions whenever they reach the size you want. And since the part you’re interested in is above ground, it’s not hard to keep track. Left growing long enough, regular onions will eventually start to form small round bulbs, which may suit your purposes just fine.
Varieties. Just about any kind of regular onion will do a fine job of producing scallions. For bunching onions, we like two varieties: Evergreen Hardy White (60 days), a very hardy variety that will keep through the winter, and Deep Purple (60 days), which has exquisitely colored red shanks, very beautiful on a relish tray. (Be forewarned: only the outermost layer is red, so don’t strip off too much during cleaning if the color is what you want to accentuate.)
LEEKS
The humongous leeks that you find for sale in the supermarket, looking like wildly overgrown scallions with white shanks as big around as the handle of a baseball bat, are mild-flavored and surprisingly sweet, especially when slow-roasted with a little butter or olive oil. The trouble is, it takes a long time to reach that size, and you may not find it practical in a container garden. But even at a smaller size, which is definitely doable, leeks are delicious, with a gentle and unique taste. And they keep on growing through light frost, reaching a larger size just in time for wonderful winter soups.
Planting. Start seeds indoors two months before the spring frost date; after a month, transplant to larger intermediate pots. When seedlings are about 6 inches high, plant in your outdoor containers. Alternatively, buy transplants at the garden center at about this same time.
Use a chopstick or a dibble to make deep narrow holes, and insert one transplant per hole; leave just a bit of green showing. As the plants grow, mound up soil around the base; this process of blanching makes the white stems longer.
Harvesting. After a couple of months you can begin harvesting small leeks. The longer you leave them, the larger the white stems become and the tougher the leaves.
Varieties. If your climate supports a long growing season, the heirloom Giant Musselburg (100 days from transplants) is wonderfully sweet. King Richard (75 days from transplants) will give you baby leeks by summer. Developed specially for direct sowing, Kilima (70 days from transplants) is another fast-growing summer leek.
GREEN GARLIC
Traditional gardeners, aiming to grow full heads of garlic for drying and storage, plant in the fall and harvest their jewels some nine or ten months later. Container gardeners do better with a different strategy and a different goal: not bothering with the bulb, but growing the plants for the green tops. Green garlic isn’t a separate species; it’s just regular garlic that hasn’t been growing long enough to form a full head underground. It’s “green” in the sense that an unripe apple is green, and also in the sense that it’s the green part that you harvest.
We think there’s very little reason to attempt to grow full-size garlic bulbs, which are readily available year-round, but every reason to grow green garlic, a gourmet treat generally available only to home gardeners. Green garlic has that unique garlic taste but in a milder version, and a bonus of bright green color. Another advantage: it is so simple to plant. You don’t have to study catalogs, choose varieties, order seeds, count back to planting time, or any of that. Just break off a few cloves from a head of garlic, which you may already have in your kitchen, poke a hole into any container wherever there’s an empty spot, and plant. You can do this whenever you think of it, starting in early spring, for a continuous supply of delicious green garlic.
Planting. At the market, buy a whole head of garlic; pick the fattest, firmest one you can find. At home, separate it into individual cloves; do not peel. Notice that the cloves have a squared-off base end and a pointy tip. Poke holes into your container soil about 2 inches deep, and put one clove into each hole, pointy end up; cover with soil, and water thoroughly.
Harvesting. Begin harvesting the baby garlic plants as soon as they form green leaves, starting about four to five weeks after planting the cloves. After trimming away the roots, you eat the whole plant: stem, leaves, and any small bulb that has begun to form at the base—and that’s green garlic. Those left to get a bit larger, with a bulb forming, are perfect for grilling.
You can also treat this as a cut-and-come-again plant (see box). Slice off some green shoots with a knife—just the amount you need for tonight—and they’ll grow back. You can do this up to five times. The plant grows fast, so keep up the fertilizing with a complete fertilizer (see page 67).
Rose Marie says: I love cooking with green garlic. It goes well in soups, casseroles, stir-fry dishes, sautéed greens, salsa, pesto—in fact, in any dish that would be complemented by a hint of garlic. But my favorite way to cook it is on the grill with a little dab of olive oil. Along with other grilled vegetables, this is a very wonderful dish with steak or grilled chicken.
In 1823 the British essayist Charles Lamb wrote about how the accumulation of wealth changes a person’s life, especially one who originally had very little and was forced to live simply: “There was pleasure in eating strawberries before they became quite common, in the first dish of peas while they were yet dear.” People with great wealth, he suggested, had the wherewithal to purchase peas and strawberries whenever they wished, shipped in at great expense. But when those foods became everyday items, they ceased to be special, and so those privileged members of society were denied one experience enjoyed only by those of modest means: the exquisitely sweet taste of the first peas of the season.
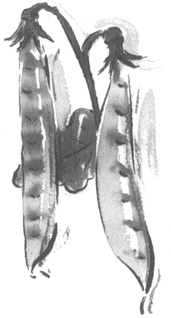
Today purchasing fresh peas out of season, flown in from another climate, is not so much an issue of class or wealth as it is a question of flavor. Fresh peas are imbued with a natural sugar that gives a hint of sweetness to their taste—and begins to turn to starch as soon as they are picked. No commercially harvested pea can match the taste of one you picked five minutes ago.
In this chapter we have grouped together three different kinds of peas: regular garden peas, sometimes called English peas or shelling peas (because you shell them and discard the pods); edible-pod peas, often called snow peas, which are picked and eaten before they make peas inside; and snap peas, which combine the best of both—plump peas and sweet crunchy pods. The tastes of these three kinds of peas are different, but the growing conditions are pretty much the same.
Pea Basics. Peas are cool-season vegetables. They grow on vines that send out curly tendrils that attach themselves ferociously to any nearby support—even the stem of another pea plant. In Asia the tender shoots (the newest leaves and tendrils at the tip) are prized as a vegetable delicacy, but Americans seem content to wait for the peas to form. If for some reason you should decide you’ve had enough fresh peas for one year, you might want to try snipping off some shoots for a salad or stir-fry. The pretty little flowers are also edible, if you can bear to sacrifice the peas that would otherwise follow.
Many of today’s varieties are dwarfs—that is, with very short vines, often described in catalogs as “bush type.” Don’t make the mistake, though, of thinking they grow like bush beans. Many types of dwarf peas easily reach 24 to 30 inches and more, and they all grow much better with some sort of support for the tendrils to cling to. Good catalogs provide information on height so you can be prepared.
Planting. Peas germinate when the soil is still cool, around 40°F, grow vigorously during cool weather, and start to shut down when the thermometer consistently hits 80°F. This means that you need to plant your peas as early as possible. Gardening books and catalogs frequently use the phrase “as soon as ground can be worked.” That means when it is no longer frozen or totally waterlogged.
Container gardeners have something of an edge here, for often you can position a container in a warmer or more sheltered spot, where the soil won’t freeze and where it will absorb sunlight for a quick winter warm-up. In that case, you could conceivably start your peas in January; in any case, try to plant them by early March. Container gardeners can expect to have a crop of peas two weeks earlier than traditional gardeners.
Peas should be direct-seeded, for they don’t transplant well. You can, however, speed up the process through presprouting (see page 128). And don’t forget to add inoculant (see box); it’s inexpensive, completely safe, and without question promotes superior growth.
Before you do anything, however, decide what kind of pea support you will use. Pole peas need a tall trellis of string or plastic grid, something with a small diameter. Dwarf or bush peas can survive without any support but do much better with some kind of help (see page 40 for a few suggestions). Whatever you decide to use, have it in place before you plant, to avoid tearing into the roots.
The roots of peas grow laterally, so a wide, shallow container is perfect. Plant peas twice the depth of the seed (or 1 inch deep if the weather is still very cold), spaced an inch or so apart. It always seems to take a long time before new growth shows itself (maybe because it’s the start of the season and we’re eager), but once up the plants grow fast.
Success with Peas. Peas, like all other legumes, are nitrogen factories (see box), but they are also heavy feeders and will benefit from a regular program of fertilizing. Once the first flowers appear, begin adding a liquid fertilizer with a ratio of 1:2:1 (that is, a higher middle number for more phosphorus) once a week or so. Liquid seaweed is very effective with peas.
If you ever grew peas in a traditional garden, you may have experienced some problems because they are susceptible to several diseases. Some come from pathogens that exist in infected soil, and therefore container gardens are usually spared. But others are spread by insects or travel through the air. Your best course is to choose disease-resistant varieties; catalogs will tell you which they are. One of the nastiest diseases, at present limited to the western United States, is pea enation virus, which blocks the plant’s vascular system. Infected plants simply collapse. The virus is spread by aphids, which is another reason peas do better in the cool spring, before aphids come around.
Because they thrive in cool weather, peas are also at risk of mildew. You can help by selecting resistant varieties and by watering carefully. Add the water to the soil; don’t spray the leaves. Check leaves frequently for mildew, and spray with baking soda solution (see page 76) at the first sign of trouble.
Harvesting and Varieties. The specific point at which the peas are perfectly ready for harvest varies among the three types, and is described below. For all of them, however, the ideal technique is the same. Grasp the main stem with one hand and the pea pod with the other; lift upward until the pod separates from the vine. Or use clippers or scissors to cut them off neatly. Do not yank; peas are very shallow rooted, and you’d be surprised how easy it is to pull the whole plant out of the soil.
This, too, is true for all three: once they start producing, check your plants every single day and keep them picked. Peas left too long on the vine are tough and bitter, but that’s not even the worst of it: the plant, having achieved its inbred goal of making seeds to reproduce itself, will simply stop producing.
As a rough guide, plan on harvesting one gallon of pea pods from each plant of the bush varieties during the season, and one to two gallons from pole types. For English peas, which you’ll shell, your edible harvest will of course be smaller.
• Garden peas. These little green jewels are ready when they have completely filled the pod. It’s easy to check: break one open and taste the peas inside; then you’ll know what to look for—-just how fat and shiny the pod should be. Two favorites are Oregon Pioneer (61 days) and Green Arrow (70 days); both are dwarf types, reaching 2 feet in height. Both are strong producers with good disease resistance; the principal difference is that one begins producing earlier. A brand-new dwarf variety that won the All-America award for 2000 is Mr. Big (58 days). The AAS judges reportedly admired its high yields, disease resistance, and giant size: almost 5 inches long.
• Snow peas. A staple of Chinese stir-fries, these crunchy peas are also very delicious raw in salads (slice crosswise into chunks and use a sesame-oil dressing). It is the outer green pod that we eat; the little peas inside are either nonexistent or so small they’re insignificant, depending on how mature the pea is when you pick it. You can begin harvesting these peas whenever they reach the size you want, but they are most flavorful when mature enough that you can just begin to see the bumpy outline of the peas inside. Don’t let them go much beyond that, or the pods will become tough and bitter.
Two of the best varieties were developed in our home state by Dr. James Baggett, professor emeritus at Oregon State University, but that’s not the reason we recommend them: they’re simply the best. Oregon Sugar Pod II (68 days) is a 2-foot bush with stringless pods. Oregon Giant Sugar Pod (70 days) is a larger plant (up to 3 feet) and makes larger peas. Both are resistant to several viral diseases and also to mildew, making them good choices for fall planting if you have a yen to try that.
• Snap peas. Sugarsnap, the original snap pea, is an All-America Gold Medal plant, and if anything ever deserved it more, we can’t imagine what it would be. When it was introduced, Sugarsnap was something the plant world had never seen: both the outer pod and also the plump peas inside were edible, and wondrously so, extremely crisp and crunchy, extremely sweet. It was an instant hit.
That was 20 years ago. Today, the name of the original plant has passed into general usage as the term for an entire category, although technically Sugarsnap refers to just that one cultivar. New varieties have been introduced, including some fine bush types.
These peas can be harvested and enjoyed while they are still somewhat immature, but wait at least until the sides have started to plump out. They are at their sweet best, many think, when the peas inside are fully formed and the pods are really fat, completely round in cross section. But if they stay on the vine past that point, the pea kernels begin to turn starchy. Just as you do with garden peas, pick one or two and sample them until you teach yourself what the perfect stage of ripeness looks like. They are delicious raw in salads or with dips, or as a cooked side dish, lightly sautéed or steamed.
Let us all pity poor Mr. Lamb, born 200 years too soon.
Super Sugar Snap (68 days), an improved, mildew-resistant version of the original Sugarsnap, is our recommendation for a vining type. It may reach 5 to 6 feet, and needs a strong trellis to support its heavy crop of peas. Two very fine bush types are Cascadia (62 days), an enation-resistant variety that does extremely well in the Pacific Northwest and northern California; and Sugar Sprint (62 days), brand-new but quickly becoming everyone’s favorite. It is resistant to multiple diseases, including mildew, so it works well for both spring and fall plantings. Both are 24 inches tall and could manage without extra support, but do considerably better with it.
Theme Garden
The Ethnic Market at Your Doorstep
Younger generations of Americans, accustomed to buying foodstuffs like precut, shrink-wrapped vegetables and 67 kinds of breakfast cereal in suburban mega-supermarkets the size of airplane factories, would be astonished at the shopping habits of homemakers in small European towns, where the ingredients of each night’s dinner are purchased fresh that day. What these suburbanites may not realize is that in our largest cities, in neighborhoods originally settled by immigrants, something of that same tradition still exists in the tiny sidewalk markets selling the vegetables, herbs, and fruits familiar and dear to the newcomers and their descendants. From these fresh ethnic ingredients, wonderful meals are made in America’s kitchens.
If you had the good luck to be born into the right family or the good sense to choose your friends well, you may have had the great pleasure of being invited to share a holiday dinner with your friend’s Vietnamese family or magnificent pasta feasts prepared by your Italian-speaking grandma. If so, you already understand the essence of good food—made from fresh, authentic ingredients and cooked with love. Second best, but still wonderful, is a meal at a local ethnic restaurant whose owners are proud to serve the foods of their homeland.
Our lives have been immeasurably enriched by our exposure to the exquisite tastes of the world’s cuisines, and today many good cooks are eager to duplicate those foods in their own kitchens. Cookbook publishers have matched our interest by bringing out many terrific new books teaching us how to prepare these dishes, but a key problem remains: where do we get the ingredients? If you don’t already live where the ingredients are everyday fare at the neighborhood greengrocer, you’re stymied.
Unless, of course, you grow them yourself.
Here we suggest five different container gardens that will provide you with the ingredients for your favorite ethnic dishes. With these gardens, it’s almost like having a small ethnic market right at your doorstep.
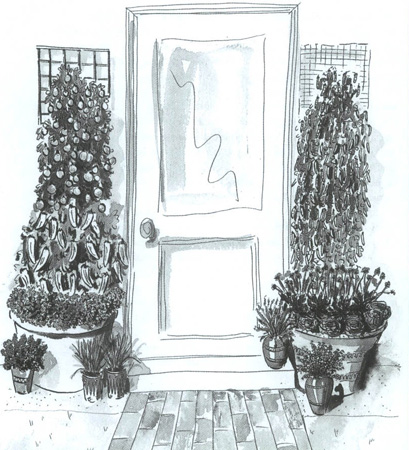
THE SALSA BOWL
Once known only to patrons of Mexican restaurants, the cool/hot/spicy blend of tomatoes and herbs we call salsa is now the first or second most popular condiment in the United States, sometimes outranking even ketchup. Every year or so a “new” style of salsa emerges, made from different vegetables or even from fruit, but the classic tomato version remains the standard.
Here, in one large container or two smaller ones, you can grow all you need to make your favorite salsa recipe. For the aesthetics of it, we like the idea of putting everything in one container, but it will have to be a good size, preferably 3 feet in diameter, and you will need to add a trellis or some support for the tomato. Otherwise, you can put the tomato in its own pot, smaller but still deep, and everything else together in a medium-size container. To enhance the Mexican theme, you might wish to use all terra-cotta pots, or one of the new lightweight molded pots that mimic Mexican styles.
Starting very early in spring, and continuing throughout the growing season, sow seeds of cilantro directly into the container. Harvest the leaves when they are young and tender, then pull out plants when they get too gangly or start to go to seed. About every three weeks, tuck in a few replacement seeds to keep a fresh supply going all through summer into fall.
For the tomato, choose any nice red one with medium-size fruit from the varieties listed in the Tomatoes section (see page 159). A small hot pepper gives you the fire; the traditional pepper is of course jalapeño, but other, smaller varieties may work better in your limited space. We like Super Chile pepper for this reason. To represent the onion taste, plant one or two clumps of chives near the edge of your container. Most salsa recipes call for fresh chopped onion, and certainly you may add that as well, but the onions will have to come from the grocery store because growing bulb onions is not practical in containers. If you like fresh garlic in your salsa, you can grow it in one of two forms: garlic chives, which give you a hint of onion and garlic together, or green garlic, which adds a nice contrasting touch of green when chopped into the mix.
A TASTE OF ITALY
All the ingredients for a rich pasta sauce at your fingertips. Here again you have a choice of putting everything together in one large container, or grouping three smaller ones. The decision depends on your space and the containers you have available.
Let’s envision using one large container first. To support the tomato, you would be smart to install some kind of semicircular trellis before planting anything. It could be a section of heavy-duty wire grid fitted into the curve of the container, or several wooden or bamboo stakes positioned around half of the rim, braced together with crosspieces at several levels.
Within this semicircle, plant one Italian plum tomato close to the trellis. Near the opposite edge, put two Giant Marconi roasting peppers. These three plants, which form the main elements of the garden, should be positioned so that from a bird’s-eye view they form a triangle; this will allow all three room to grow. Fill in the spaces around the three main plants with Italian herbs: oregano (or marjoram), parsley, and basil. Choose from the many wonderful basil varieties not normally available at the supermarket. Oregano is a perennial in all but the coldest climates, but many gardeners treat marjoram as an annual. If you’re in doubt about your weather, or not sure whether you will want to repeat the Italian garden next year, marjoram is probably the better choice because it gives you the greatest flexibility.
Most of these plants will reach their full size and their harvest peak in mid to late summer; to begin your harvest sooner, you may want to plant Black Tuscan kale, a favorite green of many Italian cooks. As a cool-season vegetable, kale is at its best in late spring and early summer, and begins to fade out just about the time the hot-weather plants are bursting into their full glory. Alternatively, you can put in some small kale plants in late summer, just as the basil and the peppers are winding down, and enjoy a fall harvest.
This garden can also be assembled easily in three smaller containers, grouped together. One should hold the tomato (you still need some kind of support) and possibly the basil; both need the same rich soil and hot, bright sun. In the second container, the peppers and the parsley (and maybe more basil if, like us, you can’t get enough). A third can contain the oregano (in a small separate pot, it is much easier to keep your oregano through the winter if you decide you can’t live without it).
A CHINATOWN GREENGROCER
Many adults who now consider their palates very sophisticated had their first non-American meal in a Chinese restaurant, often Cantonese. As we have been exposed to wider circles of international influence, there has been an occasional tendency to discount this style of cooking in favor of other, supposedly more exotic foods. As everyone who has enjoyed an authentic Chinese meal knows, this is decidedly unfair to one of the world’s greatest cuisines. For all lovers of good food, and for all styles of Asian cooking, we suggest this garden of Chinese vegetables.
Use a large container with a tall trellis. If the trellis is made of strips of wood or bamboo, cover it with either fine wire mesh or a string trellis; peas need something very thin to grab onto. In very early spring, plant lots of seeds of edible-pod peas at the feet of the trellis. These can be either the familiar flat peas we know as snow peas or the more recent snap peas; snow peas are more common in Chinese dishes. In one section of the container, put one or two clumps of garlic chives.
At the same time, plant seeds or, better yet, young transplants of several Asian greens: spinach, the upright bok choy, the pretty flat rosette of tat soi, and the richly colored Osaka Purple mustard. We suggest transplants rather than seeds simply for convenience; these four greens have very different looks, and you will find it easier to arrange them in a pleasing pattern if you have plants to work with. In any event, put in lots of plants; don’t leave any bare soil.
All these are cool-season plants, at their best in late spring. By the time summer’s heat arrives, the greens will be ready to bolt and the peas will be shriveling. At that point, yank everything out (except the chives) and put some heat lovers into the container—perhaps a rich tapestry of several basils.
MEDITERRANEAN MEDLEY
The countries of the Mediterranean region have long histories of bitter political conflict and fierce warfare, but they are also alike in many ways, not the least of which is their table. This region is the native habitat of most of our familiar culinary herbs, and the soil and climate are just right for a rich bounty of vegetables and fruits. In honor of Rose Marie’s grandmother, we think of this as a Greek garden, but in truth it represents the entire area.
This is another container garden that could work either in one large container or as a grouping of three smaller ones. Figure out which physical format your space will accommodate, and what containers you have on hand. It may be slightly easier to manage as a three-pot garden, so we’ll describe it that way, but the other approach is certainly possible.
The main container is fairly large and deep, about 18 inches. In the springtime, cover the entire surface of this container with seeds of fast-growing spinach and mustard greens; resow all through the spring as you harvest these early-season favorites. In early summer, plant a cherry tomato of your choice; you’ll need some sort of trellis or other support structure, to tie it to as it grows. At the base of the tomato, add one or more basil plants; take advantage of the room in this large pot and put in several basils. Then, at the end of summer, before a cool night turns the basil plants black, remove them and put in more small mustard plants; they thrive in cool fall weather, right up to a hard freeze.
In a second and somewhat smaller container, plant one or more eggplants. This vegetable is used often in Greek cuisine, and if you like it you’ll want several plants. In a third pot, smallest of all, one Greek oregano plant. If your winters are severe, you will need to move the oregano to a more protected location, and this is easier to do if it is in its own pot.
BANGKOK BANQUET
One of the most delicious trends in ethnic cooking of late has been the great interest in the foods of Southeast Asia, principally Thailand and Vietnam. The taste is complex—recognizably Asian, but with layers of other subtle flavors that make the whole far more than the sum of the parts.
Here we suggest a garden with some of the vegetables and herbs that are important in Southeast Asian cooking. In combination with the Chinatown Greengrocer garden described above, it will provide almost everything you need for a banquet.
For various practical considerations, you’ll have better results if you put this garden in a cluster of separate containers. If you are purchasing new pots this year, try to find some with an Asian theme or design, and arrange them on small pedestals of varying heights. A beautiful addition to this garden would be a small outdoor Japanese lantern, set on its own pedestal in a place of honor near the front of the garden.
One container will hold one or more Thai peppers and two herbs at different seasons: cilantro in the spring and Thai basil in the summer. As soon as the cilantro starts to bolt, remove it and plant the basil in its place. This will probably be your largest container.
In a second container, plant one or more Japanese eggplants. These varieties of eggplant, with their long, slender, satin-smooth fruits, are particularly appropriate for containers and very beautiful to look at. You might want to plant several, to take advantage of their beautiful colors: the deep glowing purple of Neon, the soft ivory of Asian Bride, and the bright chartreuse of Green Goddess. Susceptible to damage from flea beetles, eggplants seem to do better if raised off the floor a bit.
A third container holds a Kaffir lime, whose aromatic leaves are essential in several Thai dishes. The lime plant is not frost-hardy and so needs to be moved indoors in winter, a chore made simpler by its being in its own pot.
Finally, plant a container of lemongrass, another Thai and Vietnamese flavoring for which there is no good substitute. It’s also extremely tender, and needs an indoor spot for the winter.
Pepper plants are among the most decorative of vegetables, so pretty that we might grow them just for looks if we didn’t know that the fruits were edible. Small hot-pepper plants with upright fruits are as ornamental as many flowers. They’re so attractive that some of the small-fruited types, greenhouse-forced to yield red peppers in December, are labeled “Christmas peppers” and marketed as holiday gift plants. (And the peppers are edible, unless the plant is really a Jerusalem cherry, which is not a pepper.) In your container garden you can display bright orange peppers that look like fingerling carrots, small round peppers that look like colored beads, tiny red or yellow arrow points that sit sassily on top of the leaves, and the familiar square bell-pepper shape in luminous shades of red, yellow, orange, lavender, ivory, and chocolate brown.
As if that color bonanza weren’t enough, the foliage is handsome enough on its own to pass for a houseplant even before the fruits put on their show. Other advantages: the plants stay at a manageable size through the entire season, and as a group, peppers suffer relatively few problems. The principal cultural concern is getting the soil and the plants warm enough, a task that is far simpler to achieve in containers, which can be moved into the sun, than in an open garden. All told, peppers are extremely successful in containers, in many ways superior to traditional gardens. Container pepper plants maintain a smaller size but often produce fruit earlier.
Pepper Basics. Peppers give us an interesting lesson in one important botanical fact of life: you can’t always distinguish one species from another just by looking. Sometimes things that appear to be the same are different, and vice versa. It comes as a surprise to some people that sweet peppers—the gentle, harmless, mild-flavored green bell pepper—and many of the fiery hot peppers that blister the tongue are the very same species. It also is news to some that a red pepper is not a separate variety but simply a green pepper left on the plant long enough to reach maturity.
All peppers start out green and gradually, through a long, hot growing season, turn the color that is programmed into their genes. The key to growing peppers is hot weather. It’s only a guess, but we think it possible that Americans got used to eating sweet peppers in their green stage because for a long time that was all most of us could manage to grow. The red, yellow, and orange sweet peppers that are found in supermarkets in the off-season are usually imported from tropical and semitropical parts of the world, where hot weather lasts long enough to do the job. Now, responding to consumer demand, resourceful plant breeders have been hard at work developing varieties that mature early.
Planting. The trickiest part about growing peppers is timing. If they’re planted too soon in the spring, cool temperatures do them in. If planted too late in the summer, they’ll still be trying to produce fruits when the weather starts to turn cool in the fall, and all you’ll get is a crop of pitifully immature peppers. So unless you live in the tropics, you have to start your plants indoors, where you can give them the warmth they demand. Pepper seeds need about two weeks at high temperatures (80°F) to germinate, and six to eight more weeks to reach transplanting size. Wait till nighttime temperatures are consistently above 55°F and daytime temperatures are at least 70°F before transplanting them into the container, and don’t forget to harden them off first (see page 60).
Even though it could mean limiting your choice of varieties, you may decide it’s simpler to buy transplants than to start your own. But even then, keep an eye on the weather. Don’t forget that the transplants were grown in commercial greenhouses, under controlled conditions, and may show up at the garden center while the weather is still too cool for them. If that’s the case, be sure to provide some kind of nighttime protection (see page 55 for suggestions) until the weather warms up.
At the garden center choose the healthiest, strongest young plants—not tall and leggy, but dense and compact. And don’t allow yourself to be seduced by large pepper plants in gallon containers, with several flowers or even tiny fruits already showing. Logic would tell us that those are the best because they have a head start, but Mother Nature does not always operate on principles of human logic. If you transplant a young pepper that is already showing tiny fruit, the growth curve hits a kind of dead end from which the plant may never recover. Research by growers has consistently shown that these never develop into vigorous, productive plants. Preventing this stunted condition is a simple matter of nipping off flowers and fruits before you transplant.
Success with Peppers. Concentrate on keeping peppers warm: while the plants are getting established, position the containers where they get the most sun, and move them as needed when the sun’s path changes. If your season is so short that you have to plant peppers when the weather is marginal, cover the plants with row cover, which acts like a blanket, until they start to flower. Just to keep us humble, Mother Nature has also thrown us a curve in the opposite direction: it is possible for pepper plants to be too hot. In a heat wave (mid to upper 90s), move into the shade any pepper plants that already have fruit.
Peppers respond well to fertilizer that is rich in phosphorus (the middle number of the fertilizer trinity). If you happen to have some superphosphate, bone meal, or bulb food available, mix a bit into the soil at planting time; all are proportionately high in phosphorus. Three other important nutrients are calcium, which helps prevent blossom end rot (the fruits develop a round black area at the tip); magnesium, which helps fruits develop from the flowers and so promotes high production; and sulfur, which promotes plant protein and enriches the nutritional content of the peppers. All three may be present in your potting soil if it contains a full complement of micronutrients, but adding more won’t hurt. See box for common household sources. The one thing you don’t want to do is give them extra nitrogen, or you’ll produce plants with lots of beautiful foliage and very few fruits.
Two insect problems to be on guard against are aphids and flea beetles (see pages 73 to 75 for controls). The main disease problem that sometimes affects peppers is tomato mosiac virus, or TMV. (Peppers and tomatoes are in the same family, as is tobacco.) Stick to varieties that are TMV resistant, and don’t let smokers handle the plants.
Harvesting. Early in the season, harvest green peppers when they reach a good size, and enjoy their crisp texture in salads and vegetable sautées. The more you pick from the plants, the more production you will get. Then, later in the summer, let the peppers stay on the plant until they are fully ripe—that is, until they reach their mature color—to enjoy their full-bodied flavor. Harvest by snipping the peppers off with scissors or garden clippers, taking a bit of the stem.
Most cooks know to use gloves when working with hot peppers, to protect their skin from burns. But when simply harvesting the peppers, you are in no danger; the outer skin of the peppers won’t hurt you. The fiery oils are located in the seeds and, even more so, in the ribs that the seeds are attached to. If you burn yourself when cooking with hot peppers, pat milk on the area; water won’t do any good because it can’t dissolve the fiery oil.
If you end up with a bumper crop of hot peppers, string them together and hang them to dry in the sun, southwestern style.
Varieties. For several years now, peppers have been one of the hottest items for home gardeners, and have attracted the greatest attention of plant breeders and commercial growers. New varieties are being introduced every season, and “new” heirlooms are being reintroduced. Any pepper, including your ethnic favorites, should do very well in containers.
Note: The maturity times given here are counted from transplanting, not seeding, and designate the time when peppers are ready at the green stage. Add another 15 to 20 days for full color.
SWEET PEPPERS
• Red. Ace (50 days) is a strong producer and quite early; peppers are small to medium size. North Star (62 days) is another reliable early choice. Gypsy (70 days), an All-America winner, is a pretty yellow-green at its immature stage. Giant Marconi (72 days), an All-America Selection, is our choice for a roasting pepper; roasting peppers have completely smooth sides (not indented), which make it much easier to remove the charred skin after roasting.
• Red miniatures. Jingle Bells (58 days) is fun for the novel shape. The mature peppers are small, about 1½ inches square, which means they mature more quickly than larger fruits. They are also prolific; in summer, the plants are covered with red and green minis. For perfectly round peppers about the size of a golf ball, try Cherrytime (53 days) or Sweet Red Cherry (70 days).
• Orange. Valencia (70 days) ultimately produces peppers in a lustrous orange color.
• Yellow. As a class, yellow peppers have gorgeous color and wonderful flavor, and thus have become very popular. To meet demand, growers are introducing new varieties at a fast clip. One we like is Golden Summer (70 days); others are sure to come on the market soon. Speaking only in terms of looks, yellow peppers have one advantage over reds: when a green pepper is turning red, at the intermediate stage the pepper shows blotches of a muddy dark gray where the two colors overlap. In yellow peppers, the overlaps are a very pretty lime green.
• Purple. Purple Beauty (65 days) and Lilac (70 days) will give you showstopping purple peppers—but only for a while. Both have purple skins at an intermediate stage, and ultimately turn bright red. But if you catch them at the right time, you’ll have a real conversation piece for a salad or vegetable tray. Just be aware that the purple color turns to green when you cook them.
• Chocolate. It tastes like a pepper, not like candy, but the outer color will certainly remind you of chocolate: a rich shiny brown at maturity, with red inner flesh. Chocolate Beauty (70 days) is a well-known variety; Sweet Chocolate (58 days), also fine, is remarkably early.
HOT PEPPERS
Hotness in peppers is a matter of the concentration of capsaicin, the active constituent. This concentration is measured in Scoville units, named for Wilbur Scoville, who developed the system. To give you a scale of relativity, jalapeños, which you have no doubt eaten at some point, measure between 2,500 and 5,000 Scoville units, depending on the cultivar and how and where it was grown. It’s not possible to tell how hot a hot pepper is simply by looking at it. Size is not an indicator; some of the tiniest ones are hot enough to take the top of your head off.
When you begin perusing catalogs, you’ll find lots of intriguing types of hot peppers. We suggest a few of our favorites:
Señorita Jalapeño (60 days) has the flavor of regular jalapeño but less of its fire—300 Scoville units rather than 3,000—for great versatility in the kitchen. Produces large quantities of 3-inch-long peppers with the familiar jalapeño shape.
Super Cayenne II (70 days) peppers are the long, slender shape that is typical of the cayenne type, and they are hot: 55,000 Scoville units. Selected as an All-America winner for their high yields, even in northern states. This one has a particularly lovely shape: a 2-foot plant, compact, rounded, and spreading, it fills a medium-size container like a bouquet of peppers.
Thai Dragon (50 days) produces short (2- to 3-inch), slender peppers for all your spicy Asian dishes. They are ferociously hot—60,000 Scovilles—but the plant is very pretty, a nice choice for containers.
Super Chile (50 days), an All-America winner, is an especially fine choice for containers: the plants stay short and wide, with handsome leaves, and the tiny peppers sit up on top of the foliage like birthday candles on a cake. Very hot: 37,500 Scovilles.
Forget those big baking potatoes with the rough brown skin; you need lots of land to grow them, and besides, they come under the heading of “available year-round at the market at a very reasonable price, and I’d rather use the garden space for something else.” Instead, try some of the intriguing types not always available at the supermaket.
Gardeners have a marvelous menu of potato colors to choose from: pink, red, blue, lavender, and gold. But the real delight of potatoes for home gardeners is ready access to those choice morsels known as new potatoes. By definition, “new” potatoes are the ones eaten as soon as they are harvested, as opposed to the ones that are cured (toughened up) for storage. New potatoes aren’t necessarily tiny in size, but most are small simply because we don’t want to wait for them to get big. With their thin skin and tender flesh, new potatoes are a real treasure.
Rose Marie says: Fresh baby potatoes are one of the great delicacies of the home garden, and if you think they can’t be grown in containers—think again!
Potatoes are native to the cool mountain regions of South America. With that sort of climate in their genes, it’s no wonder that most commercial potato operations are in colder areas like Idaho, Maine, Canada, and even Alaska.
Potato Basics. Potatoes are part of the nightshade family, which makes them close cousins of tomatoes, eggplant, and peppers. Once you grow potatoes and have the opportunity to observe their pretty little flowers, you’ll see the family resemblance.
The tuber, the part we eat, is not a root even though it grows underground; a potato plant has ordinary roots like other plants. The tubers grow on short runners called stolons, which develop from nodules on the underground part of the stem; the longer that stem, the more tubers there are to harvest. Keep that visual image in mind, and you’ll understand how to grow potatoes for maximum success.
Planting. Have you ever forgotten some store-bought potatoes, tucked away in the back of the cupboard, and had them sprout on you, the potato itself becoming shriveled and spongy? If so, you understand exactly how potatoes reproduce. The eyes—those small indentations in the skin—hold the tiny buds for new growth; as they sprout, they draw nutrients from the adjacent flesh, and so the potato gradually shrinks and shrivels as the sprout gets larger and stronger. All this happens in the dark, and in your cupboard it happens accidentally. But if you took those sprouted spuds, cut them into segments, and put them into the garden, before long you’d have bushy green plants and a whole new supply of tubers underneath. And if you then saved a few of those, you could start the whole process over again next year. (That’s an explanation of the basic concept. We’re not suggesting that you do this with your cupboard renegades for the simple reason that there’s a better way.)
Field-grown potatoes are susceptible to many diseases, some of which are capable of wiping out the entire crop, especially if descendants of the same type are grown in the same place year after year. This is exactly what happened in Ireland in the 1840s, with devastating consequences. To counteract this, modern plant breeders have developed ways of producing disease-resistant miniatures specifically for use in reproduction. They are called seed potatoes, but they aren’t seeds in the usual sense; they are very small tubers, grown under conditions as disease-free as possible. An even newer technology has produced what are known as mini tubers, grown from tissue cultured in the controlled environment of a laboratory. Mail-order sources will tell you whether their seed potatoes and mini tubers are certified disease-free, and that’s what you want.
This possibility of disease is the reason most experts caution against using supermarket potatoes as seed. There’s another reason too: often they have been treated with a chemical to inhibit sprouting (sprouting is not a good thing in supermarket bins), so even if you did cut them up and plant them, they would never grow well. Besides, it’s much more fun to grow some of the nifty varieties that are best when harvested at salad size.
If, in spite of our caution, you decided to try growing potatoes from supermarket spuds, do not use that soil to grow potatoes, tomatoes, eggplant, or peppers next season.
Maggie says: When I had my big garden, I used to save kitchen scraps in a small bucket and dump them directly into bucket-size holes in the vegetable beds (the lazy gardener’s approach to composting). If potato peelings were in the bucket, I’d always get potato plants in the “dump site” later on, and some pretty nice tubers. Of course that’s not practical in container gardens, but I’m telling you this so you’ll know that growing potatoes is actually a piece of cake. If a scrap of peeling with just a bit of potato flesh is sufficient to produce a fair-to-middling plant, think how much more vigorous will be plants grown from good seed potatoes.
When you order seed potatoes or minitubers from a mail-order catalog, they’ll be shipped to you at the proper planting time for your climate—sometime in early spring. If you are not in a position to plant them immediately, store them in the vegetable drawer of your refrigerator. In any case, seed potatoes benefit from a process of presprouting; you get potatoes sooner, and more of them. If you order minitubers, you can skip the presprouting step.
Presprouting. Place seed potatoes one layer deep in a shallow pan or tray, even an egg carton, and set that container in a bright, warm indoor spot. Spritz them with liquid seaweed. In about two weeks, sturdy sprouts will form. When the sprouts are about an inch tall, the seed potatoes are ready for planting. Start this process about two weeks ahead of your spring frost date, so they’re ready to go outdoors when the outside environment is ready for them. Seed potatoes can range in size from that of a robin’s egg to a chicken’s egg. Just before planting, you might want to cut the larger seed potatoes into smaller chunks; be very careful not to break off the sprouts.
What you do next depends on how you plan to grow the potatoes.
Two Ways to Grow. Remember that the tubers grow out from the underground stem; the goal for maximum production is to elongate that stem. Traditional home gardeners and commercial potato farmers accomplish this through a process known as hilling up. They plant the seed potatoes in a trench, then gradually fill in the trench with more soil as the plants grow; even after the trench has been filled in, they continue to mound up soil around the stems, so that it appears the plants are growing on top of a small hill. The tubers grow out from the entire length of the underground stem, starting at the bottom of the trench all the way up to the top of the hill.
It’s a simple matter to use this technique in containers. The only drawback is aesthetic: until the plants reach full size, the pots will not be pretty. But for the pleasure of harvesting your own new potatoes, you may decide it’s worth it.
Start with a large container, approximately 30 inches deep and 20 inches across. Fill it about one-third full with potting soil. Lay the sprouted potato segments on top, 5 to 6 inches apart and 4 inches in from the edge of the container, with the sprouts facing up. Cover with another 2 inches of soil. When the plants are about 6 inches tall, add another 3 inches of potting soil (yes, cover up the lower leaves). Continue this process—letting the plants grow, then covering half the leaves with soil—until the soil level is about 1 inch below the rim of the pot, leaving room for watering. Let the plants grow some more, then mound up soil around them, remembering to leave a lower perimeter for watering.
A modified version of this technique, described in box at left, combines potatoes and flowers for a more attractive look.
The second technique is in some ways easier but depends on your having access to a supply of hay, straw, or lots of dried leaves. If you do, here’s the procedure. Start with a large container (20 inches wide or more), fill it nearly full with potting soil, and lay the presprouted potatoes on top.
Next, make a cage about 1 foot high around the inside edge of the container, using plastic grid or wire fencing. Cover the sprouts with an inch of straw (or hay or leaves), and wait for the plants to grow. Continue to add the material as the plants get taller, just as in the scenario above, covering about half the foliage growth with straw each time.
One extra advantage to this technique: the organic material will make the soil acidic, which potatoes like.
Success with Potatoes. By using disease-resistant seed potatoes and growing them in containers, you automatically avoid many of the soil-borne problems that plague traditional gardeners. The most common insect pest is the Colorado potato beetle, a ferocious-looking little twerp that will defoliate potato plants in nothing flat. If they are a problem in your area (ask your county extension office, see box), block them out with row covers; if you’re too late, pick them or their egg clusters off by hand (look under the leaves). At night, look over the plants with a flashlight. Whenever you see anything nasty, pick it off and drop it into a small bucket of soapy water. When that’s full of bug corpses, or when you can’t stand it anymore, just dump the contents of the bucket down the toilet.
It’s very important to keep the plants well watered. Uneven watering—dry soil, then lots of moisture—produces lumpy, misshapen potatoes with a mealy texture.
If you use the straw method for growing, make sure your cover material does in fact cover thoroughly; when young tubers are exposed to sun, they develop the alkaloid solanin, which is toxic. You can tell when this has happened: the skin turns green. Soil-grown potatoes are less likely to show this problem, although it does happen—the potatoes push their way to the surface—so check that no part of the potato tuber is exposed to sunlight.
Harvesting. The first tubers are ready for harvesting after about two months. One sure signal is that the plants have started to flower, except that some types of potatoes don’t make flowers at all, so this is not foolproof. The nice thing is, you can check without damaging the plant: just reach down close to the stem as far as you can reach, scrabble around with your fingers, and see if you feel anything round.
At this point, those who use the straw/cage method have a huge advantage over the soil/hill method. Just by reaching in through the cage, they can easily get to the base of the plant, where the earliest tubers will form. The other folks have to dig down up to their elbows to make the same test. Use your fingers to feel around the potato and gauge its size. If it seems too small, simply leave it to continue growing. But if it’s the size you want, just pull. Whenever you find one potato of eating size, there will be several others nearby; keep scrabbling.
Plan on harvesting a season-long total of two to four pounds from each plant.
By the way, digging for potatoes is great fun for children (grown-ups too, if the truth be known). It’s a bit like going after buried treasure, with that irresistible feeling that you’re going to come up with something terrific.
Varieties. If you’re trying to make selections from a catalog with a long list of varieties, remember these general guidelines: russets are good for baked and mashed potatoes, but require a very long growing season—not the best choice for containers. Any of the red-skinned types make superb baby potatoes, and even the larger ones hold their texture well when cooked. Potatoes described as “waxy” are excellent as small boiled and buttered potatoes, and for salads. Yellow-skinned and fingerling types (see below) tend to have this waxy texture, and are often very hard to find in the produce sections of supermarkets.
The heirloom potato All Blue is a rosy purple on the outside, but it really is blue on the inside. To maintain the color, add a tablespoon of vinegar to the cooking water and don’t overcook. Make a stunning potato salad from blue potatoes, red sweet peppers, and green onions.
Yukon Gold has yellow flesh and a rich, buttery taste. Yellow Finn is another excellent yellow variety with a smooth texture and rich flavor.
For red-skinned potatoes, try Dark Red Norland or Red Pontiac; both are delicious. Rose Finn Apple, with pink skin and yellow flesh, is a fine example of a type of potato called fingerling, distinguished by its shape: like a short, fat, untapered carrot. Because they are the same diameter all the way down, fingerlings slice into perfect rounds of the same size, which makes for extremely attractive potato salads.
Radishes have won a permanent spot in the hearts of gardeners for two reasons: (1) they are the earliest, fastest vegetables you can grow, providing reassurance that again this year spring has actually arrived and the growing season can begin; and (2) on a more prosaic level, these superfast germinators, mixed with slower seeds, serve to mark the rows and keep the soil loose.
Oh, and they taste good too.
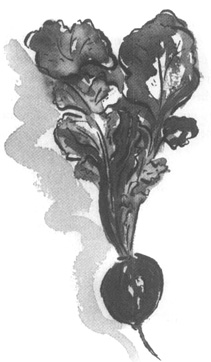
Radish Basics. We really should speak of radishes in two separate categories: (1) the familiar round ball or icicle types usually grown in spring; and (2) the Asian daikon, the long, fat, very robust radishes of fall. Those in the first group are planted very early in spring and are ready to eat in less than a month. Most Asian types are planted in late summer for fall or winter eating, because they have a longer growing period and will bolt in summer if spring-planted. With one irresistibly pretty exception, we will leave the daikon type to traditional gardeners who have the room for them.
Planting. Radish seeds are tiny, and should be direct-sowed about ¼ inch deep. Sowing them is simplicity itself: with a garden fork or small cultivator, scratch the soil surface to loosen it (if you’re reusing a container from last year), sprinkle the seeds around, push some soil over them, give them a pat and a drink, and you’re done. We find it useful to have several seed packets of different varieties on hand at the beginning of the season; then, whenever you think of it, plant a few seeds just to get yourself in the gardening mode.
To use radish seeds as a ground breaker, you’ll find it simpler to premix them with the slower seeds in a small cup and then plant the mixture.
In both cases, be assiduous about thinning the seedlings to a spacing of about an inch.
Success with Radishes. Lots of water—that’s what keeps radishes growing quickly, and growing quickly is what keeps them from becoming too hot. Do not let the container soil dry out.
Few diseases bother radishes, but you may encounter two common insect pests: flea beetles or cabbage root maggots; see Chapter 6 for controls. Overall, though, radishes are very carefree plants.
Harvesting. If we make any mistake with radishes, it is leaving them in the soil too long; they become tough and bitter, and sometimes develop a hollow core. The round types are at their best when they are the size of large marbles (the shooters, remember?). The icicle and French types should also be pulled when they are young and tender; if you’re not sure whether they’re ready, just pull one up and sample it.
Varieties. The most familiar radish is the small red, round type, and it is a very satisfying vegetable to grow. Cherry Belle (30 days), an All-America winner, is a classic. Easter Egg (25 days) is a kid’s delight. In each packet is a mixture of seeds of radishes of different colors: pink, red, white, lavender. When you pull one up, you never know what color you’ll get (although all the insides are white), and that’s the fun of it.
French radishes are long and slender, more like a fingerling carrot in shape than what most people think of as a radish. The heirloom White Icicle (28 days), white inside and out, is crisp and refreshing; it will reach 4 to 5 inches but is better when harvested young.
French Breakfast is the name of a specific heirloom variety, and the term has also been extended to mean a group of varieties with a similar look: short and cylindrical, red except for a bright white tip that looks for all the world as if it had been dipped in cream. Early French Breakfast (25 days) is an improved, earlier variety, and D’Avignon (21 days) is earliest of all.
Now the one fall radish we couldn’t resist: Misato Rose. It’s shaped like a large radish or a small turnip, from 2 to 4 inches in diameter, and because of this larger size needs a deeper container, with a minimum 8 inches of potting soil. The outside coloration is mediocre: a bland green at the top, gradually blending down to white at the tip. But the inside color is something else: clear, pure pink.
Slice them crosswise and toss in a light dressing of white wine or rice vinegar, and the pink color becomes electric. The fine British garden writer Joy Larkcom, an expert on Asian vegetables, tells us that in China they are carved into many-petaled radish roses and sold as winter street snacks.
Somehow spinach has come to be the ultimate “because it’s good for you” vegetable, and all children in America knows what that means: if it’s good for you, it doesn’t taste good. With any luck, eventually they’ll have the chance to enjoy a dish made from fresh spinach prepared with skill and respect, and they’ll realize what they’ve been missing.
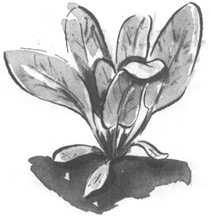
Maggie says: I used to detest spinach, mostly because I grew up in a part of the country where everything green is (or was then) cooked to mush. Ironically, with all the vitamins and minerals cooked out of it, not only did it not taste good, it wasn’t even good for you.
And then, revelation. As a young adult, trying my darnedest to be sophisticated like the other guests at my first big-city dinner party, I forced myself to try the wilted-spinach salad, and life was never the same.
Spinach Basics. Spinach is a cool-season crop that quickly fizzles out and bolts when the weather turns hot. It grows well in spring, medium well in fall, and rarely in summer. To fill in the gap, we also suggest several warm-season plants with a spinachlike look and taste, which can be used as respectable substitutes. Any specific information you need about growing them successfully is included in their individual sections below.
Planting. As early in the spring as you can manage, plant seeds directly in your containers about ½ inch deep and 1 inch apart. (Spinach germinates so well in cool weather that there’s little reason to start seeds indoors, although you can certainly do so.) Thin the seedlings, spacing about 3 inches apart as plants grow. For a fall crop, replant by the first of August. Fewer seeds will germinate than in spring, but they’ll come up at a faster rate.
Success with Spinach. Like other cool-season vegetables, spinach is tastiest when it grows rapidly, so water thoroughly and give a light application of a balanced fertilizer a couple of times during the season.
Spinach has few insect or disease problems. Its biggest enemy is the sun: if hot weather doesn’t make the plant bolt, the sun will scorch the leaves. If you still have healthy plants growing when the summer heat arrives, move your containers into some shade; that will buy you extra time.
Eventually, though, any remaining plants will bolt. When you see that about to happen (flower buds start forming), cut off the tops of the plants down to some good-looking lower leaves, and you can delay the inevitable by a few days.
Spinach planted in late summer for a fall crop is susceptible to mildew; your best bet is to choose a mildew-resistant variety.
The summer substitutes have the same needs as most other warm-season vegetables: keep them well watered and fertilized, watch for aphids, and harvest regularly.
Harvesting. You can slice off an entire plant, if that’s what you need, or pick individual leaves. The former gives you a large volume of spinach in a hurry; the latter leaves you with an ongoing source of more spinach. Large seedlings that you remove for purposes of thinning are very tasty in mixed salads.
Varieties. Two types of spinach are to be found in seed catalogs, although you sometimes have to read the descriptions carefully to distinguish them. One has deeply crinkled leaves (called “savoy” or “savoyed”); the other has relatively smooth leaves. This differentiation is primarily important to market gardeners, for the crinkled leaves collect garden soil more easily than smooth ones and thus require more washing. Otherwise, the two types are almost identical in flavor and growing conditions.
In an effort to help us have spinach for a longer season, plant breeders have been developing varieties that are slow to bolt and resistant to mildew; fortunately, they have had great success. All the varieties we suggest here will do well for spring, early summer, and fall: Melody (42 days), lightly crinkled, large leaves; Indian Summer (39 days), semi-savoyed leaves and an upright growth pattern; Bloomsdale Long Standing (46 days), an heirloom with deeply crinkled leaves. For superfast production, we like Razzle Dazzle, which is ready to harvest in only 30 days. It’s a good variety to have on hand very early in the season; plant a few seeds whenever you think about it, and you’ll be eating fresh spinach a month later. This is only an early-season variety, though, for it is not heat-tolerant.
SPINACH SUBSTITUTES
Even though “spinach” is found in their common names, none of these is true spinach in a botanical sense. All, however, produce dark green, nutritious leaves that taste close to spinach and can be used like it in the kitchen. And all of them are able to endure the heat of summer without bolting.
• New Zealand spinach (70 days) is essentially a vine with tasty leaves all along its stem. To keep it in bounds in your container, keep the tips pinched out or run it up a trellis. Its vining habit also makes it a good choice for hanging baskets. New Zealand spinach positively thrives in hot weather, and in appearance and taste is very close to true spinach. The only drawback is that it takes a long time to germinate—as much as a month. You can speed up the process somewhat if you soak the seeds overnight before planting, and give them a head start indoors.
• Malabar spinach (35 days) is another vine, and a very vigorous, fast-growing one. If your summers are hot, this definitely should be grown on a trellis, where it can reach 6 feet or more. In cooler climates, the vines stay shorter and would work well in a hanging basket. The leaves, which are attached directly to the ropelike stem, are larger and fleshier than those of spinach.
Two types are available, red and green. Green Malabar spinach is a rich green all over, including the stems. The red version is particularly attractive, with a bright red stem and green leaves tinged with red or copper.
Rose Marie says: To show that sometimes unusual combinations work wonderfully, I have a very pretty container planting that consists of a columnar apple tree and two plants of red Malabar spinach that twine around the trunk and climb up into the limbs. We love the gorgeous magenta spinach leaves in salads and stir-fry dishes.
In late spring start seeds indoors, where you can give them the heat they need; presoak seeds overnight. When seedlings are 3 to 4 inches tall, harden them off and plant outside when nighttime temperatures are no lower than 50°F. If you want plants with thick, bushy growth rather than long vines, keep the tips pinched off. This will cause side shoots to develop off the main stem, and you can either harvest the entire shoot, with its tender young leaves, or allow it to become a new stem with more leaves.
The leaves contain a natural mucilage (like okra’s) that is released with long cooking. If you don’t want that quality, cook the leaves lightly and quickly, just as you would spinach. With slow cooking, the leaves serve as a thickening agent, which is an advantage in dishes such as soups and stews.
• Spinach beet, also commonly called perpetual spinach (60 days), is neither a spinach nor a beet, although it is a beet cousin. It’s actually a variation of chard, with smaller leaves and less prominent stems and ribs. It does have the upright growth that will remind you of chard, but the taste is gentler, more like that of true spinach.
Spinach beets provide a continuous harvest from summer to early winter, as long as you keep cutting it. It survives the heat nicely, and also will tolerate light shade.
• Orach, sometimes called mountain spinach (50 days), is very popular in Europe but not yet well known in the United States. It’s a tall, handsome plant, reaching 6 feet or more, and gardeners with lots of space frequently grow it just for its looks. The leaves are small, triangular, and have a mild flavor. As with Malabar spinach, both green and red varieties are available. We prefer the red for its magnificent color. Lit by the sun, the entire plant turns a brilliant magenta, and individual ruby red leaves do wonders for a green salad.
Direct-sow seeds in spring or early summer; cover with ¼ inch of soil. The first harvest of tender leaves is ready in about six weeks. To keep the plants at the height you want, snip off the growing tips; this will force new growth of tender leaves. Keep cutting and watering, and the plants will produce most of the summer.
If you ever had a regular in-the-ground garden, or ever lived next door to, worked with, or were related to someone who did, or had even the remotest second-, third-, or fourthhand connection to anyone with a vegetable garden, you know all the jokes about zucchini. How it’s so prolific that people run out of friends to give the squashes to and start leaving them on the doorsteps of total strangers in the dead of night. How it grows so vigorously that one hidden under leaves gets large enough you could make a doghouse out of it. How whole cookbooks have been written about ways to disguise it.
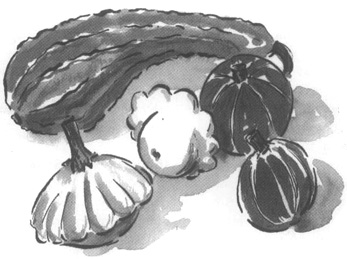
This reputation is unfair. Zucchinis are perfectly fine vegetables, attractive in the garden and very versatile in the kitchen. Italians, who know good food when they see it, have enjoyed a long love affair with zucchini, and we could do far worse than to follow their lead.
In all the commotion about zucchini, we sometimes forget its squash siblings: the crooknecks, the yellow straightnecks, the cute little pattypans. All these are collectively known as summer squashes, and for many reasons they are excellent candidates for your container garden.
Summer squashes have been bred to grow in bush form, rather than in vines as most winter squashes do, so their basic architecture is compatible with containers. The plants themselves are very handsome, with large, imposing leaves and voluptuous flowers; even a single plant will make a strong statement in your garden. And perhaps best of all, growing them in your garden is the best way (maybe the only way) to have a supply of blossoms for fritters, and of tiny squashes with the blossoms still attached for show-stopping side dishes.
Squash Basics. Squashes fit into one of two worlds: summer and winter. Summer squashes are small and fast growing, and have soft skins; winter squashes tend to be larger, take longer to develop, and have very tough skins, which makes it possible to store them for the winter.
The truth of the matter is that the so-called summer squashes are species that we humans have decided taste better when they are eaten at the immature stage of development. Winter squashes start out with soft skins too, but we let them stay on the vine until the rind becomes very stiff because we prefer the taste of those types when they are older. We could let summer squashes get much more mature, but we would not like the taste or the texture; we could eat immature winter squashes (and in fact people sometimes do at the end of the season), but most of us would think they don’t taste quite right.
In any case, in this book we concentrate on summer squashes for the simple reason that their bush shape works best in containers. Winter squashes grow on vines that have an irritating tendency to sprawl to kingdom come. The only winter squashes we include are the miniature pumpkins (yes, pumpkins are a winter squash) that are so delightful to children; and some of them have the extra virtue of a bush growth habit.
Planting. In all probability you will want only one plant of each of the squashes you choose to grow, so it makes good sense to buy small plants at the garden center. Set them out in your containers when nighttime low temperatures are 55°F. But if the variety you have your heart set on is not available as commercial transplants, you will have to plant seeds.
Start seeds indoors two to three weeks ahead of the spring frost date, or direct-seed around about the time of that date. You’ll have a lot of seeds left over; save them till next year, or give them away to other gardeners or to a school for a science class project.
To get your baby plants off to a vigorous start, put them into containers in which you have prewarmed the potting soil by wrapping the empty pot in black plastic and setting it in your sunniest spot for several days. You can push the season by a week or more if you set the transplants into warm soil and cover them with row cover, which acts like a blanket and also protects the young plants from harmful insects.
Success with Squashes. Squashes are in the same botanical family as cucumbers, and like them are fast-growing, heavy-feeding, hard-drinking heat lovers. Don’t let the potting mix dry out, and add a fertilizer rich in phosphorus several times: about a week after transplanting, at first flowering, and when the squash fruits begin to form.
Disease and insect pests are usually only a minor problem with summer squashes. Keep the foliage washed free of aphids, and use an insecticidal soap if you get a severe infestation. Spotted cucumber beetles or any other bad guys can be picked off by hand and dropped into a little bucket of soapy water. Slugs meet the same fate. In the fall you may get some powdery mildew; control it by not watering leaves directly, or by spraying with baking soda mixture, or both. See Chapter 6 for more details.
Don’t panic if some of the early flowers fall off without producing anything. They are probably male flowers. It’s also fairly common for the first few squashes to turn black or just stop growing; this is because they weren’t pollinated, a problem that Mother Nature remedies with a burst of new flowers to attract the bees.
Harvesting. As is true with all vegetables that contain seeds inside, squash plants will cease producing once a fruit gets old enough that its seeds begin to mature. Then, no more squash. Prevent that by faithfully picking the squash when they are small and succulent. You want to do that anyway—why else are you growing them? Anyone can buy full-size squash at the store; only gardeners can harvest the oh-so-delicious baby squashes, perhaps with the flowers still attached.
Use a knife or your garden clippers to cut the squash from the plant, taking about 1 inch of stem. Clippers work best for removing the flowers.
You’ll probably be using your squash the same day you harvest them, but they will keep in the crisper drawer for a day or so if need be. However, if you harvest just the flowers, or baby squashes with blossoms attached, cook and serve them that same day.
Wash the blossoms (or squash-cum-blossom) in tepid tap water, shake them dry, then spread them out in a single layer on damp paper towels and cover with another layer of damp paper towels. Healthy garden plants attract lots of beneficial insects, and we know they’re friendly so we don’t shriek when we see them. At the same time, we’d just as soon not eat them. During this resting period on the paper towels, most of the critters that may be hiding inside the blossoms will simply walk away. Then do one more visual inspection before cooking or stuffing the flowers.
Varieties. Here are some of our favorite squashes:
• Zucchini. Spacemiser (45 days) is tailor-made for container gardens: small and compact, and only 18 to 24 inches across, yet it produces normal-size zucchini. Seneca (42 days) handles cool weather better than any other zucchini, and so is a good choice for those with short summers.
Eight Ball (42 days) is a very compact plant (12 to 18 inches) that produces an amazing number of zucchini, which appear to be stacked up around the center stem. The squashes are perfectly round, perfect for stuffing. Eight Ball was an All-America winner in 1999, and it’s a real conversation piece.
Finally, Gold Rush (52 days), also an All-America Selection, has the recognizable zucchini shape but is a brilliant golden yellow. It holds its color nicely when cooked, and has a fine flavor.
• Crookneck/Straightneck. Many people consider the flavor of these yellow squashes far superior to that of zucchini; they tend to use descriptors like “buttery,” “sweet,” and “nutty.” We concur.
Yellow Crookneck is the name of an heirloom variety that has also become the name of a type: squashes with a bulbous bottom and a narrow, curved neck like the top of a question mark. Crooknecks are a longtime favorite, and many gardeners still prefer this old-fashioned type.
Newer varieties of crooknecks include Sundance (50 days), Horn of Plenty (50 days), and Fancycrook (43 days). Be sure to remove these from the plants with a knife, not a hand twist; the necks snap easily.
Straightneck squash are just what you would think: like crooknecks in color and taste, but the curved neck has been bred out of them. You can tell straightneck yellow squash from yellow zucchini by their fat bottoms; zucchini are the same diameter for their whole length, and usually have slightly raised vertical ribs. Seneca Prolific (50 days) is a good one.
For the sheer fun of it, you might want to grow Zephyr (54 days), a yellow straightneck with a green base. It looks for all the world like someone took each squash and dipped it about a third of way in green paint, giving it a novelty appearance in addition to its fine taste.
• Pattypan. The shape of pattypan squash is distinctive and unforgettable: small, flattened rounds with scalloped equators. The flavor is rich and buttery, the texture creamy but firm. They are delicious stuffed, steamed whole (especially the baby size), or sliced vertically to show off their pretty profile. The original pattypans were green, but a new yellow one has won every gardeners’ heart: Sunburst (50 days), a strong, rich golden yellow with a round circle of bright green at the base. For elegant baby squash, pick them when very young, about 1 inch in diameter.
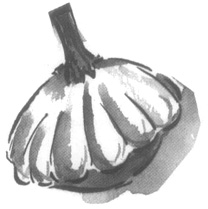
• Pumpkins. You know you can’t grow a full-size jack-o’-lantern in your containers; don’t even try. But you may not be aware of the cute-as-sa-button miniatures that will thrive in containers and are certainly worth growing for the children in your life. Several varieties are available.
Jack-Be-Little (90 days) is a pumpkin for fairies, with a flattened top and bottom and deeply ribbed sides, but only 3 inches across. Wee-B-Little (85 days), an All-America winner in 1999, is a total charmer. The 5-foot bush-type plant yields an average of 6 to 8 small pumpkins, about 3 to 4 inches in diameter, with a more rounded shape and smoother sides than Jack-Be-Little. The plants are short, productive vines that do better with trellis support.
Baby Bear (100 days) pumpkins are bigger than these two miniatures but are still much smaller than full-size pumpkins; they run about 6 inches in diameter and 4 inches in height. This All-America winner needs room to spread (a 24-inch container with an extra foot of tumbling room all around), but it’s worth the space. The sweet flesh makes wonderful pies, and the semi-hull-less seeds make a nutritious snack. These show an attractive strong orange color early in the season.
If you could take the soft, warm air of a summer afternoon and turn it into a taste, it would be the taste of a thoroughly ripe tomato, warm from the sun—tangy on the tongue and sweet at the same time, simultaneously juicy and velvet-firm. Compare that to the cardboard flavor of supermarket produce, and it’s no wonder tomatoes are the number one favorite vegetable of all home gardeners.
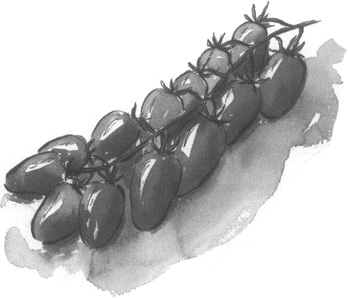
Tomato Basics. Tomatoes are heat lovers, and they belong to the nightshade family along with potatoes, peppers, and eggplant. Like peppers and potatoes, they are native to Central and South America, where European explorers “discovered” them and brought them home. As you probably know, for a long time it was thought that tomatoes were poisonous. The nightshade family contains one very toxic plant, aptly named deadly nightshade; wary Europeans, undoubtedly recognizing the nightshade flower on the new import, were afraid to try tomatoes, growing them instead as ornamentals. Did you ever wonder who was the brave soul who first tried eating one? Whoever that was, we are profoundly grateful.
Today, tomato lovers have an incredible range of tastes, colors, shapes, and sizes to choose from. Plant hybridizers have developed new varieties that stand up well to numerous diseases, harmful insects, and short growing seasons. At the same time, heirloom types with scrumptious old-fashioned flavor are being rigorously and lovingly preserved.
In seed catalogs you are apt to find tomatoes categorized in various ways (by size, by length of growing season, by growth habit, by color, by most common use) and described with varying terminology. Most of these descriptive terms are self-evident, but the most important of all may be new to you: determinate and indeterminate. Those two little words have a huge impact on gardeners who aspire to grow tomatoes. You’ll find them in the fine print of seed catalogs and maybe (or maybe not) on the label sticks in garden-center transplants.
Determinate tomatoes grow to a certain height and then get no taller. (You can think of them as having a “predetermined” size.) The plants are usually 2 to 3 feet tall, and can stand on their own without staking, although they do better with it. Flowers and fruits form only at the tips of stems, and the plants yield their entire crop of tomatoes in a concentrated span of time.
Indeterminate tomatoes just keep going until frost kills them. Rather than setting flowers, the tip ends continue with new growth—more stem, more leaves, more flowers. Flowers form from short branches all along the stems, starting near the bottom, and the tomatoes ripen over a long period of time. It’s important that you realize how rambunctious an indeterminate tomato can be, and plan appropriately (see the Providing Support section on page 163).
Planting. So many varieties of tomato are available today, you stand a very good chance of finding the perfect choice at your garden center—both the type of tomato you want and a variety well suited to your climate. If so, go ahead and get it; you’ll save yourself some work. Only one caution: don’t buy the first one you see. Young tomato transplants often show up in the store well ahead of the proper planting season.
On the other hand, you may fall in love with a particularly seductive catalog description of a special type that you just know will not be grown in a local nursery. Your only choice then is to order seeds.
You may have noticed a small timing dilemma: the catalogs arrive in December or January; the garden center starts selling tomato seedlings in March, April, or May, depending on where you live. Should you order seeds or wait for the plants? If you wait and the exact one you want never appears, you’re sunk. Our advice is, make your best guess and then don’t worry. If you don’t find your heart’s desire in the garden center, you’ll just have to choose something else wonderful. Or if you do order seeds and the garden center later carries plants of the same variety, that’s not so terrible. Plant both, and you can consider it a controlled experiment: how do your seedings compare to the nursery’s?
Starting Seeds Indoors. In the warmest spot you can manage, plant seeds in sterile seed-starting mix six to eight weeks ahead of the spring frost date. When they have two or three sets of true leaves, move the seedlings to a larger temporary pot. Bury them deeper in the starting mix, so that just one set of leaves shows. You may have to move them to a larger indoor pot before the weather is warm enough for outside planting; again, bury the stem and half the leaves. Keep the seedlings in good light; the goal is to produce plants that are vigorous but not leggy (with long sections of stretched-out stem between the leaves).
Choosing at the Garden Center. At the garden center, look for stocky plants with rich green leaves and not a lot of stem. Once the weather is warm enough, a small, vigorous plant in a 4-inch pot will catch up to a larger 1-gallon plant in no time, and may eventually surpass it because the smaller plants recover more vigorously from the shock of transplanting than do larger ones. Avoid if you can plants that are leggy.
Planting Transplants. The tomato seedlings (either from your windowsill or the nursery) are ready to go into outdoor containers when warm weather has really arrived—when nighttime temperatures stay above 55°F. Fill the containers completely with potting mix, using no foam or soda can spacers (see box). Tomatoes are heavy feeders and drinkers with a large root system, and for that they need lots of soil. An indeterminate plant that produces large tomatoes needs at least a 5-gallon container.
Dig a deep hole and sink each young plant deeper than it was in the small pot, covering up the lowest sets of leaves just as you did with the indoor repotting. All your deep planting has a very important goal: making lots of roots. The points on the stem where the leaves are attached (called nodes) are where the growth hormones are concentrated, and so they’re also the points from which roots will grow. By burying the nodes, you’re encouraging the plant to set lots of roots, and in tomatoes that is a very good thing. After all your tomatoes are planted, add a weak solution of complete fertilizer or fish emulsion to the soil around them.
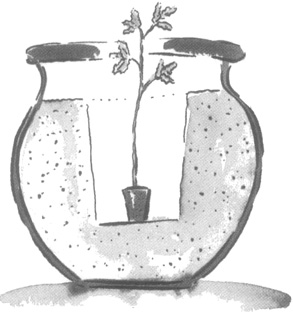
Plant tomatoes deep in the soil to promote lots of root growth.
Getting an Early Start. The first ripe tomato is a signal event in a gardener’s summer, and the source of serious bragging rights. If you want to join that party, here is one way to get a jump on the season. Start two weeks earlier than you normally would; nighttime lows of 45° to 50°F are okay.
1. Prewarm your soil by wrapping the umplanted container in black plastic and setting it in direct sunlight several days ahead.
2. Move your transplant into the container (ignore the earlier warning not to buy the very first arrivals at the garden center).
3. Partially cover the top of the container with clear plastic, leaving breathing room around the stem of the plant.
4. At night, cover the plants with something to protect against cold temperatures: a cloche, a hotcap (a pyramid made of specially treated paper), a bottomless milk jug, or plastic sheets propped up on short stakes. Uncover in the morning.
You are creating a semi-artificial environment in which the temperatures are higher than the surrounding air, and babying the plants through cool nights. When warmer weather arrives, you can discontinue your overnight protection.
Providing Support. Tomatoes are essentially vines (hence the term “vine-ripened tomatoes”), and in their natural state will scoot along the ground in all directions. Even in traditional gardens, that creates a slew of problems; in containers it becomes physically unmanageable. Unless you are growing only determinate types, you’ll need to provide some support for the tomato plants, and even determinates do better with some assistance.
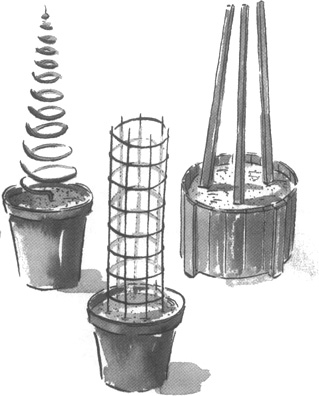
Most tomato plants need some kind of support; here are several possibilities.
The classic device, and it works just fine, is a stout stake. As the tomato grows, keep tying the main stem loosely to the stake. A modern version is a gently spiraled corkscrew of aluminum; the main stem of the plant twists into the corkscrew curves.
Another excellent system is a wide circle made of heavy-duty wire, such as concrete-reinforcing wire, with grid openings large enough to get your hand through. This wire cage catches and holds up the plant as it grows.
The demicage described for cucumbers (see page 96) would be another way to go, but make it tall—3 to 4 feet above the top of the container. The tomato cages sold in garden centers are adequate for determinate tomatoes but too short and too flimsy for most indeterminate types. You can even use a flat trellis, tying the tomato branches to the horizontal supports as they grow.
Decide what you will use for support, and install it at the same time as you transplant the tomato. If you’re using a stake or trellis, insert it at least a foot deep and right next to the plant.
Success with Tomatoes. Tomatoes need a lot of water. This will be your main challenge with containers. Because the heavy watering will also wash away soil nutrients, you’ll also need to provide additional fertilizer. Use liquid complete fertilizer every two weeks, or add a new application of timed-release fertilizer (sprinkle it right on top of the soil) about midway through the season. Make sure that the fertilizer you use is not heavy in nitrogen; you’re interested in growing fruits, not pretty foliage. An application of liquid seaweed every two weeks will give wonderful results.
One optional but very useful tomato task is pruning. If you are growing determinate tomatoes, you don’t need to prune at all. In fact, you should definitely not do it; Mother Nature has already done the work for you genetically. For indeterminates, the process is not as scary as it sounds; you don’t even need pruning shears, just your fingertips.
Look for new leaves beginning to grow in the “V” where a leaf or a short branch joins the main stem; that new growth is called a sucker. If you leave it there, it will grow into lots of foliage (which you don’t want) and will pull energy away from production of flower-bearing stems (which you do want).
Remove all suckers; just pinch them off with your fingers. The tricky part is keeping up with them. When the weather is warm and the soil is rich and moist, tomatoes grow amazingly fast, and that unwanted new growth can appear seemingly overnight; the larger your plant gets, the more “Vs” there are. Also, if your indeterminate tomatoes start outgrowing their cages, pinch off the growing tip from the tallest stems to keep them under control.
If you’re using a stake or trellis, keep tying the main stems as they grow. Use something soft like strips of an old T-shirt or ribbons cut from old panty hose. With a wire cage, continual tying is not necessary, but you would do well to help the stems find an upright position while they are still young.
Tomatoes are subject to certain diseases and pests, but nothing you can’t handle. One is blossom-end rot, in which the blossom end (where the flower used to be, not the end that is attached to a stem) gradually turns into a sunken dark-colored mess. One good preventive measure is steady, even watering; alternating wet and dry conditions seem to encourage this rot. Never let the soil dry out completely. Many experts believe that blossom-end rot is related to a lack of calcium in the soil; as a preventive, they work in a small amount of agricultural lime or some crushed eggshells at the bottom of the planting hole.
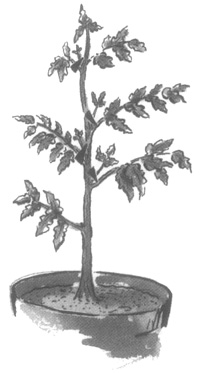
Remove suckers that grow in the notches; they’re all leaf and no fruit.
A fungal disease called early blight seems to occur when water splashes infected garden soil onto the leaves; this is seldom a problem in containers. More problematic is late blight, which hits tomatoes late in the season, when the weather is hot and humid. The leaves develop brownish spots and quickly rot, and soon the entire plant is dead. While this disease is relatively rare, it is, unfortunately, almost impossible to eradicate; tomato lovers have to proceed with a certain amount of faith.
Another problem you may encounter with tomatoes is cracking, in which the skin splits open. This is the result of uneven watering; if the plant gets a large amount of water one day, after several days of dryness, the sudden infusion of water makes the fruits crack open. Obviously you can’t control the rain, but as a container gardener, you are in complete control of keeping the soil evenly moist.
Two critters may show up uninvited: cutworms and tomato hornworms (see Chapter 6 for descriptions). Your best defense is a careful eye; when you see one, pick it off by hand and dump it into your trusty bucket of soapy water.
Harvesting. Tomatoes of indeterminate types start ripening from the bottom of the plant. Determinate tomatoes ripen pretty much all at once. For that incomparable ripe-tomato flavor, let them stay on the vine until they are truly ripe. Color is your best indicator.
As summer draws to a close and the nights begin to turn cool, gardeners know with a sad sinking feeling that there will not be time for all the green tomatoes still on the plant to ripen, and they begin a cat-and-mouse game with the weather forecaster. Totally green tomatoes will not ripen off the vine, but once they have matured past that stage, even if only to the point that the green has started to lighten to the faintest tinge of color, they will continue to ripen inside your home. So the game is to check the tomato color every day, and watch the weather forecast every night.
Anything lower than 40°F is dangerous, but as long as the forecast is for 40°F or above, you can risk it for one more night and give the tomatoes one more day of vine-ripening. If you can cover the entire plant with protective plastic, or even haul it inside for what is predicted to be just a short cold snap, you can push back the cold nights for a while longer. Then, on the last possible day, pick all the remaining tomatoes and invite a few friends over for fried green tomatoes.
Varieties. Perhaps because tomatoes are everyone’s favorite garden vegetable, there is a greater breadth of choices than with any other. Browse through several catalogs, and you’ll find that invariably the tomato selection takes up more space than anything else. We’ve tried to help you sort it out by zeroing in on a few choices in each category, and assembling the key information in the chart above.
As a general rule of thumb:
l. The smaller the fruits, the sooner you’ll have your first ripe tomatoes.
2. Determinate tomatoes produce earlier and over a shorter period of time. Indeterminates show their first ripe tomatoes later but continue to produce over a much longer time span.
Rose Marie says: After helping gardeners find satisfaction with tomatoes for some 20 years, I offer this advice for people with limited space: choose one highly reliable “mainstay” variety, such as Big Beef or Celebrity, and then try one or more others, as much as your space will permit, just for the fun of it.
Note that here, days to maturity given here are counted from time of transplanting, not time of starting seeds.
• Full-size Tomatoes (3 inches or more in diameter). Big Beef (indeterminate, 73 days) is a strong new hybrid of the classic beefsteak type—those big whoppers that you can barely hold in one hand. It has broad disease resistance, matures earlier than other beefsteaks, is very productive, and has a fabulous flavor—no wonder it’s an All-America winner.
Celebrity (determinate, 72 days) is a medium-large tomato with a nice flavor; another All-America winner. Oregon Spring (determinate, 60 days) has medium-size tomatoes, often seedless or nearly so. This variety handles cool temperatures better than most.
Jet Setter (indeterminate, 64 days) produces lots of good-size, good-tasting fruits. It is remarkably early for a full-size tomato, and has multiple disease resistance. This is a relatively new variety that is destined to be around for a very long time.
Early Girl (indeterminate, 66 days) and First Lady II (indeterminate, 66 days) are similar to each other: rich red, midsize tomatoes that are ready early.
Champion (indeterminate, 65 days) has large, tasty tomatoes and good disease-resistance. Lemon Boy (indeterminate, 72 days) produces midsize tomatoes that are a beautiful lemon yellow in color and have a pleasant, mild taste.
Brandywine (indeterminate, 85 days) is currently the best-known and most popular heirloom tomato. The tomatoes are large, pink-tinged in color, and may be a bit lumpy in shape, but with a powerful, honest-to-gosh tomato flavor that will curl your toes. This is a large plant that needs serious staking. You will get fewer tomatoes than from modern hybrids of similar size, but once you taste the tomatoes, you won’t care.
• Salad-size Tomatoes (½ to 3 inches in diameter). Tumbler (determinate, 55 days) was specifically bred for hanging baskets. The plants are bushy rather than lanky, and nicely fill a large hanging container. The tomatoes are small, salad size (approximately 1½ inches in diameter), with a very nice flavor.
Sweet Cluster (indeterminate, 72 days) produces clusters of 2-inch tomatoes in a long spray of six to eight fruits. Commercial growers harvest them in clusters, and ship to retailers with the tomatoes still attached to the stems. These are the elegant and pricey “ripe on the vine” tomatoes that you have no doubt admired in the produce market.
• Plum Tomatoes (oval shape). These tomatoes are sometimes known as Romas, after an early variety named Roma that is, incidentally, still available and popular with many gardeners. Because they have a greater proportion of flesh to juice than other categories, cooks prefer them for tomato sauces, and so they’re also sometimes called sauce or paste tomatoes. But don’t let that nomenclature deter you; they are terrific for fresh eating.
Plum tomatoes may be as small as 1½ inches in length, on up to 3 inches, and nearly cylindrical, with almost the same diameter for their whole length. When sliced crosswise, they make circles of a consistent size, which are very attractive for an arranged salad or vegetable tray.
Italian Gold (determinate, 70 days) tomatoes are a deep yellow in color, almost orange; good yield, good disease resistance, and a very rich taste.
Viva Italia (determinate, 76 days), a red Roma type, has an unusually high sugar content, making it as nice for fresh eating as it is for your favorite homemade tomato sauce recipe.
• Cherry Tomatoes. Gold Nugget (determinate, 60 days) is a delight: compact plants (2 feet high) produce scads of bright golden cherry tomatoes in a relatively short time frame. This variety is just about perfect for a container tomato.
Sun Gold (indeterminate, 62 days) tomatoes are not really gold, but more of a red-orange. High sugar content gives them a sweet taste.
Green Grape (indeterminate, 75 days) tomatoes are fun to grow because of their unique color: at the eating stage they’re still green, with just a tinge of yellow showing. Sample a few to test for ripeness. The vine is a rambler, and needs pinching back now and again; fruits are the size of a very large green grape.
Tiny Tim (determinate, 60 days) plants are real dwarfs, just about a foot tall, with small red fruits. If you’re planning a large combination container and need a “tomato garnish,” this is it.