Cooking with flowers adds an element of magic to meals. Daintily nibbling a rose petal, you could easily imagine you’ve been transported to the land of Titania and Oberon. And you can share that bit of enchantment with your family and guests by incorporating edible flowers from your container garden into salads, entrées, desserts, or beverages, and by using the blossoms as colorful garnishes on almost any dish.
In this section we offer broad suggestions about using edible flowers, plus a few recipe ideas. It is our hope that you will be inspired to come up with your own creative ways to cook with flowers, for that is a big part of the fun. Take a taste of a flower petal, close your eyes, and turn your imagination loose. If the petal tastes like lemon, what dishes would be enhanced by a lemony addition? How could you use the sweet, floral taste of rose petals or daylilies, or the peppery bite of nasturtiums?
Note that we have not described all the possible edible flowers, for some of them are not appropriate for container gardening. To expand your horizons, you may want to explore Cathy Wilkinson Barash’s wonderful book Edible Flowers from Garden to Palate. She was a true pioneer in this area, and her book is considered the bible of edible flowers. In it you’ll find many more types of flowers than we have described, and also terrific ideas for innovative ways to cook with them. We do believe, however, that from the assortment of possibilities presented here, you’ll have plenty of blossoms to work with.
Also keep in mind that the flowers of all herb plants are edible. As a group they tend to be small and not particularly showy, but they can provide charming garnishes and, when added to foods, a colorful herb taste.
If you’re serving food that contains edible flowers, it is your responsibility to know what you are doing. Safety requires scrupulous attention to several things.
1. This law is unbreakable: do not eat or serve anything that you do not know for a fact to be nontoxic. Make no assumptions; sometimes flowers that we think are closely related have very different chemical compositions, and just because one flower is safe to eat doesn’t mean that its cousins are. Even if you are using the flowers only as a garnish and do not intend for people to actually eat them, they might; use only nontoxic flowers.
Be aware that some of the flowers we consider edible (begonias, for example) contain elements that should not be eaten in great amounts. Usually the harmful elements are present in minute quantities, and you would have to consume an abnormally large amount of the flower to harm yourself, far more than any reasonable person would ever do. We’ll let you know which flowers require caution.
2. Do not eat or serve flowers that have ever been sprayed with toxic chemicals—insecticides, fertilizers, herbicides, or any other such items that can leave harmful residues. By the same token, do not use flowers that have been treated with systemic versions of those same items (systemics are applied to the soil and taken up by the roots; they affect the plant’s entire system, hence the name).
3. For that reason do not use flowers from the florist, even if they are otherwise edible. You just cannot know how they were treated at the greenhouse.
4. If you have small children in your life, teach them to be safe, too. Make sure they clearly understand that just because they see you harvest and eat some flowers does not mean they can pick and eat other flowers.
5. Many local poison-control agencies have produced a list of toxic and nontoxic plants that are likely to be found in your region. Locate the phone number (post it by the phone if you haven’t already), and ask about their resources.
After harvesting the flowers, you’ll have a few simple tasks to prepare them for eating.
1. Use common sense: wash off any dirt or dust before using the flowers. And watch for bugs. A larger blossom may shelter a honeybee down inside. The best approach is to swish blossoms in lukewarm water, then lay them in a colander or spread them on paper towels for a few minutes; the little critters will just walk away.
2. Many flowers have a small, bitter-tasting area at the base of the petals, where the petal is attached to the stem. You can remove these “heels” one at a time, but here is a much faster way.
With your left hand (or right hand if you’re left-handed), grasp the entire flower at the top by gathering all the petals together into a bundle. With your other hand, use scissors to cut through the flower just above that heel. Now you have a handful of individual petals. This is much easier to do while the flower is still on the plant.
After you’ve harvested the petals, snip off the leftover part of the flower head, for it will not produce another flower and will just look ratty if you leave it on the stem.
3. If you plan to use the entire flower rather than individual petals, and if you plan for people to actually eat the flower (rather than simply admire it as a garnish), first remove the pistil and stamens, the thin spikes that come up from the center of the flower. Snip them off with embroidery or manicure scissors. They won’t hurt you, but their texture makes them not particularly palatable.
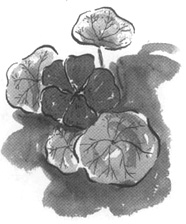
For luscious color, begonias are unparalleled. The range of hues is satisfyingly broad: all the reds, pinks, lilacs, corals, yellows, oranges, and creamy whites you could want. But it’s the quality of the color that is so mesmerizing: the blossoms seem to have an inner light that makes them luminous. It’s the warm glow of late-afternoon sunlight through colored glass, or the rich luster of antique silks.
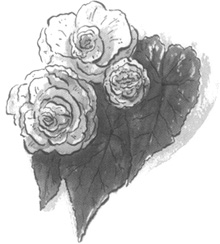
This luminescence is all the more valued because so many begonias are beautiful pastels, ultrapale tints that in most other flowers tend to be overpowered by stronger colors. Even the palest begonias can hold their own in any planting. Their blossoms are so enchanting that our senses get all mixed up: we see color and think texture, or taste, or all three at once.
Begonia blossoms are large enough to have a strong visual impact (2 to 3 inches in diameter), and each one stays on the plant for weeks. Plants begin blooming in late May or early June, and with regular fertilizing will continue through the summer and fall, up till the first hard frost. Many varieties have a cascading growth pattern, for spectacular hanging containers.
The petals (the edible part) have a crisp texture and a pleasantly tart taste that adds a nice zing to salads.
Many container gardeners face shady conditions, and finding a flowering plant that will bloom enthusiastically in shade is a real challenge. That’s another reason begonias are such a prize: these beautiful plants thrive in partial or filtered shade and fizzle in strong, direct sun. All in all, tuberous begonias are an exquisite addition to a container garden.
Begonia Basics. The genus Begonia contains several large groups, but the only one we are interested in is the type known as tuberous begonias, meaning that they are grown from tubers. (A tuber is one form of underground storage, somewhat like a bulb, and in fact is often lumped in with bulbs as one large group.)
How do you know which kind of begonia you’re getting? In catalogs, look for “tuberous begonias” in the listings; what you get when you order is the tuber itself, along with planting instructions. Garden centers sell tubers in early spring; they come in packages with large labels showing a color photograph of the mature plant, so you know what color you’re getting.
Later in the spring, you’ll be able to buy small transplants at nurseries. This is a clear advantage if they are showing a flower, because then you know the exact color. But make certain you are purchasing a tuberous begonia, not the bedding plants commonly known as wax begonias. If the label isn’t clear, and the staff can’t tell you for sure, go somewhere else.
When your begonia starts blooming, you’ll notice that the plant bears two kinds of flowers. The flat ones, with a single layer of petals, are the females; the frilly, showy ones are the males. The flowers appear at the end of a stem in groups of threes, occasionally twos. A common threesome is two female flowers with one male in the center. A flamboyant, gorgeous male, surrounded by two much more modest-looking females—make of that what you will.
Planting. The begonia tuber looks a bit like a tulip bulb that got squashed: about the same diameter, about the same color, but flat as can be, with a hollow spot in the center of one side. Plant it directly into the outdoor container, about 1 inch deep, hollow side up, after your spring frost date. Keep the soil damp but not soggy.
Make sure you mark the spot somehow, because it takes a while before you’ll see sprouts and you don’t want to accidentally dig into the tubers in the meantime. A way to avoid the problem is to plant them into a temporary container that you can keep separate until new growth is showing. Using that same idea, you can even get a serious head start on the blooming season by planting the tubers indoors in February or March, and moving them outside when the weather has warmed up.
Starting with a transplant is simplicity itself: just repot it into its permanent container when all danger of frost is past.
At the end of the season, you can remove the tubers from the pot and save them for next year. Wait until the leaves start to fall off the stems, then lift out the tubers, brush away the soil, and set them in the sun for a few days until they are very dry. Pack the tubers in a small bucket or tub filled with peat moss, and store them in a cool, dry spot. You can also use paper bags filled with a bed of peat moss. This is a very good idea if you have more than one kind because you can write the color right on the bag. Come next February, plant tubers 1 inch deep in an indoor container, set it in a warm, bright area, keep the soil damp, and wait for the pink sprouts to start poking up.
Success with Begonias. Begonias like lots of water but not soggy soil. They’re also heavy feeders. To keep the flowers corning, enrich your potting mixture with some compost, if possible, and fertilize often with liquid fertilizer; best of all, do both.
Water frequently but carefully. Try to water at the base of the plant, without soaking the leaves. The stems of the plants are soft and juicy, and the leaves are frequently quite large. When waterlogged, those big leaves can become so heavy they cause the main stem to break. Also, begonias can be bothered by powdery mildew, a plant disease that thrives in warm, damp environments. Keeping water off the leaves helps to control it.
Anything that produces as many blossoms as begonias do needs a lot of replacement fertilizer. Once a week, give the plants a drink of a complete fertilizer that is proportionately higher in phosphorus (the middle number on the package label).
And keep them out of bright sun.
Varieties. Within the tuberous group, you’ll be able to choose from several types. There are begonias with large flowers that closely resemble camellias, and they are referred to as the Camellia type; another is called the Carnation type because their tightly frilled petals look like florists’ carnations. Some begonias stand softly upright, and some are bred to grow in a cascade. Each type comes in a wide range of drop-dead colors, from deeply saturated reds, oranges, and yellows to the softest pastels. Most blossoms are solid colors, but some varieties have petals in one color with an edging of a different color. A particularly rewarding variety is Nonstop, for its nonstop flowers in many gorgeous colors.
As you’re making your choices, you will probably be most concerned with color, and second with growth habit (upright or cascading). Your best course is to study a catalog with color photos, and read the descriptions carefully. Or just go cruising in your favorite garden center, and let yourself be seduced by the sumptuous blossoms. Whatever you pick, you can hardly go wrong.
Maggie says: One year I allowed myself to get sweet-talked into buying a hanging planter from a community group that was selling them as a fundraiser. At the time I said yes, all I knew was that it was planted with begonias; no blossoms were showing, so I had no idea what color they were.
The garden gods must protect suckers like me, because what I ended up with is about the most gorgeous basket I’ve ever seen. The flowers are a soft creamy white with just a blush of pink, iridescent as mother of pearl and so shining pure it could break your heart.
Although the begonias were planted in a container meant to be hung, they are not the trailing, cascading type; the flowers sit up above the foliage, and so are best viewed from above. So I set the basket down on the stoop by my front door (northern exposure), where the flowers are (1) protected from hot sun, and (2) perfectly oriented for admiring visitors.
From this experience I learned several lessons. First, if a plant turns out to be different from what you imagined, that doesn’t make it less wonderful. Modify your original vision, and you can still enjoy it. Second, when an eight-year-old cutie-pie asks you to buy something for a school fund-raiser, say yes, and something good will happen.
Cooking with Begonias. The part of the plant that you eat is the flower petals, which have a crisp texture, something like lettuce, and a distinctively sour tang. It’s not puckery sour like vinegar, but more like the tartness of lemon. The sour taste, incidentally, comes from oxalic acid, which in very large quantities can be harmful. Oxalic acid has the effect of binding calcium in the body, with concurrent damage to the kidneys. A healthy person would have to eat something like a bushel basket every day all season to cause any major damage, but moderation is still a good idea, especially where there is a history of kidney disease.
Because of their tartness, begonia petals blend well in a salad of mixed greens with a vinaigrette dressing. They also work nicely in any vegetable dish that would be enhanced by a squeeze of fresh lemon: sautéed green beans, braised greens, roasted peppers, and so forth. Stack several petals together, slice horizontally into ribbons, and toss them in near the end of cooking. Use chopped petals in place of grated lemon peel in tabbouleh or lemon rice pilaf (use blossoms of several colors, and you can call it Confetti Pilaf). Like all edible flowers, begonias have something of a floral undertone, which combined with the lemony tang is particularly nice in a fruit salad. And all these dishes are greatly enlivened by the beautiful colors of the flower petals.
Cool and crisp on the tongue, sweet, tangy, light, and rich all at the same time, sorbet may well be the perfect light summertime dessert. Made with only sugar, water, and flavorings (usually some form of fruit), sorbet captures the unique taste of whatever fruit it embodies and holds it in cool crystalline form that is not quite like the fruit nor quite like ice but somehow embraces both. And because it contains no cream and usually not even milk, it is also fat free.
Sorbets capture not only the tastes of their fruit ingredients but their colors as well, in virtually unadulterated form. Strawberry sorbet is a far more intense deep pink than strawberry ice cream—more like strawberries. Mango sorbet is the rich color of mango flesh, and lemon sorbet is the light, almost translucent pale yellow of freshly squeezed lemon juice, not the artificially bright color of commercial lemon products.
So distinctive are these colors that the word sorbet itself has been borrowed by people describing things other than food to convey purity of color and a sense of coolness and sweetness. There is, for example, a variety of viola named Sorbet Mix, described in one catalog as having the colors of “blueberry, lemon chiffon, lavender ice, and French vanilla.” You know what they look like just from the name.
That’s the idea behind this garden—it represents sorbet both figuratively, in its freshness of color, and literally, for a delightful sorbet can be made from its plants.
The star of this garden is a great glorious tumble of tuberous begonias. Of all the wonderful edible flowers we have to choose from, for sheer oomph of color nothing can surpass the tuberous begonia. The range is impressive: everything from the most delicate ivory and many soft pastels through deeply saturated hues of red, orange, and yellow. But even more impressive is the luminous quality of the color; even the palest pastels seem to glow with inner light. A container filled with tuberous begonias, either all one color or a felicitous mixture, will absolutely knock your socks off.
This does not have to be a large garden to have impact. Use a medium-size container, the prettiest one you can find; this flower-filled garden seems to want a very decorative container, perhaps one with a floral design or a pastel color that complements the blossoms. Plant it chock full of the begonia tubers in spring after all danger of frost is past. You want the full, rich look of blossoms bursting out of the pot, so plant lots.
The sorbet garden has only one other ingredient: mint. Because of its very invasive root system, mint performs much better in its own pot. (Actually, mint performs quite nicely wherever it is; it’s just that you, the gardener, will be happier if it has its own space.) So put your favorite kind in a small, pretty container, and set it beside the begonia. Both plants will do well in a semi-shady spot; in fact, the begonias prefer it.
You may want to plant, somewhere else, some of the Sorbet Mix violas, although the violas bloom very early in spring, long before the begonias are in blossom. If you want to serve violas with your sorbet, the best way to preserve them, and also the prettiest presentation for your dessert, is to crystallize them (see instructions on page 180).
Now for the sorbet. Back in the summer of 1998, I (Maggie) visited a nursery in the San Diego area that specializes in begonias. Their offering is unique; at least I’ve never seen anything like it. Each year they plant—in the ground—thousands of begonias in a half-acre area that is like a giant lath house, covered with a ceiling made of greenhouse cloth but no real walls or floors. Customers choose their plants, dig them up, and plop them into nursery pots they brought with them. I’m told that gardeners from miles around pass along the news: “The begonias are ready at Weidners’.”
It was there I first became acquainted with begonia sorbet, although I have come across it in other places since then. This wonderfully simple recipe was originally developed by the owners of Weidners’; I have modified it to incorporate the taste of mint, which I think adds an extra dimension, but which you should surely consider optional.
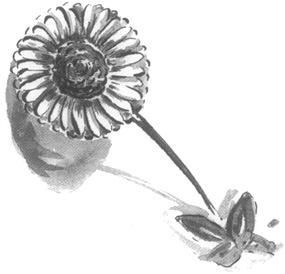
Calendula is a versatile flowering plant with many virtues: the petals give a rich golden color to foods, the flowers have medicinal properties to soothe rough skin and heal small wounds, and the bright, sassy yellows and oranges add a touch of sunshine to any garden. And if that isn’t enough, this endearing plant will even do tricks for you: the blossoms close at night and reopen with the morning sun.
In fact, calendula, with its colors of the sun, has been used as a religious symbol for many centuries and across many cultures. Hindu temples were festooned with the flowers, and Buddhists considered it one of the sacred plants, perhaps because it was one source of the yellow dye used for the golden color of monks’ robes. The ancient Egyptians, Greeks, and Romans all used calendula in religious rites as well as more temporal activities: in cooking, in medicine, and as a dye. With its long tradition in herbal medicine and folklore, calendula could as easily be placed in the Herbs chapter of this book, except for the fact that today we grow it mostly for the cheerful flowers.
Calendula Basics. The calendula flower is round and flat, rather like a daisy, about 2 inches in diameter. It has no fragrance. The stems and leaves are fuzzy but not especially noteworthy. The stars are the flowers—a bright, intense golden yellow that perks up both the garden and the gardener. Keep cutting and deadheading the flowers, and more will bloom; as cut flowers, they last very well indoors. Calendulas are considered cool-weather plants, which in many parts of the country gives them a long bloom season, from late spring all the way through fall. In very mild climates, calendula blooms all winter and peters out in the summer. Gardeners who live at the beach face unusual weather challenges, and this is one plant that works very well there.
Planting. Start seeds indoors in March, and transfer to outdoor containers when the plants are about 2 inches tall. Or buy transplants at the garden center in mid spring.
Even though calendula is technically an annual, it reseeds itself quite easily and in an open garden can come back year after year. In a container garden you may get the same benefit if you deliberately let some of the flowers mature so their seeds fall onto the soil; just remember, come next spring, that the seedlings are not weeds.
Success with Calendula. This is such a sturdy little plant, it’s hard to have bad luck with it. To get a long, steady show of flowers, stick to the basics: deadhead your plants often, fertilize regularly, and keep them watered.
Harvesting. Although at one time the leaves of the plant were used to stop the bleeding of large wounds, today we’re interested only in the flowers. Harvesting is therefore a simple matter of snipping off the flower heads, along with part of the stem (for a handle).
To use the flowers in fresh dishes such as salads, simply swish the entire blossom in water to rinse off any dust, then pull off individual petals.
The flowers also dry very easily. Remove the stem, right up to the base of the flower, and place the flowers in one layer on paper towels or in a shallow basket, away from direct sunlight. When the petals are dry (check every day), pull them from the center core and store in a tightly covered container. They will keep their color and beneficial properties for months, until you’re ready to use them in any of the ways suggested here.
Varieties. For container gardening there is only one species, Calendula officinalis.
Cooking with Calendula. It may have been one of the gastronomes of ancient Rome who first used calendula petals to give a golden color to foods. We know it has been used for many centuries as a way to color butter and cheese, and in modern kitchens it’s often used in rice dishes and breads as a substitute for the astronomically expensive saffron. This “poor man’s saffron” produces a very acceptable color but not the saffron taste; calendula has a somewhat bitter flavor.
For sprinkling over a salad or garnishing cooked vegetables, use fresh petals. In cooked dishes, either fresh or dried petals will give you good color. Fresh petals should be chopped finely, and the dried ones crushed or pulverized before adding to your recipe.
Other Uses. Calendula holds an important spot in the herbalist’s medicine chest. The plant contains natural chemicals that help stop bleeding and heal wounds, so it has been used for hundreds of years as an emergency medicine. In the United States during the Civil War and also in Europe as late as World War I, medics used it to treat wounded soldiers, and patriotic American and European gardeners grew masses of calendulas to be shipped to the battlefields.
Today, in less ferocious circumstances, we can still take advantage of the beneficial properties of this salutary garden plant. Calendula is an excellent skin balm. It can be used to ease rough or chapped skin; to soothe sunburn, rashes, or insect bites; and to heal minor cuts and abrasions. The trick is, how to get the good stuff out of the petals? Here are several ideas.
In all these natural preparations, use fresh flowers if possible, for they contain the greatest concentration of medicinal properties. While things are “brewing,” keep the container covered so the volatile chemicals do not evaporate.
• Use either fresh or dried petals to brew up a very strong batch of medicinal tea (which is technically called an infusion). Strain out the petals and, if you won’t be using the infusion immediately, store it in the refrigerator; it will keep for a few days. Dip a cotton ball into the liquid and pat it on the skin where needed, or immerse a washcloth in the herbal infusion, wring it out, and use it as a compress.
• Add the infusion to your bathwater, and slip in for a long, soothing soak.
• Use the same infusion, perhaps diluted with warm water, as a healing mouthwash and gargle after a trip to the dentist.
• Make herbal vinegar, which can be used like the infusion but has the advantage of a long shelf life. Vinegar by itself is a good skin conditioner; with the added healing properties of calendula, it is an excellent treatment. The vinegary smell dissipates quickly, and the soothing qualities continue.
To make the vinegar, tear off fresh petals and pack them loosely into a jar. Add plain distilled vinegar to cover the petals, and set the jar on a counter for several days. When the vinegar is a rich color and the petals seem to be bleached, it’s ready. Strain out and discard the petals, and store the vinegar in a clean jar.
• Make a lotion from lanolin (which you can find in some pharmacies) or light vegetable oil such as almond or safflower oil. Gently heat the lanolin or oil, stir in calendula petals, cover, and turn off the heat. Let this sit for several hours, then strain off the spent petals.
Do not use this technique to make herb-flavored oils that you intend to eat; the danger of botulism is too high in home preparations of these low-acid oils.
• Make a cream, using either petroleum jelly or calendula oil (see above) plus beeswax. This may come as a surprise, but all creams (even very expensive commercial brands) are essentially the same: an oil, melted wax, and the fragrance, which is carried in some kind of liquid, usually water. If you start with calendula-infused oil, and add to it a bit of melted beeswax, you’ll get a cream; keep adding beeswax until you get the consistency you like.
Another technique for making cream is to gently melt petroleum jelly (a few seconds in the microwave works well for this) and pour it over calendula petals in a jar with a lid. Let this sit, tightly covered, for several days, then melt to liquid form and strain out the petals.
• Make a soothing powder with cornstarch. Put dried petals and a small amount of cornstarch into a blender and blend until the petals are pulverized and blended with the cornstarch, then add more cornstarch and blend it all together. This is especially good for diaper rash.
Circumstances often dictate which technique you use. In December you won’t have access to fresh flowers, and if you develop a winter rash you’ll be glad you dried some blossoms last summer. If your children come home from a camping trip with tiny cuts all over their arms and legs, you want to help them right now, not several days from now, so you’d make an infusion for compresses rather than waiting for herbal vinegar to “brew.”
Many people who enjoy natural health and beauty products are in the habit of making up a batch of lotion or cream while their calendula plants are in full bloom, and keeping it in their medicine chest.
The chrysanthemum family is a large one, and includes such first cousins as Shasta daisy, painted daisy, marguerite daisy, and even one of the several plants known as dusty miller. Feverfew, another cousin, is listed in the Herbs chapter. Here, though, we are concentrating on just one species, the very familiar plant known to gardeners and horticulturists by the nondescript name florists’ chrysanthemum.

This is the “mum” that shows up as a potted plant in every supermarket and flower shop in the country in September and October, with puffy flowers in autumnal shades of gold, yellow, bronze, or orange. You may have taken a pot to Aunt Shirley’s for Thanksgiving dinner, or received one yourself as a hostess gift. Because we so often see them this way—in a pot wrapped in colored foil, with a matching bow—it may be something of a revelation to realize that chrysanthemums will grow quite happily in your outdoor container garden.
As is sometimes true of edible flowers, what chrysanthemums contribute to food is more a matter of color and novelty than flavor. But their contribution to your container garden more than makes up for any culinary shortfall.
Chrysanthemum Basics. It’s no accident that we associate mums with autumn, for that is their natural bloom time. They are one member of the group of plants referred to as “short-day,” meaning that their internal trigger for blossoms gets turned on when the days begin to get shorter. When you see them in the market out of their natural season, it is because a commercial greenhouse has simulated a short-day period, tricking the plants into thinking it’s time to bloom.
The plants set buds in mid to late summer; the blossoms are in full force anywhere from six to twelve weeks later, depending on the variety. Well into the fall, when most other flowering plants have finished, mums are still putting on their show. Flowers are generally long lasting, blooming for as long as eight weeks, another reason for their popularity.
The array of choices is enormous. Chrysanthemum breeders have produced plants with flowers in many sizes and shapes (from tiny buttons to huge pom-poms) and in just about every color you would ever wish: white, yellow, orange, bronze, pink, red, purple, lavender, and many shades thereof.
Chrysanthemums have passionate fans, many of whom intensely and lovingly fuss over the plants to achieve the perfect flowers that win awards at flower shows. Much of the information in catalogs of mail-order nurseries that specialize in mums is directed at these customers, so you can learn a great deal from them.
Planting. Starting with small transplants purchased from the garden center is easy as pie; just plant them into your containers in the usual way. They usually appear in the nurseries in early summer. When you order from a mail-order catalog, you get small nursery-potted plants, ready for transplanting.
Should you be the recipient of a gift of potted mums, you can sometimes turn them into outdoor garden plants as well. You may wish to enjoy them indoors until the flowers are past their peak, and then transfer them into an outdoor container. Tip the contents out, and in all likelihood you’ll see that the pot contains several individual plants, clumped close together. Separate the clump and you will have several new plants, each of which will grow into a full bush by summer. Set each one into a small container with good-quality potting soil, keep it moist, and wait for new shoots to sprout from the base of the plant.
The time of year is a factor. Often gift chrysanthemum plants will arrive in your life in October or November. It may be too cold, depending on the climate, to set out the separated plants. In that case, the easiest course is to keep the gift pot intact and indoors until spring. Snip off dead flowers and keep the soil very lightly damp through the winter; what you’ll have is a mildly interesting houseplant, with leaves but no flowers. When the weather warms up, divide the clump and put the individual plants into containers.
Success with Chrysanthemums. Your mums may be attractive to aphids (see Chapter 6 for treatments), but otherwise these are easy plants. They grow naturally into a bush shape, with lots of branches and masses of flowers. Chrysanthemum hobbyists maintain a careful regimen of pinching out new growth to encourage more branching, and then removing some of the flower buds to promote larger (but fewer) blossoms. Whether you choose to try some of those techniques is up to you. If you don’t do any of it, you’ll still have a great plant with handsome flowers in the fall.
In areas where winters are mild or moderate, your chrysanthemum will be a perennial, growing larger each year as new branches develop from the base. After several years the center of the plant may begin to die back, growing all the new healthy branches on the edges. This is your cue to divide the plant, saving smaller plants from the edges and discarding the bare center portion. The best time to do this is early spring, just as the plant is getting ready for a spurt of growth.
In very cold climates, you’ll need to give your mums some winter protection if you want to maintain them as perennials. Move the container to your most sheltered spot, and wrap it with some kind of insulating material (see page 288 for suggestions). A bit more work, but safer, is to remove the plant from its big container, put it into a smaller pot, and keep it indoors through the winter. For extra insurance, you can do some of both: divide the plant at the roots, then move just one portion into an indoor container while sheltering the larger outdoor container from the elements. Easiest of all, you can decide to treat the plant as an annual and start over next spring with new transplants from the nursery.
Harvesting. Nothing to it: just pull off petals as needed. Or snip an entire blossom for a large garnish. The more you cut the flowers, the more the plant makes new blossoms.
Varieties. As you might expect with any flower that is so significant in the florist trade, plant breeders have put in thousands of hours developing new chrysanthemum cultivars, and more are introduced each year. It would not be helpful for us to name specific varieties, as they probably will have been supplanted by the time you do your shopping. The best bet is to explore the mail-order catalog of a specialty nursery, or visit a well-stocked retail nursery and select whatever catches your fancy.
You may find it useful to know that mums are grouped into several large categories, distinguished by flower shape and growth habit. These categories are used primarily by nurseries that specialize in chrysanthemums; your garden center probably displays all mums together, regardless of category.
The type called cushion mums are especially nice for containers. They grow in small mounds, about 1 foot in diameter, often totally covered with blossoms. With this compact, tidy habit, they’d work nicely as the bottom layer of a mixed container garden. Flower color may be pink, red, salmon, white, yellow, copper, or bronze. All the others are sometimes grouped under the all-purpose heading upright garden mums, meaning that they are taller and more erect, 18 to 24 inches high. Other category names you may encounter in various catalogs are button, a reference to the very small flowers; football, the huge flowers made into autumn corsages; spider and spoon, which describe the shape of the flowers and the individual petals.
Cooking with Chrysanthemums. The flavor of chrysanthemum petals is a little on the bitter side, and so they are more appropriate with salads and main dishes than desserts. You may find, as some cooks do, that you care more about the color than the taste.
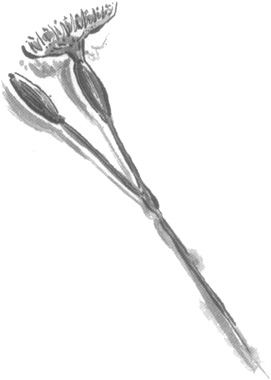
Of all the interesting tidbits concerning botanical naming, the daylily story is one of the sweetest. The genus to which all daylilies belong is Hemerocallis, a word derived from the Greek hemera, meaning “day,” and kallos, meaning “beauty”; that is, “beautiful for a day” or “one day’s beauty.” This refers to the fact that each blossom lasts only one day. A flower that dies so quickly could as easily have been given a somber, funereal name, yet daylilies are named for their beauty, not their transience—a gentle reminder that gardens hold many metaphors for living a good life.
And lest you worry that it’s all over in a snap, daylilies put on a gratifyingly long show of blooms. Each individual flower is open for just one day, but the plants produce dozens, even hundreds, of flower buds in a season. Some varieties, including the lovely Stella d’Oro, are constantly in bloom throughout the summer.
On a more prosaic note, the label Hemerocallis is important because it’s your confirmation that you are acquiring a true daylily, and not a lily. “Daylily” is not a synonym for “lily”; they are two different plants entirely. The dramatic, fragrant flowers of lilies are undeniably stunning, but not edible.
Daylily Basics. Daylilies are perennials, with long, strappy leaves and flower stalks (known as scapes) that stand up above the foliage. Sometimes the foliage forms a shape like an opened Chinese fan: the leaves arch over into a sort of semicircle that is essentially flat from front to back, and the scapes emerge from the center. A mature plant has masses of these fans in a tight clump, forming an all-around mound that is quite attractive even before the flowers begin their show. Many daylilies are herbaceous, meaning that the plant dies to the ground in the winter and reemerges in the spring, but some keep their handsome foliage all year round. The herbaceous types tolerate cold winters better than the evergreen varieties.
The flower buds form at the upper end of the flower stalks; they open for one 24-hour period, then close and eventually wither away. Most types of daylily have one main period of flowering, which can last for a month or more, and some then put on a second burst of blossoms (in catalogs, look for varieties marked “remontant”).
Planting. Start with a small plant, either from a mail-order nursery, a retail garden center, or a division (described below) from a friend’s garden. Plant it in your outdoor container the same way as you would any transplant. Sometimes a 1-gallon container plant from the garden center actually contains, or can be gently separated into, several smaller plants; in that case, plant them out with about 6 inches of space in between.
Success with Daylilies. For growing daylilies, success is largely a matter of getting up in the morning. You’d be hard pressed to find an easier, more trouble-free flower. Daylilies prefer to be in sun but will tolerate partial shade. They like rich, fluffy soil with good drainage (and what plant does not?), but they will take whatever you give them with little complaint. They appreciate a dose of fertilizer during the season, and water when needed, but otherwise are pretty undemanding. Daylilies seem to be little troubled by insects, and diseases are practically unknown.
Your only major chore will be dividing, and even that you won’t have to worry about for maybe five years. Daylilies multiply at their roots, which spread outward underground, so that each year the mound gets wider and wider. Eventually, the crowded conditions rob the plant of vigor, and its flower production diminishes. The solution is to divide the plant. Here’s how.
In the fall when the bloom season has ended, dig up the entire plant. Lay it on a flat surface so you can get a good look at the roots. If you tease away some of the soil, you can clearly see that instead of one main stem with lots of branches, what you have is a mass of stems coming up from the thick, fleshy roots. Each one of those stems could in theory become a new plant, if only you could get them apart. The best way seems brutal but is actually kindest. Take a large, sharp kitchen knife and slice down through the plant, right through the root mass. Now you have two plants, each of which has one flat side; if you replant them, new growth will quickly fill in to soften that cut edge.
Or you can continue to divide. Slice the two halves in half again, for four new plants. Eventually you will find that you can pull the roots and stems apart with your fingers, if you wish. In this way you can take one very large daylily plant and convert it into many small plants. The smaller they are, the longer you can go before having to divide them again, but also the longer it will be before they bloom heavily. Like many other things in the garden, it’s a trade-off.
Harvesting. The flowers are large and snap easily off the stalk. As with all edible flowers, you’ll probably want to remove the pistil and stamens—very carefully, if you intend to keep the blossom intact. If not, just pull the petals apart and discard the rest.
Varieties. Alongside almost any rural road anywhere in the United States, you can see daylilies growing wild, their tall scapes topped with heavy orange flowers, nodding their heads in greeting as you pass, the way country folk do. From this original species, literally thousands of cultivars have been developed by breeders both amateur and professional.
So today we have daylilies in shades of burgundy, lavender, pink, coral, salmon, pale green, and creamy white, as well as the more common yellows and oranges. Most flowers are the familiar lily shape (like a funnel or a bell), although some varieties display frilled and ruffled petals, long spidery shapes, or double layers of petals with a fluffy look.
Choosing from a catalog can be daunting. Our advice is, start by focusing on size. Dwarf varieties, 12 to 18 inches tall, work best for most containers unless you want to put together a really large, bold combination planter. Next consider color, time of bloom, and whether foliage is evergreen or herbaceous. You can’t go wrong with varieties honored by the American Hemerocallis Society: Honorable Mention (often abbreviated HM in catalogs), the Award of Merit (abbreviated AM), given to only 10 plants each year, or the Stout Medal (abbreviated SM), awarded to only the most outstanding types.
At a garden center, you will have fewer varieties to choose from (which you may consider a plus), but you often get to see them in bloom, so you know for sure what color flowers you’re getting.
Maggie says: For containers I love Stella d’Oro, which has the golden yellow flowers you would expect from its name. It’s small (total height, including scapes, 18 to 24 inches), foolproof (a Stout Medal winner), and seems to bloom forever. It is extremely popular, and therefore widely available—a real delight.
Cooking with Daylilies. The taste of most daylily flowers is floral and lightly sweet (an 11-year-old friend of ours thought Stella d’Oro petals tasted like honeysuckle), with a crisp texture. A few years ago Sunset magazine, the ne plus ultra for gardeners in the West, did a taste test involving the blossoms of nine familiar garden plants, and the tasters raved over the daylilies. They used the common roadside variety, Hemerocallis fulva, which reminded them of cucumber with a sweet aftertaste. Try the petals in green or fruit salads; add large, unopened buds to a vegetable stir-fry; toss shredded orange-colored petals into steamed green beans at the last minute.
Cathy Wilkinson Barash suggests a beautiful dessert idea: start with large blossoms and carefully remove stamens and pistil, keeping the flower intact. Lay the whole flower in a dessert dish and fill it with ice cream or sorbet, then sprinkle a few ribbons of petals over the top.
The language of gardeners is a fascinating thing. Technically, if you just say “dianthus” you could be referring to any of the several hundred species in the Dianthus genus. Among the members of this large group are the familiar florists’ carnations (both full-size and minis) that you’ve seen a million times, and also the old-fashioned cottage-garden favorite with the winsome name sweet William. But in one of those quirky habits of nomenclature that have developed over time, gardeners generally use “dianthus” to mean just one portion of the genus: all the dainty little flowers known collectively by the common name “pinks.”
In this case, pink is a noun, not an adjective. You can choose white pinks, red pinks, purple pinks, and pinks in every shade of pink. The name may derive from the fact that the edges of the flower petals have small notches, as if cut with pinking shears.
Many pinks have one other endearing quality: fragrance—the warm, spicy, and altogether surprising aroma of cloves. So pronounced is this fragrance that one group of these plants is known as “clove pinks,” and several cultivars have “clove” or “spice” in their name. This delightful fragrance is as appealing to honeybees as it is to humans, and so by planting dianthus you are encouraging bees to visit your garden. In a vegetable garden, anything that brings bees is a very good thing indeed.
All in all, these are enchanting little plants. They come back for several years (most of them, anyway); they add a strong note of color; and if you choose the right ones, they smell heavenly.
Maggie says: I recently put together a mixed container of herbs with a pink theme—the color pink, that is. It contains chives (pink puffball flowers), tricolor sage (pink streaks on the leaves), a thyme with pink flowers, and two pinks: one with magenta flowers on upright stems, and one of the spreading, clumping kind with soft pink flowers. I have no idea what variety either of the pinks is, but I really don’t care. I love their frilly little flowers and their sweet smell.
Pink Basics. If you’re just starting to feel that you have this business of scientific names under control, you might assume that the pinks are one species, sweet William is another, and florists’ carnations another. Life is seldom that simple. The flowers known as pinks comprise several separate species (with the common names maiden pinks, cottage pinks, Chinese pinks, and so on), and one subsection of one of those species is the florists’ carnations (which are mostly grown in greenhouses). From the several species of pinks, many subspecies and cultivars have been developed by crossbreeding, and new ones show up each year. The main differences are in flower color, flower shape, or the way the plant grows.
Some pinks grow in the shape of small, spreading mounds that eventually cover an area like a very lumpy carpet, their flowers tight against the foliage. Others are more upright in habit, with flowers atop erect stems, but still modest in overall size. A few are annuals or biennials (usually sold as annuals), but most are perennials. The flowers themselves take one of two basic forms: one flat layer of petals (the general term for this configuration is “single”), or multiple layers, more reminiscent of the familiar florists’ carnation (these are called “double”). In your garden center you’re more likely to find single flowers—about the size of a nickel, with pretty frilled edges to the petals.
Planting. A number of Dianthus species can be started quite easily from seeds. Start seeds indoors three to four weeks ahead of the spring frost date, following the directions on the packet for spacing and depth. When the seedlings have several sets of true leaves, they are ready to move into the outdoor container; see Chapter 5 for seed-starting and planting instructions.
If you prefer to buy young plants from the garden center, you’ll simply transplant them into your desired outdoor container in the usual way, also described in Chapter 5.
Success with Dianthus. Pinks do best in soil that drains quickly, which is probably what you already have in your containers. They bloom best in full sun, but in very hot climates will appreciate some protection from the afternoon sun. Most varieties bloom from spring through early summer, especially if you keep clipping off the dead flowers, and some put on a secondary bloom later in the summer.
Most dianthuses are perennials, but they typically don’t last more than a few years. Even the sturdiest perennials may need some protection against freezing in very cold climates (see Chapter 1 for suggestions). The clumping, spreading types have a tendency to push clumps up out of the soil, especially when they are grown close to other plants. You can turn this to an advantage by separating some of the pushy clumps and potting them into separate smaller containers. If you then bring these smaller pots inside for the winter, you’re guaranteed at least some winter survival. Come spring, each clump will be the start of a new planting.
Harvesting. Harvesting the flowers is a simple matter of snipping them off with scissors or hand pruners, and has the added bonus of stimulating the plant to produce more flowers. With practice, you can pinch the flower heads off at the base, but the stems are surprisingly sturdy and resist snapping by human hands.
Varieties. Among the half-dozen or so principal Dianthus species are literally hundreds of varieties and cultivars, with new ones being introduced each year. The original species, Dianthus caryophyllus, known in Elizabethan days as gillyflower, is today almost impossible to find in its true, original form. D. plumarius is the species known by the common name cottage pink; this is an old favorite, going back several hundred years, with many new cultivars.
Cross-breeding between D. plumarius and D. caryophyllus produced D. allwoodii, a modern group with dozens of varieties, most of them wonderfully fragrant.
D. deltoides, known as maiden pink, usually forms low, loose mats. The many cultivars of D. chinensis, Chinese pink, have brilliant colors but no fragrance.
There are more species; this is just a sampling to give you an idea what a rich, broad genus Dianthus is. Studying the selections in specialty catalogs, you can begin to develop a sense of the differences in growth habits, time of bloom, shape, color, and fragrance of flowers, and make your selections accordingly.
Or you may find it easier to just meander through your favorite garden center in spring and choose from what it has available. In addition to simplicity, this approach offers two very tangible advantages. What you primarily care about, in all likelihood, is color, and the only way to be sure what color the flowers will be is to purchase the plants while they are blooming. You’ll also be able then to check that other delightful quality of pinks: the fragrance of their flowers.
Cooking with Dianthus. Before you do anything of a culinary nature, you’ll want to remove the bitter-tasting white portion at the base of the petals. The easiest way to do this is to fold the flower petals into a clump in one hand and use scissors in the other hand to snip off the entire base; your first hand is now holding individual petals, minus their white stubs.
The petals are then ready for whatever your imagination can create. Think “floral” and “spicy” together; what does that combination suggest? For starters:
• Sprinkle flower petals over fruit salad.
• Add dianthus petals, finely chopped, to apple pie or berry cobbler.
• Combine flowers into the sauce for Harvard beets or German-style sweet-and-sour red cabbage.
Many people love marigolds: bright, cheery, pom-pom flowers in sunshine shades of yellow and orange. Anyone who has ever grown them also knows about the stinky aroma of the leaves, and in fact many people plant them alongside vegetables, particularly tomatoes, because they’re reputed to repel harmful pests like tomato hornworms.

We’re not talking about those marigolds. They’re not really edible—well, they won’t kill you, but they have a very bitter taste. Grow the large, buxom flowers if you love their looks, and plant them next to your tomatoes if you wish. And you can certainly use the blossoms as handsome garnishes. But for edible marigolds, concentrate on the particular species commonly called either signet (from its former scientific name Tagetes signata) or gem marigold—same thing.
Marigold Basics. Signet marigolds are so different from the familiar garden marigolds that you might think they were an entirely different plant. Rather than puffy pom-pom flowers, the blossoms of signet marigolds are single (just one layer of petals) and quite small, usually about a half inch. These plants are incredible bloomers, absolutely covered with flowers from summer on into fall. The flowers have a warm spicy taste that has often been compared to tarragon’s. And rather than the sharp, acrid smell of most marigold foliage, signets have a very pleasant lemony fragrance that is most apparent when you brush your hand over the soft, lacy leaves.
The plants maintain a small, tidy, well-rounded shape, and with their masses of flowers make a wonderful filler for your containers. Because of their restrained size, they’re particularly good candidates for window boxes.
Planting. If you can find transplants of signet marigolds in your garden center, plant them into your containers, following the general directions in Chapter 5, as soon as freezing weather has passed. You may, however, have more luck finding (or ordering) seeds.
Start seeds indoors (see Chapter 5) three to four weeks before your spring frost date. You can also simply wait until the outdoor weather is warm and sow seeds directly into your containers. The seeds germinate readily, but you’ll have to keep the area moist and clear of other plants in the meantime.
Success with Marigolds. This is such an easy plant, it’s hard to imagine anything going wrong unless you totally forget to water. For maximum success, place signet marigolds in a sunny spot and keep the dead flowers picked off. Otherwise, just enjoy.
Harvesting. Nothing to it: just snip off the flower heads whenever you need them. The more you snip, the more new flowers you’ll have.
Varieties. Most of the signet marigolds found in seed catalogs are part of the Gem strain: Lemon Gem, Golden Gem, Tangerine Gem. The differences, as you might imagine, are in the color of the flowers, and the colors are just what you’d expect from the names: butter yellow, golden yellow, and yellow-orange. One mail-order company offers a cultivar named Starfire, with bicolor flowers. You may find other varieties; just be sure you’re ordering seeds of Tagetes tenuifolia or T. signata (same thing).
Cooking with Marigolds. Because of their flavor (spicy rather than sweet) and their color (in the yellow/orange range), signet marigolds work best with entrees, vegetables, and salads rather than desserts.
• Use as a garnish for mixed green salads, potato salad, or pasta salad.
• Toss in with steamed or sautéed vegetables such as yellow and green zucchini or green beans.
• The rich red of cooked beets is even more brilliant when a few golden yellow flowers are added at the last minute.
• Accent chicken dishes with signet marigold flowers (tarragon is a classic herb with chicken, and as we’ve said, many people think signet marigolds have a tarragon-like taste).
Note: the white area at the base of the petal is very bitter tasting; cut it off before adding flower petals to your cooking.
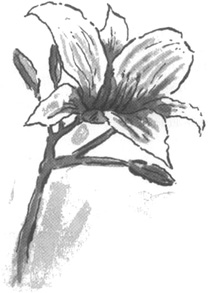
Robust taste, knockout color, and fast, easy growth—if ever there was a perfect candidate for the three-star general of the edible-flower realm, it’s nasturtiums.
This is one of the few edible flowers whose taste contributes as much to foods as does its color. In fact, all parts of this gorgeous plant are edible: the leaves, the flowers, and the seeds. The leaves and flowers have a strong, peppery taste that will remind you of watercress.

Nasturtium Basics. Garden nasturtiums come in two basic types: those that climb upward (or trail downward), and those that stay in relatively compact mounds (sometimes listed as “dwarf”). Just to complicate matters, there’s a middle ground described in some catalogs as “cascading mounds.” There are other variables you will want to consider—color and shape of flower, leaf color—but the question of growth habit comes first. If you’re planning a large combination container with a trellis full of bright orange nasturtiums as a tall backdrop, and you inadvertently plant one of the compact dwarf types, you will never have what you want. Similarly, if you mistakenly plant a trailing vine in a small, low container, it will eventually puddle its growth all over the floor rather than forming the neat mound you intended.
Planting. Nasturtiums are one of those plants that do not transplant terribly well, so your best bet is to plant seeds directly into their ultimate container. The seeds are large and easy to handle, so it’s simple to place them exactly where you want. Do it as early in the spring as possible, as soon as the danger of heavy frost is past. Seeds germinate quickly and grow fast. If you live in warm climates, with very mild winters, fall plantings will give you bright flowers in early spring.
Maggie says: One year I started the garden season with several packets of nasturtium seeds in different colors, and no good long-term plan about where each would ultimately go. I know that nasturtiums do best when direct-seeded, but I wasn’t ready for that. So in April I started seeds in expandable peat pellets (see Chapter 5). This meant that I (1) did not miss the ideal planting time and (2) bought myself some time to figure out what to do later.
Nasturtiums have the happy habit of dropping their seeds onto the ground at the end of the season and then coming up next year without any effort from you. This is of course most noticeable in full-size, traditional gardens; in container gardens, the seeds could fall onto the sidewalk or patio floor rather than onto fertile soil. But if you are growing nasturtiums in a large container, you might notice some babies poking up next spring.
Success with Nasturtiums. These bright, cheerful flowers are extremely easy to grow. They are at their best in coolish temperatures, so don’t be surprised if they seem to shut down when the weather is very hot. For that reason they will appreciate some light shade in the hottest regions, although as a general rule these are full-sun plants.
For maximum success, keep these cautions in mind:
• Make sure the soil drains well. In traditional gardens, nasturtiums do best in sandy soil. In your containers make sure you put them into soil that has lots of some supplement, such as perlite or vermiculite (see Chapter 5), that promotes drainage. Ideally, all your containers will have this kind of soil mixture, but if they do not, choose carefully which ones you use for nasturtiums.
• Go easy with the fertilizer. Too much fertilizer promotes lots of leaf growth instead of flowers. Also, nasturtiums tolerate dry soil better than many garden flowers. Don’t deliberately withhold water, but just keep this in mind as you’re planning your garden: if life’s chores get in the way, this is one plant that can go without water for a few days.
• Check regularly for aphids. If there is a downside to nasturtiums, it is that they are attractive to aphids. Many traditional gardeners, in fact, grow nasturtiums as a trap crop, to draw aphids away from other plants. Check the undersides of leaves every day in hot weather, and take corrective action (see Chapter 6 for techniques) at first appearance. You may find it easier to simply snip off and discard the affected leaves; it won’t hurt the plant.
Harvesting. Plucking a few leaves or flowers for tonight’s salad is a simple matter of pinching them off the plant and washing them well. Be on the lookout for small insects deep inside the blossoms.
Varieties. The classic nasturtium flower is bright orange, with a single layer of petals and a pronounced “tail,” technically called a spur. But as you might imagine, with years of plant breeding and developing, that’s only the beginning of the story. Today’s nasturtiums have both single and double flowers, in an amazing array of colors. You can choose from tangerine, pale buttery yellow, salmon, scarlet, apricot, rosy red, and dark mahogany red, as well as the familiar pure orange or golden yellow. Some types are packaged in mixed colors; look for the word “mix” or some synonym. The graceful rounded leaves may be lime green, deep blue-green, or bright green splashed with white. Just be sure you read the seed packet or catalog description carefully, and determine whether you’re getting a compact or trailing type.
The compact variety Whirlybird features large flowers that sit up on top of the leaves, for a very dramatic color display. Whirlybird comes in lots of colors, and is often packaged as a mix.
Empress of India is noteworthy for its striking coloring: dark blue-green leaves and deep red flowers. This variety is available as a compact, mounding type as well as a trailer.
Alaska features very unusual and very attractive variegated leaves: bright green splashed strongly with a rich, creamy white. Flowers may be yellow, orange, cherry red, salmon, or crimson; also packaged as a mix.
Peach Melba was named for the famous dessert because of the flower coloration: petals are the soft yellow of peach flesh, with a raspberry red splash at the flower’s throat.
Cooking with Nasturtiums. Because the taste is so assertive, so distinctive, nasturtiums should be reserved for dishes where their peppery tang will not startle the tastebuds—tossed salads, for instance. As we have become more adventurous in our choice of salad greens, the leaves and flowers of nasturtiums fit right in. Here are some other ideas.
• Use nasturtium flowers to garnish deviled eggs and potato salads.
• Toss individual petals and finely chopped leaves into cold pasta salads.
• Chop flower petals and add to cold soups such as vichyssoise or avocado bisque; garnish each serving with one whole flower,
• Just for the sheer beauty of it, line the edge of a round or oval serving platter with nasturtium leaves. Their round, softly scalloped shape makes a lovely background for a mounded rice dish, lightly steamed yellow squash, or tomato aspic.
• For a summertime luncheon, assemble individual salads designed in concentric circles. First lay down a base of nasturtium leaves, then an outer ring of sliced red or orange tomatoes, then a ring of cucumber slices, and an inner ring of sliced yellow tomatoes. For the centers, steam, chill, and hollow out whole pattypan squashes and stuff with tuna salad, egg salad, or tabbouleh, garnished with one perfect nasturtium blossom. Drizzle a vinaigrette dressing made with nasturtium vinegar (see pages 257 to 259) over all.
• The notion of combining herbs and spices with fruits is well established in Mediterranean countries. One delicious dessert is fresh peach halves baked on a bed of crushed peppercorns, with a bit of sugar and a splash of lemon juice. It sounds startling until you taste it. To continue the theme, add petals of Peach Melba nasturtiums to the baking dish at the last minute, and top each serving with whole flowers.
• Create your own special main-dish garnishes using individual nasturtium leaves topped with a small dab of some condiment appropriate to the entrée: horseradish sauce, mustard-cranberry relish, shredded carrots dressed with nasturtium vinaigrette, balls of herb butter. Choose the smaller leaves, and look for ones that are lightly cupped.
Here is a wonderful, simple combination for a container with a trellis: Purple Peacock pole beans growing up the trellis, with Empress of India nasturtiums trailing down over the edges of the container. All summer long, this garden delights with a changing show of beautiful colors: blue-green, scarlet red, soft mauve, deep burgundy, bright green.
All bean plants are rather skimpy and sparse looking at the base. In this planter, trailing nasturtiums, all parts of which are edible, fill in the blah space and then tumble over the edge with their beautiful leaves and blazing flowers. (By the way, trailing nasturtiums are also climbers, and they will climb up the trellis along with the beans if you turn your back.)
The glory of this combination is the rich, regal colors, and that is why we have called it a royal feast. The nasturtium flowers are a deep, glowing scarlet red, set off nicely against blue-green foliage. The beans give a double dose of color: first the flowers (which are edible) in shades of soft purple and lilac, then the beans themselves, with rich, dark purple pods. When you harvest them for dinner, be ready for a surprise: once they hit boiling water, the purple pods turn green. Children love this little chemistry lesson.
Nasturtiums do better if you plant the seeds directly in the container; do that in early spring after all danger of frost has passed. If for some reason you weren’t able to plant seeds, using small nasturtium transplants later in the season is a possibility, assuming you can find them in the garden center at that point, but they won’t have the same vigor.
You’ll need a strong trellis arrangement to support the beans; see page 40 for several ideas. Plant four or five bean seeds in front of each vertical member of the trellis as soon as the weather is warm (nighttime temperatures around 60°F).
Once the beans have passed their peak, cut down slightly on your watering and fertilizing, and the nasturtiums, which will last on into fall, will produce more flowers.
Sweet, delicate blossoms that add color and quiet grace to your containers—that’s the essence of these three closely related flowers. They bloom early in the spring, when a gardener’s soul is more than ready for flowers. Then, as the first tinge of winter approaches, a new planting gives more flowers just when other things in the garden are shutting down. Many have a hauntingly sweet fragrance, and the palette of colors they offer is broad and varied enough to enhance almost any container combination the gardener’s eye can imagine, or any dish the cook can create. To delight students of history and folklore, these plants are the subject of many charming tales and legends. And besides all that, the flowers themselves have an appealing look that can only be described as cute.

Viola Basics. In this chapter we have grouped together three plants with a very close botanical relationship. Even though we know them by three different common names, they all belong to the same genus—Viola—and share the same growing needs. So close is their connection, they are sometimes confused with one another. Knowing scientific names comes in handy.
Pansies (Viola wittrockiana) constitute the largest group of these three cousins. You know what pansies look like, but you may not realize just how many cultivars there are, in every color of the rainbow, and in both solid hues and multicolored patterns of all types. Some display a pattern of darker splotches near the center of the blossom that with a bit of imagination looks like a face; many children think they look like kitten faces.
Violas (Viola cornuta) look like pansies, except they are smaller; while some pansy flowers are as big as teacups, violas are about the size of a nickel. They are also hardier than pansies and more readily withstand cold weather. At your garden center, you’ll probably find that the range of color choices is more limited.
Johnny-jump-ups are in fact a separate species (Viola tricolor), but we include them with violas because they are so similar in size and growth habit. As you might imagine from the Latin name, each flower has three colors: purple, yellow, and white.
Violas give us another lesson in the fickleness of common names. As with dianthus, the genus name has come to be the common name of one species in that genus. You can drive yourself nuts with this—all violas are Violas but not all Violas are violas—or you can simply accept it and get on with life.
Violets are easy to recognize. In all likelihood the flowers you call violets are the species Viola odorata, known as sweet violets. There are other violet species, but they are less commonly offered in retail nurseries. Violets may be purple, blue-violet, pink, or white. Keep in mind that, unlike pansies and violas, which are typically considered annuals, violets come back every year. (African violets, by the way, are not related to violets; don’t eat them.)
Planting. Pansies and violas are usually grown as annuals, and are easy to start from seed. In winter and early spring, start seeds indoors, following the general instructions in Chapter 5. When seedlings are about 2 inches tall, transplant them into outdoor containers. This will give you a rich crop of pansies for your spring garden. If you also want a second crop for fall and winter, you can start seeds indoors or out. If outdoors, we recommend using a separate container as a propagator, since your mixed containers are going full blast with tomatoes or cucumbers and may not have room for tiny seedlings.
Or you can take the simpler route and buy small plants at the garden center; they are widely available in both spring and fall. The trade-offs are the usual ones: ordering seeds gives you access to many more varieties; buying started plants saves work. If you decide to buy plants, wait until they are showing their flowers so you can see what color you’ll be getting.
With violets, which are perennial, you will most likely start with transplants, either from a retail or mailorder nursery, or from a friend’s garden. Violets multiply by sending out underground runners, and eventually will spread to cover an entire area with their sweet little flowers and lovely leaves. Anyone who has planted violets in a traditional garden will have, after a few years, a veritable violet factory, and will probably be pleased to give you a few babies. Every gardener knows instinctively that sharing plants is good karma.
Johnny-jump-ups also grow readily from seed, whether you plant seeds or not. They get the jaunty name from their habit of vigorous self-sowing (coming up next year from seeds dropped this year), often quite some distance away. This is more noticeable in traditional gardens, where there is ample soil to receive the migrating seeds, but if you have several large containers, don’t be surprised if next year some of these Johnnys jump up in a neighboring pot.
When planting, keep in mind that pansies, violas, and Johnny-jump-ups will grow nicely in either sun or partial shade; violets need some shade, and grow best either in a northern exposure or underneath larger plants.
Success with Pansies, Violas, and Violets. With these three cousins, success is largely a matter of timing. All flourish in coolish weather, and then start to pout when it gets hot.
If you planted pansies or violas in the spring, don’t be surprised if they look bedraggled by mid summer, with long, lanky stems and increasingly puny flowers. At that point you have two choices: (1) you can prune them very heavily, cutting back almost to the soil line (which means you are sacrificing any remaining flowers), and hope they will regenerate when the fall weather comes; or (2) you can rip them out completely and buy new ones at the end of summer. If winters are mild in your area, these fall-planted pansies will often carry through to next spring, and will surprise you with delicious color in March or April.
Because pansies and violas are so widely available and are on the market in both spring and fall, it’s easy to pick up one or two and tuck them into a container or window box wherever you have a bare spot. They’ll never get to be an ungainly size, and when they start to get scraggly they’re easy to replace. In other words, they are the perfect plants for quick-in-and-out treatment, adding bright color and perhaps fragrance just when you need it.
Violets are another story. They bloom very early (February or March) and then cease producing flowers; but unlike pansies, the plants retain a tidy, compact shape between bloom times. The leaves are small, heart-shaped, and sometimes richly colored with red undersides; so that even when they’re not blooming, violets are sweet little plants. Rather than treating them as in-and-out plants, you’re better off letting them stay in place year after year, the better to woo you with their springtime fragrance.
All three plants yearn for rich, moist soil (imagine the floor of a dense forest: cool, damp, shady, with a thick layer of decaying leaves). In your containers, this means a regular program of watering and fertilizing. Deadhead regularly. And that’s really all you need to be concerned with until the summer doldrums arrive, for in most respects these are carefree plants.
Harvesting. It’s the flowers that you will use in cooking, so harvesting is a simple matter of picking them as needed, which has the extra benefit of encouraging the plant to keep producing more blossoms.
This triumvirate of flowers lends itself well to several methods of preservation. Pansies and violas, because they are essentially flat, are good candidates for flower pressing; violets can be candied (see page 180) or made into syrup (see page 387).
Varieties. Let’s start with violets, because there are fewer choices. For blossoms in a rich, classic purple, a good choice is Royal Robe. For pink flowers, look for Rosina. White Czar has, as you can guess, pure white flowers, and there is also a plain Czar, with bright blue flowers. If you’re lucky enough to have a friend with a garden bed full of violets, and your friend offers to share, you may end up with a variety whose name you don’t know; but you will know the color of the flowers, and furthermore you’ll have a treasure from the heart—and that is always better.
Violas, remember, are like miniature pansies but come in fewer colors. Like pansies, viola blossoms may be all one color or multicolored, although solid colors are more common. Here are two examples from a recent catalog. The flowers of the aptly named Cuty are a cheerful mix of purple, blue, and white petals with yellow eyes. A charming new introduction is Sorbet, which comes in half a dozen solid colors in pastel tones, with names like Lemon Chiffon and Lavender Ice.
Pansies have almost as many colors, shades, and tints as a paint store. Browsing through just one catalog, we found them in solid white, orange, yellow, gold, red, tangerine, mahogany, blue, purple, lavender, pink, and a purple so dark it was practically black. And we found color combinations almost beyond counting: magenta and white, light pink and dark pink, rose red and dark red, yellow and brick red, purple and gold and white, orange and yellow, blue and yellow, and on and on.
In addition to specific colors and color combinations, seed companies offer mixed packets of viola and pansy seeds; look for a word like “mix,” “mixture,” or “blend” in the name. With these seeds, you never know for sure what color flower any one plant will produce until it blooms. That’s either a charming surprise or a color-scheme disappointment, depending on your outlook.
Since color is really the whole point of adding pansies and violas to your containers, you may find it makes more sense to simply cruise the aisles of your favorite garden center and choose whatever colors fit into your plans, without regard for their specific names. Buy plants that are already showing a blossom or two, and you’ll know the color for sure. You will also be able to tell whether the flower is fragrant. Not all pansies are, but it’s a delightful bonus.
Cooking with Pansies, Violas, and Violets. All three of these flowers add a great boost of color and visual charm to your dishes. Taste is secondary to looks, but because the palette of possibilities is so broad, you can add pansies (and, to a lesser extent, violas) as a garnish to just about any dish, and create something lovely and memorable.
Here are a few ideas to get you started:
• Make flower-filled ice cubes from yellow and purple violas (see page 372 for instructions) and use them in lemonade.
• The next time you make oven-fried chicken, add lots of paprika to your crumb mixture so that the cooked chicken has a rich orangey color. Serve on a white platter, encircled with large dark blue pansies.
• A colorful, healthy appetizer: yogurt–cream cheese dip with lots of chopped herbs, garnished with small-flowered red or pink pansies, surrounded with toasted slices of French bread, which are in turn garnished with large pansies in the same colors.
• For a September ice-cream party: purchase several flavors of ice cream, frozen yogurt, and sorbet; go for color variation. Scoop out ice cream balls, lay them out on a cookie sheet or large plastic tray, and freeze. Set out bowls of pansies and violas in as many different colors as you can manage. (At other times of the year, you can substitute or add other flowers.) At party time, pile the ice-cream balls into a large, prechilled glass bowl and invite guests to dig in. The fun is combining flower petals and different flavors of ice cream.
If some of the ice cream remains in the bowl, it will eventually melt into a multicolored, multiflavored slush. Don’t let it go to waste. Shred any remaining flowers into bits and throw them in, and add ginger ale or seltzer for a farewell punch.
• Violets, either candied or plain, are a classic way to beautify petits fours for the tea tray. Directions for candying violets are on page 180, but you can also purchase them ready-made in specialty bakeries and confectionery shops.
• There is no cake decoration more beautiful than a ring of brilliantly colored pansies against white or pale pastel icing.
In a time long ago, when gods and goddesses walked the earth disguised as mortals, a beautiful maiden named Persephone caught the eye of Hades, the god of the Underworld. As she strolled through a meadow picking wildflowers, Persephone felt the earth open up beneath her feet when she reached for a particularly lovely flower. Out of the opening thundered the fierce Hades, who grabbed Persephone, threw her into his chariot, and disappeared back into the abyss.
Persephone was the daughter of Zeus, the greatest of all Greek gods, and Demeter, the goddess of agriculture. In despair over the loss of her daughter, the grieving Demeter neglected her duty to provide for the spring crops, and before long the entire populace was threatened with famine. Zeus, concerned for the welfare of his subjects, intervened with Hades and negotiated for Persephone’s return, but Hades would not let her leave permanently.
It was arranged that Persephone would be allowed to return to the earth and be reunited with her mother for half the year, and that she would spend the other half in the Underworld. This is why each spring, when the goddess of agriculture is filled with joy at her daughter’s return, seeds sprout and break through the earth’s crust and green plants begin to grow, only to die and return underground in winter.
This garden celebrates the legend of Persephone with a glorious burst of early springtime vegetables and flowers.
In a medium to large container with a trellis, sow seeds of climbing peas, either snap peas or English peas, or a mix of both. Sow the seeds close to the bottom of the trellis, and plant them as early in spring as you possibly can—as soon as the soil is neither frozen solid nor totally waterlogged. Here in the Pacific Northwest, we use Presidents’ Day as our pea-planting rule of thumb. In parts of the Northeast, St. Patrick’s Day serves the same purpose.
All around the surface of the potting soil, set out small plants of several kinds of lettuce, as well as any other spring greens that catch your fancy. You may have started them from seed in February or March, or purchased transplants from the garden center. Incorporate contrasting colors and textures into this garden understory by planting several different varieties, including some of the cut-and-come-again types and mesclun blends.
Intermingle spring pansies among the lettuce plants. For a soft springtime color scheme, choose small-flowered pansies in pastel blue or pink.
Add one or more clumps of chives. Their spiky green leaves appear early in spring, a perky sign of the delicious taste to come; later in the spring, their lavender pom-pom flowers will accentuate the colors of the pansies.
Except for the chives, all these plants are cool-season annuals and will die—or seriously pout—once summer weather arrives. At that point we recommend that you remove all the spring plants and replace them with summer-loving ones (one possibility: the Romeo and Juliet garden on pages 188 to 190). Work carefully around the chives because you want to maintain them for future years. Next spring, when the first tiny shoots shoulder up through the soil, remember to thank Persephone.
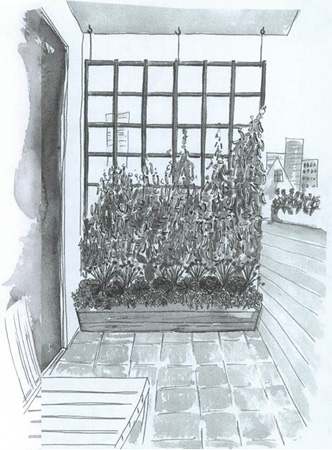
Roses have been the world’s most beloved flower since practically the beginning of time, and they are worthy of the passionate affection they inspire.
But can roses really be grown in containers? Yes, as long as you choose the right ones. If the word rose calls forth a mental picture of a single long-stemmed beauty, one perfect flower at the end of a long stem, nestled in with 11 others in a shiny white florist’s box, then you’ll need to expand your horizons and become acquainted with the various categories of roses.

Rose Basics. Roses have existed on earth in their wild form for millions of years, and they have been grown by mankind for pleasure and for healing for at least 5,000 of those years. When early humans began to cultivate the wild roses that grew around them, they set in motion a process of floriculture that eventually led to the development of many new strains of roses, and that continues to this day.
A seminal date in rose history is 1867, when the first hybrid tea rose was unveiled in France. Today, rose fanciers use that year as the beginning of what are referred to as “modern” roses; all types of roses in existence before that date are “old” roses, many of which are enjoying a well-deserved surge in popularity. The 1867 date is significant for us because the roses recommended for container growing are all modern types.
The number of rose varieties increased exponentially after 1867, as breeders around the world found enthusiastic customers for everything they could come up with. Today there are more than 20,000 different roses; to make discussion simpler, they are grouped into categories. Depending on which professional you ask, there are between 20 and 35 categories, and there is still honest debate about where the dividing lines are. (The final word on the matter belongs to the American Rose Society; see page 399.)
To choose an appropriate rose for your container, concentrate on the following four categories.
The first category we recommend for containers is the polyantha, which means “many flowers.” The first polyantha roses hit the market in the late nineteenth century, and since then hundreds of cultivars have been introduced. Polyanthas are distinguished by their bloom pattern: large clusters of many small flowers at the ends of their stems. They tend to be smaller plants overall, which makes them ideal for our purposes. Another wonderful feature: they bloom continuously all summer long.
Another significant development welcomed enthusiastically by container gardeners is the miniature rose. This type is just what you would imagine from the name: a miniaturized version of a classic rosebush. Some plants are so tiny they could fit in a teacup, but the standard size is around 1 foot. Miniatures show the complete range of flower shapes seen in full-size plants, they come in every rose color known, and many new ones are introduced every year. And for something that seems so fairylike and dainty, they are surprisingly hardy.
A third category of special interest to container gardeners is the patio rose. This is something of an in-betweener: larger than miniatures, smaller than polyanthas. Patio roses are generally between 1 and 2 feet tall, form a nicely shaped mound, and bloom heavily. As a category, patio roses are better known in England than in the United States, but some of the larger mail-order nurseries now carry a good selection. In 1999, the American Rose Society adopted a new category it calls mini-flora, which comprises plants that in size are midway between floribundas (the next step up from polyanthas) and miniatures. As a practical matter, we think of patio roses and mini-floras as being quite similar.
Finally, there are ground cover roses. They spread out horizontally and stay relatively low to the ground—the classic definition of a ground cover—and that makes them perfect for containers, especially if you like the idea of roses tumbling over the sides. You may find ground cover roses in well-stocked retail garden centers, but more likely in mail-order catalogs of rose growers.
Planting. The roses you purchase at the garden center, as well as from mail-order suppliers, will probably be packaged as bare-root plants (see page 290). The best time to plant them, in general, is spring. That is when you’re most likely to find them for sale in retail nurseries, and most mail-order nurseries schedule their shipping dates so that plants arrive at your best planting time. The exception is miniatures: they are almost always sold as potted plants, which means they can be planted at any time; also, some mail-order nurseries ship all their roses in pots.
To plant bare-root roses, follow the general directions on page 290. We’ve seen good results from fortifying the potting soil with compost mixed in at the bottom (roses are heavy feeders). The process is this: fill the container about one-fourth full with potting soil, add a layer of compost to about the one-third level, and mix them together very well. If you can’t find a good source for compost, use slow-release fertilizer granules (see Chapter 5) and stir them into your potting mix before planting. You might also add some hydrogel crystals (roses are also heavy drinkers). Then continue as described for all bare-root plants.
Planting roses that come in nursery containers is just like planting anything else from containers, but remember to incorporate extra fertilizer and hydrogel into the potting soil first.
Keep in mind that your rose will be in the container for many years. This will affect your choice of pots in terms of size (except for miniatures, large is better than small) and material (stay away from shortlived pots). It also means that you’ll need to give some thought to what else goes in the same container. Either combine roses with other perennials so you never have to dig into the soil, or, if you wish to plant annuals, choose those with very shallow roots so you won’t disturb the root system of the rose when planting the annuals.
Success with Roses. Mention your interest in growing roses, and you’ll hear horror stories about how temperamental they are, how hard they are to grow, how much work they entail, and so forth. We readily admit that roses are not as easy as, say, daylilies, but neither are they worthy of the bad rap they too often get.
Watering. Even in the ground in a traditional garden, roses need lots of water. In containers, which dry out much faster, they are especially vulnerable. Roses must never be allowed to dry out completely. Adding hydrogel crystals will help, but you still need to check the soil faithfully; in summer, you may have to water roses every single day. Don’t skimp, and don’t get careless.
How you water is also important. Water the soil directly, and don’t water from above; the idea is not to get the leaves wet. Damp leaves lead to mildew, black spot, and rust—fungal diseases that thrive in cool, damp environments. It’s preferable to water in the morning, so the sun has a chance to dry away any dampness during the day. If life’s circumstances force you to do your watering in the evening, be especially careful not to wet the leaves.
Fertilizing. Roses by their nature need lots of nutrients; however, because of all the watering you are doing, you’re continuously washing away the nutrients in the potting mixture. The solution, happily, is simple: fertilize frequently to replace lost nutrients.
A high-blooming plant such as a rose needs a complete fertilizer that is a bit higher in phosphorus (the middle number). Any general flower fertilizer with a ratio close to 1:2:1 (see Chapter 5) will work, although many gardeners prefer to use one of the commercial fertilizers specially formulated for roses. While the rose is actively blooming, apply fertilizer once a week. Begin to taper off in mid August, and stop altogether as soon as the leaves drop.
Pruning. We prune any plant for two purposes: to promote its health by removing diseased or problematic limbs, and to control its shape by directing its growth. Both are important for roses, but even more important is a related phenomenon: in plants that flower in the way many roses do, pruning for shape has the extra effect of promoting the production of flowers.
Here’s how it works. Speaking in very general terms, roses produce their blossoms out at the end of the stem (in roses it’s called a cane), rather than all along the stem as some flowering plants do. Also, speaking very generally, roses start growing each spring at the point where they stopped growing the previous year. Left to their own devices, then, the canes just keep getting longer and longer each year, so that eventually you have a very silly-looking plant with long, spindly stems and a few lonesome flowers at the ends. Pruning is what keeps that from happening.
In your mind’s eye, picture a yardstick and then imagine it is a rose cane. All along the cane, every few inches, there are buds that represent potential new stems; in the spring, as the plant comes to life after winter dormancy, those buds start to thicken. Pick a spot on the virtual yardstick where you want new stems to begin, and imagine cutting just above the bud that is closest to that spot. If your cut is at the 12-inch mark, then the one or two buds just below that point will form new canes, and flowers will form at the end of those canes. The first 12 inches from the soil line will be bare, except perhaps for some leaves. If you choose to cut lower down, at the 6-inch mark, say, then your rosebush will have bare stems for 6 inches, then new canes and flowers.
Now convert that imaginary yardstick into a real stem; even though it may not be as perfectly straight as a yardstick, the concept remains: prune back last year’s growth to the point where you want this year’s growth to begin. You won’t have a rose where you make your cut; you’ll have the start of a new cane.
Keep these principles in mind:
1. Pruning stimulates growth. The buds immediately below the cut open, and new growth follows.
2. In most cases, pruning is best done in the spring. Because pruning stimulates growth (see Principle 1), you don’t want to do it just as the weather is starting to turn cool, or the tender new growth will freeze.
In Victorian England, chaste young ladies and their suitors used floral bouquets to send each other messages of love. For this purpose many flowers and herbs were assigned special meanings, but it was the rose, that most storied of all flowers, that often carried the most complex, most subtle messages.

Certain rose varieties carried very specific meanings. The centifolia, one of the old roses, meant “My heart is in flames.” La France (the original hybrid tea rose, introduced in France in 1867) was very precise: “Meet me by moonlight.”
Communications of the heart are, of course, ripe for misinterpretation, and we can only wonder how these young lovers managed to declare their true feelings when some of the flowers had more than one meaning. Then, as now, love was hard.
3. Choose a bud that is facing outward, rather than in toward the middle of the plant, and make your cut just above it.
The other reason for pruning, to remove diseased or problematic limbs, is psychologically easier. Whenever you see a stem that is obviously dead, cut it off at the soil line. Cut back any broken stems below the break. And anytime two stems cross and rub against each other, one of them has to go; remove the one that is pointing in toward the center of the plant, cutting at the soil line. Do this cleanup pruning first, and the strategy needed to prune for shape will be easier to see.
Weatherizing. Roses are tough plants, but they do need to be protected from extreme heat and extreme cold.
In very hot weather, the danger is to the roots, and the solution is to keep the soil as cool as possible. If convenient, move the container into the shade in the hottest part of the afternoon, but don’t forget to move it back: roses need at least six hours of sun a day to bloom. A more convenient, and more permanent, solution is double-potting (see page 4). Place the container with the rose inside a larger container, fill the space between them with something like wood chips or moss, and keep that perpetually moist. The layer of insulation will protect the tender roots from overheating.
Double-potting requires planning. Since your original container is likely to be large and thus rather heavy, lifting it into another, still larger container will not be easy. If your summers are scorchers, it is wiser to create this double-pot arrangement before planting, and just leave it intact all year. The insulating layer will also help protect the soil against severe cold come wintertime.
Roses are vulnerable to freezing in areas with hard winters. In traditional gardens, the surrounding earth acts as insulation; in containers, there is no such protection. Where winters are bitterly cold, move the entire container into a more protected area, such as a garage or cool indoor room. If that’s not possible, wrap the container in a thick blanket of insulating material (see page 288 for some suggestions) and move it to the most sheltered outdoor spot you have.
Pests and Diseases. The biggest insect problem you will have, if any, is probably aphids. They love the juicy buds of roses, so keep your eyes open as soon as the weather turns warm and the flower buds get fat. See Chapter 6 for controls.
Roses are more susceptible to diseases than most of the other flowers you might consider growing in containers, and that is probably the source of their bad reputation as picky plants. But none of these diseases is an automatic life sentence, and they’re actually quite easy to get under control, especially if you take action at the first sign of trouble. In this regard you have an edge over traditional gardeners, since in containers roses are close at hand and right at eye level, and thus easy to monitor.
Three fungal diseases are the biggest problem for roses: black spot, rust, and mildew. Thanks to their very descriptive names, they’re easy to recognize. Black spot causes small black spots on the leaves, ranging in size from a pinpoint to a pencil eraser. Rust shows up as a spatter of rusty red specks on the leaves. And mildew appears as a splotchy coating of gray powder all over the leaves and buds. In truth none of the three will kill your plant, and often you can get by with ignoring the whole thing—except they’re ugly as sin, especially the mildew.
The best cure is prevention. First, realize that these diseases thrive in environments that are wet, cool, and thick with vegetation. Good air circulation is their enemy, so keep the roses and all surrounding plants pruned enough to promote airflow.
Many serious rose growers use a preventive spray every spring: a dormant spray that combines a horticultural oil with lime sulfur to smother insect eggs and fungus spores. A homemade, nontoxic alternative you can use for edible flowers is the baking-soda spray described on page 76.
If one of the Nasty Threesome shows up anyway, first of all remove the infected leaves and put them in the garbage. Then spray the plant thoroughly with the baking-soda solution, covering the tops and bottoms of all leaves; repeat every couple of days as needed.
Harvesting. Snip off the whole rose and its stem, so as not to leave an unsightly bare stem on the plant. Wash the flower carefully; roses, with their many folds of petals, are apt to collect dirt.
To use the petals individually, grasp the rose in one hand and cut the entire flower away from the base with scissors; make your cut high enough so that the bitter-tasting white heel at the base of the petals is left behind. (Then, of course, snip off the stem, for aesthetic reasons.)
Roses also dry beautifully, either an entire blossom or bud, or individual petals. The colors tend to darken, and the fragrance usually fades away, but it does mean you can have rose petals in wintertime. Dry them the same way you do herbs: spread individual petals out flat; hang whole flowers on stems upside down, just like herb bundles (see box).
Any blossom left on the plant will eventually form a fruit, called a hip, about the size and shape of a cranberry. The fruits are attractive in their own right, and a favorite snack for birds. Rose hips are very high in vitamin C and, as you may already know, can be used to make a delicious caffeine-free herbal tea.
Varieties. One difficulty with suggesting specific cultivars of roses is that there are so many of them, with dozens more introduced every year. This year’s favorite may be impossible to find next year, as growers develop new beauties and retailers succumb to their charms. It is with some trepidation, then, that we make our recommendations.
• Polyantha
Angel Face (mauve, fragrant)
Cecile Brünner, a.k.a. Sweetheart Rose (light pink)
China Doll (deep pink)
Lovely Fairy (darker pink)
Margo Koster (orange-pink blend)
Perle d’Or, a.k.a. Yellow Cecile Brūnner (yellow-orange)
The Fairy (light pink, cascading)
White Pet (white, fragrant)
• Patio
Gourmet Popcorn (white with yellow centers)
Regensburg (deep red with white overlay)
• Miniature
Winsome (lavender)
Jean Mermoz (pink)
Ralph Moore (red; 2000 ARS award winner)
Applause (orange-pink; 2000 ARS award winner)
Lemon Gems (yellow; 2000 ARS award winner)
Sweet Chariot (purple, fragrant)
Cinderella (white, fragrant)
• Ground Cover
Arctic Sunrise (white)
Gourmet Pheasant (deep pink)
Minilights (yellow)
Robin Red Breast (dark red)
Some ground-cover roses attain a height of 2 to 3 feet, but others, including those suggested here, are much smaller plants.
Floribundas have a growth habit similar to that of polyanthas, but they are larger overall and so most are unsuitable for any but extremely large containers. Two that do work well in containers as they are smaller than most others in their category are Margaret Merril (white) and Sunsprite (yellow, very fragrant).
Perhaps the best advice we can give you is to acquire the catalogs of rose nurseries (see Appendix) and become acquainted with their offerings. Look at the photographs and read the descriptive details, paying close attention to what the growers say about the size of mature plants. AARS winners and ARS Awards of Excellence for Miniature Roses (see box) are usually highlighted in the catalogs.
One small word of warning: you’re likely to find inconsistencies in how individual roses are categorized; one grower may include a certain plant in the list of polyanthas, while another may put that same rose in with the patios, or even the miniatures. Don’t let this worry you. In the long run, it doesn’t really matter which category a rose is assigned to as long as you’re getting a plant that is an appropriate size for containers.
Shopping for roses via mail order offers several advantages: you get to see the newest cultivars; you get complete, dependable information about the size of the plant, which is critical for container gardeners; and it’s a lot of fun.
Cooking with Roses. The citizens of ancient Rome, who knew how to throw a party, were especially fond of foods prepared with roses. They had rose wine, rose cakes and pastries, rose sauces for meats and game, and between courses they nibbled on rose petals sprinkled all over the banquet tables. For those of us who think we’re ultrahip by incorporating fresh flowers into our cuisine, it’s rather humbling to realize that this was an established food fad more than 2,000 years ago.
But that makes it no less delicious. The intoxicating sweetness that we associate with the most fragrant roses can be captured in cooking, adding a note of elegance and grace to many kinds of dishes.
Speaking very generally, the more fragrant a rose is, the stronger its flavor. Individual flavors vary from spicy to fruity, but always with the foundation of “rose.” There’s no other way to describe it: a rose petal tastes like a rose smells.
Because the flavor is something our taste buds identify as sweet, roses are especially appropriate for desserts and beverages.
Try adding chopped rose petals to:
• apple pies, tarts, or baked apples;
• custards and puddings (especially vanilla);
• cakes and cupcakes;
• sweet quick breads, such as applesauce or apricot bread;
• cream cheese, with nuts and chopped fruit, for a tea-sandwich spread.
Or steep shredded rose petals in hot water for half an hour to extract flavor and color. Strain out the petals and add the rose liquid to lemonade, fruit punch, or white wine spritzers.
Whole petals, flowers, and rosebuds can be used in these ways:
• Sprinkle petals of yellow, orange, or coral roses into spinach salads; make vinaigrette dressing with rose vinegar (make just like herb vinegar; see box).
• Cut petals of dark red roses into ribbons, add to carrot-pineapple salad; garnish with whole flowers.
• Add petals to fruit salad; garnish with whole flowers.
• Freeze tiny rosebuds into ice cubes (see page 372) and add to punch or iced rose-hip tea at a bride’s luncheon.
• From an early-twentieth-century herbal comes this idea for tea sandwiches, adapted for modern cooks. First, prepare rose-scented butter: thoroughly cover one or two sticks of unsalted butter with rose petals by rolling them in lightly crushed petals. Wrap each stick tightly in plastic wrap, and chill overnight. For the sandwiches, scrape away the petals and spread the rose-scented butter in an even layer on thin-sliced bread. Trim the crusts from the buttered bread, and cut the bread into fingers or triangles. Lay fresh petals between two slices of bread, letting some of the petals peek out over the edge.
• Make a composed salad using whole roses with flat, open flowers (the kind with just one layer of petals). Carefully snip off the stamens and pistil so that each blossom becomes a shallow cup. Arrange several of these rose cups on a bed of mixed greens, and fill each one with an assortment of goodies: melon balls, strawberries standing on end, or small balls of flavored cream cheese. Drizzle a lemon-honey dressing over everything.
The gentle giant of the American prairie ... the flower that captivated Vincent van Gogh ... the solemn religious symbol of the Aztecs ... the favorite floral hiding place for children. This cheerful flower named for the sun is so well loved for its happy countenance, it’s no wonder that it has found such a prominent place in the gardens of so many cultures, past and present.

One of the fascinating aspects of the study of plants is the way they help us track the great movements of history. We may not be able to remember kings and dates, but anyone who loves gardens and flowers can visualize the people of long-ago cultures working in their gardens, and thus get a very real sense of what was happening in their world at that time.
Many familiar garden flowers and food plants are indigenous to the temperate areas of Asia and the Middle East. When European explorers began their journeys to the East in the fifteenth century, their primary goal was commerce, but an important secondary outcome was the expansion of scientific knowledge.
Most of the expeditions included naturalists, who were as thrilled to find unknown specimens of plants and animals as the ships’ captains were to discover unknown lands. And so plants native to the East were introduced to the West, where many of them thrived and became part of the natural landscape.
A couple of centuries later, when settlers from Europe colonized the New World, they brought with them the seeds of the plants they had come to depend on, and so the botanical thread was extended from Asia to Europe and thence to the Americas—almost full circle.
But sometimes the circle turned the opposite way. The first Europeans to visit the New World found some plants that were unknown to them, including significant food crops that had sustained native Americans for millennia: corn, squash, beans, and peppers both hot and sweet. They also reported a stunning flower; tall as a tree, strong and supple, with an enormous flower head that moved throughout the day to turn its face to the sun it so closely resembled in shape and color.
Returning home, these Europeans brought with them seeds of this exotic plant, and soon sunflowers were to be found in the gardens of Europe:
• In France, where years later Vincent van Gogh was enchanted by vast fields of them.
• In the Netherlands, where their ability to soak up large amounts of water was put to good use in the reclamation of low-lying marshlands.
• In southern Russia, where the open spaces of the Russian prairie were the perfect ground for cultivation. Today, close to 90 percent of the world’s commercial crop of sunflowers comes from Russia.
Back in the New World, the hefty flower with the nutritious seeds flourished throughout North America, especially on the Great Plains. Today visitors to Kansas, the Sunflower State, send home postcards of the mammoth plants. And wherever it is grown, the cheerful sunflower never fails to warm the heart of those who encounter it.
Sunflower Basics. Sunflowers are annual plants: they go from a seed to a tall plant bearing bright-faced flowers and a big seed head all in one season. That cycle—seed to flower and back to seed—is something we all understand intellectually, but in sunflowers we get to observe it in a very memorable way. That’s one reason sunflowers are so good for children to grow: few lessons in science are this much fun.
The familiar tall plant that comes to mind when you think of sunflowers usually has just one large blossom at the top. But newer varieties have been developed that form numerous branches, creating a shape more like a shrub than a tree, and these are more suitable for containers.
The cheery blooms are beautiful in cut-flower arrangements. The brightly colored petals are edible, and are very pretty sprinkled onto green salads. But if you want to have sunflower seeds to munch on, you must leave the flowers on the plant to fully mature, at which point the petals will have completely died off. You can, in other words, have edible flowers or edible seeds, but not both—at least not from the same flower head.
Planting. Sunflower seeds are large, easy to handle, and germinate quickly. Start seeds indoors two or three weeks before the spring frost date, then set the seedlings out into your containers when all danger of frost has passed. Or if your growing season is long enough, you can plant seeds directly into the container. Most of the dwarf types reach bloom time in 60 to 75 days.
You may also find sunflower transplants for sale at the garden center in the spring; these can be tempting, but be careful. Large garden centers typically offer only the familiar tall plants, since that’s what most people expect. But full-size sunflowers are simply too large for containers, and are practically guaranteed to blow over come the first good wind. Nursery labels, alas, are not always exact. The only way we know to be absolutely sure of getting a dwarf variety that will work in containers is to order seed from a mail-order catalog.
Success with Sunflowers. These gigantic flowers are quite easy to grow. They tolerate hot, dry weather better than most flowers. Although no one recommends actually letting the plants go dry, it probably isn’t a mortal error if you miss watering now and then. To encourage sunflowers to reach full maturity, fertilize and water regularly. Late in the summer you may see rust or powdery mildew on the leaves (about the time these diseases show up on your cucumbers), but seldom are they fatal; see Chapter 6 for controls.
Harvesting. To use the petals, simply pull them from the flowers. If you’re careful, you can remove a few individual petals and leave the flower on the plant for the seeds to mature.
If you love roasted sunflower seeds, you’ll find it very satisfying to grow them yourself—that is, if you can harvest them before the birds do. Something like 40 species of North American birds enjoy sunflower seeds as food, and you’re sure to have a few of them where you live. To keep the birds away, cover the ripening seed head with protective fabric or tie on a large paper bag. When the seeds are fat and move easily when you wiggle them, they’re ready. In the long run, though, you may find it even more pleasing to leave the seeds to the birds. Then you can simply sit back and watch the show, as dozens of these beautiful creatures drop by your patio for lunch.
Cooking with Sunflowers. As a container gardener, you have the choice of using sunflowers at any one of three stages:
1. The immature buds can be steamed or sautéed and served like artichokes. (This is a treat that only those who grow sunflowers can enjoy. When the buds are fat enough to have some substance, but before they begin to open up into a flower, cut them off with your pruners.)
2. The bright-colored petals can be used much in the same ways as marigold flowers (see page 375); there is a distinct bitter tang to their flavor.
3. The mature seeds are a nutritious snack.
Varieties. You may be interested to know that the tallest sunflower on record is more than 25 feet high, and the largest recorded flower head is more than 32 inches across. But not all sunflowers are the height of a two-story building with a flower the size of a garbage-can lid. Happily for container gardeners, flower breeders have developed dwarf varieties with short, branching trunks and smaller flowers. And they have given us a variety of flower colors and shapes, too. While the familiar flat flower head, with just one layer of golden yellow petals surrounding a dark center, is the most common, you can also find flowers in other hues (burgundy red, burnt orange, bronze, white, and two-toned) and double flowers in the shape of fluffy pompoms. Here are several appropriate for growing in containers.
Sunspot is a rather small plant (2 feet high) that produces astonishingly large flowers: 10 inches across, with a very large seed head in the center.
The well-branched Sundance Kid reaches a height of approximately 1½ feet, with flowers 4 to 6 inches in diameter. The flowers themselves may be different colors, from pure yellow through and through to a darker bronze-and-gold blend.
An award-winning Music Box is a bit over 2 feet tall and bears lots of 4-inch flowers on its many branches. From one packet, you’ll get sunflowers in a range of colors.
Big Smile is a full-size (5-inch) classic flower—bright golden yellow petals around a dark center—on a plant that rarely tops 1 foot tall.
Pacino produces soft yellow flowers 4 to 5 inches across. Plants stay about 1½ feet in containers, and produce lots of side branches.
Teddy Bear is sure to delight children. Most sunflowers are flat as a dinner plate; this one is rounded and very frilly and fluffy, rather like a marigold on steroids. The 6-inch flower is bright golden yellow, with no visible seed center, and fuzzy to the touch. Plants may reach 2½ to 3 feet in height.
All gardening is, to one degree or another, an act of faith. You put something into soil and you expect or hope or pray that it will flourish. This is true with small transplants and shrubs, on which you can already see the promise of future glory, but know intuitively that it comes with no guarantees. It is true with seeds, which hold their destiny encased in a small, plain-looking package that bears no visible relation to the plants’ ultimate form. And it is especially true with tulips, with their counterintuitive timing.
We put tulips (and other spring-flowering bulbs) into the earth in the fall, just as all the other plants are in the process of shutting down for the winter. If all goes well during the cold season, we will be rewarded with a burst of glorious color the following spring. In the meantime, we and all around us are turning inward, coming inside, consciously and deliberately moving away from the natural world outdoors. While they are developing underground, the tulip bulbs are completely hidden from sight, depriving us of even the kind of stark winter beauty that many trees and shrubs display. It is easy to forget that tulips exist.
There is something poignant and surreal about planting just before winter. It feels illogical, even backward. But tulips cannot be grown in any other way, which is why planting them represents the purest form of a gardener’s faith.
The outcome of that faith is a brilliant flash of some of the most intense color you will ever see in nature, at the time you most need it: just when you think you can’t bear another cold, dreary winter day. That such beauty is also good to eat is an unexpected bonus.
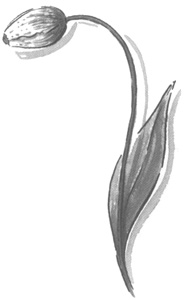
Tulip Basics. Tulip bulbs contain the embryonic raw material for long, strappy leaves and (usually) just one flower stalk. Most flowers are large and vibrantly colored, lasting on the plant for about two weeks. Depending on variety, the blossoms will appear in March, April, or May. By choosing carefully from the many types and classes available, it’s possible to enjoy tulips over a long span of time. They make wonderful cut flowers, and add a strong note of color to your cuisine.
Just about every tulip bulb you plant is guaranteed to produce a gorgeous flower the following spring. Whether it comes back the second spring is another matter. When they reach a certain level of maturity, tulips reproduce themselves by growing small bulblets, called offsets, attached to the mother bulb. The mother bulb, knowing it has done its duty, starts a mortal slide downward. In commercial fields, the offsets are harvested and planted for future inventory. We could do that, too, except that they take several years to reach the flowering stage; in the meantime, there are no flowers. So it is a foregone conclusion that at a certain point, a tulip bulb will decline and flower production will go on hiatus. The difficulty is that you cannot tell by looking whether a bulb you purchased is at that point. Sometimes a bulb will flower for two or three years, sometimes not.
As a practical matter, therefore, many people treat tulips as annuals and plant new bulbs every fall. To avoid disappointment, we recommend that you do likewise.
Planting. A tulip bulb has the general shape of a very large teardrop, with one more-or-less flat end and one pointed end. Plant the bulbs with the pointed end up. Here’s the basic process.
First dig out a space for the bulbs. How deep? One rule of thumb is two to three times as deep as the bulb is fat; 6 inches is a good round number. Sprinkle some phosphorus-rich fertilizer in the bottom of the hole, either bone meal or commercial bulb food. Set the bulbs in place, quite close together, and cover with your potting mix. Mark the area in some way so you won’t accidentally dig into the bulbs next spring if you plant other things in that same container. If your winters are severe, put the pot in a sheltered location, or cover the soil with mulch, or both.
It is also possible to add tulip bulbs to an established container in which you already have a small tree or other perennials; you just have to be a bit more careful with your digging. Also, if the container where you wish to have tulips next spring still houses flourishing tomatoes or cucumbers in September or October, you’ll have to work around them. Usually it’s only a matter of lifting the vines aside temporarily while you insert the tulip bulbs underneath.
Those of you who live in the South or the Sun Belt have one extra step. Tulips need to go through a period of cold weather to form roots and to activate the embryo inside the bulb. If Mother Nature does not provide that cold period, you’ll have to step in. Acquire your bulbs no later than November 1, and store them in the refrigerator for six to eight weeks. Around Christmastime, plant them in the containers. It’s a nice thing to do in the week between Christmas and New Year’s.
Tulips need to be planted in potting soil that drains readily, so they don’t rot during the winter. If you had a traditional garden, you might also have to take special precautions against underground animals or insects that munch on bulbs, but as a container gardener, you completely avoid that problem.
Success with Tulips. Once you make peace with the fact that you may not be able to keep tulips from year to year, the rest is easy, for tulips are remarkably free of diseases and other problems. Starting with fresh bulbs, all you really have to do is enjoy the gorgeous results. But if you do want to try to rejuvenate the bulbs for next year, here’s what to do.
Once the flowering is done (the flower head simply disintegrates as the individual petals fall off), cut off and discard the stem and leave the foliage in place. It will gradually turn yellow, and that’s your cue to remove it. You can tell when the proper time has arrived because the leaves pull away easily with a gentle tug. As they mature, the leaves transmit energy down to the bulb for winter storage; that’s why you must leave the plants in place until the process is complete, even though they look ugly in the interim. You can disguise the yellowing foliage by tucking in some annuals around them.
Continue to fertilize the container (which you will do anyway if other things are planted in it) through the summer and again early next spring, when the pointy tips of the foliage first emerge, and keep your fingers crossed. If you get leaves but no flowers the second spring, remove the spent bulbs and start over with new ones in the fall; a second year of fertilizing isn’t going to help.
Harvesting. Snip off the entire flower (and remove the remainder of the stem from the plant for aesthetic reasons). To use the whole flower, carefully take out the stamens and pistil; for individual petals, simply pull them from the base. Just remember that, unlike most of the flowers we suggest in this book, tulips don’t rebloom after cutting. Except for some very specialized types that produce multiple stems, one tulip bulb is going to make one flower, and once it’s gone, it’s gone.
Varieties. Rather than name individual varieties of tulip, of which there are a gazillion, it may be more useful to you if we acquaint you with some general classifications.
One way of categorizing modern tulips is by time of bloom. Thus you will see that many mail-order companies group their offerings into “early,” “midseason,” and “late” (March, April, and May, respectively), and in fact official classifications of tulip groupings include single early, single late, double early, and double late. Other group names you may encounter refer to the shape of the blossom itself: lily-flowered and peony-flowered are what you would imagine from the names; parrot tulips have petals with very feathery edges; fringed tulips have a very frilly look.
Darwin tulips and Darwin hybrids, with their familiar squarish flowers in dynamite colors, are among the most popular and most common types; they are midseason bloomers. Triumph types were crossbred from Darwins and so have very similar blossoms but extra-sturdy stems. So-called cottage tulips are egg-shaped late bloomers.
And every one of these comes in such a range of fabulous colors and color combinations that you’ll have no trouble finding ones that make your color scheme sizzle and pop.
As if that weren’t enough, you can also choose from a wide range of species tulips, sometimes called botanical tulips. Like other species plants, these are the original, wild forms of the flower, cultivated by modern growers but retaining all the original traits of the wild plant. Species tulips are small, low-growing, and early blooming; a very pretty arrangement is to use them as a lower tier underneath full-size tulips.
All these types can be ordered from mail-order catalogs, where you’ll find so many temptations your head will spin. Or you may prefer to buy from your local garden center. Happily, retail nurseries and garden centers inevitably remind us when it’s time to plant tulips by setting out an enticing array of bulbs. Some are packaged in groups of five to ten, with a large photograph showing the flower in bloom. You can also buy from bulk bins, filled with individual bulbs; choose the fattest, firmest bulbs you can find.
Cooking with Tulips. The undertaste of tulip petals is usually described as being reminiscent of fresh garden peas, which makes tulip blossoms especially appropriate for entrées and salads. Their dazzling colors also contribute panache to desserts, and we won’t overlook that aspect, but when you’re looking for flowers that lend themselves to main dishes, think tulips.
• Cathy Wilkinson Barash, who has given us so many wonderful ideas in her books on edible flowers, suggests stuffing whole blossoms with tuna salad (remove the stamens and pistil first). You can expand that idea in any direction: pasta or rice salads, tabbouleh, potato and roast beef salad, coleslaw, marinated cucumber salad, and so forth.
• Cut petals into thin ribbons and sprinkle over steamed vegetables. Look for good color combinations: orange or yellow with spinach, white or pale apricot with peas, dark red or purple with potatoes.
• For a luncheon salad, first line the plates with dark green lettuce leaves and tuck in a few brilliantly colored tulip petals—perhaps pure lavender or a two-toned pink.
• Here are a few possibilities for your hors d’oeuvres tray:
• Marinated mushrooms accented with whole petals of deep orange tulips.
• Sliced pâté on a bed of bright red tulip petals.
• A spread of cream cheese and diced smoked oysters, showing bright specks of shredded yellow tulip petals.
• Rounds of English cucumber, spread with softened cream cheese, then topped with one magenta tulip petal and a few curls of lemon zest.
Victoria ruled the British Empire for 63 years, longer than any other monarch before or since. She assumed the throne in 1837 when she was 18 years old, and was still active as ruler when she died at the age of 81. During her reign Great Britain became the leading world power. Largely free from war during the period, England developed into the world’s first urban industrialized society, and with that came the mix of economic prosperity and social problems that remain the hallmark of the modern age.
Today our main impression of Victorian society is that it was uptight, repressed, and prudish. But human nature is seldom one-dimensional, and Victorian England was far more contradictory than it was clear-cut. While Victoria was queen, Wordsworth and Shelley wrote some of the most sensual poetry in the English language; Charlotte Brontë captured the dilemma of an entire generation of women with her story of the young Jane Eyre, struggling between sexual desire and a sense of duty; Charles Dickens goaded the country into passing child labor laws with his strong novels of urban poverty; and Charles Darwin challenged traditional religious views with the publication of On the Origin of Species.
That same sense of contradiction can be seen in the decorative styles of the day. We think of Victorian interiors as terribly formal, stiff, overstuffed, and overdecorated, and often they were. But in protest against that overblown style, the architect and painter William Morris founded the Arts and Crafts school that remains so popular today.
In gardening we can see that same shift. Early in the Victorian period, gardens indoors and out were formal and artificial; in England, the most untropical climate imaginable, large tropical plants were the height of fashion. Near the end of the nineteenth century, under the influence of garden designers like Gertrude Jekyll, things began to loosen up. The lush, flower-packed, but definitely unrigid Jekyll style is best recognized in what we today call the cottage garden, filled with old-fashioned, well-loved flowers (although in Jekyll’s day no one would have considered them old-fashioned).
If we can say anything definitive about the Victorians, it is that they had a passion for flowers, flowers, and more flowers. And that is why our Victorian container garden is stuffed with them, along with highly decorative herbs. But in keeping with the theme of this book, all the flowers are edible.
To accentuate the Victorian look, you might consider planting this garden in an antique or white wicker container. If you find something wonderful, the container itself becomes part of the overall look, and you’ll want to make sure it gets a place of honor. At the same time, of course, make sure it’s large enough to hold all the plants you intend to include.

One style that we have admired is made of white wicker; it is essentially a long rectangle set on legs, and has a sweet, old-fashioned appeal. We’ll describe this garden as if it were in such a planter—that is, long and skinny—but you can readily adjust it to a garden-in-the-round if need be. Also, in the spirit of the Victorians, we will create a symmetrical, slightly formal arrangement.
In the center, one scrumptious rose. Depending on the size of your container, select either a polyantha or a patio type (polyanthas are the larger of the two). Choose a color that you love, for it will establish the color scheme for your garden. Anything white, pale peach or apricot, soft pink, or pale lavender will look lovely. On either side, a large lavender. The species known as Spanish lavender has flowers much showier than most lavenders. Next to the lavenders, one or more miniature roses in colors that harmonize with the lavender and the large rose.
Between the lavenders and the large rose, and slightly in front of them, place two rose-scented geraniums. They will not be the most floriferous plants in your garden, but will give off an incomparable rose fragrance when touched. On either side of the geraniums, more miniature roses.
Fill in the balance of the front row with violets, violas, and pansies in shades of soft purple and pink, and with decorative herbs, including tricolor sage and cascading thyme, perhaps Silver Lemon, delicately edged in white. Aim for a full, lush look; put in lots of plants.
This garden will give you flowers from early spring (the violets and pansies) through fall (roses). All these plants will last for a number of years, except for the pansies, which you will want to replace each spring, and the geraniums, which will be killed by severe cold. If you fall in love with your geraniums, take cuttings in late summer and root them indoors in the winter, ready to go back into the planter come spring.
You may wish to embellish the planter with several pretty pots of pastel tulips arranged near the base. Among the prettiest and most Victorian-looking are the ones with fringed petals. Because tulips are most successful when planted anew each year, we suggest you use separate containers that can be easily moved aside when the tulips are finished blooming.
To create a similar look in a large round container, put the tallest rose in the center, the lavenders, miniature roses, and geraniums around it, and the herbs and smaller flowers in the outermost ring. Plant tulip bulbs in a separate pot, and sink it into the soil of the larger container; when the tulips are past, lift out that pot and set it aside for replanting in the fall.

