CHAPTER 7
CONVENTIONAL BREWING INGREDIENTS
IF YOU’RE GOING TO EXPERIMENT with beer, you definitely need to take some time to master the ingredients that form the foundation of all beers. Although different beers can have a lot of different ingredients, from fruit to spruce, there are four main ingredients that you’re sure to see: grains, hops, yeast, and water. These are the components that every brewer must consider when making or drinking beer. And then there’s the matter of oft-maligned sugar. It may not be beloved by the Germans, but virtually every other brewing culture out there has discovered great uses for it. From British Bitters to Belgian Dubbels to American Imperial IPA, sugar is everywhere you turn. You just have to know how to use it.
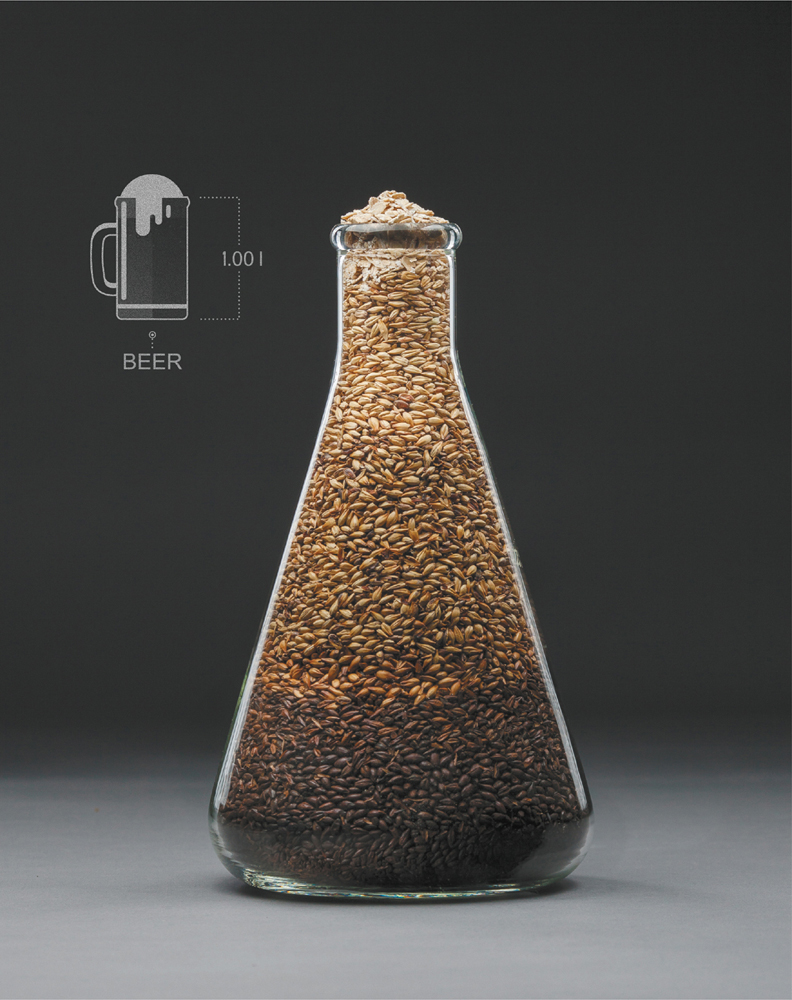
GRAINS
Grain is the heart of a beer. In fact, the fermented grain we know as malt is what separates beer from fermented fruit beverages such as wine and cider. Before we look at specific grains, let’s first look at the process that allows grain to be made into malt.
MALTING
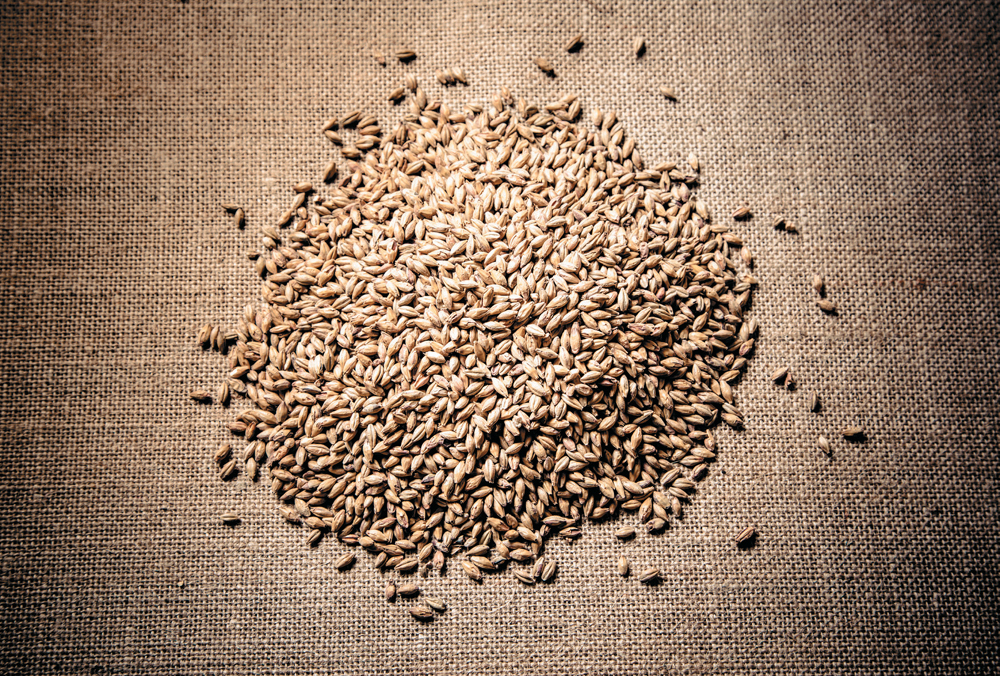
The malting process starts the activation of amylase enzymes in the grain, which eventually convert the grain starches to fermentable sugars. First, maltsters dampen the grain to a specific moisture level. The moisture is maintained at a specific temperature until the grain begins to germinate.
You’ll often hear brewers talking about modification. It’s this germination process they’re referring to: The sprout coming out of the end of the grain is referred to as an acrospire, and the amount it grows reflects the amount of modification of the grain. The longer it sprouts, the further the activation of grain enzymes has gone. This activation, in turn, is an indicator of how easily the grain can be mashed. As the acrospire grows, the protein levels of the malt reduce, the starches are released from their protective matrixes, and the plant begins to consume them. However, if the maltster lets the process go on too long, they end up with either new barley grass or grain that’s too mealy and mushy for proper use in the brewery.
Note: In the past, malts generally only achieved a low level of modification and had to be mashed using tedious processes that took the grain through a series of temperature steps, each of which activated different enzymes. (The enzymes reduce haze, increase foam production and retention, and control the body of the beer. Which enzymes are activated to work on the malt depend on the rest temperatures and the impact on the time a step is held.) Modern malts are generally highly modified, though, meaning that they can, and should, be mashed at a single temperature for the best results. In fact, if the malt is very highly modified, step mashes can actually be detrimental. If you use the wrong temperature step or hold a step for too long at a low temperature, you can ruin the foam or body of a beer!
Once modification has reached the maltster’s preferred level, the grain is dried to halt further acrospire growth. The grain is then put in a kiln and heated to both dry and achieve a specific color (which translates to flavor), depending on the type of malt being produced. How the malt is treated during this drying stage (extra water, multiple temperature steps, and so on) affects not only the color but also the flavor.
Malt color is measured on the Lovibond (°L) scale. It covers the yellow-to-copper-to-red-to-brown/black range that you find in all malt beers. The scale was invented by a British brewer, Joseph William Lovibond. He developed a device made of stained glass (originally liquid-filled jars) called a tintometer to describe beer color. He was driven to develop this device because he was convinced that a golden amber color was a sure sign of a high-quality beer. Eventually his tintometer would be replaced by frequency analysis of light, but the Lovibond unit is still in use.
You will sometimes see malt color specified in standard reference method (SRM) units. In fact, the Lovibond ratings of modern malts are back-calculated from worts made with them in the lab passed through SRM analysis. Usually a standalone SRM measurement refers to the color of the finished beer. Practically speaking, SRM and °L are identical.
A competing version of SRM is European brewery convention (EBC). The measurements and calculations are almost identical. Both required turbidity-free wort in a fixed sample cell. Labs then measure the reaction to a stimulating light at 430 nanometers. The number is converted and ultimately multiplied by a different number (12.7 in the SRM/°L system, 25 times in EBC).
To convert any EBC measurements into SRM, divide the EBC by 1.97:
SRM = EBC / 1.97
To convert SRM to EBC, you just multiply:
EBC = SRM × 1.97
For on-the-fly conversions, simply multiplying or dividing by 2 will get you into the ballpark.
Malt Genetics
We’re about to fall into a world of malts. It is important to understand that these types are generic terms for a general characteristic style of malt. Lying underneath all these comments of pilsner malt and pale malt, two-row and six-row is the notion of strain variety.
In the United States you’d have a hard time knowing about strain variety because domestic malts are usually sold to homebrewers by general style monikers. German malts usually are sold by the generic type as well, but if you look at British malts, you’ll see the varieties poking out.
For instance, Maris Otter is not a pale malt toasted in a particular fashion; it is the strain. It was developed in the late 1960s in Britain as a high-yield winter barley variety for cask beer makers. Because the strain is nearly fifty years old, it’s been passed in yield and stability by newer strains and is hanging on just barely, because of its flavors. You’ll see others from Britain as well: Pipkin, Optic, Halcyon, Golden Promise, and so on (see page 195 for tasting notes). Just about the only European malt you’ll ever see explicitly referred to by strain is Moravian, the traditional malt of the Pilsen region.
Every great once in a while, you will see recipes still refer to American strains such as Klages, Harrington, or even B1202. Klages is no longer commercially grown, and even Harrington, once the king of American malts, has faded. Modern varieties such as Tradition, Lacey, and AC Metcalfe have taken their place.
Here’s the question, then: Why don’t we know about these varieties? It’s a not a nefarious conspiracy; the truth is that buyers are usually interested in the variety as much as the data. Barley variety development at several US Department of Agriculture (USDA) Agricultural Research Stations (and similar institutions around the world) is driven by the demands of the biggest customers, the mass breweries. Comparatively, craft brewers are just now getting some sway while we homebrewers are the gleaners of the industry.
What do the big brewers want? More than anything, they want consistency, low cost, and low protein with high enzymatic content and starch content. That translates to less room taken up in the mash tun and stronger, clearer, smoother, and more stable wort. The farmers—who already lose a ton of money to barley not fit for malting and beer making—want to increase their product yield that fits the numbers needed for malt. Less than a quarter of the world’s barley growth meets the statistics for the higher-price malting barley category. The rest goes to cheap farm feed.
So farmers want consistent yields, but brewers need consistent numbers for repeatability. How does a maltster faced with a naturally varying agricultural product deal with this dilemma? Maltsters blend—and that is the reason your malt isn’t coming to you as “Tradition” Pale Ale Malt. By blending multiple varieties, a maltster can dial in their numbers (unless the growing season has been truly terrible).
Malt Numbers
Unless you’ve been buying sacks of grain, you’ve probably never realized that each bag of grain is tagged with lot numbers and tracking data. Some bags come with a malt analysis card, and for others, you can use the lot number on the maltster’s website to download the data. What each company provides is different, but there are a few numbers you should pay attention to:
• Color: Unsurprisingly, this is the color rating of the malt—in SRM, Lovibond, or EBC. The value is determined by analyzing the wort produced by a Congress mash (see page 133).
• Diastatic power (degrees Lintner): This is the measure of the enzymatic power of the malt.
• Extract, fine grind, and coarse grind: This indicates how much starch we should predict being available to us from a malt. The different grind types reflect perfect lab conditions with no concerns about slow lautering (fine) and real-world brewery conditions (coarse). You’ll notice that the coarse numbers are always lower and only available for base malts. Specialty malts typically grind finer than base malts, thanks to the extra kilning. Look for the “as is” rating; that’s the percentage with the moisture weight calculated in. The primary thing to watch for is that the numbers should be in the high 70s and 80s. You can multiply this by 46 (sucrose weight) to determine the maximum gravity you get from a perfect mash. Malt with an as-is basis of 80 percent would provide a maximum of 36.8 points per pound of malt. You then multiply that by your efficiency to see what you would actually get: 36.8 × 70 percent = 25.76. If the maltster provides only a dry basis number, subtract the moisture content from the percentage before using. (For example, if the dry basis coarse grind number is 84 percent, and the malt has 4 percent moisture, you’d calculate using 84 percent – 4 percent = 80 percent.)
• Moisture: Moisture affects the storability and milling characteristics of a malt. If the kernels are too dry, the malt will shatter and absorb more of your mash liquor. Moist malt, on the other hand, can gum up the mill and not crack cleanly. Moister malts also have shorter storage lifespans. Be careful with your malts and allow them to breathe from time to time if storing in an airproof vault. Moisture that leeches out in the drier environment can sit on the kernels and rot them.
• Protein: Modern brewing malt development has been driven in part to reduce the amount of protein in the kernel. Excess protein levels can cause stuck, gummy mashes; darker beer; and most importantly, harsh, hazy beer that has particulates (proteins) settling out in the bottle or keg. You wouldn’t think this would be a problem normally, but you can save yourself some heartache by paying attention to this number. A few years back, several maltsters’ supplies of Maris Otter had higher protein levels, leading some of us to have harsh, cloudy batches.
BASE GRAINS
Base grains are just what they sound like: the base fermentable upon which you build your beer. The most common base grain is barley, although wheat or other grains can also be the base of a beer. Most base grains are malted, although unmalted grains can be used as well. They’re kind of a special case, which we’ll cover in a dedicated section (page 141).
Barley grows in two forms, commonly referred to as two-row and six-row (the number of rows of kernels you see on the head of the barley). Six-row barley used to be the standard variety grown in the United States for brewer’s malt due to its hardiness. It traditionally had a higher protein (and thus, enzyme) content than two-row barley. It therefore was more suitable for using in beers that contained adjuncts like rice or corn, which are unmalted and have no enzymes of their own. They relied on a surplus of barley enzymes to convert the starches in them to fermentable sugars.
These days, barley breeding has produced two-row barley that has nearly the same enzyme (or diastatic) power as six-row malt has traditionally had. There is no longer a reason to use six-row malt just to convert adjuncts at normal amounts.
In addition, six-row barley has a slightly grainier flavor that can be objectionable in some styles. Some brewers perceive an extra astringency from six-row’s greater quantity of husks. Lighter styles with nothing to cover the flavor of six-row are usually not appropriate for it, although it’s a welcome addition to styles such as cream ale or Classic American Pilsner. Six-row can be fine for some specialty malts in which the flavor is more defined by the level of roasting rather than the flavor of the barley itself. Additionally, the extra husk material can be a boon to those who make beers high in huskless adjuncts such as wheat, rye, corn, and oats.
Many maltsters simply call their light-colored (approximately 2 Lovibond) base malt two-row. That can be misleading, since almost any malt you buy is made from two-row barley. A more accurate designation would be two-row pale malt or even simply pale malt. Just be aware that all of these can refer to the same thing.
Pilsner Malt (1.2°L–1.8°L)
Pilsner malt is the lightest-colored of all the malts. Pilsner malt is also sometimes referred to as lager malt. This is the preferred malt for very light colored beers, such as … well, pilsner! It is also typically used for tripel, Kolsch, blond ale, and cream ale, among other styles. Its light kilning means that you get the full malt flavor, unobscured by any toasty flavors created by the kilning. The one possible downside of the light kilning is that there is an increased chance of having a finished beer with DMS (dimethyl sulfide). This gives the beer a kind of cooked-corn aroma. All malt contains a precursor to DMS called SMM (S-methyl methionine). SMM can be limited to some extent by slightly undermodifying the malt or kilning at a higher temperature. The SMM present in malt means that DMS will always be produced, but since it’s a fairly volatile chemical, a large portion of it can be driven off by a vigorous boil. This is the basis of the recommendation to do a longer boil with pilsner malt than with pale malt. The longer boil will drive off more DMS. It’s also the reason it’s recommended to boil with an uncovered kettle. You want the DMS to be able to escape.
It used to be thought that pilsner malt always required a multistep mash, including a protein rest. That’s because traditional pilsner malt (such as Moravian) was undermodified. These days you have to look really hard to find a pilsner malt that requires a step mash. It’s modified just as much as pale malt, and almost any pilsner malt can be used with a single-infusion mash. If you’re in doubt, you can check the website of the maltster to see what they recommend. Or you can do an experiment and decide for yourself.
Pale Malt (1.8°L–2.2°L)
Pale malt is kilned a little darker than pils malt so that the malt just starts to take on a little toastiness in flavor. Pale malt is the base of many ales, from American pale ales to British bitter. It can be mashed with a single temperature mash. Because it’s kilned at a higher temperature than pilsner malt, the risk of DMS in the finished beer is greatly reduced. A 60-minute boil is sufficient for DMS reduction in pale malt.
Pale Ale Malt (2.6°L–3.5°L)
Pale ale malt is a lot like pale malt, but kilned just a bit darker to get an even more toasty flavor. Pale ale malt is especially well suited to British styles due to its deeper flavor compared to pale malt. The difference, though noticeable, is subtle. While it will add depth of flavor to a beer, pale malt can be used as a substitute.
British pale ale malts are usually made with different varieties of barley than US pale ale malts. One barley variety commonly used is called Maris Otter. It has been said that British malts in general, and Maris Otter in particular, have a richer, maltier flavor than their American counterparts. That can work well in some beers but can also be inappropriate for American style ales.
Vienna Malt (2.8°L–3.9°L)
Going a little darker, we have Vienna malt, named for its city of origin. Vienna malt can be used in combination with other malts to provide a maltier, toastier profile, or as 100 percent of the grist for the Vienna lager style. In the mid-1800s, lagers were just beginning to be understood, although there is evidence they had actually been brewed far longer. Owing to the technology (or lack thereof) at the time, all malts were dark. When Anton Dreher began brewing his lagers in 1841, Vienna malt (who knows what it was called then) was the lightest malt available. Today’s brewers are uncertain exactly what color the original Vienna lager was. Some say reddish; some say a very dark gold. Since no original examples remain, it’s purely speculation at this point. But most agree that this darkish malt was the base of those beers. Besides its toasty, malty flavor, it’s been noted to impart a dryness to the beer that can enhance drinkability.
Munich Light Malt (5.1°L–7°L) and Munich Dark Malt (8°L–10°L)
Munich malt has a very rich, sweet, malty flavor with a noticeable toastiness. Either variety can be used as 100 percent of the grist of a beer, or used in conjunction with other malts to deepen flavor. For example, using Munich malt along with wheat malt is the grist bill for a classic dunkelweizen. Using Munich as 10–25 percent of the grist for an American IPA works great as a backdrop for the high hop rates of that style. You can even make a great American IPA using Munich malt as 100 percent of the grist. Although altbier traditionally uses little to no Munich, a great altbier variation can be made with an all-dark Munich grist, coupled with Spalt or Mt. Hood hops.
Wheat Malt (1.7°L–2.4°L)
Not many malts are so special that they get whole classes of beer all to themselves, but that’s how fundamental wheat is and has been to brewing. Two primary varieties of malted wheat are available: white and red. The difference is in the bran coating the kernel. It’s no surprise that red wheat is darker and more common, whereas white wheat was developed from albinolike versions of its older cousin.
In tasting, white wheat is generally considered to be sweeter and more breadlike, while red is more hearty and earthy. The debate over which variety to use rages on. The debaters point out the advantages and flaws of each type.
You may also see mention of spring and winter wheat. Winter wheat, which is planted in the fall and is harvested at the break of spring, is almost always a red wheat. It is considered more robust than spring wheat, which is planted in spring and harvested at the end of summer.
In beers, such as the revitalized Bavarian Hefeweizen, malted wheat can make up 70 percent of the grain bill. This indicates that the malt carries sufficient enzymatic load to self-convert. In fact, it is possible to make a 100 percent wheat beer, if you can figure out how to lauter the wort away from the doughy mass. In other styles, like Belgian Witbier, you may see 40 percent. American Hefeweizen (or American Wheat) ranges to the 50 percent mark. Traditionally, both British and British-inspired American Pale Ales and IPAs saw charges of wheat of nearly 20 percent, in the belief that the extra protein from wheat contributed to positive foam characteristics and head retention.
It turns out that wheat doesn’t have significantly higher protein levels compared to barley, but due to solubility factors, it leaches more protein into the wort. According to a recent study from Leuven, Belgium, wheat provides some better foam stability characteristics, but only for brews with highly modified malts and only in the higher-gravity versions and only when gassed with nitrogen instead of CO2. Even better: we know that wheat is supposed to induce hazy, cloudy beers, right? The effect of wheat protein haze is more pronounced at lower overall levels of wheat in the mash; that is, a beer brewed with 20 percent wheat will be hazier than a beer brewed with 40 percent wheat. According to the researchers, this is due to the more aggressive breakdown of the large protein strands in the 20 percent wheat beer. This more aggressive breakdown leads to smaller particles, which are less likely to settle out.
What’s the verdict, then, on wheat malt and foam and haze? It seems that for all of our best wishes, these perceived effects are tricky and intertwined with a number of factors. One thing not to discount, however, is the increased viscosity of the wort having an impact on mouthfeel.
Rye Malt (2°L–4.3°L)
We’re putting rye malt in the base grain category because it really doesn’t fit anywhere else. It’s probably not a great idea to use rye malt as 100 percent of a beer’s grist. It can be done, but it can be difficult to lauter that much rye, and the beer produced can be viscous to the point of seeming oily. Rye malt is a great complement to other malts. The seldom-seen roggenbier style uses rye malt as about 50–60 percent of the total grist, with most of the rest being made up of Munich, pale, pilsner, and/or wheat malt. Rye malt is a great addition to American IPA or pale ale styles at amounts from 20–60 percent of the total grist bill. It gives the beer a full, smooth mouthfeel, and a beautiful red-orange hue. It’s generally regarded as adding a slightly spicy finish to the beer, which is a wonderful complement to the American hops (see page 108 for Denny’s Wry Smile recipe).
CRYSTAL AND CARAMEL MALTS
Crystal and caramel malts are used to increase the body of the beer and provide flavors not available from base malts. These flavors can range from a nearly imperceptible sweetness from very light crystal malts (such as carapils at 1.5°L) all the way to the raisiny flavors you get from Special B (135°L), with a range of toffeelike flavors in between. Crystal malts are typically produced at colors of 20°L, 30°L, 40°L, 60°L, 80°L, 90°L, and 120°L. The exact colors available will vary depending on the maltster. When you look at crystal malt, you’ll notice that it’s a mix of lighter and darker grains. The color is specified by an average of the grain colors.
While crystal and caramel malts are essentially the same thing, some maltsters make a subtle distinction between the two based on the process used to produce them. For more information, we turn to Dave Kuske, director of malting operations at Briess Malt & Ingredients Co:
The difference between caramel and crystal malts involves both terminology and chemistry and production differences.
As for terminology, the European maltsters landed on crystal malt as the descriptor of malts that go through a conversion step where starches are rapidly (typically within forty-five minutes) converted to sugars, and the sugars are then crystallized at high temperatures in a roaster. Somewhere in our distant past, it was decided that our crystal-style malts produced in the same manner were given the name caramel malt.
The term caramel really refers to the process of pyrolisis of sugars. When I give presentations on the process, I encourage the audience to envision a candy thermometer. There are different temperature breaks where different types of caramel are produced, and each has unique physical and flavor properties. Crystal-style malt is in reality the end process of achieving high enough temperatures to produce a hard crack–type caramel inside of each malt kernel, which results in a hard, glassy endosperm. This crystallization lends unique properties to the flavor and functionality of the malt. In order to achieve crystallization, the actual kernel temperature must exceed 300°F, which requires much higher applied temperatures only achievable using a roaster, which has the burner capacity to reach in excess of 700°F if needed.
There are caramel malts on the market that are produced using a kiln. The green malt is heated at minimal airflow and is held at high moisture content for an extended period of time (more like hours than minutes) on the upper kiln to stew the malt to allow the enzymes to break the starches into sugars. It is a tricky step on the kiln because it is difficult to get the wet malt heated up to the enzyme-optimum temperatures (60°C–70°C or 140°F–158°F) without drying the malt in the process, which slows the enzymatic breakdown. I liken it to trying to heat up a wet bath towel. After stewing, the malt is heated at the highest temperature possible on the kiln, which is not hot enough to actually crystallize the sugars due to maximum temperature limitations on the kiln. In most cases, 220°F–240°F burner temperature is as high as one can achieve on a kiln, which falls far short of crystallization temperature of the predominant sugars. There is some caramelization that occurs at the lower temperatures, but the majority of the color and flavor development is due to the Maillard reaction (sugar + amino acid), which provides a different flavor profile and a mealy or powdery endosperm.
Many maltsters have come up with their own trademarked names for their versions of crystal/cara malts. We’ll look at a few of those, along with other crystal/cara variations, below.
• Golden Naked Oats (4.3°L–8.1°L), from Simpsons Malt, are a huskless crystal oat malt. This malt gives the beer a flavor sometimes referred to as nutty. It also increases the body. Although it’s technically a crystal, homebrewers have been known to use larger amounts of it in a batch than normally would be used for crystal malts. Amounts around 30 percent aren’t unusual to see in some recipes.
• Caramunich I (31°L–38°L), Caramunich II (42°L–49°L), Caramunich III (53°L–60.5°L), Caraaroma (115°L–150°L), Carabelge (118°L–13.7°L), Carabohemian (64°L–83°L), Carawheat (42°L–53°L), Carapils (1.5°L–2.9°L), Carahell (8.1°L–11.8°L), Carared (16°L–23°L), Caraamber (23°L–31°L), and Cararye (57°L–76°L) are names trademarked by Weyermann for their line of caramel/crystal malts.
• Carastan is the name Baird’s gives to its crystal/cara malts.
• Caravienne (21°L) is a light crystal malt originally produced by the Belgian maltsters Dewolf-Cosyns. After they closed around 2001, it has been produced by a number of other maltsters. If you can’t find it, we’ve found that 20°L crystal is a really close substitute.
DARK ROASTED GRAINS
Dark roasted grains span a wide spectrum of colors and flavors. They can be made from either malted or unmalted grains. They can be used in amounts as small as an ounce to color a beer or in larger amounts to give the beer roasty flavor and aroma notes of coffee or even hints of chocolate. In general, the darker the grain, the less of it you use.
Some maltsters have found that by removing the husk of the grain before kilning, they can make dark malts that have less bite and a smoother flavor. These can be great in porters, where the reduced bitterness from the roast malt lets your hops shine through. (See the last two entries that follow for examples.) Here are some of the dark roasted malts, a range of color for them, and ideas for their use:
• Chocolate (300°L–350°L), chocolate wheat (300°L–450°L), chocolate rye (180°L–300°L), and chocolate spelt (170°L–240°L) are most often used in styles like porter. Their roasty coffee and cocoa character plays off the base malt to create a rich flavor profile. Adding some Munich or crystal malt along with the chocolate malt accentuates the chocolate flavor and tones down the roastiness a bit. Non-barley variations maintain some of the character unique to the grain they were made from, as well as having the moderate roast qualities of chocolate malt.
• Dark chocolate malt (420°L) has a more intense coffee character than regular chocolate malt. Pale chocolate malt (180°L–250°L) is perfect for those who find chocolate malt too strong. As you might expect, it is a touch lighter and can benefit some styles where you don’t want the roastiness or acrid acidic bite of chocolate malt.
• Roasted barley (375°L–450°L) and roasted rye (188°L-300°L): These malts are used to impart a roasted coffee character and dark black color to the beer. Roasted barley is often cited as the ingredient that distinguishes a stout from a porter. (The actual historical record says otherwise.) The classic dry stout recipe uses about 10 percent of the grist bill as roasted barley. Roasted rye does about the same thing while retaining a bit of the rye character. Due to the dark roasting, though, much of that flavor is lost.
• Carafa malts are trademarked by the German maltster Weyermann. They come in three color variations: I (300°L–375°L), II (413°L–450°L), and III (488°L–563°L). They also come in two variteies: regular and special (aka dehusked). These malts can be thought of as chocolate malts in terms of flavor and color, although the darkest carafa is closer to roasted barley than chocolate malt in color. A primary use of carafa malts is for color in a beer. An ounce or two in a 5-gallon batch of homebrew will give the beer a reddish hue. Larger amounts start to impart a chocolate and toffee flavor, but without some of the harsh roastiness of roasted barley.
• Dehusked and debittered Blackprinz (500°L) and Midnight Wheat (550°L) malts are trademarked by Briess Malt & Ingredients Company. Like Weyermann Carafa Special malts, both Blackprinz and Midnight Wheat are dehusked malts. Briess points out that the husk is mainly, but not completely, removed. Since it’s the husk that develops bitter notes during roasting, the dehusked version (called Carafa Special by Weyermann) contributes a smoother flavor with less astringency than the variety that retains the husks.
FLAKED, UNMALTED, AND OTHER SPECIALTY GRAINS
• Flaked barley (1.5°L), flaked wheat (2°L), flaked rye (2°L), and flaked oats (1°L) are often used to increase body as well as head formation and retention. A high level of protein promotes those effects. Flaked maize (1°L) and flaked rice (1°L) can be used to lighten the body and increase the alcohol content of your beer. Flaked maize can add a little sweet, corny flavor. Flaked grains have not been malted and therefore have no diastatic power to convert their starches to sugar. They need to be mashed with grains that have ample diastatic power, like pale malt, so that the flaked grains can hitchhike on the enzymes. Pale malt has enough enzymes to convert itself and at least its own weight of another grain.
Note: You will sometimes see recipes where flaked grains are steeped. While that may get you some of the properties of the grain, you will also be adding unconverted starch to your beer. That unconverted starch will create haze, not to mention that wild yeast and bacteria just love to eat unconverted starch while they ruin your beer! It’s never a good idea to use flaked grains without some sort of base malt to convert those starches.
• Oat malt (4°L) is produced by Thomas Fawcett & Sons in England. It is intended to enhance the body and flavor of porters, stouts, winter warmers, and other robust English ales. It provides a nutty, rich silkiness to beers and serves as a great replacement for flaked oats. Due to the tiny kernel size, it is a bit trickier to mill, but generally works fine with your standard mill gap as long as it is mixed with regular malt. For extract brewers, oat malts are self-converting and can be steeped for 30 minutes on their own at 148°F–160°F to complete the starch transformation. In other words, you can steep and get the effects of oats without introducing a bunch of starch as you do if you just steep flaked oats. Note: While only one maltster makes malted oats today, malted oats played a major role in the brewing world until the turn of the twentieth century. There were a number of great beers that were golden, strong, and almost entirely made of oats, both in the UK and continental Europe. (See the Haarlem Bokbier variant on page 32 for an example.)
• Melanoidin malt (23°L–31°L) is produced by Weyermann, who say it adds flavor stability and fullness to a beer. In addition, it produces a red color. Keep in mind that melanoidins are a color, not a flavor, although the Maillard reactions that create melanoidins also create flavors. Savvy, lazy brewers like Drew use Melanoidin malt to simulate some of the flavors produced by crazy decoction mash brewers. Gambrinus Malting produces a Honey Malt (aka Brumalt) that provides some of the same flavor impact, but with increased honeylike sweetness. Aromatic malt is another malt variety with similar impacts. You can think of them as super Munichs, so a little goes a long way.
• Briess Victory, Dingemans Biscuit, and Malteries Franco-Belgies Kiln Amber (15°L–28°L): These are all lightly roasted malts that carry a similar toasty, biscuity bread quality. Again, these are potent malts suitable for about 10 percent of the mash and can impart tremendous warmth to a beer when used judiciously.
Smoked Malts
Until recent times, all malts carried a smoky flavor due to kilning over wood fires. Given people’s continued affinity for smoked meat products (bacon or barbecue, anyone?), it’s safe to say that smoke is something people love. They’re just not used to it from their beer.
• Rauchmalt (2°L–5°L) is the German answer to the smoke question. The whole Bavarian town of Bamberg is Bam-nutty about its Rauchbier. (The word Rauch means “smoke” in German.) The majority of the German rauchmalts are smoked over beechwood fires. They can be used in amounts up to 100 percent of your grist to impart a intense, smoky (some say bacony) flavor to your beer. It works wonderfully when put into a beer with a sturdy malt backbone, such as a Marzen or bock. Weyermann also has produced a special edition Oak Rauchmalt.
• Peat (2°L–3°L) malt is the approach to smoked malt that takes its cue from Scotland. Maltsters produce, mostly for distillers, intensely smoky, almost iodiney, malts over burning piles of peat. What is peat? It’s a mass of decaying vegetation held together by dirt and moss. It slowly forms around bogs and has been an important fuel source in Northern Europe for … well … forever. The smoke varies wildly based on what’s in it, but you can be assured that it’s tough stuff. Peated malt is very strong, and caution is advised in its use. Usually a small amount (2–4 ounces per 5 gallons) will impart an intense smoky flavor and aroma to the beer. It’s been said that it can give you iodine or seaweed flavors in larger amounts. It seems to be a thing that brewers either love or hate. Drew: There has been a debate about the use of peated malt in Scotch ales. Some say it gives the beer the smokiness that the style needs. Others say that it throws the beer out of style, is unpleasant, and has no place in a wee heavy. Like all things in homebrewing, it’s up to you to decide. But at least in my case, I prefer peat to stay in my scotch. And I know Denny doesn’t use peat malt or drink scotch!
• Other smoked malts are worth exploring, since other countries have histories of smoking their malts over diverse woods like spruce and fir. The most popular commercially made American smoked malt available to homebrewers is Briess’s Smoked Malt (5°L) that’s fired over Cherrywood. It’s not as intense as the peat-smoked and is not far off from the Rauch malt. It can be used to great effect to lend character to milds and dark ales. Note: If you’re like a great many brewers, you’ve probably dabbled with the notion of proper barbecue, and maybe you’ve invested in a smoker. Making your own smoked malts is a simple as exposing lightly misted malt to a smoky fire for 20–30 minutes. You can do this with a couple of takeout tins or a proper cold smoker arrangement, or you can make like Alaskan Brewing and take over a salmon smokehouse to produce the Alderwood smoked malt they use for their world famous Alaskan Smoked Porter. This is one area in which we encourage playing around; just remember to give your freshly smoked malts some resting time (1–2 weeks) before using.
SUGARS
Sugar, honey, and other rich sugar sources such as dates have historically been added to beer since the times of the Sumerians. In modern times, many styles of Belgian beer and more than a few British beers include sugar additions.
Sugar briefly fell into disrepute during the early days of homebrewing, when the typical recipe was a kit and a kilo—meaning a kit with 3.3 pounds of liquid malt extract and a dodgy packet of dry yeast to which you added a kilo of table sugar. The extract had often been sitting on store shelves for long enough to go stale and become oxidized, and the sugar, intended to up the alcohol content, did nothing to hide the flavor of the stale extract. The sugar was wrongly blamed for the poor, cidery quality of the beer. Even today, you’ll hear that too much sugar yields a cidery beer—and now you know it’s not true.
By adding sugar to an existing recipe, you boost its alcohol content, since sugar is highly fermentable. Replacing a portion of malt with an equal number of gravity units of sugar is a common way for brewers to lighten the body of a beer, because the sugar ferments out completely. The beer feels drier because it doesn’t contain the additional longer-chain carbohydrates (dextrins) and proteins that malt leaves behind when it ferments.
An important point: you’ll hear a lot of brewers say, “Well, I wanted it drier, so I boosted it with sugar,” or, “My ferment stalled out, so I tried adding sugar to dry it out.” It really doesn’t work that way. Your sugar additions most effectively dry a beer when used to replace base malt, not to undercut existing malt gravity.
Of course, some brewers also use sugars because they’re after a particular flavor—or in the case of lactose or maltodextrin, a particular change to both sweetness and body. As you’ll see on the following pages, sugar gives you a few ways to play with your beer.
SUGARS FOR ALCOHOL
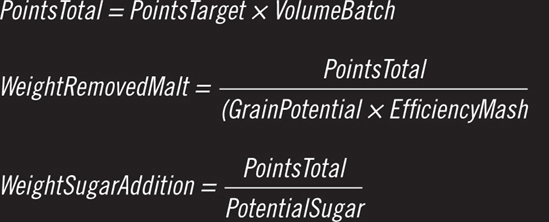
Any of the sugars on the pages that follow can be used to increase the alcohol content and/or thin out the body of a beer. However, the ones in this section add no flavor to the beer, and the primary purpose of using them is for adjusting alcohol and body. As a general rule, you can assume most dry sugars have a gravity impact of about 45 points per pound per gallon (PPG). If you want to thin body without increasing alcohol, substitute one of the sugars for an equal number of gravity points of grain. To increase the alcohol, add sugar rather than substituting it. One pound of dry sugar will add about 9 points to the original gravity for a 5-gallon batch of your beer. In general, it’s best to keep sugar additions to less than 30 percent of your total fermentables.
• Corn syrup: Corn syrup is a mix of maltose, sucrose, and fructose generated by enyzmatic conversion of dent corn. It’s America’s favorite sweetener and humectant (a substance that retains moisture). Commercial consumer-grade corn syrups are typically a blend of corn syrup and its cousin, high-fructose corn syrup. Because the consumer-grade syrup is blended with salt and vanilla, we don’t recommend it for heavy use in brewing. A brewer’s corn syrup is available, but it’s hard to find. As its name implies, you can use that one in your beer.
• Corn sugar (dextrose): Corn sugar is a simple monosaccharide consisting of glucose. Its simple nature, yeast digestibility, and predictability is why you see it used so extensively for bottle priming when the yeast are in their most stressful environment (full of alcohol, CO2, and pressure).
• Rock candi sugar: Rock candi sugar consists of large chunks of refined table sugar. It offers no additional flavor and no difference from table or corn sugar, and thus is not worth the price. Darker or other colored forms of candi sugar can add slight smoky, spicy tones to a beer, but the overall impact from the small amount usually used in brewing is minimal.
• Table sugar: Table sugar is plain white sucrose (disaccharide of fructose and glucose) derived from sugar cane or beets. Arguably it is one of humankind’s most important and dangerous discoveries. Regardless of the source, it produces the same results. It adds no flavor to your beer. It is a great choice to add alcohol and/or lighten the body of your beer. Don’t believe us? Take a simple wort of DME and water. Make two sample batches of 1/2 liter. Into one batch add cane sugar syrup; into the other batch add beet sugar syrup. Ferment out, chill, and taste. If you can taste a difference due to the sugar, our hats are off to you.
SUGARS FOR FLAVOR
While the previous sugars are all highly refined, and thus vanish like a ghost, the “dirty” sugars that follow can leave behind aromas and flavors that you can’t get any other way. What makes them dirty? Well, it turns out that for much of recent human history sugar making was a simple process. Take sugar cane, squeeze the juice out of it, and boil or evaporate the liquid. The crystals were thus coated with various byproducts of the process and plant that carry other flavors.
The best way to retain the flavor of sugar in the brewing process is to add it as late in the process as possible. Why? Just like any other addition, the aromas and flavors we sense are due to potential volatile compounds. Chuck them in too early, and your brewery will smell great while your beer is bland. This is true of a great many things; the better your brewery smells, the less scent your beer will have at quaffing time.
Adding sugar late in the boil or after the bulk of fermentation has occurred works well, although some of the very dark candi syrups stand up well when added earlier in the boil. Most dry sugars will yield about 45 ppg, and liquid sugars will yield around 32 ppg.
• Agave: As you might expect, this liquid sugar comes from the agave cactus and is not refined into crystalline form as other sucrose sources are. It tastes a little less sweet than other sugars, and the darker varieties can have a smoky flavor. Be wary, though; with the recent rise in popularity of agave as a low glycemic index sweetener, the commercial market has expanded with some questionable providers.
• Candi syrup: Traditional candi syrup is a byproduct of the molasses production pipeline, but it was never seen in the United States for brewers until the early 2000s, when Brian Mercer of Dark Candi began to bring it in and repackage it. Overnight, everyone’s understanding of making Belgian dark ales such as Westvleteren 12 was shattered. Before this, people used a mixture of malts, such as Special B, Carafa, high Lovibond crystals, and dark brown sugars to capture the plum, raisin, and rum characters of those special beers. It worked, but never quite matched the inspiration. Once we got our hands on the dark syrups, that world became unlocked to us! New suppliers, including some domestic producers, have sprung up in recent years. We don’t use the clear syrups, but the amber and dark syrups have become indispensable—especially when you want to make two radically different batches from a pale mash just by adding a candi syrup to one portion.
• Demerara sugar: Some natural brown sugars have particular names and characteristics, and are sold as turbinado, demerara, or raw sugar. Turbinado is made by crystallizing raw sugar cane juice, then spinning it in a centrifuge to remove water and some impurities. Demerara and raw sugar have less molasses than light brown sugar, but added near the end of the boil or to the fermenter, it can add a honeylike flavor to your beer.
• Honey: Honey provides a vast array of flavor possibilities. If you’ve never explored honey beyond the squeeze bottle on your grocery shelf, you’re missing out. That stuff is the honey equivalent to American Light Lagers. Instead, find your local apiarist (beekeeper) and explore his or her wares. You’ll find varietal honeys produced from a singular crop such as blueberry, almond, cherry, and so on. Even the wildflower and clover honeys will punch above their weight. As an added advantage, if you buy local and know your apiarist, you can avoid buying honey that’s tainted with heavy metals and chemicals illegal in the United States, but legal in China and India (homes of cheap honey production), and you can be assured that your honey is all honey and not honey with added corn syrup. To see an example of strange honey in practice, see the Saison Guacamole on page 175, which uses intensely molasseslike avocado honey. Please note that because of its delicate aromatics, honey is best added late in the fermentation process.
• Invert sugar syrup: Invert sugar syrup is a simple syrup made by boiling sucrose and water in the presence of an acid (citric, ascorbic, or tartaric). The heat and acid cause the sucrose molecules to break into fructose and glucose in a chemical process called hydrolysis. The result is a thick syrup that can be added readily to beer. In theory, inverted sugar is easier for the yeast to ferment than a noninverted sugar. Practically, during the ferment, yeast produce an enzyme, invertase, that naturally inverts the sugar. As long as you have healthy yeast and aren’t breeching 40 percent sugar, your yeast will handle it. To see how to make your own invert sugar syrup, refer to page 80.
• Maple syrup: Almost everyone is very familiar with this concentrated sap from the maple tree. And we’re talking the real, honest-to-goodness stuff from the cold northern region of North America. If you’re looking at the cheap syrup you used as a kid, stop. That stuff is doctored high-fructose corn syrup and has as much to do with maple trees as our left feet. In the past, we’d tell you to skip over the Grade A maple syrup for the far better Grade B syrup, but the International Maple Syrup Institute is encouraging a change in the grading process. Gone are the Grade B slots. Everything is Grade A, but with a spectrum of Golden/Delicate to Dark/Strong. Under the new scheme, we recommend Grade A Dark/Robust. In order to maintain the most flavor from the delicate syrup, it’s best to add it late in the fermentation process. Even then, it’s possible for the flavor to ferment out. Too much maple syrup can add an almost woody flavor to beer. Start by using maple syrup as 8–10 percent of your total fermentables. After you taste a beer made that way, you’ll have an idea of what your taste threshold is and how much you want to use in the future.
• Molasses: Molasses, called treacle in the United Kingdom, is a byproduct of cane or beet sugar refining. The juice is boiled to concentrate it. The first, least sweet, boiling is known as cane syrup. The second boiling is usually just referred to as molasses. The third, strongest-flavored boiling is called blackstrap molasses. Molasses can add a very distinctive flavor to a beer and is best used in moderation. It is also recommended that you stick to varieties that are unsulfured to avoid adding sulfurous characters to your beers—unless you like the idea of a fire-and-brimstone ale.
• Muscovado (also moscovado): This unrefined, dark brown sugar of the Caribbean has much smaller crystals than turbinado sugar. The sugar cane extract is heated to thicken it, pan-evaporated in the sun, and pounded to yield an unprocessed, damp sugar. Think moister than fresh brown sugar (which is really just white sugar with molasses added). Muscovado has one of the largest mineral loads of commercial sugars and is a key ingredient in making rum. Unsurprisingly, the flavor impact is reminiscent of molasses and rum.
• Panela, piloncillo, raspadura, or jaggery: The first three are names for an unrefined sugar mostly made by boiling sugar cane juice in South and Central America. Jaggery is made from cane, dates, and palm sap in East Asia. Instead of aiming for crystals, concentrated cane juice is allowed to cool and harden in thin pans. Once cooled, but while still plastic, the sugar sheet is pressed and shaped and dried into various blocks or cones. To use, the solid mass is traditionally grated. We just need it broken up and dissolved. In the United States, we most commonly see the cone-shaped Mexican piloncillo. The flavor characteristics depend largely on the color, but the usual flavor is somewhat between muscovado and golden invert syrup with strong caramel components.
SPECIAL SUGARS
There are two remaining sugars we need to talk about. They don’t boost the booze, they don’t add flavor, and unlike the other sugars we’ve talked about, they actually add body instead of cut it. These sugars are for special cases when you need to retain mouthfeel or create richer body in a beer.
• Maltodextrin: Maltodextrin is good for adding mouthfeel and body to extract brews without affecting flavor, because it adds no sweetness. Maltodextrin is added to the wort at the same time as the extracts, or it can be boiled with a little water and added later in the process, even up to packaging. Maltodextrin is only 3 percent fermentable by brewer’s yeast. It adds 40 ppg. Another use for maltodextrin is in the creation of a finer, longer-lasting head.
• Lactose: Lactose is a milk-based sugar (glucose and galactose) that is not fully fermentable by beer yeast. It adds body and sweetness to sweet stouts or other beers. Add to the boil for 30–35 ppg. For a 5-gallon batch, the typical dose in a stout will be 1 pound, to lend that richness that can cut off the acrid notes of a dark stout. Many homebrewers look to lactose as a way to sweeten an overly dry beer by adding a freshly boiled lactose addition to the finished beer. The problem is that lactose is 6.25 times less sweet than table sugar!
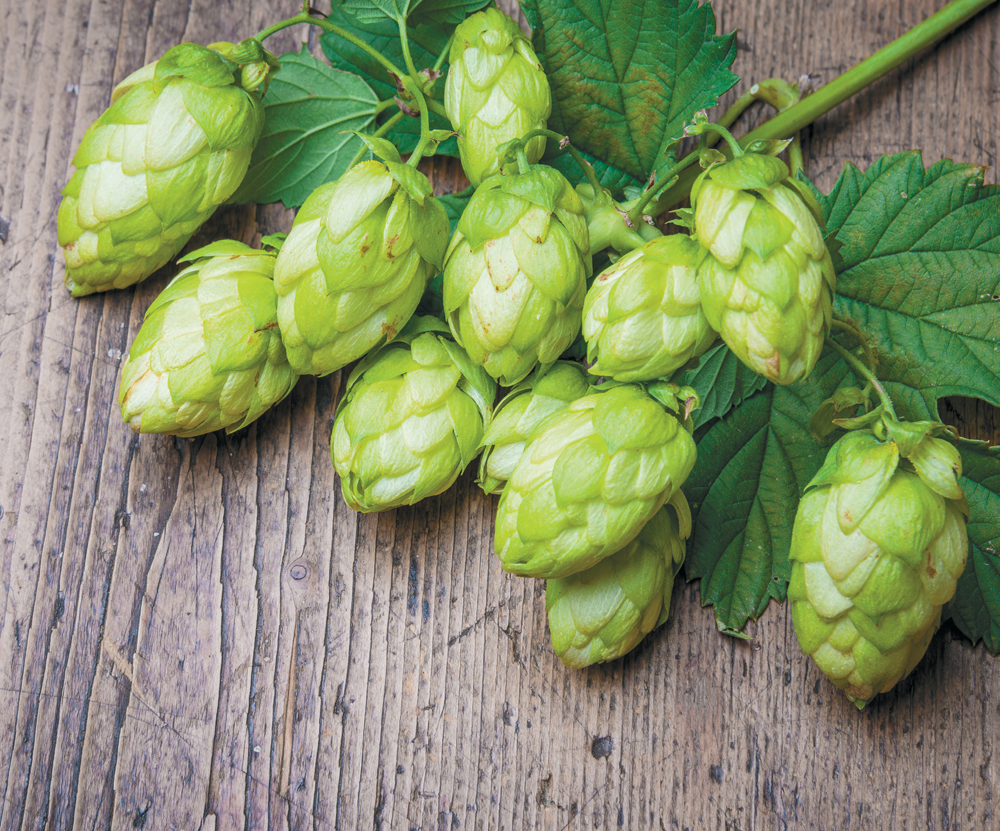
HOPS
One of the first things new brewers learn is why hops are used and the different effects they have on beer depending on their usage. The rule of thumb is that hops added early in the boil provide bitterness (due to the isomerization of alpha acids) to balance the sweetness of the malt sugars. Hops added later will contribute less bitterness, but more of their volatile essential oils will remain to add flavor and aroma to the beer.
Generally, you will extract most of the bitterness in the first 60 minutes of boiling the hops. Boiling them longer results in little further isomerization. In fact, boiling hops longer than 90 minutes can lead to a degradation of the bitterness already extracted. Hops added in the last 20 minutes of the boil will add hop flavor to the beer, and hops added in the last 5 minutes or less of the boil give the beer hop aroma.
In addition, hops have been touted as having preservative qualities. More than any other factor, this is probably what drove their adoption by brewers. With no refrigeration and no knowledge of sanitation, unhopped beer spoiled rapidly within a week or two. Those bitter iso-alpha and other compounds stave off two of the most common beer spoilage organisms: Lactobacillus and Pediococcus. Both are gram-positive bacteria, and iso-alphas’ bacteriostatic effect interferes with their reproduction. Hops, however, have no effect on gram-negative bacteria or our funky yeast cousins, Brettanomyces.
Fun fact: Hops are also a natural soporific, meaning they are conducive to sleepiness. If you’re suffering the occasional bout of sleeplessness, toss a few hops in a pillowcase or potpourri sack and stick it under your pillow. You’ll be asleep in no time at all!
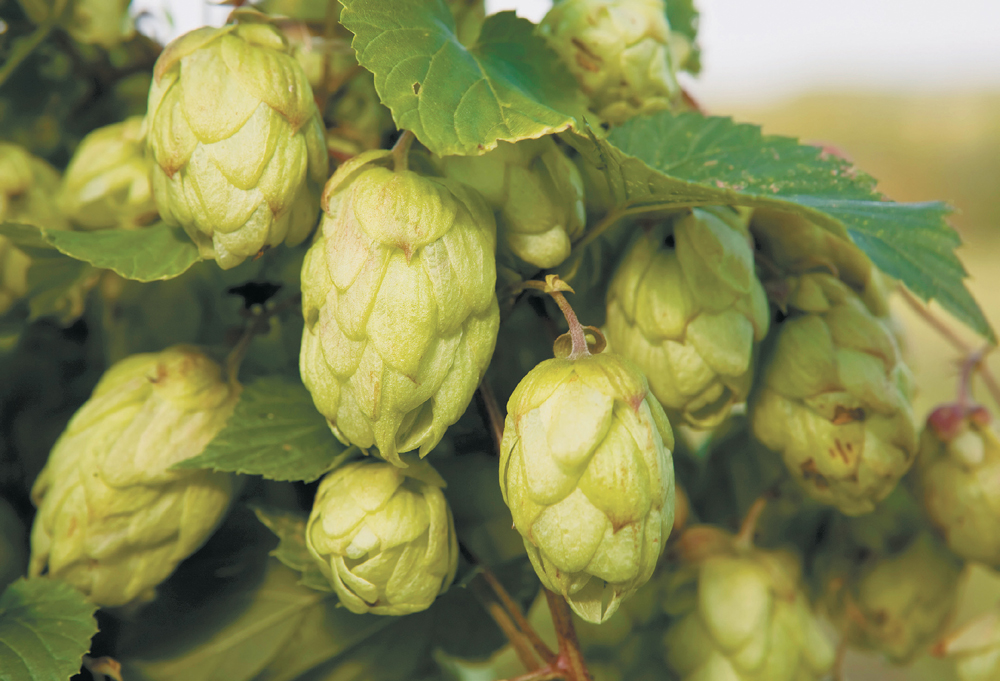
TRADITIONAL CONTINENTAL HOPS
Traditonally, most European hops were grown in England, Germany, and nearby areas. Generally, these traditional British and German hops have a lower alpha acid content than more recently developed American varieties. That means for high levels of bitterness, you have to use large amounts of them, which could lend a vegetal character to the beer. On the other hand, some of these hops, such as East Kent Goldings and Saaz, have delicate, enticing aromas when used in moderation.
Some of the best known English varieties are Fuggle, East Kent Goldings, and Northern Brewer. English hops get described in very different terms than American varieties. Fuggle has been called earthy or even dirtlike. (It’s a description, not a value judgment!) East Kent Goldings are noted as having a candylike aroma.
A subset of German and Czech hops that are low in bitterness and high in aroma are often referred to as noble hops. They have a high amount of the hop oil called humulene. Humulene gives an earthy, woody, or herbal quality to the hops. Additionally, the spicy character that people detect is a case of good oxidation. The compounds that form these aromas are believed to come from the oxidation of beta acids. These noble varieties are Hallertauer, Hersbrucker, Czech Saaz, Spalt, and Tettnang. Fuggle, Goldings, and East Kent Goldings are sometimes referred to as English noble hops. In the United States, you’ll sometimes hear varieties such as Crystal, Liberty, Mt. Hood, Santiam, and others referred to as American nobles.
Why all this emphasis on being noble? Outside of our craft beer and homebrew bubble, the world is absolutely ruled by lager breweries making their pilsners of varying quality. Given the number of these brewers either founded by Germans and Bohemians (or paying fetishistic homage to them), it makes sense that they would all go for that vaunted noble label. If you’re trying to make money at growing hops (good luck!), you’re going to go where the large segment of the market lies: big alpha and noble aromas.
A reminder about imported hops: Since we’re not making like a big brewer with crews flying over to Germany to judge the recent crop, what we see as homebrewers is typically the unspoken-for hops that may be of lesser quality. Don’t be seduced by the notion of having to use a particular variety. It’s far better to choose a fresher hop with similar qualities than a degraded sample of the right hop.
TRADITIONAL AMERICAN HOPS
American hops growers have taken traditional European hops and built new varieties by crossbreeding them with wild hops found in America. These native hops had higher levels of alpha acid and aromas of citrus fruits such as grapefruit and lemon, or intense flavors and aroma of pine. Unlike the European hops, which gently tickled your senses with lightly oxidized noble oils, these American varieties were more of a slap in the face. (And I mean that in a good way.) The hop breeding program at Oregon State University leads the way with varieties such as Cascade and Willamette. Other well-known and much-used American hops include Chinook, Centennial, and Mt. Hood. Later American varieties, some discovered growing wild, include Columbus, Amarillo, Summit, and Simcoe. A lot of these hops have flavors and aromas reminiscent of citrus fruits. Grapefruit, lemon, and tangerine are flavors often used to describe them. Others, descended from continental hops, retain more of their parent’s character. Willamette is bred from Fuggle and has some of the same earthy notes. Likewise, Mt. Hood’s lineage traces back to Hallertauer hops. It has some of the same noble hops flavor and aroma and makes a great substitute for German Hallertauer hops.
As craft brewing has grown in popularity, and the IPA has become the current king of craft beer drinking, demand for American hops has skyrocketed globally. This has led to increased hop shortages and has left hop farmers racing to catch up. The problem is one of lag. It takes three years for a field of a new hop variety to reach sustainable levels of commercial-grade hop production. For years, hop growers were focused on yielding the highest amount of alpha acid for the megabreweries. Aroma and flavor characteristics took a back seat in crop selection. Now, while alpha acid is still a primary focus, more and more aroma varieties are being brought online.
An added complication today is the number of proprietary strains that exist from commercial hop breeders. That’s why you see basically the same hop under three different names (Columbus, Tomahawk, and Zeus) and why hops like Simcoe and Citra are in short supply and high demand. And of course, new varieties are constantly being grown. On the pages that follow, we’ll cover the major categories and some of the most popular hops that are likely to stay in production for decades.
NEWER HOPS
The latest wave of hops to hit the market have largely been bred for fruity aromas and low cohumulone levels. It has opened up a wave of experimentation about what can be done with hop flavor.
Flavors and aromas in the newest hops range from blueberry and passion fruit to eucalyptus and peppermint. Hop varieties such as Citra, Calypso, El Dorado, and Mandarina Bavaria still exhibit the citrusy or piney character of the previous generation, but many times those flavors are blended with tropical fruit flavors. For example, Mosaic hops can come across as a combination of the dankness of Columbus and the mango-passion-fruitiness of Citra.
Why low cohumulone levels? It was long thought that higher cohumulone amounts created a sharp, intense bitterness, and lower levels equated to a smoother, more subdued bitterness. This theory has been called into question the last few years after testing done at Oregon State University, based on work done by Dr. Thomas H. Shellhammer, (Nor’Wester Professor of Fermentation Science, Associate Professor of Brewing and Food Engineering, Department of Food Science and Technology, Oregon State University, Corvallis, Oregon). Although the low-cohumulone theory may be in doubt, that hasn’t stopped hop farmers from growing lower-cohumulone hops or stopped brewers from getting excited by them.
OUR FAVORITE HOPS
You’ll notice that we’re not grinding out a list of hops for you to look through. The problem is that with such rapid development of new cultivars, any list we’d make would be out of date within moments. So instead, we’ve focused on general characteristics, but that doesn’t mean we don’t have our favorites! In no particular order, here are the hops we find ourselves grabbing time and time again. No doubt if you ask in a year or two, we’ll have new favorites!
Drew
• Magnum and Warrior: Magnum is my all-purpose bittering hop. You will see this crop up time and time again. I like the clean, neutral bittering that it gives, and it provides an excellent base for the rest of the beer. Warrior is my other bittering hop. I tend to use Warrior in my big hoppy beers like my DIPA/TIPAs. However, neither of these hops blow me away in other parts of the brew day (dry hop, late hop, etc.).
• Amarillo: One of my favorite hops to use as a singleton addition and particularly makes a fantastic American Saison or Hoppy American Wheat Beer. Provides big grapefruit with minimal cattiness although it can taste like baby aspirin if used too heavily.
• Cascade and Centennial: I lump these two together because they are classics and the original name for Centennial was “Super Cascade.” These are the citrus cat bombs that have defined so much of what is American craft brew. One of the originals—New Albion Pale Ale—used nothing but Cascade, and it has never surrendered its place of importance.
• Columbus/Tomahawk/Zeus: If you’ve ever giggled at Rob Schneider saying “You put your weed in there” or watched Cheech & Chong, then the triumvirate of C/T/Z are for you. Actually they’re for you if you just like an aggressively piney deep earthy hop character that coats your mouth.
• Citra: The little hop that could. It only recently appeared on the market and is a proprietary hop. Where it usually takes years for a hop to launch, Citra burst on the scene and captured brewers’ hearts with its big blast of mango. I love this hop for defying expectations.
• Challenger and Target: I strongly dislike the majority of the Fuggles and Goldings hops I’ve run into here in the US, mostly because of the quality of what we get here in the US. Instead of floral and earthy, what I’ve always gotten is mulched grass and tea, so my two British mainstays are a little off the beaten path. Challenger is a dual use hop that is semi-earthy and semi-citrusy. It’s a good bridge hop for those used to an American presentation. Target is a higher alpha British hop popular in the early ’90s. The aroma and flavor profile is very clean with a nice twinge of citrus from heavy myrcene content. Think somewhere between Magnum and Warrior.
• Styrian Goldings: Despite the name, this hop descends from Fuggles. It is an old spicy, slightly woody hop originally from Austria. It is my go-to hop for my Belgian beers since it’s heavily used there.
• Saphir: This new variety of hop out of Germany is all about the aroma. It has a low alpha acid content of 2-5 percent. What it lacks in IBU potential, it more than makes up in aroma. It is another European hop that is picking up the citrus idea from American hops. Very smooth and lightly tangerine.
Denny
• Magnum and Horizon: Both of these have a smooth, clean bitterness that blends in and supports the beer without shouting at you. I find the two very much alike. These are my favorite bittering hops for Belgian-style beers, especially tripels. I don’t care as much for them in hoppy American styles such as APA or AIPA, because they just don’t give me the hoppy slap in the face I’m looking for in those beers.
• Columbus/Tomahawk/Zeus: These are different names for the same hop. It has an intense, dank aroma with hints of citrus. It’s a great hop for bittering, flavor, or aroma and is one of my favorite dry hops.
• Amarillo: Amarillo was discovered as a wild hop and subsequently domesticated. Its lemon and orange notes make it a great flavor or aroma hop, either alone or combined with other hops with similar qualities.
• Cascade: I live in the Pacific Northwest, and Cascade is one of the signature hops of this region. Developed at Oregon State University and first released in 1971, the grapefruit flavor and aroma have led to it being one of the most popular hops in the world. Although it’s being slightly overtaken by newer varieties, Cascade hops are one of my go-to hops. In addition, Cascade’s vigor and disease resistance makes it popular both with commercial and home hop growers.
• Mt. Hood: Another hop bred and grown in the Pacific Northwest, Mt. Hood is a mainstay for me in both German and Belgian styles. It has a lovely, slightly herbal aroma, with some light floral notes. I’ll take fresh Mt. Hood over old, imported Hallertauer any day.
YEAST
There’s an old saying that brewers make wort, but yeast makes beer. The role of yeast in making beer goes way beyond simply fermenting the sugars into alcohol. Yeast is a primary flavor component of beer. Even a yeast that doesn’t add any of its own flavor helps define the beer by letting the other ingredients shine through. Choose the proper yeast, treat it right, and you’ll be rewarded with a delicious brew.
ATTENUATION AND TEMPERATURE
Many times we’ve heard people ask if their beer is done fermenting, because it hasn’t reached the amount of attenuation they expected based on the attenuation rating of the yeast. That rating is used to compare the attenuation of one strain to another using a standardized wort. It doesn’t necessarily reflect the amount of attenuation you’ll get with the yeast. That depends pretty much on the composition of the wort. Using the same yeast rated at 75 percent attenuation, you might get 85 percent in a very fermentable wort (mashed long and low, with sugar added) or 65 percent for a more unfermentable wort (mashed at a higher temp with significant amounts of crystal malt). Be sure you take the type of wort you’ve made into account when trying to decide if fermentation is finished.
Fermentation temperature plays a large role in the performance and flavor of a yeast. Generally, higher temperatures promote faster fermentation and more ester or phenol production. Temperatures that are too high can promote the formation of fusel alcohols. These smell like nail polish remover and can give you a headache that might make you wish you’d never drink again—okay, maybe not quite that bad! Yeast companies will give you a suggested range of temperature for the yeast, but don’t think you have to stick strictly to that range. Often, the suggested temperatures will be higher than those that make the beer taste the way you want it to taste. We have found that we usually prefer beers that are fermented at or slightly below the lower end of the suggested temperature range. As with everything else in homebrewing, experiment and decide what’s right for you.
FORM (DRY AND LIQUID)
Yeast for brewing comes in liquid or dry form. Each form has its own advantages and drawbacks. Dry yeast is very easy to use. Simply open the packet, rehydrate (or not), and pour the yeast into the wort. Dry yeast makes an excellent choice for doing experiments because of the consistency. If you acquire two packs of dry yeast with the same date, you can be pretty certain that there will be the same number of viable cells in each pack. Because dry yeast packs contain so many more cells than liquid yeast packages, you don’t need to make a starter to increase the cell count as you usually do with liquid yeast. The major drawback of dry yeast is that there is a limited number of strains available. Not all yeasts take well to drying, so your selection is more limited than if you use liquid yeast.
Rehydration gets a bit of a mixed reaction from brewers. Some object that it complicates the process of brewing and that dry yeast works just fine when they snip open the packet and dump it into the freshly cooled wort. Why bother with rehydrating? The problem with not hydrating the yeast first is that the mummified granules lack any defense against the toxic levels of sugar in fresh wort. Over half the viable population dies before it can get to work. A quick 5–15 minute soak in warm water with a pinch of yeast nutrient gives your yeast time to restore their strong, flexible walls and modulate their intake of sugar. Take a moment and ensure they’re ready to go.
Liquid yeast gives you a wide variety of yeast strains to choose from. Because there are fewer cells in a package than dry yeast, you will usually need to start by pitching the yeast into a low-gravity wort to start the yeast and build up the cell count. Some yeast packaging will give you a chance to proof the yeast first, which is great for ascertaining its viability. But don’t be fooled into thinking that this proofing is equivalent to a starter. There is very little food for the yeast in the pack, meaning that there is virtually no cell growth. You still will usually need to make a starter, even after smacking the pack to proof the yeast.
A quick word about yeast suppliers. Until recently, homebrewers have had a relatively small number of yeast suppliers to choose from: Red Star, Lallemand, White Labs, and Wyeast. But over the past few years, new boutique suppliers have appeared, challenging the market by pushing new, different strains on the world. Take a look around and explore the options provided by companies like East Coast Yeast and others. Who knows, you may have a new microbiologist in your backyard.
TYPES
Yeast can be grouped into two main classes. Each class contains several subclasses.
Ale yeasts generally work best at temperatures from the low 60°Fs to the mid-70°Fs. They are sometimes referred to as top fermenting yeasts. Their flavor impact can range from virtually none, as in many American pale ales, to a flavor that pretty much defines the beer, like German Hefeweizen or most Belgian styles.
There is less variation in lager yeasts than in ale yeasts. Lager yeasts should be very clean. They ferment at lower temperatures than ale yeasts, generally in the 45°F–55°F temperature range (although there are ale yeasts that ferment very well into the mid 50°sF). The main differences between lager yeasts are those that leave the beer with a sharp, crisp mouthfeel and those that give a maltier flavor and chewier mouthfeel. But remember, there’s a lot of crossover and not a huge amount of difference. A yeast from one group may work great for a style in the other group.
Clean Ale
Clean ale yeasts are the choice for many American styles of beer. These yeasts have very low levels of esters (the fuity aromas and flavors you get from some yeasts). While some people refer to clean ale yeasts as boring, in reality, these yeasts allow you to experiment with malt and hops without interference from yeast flavors. Yeasts such as WY1056 American Ale, WLP001 California Ale, or Fermentis Safale US-05 are great examples of clean ale yeast.
Estery Ale
Estery ale yeasts pack their own distinctive flavors. Usually when you hear the word ester, brewers tend to go straight to the world of faults. After all, many American beers’ distinctive aromas come from the hops, and to a German lager brewer, an ester in the brewhouse is a deeply troubling failure. However, to a British or Belgian brewer, esters are welcome companions.
Mostly formed during the lag phase, ester compounds provide strong organoleptic sensations. These usually include fruit notes of apple, pear, banana, clove, or cherry. But the range can run to flowers (geranyl acetate) or the dreaded nail polish remover (ethyl acetate). The amount in your beer is driven by the yeast health, the presence of precursors, yeast stress, and most importantly, temperature. The warmer your ferment, the more ester production you will see.
British brew strains tend to showcase a number of the fruity tones that American brewers avoid. The strains were chosen for a number of factors, including flocculation, stability of the yeast cake, and yes, the estery character that blended well with native ingredients—especially the earthy and floral hops grown in the British Isles.
Belgian or French Ale
Belgian yeasts are pretty much the definition of estery yeast. The fruit flavors, coupled with phenolics that range from spicy to smoky, bring a huge depth of flavor to most Belgian styles. There are liquid yeasts available that are sourced from Trappist monasteries that have been brewing beer for centuries. With these yeasts and a carefully constructed recipe, you can pretty accurately create the same flavors that the monks do. WY1214 Belgian Abbey / WLP500 Trappist Ale (Chimay) and WY1762 Belgian Abbey II / WLP540 Abbey IV (Rochefort), used in the right temperature range with the right recipe, allow you to create beers that would cost a fortune if you bought them.
Denny: One of my favorite beers is Rochefort 10. I once calculated that the 5-gallon batch of a similar recipe that cost me about thirty-five dollars to make would cost over six hundred dollars if I bought the same amount by the bottle.
WY3522 Ardennes is an example of a Belgian yeast that favors phenolics if fermented at lower temperatures (60°F–65°F) and fruitier characteristics fermented at temperatures of 68°F and above. At the low end of the range, it makes a wonderful Belgo-American IPA.
The saison and farmhouse yeasts of Northern France and Southern Belgium are usually a little less estery and more phenolic than other Belgian strains. It will depend on the exact strain and how you use it. We’ll let Mr. Saison tell you a little more about those on page 158.
Wheat/Hefeweizen (Ale)
In Germany, a country with a history of strict beer laws that tightly regulate everything about a beer, the Bavarian hefeweizens stick out like a weird sore thumb. Like saison, a wheat beer is just a wheat beer without the appropriate yeast to make it a hefeweizen.
The few strains that exist for hefeweizen are prodigious producers of clove phenol (4-vinyl guaiacol) and a banana ester (isoamyl acetate). This is the classic push-pull of a Bavarian hefe. The general rule of thumb is lots of yeast, ferment cooler (64°F–65°F) if you want to promote the clove, and ferment warmer (67°F–68°F) if you want to push the banana.
You’ll also notice some American Wheat strains, those very neutral ale strains that don’t impart the same loveliness that a true hefeweizen does. You can safely ignore them if you wish.
Sharp Lager
Sharp lager yeasts yield a very clean, crisp beer. They are generally best suited to German or Bohemian pilsners, as well as Dutch pils, Helles, Dortmundern, and even American lagers. Examples of these yeasts are WY2000 Budvar Lager, WY2001 Urquell Lager, WY2007 Pilsen Lager, WY2035 American Lager, WY2042 Danish Lager, WY2124 Bohemian Lager, and WY2278 Czech Pils.
Malty Lager
Malty lager yeasts leave the beer with a smoother mouthfeel that favors malt characteristics. They are best used for fuller-bodied lager styles, such as Munich dunkel, Maibock/Helles bock, or doppelbock. Look for WY2206 Bavarian Lager or WY2308 Munich Lager.
WATER
Water treatment is one of the last things that homebrewers should tackle in the effort to tweak their beers to perfection. Our experience is that if your water tastes good, then you can usually make good beer without treating your water. That said, water treatment will help you get that final 5 percent of homebrew deliciousness that we all crave. As a general rule, keep a few things in mind:
• Getting the pH right (5.2–5.6) is key. Too high a pH will encourage the extraction of tannins, which can give your beer an undesirable dry mouthfeel and the perception of harsh bitterness. Also, correct pH can increase your mash efficiency.
• Higher levels of sulfate can enhance the bitterness of the beer by increasing the dryness of the finish, which can be desirable in styles like IPA. This dryness is unlike the puckering dryness you get from tannins as a result of your pH being too high.
• Higher levels of chloride will enhance the perception of malt and sweetness in a beer, as will higher levels of sodium. Sodium is tricky, however, and too much will give your beer a strange malt flavor, not to mention saltiness.
• Proper levels of calcium (50–100 ppm for ales and 20–50 ppm for lagers) promote both yeast health and clearer beer.
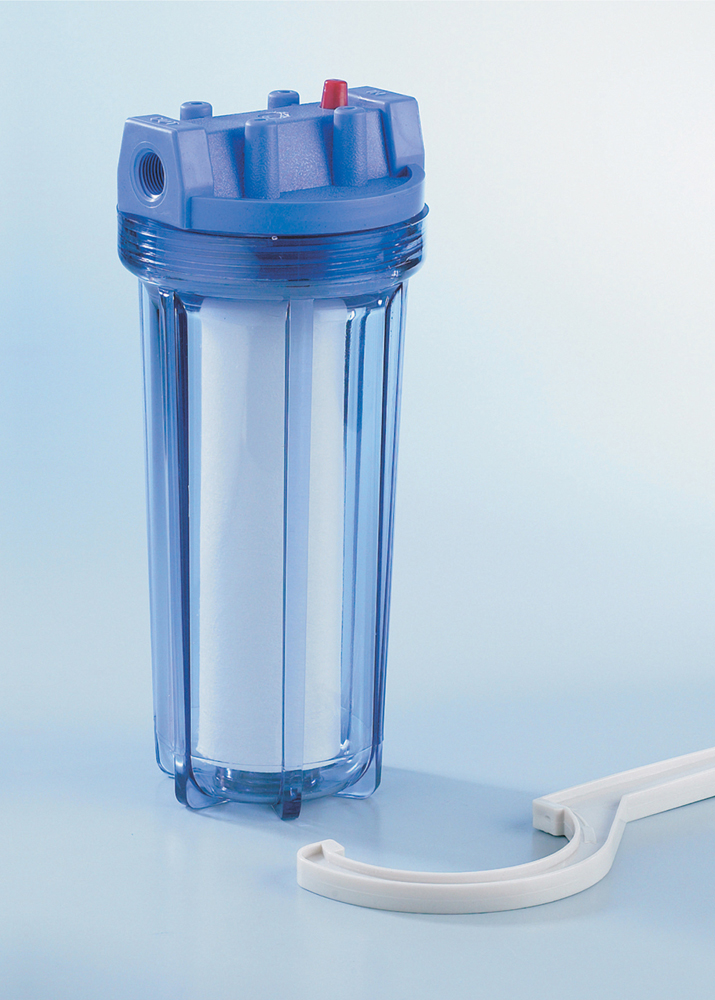
If you’re an extract brewer, consider using distilled or reverse-osmosis water if you don’t think your own water quality is up to par. When extracts are made, the producers make sure they have the correct minerals for the type of extract being produced. Since the minerals are already there, you can use water with no mineral content and still be assured that your wort will have the proper mineral content. The caveat here is that you may still want to do some adjustments for flavor enhancement.
GETTING STARTED
In order to properly manipulate your water, you have to know your starting point by getting a water analysis. If you’re on a municipal water system, you might be able to get the information you need from your local water department. Often, though, those reports lack the information about minerals that are crucial to homebrewers. Instead, send a water sample to an independent lab for testing. You can find one local to you or use Ward Laboratories (www.wardlab.com). Many brewers have found their service to be complete and accurate. However you get your information, make sure it includes concentration numbers for sodium, calcium, magnesium, sulfate, chloride, carbonate, bicarbonate, total hardness as CaCO3, and total alkalinity as CaCO3.
Okay, so you’ve got your water analysis information. Now, what the heck can you do with it? There are several fine, free resources to help you calculate mineral additions. Look for calculators from Martin Brungard (Bru’nwater) or Kai Troester (Brewer’s Friend), among others. Plug in the numbers you get from water analysis and pick a water profile. Some of the calculators have profile lists right in them, though you can also refer to a book or the Internet.
You will usually have better luck choosing a profile based on the color and flavor, or style, of your beer (like amber bitter) than by choosing a profile from the city where the beer is traditionally brewed. Water profiles for various cities are usually no more than a snapshot from a particular time and may change after the profile was published. Also, many breweries adjust their water to accommodate the beer they’re brewing, so simply knowing the water profile from a particular city may not tell you what the treated water they use is really like.
ADJUSTMENTS FOR pH AND FLAVOR
There are two main reasons to adjust the water you use for brewing: pH and beer flavor. Adjustments for pH are usually made in the mash, although pH can be adjusted in the kettle as well. Correct mash pH, generally 5.2–5.6, can improve the efficiency of your mash. In addition, correct pH can effect the utilization of your hops and even the final color of the beer.
Sometimes, even though your pH is correct in the mash, you want to add mineral salts like chlorides or sulfates to enhance beer flavor. You can add these to the mash for pH and flavor adjustments, unless they would adversely effect the mash pH you’ve worked so hard to get right. In that case, these minerals can be added directly to the kettle for flavor.
Denny has pretty good water, and for most mid-colored beers, his mash hits the correct pH with little to no adjustment. Calcium, present in both of the most common water treatment minerals—gypsum (CaSO4) and calcium chloride—will lower the pH if added to the mash. If that’s what you need, simply add them to the kettle as the wort is boiling. The effect on the kettle pH is minimal, and the flavor enhancement works great.
SULFATE AND CHLORIDE
Knowing how sulfate and chloride relate to beer flavor gives you some options in adjusting your beer. For a more bitter beer with a drier finish, increase the sulfate. The dryness of the finish enhances the perception of bitterness. For a beer that tastes maltier, increase the chloride. In general, you can think of the ratio of sulfate to chloride as being assignable to each beer style you brew.
That works pretty well, but sometimes you have to toss that aside and concern yourself with the absolute numbers. For instance, assume you’re brewing an IPA and have decided that a sulfate:chloride ratio of 1.2:1 is works well for you. But after a few batches, you’ve found that it just isn’t giving you the hop kick that you’d like it to have. You want a drier finish and more in-your-face bitterness, which you can get by increasing the sulfate. But to maintain the ratio, you also need to increase the chloride. It’s recommended that the chloride level should stay below 100 ppm, so if you try to maintain the ratio, you could go above that. At that point, forget about the ratio! What matters is the amount of sulfate you need. Keep the chloride amount constant and start trying increases in the sulfate level. It will throw your ratio off, but it may just get you the beer you want to drink.
Note: Gypsum and calcium chloride can also be added directly to a glass to taste-test the effect they have on the beer. This is a good way to see if you want to use them in the next batch. Go easy … start with small amounts and scale up from there.
THE IMPORTANCE OF ALKALINITY
Alkalinity is a measure of the buffering capability of water and its ability to resist pH change. Alkalinity is usually due to the level of carbonate and bicarbonate in the water. Those things make it more difficult to lower the pH of the water. Grain has a natural acidifying effect on the water, which will lower the pH under most circumstances. Too much alkalinity will make that impossible and have a negative impact on beer flavor. Some amount of alkalinity is necessary to keep beer pH from falling too low and giving the beer a winelike character, but too much alkalinity will mute hop expression and make the extraction of undesirable amounts of tannins from the hops and grain more likely.