PROJECT
Beaded Key Fob or Necklace
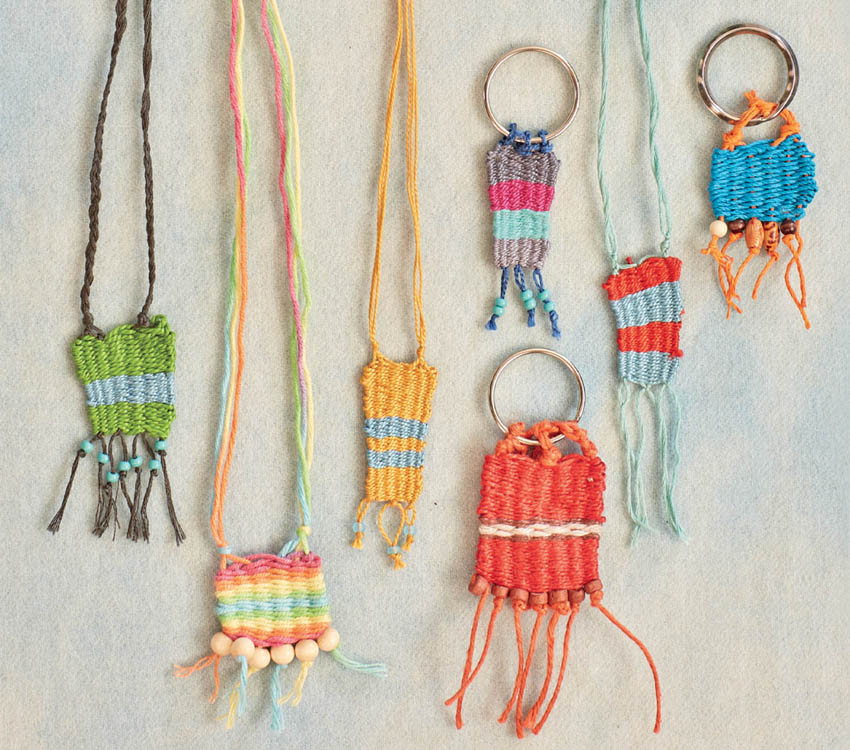
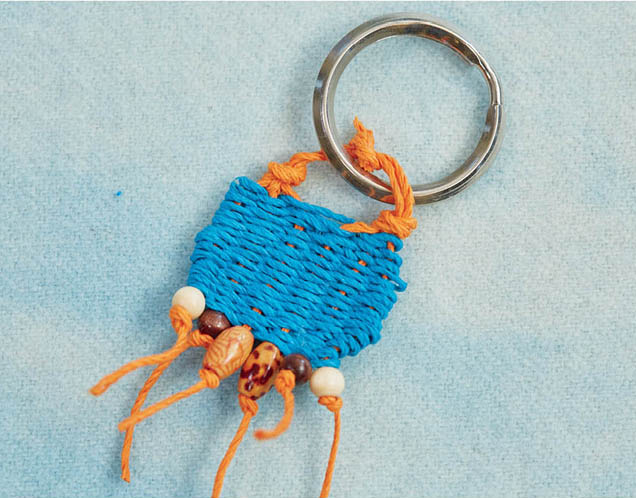
This is a great little project for beginners because you get to make and use a loom. But the loom is nice and small, so you can finish something in one sitting — like this cool key fob, which is just an old-fashioned way of saying key chain. The beads give the project enough weight and substance to keep it from getting lost in your pocket — or, if you’re making a necklace, from getting tangled in your hair.
What You Need
- 10-inch × 31⁄2-inch piece of heavy cardboard
- Masking tape
- Ruler
- Pencil
- Scissors
- Sturdy string, garden twine, or jute
- Blunt needle with an eye large enough to fit your string
- 6 beads
- Split-ring key ring, carabiner, or swivel-eye lobster snap clasp hook (a long name for a small hook!)
How You Make It
Making and Setting Up the Loom
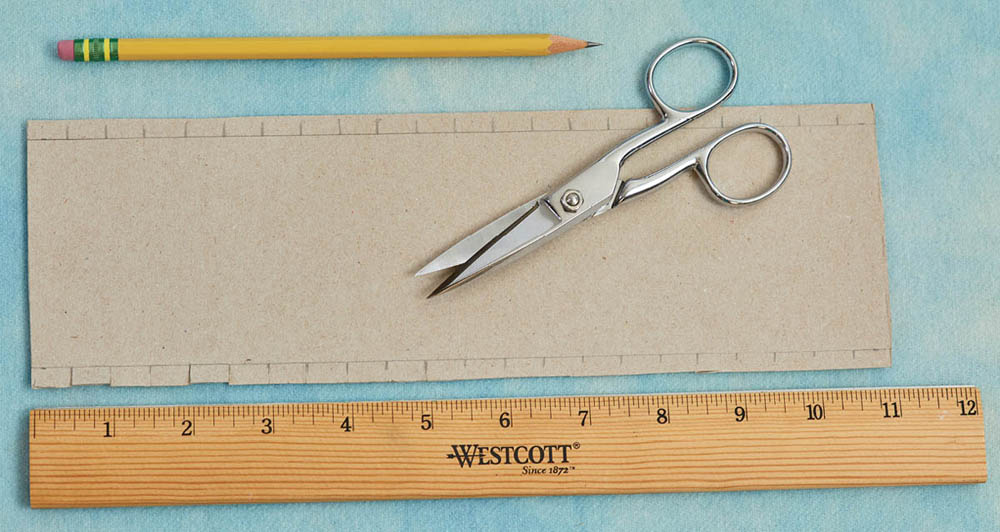
- 1. Wrap the top and bottom edges of the cardboard with masking tape to make it sturdier. Hold the ruler along the top edge and mark 1 inch in from the edge, and then every 1⁄4 inch until you get to 21⁄4 inches. You will have six marks.
Repeat along the bottom edge, making six marks at the same intervals. Use your scissors to make a tiny cut — about 1⁄4 inch long — at each mark.
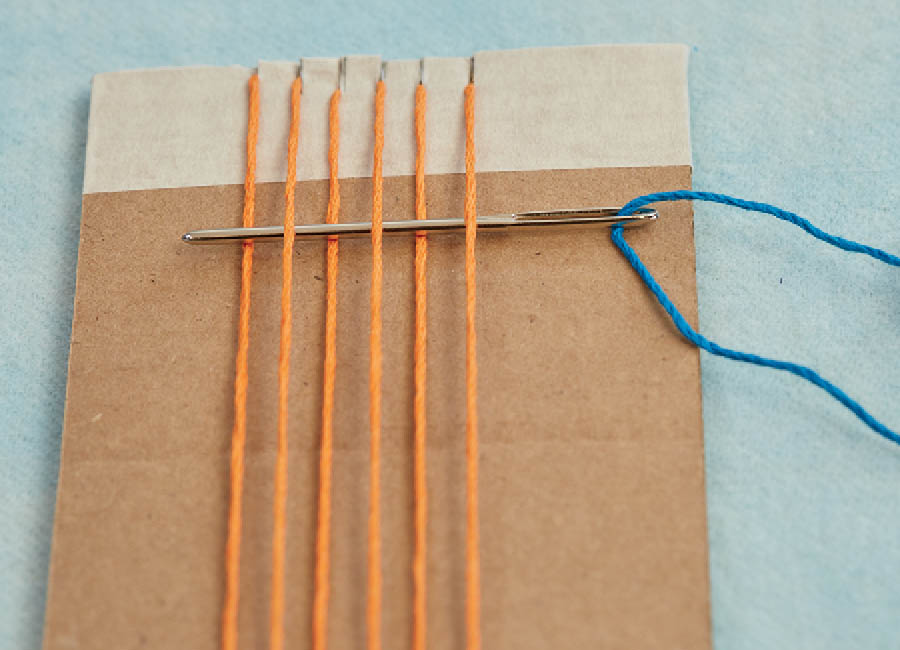
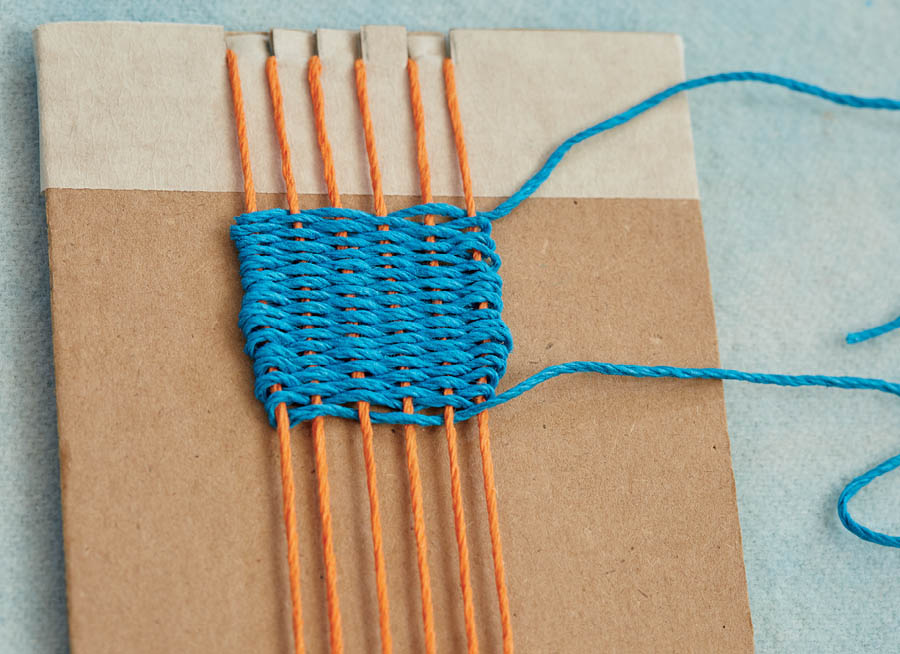
- 2. To make the warp, tape one end of your string (or twine or jute) to the middle of the back side of the loom. Slot it into the rightmost top slit, then flip the loom over like you’re turning a page, so that the front is facing forward (the string will now be on the left).
Wrap the string down to the bottom side of the cardboard and wedge it into the corresponding notch, then stretch it up the back side, and slot it into the second notch on top, and then down into the matching notch on the bottom. Continue wrapping, pulling the string tight in the notches, moving left to right, until you have six vertical strands.
Tape the string to the back of the loom, then cut the tail. Run an extra piece of tape across the warp strings on the back to secure them.
Weaving the weft
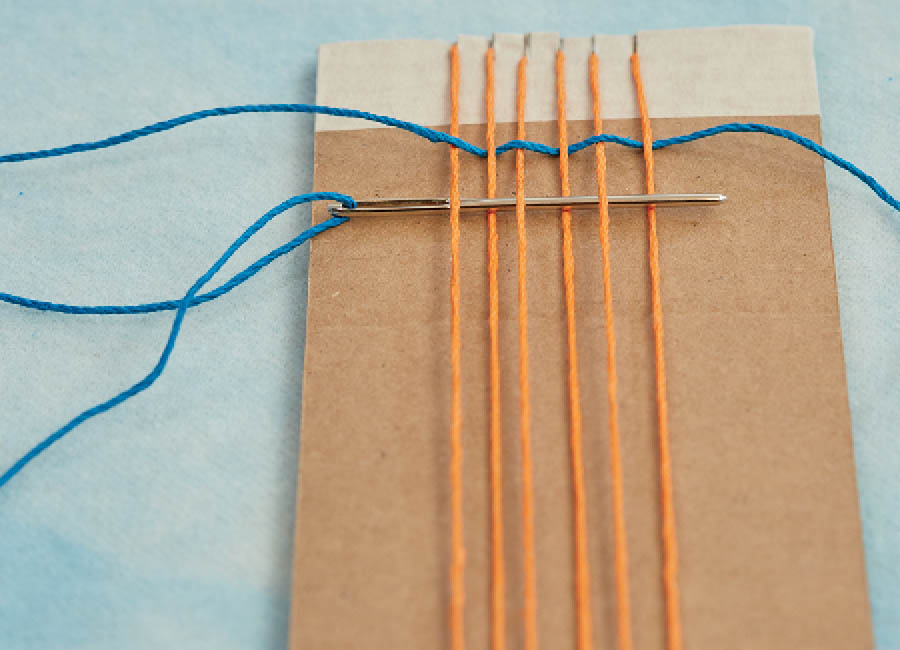
- 1. Start the weft by cutting about a yard of yarn, string, twine, or jute, and thread your needle (see Thread Your Needle). Starting about 1 inch from the top of the cardboard, weave the needle under and over the warp threads until you get to the other side (see Over and Under).
- 2. Pull the yarn through, leaving a 6-inch tail, then come back the other way, making sure to go under the warp threads you went over on the previous row, and over the warp threads you went under.
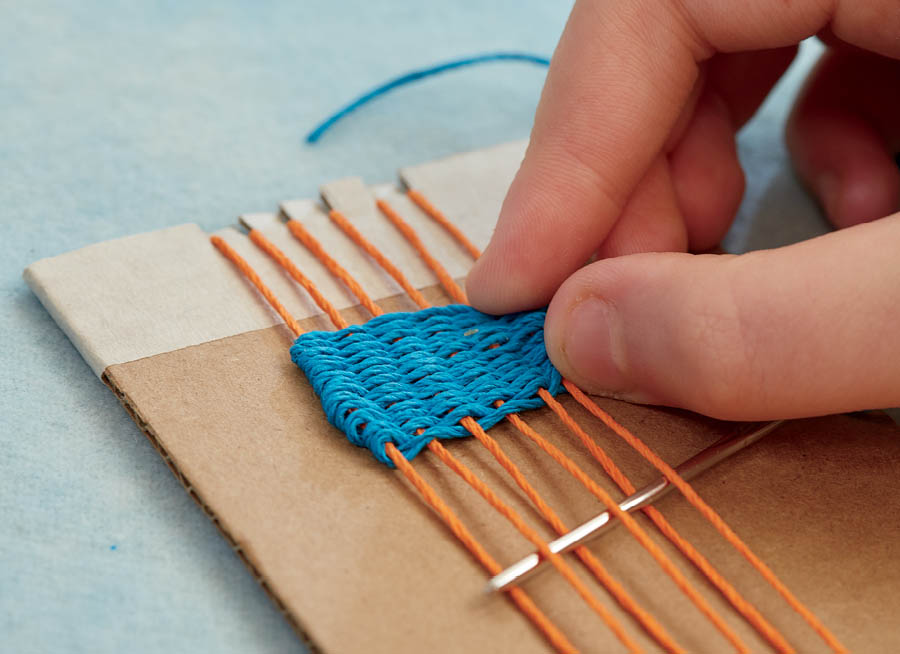
- 3. Repeat, going back and forth, until the weaving is as long as you like (this one is about 1 inch), stopping occasionally as you weave to push the rows together snugly with your fingers or the needle. If you want to change colors at any point, simply snip the string you’re using, and knot on a different color.
- 4. At the end of your last row, snip the string, leaving a 6-inch tail.
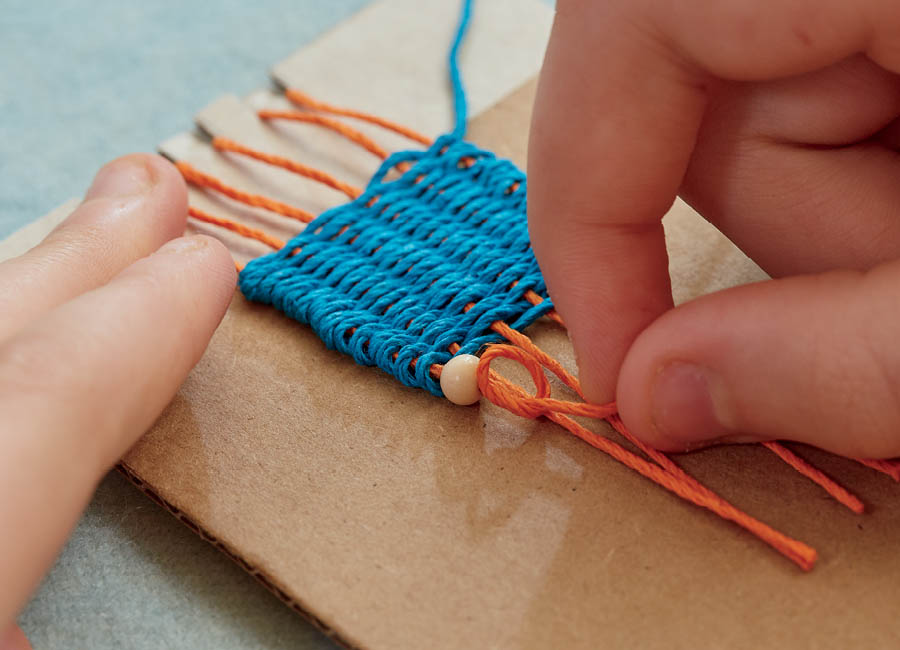
- 5. Cut across the warp strings 2 inches below your weaving, then thread a bead onto each string and tie a knot below it to secure.
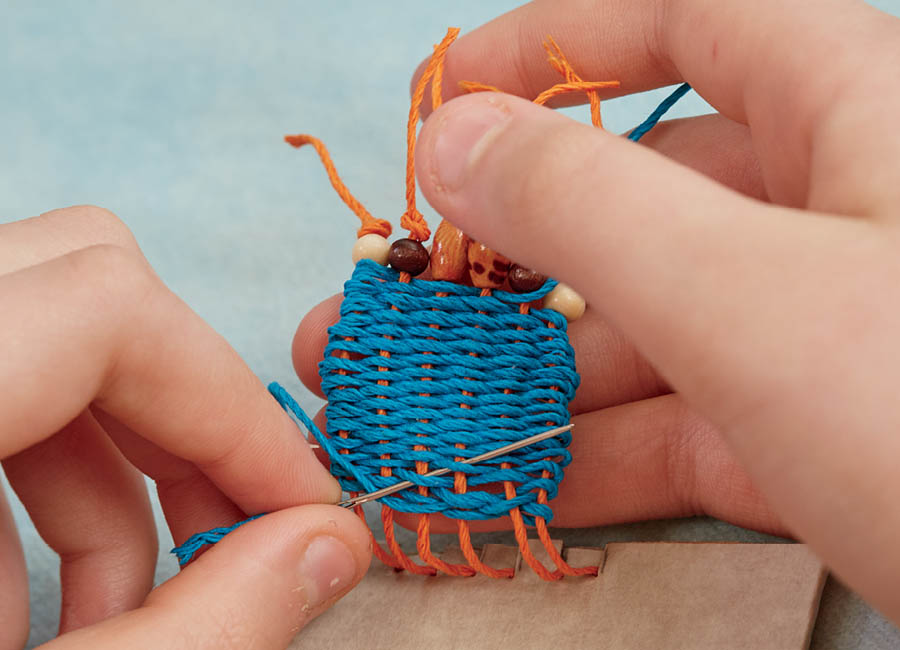
- 6. Use a needle to weave your two 6-inch weft tails into the back of your weaving, threading each one over and under the weft a few times and then tying them together where they meet in the middle. Snip off the ends.
- 7. Untape your warp strings and gently remove all the strings from the loom. Separate the warp strings into two groups of three strings each. Knot each set of three warp strings snugly against the weaving.
For a Key Fob
Knot the two sets of warp strings together to make a small loop and snip the ends. Thread the loop onto your key ring.
For a Necklace
Use a nice soft string or yarn for your weaving so it won’t be scratchy on your neck! Follow the directions for Making and Setting Up the Loom and Weaving the Weft through step 7. Knot the two sets of warp strings together at the top to make a long necklace that fits over your head.
If you like to change things up, you can keep the strings loose and tie them each time you wear the necklace, making it a different length, if you want.
Tip For Best Results
. . . Try to keep the width of your weaving even by not pulling too hard on the weft as you weave.
. . . Pack the weft in tightly (much more tightly than you might even think is possible). You’ll want to cover the warp threads completely in order to make a nice, firm fabric. You can use the needle to push each weft thread up against the area you’ve already woven.
. . . Add a piece of tape across the front of the warp at the very top before you start weaving. This will help keep the weft from slipping upward when you push your rows tight.
. . . If you want stripes, try using variegated yarn (see here).
For Fun
Weave Everything
The more you weave, the more you’re going to see weaving potential everywhere. Anything with holes or empty spaces in it, for example, is going to interest you. A colander! A sieve! A tennis racket! A slotted spoon! A forked tree branch! Your Crocs!
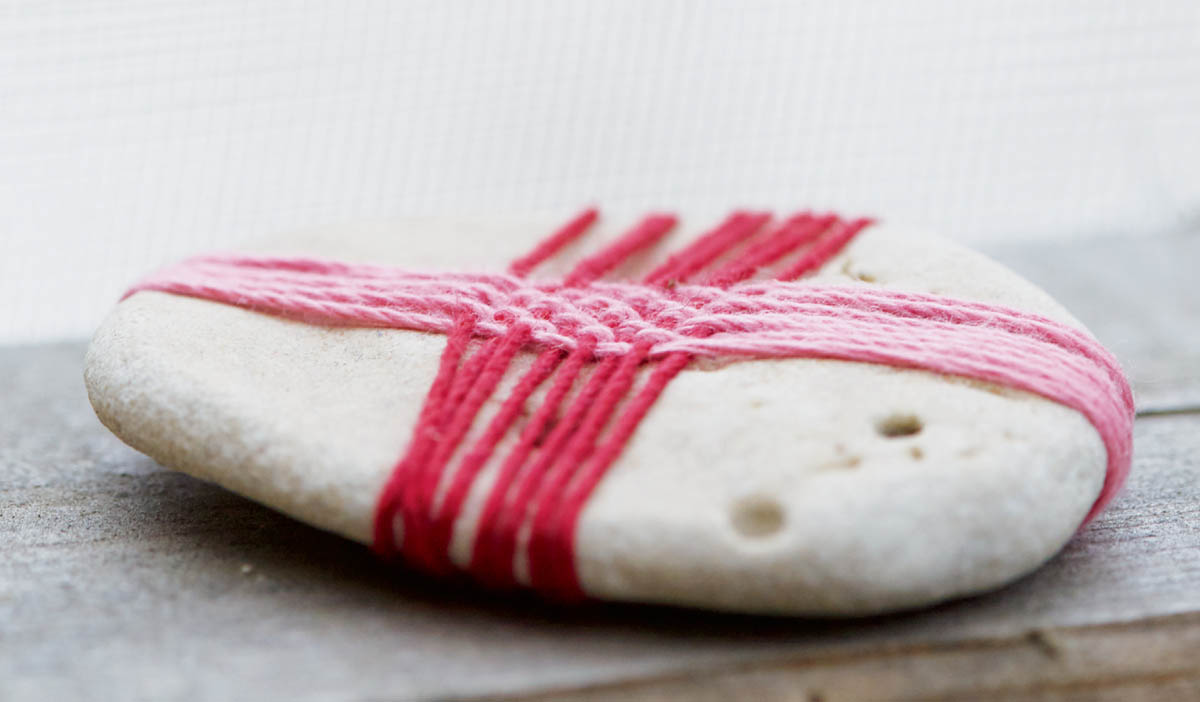
But you can also weave over anything that has a flat surface. We decorated this beach rock by winding the warp thread around and around and around, knotting the two ends tightly on the back. We wove the weft with a needle, winding it around the back between rows, and tying the two ends in back when we were done. Paperweight? Art? Weird holiday gift? You decide.
How to
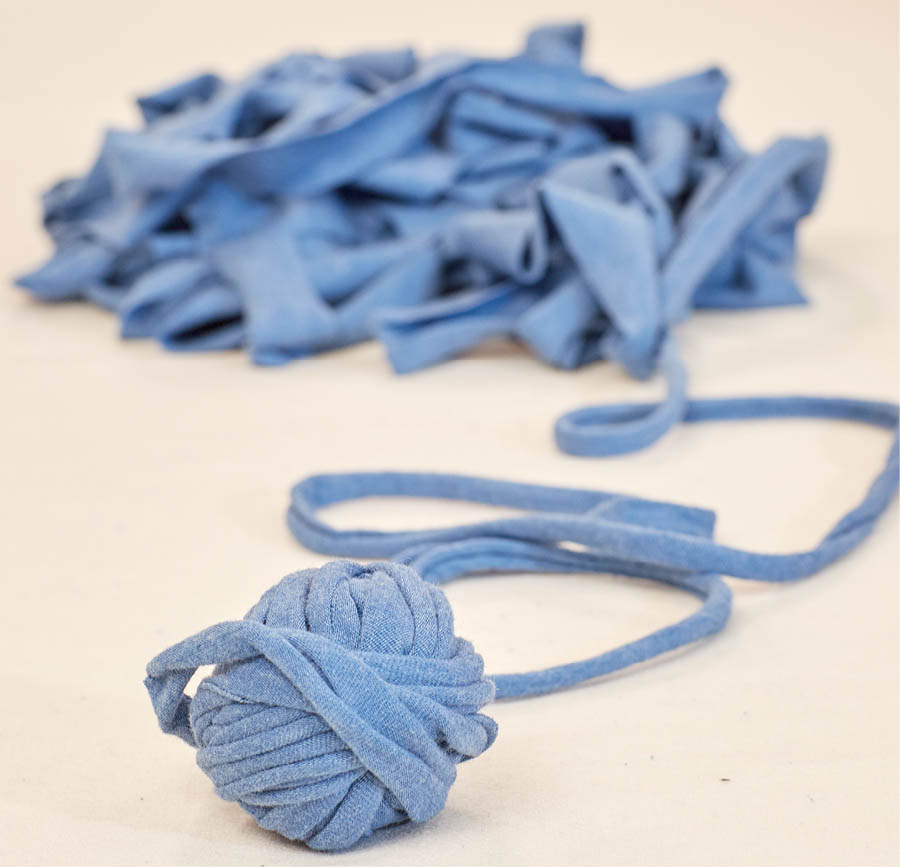
Cut a T-shirt into a Continuous Strand
You can use old T-shirts to make nice thick and colorful weft strips for weaving, or even “yarn” for knitting or crocheting. If you’re going to be working with a lot of one color, it’s easier to cut the T-shirt a special way so that you can make one continuous strand! Make sure you use a shirt without side seams. And be prepared to clean up lots of tiny nubbles that will come off the shirt as you cut it!
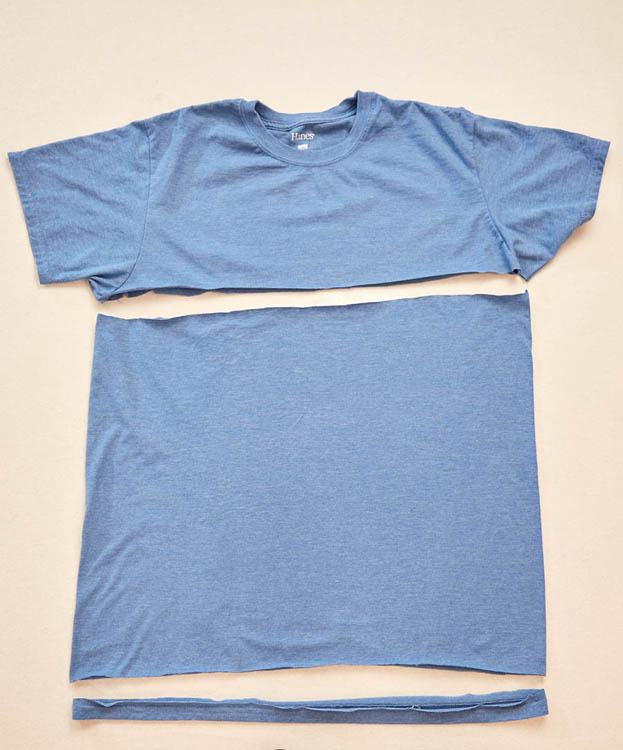
- 1. Cut a tube of fabric from the middle of the T-shirt, making one horizontal cut just above the bottom hem and one just below the armholes. You’ll end up with nice, smooth fabric, without the added seam and bulk of the hem.
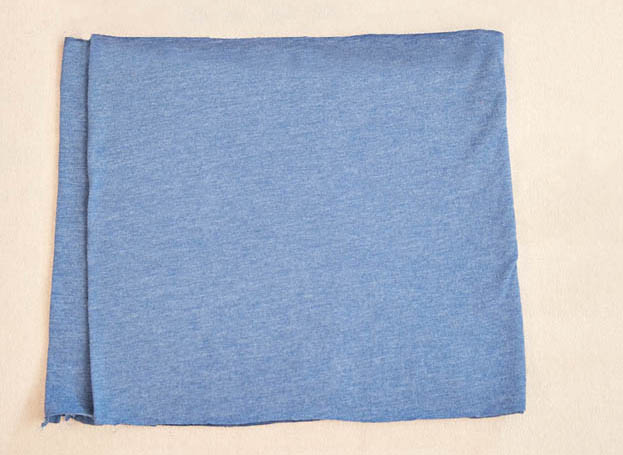
- 2. Fold one side of the tube toward the other side, stopping about 1 inch shy of the edge and smoothing out the fabric.
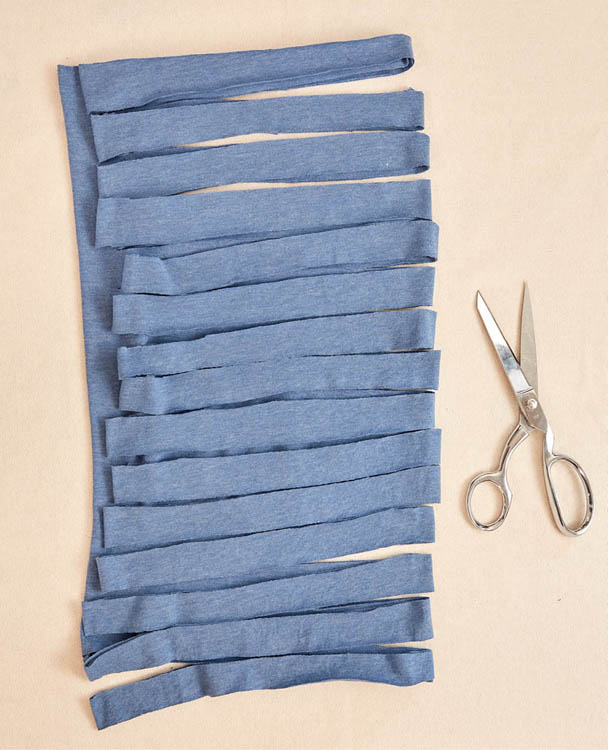
- 3. Going through all four layers of fabric, cut 1⁄2- to 1-inch strips from your right-hand fold through the left edge of the top piece.
- 4. Unfold the fabric, slip your arm through the uncut channel, and finish cutting the strips diagonally: from the first strip, cut across to the second strip, and so on until you reach the other end of the fabric.
- 5. Now you have one continuous strand of fabric. Working in arm-length segments, pull the strand tightly in opposite directions, stretching it to make the strip narrower and curled in, which will allow you to more easily weave or knit with it. Roll it up into a ball, and you’re ready to use it!
PROJECT
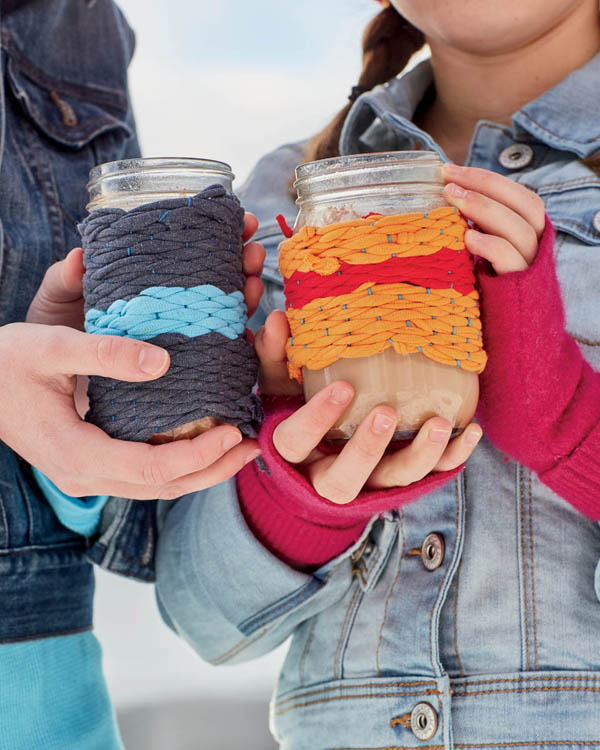
Jar Jacket
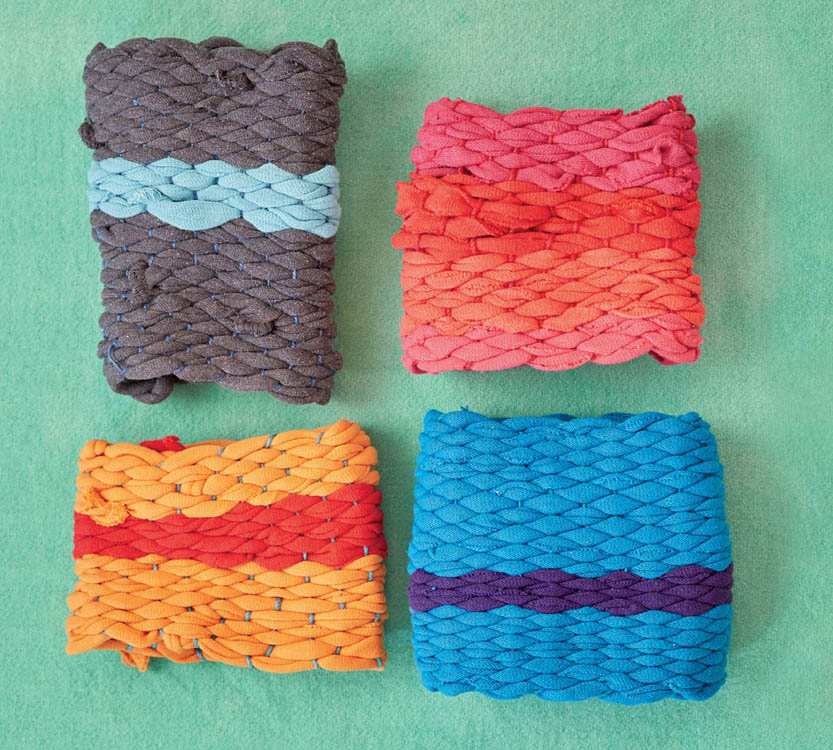
We got the idea for this project from experimenting with using a toilet-paper tube for a loom. A toilet-paper tube makes a super cute — but really small — cylinder of woven fabric. Our loom has an extra step (taping cardboard together to make a tube), but creates something you can really use!
We love this project because it’s so much fun to weave around and around. Besides, everyone has old T-shirts kicking around, and this way you can give them new life. And your mason jar drinking glass really needs a new outfit, no? (If it doesn’t, this makes a cute wrist cuff for a human.)
What You Need
- Ruler
- Pencil
- 31⁄2-inch × 11-inch piece of cardboard, cut from a cereal box (Use a ruler for measuring, so that the lines will be straight.)
- Scissors
- Clear packing tape
- Sturdy string or twine
- Old T-shirts
- Large-eyed blunt needle
How You Make It
Making and Setting up the Loom
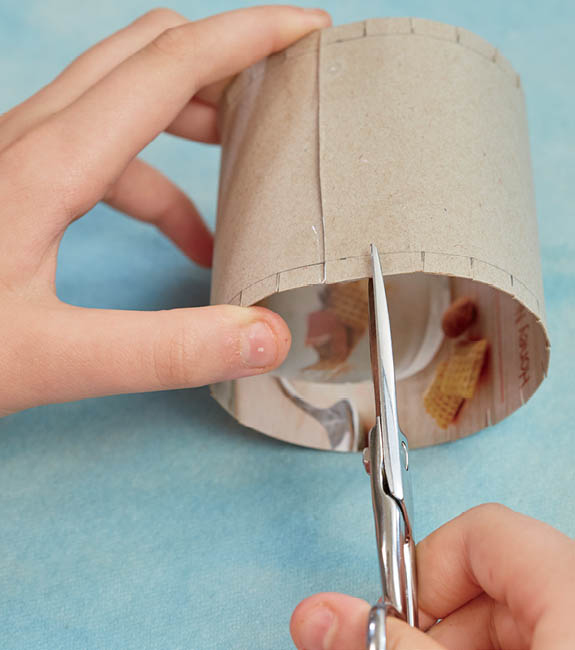
- 1. Use the ruler to draw a straight line across the top and bottom of the cardboard, about 1⁄4 inch in from the edge. These will be your cutting guides. Mark every 1⁄2 inch along the top edge and make sure you have an odd number of marks! Repeat along the bottom edge.
Cut along each mark, making sure to go only as far as the cutting guide. These will be the slots for your warp thread.
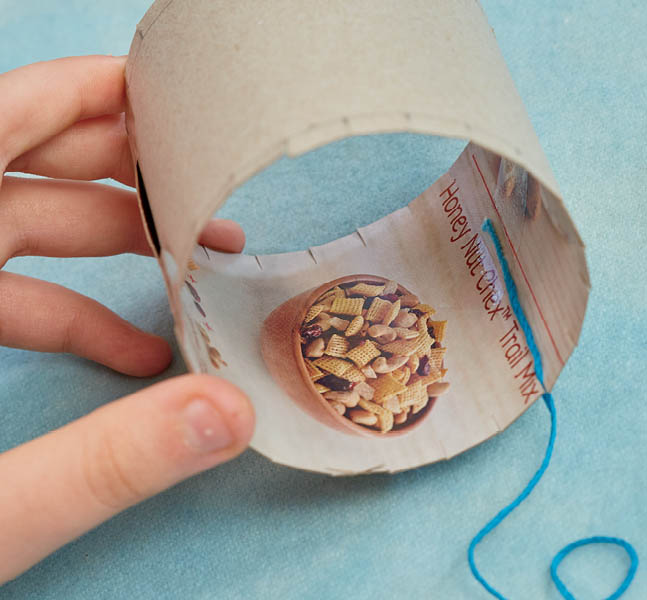
- 2. Curve the cardboard into a tube, overlapping the edges exactly 1⁄2 inch, then secure well with tape. The tape will probably cover one of the slits, and you should recut that one.
- 3. To start setting up the warp, slide the string or twine into the notch nearest the tape, leaving a 2-inch tail inside the tube. Tape the tail down to secure it.
- 4. Pull the string down to the corresponding notch at the bottom of the tube, and slide it in, pulling the string taut. Now tug the string over into the next notch (you’ll make a little dash of string inside the tube), and stretch it up across the tube into the corresponding notch above. Then pull the string one notch over and down. Repeat this until you have strung the warp up and down around the entire tube.
When you get back to where you started, leave a 2-inch tail and snip the thread, then tape the tail inside the tube.
Weaving the Jar Jacket
- 1. Cut long 1⁄2-inch-wide strips of fabric from your T-shirts. (It’s fine if they’re a little raggedy and imperfect!) Or learn how to cut your shirt into one continuous strand (see Cut a T-shirt into a Continuous Strand).
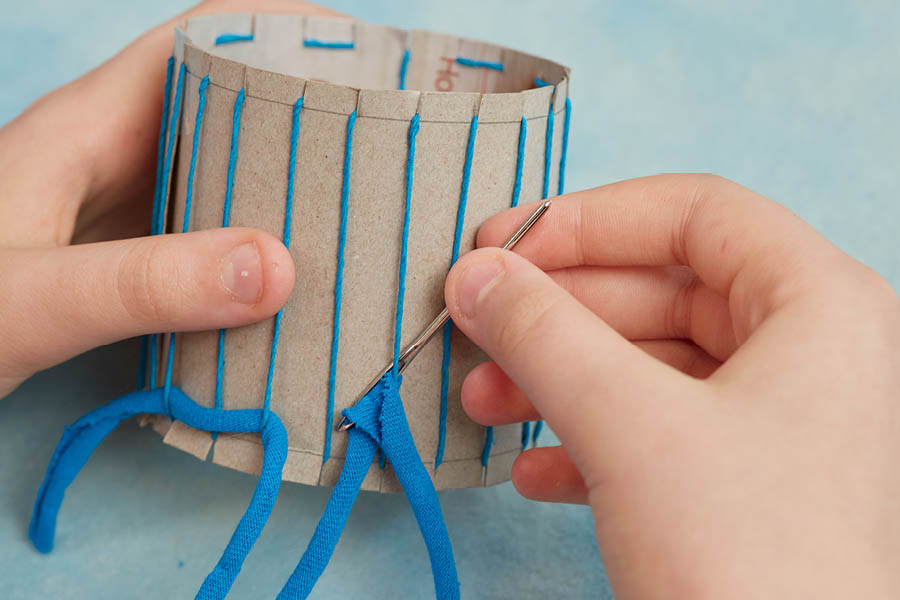
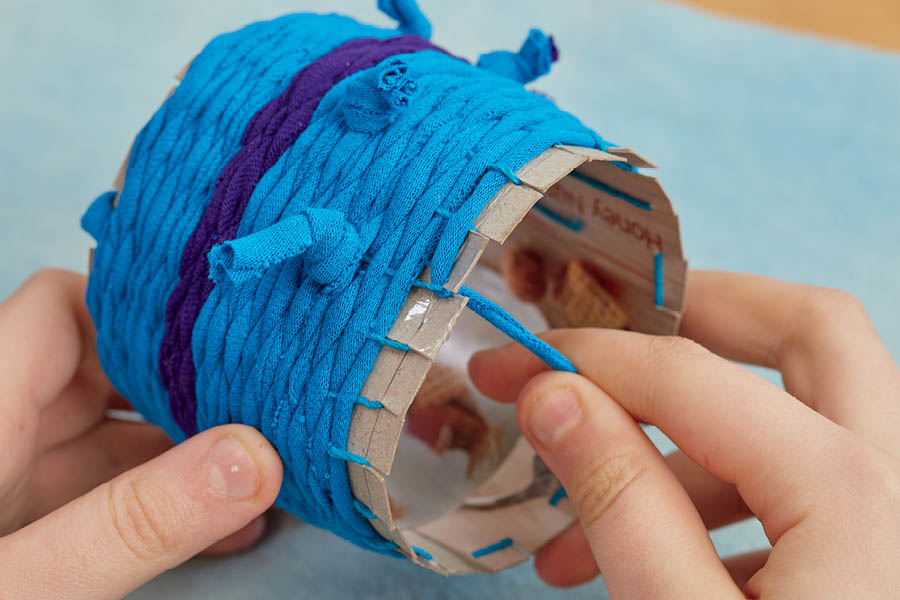
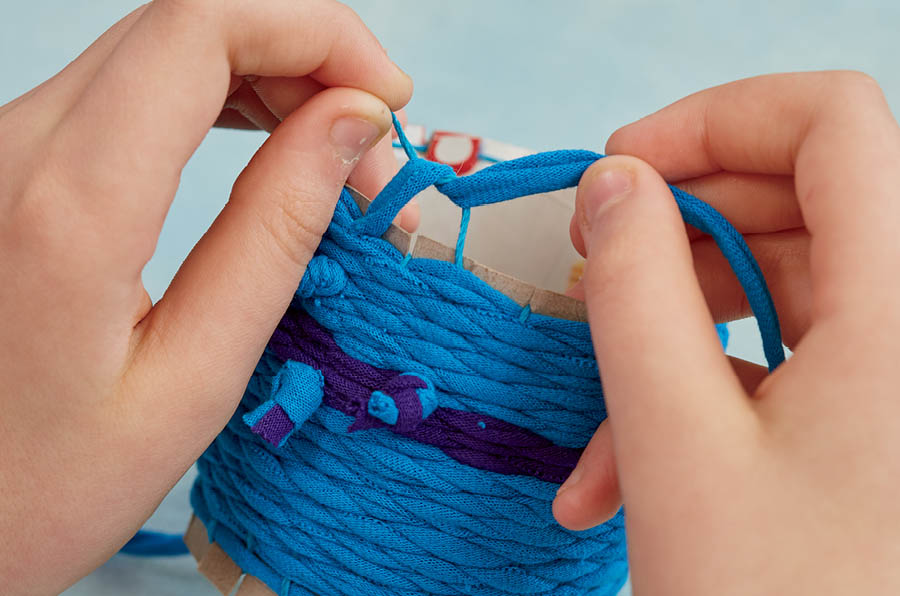
- 2. Thread your needle with one T-shirt strip and begin weaving near the tape at the bottom of the tube, leaving a 2-inch tail. Weave the fabric over and under (see Over and Under) the warp strings, around and around the tube, pulling it through as you go.
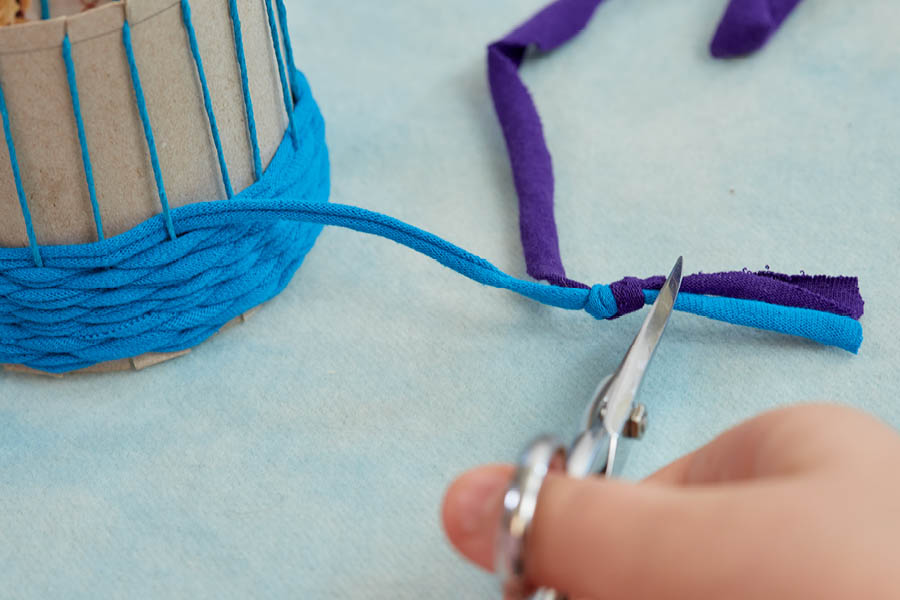
- 3. When you have about 3 inches of weft fabric left, stop, remove the needle, knot a new piece (or a new color) to the old one, and snip the ends. Rethread your needle and keep weaving, carefully pulling the knot through so that the weft stays nice and tight. (Don’t worry: the knots will end up on the back!)
- 4. Keep weaving, stopping occasionally to push the weft together so that it stays snug, until you get to the very top of the tube. (You want to cram in as much as you can, so the weaving will be nice and tight and all of the warp strings will be covered by the T-shirt weft strings.) Finish your weft row at the tape.
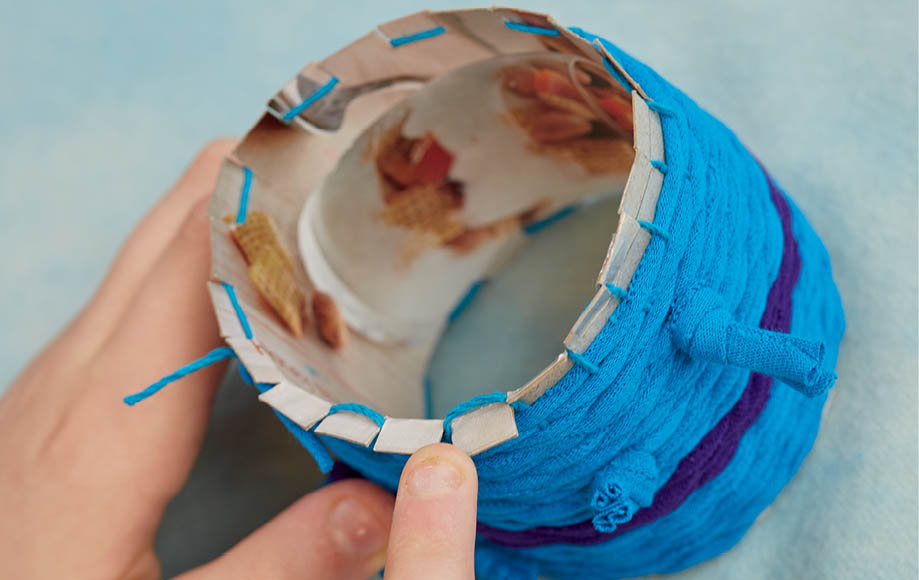
- 5. Cut your weft strip, leaving a 3-inch tail, then untape the warp from the inside of the tube. Tie the weft and warp strands together. Repeat at the bottom, knotting the original weft tail to the warp tail.
- 6. Fold the cardboard tabs at the top toward you to release the warp loops from the back. Repeat with the tabs at the bottom of the tube, then fold the cardboard slightly to let the weaving slide off.
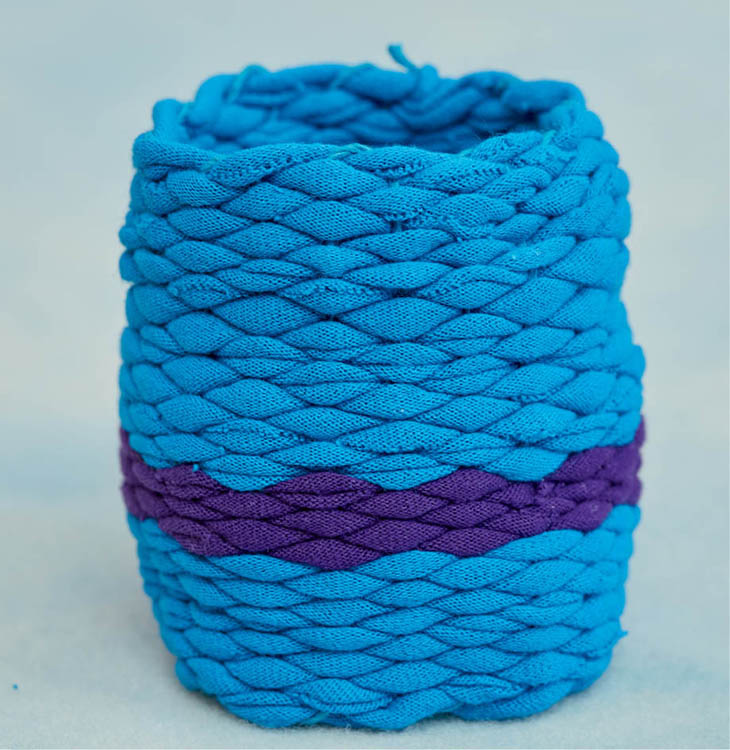
- 7. Turn your weaving inside out so the knots are on the inside.
For Fun
DIY Looms
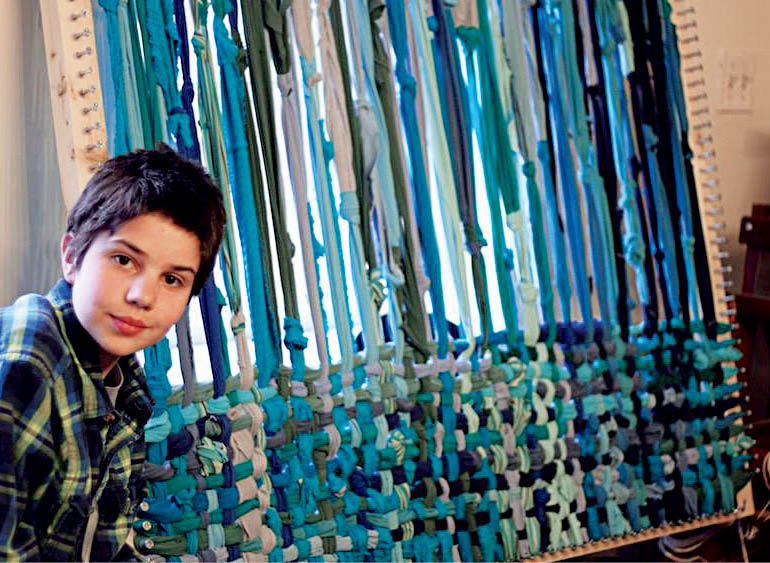
f you’ve got the weaving bug now, you can make a bigger loom out of any number of different materials: a cardboard box, a picture frame, a chair that has no bottom, or PVC pipe, which you can get at the hardware store.
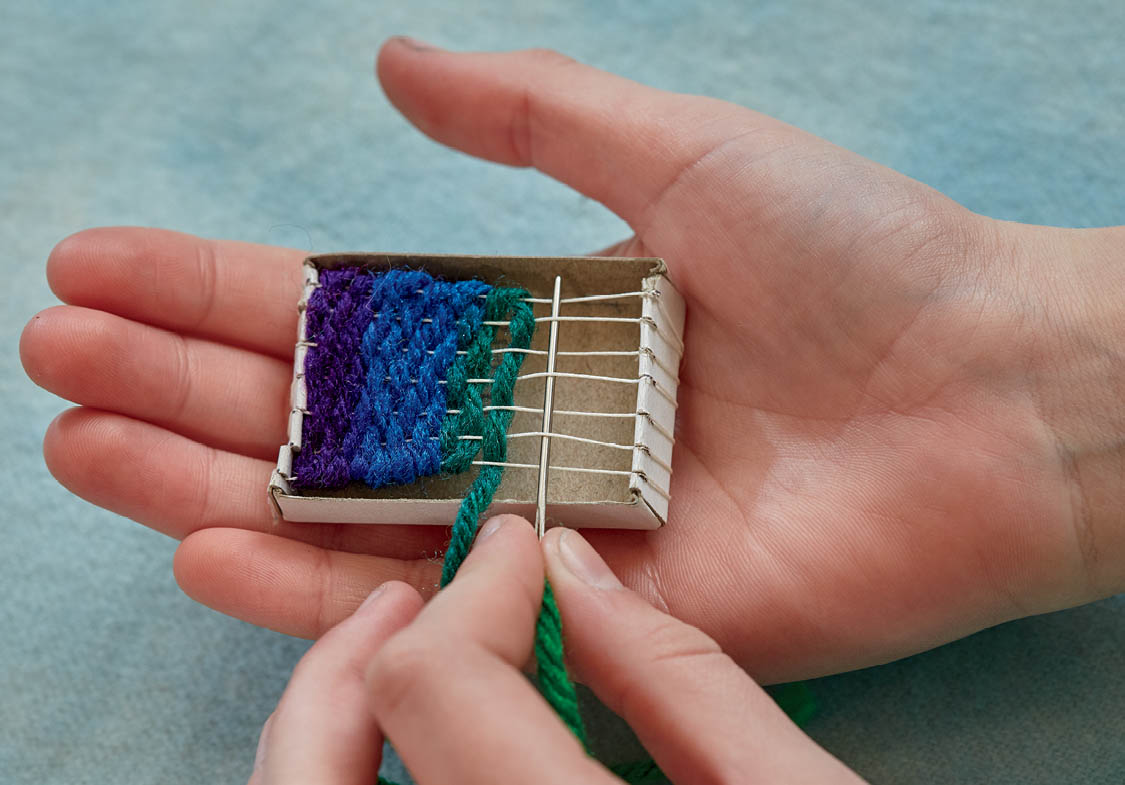
Kids Weaving, by Sarah Swett, has complete directions for making a PVC pipe loom, and there are also lots of websites with directions for all kinds of DIY (do-it-yourself) looms. (In the picture above, Catherine’s daughter is at the Snow Farm craft center weaving a T-shirt rug on a giant pot holder–style loom that our friend Crispina ffrench made from wood and screws!) Of course, you can also make smaller looms. A matchbox makes a fun loom frame for the tiniest projects.
