GROW
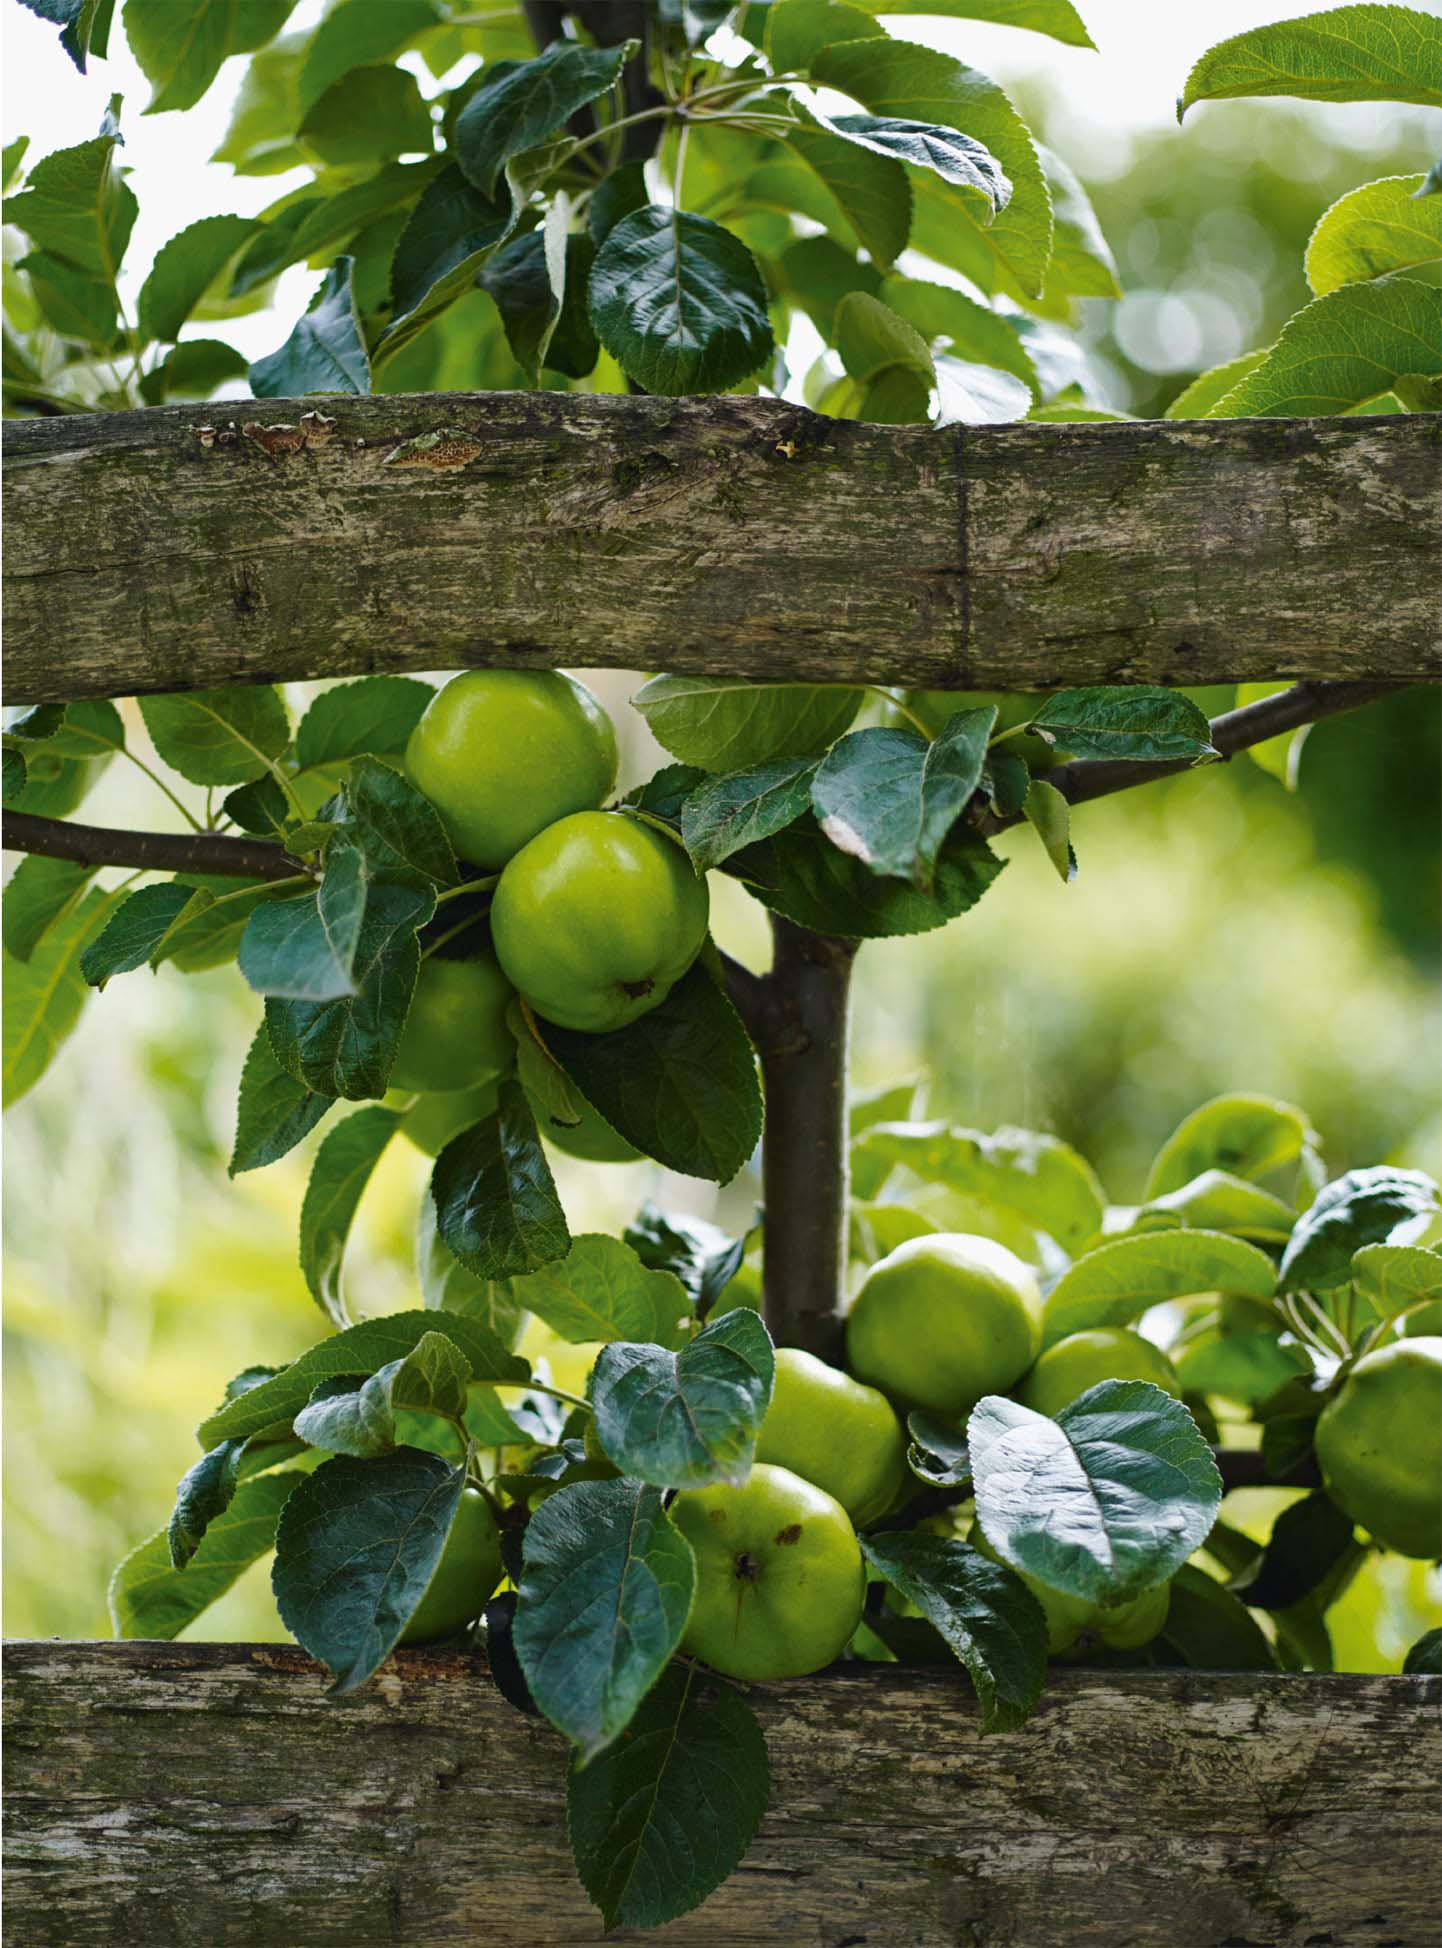
Apples are a long-term investment in the garden, but they are well worth the wait. Much of the fruit sold in the shops is imported from the other side of the world, or stored for months, or both, and inevitably some of the natural sugars are lost. Plus, by growing your own, you can choose from the hundreds of varieties available. Apple trees do not require a lot of space, and they grow just as happily in a pot or when planted in the garden against a fence.
When choosing varieties, consider whether you want the fruit to cook down into a purée or to hold its form. Cooking apples that break down include ‘Bramley’s Seedling’ and the compact ‘Emneth Early’, whereas ‘Blenheim Orange’ will hold its shape. Dessert apples tend to be sweeter and can be grated before they are cooked, or else baked in recipes requiring apples that keep their shape. Good choices are ‘Egremont Russet’, ‘Falstaff’ and ‘Cox’s Orange Pippin’.
Plant trees (whether growing in pots or bareroot) from autumn to spring. First put in wires to train them on, or stake free-standing trees. An open, sunny aspect is best, and the trees will tolerate most soils. How far apart your trees need to be spaced depends on if/how each is trained and on to which rootstock it is grafted. Dwarfed cordons can be planted as little as 75cm/30in apart, while large trees should be up to 9m/30ft apart.
Water in dry spells, especially once the tree is flowering and then producing fruit. An annual mulch in spring will help conserve moisture. The tree’s own ‘June drop’ usually disposes of excess young fruits, but remove most of any large clusters to allow decent-sized apples to develop. Prune annually, in summer (for trained trees) or winter (for free-standing ones), cutting branches back to 2–3 buds above last year’s cut; see here for where to find pruning advice.
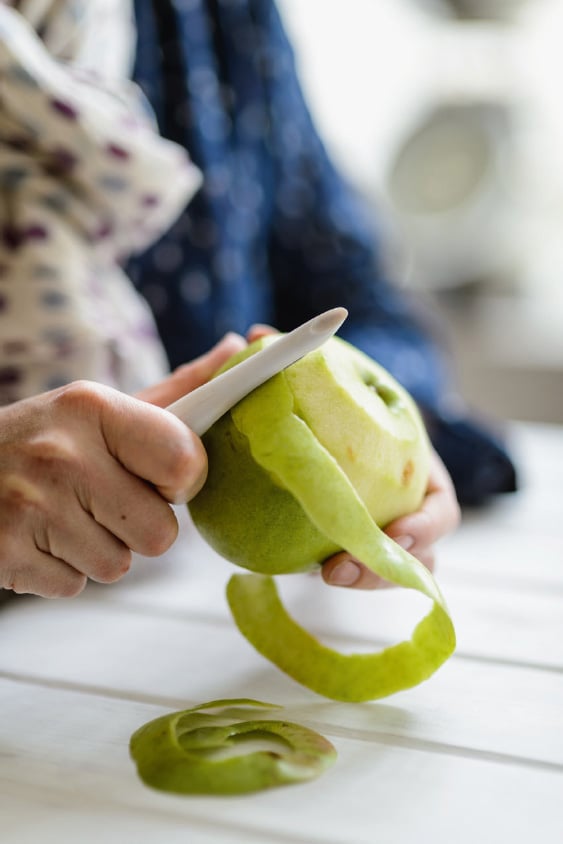
An apple is ready to harvest if its stalk breaks naturally when the fruit is gently lifted from the branch. Depending on the variety this can be from late summer to early winter.
Apples are ready to harvest when the stalk breaks easily from the branch.
BAKE
A muffin for all seasons (see here)
Apple pie (see here)
Mince pies (see here)
Toffee apple cupcakes (see here)
BAKE
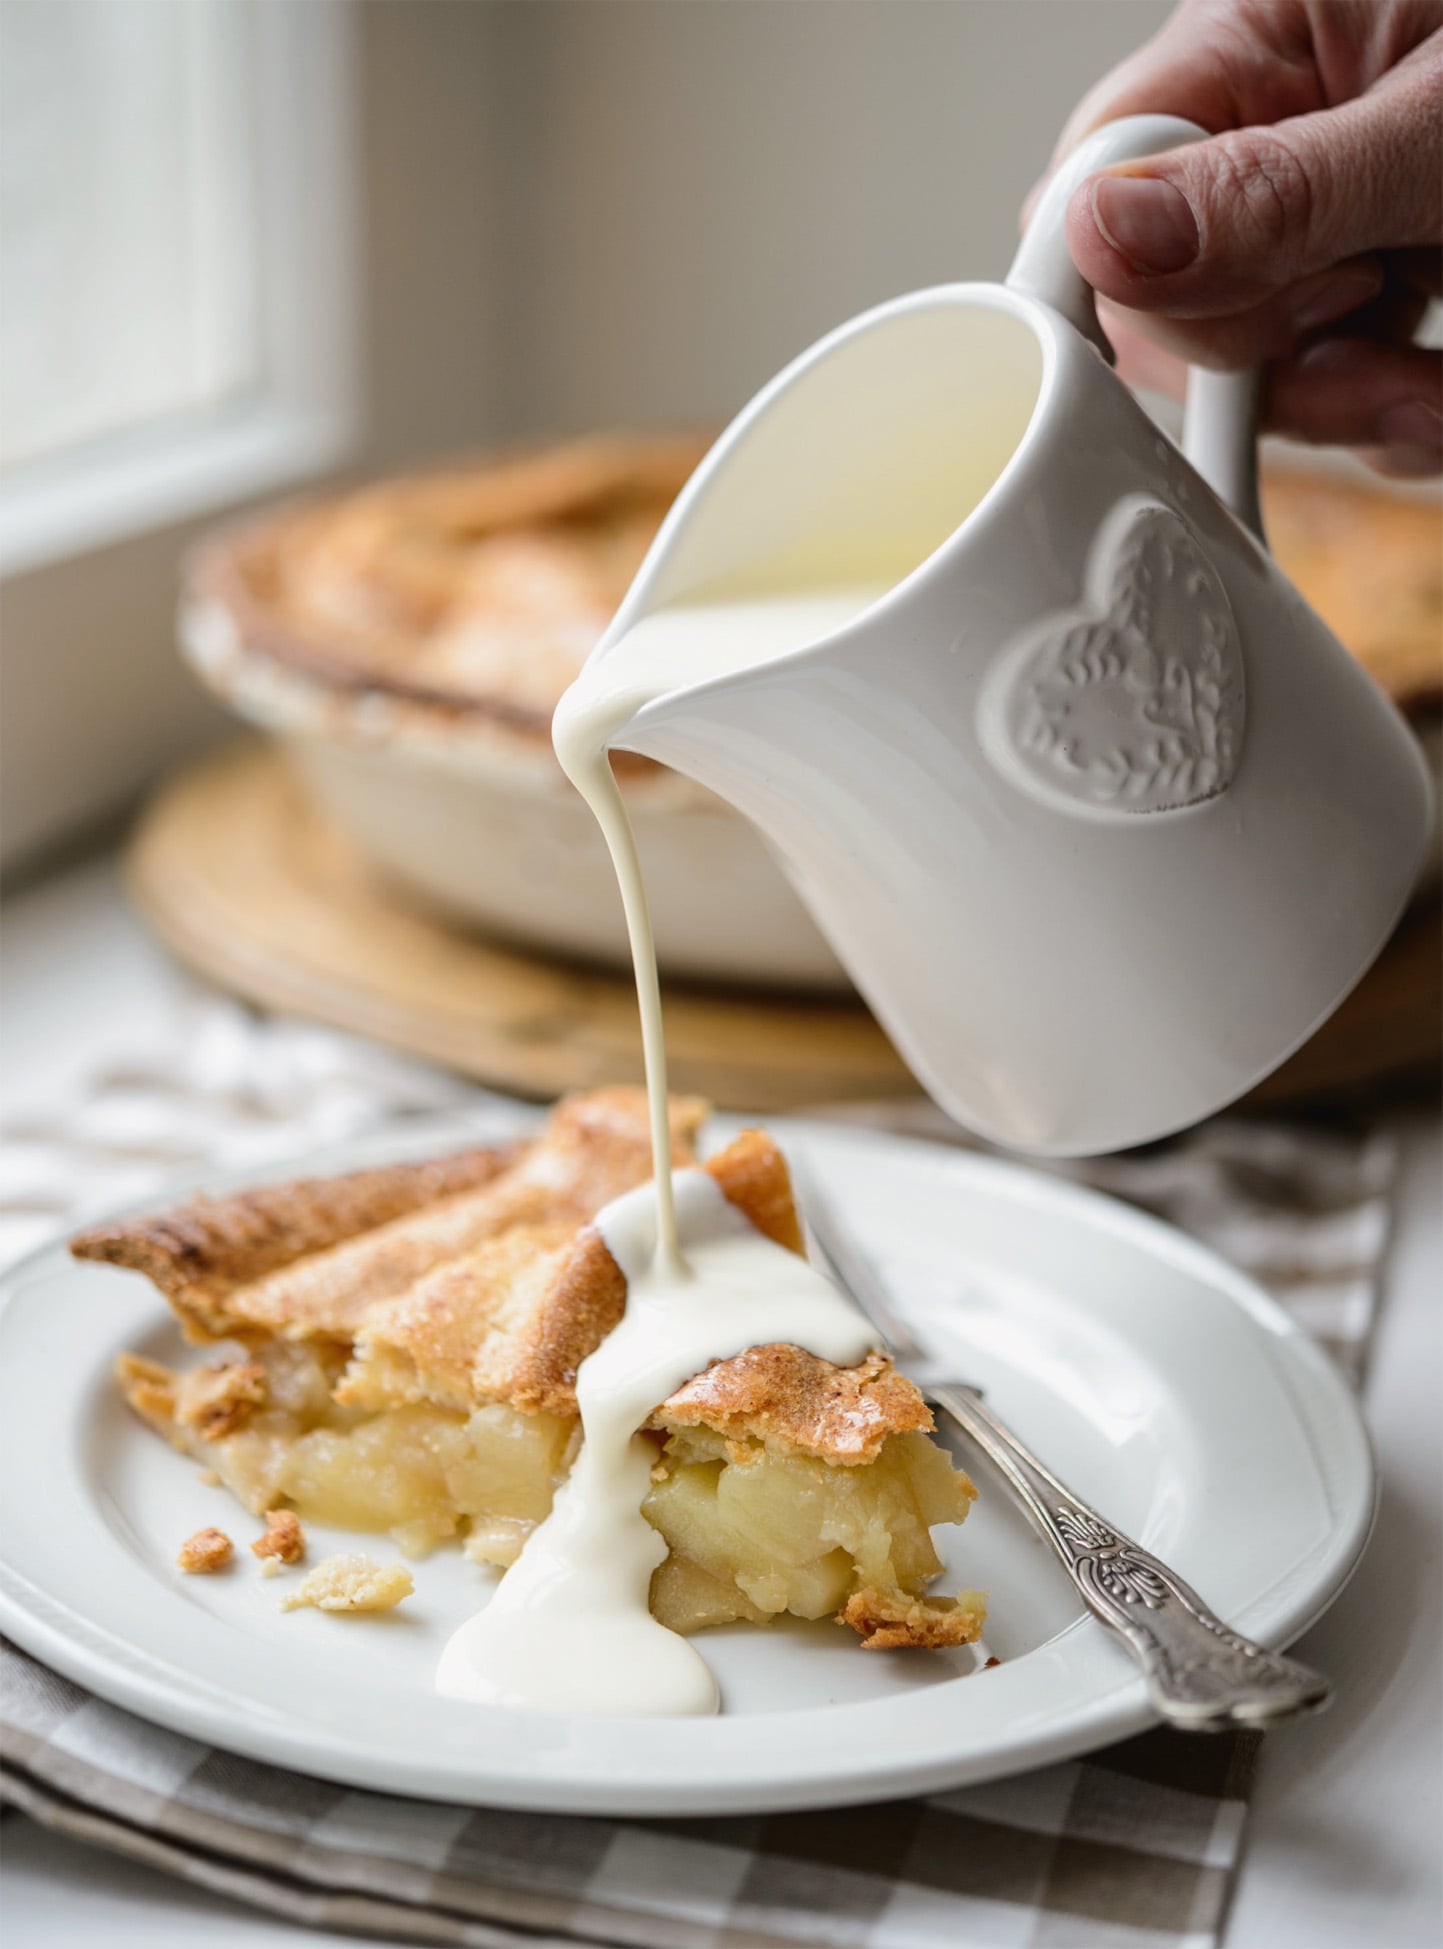
The choice of apple in your pie is a matter of taste and texture. Do you want definite pieces of apple or a general blend (I hesitate to say mush, but that is essentially what it is)? This recipe is the best of both worlds – the apples are completely enclosed with rich buttery pastry and dusted with cinnamon sugar.
SERVES 10
YOU WILL NEED
1 × baking sheet
1 × deep pie dish, 24–25cm/
9½–10in diameter, greased
INGREDIENTS
Pastry case:
350g/12oz plain flour
125g/4oz unsalted butter, chilled
125g/4oz light muscovado sugar
2 eggs, beaten
Filling:
1 tbsp cornflour
2 tbsp (golden) caster sugar
6 dessert apples that keep their form
2 large cooking apples that break down
½ lemon, juice
Topping:
1 egg, beaten with a small pinch of salt
1 tsp ground cinnamon
1 tbsp demerara sugar
METHOD
• |
For the pastry case, roll out two-thirds of the pastry so that it is big enough to line the dish, and transfer it carefully. Remove the overhang and use it to cut out leaves or other shapes to decorate the top of the pie. Roll out the remaining one-third to create a disc big enough to form the pie lid, remembering the apples will be mounded up in the dish; then return the lid to the refrigerator on a sheet of baking paper. Preheat the oven to 190°C/375°F/gas mark 5 and place the baking sheet on the middle shelf. |
• |
For the filling, mix the cornflour and caster sugar together in a small bowl. Peel, core and slice the apples, and arrange in the dish in alternate tiers of the two varieties. Sprinkle each tier with lemon juice and a heaped teaspoon of the cornflour/sugar mix. Mound the final tiers towards the centre of the dish slightly. |
• |
For the topping, brush the edge of the pastry base with the egg and lay the lid over the top, cutting off any excess and pressing the edges together with a fork to seal them. Brush the lid with beaten egg, lay on the decorative leaves, brush them with egg and cut a small steam hole in the centre of the lid. Mix the cinnamon and demerara sugar in a bowl and sprinkle it over the pie top. Put the dish on the baking sheet in the oven. Bake for 30–40 minutes, until the pastry is hard when tapped and the apples soft. (The cinnamon and brown sugar in the pastry make it appear darker than usual.) Remove from the oven and leave to settle for a bit. |
TO SERVE
Serve hot, but not straight from the oven, with lashings of cream.
GROW
Fat, sweet, juicy plums herald the beginning of the end of summer, the most bounteous time of year in the kitchen garden. If you leave the fruits to ripen on the tree until it takes only a look to make them fall into your hand, you will be rewarded with the best plums you have ever tasted.
Plum varieties are split into culinary and dessert plums, but to be honest even the former varieties are delicious to eat raw when compared with a supermarket fruit. Good choices are ‘Czar’, and the reliable ‘Opal’ and ‘Victoria’, or try a greengage instead such as ‘Cambridge Gage’. All of these are self-fertile, so you need only one tree for successful fertilization. Damsons, a type of plum, are best cooked and have a much more intense flavour, which is ideal for jams or mincemeat (see here).
Plums prefer a sunny site with shelter from wind, and are ideal for training against a sunny wall or fence (a fan shape is the traditional form, but they can also be grown in cordons). They can be grown in large pots too. Plant bare-root trees in autumn or late winter, and potted trees in autumn or spring, staking or tying them to wires. Cordons should be planted 75cm/30in apart, fans will need 4–5m/13–16ft between trees and free-standing plums on semi-dwarfing rootstocks should be set 2.5–3.5m/8–12ft apart.
Unlike other tree fruit, plums are pruned when in leaf, to avoid spreading a couple of specific plum diseases. An annual prune in spring (for bush trees) or summer (for trained ones) is all that is required (see here–here). Make sure no fruit is left rotting on the tree, and mulch it with organic matter in spring.
Depending on the variety, plums will ripen from midsummer to autumn. If possible leave the fruit on the tree until the merest nudge knocks it off the branch, but, if the cold weather is imminent or wasps are a nuisance, pick the fruit when unripe and leave it to develop indoors.
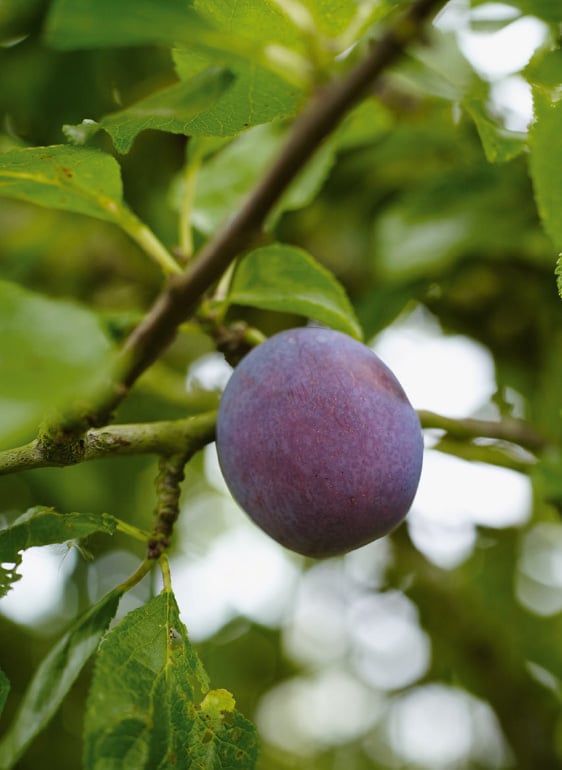
Leave plums to ripen for as long as possible on the tree.
BAKE
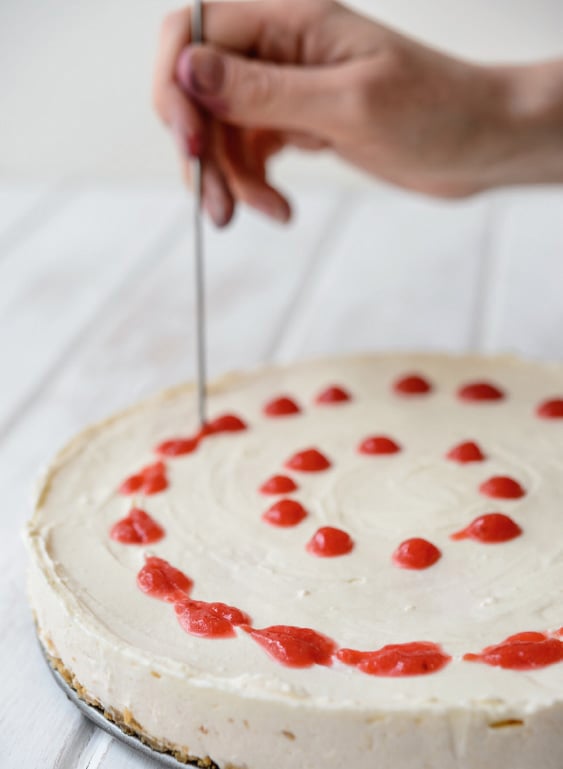
This delightful, light pudding for late summer is perfect for that last evening meal of the year under the stars. Before you roast the plums always check that you have enough halves to cover the base completely, cut side down, with at least two whole plums/four halves left over. The components of this plum cheesecake can be made in advance and assembled on the day.
SERVES 8–10
YOU WILL NEED
1 × spring-form, round cake tin, 23cm/9in diameter,
greased and base-lined
1 × brownie or small roasting tin, 20 × 25 × 3cm/
8 × 10 × 1¼in
INGREDIENTS
Roasted plums:
750–800g/1lb 10oz–1lb 12oz plums, halved and pitted
75g/2½oz caster sugar
150ml/¼ pint water
Base:
200g/7oz ginger biscuits
100g/3½oz unsalted butter
Cheesecake:
300g/10oz mascarpone
300g/10oz crème fraîche
1 tsp vanilla extract
4 tbsp icing sugar
METHOD
TO SERVE
Serve chilled, on the day of making.
GROW
Plums (see here)
BAKE
These pizzas are a great finish to a meal of their savoury counterparts, and a good way to involve children with the cooking. Some suggested toppings are given below, but get creative and make up your own.
MAKES 8 SMALL PIZZAS
YOU WILL NEED
1 × pizza stone or a baking sheet
1 × baking sheet, floured
INGREDIENTS
250g/8oz strong white bread flour
250g/8oz plain flour
1½ tsp fast-action dried yeast
1 tsp salt
1 tsp caster sugar
320ml/11fl oz warm water (100ml/3½fl oz boiling water, the rest cold water)
1 tbsp olive oil
TOPPING SUGGESTIONS
(QUANTITIES FOR ONE PIZZA):
Berries and currants topping:
75g/2½oz raspberries, strawberries, red- or blackcurrants and/or blueberries, or a mixture of some or all of these
2 tbsp jam
Apple or pear topping:
1 tsp muscovado sugar
small knob of butter
½ apple or pear, thinly sliced
Fig and almond topping:
2–3 figs
runny honey, for drizzling
1–2 tbsp flaked almonds
Cinnamon plum topping:
½ tsp ground cinnamon
1–2 plums, pitted and thinly sliced
½ tsp demarara sugar
METHOD
• |
For the dough, sift all the dry ingredients together, and pour in the water and oil. Mix to a dough and knead until it is soft and silky (about 10 minutes in a stand mixer with a dough hook). Cover and leave in a warm place to double in size. Preheat the oven to as hot as it will go (or fire up the pizza oven, if you are lucky enough to have one), but to at least 220°C/425°F/gas mark 7; place a pizza stone or baking sheet inside to warm up. Divide the dough into 8 pieces and roll out each to about the size of a side plate. Put a couple on the floured baking sheet, then add the toppings. |
• |
For the berry and currant topping, spread the jam on the dough, then top with the berries and currants. Once it is out of the oven, you could add a couple of squares of chocolate, roughly chopped. Alternatively omit the jam and add blobs of Lemon curd (see here) to the cooked pizza. |
• |
For the apple or pear topping, mash the sugar into the butter with a fork and spread over the dough. Lay over the apple or pear slices. |
• |
For the fig and almond topping, cut each fig into one-eighths and put on the dough. Drizzle with honey and scatter with flaked almonds. |
• |
For the cinnamon plum topping, dust the dough with cinnamon. Lay the plum slices over the dough and scatter with the sugar. |
TO SERVE
Slide the pizzas off the baking sheet on to the preheated stone/baking sheet and cook for 7–10 minutes, until the bases are crisp and the crusts slightly browned. Remove from the oven and repeat to bake the other pizzas. Serve hot, sliced into wedges, with more honey/jam/melted chocolate, as appropriate, for drizzling over the top.
GROW
Apples (see here)
Berries (see here, here, here)
Figs (see here)
Lemons (see here)
Pears (see here)
Plums (see here)
GROW
Chillies are an increasingly popular crop for the home-grower, not least because cultivating your own from seed allows for a far, far greater range of heat levels and flavours than the choice on a supermarket shelf would indicate was possible.
BEST VARIETIES
Consider how spicy you like your chillies before choosing which varieties to grow. The fruitiest flavours come from the habanero types (also known as Scotch bonnet chillies), which range from the mild ‘Apricot’ through quite spicy ‘Hot Scotch’ and very hot ‘Submarine’ to the eye-watering ‘Devil’s Rib’. Chillies can also be very pretty plants to grow: the multicoloured ‘Numex Twilight’ is a great example, while ‘Spike’ would be a good choice for the sugar glass (see here).
PLANTING
Sow chillies in late winter, indoors and preferably in a heated propagator as they need temperatures of 18°C/65°F+ to germinate. Alternatively buy young plants from garden centres or specialist growers. Once there is little risk of frosts plant out into the sunniest, hottest patch of ground you have, or set in a pot and position it on a patio or windowsill. Space plants 40cm/16in apart.
MAINTENANCE
If the branches of large-fruited varieties – and even smaller-fruited ones – get overladen, tie them to a stake, using the three-loop method (see here). Keep plants well-watered and fed, especially those in pots. Plants grown under cover will benefit from being sprayed with water when they are flowering, to help pollination.
HARVEST
Chillies will be ready to harvest from midsummer, depending on the variety and when they were sown. A chilli is mature when it feels firm to the touch, and can be picked then, even if it is green. For the best flavour wait until the chilli is ripe, when it has developed its final colouring.
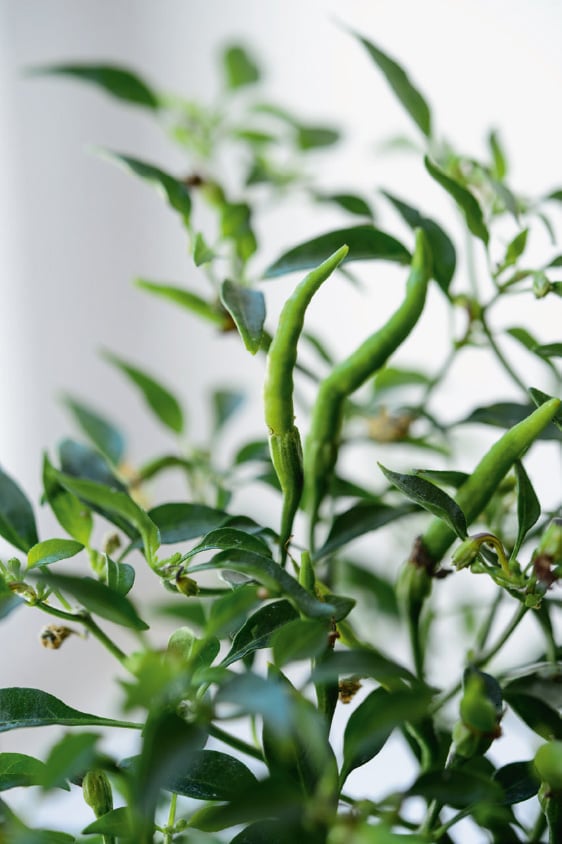
Chillies, here on the variety ‘Spike’, once mature can be picked green or red.
BAKE
Chilli chocolate mudcake (see here)
BAKE
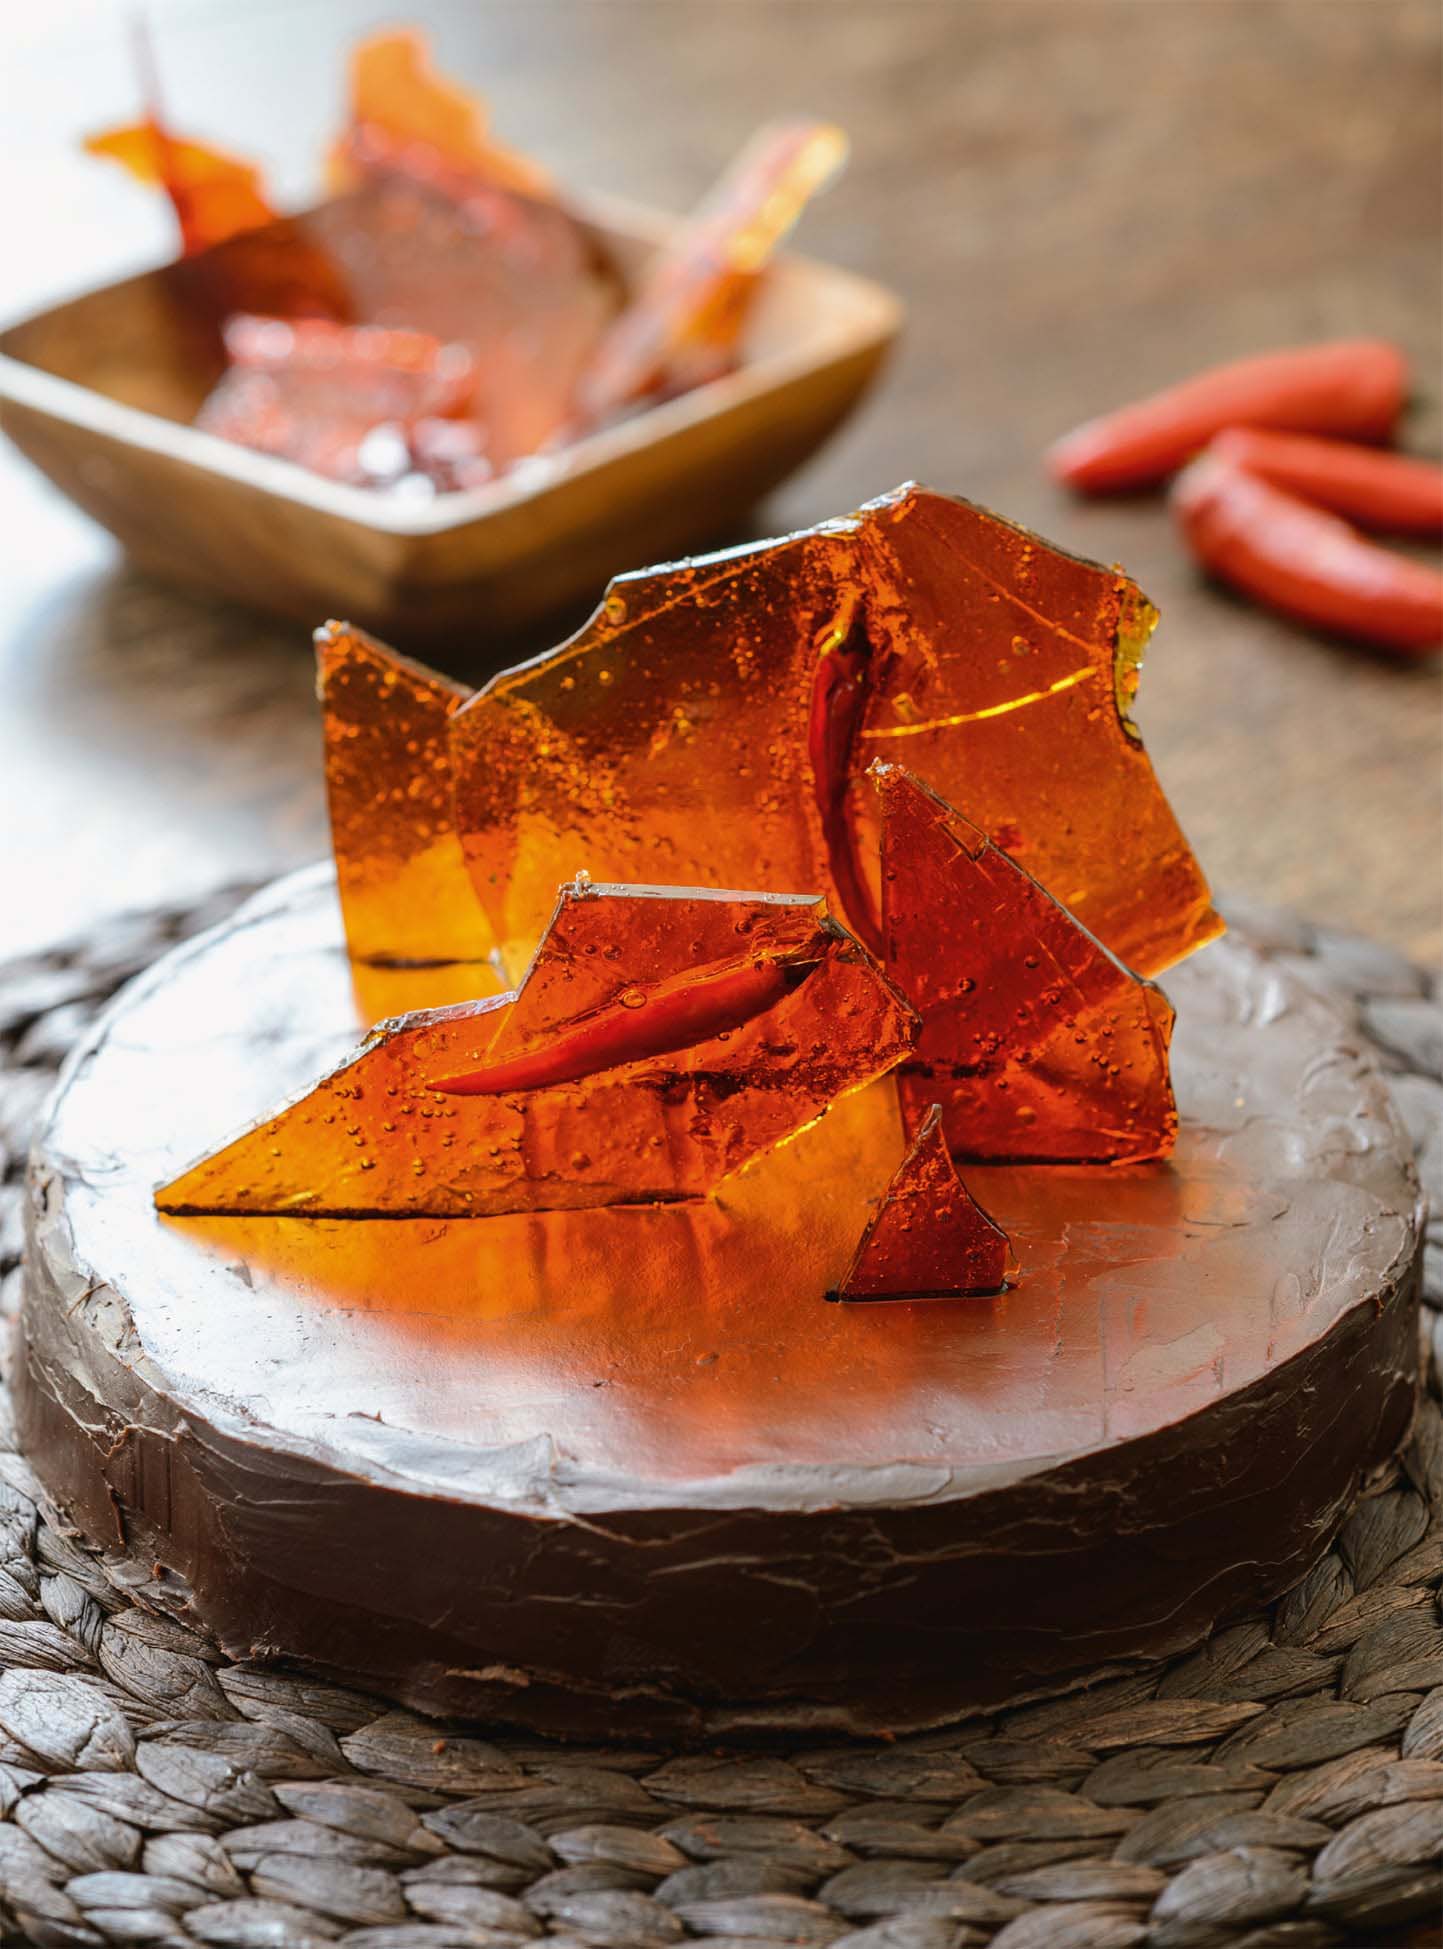
Adding chilli takes the humble mudcake to another level, and makes this an altogether sophisticated dessert. The longer the cake is left, the fudgier the texture becomes, so bake it the day before serving if possible, but beware – the chilli heat also develops over time! The sugar glass shards can also be prepared in advance and stored in an airtight tin.
MAKES A TWO-LAYER CAKE
YOU WILL NEED
1 × spring-form, round cake tin, 23cm/9in diameter, greased and base-lined
1 × small square/rectangular roasting/oven tray (one side at least c.20cm/8in long), lined with oil-coated foil (making sure the foil comes a couple of centimetres up the sides)
1 × sugar or infra-red thermometer
INGREDIENTS
Cake:
2 red chillies 250g/8½oz plain dark chocolate (70 per cent cocoa solids), coarsely chopped
250g/8½oz unsalted butter, diced
4 eggs
200g/7oz muscovado sugar
100g/3½oz grated pumpkin or butternut squash
100g/3½oz plain flour
1 tsp baking powder
pinch of salt
Ganache:
1 red chilli
300ml/½ pint double cream
1 tbsp caster sugar
250g/8½oz plain dark chocolate (70 per cent cocoa solids), finely chopped
50g/2oz unsalted butter
Sugar glass shards:
4–6 small red chillies
180g/6oz granulated sugar
65ml/2fl oz liquid glucose
125ml/4fl oz water
red food colouring
METHOD
• |
For the cake, first blacken the skins of the chillies under the grill, then seal them, while still hot, in a plastic bag and leave to cool. Once cool, peel off the skins, take out the seeds and finely chop the flesh. Preheat the oven to 170°C/325°F/gas mark 3. Melt the chocolate and prepared chilli in a bowl set over a pan of simmering water, then remove from the heat. Add the butter and stir until melted and smooth. Separate the eggs and whisk the egg whites until they form soft peaks; set aside. Beat the egg yolks and sugar together until creamy, then stir in the melted chilli chocolate mix, followed by the pumpkin and finally the flour, baking powder and salt. Stir through a spoonful of the egg white, then carefully fold in the rest until fully incorporated. Bake for 30 minutes, taking it out when there is still a slight tremor in the middle of the cake when wobbled. Leave to cool for 10 minutes in the tin before turning out on to a wire rack to cool completely. |
• |
For the ganache, cut the chilli in half and put into a saucepan with the cream and sugar. Leave to infuse for at least two hours, then bring to a boil over a medium heat, stirring to make sure the sugar is fully dissolved. Put the chocolate in a large bowl and pour over half of the cream (through a sieve to catch the chilli and any loose seeds). Stir to melt the chocolate, then pour over the remaining cream, add the butter and continue stirring until the mix is smooth and glossy. Allow to cool slightly before pouring/spreading over the cake. |
• |
For the sugar glass shards, put the remaining ingredients in a saucepan and bring to the boil, stirring all the time. Once the glazing liquid reaches 150°C/300°F (or ‘hard crack’), take it off the heat and allow it to cool to 130°C/250°F, when it should be poured immediately on to the prepared baking sheet. Very quickly, position the chillies on the glazing liquid. Once completely cool, score the glass sheet with a sharp knife to mark where you would like it to break (this helps, but does not always work), then with one strong, swift blow, strike the middle of the sheet with a hammer or similar tool. Stick the resultant shards into the ganache-covered cake. |
TO SERVE
Serve with a scoop of cooling vanilla ice cream.
GROW
Whenever I see pears in the supermarket I am reminded of an Eddie Izzard sketch in which he mimes using the fruit to hammer in nails, because it is so unripe. If you grow your own, you will never have to wait weeks for pears to ripen in the fruit bowl again.
There is a reason that ‘Conference’ pears are so widely available – this variety is reliable and has a good flavour, but ‘Buerré Bosc’ (or simply ‘Bosc’) is the better for baking. ‘Concorde’ has a compact growth habit. Choose varieties from the same pollination group and on a suitable rootstock – dwarfing, or whatever – for your situation.
Plant trees (available in pots or bare-root) from autumn to spring. At the same time fix wires to train them on, or stake free-standing trees. Early pear blossom can be damaged by spring winds and frosts, so plant in a sheltered, warm spot. Cordons should be placed 75cm/30in apart; leave at least 2.5m/8ft between full-sized trees, depending on their rootstock. Pears can also be grown permanently in large pots, but be sure to choose a tree on a dwarfing rootstock.
Water in dry spells, especially once the tree is flowering and producing fruit. Remove most of the fruitlets of any large clusters to allow a few decent-sized pears to develop. Prune annually, in summer (for trained trees) or in winter (for free-standing ones); see here for where to obtain pruning advice.
Pears are ready to harvest when the stalk breaks naturally from the branch when the fruit is gently lifted. Depending on the variety this can be from late summer to mid-autumn. The flesh should be sweet but not starchy, and they will still need a little ripening indoors.
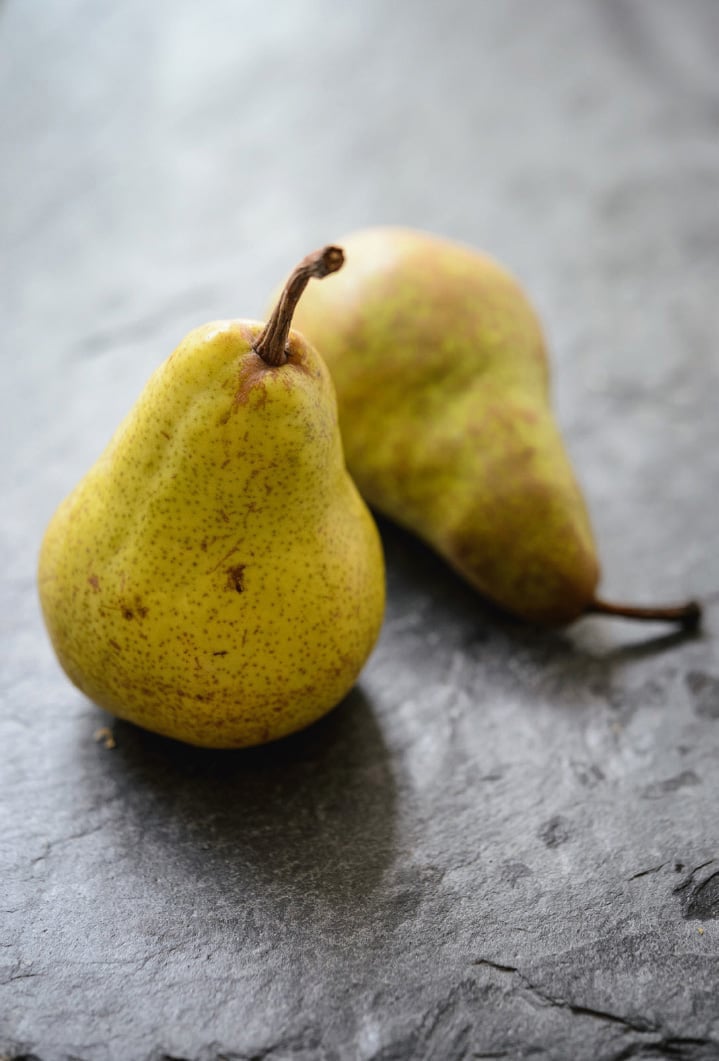
Pears will still need a little ripening once picked, but not as long as shop-bought fruit.
BAKE
This sticky, caramel pear cake is just the thing for a cold winter’s night. It is also quite accommodating for a dinner party schedule, as it is best served warm rather than hot, so that the delicate flavour of the pears really comes through.
MAKES A TWO-LAYER CAKE
YOU WILL NEED
1 × deep, round cake tin, 20cm/8in diameter; line the base of a loose-bottomed tin if it has a silicone seal, otherwise fully line the tin
INGREDIENTS
Caramel pears base:
100g/3½oz caster or granulated sugar
15g/½oz unsalted butter
4–5 pears
Sponge:
200g/7oz peeled and cored pears
2 tsp vanilla extract
200g/7oz plain flour
50g/2oz ground almonds
2½ tsp baking powder
¼ tsp salt
120g/4oz unsalted butter
100g/3½oz light muscovado sugar
2 eggs
METHOD
• |
For the caramel pears base, pour the sugar into a saucepan so that it covers the base in an even tier and put over a medium heat. Only when the sugar has almost all melted should you stir the contents until it is a uniform, golden brown liquid. Take the pan off the heat, stir in the butter until it has melted, then pour into the prepared tin to cover the base evenly. Leave to cool. Preheat the oven to 180°C/350°F/gas mark 4. Peel, core and halve the pears and lay cut side down on the caramel, top end inwards so that they form a nice circular pattern and cover the base of the tin. |
• |
For the sponge, blend the pears and vanilla extract into a purée, using a stick blender if possible, and set aside. Mix the flour with the ground almonds, baking powder and salt and set aside. Cream the butter and sugar together, then beat in the eggs, followed by the puréed pears. Finally sift in the dry ingredients and beat until incorporated. Pour the mixture into the tin and spread over the pears, levelling off the top. Bake for 45–55 minutes, until a skewer comes out clean, then remove from the oven and leave to cool in the tin for 15 minutes. |
TO SERVE
Turn out on to a serving plate (leave to cool further if necessary) and peel off the baking paper. Serve warm, perhaps with a drizzle of cream.
GROW
Pears (see here)
BAKE
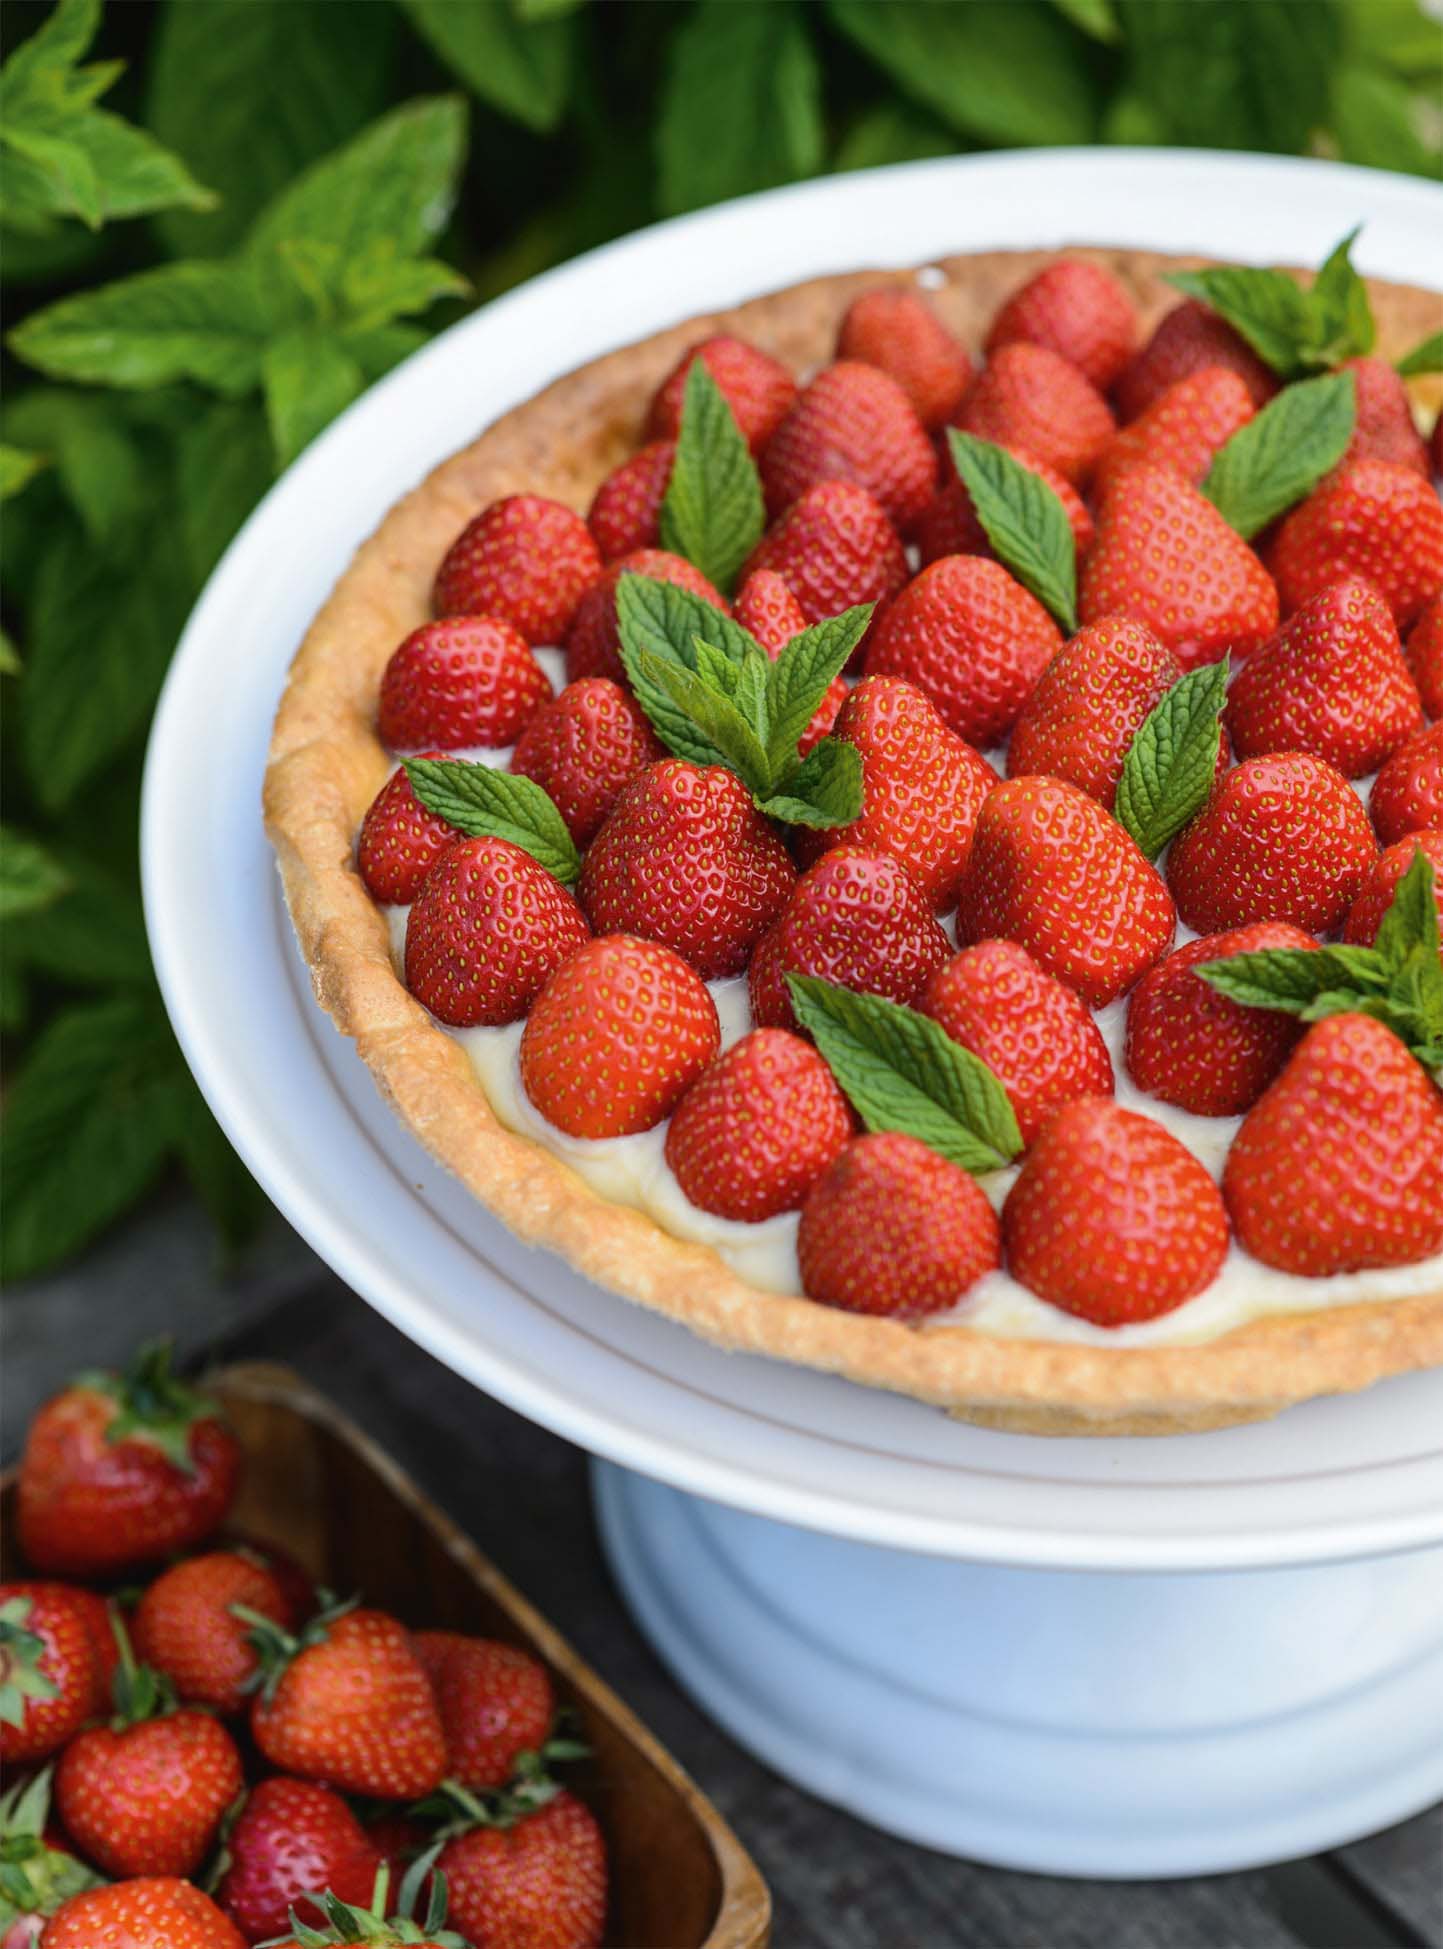
This tart is perfect for a summer’s dinner party. It looks so impressive that your guests will think you have bought it, and your delicious sun-ripened strawberries will be the star of the show. The components can be prepared in advance and assembled at the last minute.
MAKES A TWO-LAYER CAKE
YOU WILL NEED
1 × flan tin, 23–25cm/9–10in diameter, greased
INGREDIENTS
Pastry case:
230g/8oz plain flour
80g/2½oz unsalted butter, chilled
80g/2½oz caster sugar
2 eggs
pinch of salt
1 vanilla pod
500ml/17½fl oz milk
6 egg yolks
120g/4oz caster sugar
2 tbsp cornflour
Filling:
600–800g/1lb 4oz–1lb 12oz strawberries
mint sprigs/leaves (optional)
Decoration:
100g/3½oz apricot jam OR icing sugar, for dusting
METHOD
• |
For the pastry case, blind bake the case and leave to cool. |
• |
For the crème pâtissière, slice the vanilla pod in half along its length. Using the back of the knife, scrape out the tiny black seeds within. Put the seeds and pod with the milk in a large, heavy-based saucepan over a medium heat. Bring the milk to the boil, then take the pan off the heat and leave to infuse for 10 minutes. Meanwhile whisk the egg yolks into the sugar and cornflour in a large bowl until the mix is smooth but not pale. Bring the milk back to the boil, and pour one-third to one-half of it into the egg mixture, whisking as you pour. Add in the remaining milk, whisk it to a smooth mixture, then pour it all through a sieve back into the saucepan. Bring to the boil and simmer for 1 minute, whisking the whole time, then take off the heat. The crème pâtissière should feel smooth and thick. Pour it into a bowl and lay a piece of baking paper over the surface, to prevent a skin forming. Leave the crème pâtissière to cool, then store it in the refrigerator until you are ready to assemble the tart. |
• |
For the filling, spread the crème pâtissière in the pastry case. Slice the tops off the strawberries and arrange as closely together as possible, cut side down, in the tart. Dot a few sprigs of mint around the strawberries, if using. |
TO SERVE
For the patisserie look, gently heat the apricot jam over a low heat to loosen it, then brush over the whole tart to glaze. Alternatively dust with icing sugar just before serving.
GROW
Soft, luscious figs speak of lazy days in the sunshine and decadent feasts. They are easy to grow, and will quickly spread to cover a wall or fill a sunny spot. Their architectural foliage looks as good as the figs taste.
It is hard to beat ‘Brown Turkey’ for availability and reliable crops in cool-temperate climates, but in warmer ones or in a greenhouse ‘Rouge de Bordeaux’ and ‘Osborn’s Prolific’ are better for flavour.
In order to fruit well, figs must be in a sheltered, warm and light spot; training against a wall or planting in a pot on a sunny patio are the best options. In cool-temperate climates, they will need protection from frosts and cold weather, either by moving the pot under cover or by covering the plant with fleece.
Fig trees are sold in pots. Plant in the spring, after the last frost. To encourage the plant to fruit rather than put on lots of foliage, it is best to restrict the roots. Growing in a container is therefore ideal, but make sure you will still be able to move it into shelter if necessary. Otherwise figs are an ideal crop for a narrow border along a wall; make a planting pit roughly 60cm/24in square and line the sides with paving slabs or similar. A tree trained in a fan against a wall will need a space 3.5m/12ft wide and 2.5m/8ft high.
Where fig roots have been restricted by a pit or container, provide regular watering and feeding through spring and summer. In winter figs need less water and no fertilizer, but do not let the compost dry out completely. Repot figs grown in containers every couple of years, even if each is put back into the same pot with fresh compost. Prune in spring (see here–here).
Figs are ready to pick when the skin is beginning to split, the fruit is soft and hanging down off the branch. The skin colour depends on the variety. Hold on to the stalk and snap the fruit off the branch.
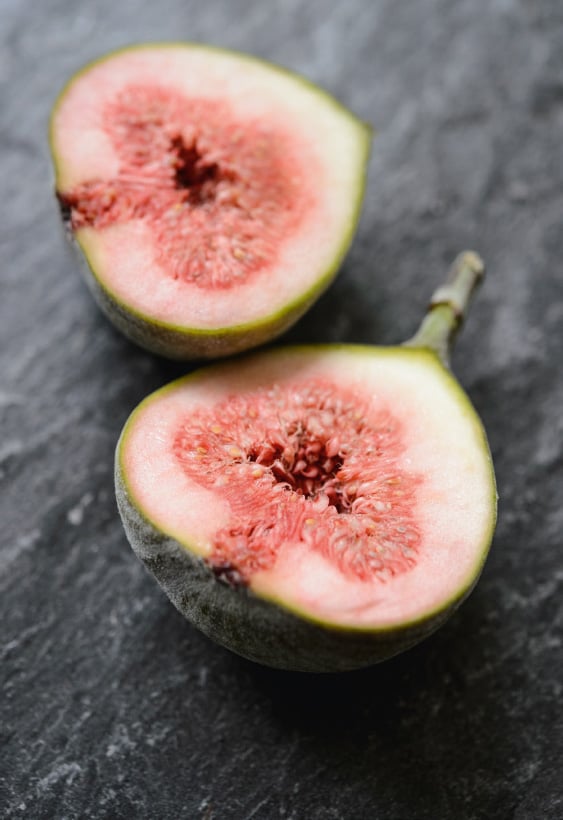
The skin colour of ripe figs will depend on the variety.
BAKE
Fig tart (see here)
BAKE
This impressive tart is very simple to make. The figs are merely halved, maximizing the contrast between their sumptuous purple flesh and the sunshine yellow custard filling, and showing them off to their best advantage.
SERVES 12
YOU WILL NEED
1 × loose-bottomed, metal flan tin, 20 × 30cm/8 × 12in, greased
1 × baking sheet
INGREDIENTS
200g/7oz plain flour
70g/2½oz unsalted butter, chilled
70g/2½oz caster sugar
2 eggs, beaten
Filling:
25g/1oz unsalted butter
3 eggs
100g/3½oz caster sugar
25g/1oz ground almonds
1 tbsp plain flour
150ml/¼ pint double cream
1 tbsp amaretto liqueur (optional)
6 fresh figs, halved lengthways
METHOD
• |
For the pastry case, preheat the oven to 180°C/350°F/gas mark 4, and put the baking sheet on the middle shelf. Roll out the pastry and line the tin. Trim off the excess so the edges are flush with the tin and put it into the refrigerator while you make the filling. |
• |
For the filling, melt the butter. Beat the eggs, sugar, almonds and flour together, then whisk in the butter, cream and amaretto for 1–2 minutes until smooth (this is best done using a stand mixer if possible). Arrange the figs in the pastry case, cut side up (little blobs of pastry under the figs can help to keep the tops level). Then put the tart on to the baking sheet in the oven. Pour in the custard, trying not to cover the tops of the figs. (Pouring the custard once the tart is on the oven shelf minimizes the risk of spillages.) Bake for 30–40 minutes, or until the custard has set. |
TO SERVE
Serve warm.

GROW
Figs (see here)
GROW
Cobnuts (Corylus avellana) and filberts (C. maxima) are the names given to hazelnuts when they are in cultivation, the main difference being that cobnuts have a shorter husk enclosing the nut. These deciduous shrubs require a bit of space, but are relatively low maintenance, and the pruned branches can also usefully supply your garden with bean poles and stakes.
Unless there is hazel growing in the immediate surrounding area, you need two plants to get decent wind pollination, and therefore nuts. Cobnut varieties include ‘Cosford Cob’ and ‘Pearson’s Prolific’, and good-flavoured filberts are ‘Kentish Cob’ and ‘Gunslebert’.
A sunny spot is best; hazel will grow, but may not fruit well, in shade. Buy bare-root or potted plants, and plant in autumn, winter (for bare-root) or spring. Set them 5m/16ft apart, unless you are creating a hedge, in which case 3m/10ft between plants is enough. It is fine to grow your hazels as they would in the wild, that is, with all the stems originating from the base. However it is possible to train them on a ‘leg’, a single stem/trunk of 30–45cm/12–18in, with all the branches then sprouting off the top of that. If you opt for this method, stake the tree until it is established.
Keep the plants watered during dry spells, and mulch in spring. The easiest way to prune is to remove one-quarter to one-third of the stems at the base (or at the top of the leg) in late winter or early spring, as this will also supply you with bean poles for the year. In summer remove any suckers (small branches) that try to grow around the base of the leg.
Hazelnuts will be ready in autumn, when the husks start to yellow. Do not leave them too long, or the squirrels will take your entire crop; but do not pick them too early either. Spread the nuts in a single layer in boxes lined with newspaper in a cool, dry place and leave for a few weeks. Remove the husks from dried nuts and store in a dry place with good air circulation (e.g. in a net bag, not a sealed box).

The brown skins of hazelnuts can be rubbed off before grinding.
BAKE
Hazelnut & rosemary pavlova (see here)
BAKE
Baking with nuts need not mean a dense, heavy cake. Here hazelnuts are used, with accents of rosemary and chocolate, to create a sophisticated pavlova.

MAKES ONE LARGE PAVLOVA
YOU WILL NEED
1 × baking sheet (preferably square rather than rectangular), at least 30 × 30cm (12 × 12in), lined with baking paper
INGREDIENTS
Ground hazelnuts:
85g/3oz hazelnuts, toasted
Meringue:
3 egg whites
dash of lemon juice
150g/5oz caster sugar
Filling/topping:
250ml/9fl oz double cream, whipped
2 sprigs of rosemary, finely chopped, plus more sprigs for decoration
50g/2oz toasted hazelnuts, roughly chopped
plain dark chocolate shavings
METHOD
• |
For the ground hazelnuts, rub the hazelnuts between your hands or two tea towels to remove the dark outer skins, then chop them in a food processor until finely ground. Weigh out 75g/2½oz and set aside. |
• |
For the meringue, preheat the oven to 150°C/300°F/gas mark 2. Whisk the egg whites and lemon juice to soft peaks using a stand mixer (or whisk fast by hand), then, still whisking slowly, trickle in the sugar. Once it has all been incorporated, continue whisking quickly until the meringue forms stiff peaks. Fold in the ground hazelnuts until they are well dispersed through the meringue. Use two-thirds of the meringue to make a large disc (20–25cm/8–10in diameter) on the baking sheet. Spoon the remaining meringue into a piping bag and add peaked meringue blobs all around the edge of the disc; spread any leftovers in the middle. Bake for 1 hour, then turn off the oven and leave the meringue there for at least another hour, preferably overnight. |
TO ASSEMBLE
Spread the cream over the middle of the pavlova base, then scatter over the chopped rosemary and nuts and the chocolate shavings. Finish with a few sprigs of rosemary.