Keep Mail, Contacts, and Calendars in Sync
Email, contact, and calendar data work together to help you with many day-to-day tasks, and those sets of details are the ones you’ll most likely want to keep in sync across your Macs and iOS and iPadOS devices. Behind the scenes, they rely on different technologies to do their work. But the end result is that when you change email, contact, or calendar data on one device, iCloud immediately pushes those changes to your other devices.
This chapter discusses these three data types. In the interest of simplicity, I’ve left out most of the boring instructions for tasks you already know how to carry out or can figure out easily, as well as anything for which Apple offers detailed instructions via the Help menu on your Mac or clicking the Help ![]() icon on the iCloud website).
icon on the iCloud website).
In this chapter, I also explain how to Use Mail Drop, an iCloud feature that simplifies sending large attachments.
Work with iCloud Mail
Your iCloud account includes an email address in the icloud.com domain. Among other things, you also get 5 GB of free storage (shared with other iCloud services) and a lovely web interface for checking your email (see The Mail Web App).
In most respects, iCloud Mail is a conventional IMAP account. (For more on what that means, read my article FlippedBITS: IMAP Misconceptions.) Your email host’s mail server stores all the messages in your inbox, messages you’ve filed in folders, and your sent mail. The server also tracks which messages you’ve read, replied to, or forwarded. Because mail is stored remotely, you can access your email on any device (even with a third-party email client) or in a web browser, and see exactly the same messages, in the same locations, with the same status.
With default settings, as soon as you enable Mail in iCloud’s settings on each device, your iCloud Mail stays in sync across devices without any manual intervention—not because iCloud does anything special but because that’s the way IMAP works. However, iCloud Mail differs from run-of-the-mill IMAP accounts in several respects:
Setting up an iCloud Mail account on any Apple device is as easy as it gets: all you have to do is make sure Mail is turned on after entering your iCloud username and password.
When used with iOS and iPadOS devices, you can choose push updates, which send messages to your device the instant they come in, rather than having to wait for the next scheduled check.
iCloud Mail has a good webmail interface that supports searching message contents, setting up auto-responses, forwarding email to another account, uploading attachments with Mail Drop (see Use Mail Drop), and creating rules that automatically sort messages.
Apple’s mail servers provide basic spam and malware filtering. However, when iCloud Mail encounters an incoming message that matches certain criteria that Apple doesn’t disclose, it doesn’t merely label the message as Junk or move it to a Spam mailbox; instead, the iCloud server summarily deletes it without any notice to the sender or recipient. (You can read about this in Silent email filtering makes iCloud an unreliable option, at Macworld.) I disagree with this approach because all spam filters make mistakes.
You can add up to three aliases—extra email addresses ending in @icloud.com—that forward incoming messages to your main Inbox.
iCloud Mail doesn’t let you use a custom domain name. You may be able to forward email from another address to your iCloud Mail account, but you can’t change your iCloud email address to one in a personal domain, nor can you use iCloud Mail to send out email from a non-iCloud address.
iCloud offers no POP support at all.
Although turning on Mail in System Preferences > Apple ID > iCloud (Mac, Catalina or later), System Preferences > iCloud (Mac, Mojave), or Settings > Your Name > iCloud (iOS/iPadOS) syncs your messages and mailboxes, several other types of Mail settings and data sync only when iCloud Drive is enabled and Mail is selected in iCloud Drive > Options: signatures, flag names, blocked senders and muted conversations (Catalina and later, and iOS 13/iPadOS 13 and later), and (only on Macs) rules and smart mailboxes. (VIPs and previous recipients are synced as part of Contacts.)
On the whole, iCloud Mail is not bad as email services go, although you may prefer more customizability or need additional features. If so, keep in mind that email providers are a dime (or less) a dozen—anyone can get a free account from Gmail, Outlook.com, Yahoo, and numerous other sources, and paid options with more services, security, or storage abound. So, if you find the limitations of iCloud Mail a turnoff, you’re free to ignore it, or to use it only as a secondary account.
Use Mail Drop
Email servers often handle large attachments awkwardly. To avoid aggravation, you can send a link instead: copy a file to cloud storage, follow the service’s steps to get a URL for the file, and then email that URL. But that’s an inconvenient, multi-step process.
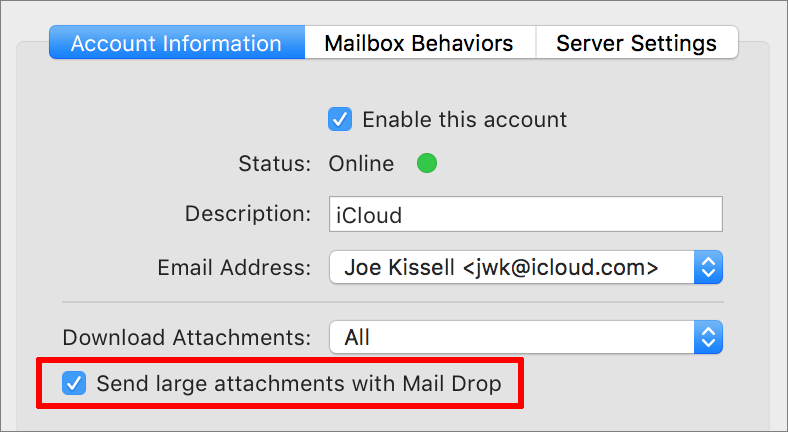
A better way, available in Mail on all platforms (macOS, iOS, iPadOS, and web), is an iCloud feature called Mail Drop. In iOS and iPadOS it’s always enabled. On a Mac, it’s enabled by default for iCloud email accounts; for other IMAP and Exchange accounts (but not POP accounts, which don’t support Mail Drop), go to Mail > Preferences > Accounts > Account Name > Account Information and select “Send large attachments with Mail Drop” (Figure 19). In the Mail web app on the iCloud website, enable it by clicking the gear ![]() icon in the sidebar, choosing Preferences, and clicking Composing. Then check “Use Mail Drop when sending large attachments.”
icon in the sidebar, choosing Preferences, and clicking Composing. Then check “Use Mail Drop when sending large attachments.”
With Mail Drop, you compose a message and drag files in to attach them, just as you normally would. But when you click the Send button, if the message and its attachments are over 20 MB or so, Mail uploads the attachments to iCloud, and inserts a link to the files in the message. Mail Drop attachments don’t count towards your iCloud storage quota.
When the message arrives, the recipient sees a link that can be used to download the attachments. iCloud stores sent attachments for 30 days and then deletes them.
Sync Your Contacts
iCloud’s Contacts feature lets you create, search, and organize an address book of the people and companies you interact with often. As you make additions and changes, the contact data synchronizes immediately among your various devices. Depending on which device you’re using at the moment, the Contacts app may give you options to dial a phone number, compose an email message, map an address, and perform other tasks relevant to the contact you’re currently viewing.
When you turn on Contacts in iCloud’s settings, syncing begins at once and continues in the background. In some situations you may be asked if you want to merge contacts on your device with contacts already in iCloud—nearly always, the answer is yes. (Similarly, if you turn off iCloud Contacts on a device, you’ll be asked whether you want to delete the local copy of those contacts; the answer to that is usually no.)
Most of the things you’ll need to do with contacts are self-explanatory. But two aspects of iCloud’s contact syncing have always struck me as a bit weird and annoying, so I want to say a few words about those here. (I also offer problem-solving pointers for contacts at the end of the chapter, in Troubleshoot Contact and Calendar Problems.)
Work with Contact Groups
Groups are nothing more or less than lists of contacts. If you create a group in the Contacts app on the iCloud website or in the Contacts app (or the older Address Book app) on a Mac—say, all the members of your volleyball team or the coworkers in your department—then you can later send a message to everyone in the group simply by typing the group’s name into the To, Cc, or Bcc field when you compose a new message in Mail. That’s the obvious use for groups—in fact, it’s the whole point. Putting contacts in a group does give you the secondary benefit of being able to quickly narrow searches to just group members, but there are other ways to accomplish that.
In iOS and iPadOS, you can use a group when addressing a Mail message. When you type the name (or partial name) of a group in a message’s To, Cc, or Bcc field, the list of potential matches from Contacts now includes matching groups (each helpfully labeled with the word Group). Tap a group to add all its members as recipients.
However, groups in iOS and iPadOS have three main limitations:
As of August 2020, Contacts in iOS and iPadOS still offers no capability to create groups. Although you can add someone to a group, you can’t remove someone. You’ll have to do all that on your Mac (or in the Contacts web app).
Because Contacts for iOS and iPadOS has no concept of smart groups, any smart groups you created on your Mac won’t appear in Contacts on your iOS or iPadOS devices and thus won’t be available to Mail on those devices either.
Still, something is better than nothing, and perhaps future versions of iOS and iPadOS will overcome these limitations.
Sync Your Calendars
iCloud’s Calendar feature stores events and appointments of all sorts, pushes updates to all your devices automatically, and lets you access your calendar data in a web browser. You can also share calendars with other iCloud users, send and receive meeting invitations, and perform quite a few other scheduling tasks.
As with contacts, most calendar activities are straightforward, but I want to explain a bit more about handling meeting invitations and shared calendars. (For tips on solving problems with calendars, see Troubleshoot Contact and Calendar Problems.)
Invite Others to a Meeting
You can invite other people to join any event on your calendar. This lets you keep track of who has agreed to come (or turned down the meeting), and to send out updates if the event changes.
When you create an event, enter a name or email address in the invitees field to invite someone. As you type, Calendar looks for matching contacts in your Contacts list and offers a menu of possible matches. Select a contact from this list to accept it, or keep typing. After you add an invitee, you can repeat the procedure to add more.
After adding an invitee, click the person’s name to open a pop-up menu with options such as Edit and Remove (or, in iOS/iPadOS, swipe to the left on a name to remove it). If you remove an invitee, the event is deleted from that person’s calendar; if you remove everyone after sending an invitation, a cancellation notice is sent.
For invitees who use iCloud, the invitation appears in Calendar’s notification box on the iCloud website, as well as in Calendar on a Mac or iOS/iPadOS device. For other invitees, invitation messages include buttons (or links) for Accept, Decline, and Maybe. After clicking one of these, the invitee sees a confirmation page with a downloadable .ics file that can be used to add the event to Calendar or a third-party calendar app.
In addition, the event on your own calendar is updated with icons reflecting each invitee’s status, and any responses also appear in your notification box.
Work with Shared Calendars
iCloud can share any calendar, either publicly or privately, using the industry-standard CalDAV protocol. When you share a calendar privately, you can assign read-only or read-write privileges on a per-user basis. This mechanism makes it practical for families, coworkers, and other groups to use iCloud for calendars that apply to multiple people without jumping through lots of hoops or buying extra software. (Note, however, that families who Use iCloud Family Sharing get a shared Family calendar automatically and can skip this topic.)
Shared calendars can be viewed in iCloud Calendar, the Calendar app for Mac or iOS/iPadOS, or third-party calendar apps such as BusyCal and Microsoft Outlook.
To share a calendar on a Mac, click the Share ![]() icon that appears when you hover over the calendar’s name in the sidebar. In the popover, you can share the calendar privately with only people you select—and also decide who is allowed to edit the calendar—or you can share it publicly for anyone with the address to view (but not edit).
icon that appears when you hover over the calendar’s name in the sidebar. In the popover, you can share the calendar privately with only people you select—and also decide who is allowed to edit the calendar—or you can share it publicly for anyone with the address to view (but not edit).
Troubleshoot Contact and Calendar Problems
iCloud Contacts and Calendar have been astonishingly problem-free for me over the past few years, but I’ve heard from a number of users who have experienced problems, especially duplication of entries when moving from another provider or app.
Because of the sheer number of variables involved, I can’t offer specific solutions to every problem, but I can recommend Scholle McFarland’s book Take Control of Calendar and Reminders, which includes a troubleshooting chapter. I can also point you to Apple’s extensive and helpful support articles:
Contacts troubleshooting:
Calendar troubleshooting:
iCloud: Advanced Calendar and iCal troubleshooting (no longer being updated, but still contains useful information)