Chapter 3
Alleviating Apprehensions and Making Decisions
IN THIS CHAPTER
 Avoiding the dreaded stinger
Understanding local restrictions
Winning over your family, friends, neighbors, and landlords
Picking the perfect location
Deciding the best time to start
I suspect all new backyard beekeepers think similar thoughts as they’re deciding to make the plunge. You’ve thought about beekeeping for some time. You’re growing more and more intrigued by the idea … maybe this is the year you’re going to do something. It certainly sounds like a lot of fun. What could be more unique? It’s educational and a nice outdoor activity for you — back to nature and all that stuff. The bees will do a great job of pollinating the garden, and there’s that glorious crop of delicious homegrown honey to look forward to. And you realize you can make a difference by introducing a colony of bees at a time when the feral bee population is in jeopardy. The anticipation is building daily, and you’re consumed with excitement. That’s it! You’ve made up your mind. You’ll become a beekeeper! But in the back of your mind, some nagging concerns keep bubbling to the surface.
You’re a wee bit concerned about getting stung, aren’t you? Your friends and family may say you’re crazy for thinking of becoming a beekeeper. What if the neighbors disapprove when they find out? Maybe bees are not even allowed in your neighborhood. What happens if the bees don’t like their new home and all fly away? Help!
Relax. These are certainly some of the concerns I had when I first started. In this chapter, I hope to defuse your apprehensions and suggest some helpful ways to deal with those concerns.
Overcoming Sting Phobia
Perhaps the best-known part of the bee’s anatomy is its stinger. Quite honestly, that was my biggest apprehension about taking up beekeeping. I don’t think I’d ever been stung by a honey bee, but I’d certainly felt the wrath of yellow jackets and wasps. I wanted no part of becoming a daily target for anything so unpleasant. I fretted about my fear for a long time, looking for reassurances from experienced beekeepers. They told me time and again that honey bees bred for beekeeping were docile and seldom inclined to sting. But lacking firsthand experience, I was doubtful.
The advice turned out to be 100 percent correct. Honey bees are docile and gentle creatures. To my surprise (and delight), I made it through my entire first season without receiving a single sting. In the decades that I’ve been keeping bees, not a single member of my family, not a single visitor to my home, and not a single neighbor has ever been stung by one of my honey bees.
By the way, bees sting — they don’t bite. Honey bees use their stinger only as a last resort to defend the colony. After all, they die after stinging a person. When bees are away from the hive (while they’re collecting nectar and pollen), defending the colony is no longer a priority, so they’re as gentle as lambs out in the field, unless, of course, accidentally stepped on.
Do I ever get stung? Sure. But usually not more than three or four times a year. In every case, the stings I take are a result of my own carelessness. I’m rushing, taking shortcuts, or am inattentive to their mood — all things I shouldn’t do. (I really should read this book more often!) My sloppiness is merely the result of becoming so comfortable with my bees that I’m not as diligent as I should be. The secrets to avoiding stings are your technique and demeanor.
Here are some helpful tips for avoiding stings:
- Always wear a veil and use your smoker when visiting your hive (see Chapter 5 for more information on these two vital pieces of beekeeper apparatus).
- Inspect your bees during pleasant daytime weather. Try to use the hours between 10 a.m. and 5 p.m. That’s when most of the bees are out working, and fewer bees are at home. Don’t open up the hive at night, during bad weather, or if a thunderstorm is brewing. In Chapters 7 and 8, I go into detail about how to open the hive and inspect the colony.
- Don’t rush. Take your time and move calmly. Sudden movements are a no-no. That sudden jerk of your hand away often provokes, rather than avoids, a sting.
- Keep a good grip on frames. If you drop a frame of bees, you’ll have a memorable story to tell but not a happy one. Also, city roofs are often covered in reflective paint, which gets very hot. The high temperatures will damage the bees’ feet and/or wings. A bee landing on a city rooftop is not the same as landing on a lawn. Perhaps lay a cloth down around the hive before starting an inspection.
- Never swat at bees. Become accustomed to them crawling on your hands and clothing. They’re just exploring. Bees can be gently pushed aside if necessary.
- When woodenware is stuck together with propolis, don’t snap it apart with a loud “crack.” The bees go on full alert when they feel sudden vibrations. Gentle and slow is the way to go.
 Bees don’t like loud noises and vibrations, so don’t locate your city bees near noisy compressors, air conditioners, or anything else that might make them cranky.
- Never leave sugar syrup or honey in open containers near the hive. Doing so can excite bees into a frenzy, and you may find yourself in the middle of it. It can also set off robbing — an unwelcome situation in which bees from other colonies attack your bees, robbing them of their honey. In Chapter 10, you find instructions on how to avoid robbing and what to do when it happens.
- Keep yourself and your bee clothing clean. Bees don’t like bad body odor. If you like to eat garlic, avoid indulging right before visiting your bees. Chapter 7 has some handy hygiene hints.
- Wear light-colored clothing. Bees don’t seem to like dark colors.
Knowing what to do if you’re stung
Be prepared to answer the following question from everyone who hears you’re a beekeeper: “Do you ever get stung?” You’ll hear this a hundred times. An occasional sting is a fact of life for a beekeeper. Following the rules of the road, however, keeps stings to a minimum, or perhaps you’ll get none at all. Yet, if a bee stings you or your clothing, calmly remove the stinger and smoke the area to mask the chemical alarm scent left behind. (This alarm pheromone can stimulate other bees to sting.) To remove the stinger, you can use your fingernail to scrape or pinch it off your skin.
 If you are stung, apply a cold compress and take an antihistamine tablet (such as Benadryl). Antihistamine creams also are available. Some work better than others. Find one you like. Using this technique reduces the swelling, itching, and discomfort.
Some old-timers swear by the effectiveness of baking-soda-and-water poultices for bee stings; other folks advocate meat tenderizer and wet tobacco poultices, respectively. These are “grandma recipes” that were used before we had the antidote that the medical profession endorses — over-the-counter antihistamines.
Watching for allergic reactions
All bee stings hurt a bit, but not for long. Experiencing redness, swelling, and itching is completely natural. These are normal (not allergic) reactions. For a small percentage of individuals, more severe allergic or even toxic reactions can occur, including severe swelling beyond the immediate area of the sting and shortness of breath. In the worst cases, reaction to bee stings can result in loss of consciousness or even death. The most severe reactions occur in less than 1 percent of the population. To put that in perspective, more people are killed by lightning each year than die from bee stings.
As a precaution against a severe reaction, some beekeepers keep an EpiPen on hand (warning: they are pricy). EpiPens are available via your doctor by prescription. The EpiPen automatically injects a dosage of epinephrine (adrenaline). But be careful. Liability issues can arise when injecting another person, so check with your doctor (or even lawyer) beforehand.
Building up a tolerance
Now this may sound strange, but some beekeepers (myself included) look forward to getting a few stings early in the season. No, we’re not masochistic. The more stings we get, the less the swelling and itching. For many, occasional stings actually build up a kind of tolerance. It still smarts, but the side effects disappear.
One school of thought states that bee venom can actually be good for some health conditions that you may suffer from. This is what bee-sting therapy is all about; see Chapter 1 for more information.
Understanding Local Laws and Ordinances
Is it legal to keep bees? In most places, the answer is yes. But some areas have laws or ordinances restricting or even prohibiting beekeeping. For the most part, such restrictions are limited to highly populated, urban areas. Other communities may limit the number of hives you can keep, and some require you to register your bees. Ask your local authorities how to go about this. Some communities require that the state bee inspector inspect the health of your colonies periodically. If you have any questions about the legality of keeping bees, contact your state bee inspector, the state department of agriculture, or a local bee club or association.
Bee Culture magazine maintains a terrific online resource under the tab “Resources.” This is a great way to find beekeeping clubs, associations, and agencies in your state. Visit www.beeculture.com and follow the links under the “resources” tab. By the way, there’s a subscription discount offer for this journal at the end of this book.
Easing the Minds of Family and Neighbors
For many among the general public, ignorance of honey bees is complete. Having been stung by wasps and yellow jackets, they assume having any kind of bee nearby spells trouble. Not true. It’s up to you to take steps to educate them and alleviate their fears.
Some things you can do to put them at ease are
- Restrict your bee yard to two hives or fewer. Having a couple of hives is far less intimidating to the uneducated than if you had a whole phalanx of hives.
- Locate your hive in such a way that it doesn’t point at your neighbor’s driveway, your house entrance, or some other pedestrian traffic-way. Bees fly up, up, and away as they leave the hive. When they’re 15 feet from the hive, they’re way above head level.
- Don’t flaunt your hives. Put them in an area where they’ll be inconspicuous.
- In a densely populated urban setting, sometimes, keeping your hobby on the down-low, or at least not telling people the exact location of your hive, could spare you from an opportunistic complainer!
- Paint or stain your hives to blend into the environment. Painting them flame orange is only tempting fate.
Provide a nearby source of water for your bees. That keeps them from collecting water from your neighbor’s pool or birdbath (see the “Providing for your thirsty bees” section later in this chapter).
Air-conditioning drips are a strong temptation for city bees. Also, drips from water towers are ever present, and enticing for thirsty bees — but bee-ware! This water might be laced with chemicals that pose threats to bees. So be sure to provide your colonies with a nearby source of clean water to help them avoid becoming a nuisance ! Bait it with sugar for a couple of weeks to lure the bees to your water source.Invite folks to stop by and watch you inspect your hive. They’ll see firsthand how gentle bees are, and your own enthusiasm will be contagious. You usually won’t have to ask; they will seek you out.
Keep an extra veil or two on hand for your visiting friends. You certainly don’t want a sting on their nose to be what they remember about your bees.- Let your neighbors know that bees fly several miles from home (that’s equal to thousands of acres). So mostly they’ll be visiting a huge area that isn’t anywhere near your neighbor’s property.
- Give gifts of honey to all your immediate neighbors (see Figure 3-1 for an example). This gesture goes a long way in the public relations department.
In an urban environment, don’t forget your building superintendent and/or the president of your co-op board.
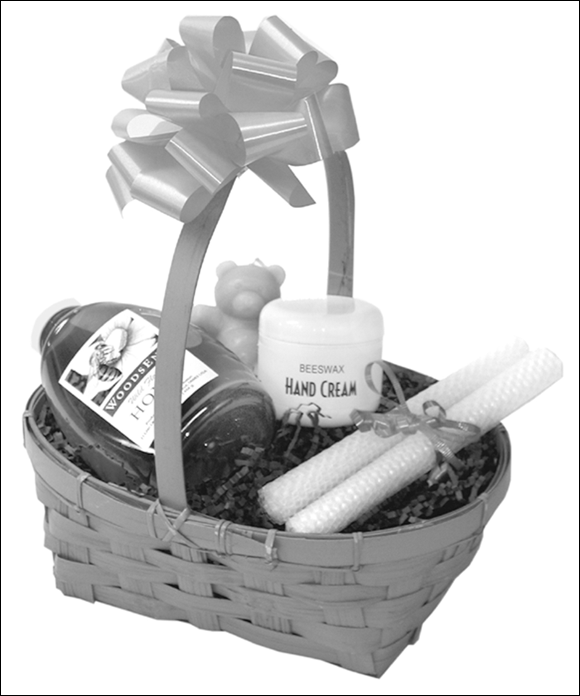
Courtesy of Howland Blackiston
FIGURE 3-1: This gift basket of honey bee products will be given to each of my immediate neighbors. That’s sure to help sweeten them up.
Location, Location, Location: Where to Keep Your Hives
You can keep bees just about anywhere: in the countryside, in the city, in a corner of the garden, by the back door, in a field, on the terrace, or even on an urban rooftop. You don’t need a great deal of space, nor do you need to have flowers on your property. Bees will happily travel a few miles to forage for what they need.
Knowing what makes a perfect bee yard
These girls are amazingly adaptable, but you’ll get optimum results and a more rewarding honey harvest if you follow some basic guidelines (see Figure 3-2). Basically, you’re looking for easy access (so you can tend to your hives), good drainage (so the bees don’t get wet), a nearby water source for the bees, dappled sunlight, and minimal wind. Keep in mind that fulfilling all these criteria may not be possible. Do the best you can by
- Facing your hive to the southeast. That way your bees get an early morning wake-up call and start foraging early.
- Positioning your hive so it is easily accessible come honey harvest time. You don’t want to be hauling hundreds of pounds of honey up a hill on a fiery hot day.
- Providing a windbreak at the rear of the hive (see Figure 3-3). I’ve planted a few hemlocks behind my hives. Or you can erect a fence made from posts and burlap, blocking harsh winter winds that can stress the colony (assuming you live in a climate with cold winters).
Putting the hive in dappled sunlight. Ideally, avoid full sun because the warmth of the sun requires the colony to work hard to regulate the hive’s temperature on hot days. By contrast, you also want to avoid deep, dark shade because it can make the hive damp and the colony listless.
On a city rooftop, fashion a burlap shade roof by stapling the material to four sturdy posts solidly planted in four 5-gallon buckets of cement. Or, fashion a small section of plywood, crank-strapped to and around the hive, to provide some shade for the girls.- Making sure the hive has good ventilation. Avoid placing it in a gully where the air is still and damp. Also, avoid putting it at the peak of a hill, should you live in a region where the bees will be subjected to winter’s cold fury.
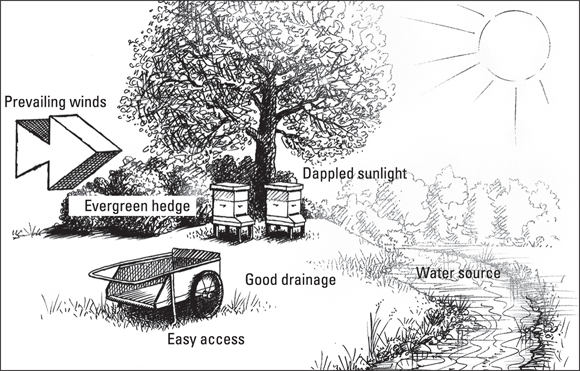
Courtesy of Howland Blackiston
FIGURE 3-2: The picture-perfect bee yard. Not always possible, but an admirable objective.
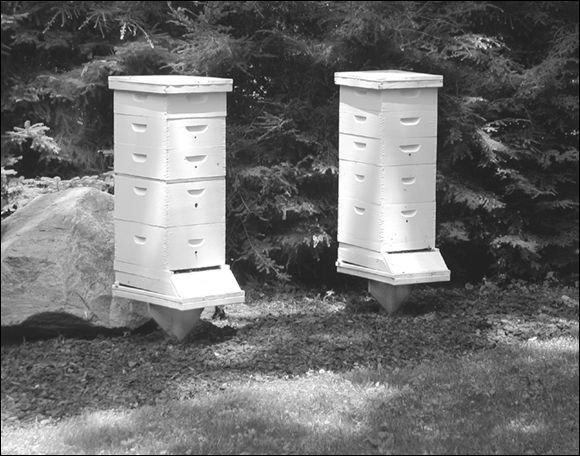
Courtesy of Howland Blackiston
FIGURE 3-3: An ideal backyard location: hemlock windbreak; flat, easy access; dappled sunlight; southeastern exposure; and a nearby water source (not visible in this image).
- Placing the hive absolutely level from side to side, and with the front of the hive just slightly lower than the rear (a difference of an inch or so is fine) so rainwater (and condensation from thousands of breathing bees) drains out of the hive (and not into it).
- Mulching around the hive prevents grass and weeds from blocking its entrances.
Locating your hive on firm, dry land. Don’t let it sink into the quagmire.
If you have doubts regarding the structure of your urban rooftop, check with the building maintenance crew. Don’t be famous for being the first urban beekeeper to fall through the roof and into someone’s apartment.
Urban considerations
(Many thanks to New York City–beekeeper Andrew Coté, author of Honey and Venom: Confessions of an Urban Beekeeper (Penguin Random House) for his contribution to this section and the “urban” call-outs throughout the book.)
Just about all the considerations listed in the preceding section apply to urban situations. Here are a few more details for all you city beekeepers out there.
Dealing with nervous neighbors
Bees living near people can cause anxiety, particularly in the close quarters of city living. In an urban environment, there can be more tension than in the suburbs or in the country. Education is, of course, one of the best remedies for making neighbors more comfortable. And so is a tasty bribe. Give a jar of honey to your neighbors to sweeten their view of bees and beekeeping. Promise them that there’s more where that came from!
If your hive has not yet produced honey, don’t wait until it does. Just buy someone else’s honey and present it to nervous neighbors. Let them know the sweet treat that awaits them in the future.
With the gift jar, include a thoughtfully worded letter that explains what you are planning to do. Let them know it’s perfectly legal (assuming it is legal in your area). Explain the wonder of honey bees. Exude the virtues of pollination. Share the magic of how local honey fends off pollen allergies. Reassure them that bees rarely sting unless threatened. Give your neighbors time to get past the fear factor; let them digest what they’ve read and appreciate what they’ve tasted.
City bees have the same needs as country bees
Bees in urban settings need morning sun, dappled afternoon shade, a nearby water source (to keep the bees away from air-conditioner drips and leaky water towers that are surely nearby), and a buffer from the cold winter wind.
Deciding where to put your hives
Placement of urban hives is often tricky and a stumbling block for many metropolitan beekeepers. Don’t be one of those beekeepers who takes a course, builds a kit, gets a package of bees, and then realizes there’s no suitable place to put the bees! Do your homework upfront. Talk to neighbors with roof access, check in with community gardens or privately administered parks, ask a nearby house of worship or even a zoo for permission to establish your apiary. Knock on a lot of doors.
Strike a deal with a community garden
These are usually run by small neighborhood groups who are sympathetic to honey bees, welcome their pollination, and are likely eager to offer a home for your hives.
 Don’t be so eager for a spot in the community garden that you impulsively offer half of your honey harvest! Your “rent” should be bartered in exchange for the considerable pollination services you bring to the garden. The honey should be yours (with maybe 10 percent tops going to the landlord or board).
Speak to your landlord about roof rights
See if you can get access to your building’s rooftop and obtain permission to place a hive or two on the roof. Rooftop hives are wonderful in that they are out of sight to most residents, thus reducing neighborhood fear and lessening the chance of vandalism.
Although a roof is a great location for urban beehives, there are safety issues to take into consideration.
- Consider carefully a roof if you have to go up a fire escape, climb a tall ladder, or use a rooftop hatch. In all of these situations, it might be difficult (and dangerous) to attempt to remove full and heavy honey supers from the roof area. If it is tough to get yourself up and down, imagine doing so with heavy, sticky equipment and bees buzzing all around you.
- Don’t place your hive too close to the edge of the roof. If you end up with a bee up your pant leg and you lose your balance, no amount of arm flapping will help you fly safely to the ground.
- Secure all the parts of the hive using crank straps (heavy-duty cargo straps with a ratchet locking mechanism). Strong gusts of wind can send hive parts flying wildly off the roof and onto pedestrians below.
 Never place a beehive on a fire escape. Never. It’s illegal, and it’s dangerous.
Providing for your thirsty bees
During their foraging season, bees collect more than just nectar and pollen. They gather a whole lot of water. They use it to dilute honey that’s too thick and to cool the hive during hot weather. Field bees bring water back to the hive and deposit it in cells, while other bees fan their wings furiously to evaporate the water and regulate the temperature of the hive.
If your hive is at the edge of a stream or pond, that’s perfect. But if it isn’t, you should provide a nearby water source for the bees. Keep in mind that they’ll seek out the nearest water source. You certainly don’t want that to be your neighbor’s kiddy pool. You can improvise all kinds of watering devices. Figure 3-4 shows an attractive and natural-looking watering device that I created on top of a boulder that sits in one of my bee yards. All it took was a little cement, a dozen rocks, and a few minutes of amateur masonry skills.

Courtesy of Howland Blackiston
FIGURE 3-4: A shallow bee watering pool that I constructed on a boulder near my hives.
Consider these other watering options: a pie pan filled with gravel and topped off with water, a chicken-watering device (available at farm supply stores; see Figure 3-5), or simply an outdoor faucet that is encouraged to develop a slow drip.
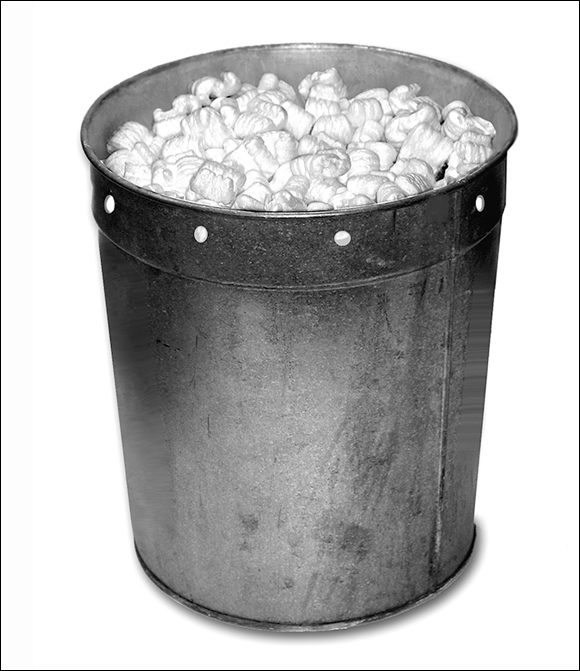
When it comes to providing water for your bees, Figure 3-6 shows a nifty idea that I learned from a fellow beekeeper. Find or purchase a clean pail or bucket. Any size, color, or material will do. Just make sure that it’s clean and has never been used for chemicals, fertilizers, or pesticides. Drill ½-inch drainage holes all around the top edge of the bucket. The holes should be placed about 2 to 3 inches down from the top. Fill the bucket nearly to the holes with water, and then float a single layer of Styrofoam packaging pellets on the surface of the water. The pellets give the bees something to stand on as they sip water. That way they won’t drown. The drainage holes keep rainwater from overflowing the bucket and washing away the pellets. Neat, huh?
You can use a hive-top feeder, filled with water (not syrup) as a convenient way to provide your colony with water.
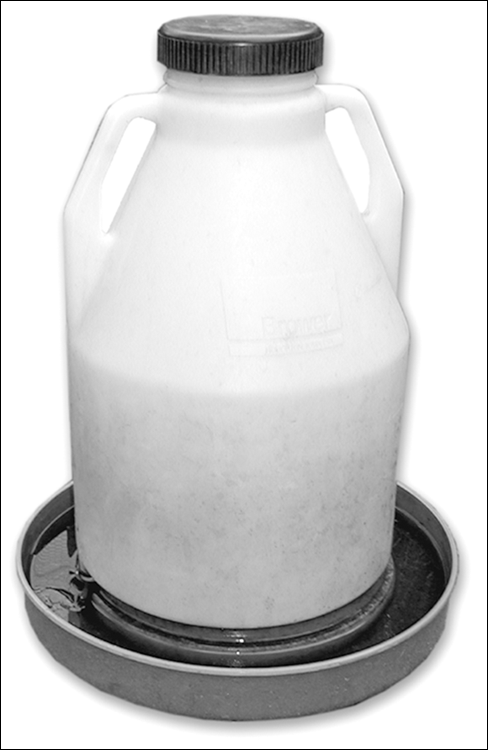
Courtesy of Howland Blackiston
FIGURE 3-5: A chicken waterer is a great way to provide your bees with water. Place some gravel or small pebbles in the tray so the bees don’t drown.
Courtesy of Howland Blackiston
FIGURE 3-6: The clever bucket-and-packing-pellets solution is a great do-it-yourself watering device.
Understanding the correlation between geographical area and honey flavors
The type of honey you eat usually is distinguished by the primary floral sources from which the bees gathered the nectar. A colony hived in the midst of a huge orange grove collects nectar from the orange blossoms — thus the bees make orange-blossom honey. Bees in a field of clover make clover honey and so on. As many different kinds of honey can exist as there are flowers that bloom. The list gets long.
For most hobbyists, the flavor of honey your bees harvest depends on the dominant floral sources in their area. During the course of a season, your bees visit many different floral sources. They bring in many different kinds of nectar. The resulting honey, therefore, can properly be classified as wildflower honey, a natural blend of various floral sources.
The beekeeper who is determined to harvest a particular kind of honey (clover, blueberry, apple blossom, sage, tupelo, buckwheat, and so on) needs to locate his or her colony in the midst of acres of this preferred source and must harvest the honey as soon as that desired bloom is over. But doing so is not practical for the backyard beekeeper. Leave it to the professional migratory beekeepers.
City bees gather a particularly complex plethora of nectars while foraging. That’s because most flora planted in urban settings is not native and immensely varied. This results in a delicious blend of nectars (and thus a delectable honey) that is not found anywhere else on earth. And you will be amazed how it may vary from one year to the next.
My advice? Let the bees do their thing and collect from myriad nectar sources. You’ll not be disappointed in the resulting harvest, because it will be unique to your neighborhood and better than anything you have ever tasted from the supermarket. Guaranteed!
For a lot more information on honey varietals, see Chapter 15.
Knowing When to Start Your Adventure
So when do you start your BIG adventure with your bees? The answer depends on where you live. A good time to start is a few months before the “official” launch of the season (when the flowers come into bloom). A chart in Chapter 9 helps you determine the right calendar of events for your region and climate. Generally speaking, in the United States, the season officially starts in the early spring when the bee breeders in the southern states have package bees ready to sell. Don’t wait until the last minute. Use the “winter” months to order and assemble the equipment that you’ll need and to reserve a package of bees for early-spring delivery. Read up on bees and beekeeping, and become familiar with your equipment. Join a bee club and attend its meetings. That’s a great way to get to know more about beekeeping and meet new friends. Many clubs have special early spring programs for new beekeepers (called “newbees”) and hands-on weekend workshops that show you how it’s done. Latch on to a mentor whom you can call on to answer questions and help you get started.
Install your bees in the early spring. Spring varies from area to area, but you’re trying to time your start date to coincide with the first early-season blossoms, and just a few weeks prior to the fruit bloom. Don’t wait until later. Starting a hive in summer won’t give your colony a chance to grow strong for its first winter.
Be sure to have everything assembled and ready to go before the arrival of your bees. As for what kind of hives and equipment you need to get for this new adventure, I cover that in Chapters 4 and 5.