Figure 847: RxEcho Service Notification
For short-range communications, Bluetooth is fairly popular. It is widespread, available on mobile devices, notebooks, and many Internet of Things platforms. It performs reasonably well, at least for moderate amounts of data. Android has a variety of classes in the Android SDK for adding Bluetooth communications to an app.
However, Bluetooth overall is a vast topic. The documentation for the Android SDK classes is spotty. And it can be fairly difficult to make sense of how all the different pieces are supposed to plug in together.
In this chapter, we will explore a sample app that demonstrates Bluetooth communications between two Android devices and use that to see how to work with Bluetooth on Android. For extra fun, we will also peek a bit at how things differ when you try to use Bluetooth on an Android Things device, such as a Raspberry Pi.
This chapter makes use of RxJava, foreground services,
RecyclerView, and data binding.
If you want to run the sample app, you will need two Android 5.0+ devices, each with working Bluetooth.
As mentioned, Bluetooth is vast, much more than can be covered in a single chapter.
This chapter will focus on Bluetooth, not Bluetooth Low Energy (BLE). When most people think of Bluetooth, they are thinking of “full” Bluetooth. BLE is designed for low-power environments and lower data throughput.
This chapter will focus on RFCOMM. Bluetooth is based around “profiles”, which describe particular standards of data exchange between parties. If you think of Bluetooth as being HTTPS, a Bluetooth profile is a particular Web service API. RFCOMM is a general-purpose mechanism designed for communications that fall outside any standard profile.
And, this chapter will focus on one particular recipe for using Bluetooth. As with many of the book examples, the code shown here is not bulletproof, but is here to illustrate the use of various APIs and concepts. A production-grade app will need to handle concerns that lie outside the scope of the chapter, such as:
The sample app –
Bluetooth/RxEcho –
is somewhat more complex than are many in this book. The explanation of how
the app works may be somewhat clearer if we take a look at the app overall
first, before diving in the details.
When you launch the app, Android will prompt you to allow the app to detect the device’s location. As we will see later in the chapter, Bluetooth has some interesting permission requirements.
If you agree to the permission, you then may get a dialog asking you if you want to enable Bluetooth, if it is not already enabled. If you decline, the app shuts down, as it cannot really do anything useful.
If you grant the location permission and enable Bluetooth, the app will present a largely empty UI. The fun begins with the action bar overflow menu, where there is a “Server” checkable item, a “Discover” item, and an “Allow Discovery” item.
Designate one of your two test devices as the “client” and the other as the “server”. Both will need the app up and running.
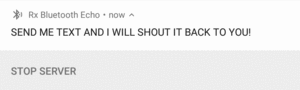
On the server, click the “Server” action bar item. This will spawn a Notification
letting you know that something is running… a bit loudly:
Figure 847: RxEcho Service Notification
Later, when you are done with the sample app, you can stop the server either
through the action bar overflow item (unchecking it) or by clicking the “Stop Server”
action in the Notification.
Then, on the server, from the action bar overflow menu, choose “Allow Discovery”. This will pop up a dialog box asking you if you are willing to allow other devices to discover this one, for 120 seconds. If you accept the dialog… nothing visible happens, but your device will now be discoverable by other Bluetooth devices.
During those 120 seconds, on the client, choose “Discover” from the action bar overflow menu. You should see an entry pop up with the Bluetooth MAC address of the server device:
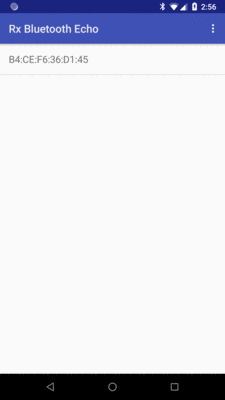
Figure 848: RxEcho Client, Showing Discovered Device
You have no good way of knowing that this is the Bluetooth MAC address of your other device, but most likely there is nothing else discoverable right now that matches what the app is looking for, and so most likely what you find will be your server device.
Then, tap on that MAC address, to bring up a screen dedicated to that device:
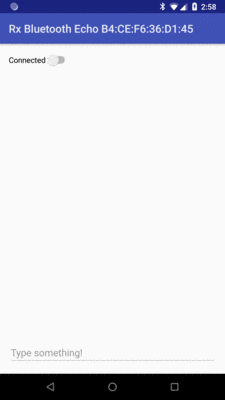
Figure 849: RxEcho Client, Showing the Selected Device
Click the “Connected” switch. After a short delay, you should see a pairing dialog appear on both devices:
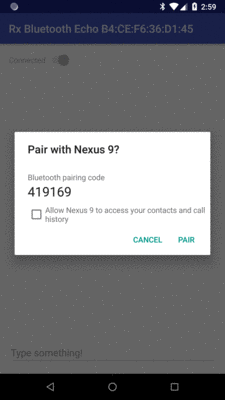
Figure 850: RxEcho Client, Showing the Pairing Dialog
Click “Pair” on both devices, though you do not need to grant rights for accessing contacts via the checkbox on the dialog.
At this point, the “Connected” switch should be in the “on” state. More importantly, the field at the bottom of the screen should be enabled. Tap on the field, type in a short message, and click the “send” action button. You should see an entry appear on the screen with your message echoed back to you in all caps:
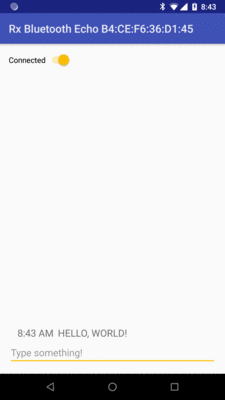
Figure 851: RxEcho Client, Showing the Echoed Response From the Server
Your message was sent via Bluetooth RFCOMM to the server, which sent back the all-caps echo.
If you type in other messages, they will be added to the list. You can disconnect at any time, either by clicking the “Connected” switch again to toggle it off, or by pressing BACK to return to the list of device MAC addresses.
Once you have paired a device, you no longer need to discover it. So, for example, if you exit the sample app on the client and terminate its process (e.g., press the square “stop” toolbar button in Android Studio), then start it again, your server device should appear in the list immediately, even though the 120-second discoverability window may have elapsed and you have not asked the client to discover devices in any case. Your devices are paired, and you will see that pairing not only in the app on both devices, but in the Bluetooth screen in Settings as well.
The app consists of a single activity, called MainActivity. It uses two
fragments:
RosterFragment for showing the paired and discovered devices in a
RecyclerView
DeviceFragment for showing the “Connected” Switch, EditText for
message entry, and RecyclerView for the responsesThere is also ShoutingEchoService, which is a foreground Service that
handles our incoming requests and their associated responses.
The Bluetooth logic is wrapped up in RxBluetooth. As the name suggests, this puts an RxJava wrapper around many of the Bluetooth APIs, to make it easier for us to handle thread management. The prose in this chapter will cover both the Android SDK classes and methods plus RxBluetooth; the sample just uses RxBluetooth.
A Bluetooth app usually will need three permissions:
BLUETOOTH, for general Bluetooth operationsBLUETOOTH_ADMIN, for Bluetooth discovery operations… which nearly every
Bluetooth app will needACCESS_COARSE_LOCATION or ACCESS_FINE_LOCATION, in order to be
able to get the Bluetooth MAC addresses of discovered or paired devicesThe latter requirement is for privacy:
BLUETOOTH and BLUETOOTH_ADMIN permissions have a protectionLevel
of normal, and so all you need to do is request them in the manifest.
The location permissions are dangerous, though, and so on Android 6.0+
devices, with a targetSdkVersion of 23 or higher, you need to request those
at runtime. The RxBluetooth library has the <uses-permission> elements
for BLUETOOTH, BLUETOOTH_ADMIN, and ACCESS_COARSE_LOCATION, which is
all that we need, and therefore we do not need our own manifest entries for those.
However, we do need to request ACCESS_COARSE_LOCATION at runtime. Hence, this
app uses the same AbstractPermissionActivity seen elsewhere in the book,
to manage our permission request on first run of the app. MainActivity
declares that it needs ACCESS_COARSE_LOCATION and exits with a Toast
if the user declines to grant the permission.
RxBluetooth is available as a com.github.ivbaranov:rxbluetooth2 artifact, which
we pull in using our dependencies closure:
apply plugin: 'com.android.application'

android {
  compileSdkVersion 27

  defaultConfig {
    applicationId "com.commonsware.android.bluetooth.rxecho"
    minSdkVersion 21
    targetSdkVersion 27
    versionCode 1
    versionName "1.0"
    testInstrumentationRunner "android.support.test.runner.AndroidJUnitRunner"
  }

  buildTypes {
    release {
      minifyEnabled false
      proguardFiles getDefaultProguardFile('proguard-android.txt'), 'proguard-rules.pro'
    }
  }

  compileOptions {
    sourceCompatibility JavaVersion.VERSION_1_8
    targetCompatibility JavaVersion.VERSION_1_8
  }

  dataBinding {
    enabled = true
  }
}

def supportVer="27.1.1"

dependencies {
  implementation("com.android.support:support-v4:$supportVer") {
    exclude group: 'com.android.support', module: 'support-media-compat'
  } // for https://issuetracker.google.com/issues/64909326
  implementation "com.android.support:recyclerview-v7:$supportVer"
  implementation "com.android.support.constraint:constraint-layout:1.1.0"
  implementation "com.github.ivbaranov:rxbluetooth2:2.0.1"
  implementation "io.reactivex.rxjava2:rxjava:2.1.7"
  implementation "io.reactivex.rxjava2:rxandroid:2.0.1"
  implementation "com.github.davidmoten:rxjava2-extras:0.1.18"
  implementation "android.arch.lifecycle:extensions:1.1.1"
}
We will discuss some of those other dependencies later in this chapter.
The entry point to the RxBluetooth library is an RxBluetooth class. Its constructor
takes a Context, which RxBluetooth holds onto directly. As a result, it
is safest to pass in the Application singleton, so we do not wind up with
memory leaks. Both fragments and the ShoutingEchoService need to use Bluetooth,
so each have their own RxBluetooth instances, held in rxBluetooth fields,
initialized as those fragments and service are created, such as:
rxBluetooth=new RxBluetooth(getActivity().getApplicationContext());
Roughly speaking, there are three possibilities with respect to Bluetooth on the device:
The first scenario should not happen. Our request of Bluetooth permissions
triggers an implicit requirement of Bluetooth hardware. We would have to
have [uses-feature android:name="android.hardware.bluetooth" android:required="false" /]
in our manifest to say that Bluetooth is not required, if we were willing to work
without it. As it stands, our app should not be installable on devices that
lack Bluetooth.
That being said, for illustration purposes, the sample code checks
to see whether we have Bluetooth hardware, by calling isBluetoothAvailable()
on the RxBluetooth object:
    if (!rxBluetooth.isBluetoothAvailable()) {
      Toast.makeText(getActivity(), R.string.msg_no_bt, Toast.LENGTH_LONG).show();
    }
    else {
      enableBluetooth(false);
    }
Under the covers, RxBluetooth works with BluetoothAdapter, the entry point
into the Bluetooth APIs in the Android SDK. BluetoothAdapter has
a getDefaultAdapter() method that returns its singleton instance. If that
returns null or has an empty address, then we do not have Bluetooth hardware.
If isBluetoothAvailable() returns true, we then go and see if Bluetooth
is enabled, via an enableBluetooth() method. There are three possibilities
that this method needs to handle:
We need to handle that latter case so that we can exit gracefully, rather than continuously popping up demands that the user enable Bluetooth.
The boolean parameter to enableBluetooth() indicates whether this is the
first call (as we are starting up) or the second call (after we asked the user
to enable Bluetooth). The code snippet shown above — from the onViewCreated()
method of RosterFragment — has the first call. enableBluetooth(), then,
takes over:
  void enableBluetooth(boolean didWeAskAlready) {
    if (rxBluetooth.isBluetoothEnabled()) {
      bluetoothReady();
    }
    else if (isThing()) {
      rxBluetooth.enable();

      subs.add(rxBluetooth.observeBluetoothState()
        .subscribeOn(Schedulers.io())
        .observeOn(AndroidSchedulers.mainThread())
        .filter(state -> (BluetoothAdapter.STATE_CONNECTED==state))
        .subscribe(state -> bluetoothReady()));
    }
    else if (didWeAskAlready) {
      Toast.makeText(getActivity(), R.string.msg_away, Toast.LENGTH_LONG).show();
      getActivity().finish();
    }
    else {
      rxBluetooth.enableBluetooth(getActivity(), MainActivity.REQUEST_ENABLE_BLUETOOTH);
    }
  }
We first call isBluetoothEnabled() on the RxBluetooth instance. That
just calls isEnabled() on the BluetoothAdapter, and returns a simple boolean
status. If Bluetooth is enabled, we call a bluetoothReady() method to get
things started — we will examine this method in detail shortly.
If Bluetooth is not enabled, and we are running on an Android Things device, we will handle Bluetooth a bit differently, which we will examine later in this chapter.
If Bluetooth is not enabled, and we are not on an Android Things devices,
and this is the first call (didWeAskAlready is
false), we call enableBluetooth() on the RxBluetooth instance. This, in turn,
will call startActivityForResult(), for an Intent with the
BluetoothAdapter.ACTION_REQUEST_ENABLE action string. This will cause the
system to display a dialog-themed activity prompting the user to enable Bluetooth.
So, we pass an Activity and a request code into enableBluetooth(), and those
are used to make the startActivityForResult() call.
The catch is that enableBluetooth() takes an Activity as a parameter and
calls startActivityForResult() on it. Hence, the result goes to the Activity.
This code is in RosterFragment, and so we cannot implement onActivityResult()
here, as that will not be used. Instead, onActivityResult() goes on MainActivity,
which then turns around and calls enableBluetooth() again, this time with a
true parameter:
  @Override
  public void onActivityResult(int requestCode, int resultCode, Intent data) {
    if (requestCode==REQUEST_ENABLE_BLUETOOTH && roster!=null) {
      roster.enableBluetooth(true);
    }
  }
Here, roster is the RosterFragment instance, set up in onCreate().
Back in enableBluetooth() in RosterFragment, if Bluetooth is not
available, and we already asked the user — we are being called again
by that onActivityResult() from MainActivity — we show a Toast and
exit, since the user does not want to enable Bluetooth.
Ideally, eventually, the user enables Bluetooth, so our app can work.
Next, we need to provide the user with a list of devices that might be running our app. This list comes from two sources:
However, this list will also need to be filtered, so we do not present clearly silly options to the user, such as suggesting that our app is running on a Bluetooth-connected speaker.
BluetoothAdapter has a getBondedDevices() method; RxBluetooth wraps
that in its own getBondedDevices() method. This returns the list of
“bonded” devices, which pretty much everyone else would refer to as the “paired”
devices.
Specifically, we get back a list of BluetoothDevice objects. We will need those
objects later on for connecting to and communicating with the other device,
so we will maintain a model collection of these objects.
The bluetoothReady() method is called when we know that Bluetooth is
ready for use. There, part of its work is to call initAdapter():
  private void initAdapter() {
    adapter.setItems(rxBluetooth.getBondedDevices());
  }
Here, we call getBondedDevices() and pass that to a setItems() method
on an adapter. adapter is a DevicesAdapter instance that we set up
when we create the fragment. DevicesAdapter is a RecyclerView.Adapter,
tied to a RowHolder for our list rows:
  private class DevicesAdapter extends RecyclerView.Adapter<RowHolder> {
    private final ArrayList<BluetoothDevice> devices=new ArrayList<>();

    @Override
    public RowHolder onCreateViewHolder(ViewGroup parent, int viewType) {
      return(new RowHolder(RosterRowBinding.inflate(getLayoutInflater(), parent, false)));
    }

    @Override
    public void onBindViewHolder(RowHolder holder, int position) {
      holder.bind(devices.get(position));
    }

    @Override
    public int getItemCount() {
      return(devices.size());
    }

    void setItems(Collection<BluetoothDevice> devices) {
      this.devices.clear();

      for (BluetoothDevice device : devices) {
        if (isCandidateDevice(device)) {
          this.devices.add(device);
        }
      }

      notifyDataSetChanged();
    }

    void addDevice(BluetoothDevice device) {
      if (isCandidateDevice(device) && !devices.contains(device)) {
        devices.add(device);
        notifyItemInserted(devices.size()-1);
      }
    }

    boolean isCandidateDevice(BluetoothDevice device) {
      int deviceClass=device.getBluetoothClass().getDeviceClass();

      return(((deviceClass & BluetoothClass.Device.Major.COMPUTER)==
        BluetoothClass.Device.Major.COMPUTER) ||
        ((deviceClass & BluetoothClass.Device.Major.PHONE)==
        BluetoothClass.Device.Major.PHONE) ||
        ((deviceClass & BluetoothClass.Device.Major.AUDIO_VIDEO)==
          BluetoothClass.Device.Major.AUDIO_VIDEO));
    }
  }

  public class RowHolder extends RecyclerView.ViewHolder {
    private final RosterRowBinding binding;

    RowHolder(RosterRowBinding binding) {
      super(binding.getRoot());

      this.binding=binding;
    }

    void bind(BluetoothDevice device) {
      binding.setDevice(device);
      binding.setController(this);
      binding.executePendingBindings();
    }

    public void onClick(BluetoothDevice device) {
      ((Contract)(getActivity())).showDevice(device);
    }
  }
}
Most of the above code follows from what we saw with RecyclerView
and the data binding framework elsewhere in the book.
What’s a little strange is the filtering going on in methods like the
setItems() that initAdapter() calls.
Bluetooth devices have classes. Computers are a different class than are audio devices, which are in a different class than are toys, and so on. An Android device might discover, or be paired with, other devices from a variety of classes. Rather than present all possible devices, it makes sense to limit the devices to things that are reasonably likely to have our app.
BluetoothDevice has a getBluetoothClass() method, which returns a BluetoothClass
object. That, in turn, has a getDeviceClass() method, which returns an int
that represents the device class.
There are three classes (at least) that Android devices can fall in, identified
by constants defined on the BluetoothClass.Device.Major class:
COMPUTER
PHONE
AUDIO_VIDEO
So, isCandidateDevice() does some bit-checking to see if the device we
are bonded to is in one of those three major classes, rejecting any others.
The onViewCreated() method of RosterFragment sets up that RecyclerView,
as well as creating the RxBluetooth instance, seeing if we have Bluetooth
hardware, and triggering the initial call to enableBluetooth():
  @Override
  public void onViewCreated(View view, @Nullable Bundle savedInstanceState) {
    super.onViewCreated(view, savedInstanceState);

    rv=view.findViewById(R.id.devices);

    rv.setLayoutManager(new LinearLayoutManager(getActivity()));
    rv.addItemDecoration(new DividerItemDecoration(getActivity(),
      LinearLayoutManager.VERTICAL));
    rv.setAdapter(adapter);

    rxBluetooth=new RxBluetooth(getActivity().getApplicationContext());

    if (!rxBluetooth.isBluetoothAvailable()) {
      Toast.makeText(getActivity(), R.string.msg_no_bt, Toast.LENGTH_LONG).show();
    }
    else {
      enableBluetooth(false);
    }
  }
Before we can connect to a Bluetooth device, we need to pair with it. And before we can pair with it, we need to discover it. So, while the preceding section outlined how we can show the user already-paired devices, we also have to allow the user to discover devices to pair with.
This is a three-part process:
In the Android SDK, to allow other devices to discover the one your app is running
on, you use startActivityForResult() on a BluetoothAdapter.ACTION_REQUEST_DISCOVERABLE
Intent. This will pop up a system-supplied dialog-themed activity to confirm
that the user really wants the device to be discoverable. If the user agrees,
then the device will be discoverable… for a short while.
The default discoverability duration in 120 seconds. You can add a
BluetoothAdapter.EXTRA_DISCOVERABLE_DURATION extra to the Intent, with a
value in seconds (up to 300) of how long you would like the device to be discoverable.
RxBluetooth hides all of this behind a pair of enableDiscoverability() methods.
Both take an Activity and a request code, for use with the
startActivityForResult() call. One of the enableDiscoverability() methods
also takes a duration, to pass along via EXTRA_DISCOVERABLE_DURATION.
As with enableBluetooth(), the startActivityForResult() call is made on the
supplied Activity, not any fragment. If you want the result, you will need
to implement onActivityResult() on the same Activity that you supplied to the
enableDiscoverability() call. Here, the result is contained entirely in the
result code, which will be RESULT_CANCELED if the user declined to enable
discoverability… or the duration in seconds that the device will be discoverable.
RESULT_OK is not the value indicating success in this case.
In RosterFragment, if the user taps on the “Allow Discovery” action bar item,
we just call enableDiscoverability():
rxBluetooth.enableDiscoverability(getActivity(), REQUEST_ENABLE_DISCOVERY);
In our case, we are ignoring the result, as we have no behavior to invoke based upon that result.
There is no way to cancel discoverability — it will simply time out on its own.
In the Android SDK, BluetoothAdapter has three methods tied to discovery (the
act of discovering discoverable devices):
startDiscovery()isDiscovering()cancelDiscovery()RxBluetooth has its own versions of those methods, which just call the corresponding
method on the wrapped BluetoothAdapter.
The three methods do pretty much what you would expect from their names: start searching for discoverable devices, report if a discovery search is ongoing, and stop the search.
In RosterFragment, if the user taps the “Discover” action bar item, we just
call startDiscovery():
rxBluetooth.startDiscovery();
As part of cleanup, we call cancelDiscovery() in onDestroy(), so a discovery
operation will not continue past the lifetime of the fragment instance.
However, somewhere along the line, it would be very useful if we actually found out about the discovery results. If the scan finds devices, we need to know about them. We also need to know when the discovery scan stops of its own accord, as it will not run forever.
To that end, as part of our work in bluetoothReady() in RosterFragment,
we set up two RxJava chains. One will use observeDevices() on RxBluetooth
to find out about discovered devices. The other will use observeDiscovery()
on RxBluetooth to find out about the status of the discovery scan itself:
      subs.add(rxBluetooth.observeDevices()
        .subscribeOn(Schedulers.io())
        .observeOn(AndroidSchedulers.mainThread())
        .subscribe(this::addDevice));

      subs.add(rxBluetooth.observeDiscovery()
        .subscribeOn(Schedulers.io())
        .observeOn(AndroidSchedulers.mainThread())
        .subscribe(s ->
          discover.setEnabled(!BluetoothAdapter.ACTION_DISCOVERY_STARTED.equals(s))));
observeDiscovery(), under the covers, uses a BroadcastReceiver to listen for
BluetoothAdapter.ACTION_DISCOVERY_STARTED and
BluetoothAdapter.ACTION_DISCOVERY_FINISHED broadcasts, forwarding them along
to our chain. We simply enable and disable the “Discovery” MenuItem depending
upon the scan state.
Similarly, observeDevices() uses a BroadcastReceiver for
BluetoothDevice.ACTION_FOUND devices, forwarding the BluetoothDevice
extra (EXTRA_DEVICE) along to our chain. We call addDevice(), which will
add the device to our RecyclerView, if that device is not already in the list.
It might already be in the list because:
Given all of that, our client device can find our server device. Now, we need to set up the actual communications between them.
First, let’s look at how our server listens for incoming connections from
clients. That is managed by the ShoutingEchoService, so that we can
listen for connections and respond to requests from the background, if desired.
ShoutingEchoService is a foreground service, partly so the user can stop
the service from the Notification, and partly so that the service can run
for an extended period of time. So, in onCreate(), among other things,
we set up our notification channel and call startForeground():
    NotificationManager mgr=
      (NotificationManager)getSystemService(NOTIFICATION_SERVICE);

    if (Build.VERSION.SDK_INT>=Build.VERSION_CODES.O &&
      mgr.getNotificationChannel(CHANNEL_WHATEVER)==null) {
      mgr.createNotificationChannel(new NotificationChannel(CHANNEL_WHATEVER,
        "Whatever", NotificationManager.IMPORTANCE_DEFAULT));
    }

    startForeground(1338, buildForegroundNotification());
startForeground() relies on a buildForegroundNotification() method to
create the Notification:
  private Notification buildForegroundNotification() {
    NotificationCompat.Builder b=
      new NotificationCompat.Builder(this, CHANNEL_WHATEVER);

    b.setOngoing(true)
      .setContentTitle(getString(R.string.msg_foreground))
      .setSmallIcon(R.drawable.ic_stat_ping)
      .addAction(android.R.drawable.ic_media_pause, getString(R.string.msg_stop),
        buildStopPendingIntent());

    return(b.build());
  }
buildForegroundNotification(), in turn, calls buildStopPendingIntent(),
to craft a PendingIntent to be tied to the “stop” action added to the Notification.
buildStopPendingIntent() uses a service PendingIntent, wrapped around
an explicit Intent (identifying our service) to which we also happen to
attach a custom action string (ACTION_STOP):
  private PendingIntent buildStopPendingIntent() {
    Intent i=new Intent(this, getClass()).setAction(ACTION_STOP);

    return(PendingIntent.getService(this, 0, i, 0));
  }
onStartCommand() then examines the Intent used to start the service,
sees if it is ACTION_STOP, and calls stopSelf() if so:
  @Override
  public int onStartCommand(Intent intent, int flags, int startId) {
    if (ACTION_STOP.equals(intent.getAction())) {
      stopSelf();
    }

    return(START_NOT_STICKY);
  }
As a result, if the user taps the “Stop Server” notification action, the service will stop itself.
The RosterFragment has a checkable action bar item, “Server”, used to start
and stop the ShoutingEchoService. To make that work, the RosterFragment needs
to know about the status of the service, and changes to the status of the service.
For example, if the user stops the service through the notification action, we
need to uncheck the MenuItem if our UI is still around.
We could use an event bus, such as greenrobot’s EventBus. In this case, we
are using MutableLiveData.
MutableLiveData is from the Architecture Components family of libraries.
LiveData is a bit like a very tiny subset of RxJava, allowing you to observe
on a stream of data. MutableLiveData is a subclass of LiveData that allows
external parties to post events to observers. As a result, MutableLiveData can
be used a bit like an event bus. The main “claim to fame” for LiveData — beyond
it coming from Google — is that its mechanism for observing changes is lifecycle-aware,
so we do not need to register and unregister from activity or fragment
lifecycle methods.
You can learn a lot more about MutableLiveData, LiveData, and the rest
of the Architecture Components in the companion volume, Android’s Architecture Components.
To keep the UI layer informed about the status of the service, ShoutingEchoService
has a MutableLiveData that publishes Status objects:
static final MutableLiveData<Status> STATUS=new MutableLiveData<>();
Here, Status is a simple wrapper around a boolean:
  static class Status {
    static final Status IS_RUNNING=new Status(true);
    static final Status NOT_RUNNING=new Status(false);
    final boolean isRunning;

    private Status(boolean isRunning) {
      this.isRunning=isRunning;
    }
  }
This could be replaced by an enum or Boolean, but you might have more complex data that
you want to publish as part of the status.
Then, in onCreate(), we use postValue() on MutableLiveData to publish
that the service is running:
  @Override
  public void onCreate() {
    super.onCreate();

    rxBluetooth=new RxBluetooth(getApplicationContext());
    acceptConnections();

    NotificationManager mgr=
      (NotificationManager)getSystemService(NOTIFICATION_SERVICE);

    if (Build.VERSION.SDK_INT>=Build.VERSION_CODES.O &&
      mgr.getNotificationChannel(CHANNEL_WHATEVER)==null) {
      mgr.createNotificationChannel(new NotificationChannel(CHANNEL_WHATEVER,
        "Whatever", NotificationManager.IMPORTANCE_DEFAULT));
    }

    startForeground(1338, buildForegroundNotification());

    STATUS.postValue(Status.IS_RUNNING);
  }
In onDestroy(), among other things, we publish that the service is no longer
running:
STATUS.postValue(Status.NOT_RUNNING);
RosterFragment sets up a lambda expression to observe these status changes
and update the checked state of a server MenuItem:
    ShoutingEchoService.STATUS.observe(this,
      status -> {
        if (server!=null && status!=null) server.setChecked(status.isRunning);
      });
That informs us in real time about status changes. To find out the current
status, we have to call getValue() on the MutableLiveData, which RosterFragment
wraps in an isServerRunning() method:
  private boolean isServerRunning() {
    ShoutingEchoService.Status status=ShoutingEchoService.STATUS.getValue();

    return(status!=null && status.isRunning);
  }
That can then be used to control what happens when the user taps that “Server” action bar item:
  @Override
  public boolean onOptionsItemSelected(MenuItem item) {
    switch (item.getItemId()) {
      case R.id.server:
        if (isServerRunning()) {
          getActivity().stopService(new Intent(getActivity(),
            ShoutingEchoService.class));
        }
        else {
          getActivity().startService(new Intent(getActivity(),
            ShoutingEchoService.class));
        }

        return(true);

      case R.id.discover:
        rxBluetooth.startDiscovery();
        return(true);

      case R.id.allow_disco:
        rxBluetooth.enableDiscoverability(getActivity(), REQUEST_ENABLE_DISCOVERY);
        return(true);
    }

    return(super.onOptionsItemSelected(item));
  }
Of course, none of this has anything much to do with Bluetooth. It would be nice if our server actually used Bluetooth somewhere.
Up in onCreate(), in addition to initializing our RxBluetooth instance, we
call acceptConnections(). That is where the Bluetooth fun starts with our service:
  private void acceptConnections() {
    connectionSub=rxBluetooth
      .observeBluetoothSocket(getString(R.string.app_name), SERVICE_ID)
      .subscribeOn(Schedulers.io())
      .observeOn(Schedulers.computation())
      .subscribe(this::operateServer,
        throwable -> Log.e(getClass().getSimpleName(),
          "Exception from Bluetooth", throwable));
  }
In the Android SDK, a server can start listening for RFCOMM connection requests
by calling listenUsingRfcommWithServiceRecord() on the BluetoothAdapter
instance. That is wrapped by observeBluetoothSocket() on RxBluetooth, so
we can observe the results of that work.
listenUsingRfcommWithServiceRecord() takes two parameters:
Clients that try to connect to us will need to use that same UUID, to distinguish
our Bluetooth service from other ones. In our case, the UUID is SERVICE_ID:
  static final UUID SERVICE_ID=
      UUID.fromString("20c6de08-2cf5-4ca2-96af-cb0a45055d37");
listenUsingRfcommWithServiceRecord() returns a BluetoothServerSocket.
Calling accept() on it blocks until a connection is made, at which time
accept() returns a BluetoothSocket that can be used for communicating with
that connected client. At this point, you close() the BluetoothServerSocket,
as a given instance of BluetoothServerSocket is used for establishing just
one connection. All of that work is wrapped up inside of RxBluetooth, so we
can just set up an RxJava chain, using background threads both for listening
for incoming connections and consuming the resulting BluetoothSocket.
Once we get a BluetoothSocket, we call operateServer(). Among other things,
operateServer() turns around and calls acceptConnections() again, so we can
accept the next incoming client connection request. So that we do not wind
up with a bunch of RxJava subscriptions piling up, we keep track of the outstanding
one in a connectionSub field, disposing of it both in onDestroy() (as we
no longer need it then) and in acceptConnections() (as we no longer need the
previous subscription, since we already received our BluetoothSocket).
Given that our server has its service to respond to connections, our client has to make those connections.
On the client side, this is managed by the DeviceFragment. We create
and show one of these when the user clicks on a device in the list
displayed in the RosterFragment. As it turns out, BluetoothDevice
is Parcelable, so we can pass that over to the DeviceFragment using
the arguments Bundle:
  public static Fragment newInstance(BluetoothDevice device) {
    DeviceFragment result=new DeviceFragment();
    Bundle args=new Bundle();

    args.putParcelable(ARG_DEVICE, device);
    result.setArguments(args);

    return(result);
  }
  private BluetoothDevice getDevice() {
    return(getArguments().getParcelable(ARG_DEVICE));
  }
The DeviceFragment UI is mediated by the data binding framework. The fragment’s
layout — res/layout/device.xml — injects the fragment itself as a controller
and has the Switch invoke onConnectionChange() on the fragment when the
Switch state changes:
<?xml version="1.0" encoding="utf-8"?>
<layout xmlns:android="http://schemas.android.com/apk/res/android"
  xmlns:app="http://schemas.android.com/apk/res-auto">

  <data>

    <variable
      name="controller"
      type="com.commonsware.android.bluetooth.rxecho.DeviceFragment" />
  </data>

  <android.support.constraint.ConstraintLayout
    android:layout_width="match_parent"
    android:layout_height="match_parent"
    android:padding="@dimen/padding_main">

    <Switch
      android:id="@+id/connected"
      android:layout_width="wrap_content"
      android:layout_height="wrap_content"
      android:onCheckedChanged="@{() -> controller.onConnectionChange()}"
      android:text="@string/switch_connected"
      app:layout_constraintStart_toStartOf="parent"
      app:layout_constraintTop_toTopOf="parent" />

    <android.support.v7.widget.RecyclerView
      android:id="@+id/transcript"
      android:layout_width="0dp"
      android:layout_height="0dp"
      app:layoutManager="LinearLayoutManager"
      app:layout_constraintBottom_toTopOf="@+id/entry"
      app:layout_constraintEnd_toEndOf="parent"
      app:layout_constraintStart_toStartOf="parent"
      app:layout_constraintTop_toBottomOf="@+id/connected"
      app:stackFromEnd="true" />

    <EditText
      android:id="@+id/entry"
      android:layout_width="0dp"
      android:layout_height="wrap_content"
      android:ems="10"
      android:enabled="false"
      android:hint="@string/hint_entry"
      android:inputType="text"
      android:imeOptions="actionSend"
      app:layout_constraintBottom_toBottomOf="parent"
      app:layout_constraintEnd_toEndOf="parent"
      app:layout_constraintHorizontal_bias="0.627"
      app:layout_constraintStart_toStartOf="parent" />
  </android.support.constraint.ConstraintLayout>
</layout>onCreateView() then sets up the DeviceBinding, holding onto it in a binding
field:
  @Nullable
  @Override
  public View onCreateView(LayoutInflater inflater,
                           @Nullable ViewGroup container,
                           @Nullable Bundle savedInstanceState) {
    binding=DeviceBinding.inflate(inflater, container, false);
    binding.setController(this);

    return(binding.getRoot());
  }
That onConnectionChange() method then checks to see if the Switch
is checked. If it is, we disable the Switch, so the disabled state indicates
that we are in a “connecting” state, as opposed to a “disconnected” or “connected”
state:
  public void onConnectionChange() {
    if (binding.connected.isChecked()) {
      binding.connected.setEnabled(false);
      connectionSub=rxBluetooth.observeConnectDevice(getDevice(), ShoutingEchoService.SERVICE_ID)
        .subscribeOn(Schedulers.io())
        .observeOn(AndroidSchedulers.mainThread())
        .subscribe(this::onConnected, this::onConnectionError);
    }
    else {
      disconnect();
    }
  }
More importantly, we set up an RxJava chain based on observeConnectDevice()
on our RxBluetooth object. This will try to connect to our service, given
the BluetoothDevice of the server’s device and the UUID of the service.
observeConnectDevice() wraps a call to createRfcommSocketToServiceRecord()
on BluetoothDevice. This creates a BluetoothSocket representing the client
side of the connection to the UUID-identified service running on the designated
device. A call to connect() will block until we successfully connect
to that service or it throws some form of IOException indicating that we could
not connect.
Our RxJava chain routes successful connections to an onConnected() method. Among
other things, it enables the Switch (to show that we are connected) and
the EditText (initially disabled, since we cannot send messages until we are
connected). The rest has to do with data exchange, which we will look at in the
next section.
Our RxJava chain routes exceptions to onConnectionError(), which unchecks
the Switch (since we are not connected), logs the details to LogCat (in case
this error was unexpected), and shows a Toast.
The fact that we uncheck the Switch triggers a fresh call to onConnectionChange().
If the Switch is unchecked, we call a disconnect() method, which,
among other things, will dispose() the connectionSub subscription, as we no
longer need that RxJava chain for our failed connection attempt.
There is nothing in this code specific to pairing. That happens automatically
when we try to connect to the service on the other device. If we are already
paired, getting our BluetoothSocket is relatively quick. If we are not paired,
we need to wait for the user to agree to pair the devices, which may take some
time or possibly never happen (e.g., user declines, user fails to notice the
dialog and it times out).
Once our client has connected to the server, we can start exchanging messages.
Technically, there is nothing in Bluetooth that requires a request/response protocol. Both sides can communicate as needed to the other. However, a request/response pattern is easy to write, which is why we use it here.
A BluetoothSocket has getInputStream() and getOutputStream() methods
for receiving and sending data to the other party, respectively. RxBluetooth
does not add anything for these — you are on your own for determining when
and how to use those streams.
The onConnected() method, in addition to adjusting the state of some widgets:
BluetoothSocket
PrintWriter tied to the output stream from the BluetoothSocket
  private void onConnected(BluetoothSocket socket) throws IOException {
    binding.connected.setEnabled(true);
    binding.entry.setEnabled(true);
    this.socket=socket;
    out=new PrintWriter(new OutputStreamWriter(socket.getOutputStream()));
    responseSub=Bytes.from(socket.getInputStream())
      .subscribeOn(Schedulers.io())
      .observeOn(AndroidSchedulers.mainThread())
      .subscribe(bytes -> post(new String(bytes)),
        throwable -> out.close());
  }
We will examine that RxJava chain in greater detail a bit later in this chapter.
The DeviceFragment layout, shown above, has android:imeOptions="actionSend",
to ask for a “send” button on any soft keyboard. In onViewCreated(),
we tie the EditText to a send() method by means of a lambda expression
supplied to setOnEditorActionListener(), to find out when the user taps
that “send” button:
  @Override
  public void onViewCreated(View view, @Nullable Bundle savedInstanceState) {
    super.onViewCreated(view, savedInstanceState);

    binding.entry.setOnEditorActionListener((v, actionId, event) -> (send()));
    binding.entry.setEnabled(socket!=null);

    RecyclerView rv=view.findViewById(R.id.transcript);

    rv.setAdapter(adapter);
  }
send(), in turn, uses the PrintWriter to send the entered text to the
server:
  public boolean send() {
    Single.just(binding.entry.getText().toString())
      .observeOn(Schedulers.io())
      .subscribe(message -> {
        out.print(message);
        out.flush();
      });

    return(true);
  }
We want to do that work on a background thread, as we always want to do I/O
on a background thread. To stick to a single thread pool, we wrap the text
that the user types in into a Single (a “one-shot” RxJava type otherwise
reminiscent of Observable), observe the data on the io() thread, and
in there print() the text to the PrintWriter and flush() it to make
sure that it goes out.
Back in ShoutingEchoService, the operateServer() method gets the
BluetoothSocket representing the server side of the connection and sets
up its own RxJava chain to work with it:
  private void operateServer(BluetoothSocket socket) throws IOException {
    disconnect();
    this.socket=socket;
    acceptConnections();

    final PrintWriter out=
      new PrintWriter(new OutputStreamWriter(socket.getOutputStream()));

    Bytes.from(socket.getInputStream())
      .subscribeOn(Schedulers.io())
      .observeOn(Schedulers.computation())
      .subscribe(bytes -> {
        out.print(new String(bytes).toUpperCase());
        out.flush();
      }, throwable -> out.close());
  }
First, though, we call disconnect(), which closes any existing BluetoothSocket
that we might have:
  private void disconnect() {
    if (socket!=null) {
      try {
        socket.close();
      }
      catch (IOException e) {
        Log.e(TAG, "Exception from Bluetooth", e);
      }
    }
  }
As noted above, we also call acceptConnections(), so we can accept a connection
from the next client. We only support one client at a time, closing the BluetoothSocket
from the previous client as part of accepting the next one here. That’s mostly
a limitation of the sample app, to try to keep this sample from being
excessively complex.
RxJava does not provide anything that works directly with Java’s stream
classes, like InputStream or OutputStream. However, David Moten offers
the rxjava2-extras library
which adds more Java-specific bridges to RxJava. Here, we use the Bytes
class, which sets up RxJava chains for data coming in from an InputStream.
We want to receive the message on a background thread, and we also want to send
the response on a background thread. To prevent sending the response from
blocking future input, we use separate threads, with the io() thread for
reading the data off of the InputStream and the computation() thread
for sending the response.
Actually sending the response then is simply a matter of:
String
String using toUpperCase(), so the service appears to be shoutingprint() and flush() on our PrintWriter to send the response back to the clientIf there is an IOException, we just close the PrintWriter, which closes the
associated OutputStream. Bytes automatically closes our InputStream when
the stream is closed from the sending side.
In DeviceFragment, part of what onConnected() does is set up a similar
Bytes-based RxJava chain to listen for the responses from the server:
  private void onConnected(BluetoothSocket socket) throws IOException {
    binding.connected.setEnabled(true);
    binding.entry.setEnabled(true);
    this.socket=socket;
    out=new PrintWriter(new OutputStreamWriter(socket.getOutputStream()));
    responseSub=Bytes.from(socket.getInputStream())
      .subscribeOn(Schedulers.io())
      .observeOn(AndroidSchedulers.mainThread())
      .subscribe(bytes -> post(new String(bytes)),
        throwable -> out.close());
  }
Here, we get the data on the main application thread, using AndroidSchedulers.mainThread(),
so we can take the bytes, convert them into a String, and call a post() method.
post(), in turn, clears out the EditText (to prepare for the next message)
and adds the response message to a TranscriptAdapter that populates
the RecyclerView that dominates this fragment’s UI:
  private void post(String message) {
    binding.entry.setText("");
    adapter.add(message);
  }
The result is that when we get the response, it appears in the list of responses, reminiscent of a chat client.
There are a couple of differences in how the RxEcho app runs on an Android Things platform.
First, we need to know that we are on an Android Things platform. To determine
that, we have an isThing() method that checks to see if we have
the FEATURE_EMBEDDED system feature or not:
  private boolean isThing() {
    return(Build.VERSION.SDK_INT>=Build.VERSION_CODES.O &&
      (getActivity().getPackageManager().hasSystemFeature(PackageManager.FEATURE_EMBEDDED)));
  }
In enableBluetooth(), if we are on an Android Thing, and we do not already
have Bluetooth enabled, we can enable it directly ourselves, by calling enable()
on the RxBluetooth instance (which, in turn, calls enable() on the BluetoothAdapter).
This is frowned
upon in conventional Android apps, where we should ask the user if it is OK
to enable Bluetooth. In the case of an Android Thing, we have no way to ask
the user — not only might the Thing not have a screen, but the system-supplied
confirmation activity does not even exist.
However, enable() is asynchronous. We get control right away, and Bluetooth
will not yet be powered on. We need to find out when it is ready, so we can
continue. RxBluetooth offers an observeBluetoothState() method to allow
us to set up an RxJava chain to find out about state changes in Bluetooth itself.
As with some of the other observe...() methods, this wraps around a BroadcastReceiver,
in this case one that watches for BluetoothAdapter.ACTION_STATE_CHANGED
events, passing to us the state as an Integer. There are a few constants
out on BluetoothAdapter for different possible states; the one that we want
is STATE_CONNECTED. We use an RxJava filter() operator to only pass along
STATE_CONNECTED to our subscriber, which then calls bluetoothReady() to
set up the rest of the Bluetooth support.
bluetoothReady() itself behaves substantially differently depending on whether
we are on a Thing or not:
  private void bluetoothReady() {
    isReady=true;

    if (isThing()) {
      getActivity().startService(new Intent(getActivity(),
        ShoutingEchoService.class));
      rxBluetooth.enableDiscoverability(getActivity(), REQUEST_ENABLE_DISCOVERY,
        300);
      Toast.makeText(getActivity(), R.string.msg_disco, Toast.LENGTH_LONG).show();
    }
    else {
      updateMenu();
      initAdapter();

      subs.add(rxBluetooth.observeDevices()
        .subscribeOn(Schedulers.io())
        .observeOn(AndroidSchedulers.mainThread())
        .subscribe(this::addDevice));

      subs.add(rxBluetooth.observeDiscovery()
        .subscribeOn(Schedulers.io())
        .observeOn(AndroidSchedulers.mainThread())
        .subscribe(s ->
          discover.setEnabled(!BluetoothAdapter.ACTION_DISCOVERY_STARTED.equals(s))));
    }
  }
If we are not on a Thing, we:
RecyclerView with paired devicesOn a Thing, we do not need any of that, as we do not necessarily have a screen to work with. Instead, we:
ShoutingEchoService directlyToast about the discoverability, in case we do happen to have a
screen (as might be the case on a Raspberry Pi)The net is that on a Thing, we immediately set up the echo server and make it possible for clients to pair with it, since we cannot rely on the user to request those things from the action bar.