Chapter 18. Getting The Most Out of On-Camera Flash
POP-UP FLASH VS. SPEEDLITE
FILL SHADOWS WITH ON-CAMERA FLASH
CREATE SOFT LIGHT BY BOUNCING ON-CAMERA FLASH
ARE DIFFUSERS FOR ON-CAMERA FLASH HELPFUL?
OTHER TIPS FOR ON-CAMERA FLASH
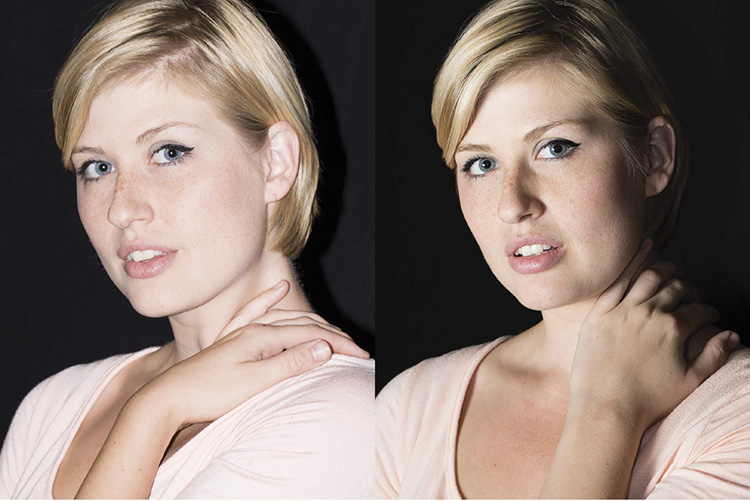
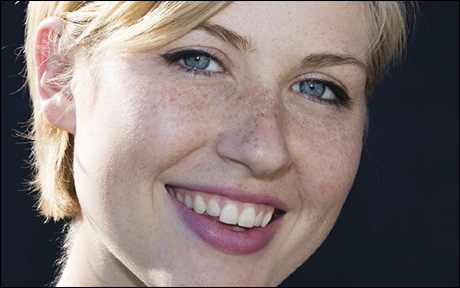
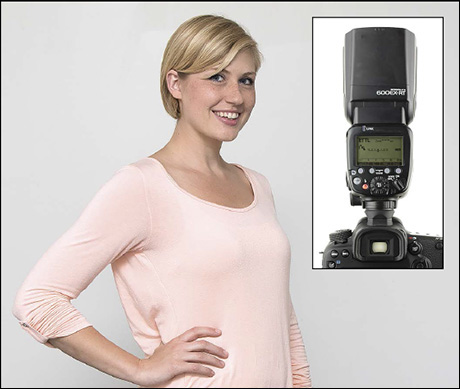
Figure 18.1
A hotshoe-mounted Speedlite can create a diverse range of light. Left: Rotating my camera/Speedlite to the left created crisp but minimal shadows in this shot lit with the direct flash from a 600EX-RT. Right: Bouncing the flash off a 42″ reflector softens the light and creates chiaroscuro—the interplay of light and shadow.
The Short Version
The are many options for creating great light and useful shadows with a hotshoe-mounted Speedlite. The key to remember is that all the guidelines for making great light with off-camera flash apply to on-camera flash. The two most important ideas are: Make the light source appear much larger than the subject to soften the shadows, and send the light towards the subject at an angle (by bouncing the flash) to create shadows that portray depth. As importantly, remember that an on-camera flash can be used as a quick source of fill flash when shooting outdoors in bright sunlight.
Pop-Up Flash vs. Speedlite
Many photographers start their journey towards becoming a Speedliter by exploring the uses of a pop-up flash. Those who stick with flash photography long enough will eventually make the transition to the versatility provided by Speedlites. In case you are considering whether a Speedlite is worth the expenditure of money and time to learn how to use it well, here are several considerations to ponder.
The Convenience Of Pop-Up Flash Cannot Be Denied
The convenience of pop-up is that it is already built into your camera. With just the push of a button, it is ready to fire. That said, the small size and light weight of a Speedlite make it easy to carry as well.
The Pop-Up Flash Is Best At Close Distances
Due to the diminutive size of the flash tube in a pop-up, its effective range is typically 2′ to 12′. You can increase this range by using a wider aperture and/or higher ISO. By comparison, the range of most Speedlites is two to four times that of a pop-up flash.
The Pop-Up Flash Always Looks Straight Ahead
Unlike a Speedlite, with a head that can be panned side to side or tilted up, the pop-up flash always fires straight ahead. This limits the opportunities to soften the look of on-camera flash by bouncing it off a nearby wall or ceiling—as we’ll explore in this chapter.
A Pop-Up Flash Cannot Be Zoomed
Very frequently, I want to light my subject but not the background. The ability to manually zoom the head of a Speedlite to a tight pattern of light provides for a wide range of creativity. Unfortunately, a pop-up flash does not have this same flexibility.
The Pop-Up Flash As A Transmitter
The pop-up flashes on many EOS cameras (T3i, T4i, T5i, T6i, 60D, 70D, 7D, 7D Mark II) can be used to control slave Speedlites. This is a great way to get started with off-camera flash. Remember that a slaved Speedlite working in optical wireless must see the signal coming from the pop-up. So, the slave must be in front of the camera—especially when shooting outdoors. If you put your slaved Speedlite too far to the side of your camera, it may not fire.
A Pop-Up Flash Will Not Do High-Speed Sync
One of the best uses for on-camera flash is to provide fill flash when shooting outdoors in bright sunlight. As we will explore shortly, this low-power puff of light will allow the camera to record details that otherwise would be hidden in dark shadows.
Unfortunately, pop-up flashes cannot recycle fast enough to provide the near-continuous pulse of light provided by high-speed sync. This means that the fastest shutter speed that can be used with a pop-up is the camera’s sync speed (typically  ″).
″).
In bright sunlight, a shutter speed of
″ means that a narrow aperture must be used—which limits the ability to create shots with the blurry backgrounds created when using a wide aperture (compare Figures 18.6
and 18.7
).
The Best Uses For A Pop-Up Flash
Despite the limitations that I have just listed, here are what I consider to be the best uses for a pop-up flash:
 Fill flash in bright sunlight
—A bit of fill flash can make a huge difference in a shot. Even if I have to stop the lens down to accommodate the
″ sync speed—which means that the background might be a bit sharp—this is better than a blurry background and a silhouetted subject.
Fill flash in bright sunlight
—A bit of fill flash can make a huge difference in a shot. Even if I have to stop the lens down to accommodate the
″ sync speed—which means that the background might be a bit sharp—this is better than a blurry background and a silhouetted subject.
Starting with off-camera flash
—With a wireless-compatible pop-up and one Speedlite, you can begin to take the first steps with off-camera flash.
Fill Shadows with On-Camera Flash
As we discussed way back in Chapter 1
: Learn To See Light
, your camera sees the world differently than you do. One of the most significant differences is that we see more details in shadows than our cameras can record. For instance, in scenes with an extreme range of brightness—such as when shooting outdoors on a cloudless day—medium-dark details will be recorded as pure black when we set our exposure so that it preserves highlight details.
The good news is that a quick puff of light from an on-camera flash—pop-up or Speedlite—will reduce the dynamic range of light in the scene so that the camera can record details in the shadows. We call this fill flash
.
As a general rule, when I am outdoors taking quick shots in bright sun, I use a Speedlite in the hotshoe of my camera with its mode set to E-TTL to create automatic fill flash.
On-Camera Key vs. On-Camera Fill Light
Throughout the Handbook
, I talk about the benefits of off-camera flash over on-camera flash when it comes to capturing depth and texture in your shots. You will recall that when the Speedlite is mounted in the hotshoe of the camera and aimed directly at the subject, it lights both sides of the scene equally, which flattens the sense of depth and texture in the shot. By moving the flash off-camera, you create shadows that the lens can see.
So, an important distinction must be made between on-camera key light and on-camera fill light. On-camera fill flash does not create the same visual challenges as on-camera key light because the purpose of the fill is to reduce the contrast of the shadows that are already in the shot. So, for fill flash, the hotshoe is great.
Figure 18.2
By setting up the shot so that the sun is behind Brittany, she has nice rim light on her hair and shoulders—but her face is too dark.
Figure 18.3
The pop-up flash on my 7D Mark II rebalances the shot by adding light into the shadows.
E-TTL Is The Best Mode For Fill Flash
One of the best applications for E-TTL mode is fill flash. You will recall from Chapter 9
: E Is For Evaluative
that E-TTL meters the light returning from a pre-flash and compares that to meter readings of the ambient light so that the camera can automatically set the power of the flash. I find E-TTL to be quite reliable when the purpose of the Speedlite is to provide fill flash.
Another advantage of E-TTL is that it allows me to recompose the shot (either by zooming my lens or by moving closer to/farther from my subject) without having to stop and adjust the power (as would be required if I shot the Speedlite in Manual mode).
Remember: You should use Flash Exposure Compensation (FEC) to fine-tune the amount of E-TTL flash in the shot. For the details, review Chapter 9
: E Is For Evaluative
.
High-Speed Sync Is A Huge Help With Fill Flash
As a rule, when I am using a Speedlite for fill flash, I activate High-Speed Sync so that I do not have to worry about my camera pushing the shutter speed back to its sync speed when I am shooting at a wide aperture. (Review Chapter 7
: Control Your Speedlite
if this does not make sense.) Keep in mind that HSS is not available when shooting pop-up flash.
Figure 18.4
While this ambient-only shot is appealing, the shot would be stronger with a bit of light added to Brittany’s eyes. Exposure:  ″ f/2, ISO 200.
Figure 18.5
Activating the pop-up flash on my 7D Mark II forces the shutter speed back to the camera’s sync speed. The 4-stop change in the shutter speed overexposed this shot with too much ambient light, not flash. Exposure:
″ f/2, ISO 200.
Figure 18.6
Since pop-up flashes cannot do high-speed sync, I had to close the aperture by four stops to rebalance the exposure. Note that the depth of field is a bit deeper. Exposure:
″ f/11, ISO 200.
Figure 18.7
Connecting a Speedlite to the camera’s hotshoe enabled me to use high-speed sync for the fill flash and to return the exposure settings to those I used for the ambient-only shot. I prefer the shallower depth of field in this shot. Exposure:
″ f/2, ISO 200.
Create Soft Light By Bouncing On-Camera Flash
There are two tell-tale signs that a shot was lit with on-camera flash: The shadow has hard edges, and it drops behind or beside the subject. This effect is shown in Figure 18.9
(pop-up flash) and Figure 18.10
(hotshoe-mounted Speedlite).
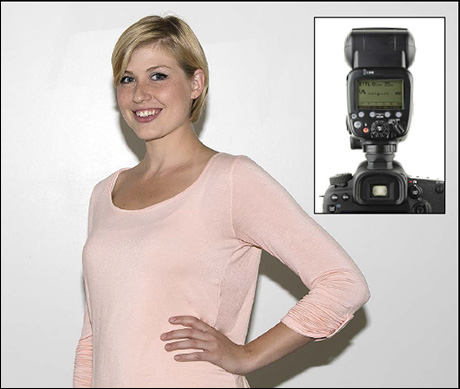
Figure 18.8
Ambient light only—provided by a large window 20′ to my right. While there is nice edge light, Brittany’s face is too dark.
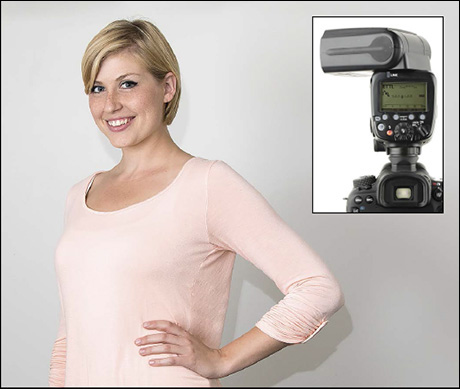
Figure 18.9
The pop-up flash on my 7D Mark II provides just enough light to fill the shadows on Brittany’s face. Note the faint ribbon shadows on the left side of her face and along her arm.
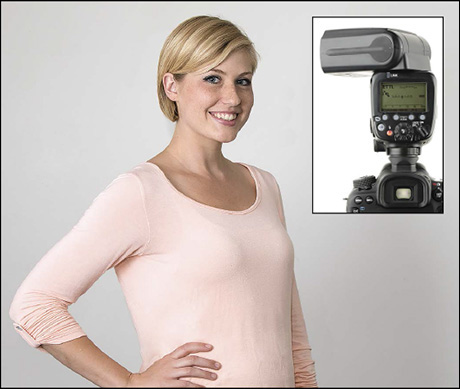
Figure 18.10
A Speedlite can provide much more light than a pop-up flash. Here, a hotshoe-mounted 600EX-RT replaces the ambient window light as the key light. Note that the contrast of the ribbon shadow is stronger than in Figure 18.7
, but essentially in the same place.
If you frame your shot horizontally, then the shadow drops behind your subject because the flash is sitting straight above the lens. When you frame your shot vertically, the flash tips to one side and the shadow appears on the side opposite the flash. For instance, if you tip your camera to the left, then the shadow appears to the right of the subject. This is discussed in more detail in the Place Your Shadows
section later in this chapter.
Bouncing your flash off a wall is an effective way to increase its apparent size, which softens the light. With a Speedlite, this technique is achieved by angling the head of the flash sideways towards the wall. Aim the head at a spot halfway between you and your subject. If you have time, zoom the head to 105mm or 200mm to concentrate the light on the wall.
In Figure 18.11
, I bounced the flash from a hotshoe-mounted 600EX-RT off the wall to my left. Compare this shot to Figure 18.10
, which was lit with the flash aimed straight at Brittany. You will see that by turning a large part of the wall into my light source, the shadows on Brittany’s face are significantly softer.
Figure 18.11
By panning and tilting the head of the Speedlite, I was able to bounce it off a nearby white wall. Note how the contrast of the shadows is less severe and that the shadows have soft edges.
Now what about the hard shadows that you can see in Figure 18.11
? They were created by direct flash coming from the head of the Speedlite. Even though the head was angled to the left, a portion of its front panel was still visible from Brittany’s position. So, some light flew directly at Brittany and created the hard shadows. An effective way to eliminate the hard shadow is to flag the side of the Speedlite’s head so that your subject cannot see any of the Speedlite’s front panel. A Rogue Flashbender is my favorite tool for this job. In a pinch, you can just use your left hand as an instant flag.
One important consideration with wall bounce is which wall to use. Should you bounce to the right or left? As a general rule, the wall towards which your subject’s nose is pointing is the better wall—even if it is farther away. This sends the light straight at the nose, which minimizes the shadow. For Figure 18.12
, I asked Brittany to turn to the other side. While not a huge issue in this shot, you can see that the shadow of her nose is more apparent than it is in Figure 18.11
.
Figure 18.12
When possible, bounce the flash off the wall that the subject’s nose is pointing towards. Here, the flash is still pointing to the left, so it crosses Brittany’s nose and creates a larger shadow than it would if I had bounced the Speedlite off the opposite wall.
If there are no nearby walls, another option is to bounce the flash off a reflector disk. A person nearby in a white shirt can also be called into service.
Ceiling bounce is not as effective as wall bounce. While it, too, creates soft light, as you will note in Figure 18.13
, it eliminated the catchlights in Brittany’s eyes. Some people (like me) have deep-set eyes—which means that ceiling bounce hides our eyes in shadow.
Figure 18.13
Ceiling bounce is not as effective as wall bounce. Here, I have aimed the Speedlite straight up at the ceiling. Note how there is less sparkle in the catchlights of Brittany’s eyes. For this reason, I avoid ceiling bounce whenever possible.
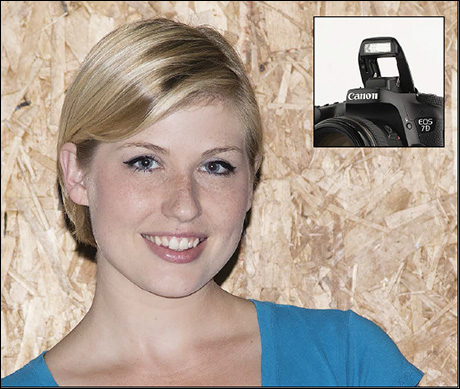
Are Diffusers for On-Camera Flash Helpful?
Fortunes have been made, literally, by entrepreneurs who develop unique gadgets that claim to create amazing soft light from on-camera flash. Based on my experience, I remain a skeptic that these devices work in a wide range of situations. I think that you will agree that these images support my claim.
As you can see in Figures 18.12
—18.14
(pop-up flash examples) and in Figures 18.15
—18.17
(hotshoe-mounted Speedlite examples), the difference between straight flash and the diffused light created by on-camera modifiers is very subtle. Given that each of these modifiers consumes some of the flash power, you should consider whether the light loss is worth the light modification.
Figure 18.14
The flash from the pop-up flash on my 7D Mark II is crisp and adds bright catchlights in Brittany’s eyes.
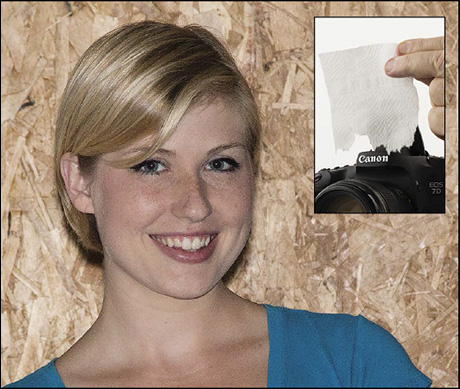
Figure 18.15
Holding a piece of paper towel in front of the pop-up flash can soften the light a bit.
Figure 18.16
This pop-up diffuser slides into the hotshoe of the camera and becomes a translucent panel for the pop-up flash. It is about the size of the head of a standard Speedlite.
Figure 18.17
The direct flash of a 600EX-RT Speedlite in the hotshoe of my camera drops the shadow beneath Brittany’s chin, which helps separate her face from her neck. If the shadow of her head on the wall is bothersome, having her step away from the wall reduces the visual impact of the shadow.
Typically, the best modification that an on-camera diffuser can provide is to reduce the contrast between the highlights and the shadows. You will notice in both series of headshots, for instance, that the highlights on Brittany’s forehead and nose are less apparent when a diffuser is used. I think that this is a fine reason to use a diffuser for your on-camera flash.
You should note that, with these on-camera diffusers, you will not see a softness of the light that approaches the quality of light that can be created by a large softbox. Recall from Chapter 3
: Mechanics of Light
that the size of the light source is relative to the size of the subject, and that the apparent size of the source determines whether the shadows will be hard or soft. Since the vast majority of on-camera diffusers are smaller than most subjects, they do not significantly soften the flash.
You will also recall that the apparent size of the light source shrinks—hence, the light gets harder—as the source moves away from the subject. So, one advantage of off-camera diffusers is that they can be pushed in towards your subject independently of the position of the camera—leaving you free to position your camera as needed to frame your shot.
Still, there are times when an on-camera flash is your best (or only) option. Event photography is one example. Chasing snapshots at a family birthday party is another. For these situations, you may find a diffuser to be helpful.
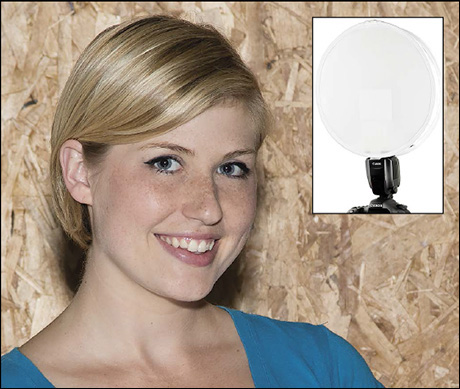
For pop-up flash, the main options center around the idea of a diffuser held up by a bracket that slides into the camera’s hotshoe, as shown in the inset to Figure 18.16
. You should look for a Canon-specific model so that the sensing switch in the hotshoe is not tripped (which disables the pop-up flash).
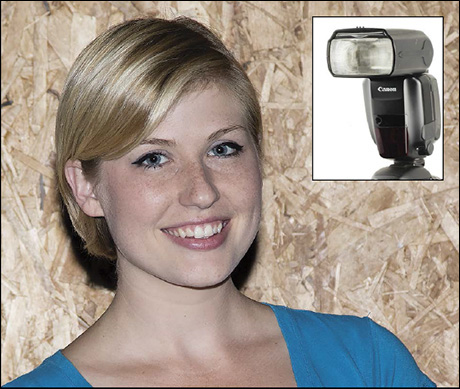
For hotshoe-mounted Speedlites, the diffuser options range from plastic cap and bowl-shaped diffusers to collapsible fabric diffusers. The best on-camera diffusers push light forward, not sideways. My current favorite is the Fstoppers Flash Disc, used for Figure 18.19
. Look to the Other Tips
section at the end of this chapter for reasons why I think that dish (“lambency”) diffusers waste a ton of light.
Figure 18.18
The light from a cap-style diffuser is only slightly softer than the direct flash in Figure 18.15
. While popular among many, I seldom use this style of diffuser. The amount of light consumed by the plastic is not a good trade for the small change in the quality of the light.
Figure 18.19
The Fstoppers Flash Disk is my current favorite among many options for collapsible, fabric diffusers. Its 12″ diameter is large enough to truly soften the flash a bit. Since it mounts on top of the Speedlite, which is pointed straight up, the Flash Disk provides a bit of helpful separation between the lens and the light.
Other Tips for On-Camera Flash
Place Your Shadows By Rotating Your Camera
When shooting on-camera flash, remember that the orientation of your camera affects the placement of the shadow from the Speedlite. For instance, when your camera is horizontal, the Speedlite is above the lens—which drops the shadow directly behind your subject, as shown in Figure 18.18
. When you frame your shot vertically, the flash sits to the side of the lens and creates what I call a “ribbon shadow” as shown in Figures 18.19
and 18.20
.
Figure 18.20
In horizontal shots, the Speedlite drops the shadow directly behind and below the subject.
Compare the insets to Figures 18.18
—18.20
. You will note that Brittany’s shadow in Figure 18.18
is the smallest because it drops directly behind her. Confession: This shot was cropped from a horizontal frame—meaning that the flash was above the lens. As you will read shortly, there are flash brackets that keep the Speedlite centered above the lens regardless of the camera’s orientation. These can be a huge help in eliminating ribbon shadows.
Align The Flash With Your Subject’s Nose
Shots lit with direct flash will have crisp shadows (a positive way of saying “hard shadows”). When a crisp shadow drops under the chin of your subject, it separates the jaw from the neck (Figure 18.20
). When shooting vertical shots, turn your camera so that the flash is on the same side of the lens as the subject’s nose. This minimizes the nose shadow (Figure 18.21
). If you rotate the camera so that the flash is on the opposite side of the lens, then the nose shadow will be more apparent (Figure 18.22
).
Figure 18.21
Turning the camera so that the Speedlite is on the right side of the lens minimized the nose shadow in this shot.
Figure 18.22
Turning the camera so that the Speedlite is on the left side of the lens made the nose shadow more apparent in this shot.
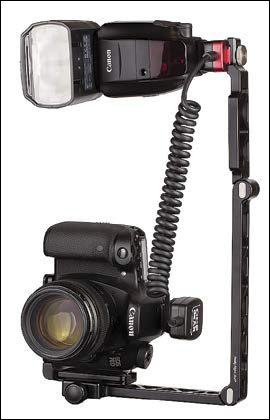
Figure 18.23
The WPF-1 bracket by Really Right Stuff.
Use A Flash Bracket That Centers The Speedlite Above The Lens
Keeping your flash above the lens will drop the shadow behind your subject. My favorite flash bracket, the WPF-1 by Really Right Stuff, keeps the Speedlite oriented with the direction of the viewfinder and centered above the lens.
That Little White Card Is Effective Only At Very Close Distances
The catchlight panel, that little white card that pulls out of 500- and 600-series Speedlites, is virtually useless. The idea is that when you do a ceiling bounce, it will create catchlights (“sparkles”) in the eyes of your subjects. In the user manual to the 600EX-RT, Canon came clean and added a note that it is only useful if the subject is within 4.5′ of your camera. When you are that close, your hand is a more effective bounce card. Just position it behind the head of your Speedlite, as shown in Figure 18.24
. When shooting farther away, the Rogue Flashbender Large is even better at creating catchlights when shooting a ceiling bounce.
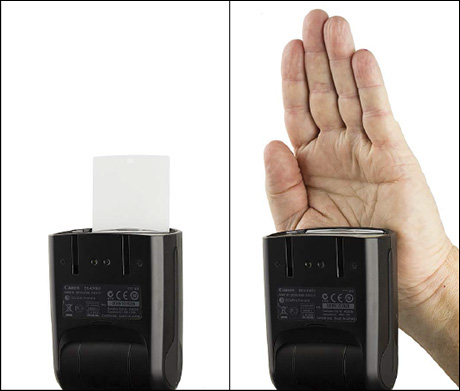
Figure 18.24
Left: The catchlight panel is really too small to create catchlights. Right: Your hand can be a bounce card when shooting ceiling bounce close in.
Dish Diffusers Waste Lots Of Light Unless There Is A Bounce Surface Nearby
I think that dish diffusers, like the style shown in Figure 18.26
, are one-trick ponies. They work in small rooms with low ceilings by pushing the flash in a 360° pattern. However, when there are not walls close by, such as in large ballrooms or outdoors, most of the flash flies away and does not contribute to the shot.
Figure 18.25
The Rogue Flashbender Large will create nice catchlights when bouncing the flash off the ceiling.
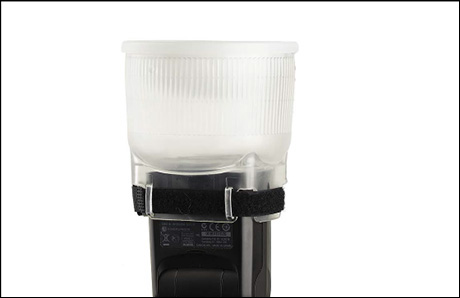
Figure 18.26
Dish diffusers, often called “lambency diffusers,” only work if there are light-colored walls nearby. In large spaces and outdoors, without surfaces to return the bounced light, they are ineffective.