

ZUNI ROAST CHICKEN with BREAD SALAD
THE ZUNI ROAST CHICKEN DEPENDS ON THREE THINGS, BEGINNING WITH THE small size of the bird. Don’t substitute a jumbo roaster~it will be too lean and won’t tolerate high heat, which is the second requirement of the method. Small chickens, 2-3/4 to 3-1/2 pounds, flourish at high heat, roasting quickly and evenly, and, with lots of skin per ounce of meat, they are virtually designed to stay succulent. Your store may not promote this size for roasting, but let them know you’d like it. I used to ask for a whole fryer, but since many people don’t want to cut up their own chickens for frying {or anything else}, those smaller birds rarely make it to the display case intact; most are sacrificed to the “parts” market. But it is no secret that a whole fryer makes a great roaster~it’s the size of bird favored for popular spit-roasted chickens to-go. It ought to return to retail cases.
The third requirement is salting the bird at least 24 hours in advance. This improves flavor, keeps it moist, and makes it tender. {For more on this idea, see The Practice of Salting Early, here.} We don’t bother trussing the chicken~I want as much skin as possible to blister and color. And we don’t rub the chicken with extra fat, trusting its own skin to provide enough. Our brick oven does add a lovely smoky flavor, but it is its tender succulence that really distinguishes this chicken, and this you can achieve at home. I have shared our method with many home cooks, who report the results are startling and delicious when they prepare a chicken this way in their gas or electric ovens. And over the years, I’ve cooked at least a hundred of these preseasoned chickens in a 1940s O’Keefe and Merritt oven at home, roasting variously in a cast-iron frying pan, a tin pie pan, a copper Tarte Tatin pan, and a 10-inch All-Clad skillet, with no anxiety, or apologies, and with fine results. {For a general discussion of roasting, see here.}
But if the chicken is about method, the bread salad is more about recipe. Sort of a scrappy extramural stuffing, it is a warm mix of crispy, tender, and chewy chunks of bread, a little slivered garlic and scallion, a scatter of currants and pine nuts, and a handful of greens, all moistened with vinaigrette and chicken drippings. Tasting as you make it is obligatory, and fun. I recommend you allow a little extra bread and vinaigrette the first time you make the recipe so you can taste with impunity. For the best texture, use chewy peasant-style bread with lots of big and little holes in the crumb. Such loaves are usually about 1 or 2 pounds, so plan on a half or a quarter loaf, respectively, per chicken. I don’t use sourdough or levain-type bread for this recipe, finding the sour flavor too strong and rich for this dish. And make sure to use day-old bread; fresh bread can make a soggy, doughy salad.
Although everyone seems to love bread salad, it is optional here. The roast chicken is so versatile and appealing you’ll want to serve it often, and with your own favorite side dishes.
Wine: Handley Anderson Valley Pinot Noir, 1999
FOR 2 TO 4 SERVINGS:
For the chicken:
One small chicken, 2-3/4 to 3-1/2-pounds
4 tender sprigs fresh thyme, marjoram, rosemary, or sage, about 1/2 inch long
Salt
About 1/4 teaspoon freshly cracked black pepper
A little water
For the salad:
Generous 8 ounces slightly stale open-crumbed, chewy, peasant-style bread {not sourdough}
6 to 8 tablespoons mild-tasting olive oil
1-1/2 tablespoons Champagne vinegar or white wine vinegar
Salt and freshly cracked black pepper
1 tablespoon dried currants
1 teaspoon red wine vinegar, or as needed
1 tablespoon warm water
2 tablespoons pine nuts
2 to 3 garlic cloves, slivered
1/4 cup slivered scallions {about 4 scallions}, including a little of the green part
2 tablespoons lightly salted Chicken Stock {here} or lightly salted water
A few handfuls of arugula, frisée, or red mustard greens, carefully washed and dried
Seasoning the chicken {1 to 3 days before serving; for 3-1/4- to 3-1/2-pound chickens, at least 2 days}:
Remove and discard the lump of fat inside the chicken. Rinse the chicken and pat very dry inside and out. Be thorough~a wet chicken will spend too much time steaming before it begins to turn golden brown.
Approaching from the edge of the cavity, slide a finger under the skin of each of the breasts, making 2 little pockets. Now use the tip of your finger to gently loosen a pocket of skin on the outside of the thickest section of each thigh. Using your finger, shove an herb sprig into each of the 4 pockets.
Season the chicken liberally all over with salt and the pepper {we use 3/4 teaspoon sea salt per pound of chicken}. Season the thick sections a little more heavily than the skinny ankles and wings. Sprinkle a little of the salt just inside the cavity, on the backbone, but don’t otherwise worry about seasoning the inside. Twist and tuck the wing tips behind the shoulders. Cover loosely and refrigerate.
Starting the bread salad {up to several hours in advance}:
Preheat the broiler.
Cut the bread into a couple of large chunks. Carve off all of the bottom crust and most of the top and side crust {reserve the top and side crusts to use as croûtons in salads or soups}. Brush the bread all over with olive oil. Broil very briefly, to crisp and lightly color the surface. Turn the bread chunks over and crisp the other side. Trim off any badly charred tips, then tear the chunks into a combination of irregular 2- to 3-inch wads, bite-sized bits, and fat crumbs. You should get about 4 cups.
Combine about 1/4 cup of the olive oil with the Champagne or white wine vinegar and salt and pepper to taste. Toss about 1/4 cup of this tart vinaigrette with the torn bread in a wide salad bowl; the bread will be unevenly dressed. Taste one of the more saturated pieces. If it is bland, add a little salt and pepper and toss again.
Place the currants in a small bowl and moisten with the red wine vinegar and warm water. Set aside.
Roasting the chicken and assembling the salad:
Preheat the oven to 475°. {Depending on the size, efficiency, and accuracy of your oven, and the size of your bird, you may need to adjust the heat to as high as 500° or as low as 450° during the course of roasting the chicken to get it to brown properly. If that proves to be the case, begin at that temperature the next time you roast a chicken. If you have a convection function on your oven, use it for the first 30 minutes; it will enhance browning, and may reduce overall cooking time by 5 to 10 minutes.}
Choose a shallow flameproof roasting pan or dish barely larger than the chicken, or use a 10-inch skillet with an all-metal handle. Preheat the pan over medium heat. Wipe the chicken dry and set it breast side up in the pan. It should sizzle.
Place in the center of the oven and listen and watch for it to start sizzling and browning within 20 minutes. If it doesn’t, raise the temperature progressively until it does. The skin should blister, but if the chicken begins to char, or the fat is smoking, reduce the temperature by 25 degrees. After about 30 minutes, turn the bird over {drying the bird and preheating the pan should keep the skin from sticking}. Roast for another 10 to 20 minutes, depending on size, then flip back over to recrisp the breast skin, another 5 to 10 minutes. Total oven time will be 45 minutes to an hour.
While the chicken is roasting, place the pine nuts in a small baking dish and set in the hot oven for a minute or two, just to warm through. Add them to the bowl of bread.
Place a spoonful of the olive oil in a small skillet, add the garlic and scallions, and cook over medium-low heat, stirring constantly, until softened. Don’t let them color. Scrape into the bread and fold to combine. Drain the plumped currants and fold in. Dribble the chicken stock or lightly salted water over the salad and fold again. Taste a few pieces of bread~a fairly saturated one and a dryish one. If it is bland, add salt, pepper, and/or a few drops of vinegar, then toss well. Since the basic character of bread salad depends on the bread you use, these adjustments can be essential.
Pile the bread salad in a 1-quart baking dish and tent with foil; set the salad bowl aside. Place the salad in the oven after you flip the chicken the final time.
Finishing and serving the chicken and bread salad:
Remove the chicken from the oven and turn off the heat. Leave the bread salad to continue warming for another 5 minutes or so.
Lift the chicken from the roasting pan and set on a plate. Carefully pour the clear fat from the roasting pan, leaving the lean drippings behind. Add about a tablespoon of water to the hot pan and swirl it.
Slash the stretched skin between the thighs and breasts of the chicken, then tilt the bird and plate over the roasting pan to drain the juice into the drippings. Set the chicken in a warm spot {which may be your stovetop}, and leave to rest while you finish the bread salad. The meat will become more tender and uniformly succulent as it cools.
Set a platter in the oven to warm for a minute or two.
Tilt the roasting pan and skim the last of the fat. Place over medium-low heat, add any juice that has collected under the chicken, and bring to a simmer. Stir and scrape to soften any hard golden drippings. Taste~the juices will be extremely flavorful.
Tip the bread salad into the salad bowl. {It will be steamy-hot, a mixture of soft, moist wads, crispy-on-the-outside-but-moist-in-the-middle wads, and a few downright crispy ones.} Drizzle and toss with a spoonful of the pan juices. Add the greens, a drizzle of vinaigrette, and fold well. Taste again.
Cut the chicken into pieces, spread the bread salad on the warm platter, and nestle the chicken in the salad.
Capitalizing on leftovers: Strain and save the drippings you don’t use, they are delicious tossed with spätzle or egg noodles, or stirred into beans or risotto. You also can use them, plus leftover scraps of roast chicken, for the chicken salad which follows.
ROAST CHICKEN SALAD with PEPPERS, PINE NUTS, OLIVES, & BITTER GREENS
SINCE RUNNING OUT OF ROAST CHICKEN IS NOT AN OPTION AT ZUNI, WE DO SOMEtimes find ourselves with way too many birds in house and so have explored the options of chicken sandwiches and chicken salads extensively. This is my favorite of the repertory. It is a warm, bright, crunchy alternative to mayonnaise-based chicken salad, an attractive tangle to make for one or two when you have a little leftover roast chicken, or for four to six if you roast a bird expressly. Treat the amounts in this recipe as guidelines; you can alter them to accommodate your supplies and preferences. More important is that each element be tasty on its own and that everything be warm, including the bowl where you combine everything just before serving.
If you are using leftover chicken, wait to pull it off the bones until you are set to make the dish. Once it is “picked,” it will start to dry out and absorb other flavors, especially in the refrigerator.
Note: A 2-3/4-pound roast chicken will yield about 1 pound meat, a 3-1/4-pound bird about 1-1/4 pounds.
Wine: Chinon, Charles Joguet Jeunes Vignes, 1999
FOR 4 SERVINGS:
About 8 ounces roast chicken meat {see Zuni Roast Chicken, here}, at room temperature or warmer
About 2 tablespoons gelatinous drippings from the roast chicken
A crusty chunk~4 to 8 ounces~of chewy, peasant-style bread {or the curved crusts you generated if you made the bread salad}
About 1/2 cup extra-virgin olive oil
1 garlic clove, peeled
2 tablespoons pine nuts
1 small red, yellow, or green bell pepper {about 6 ounces}, cored, seeded, and thinly sliced, at room temperature
3 handfuls~about 3 ounces~hearty greens, such as arugula, dandelion, chicory, or watercress, at room temperature
12 pitted, oil-cured olives, such as Nyons, or 24 pitted brined black olives, such as Niçoise, Ligurian, or Greek Elitses {about 1/3 cup}
About 1-1/2 tablespoons red wine vinegar
Salt and freshly cracked black pepper
Preheat the oven to 400°.
Tear the roast chicken into bite-sized pieces or smaller and remove any bits of fat and sinew, and skin if you wish, so that each bit is impeccable. Place in a small bowl.
Warm the drippings in a small saucepan. Tilt the pan and skim and discard any fat. Moisten the chicken with the drippings, adding enough to coat all the surfaces well. {This will make the chicken succulent and more flavorful, and prevent it from absorbing the vinegar.} Set in a warm spot.
Carve enough of the crust from the chunk of bread to make an awkward handful of irregular curved croûtons {save the chunk of bread for bread crumbs, or to tear into bread wads for Madeleine’s Omelette, here}. Brush the crusts with olive oil to coat, spread on a sheet pan, and toast until golden on the edges, about 6 minutes. Cool slightly, then rub the hot crusts with the garlic~be as thorough as you as you are fond of garlic.
Set the pine nuts and olives in a small dish and place in the turned-off oven to warm for a few minutes, then remove.
Whisk together the remaining oil, the vinegar, salt, and pepper to taste, to make about 1/2 cup vinaigrette.
Set the salad bowl and four plates in the oven for a minute or two to warm through.
Place the peppers and greens in the warm bowl and toss with vinaigrette to coat liberally. Add the warm chicken, pine nuts, and olives and toss well, coating every surface. Break the croûtons into bite-sized pieces directly over the bowl so the garlicky crumbs fall into the salad. Drizzle a little more of the vinaigrette over the crusts and toss the whole salad again. Taste and add more vinaigrette {or vinegar, or oil, and salt or pepper}. Serve promptly on the warm plates.
CHICKEN BOUILLABAISSE
THIS IS AN EASY, CROWD-PLEASING DISH I OWE TO MADELEINE SERRAILLE, SISTER of the famous frères Troisgros. It is one of the distracting dishes her brother Jean would sniff and sample when he happened by her house on his way back to the restaurant to cook salmon in sorrel sauce and steak à la moelle. Madeleine claimed it was from Ali-Bab’s Gastronomie Pratique, an idiosyncratic eleven-pound treasury of French cooking that she insisted I buy and study the summer before I went to college.
Aïoli gives this dish richness along with a jolt of garlic; a lighter alternative is to rub the hot toasted bread with raw garlic.
Wine: Pellegrini Alexander Valley Carignane, Old Vines, 1999
FOR 4 SERVINGS:
4 chicken legs {about 8 ounces each} or one 3-pound chicken, back removed and quartered
8 ounces sliced yellow onion {2 cups, about 1 medium onion}
1/4 cup extra-virgin olive oil
Salt
1 bay leaf
A sprig of fresh thyme
1 small dried chili
1/4 cup dry white wine
1/4 cup coarsely chopped drained canned tomatoes or 1/3 cup chopped, peeled, ripe tomatoes
Pinch of saffron threads
2 garlic cloves, coarsely chopped
2 cups Chicken Stock {here}
4 small slices chewy peasant-style bread, about 1/2 inch thick
About 1/2 cup Aïoli {here} {optional} or 1 garlic clove, peeled
Seasoning the chicken {for the best flavor and succulence, do this step 12 to 24 hours in advance}:
Trim the excess fat, then season the chicken evenly all over with salt {we use 3/4 teaspoon sea salt per pound of chicken}. Cover loosely and refrigerate.
Combine the onions with the oil and a few pinches of salt in a 4-quart saucepan and place over medium heat. Cook, stirring frequently so they do not color, until the onions are nutty-tender and translucent and have fallen to half their former mass, about 5 minutes.
Add the bay leaf, thyme, and chili, breaking the pod in half if you want the bouillabaisse to be a little spicier. Add the white wine and boil for 1 minute. Add the tomatoes, saffron, garlic, and chicken stock and bring to a simmer.
Add the 4 or 2 chicken legs and bring back to a simmer. Skim any foam. Adjust the heat to maintain a quiet simmer and cook uncovered for about 1 hour, stirring once or twice. If using a cut-up chicken, add the breasts after about 30 minutes of cooking time. The chicken should be quite tender, but not falling off the bone.
Meanwhile, grill or toast the bread. Spread each warm slice with about 1 tablespoon of Aïoli, if using, and place in a warm bowl.
Lightly skim the surface of the bouillabaisse, then raise the heat and boil vigorously for 1 minute. Place a piece of chicken on each toast and moisten with the golden, oniony broth. Offer the remaining aïoli as a garnish.
CHICKEN BRAISED with FIGS, HONEY, & VINEGAR
LEARNING TO IDENTIFY GOOD FIGS IS AN ANNUAL RITUAL AT ZUNI. As each year’s fig crop appears, I always ask the new cooks if they have eaten many before. Often, particularly from those new to California, the answer is, “Not really,” and I envy them the pleasure of what lies ahead.
“Look at them. Feel them. Plump can be good, but not unless they are really heavy for their size and they need to be tender.”
A tentative squeeze.
“Taste it. How is it? And that cracked one. It’s kind of light, but check anyway. How about that one, it looks flawless, and it’s heavy, but it is kind of hard. Taste it.”
After a wary nibble, “It’s not that great.”
“Now look at that one. Shrunken and wrinkled is actually good, as long as it is heavy. ‘Pristine’ isn’t usually a good sign. If you look for pretty, you may miss the best ones. Just keep tasting until you can tell. And then try to remember how ‘that look’ and ‘that feel’ taste.”
This last applies to all produce, all meat, all fish, all cooking.
We use a lot of figs at Zuni, in every course. This dish is Greek in inspiration, and it is a crowd pleaser. We use fleshy Kadota figs, syrupy and with a blush of pink in the center when ripe, though you can use Smyrnas {re-christened “Calmyrna” or “Calimyrna” when grown in California}, Excel, Adriatic, or plump-ripe Black Mission figs as well. Use wildflower or chestnut honey. The flavor of lavender honey is too persuasive.
We sometimes serve this dish with a salad of raw fennel ribbons and frisée or arugula, with wedges of fried pizza dough to sop up the sauce. Grilled bread is a fine and practical alternative.
Wine: Boutari Nemea, 1999
FOR 4 SERVINGS:
4 chicken legs {8 to 9 ounces each}
Salt
About 2 tablespoons mild-tasting olive oil
1 medium yellow onion {about 8 ounces}, root end trimmed flat, peeled, and cut into 8 wedges
About 1/2 cup dry white wine
About 2 tablespoons dry white vermouth
About 1/2 cup Chicken Stock {here}
1 bay leaf
A sprig of fresh thyme
A few black peppercorns, barely cracked in a mortar
About 2 tablespoons cider vinegar
About 1 tablespoon honey
8 to 10 ripe fresh figs~Kadota, Smyrna, Excel, Adriatic, or Black Mission
Seasoning the chicken {for the best flavor and succulence, do this step 12 to 24 hours in advance}:
Trim the excess fat, then season the chicken evenly all over with salt {we use a scant 3/4 teaspoon sea salt per pound of chicken}. Cover loosely and refrigerate.
Cooking the chicken:
Preheat the oven to 375°.
Pat the chicken legs dry; this will make them less likely to stick. Heat a scant 2 tablespoons olive oil in a 12-inch skillet over medium-low heat, then add the chicken legs, skin side down. The oil should sizzle, not pop explosively, when you add chicken. Adjusting the heat as necessary, cook until the skin is evenly golden, about 8 minutes. Turn the legs over and color only slightly on the other side, about 4 minutes. Pour off the fat.
If your skillet is ovenproof, arrange the onion wedges in the spaces between the chicken legs; otherwise, transfer the chicken to a shallow flameproof braising dish that will easily hold the chicken and onions in a single layer, and add the onions. Add the wine, the vermouth, and enough stock to come to a depth of about 1/2 inch. Bring to a simmer and add the bay leaf, thyme, and cracked black peppercorns.
Place, uncovered, in the oven, and cook until the meat is tender but not quite falling off the bone, about 40 minutes. The exposed skin will have turned golden and crispy; the liquid ought to have reduced by about half. Remove from the oven and set on a slight tilt so the fat will collect at one side of the pan.
Combine the vinegar and honey and warm slightly. Taste. The vinegar should dominate, but without making you squint. Trim the stems and cut the figs in half.
Skim as much fat as possible from the braising liquid, then set the pan over medium heat. Bring to a boil and swirl as you reduce the liquid to a syrupy consistency. Distribute the figs evenly around the pan, add about 2 tablespoons of the vinegar-honey syrup, and swirl the pan to diffuse the bubbling, amber syrup without smashing the tender fruit. The sauce will be glossy. Taste~it should be rich and vibrantly sour-sweet. Add more, or all of the syrup, to taste. The vinegar adds a bright but unstable note of acidity, which will fade with boiling, so simmer for only a minute or less.
Serve each chicken leg with 2 wedges of sweet, soft onion and 4 or 5 fig halves, bathed in a few spoonfuls of the sauce.
DUCK BRAISED with RED WINE & PRUNES
A RICH OLD FRENCH DISH. If you use the orange zest or the clove, it will have a dramatic impact on the flavor and character of the dish, making it sneakily festive. I like it both ways.
Muscovy, or Barbarie {Barbary}, duck has firm, almost beefy, dark red flesh that supports long cooking and generous old-fashioned flavors. Very good with roasted polenta {here}.
Wine: Cahors, Château du Cayrou, 1996
FOR 4 SERVINGS:
4 Muscovy duck legs {10 to 12 ounces each}{see Sources and Resources, here}
Salt
4 cups medium-bodied or hearty red wine, such as Sangiovese, Merlot, Syrah, or Cabernet Sauvignon
2 cups Duck Stock or other bird stock {here} or Chicken Stock {here}
2 medium yellow onions {about 8 ounces each}, root end trimmed flat, peeled, and cut into 1-1/2-inch wedges
2 ounces garlic cloves {about 1/2 cup}, unpeeled
1 bay leaf
2 wide strips of orange zest about 1-1/2 inches long, removed with a vegetable peeler, and/or 1 whole clove {optional}
12 prunes, preferably with pits
Trimming and seasoning the duck legs {for the best flavor and succulence, do this step 1 to 3 days in advance}:
Trim lumps of fat, ragged edges or meatless flaps of skin {it’s worth saving and rendering these [see here]; even a few scraps can be enough to flavor a soup}. Rinse the duck legs, lay between dry towels, and press to absorb surface moisture. Season evenly all over with salt {we use a scant 3/4 teaspoon sea salt per pound of duck}. Cover loosely and refrigerate.
Cooking the duck:
Preheat the oven to 300°.
Reduce the red wine and the stock separately to about 1 cup each. The stock should have body and will be slightly salty. Set aside.
Press the duck between towels to wick off excess moisture. Place a dry 10- or 12-inch skillet over medium heat. When the pan is hot enough that the duck hisses on contact, add the legs, skin side down, and leave to set a golden crust, about 10 minutes. The duck will begin to render fat within a few minutes; reduce the heat if the fat starts to smoke. Turn the legs over and brown for just a few minutes on the flesh side, then arrange skin side up in an ovenproof 3-quart sauté pan. Pour off the rendered fat from the skillet; if any appetizing golden bits remain in the skillet, add the reduced red wine to the pan and simmer briefly, stirring, to dissolve them. Set aside.
Nestle the onion wedges in between the duck legs. Add the garlic, bay leaf, and optional orange zest and/or clove. Add enough of the reduced wine and stock, in about equal doses, to come to a depth of 1/2 inch; save any extra wine and stock for extending the sauce. Swirl the pan as you bring to a simmer over medium heat, then cover tightly, place in the oven, and cook for about 1 hour.
Turn the duck legs over and add the unpitted prunes, making sure they are submerged in the braising liquid; work quickly, so you don’t lose too much heat. {If you are using pitted prunes, add them after 30 minutes more.} Cover the pan tightly and return to the oven.
After another hour {or about 40 minutes if the duck legs are on the small end of the range listed}, turn the legs over, turn the heat up to 375°, and return the pan to the oven uncovered. When the legs feel just tender and are slightly browned, usually within another 20 minutes, remove the pan from the oven. Turn off the oven and place a serving platter to warm in the oven for a minute or two. Leave the duck legs to rest for about 5 minutes, then carefully lift from the sauce to the warm serving platter.
Skim the abundant fat from the surface of the braising liquid, and taste the liquid. If it seems thin in flavor or texture, set the pan over medium heat and, skimming attentively, reduce to the texture of warm maple syrup. If the sauce tastes too rich, dilute it with a trickle of water. If you seem shy on sauce and you have extra wine and reduced stock, add a little of each, then simmer to bring the sauce to a slightly syrupy consistency.
Serve each duck leg with 3 prunes and a few silky onion wedges and slippery garlic cloves. There should be a few tablespoons of sauce for each leg.
ROASTED GUINEA HEN with BAY LEAVES, MADEIRA, & DATES
GUINEA HEN IS A FLAVORFUL BUT UNDERAPPRECIATED GAME BIRD. Roasted whole, as it often is, it tends to cook unevenly and can be tough, which discourages further experiments with this premium product. But if you handle the breasts and legs separately, and roast them hot and fast, you can get great results. It becomes an elegant, lean alternative to chicken and duck. This recipe was inspired by the stunning guinea hen with Vin Santo that my Tuscan colleague and friend Carlo Cioni made at Zuni when he graced our kitchen in 1999. He taught us to perfume the bird with a fistful of buoyant aromatics and to sauce it stingily. Salting the meat in advance enhances succulence, and I especially recommend it for guinea hen dishes.
You can serve 4 with one guinea hen, or consider buying two birds and using the four legs and wings for this dish, and the breasts for Guinea Hen Breast Saltimbocca, which follows.
This is a winter dish, and the aromatics make it festive and friendly to big red wines. Allspice berries can replace the cloves if you prefer that flavor. Substitute dry Marsala or Vin Santo for the Madeira, if either is more convenient. You can also make this dish with whole quail {count 2 per person}, although instead of browning them first, simply rub them with a little of the Madeira before you set them to roast. Finish them under the broiler if they haven’t turned golden. They will take only about 10 minutes. {See Roasted or Grilled Quail, here.}
Serve with wild rice; soft, grilled, or roasted polenta {here}; or, for a lighter meal, with a wad of watercress, with or without a splash of sherry vinaigrette.
Wine. Qupé Central Coast Syrah, 1999
FOR 4 SERVINGS:
One 3-1/4- to 3-1/2-pound guinea hen (see Sources and Resources, here)
Salt
About 3/4 cup Guinea Hen Stock (here) or Chicken Stock (here)
1 tablespoon mild-tasting olive oil
6 bay leaves
2 whole cloves or allspice berries
2 matchstick-sized pieces cinnamon stick
1/2 cup Madeira
A wide strip of orange zest, about 1-1/2 inches long, removed with a vegetable peeler
8 small dates, pitted and halved
Cutting up and seasoning the guinea hen {for the best flavor, do this step 12 to 24 hours in advance}:
Make a long incision in the skin between each leg and the breast meat, then tug the leg away from the carcass. Fold it all the way back to pop the ball joint, then fold even farther and use the tip of your knife to carve out the lentil-shaped muscle known as the “pope’s nose.” Then tug at the leg as you cut through the remaining muscle and skin.
To extricate the meaty wings, tug the wing straight out and make a circular cut around the shoulder joint. Twist the wing, straining that joint, to reveal the stubborn connective tissue. Sever with the tip of your knife. Continue to twist and fold the wing back, cutting through remaining muscle, sinew, and skin.
To remove the breast meat, first make a deep clean cut with the knife flat against each side of the sternum. Next, tugging the breast away from the collarbone, use the tip of your knife to make a shallow cut along each arc of collarbone {the wishbone}. Pulling the breast away from the sternum, make a series of little cuts flat against the sternum and under the wishbone to progressively free the breast as you go. Repeat with the other breast.
Season the 6 pieces of guinea hen evenly all over with salt {we use a scant 3/4 teaspoon sea salt per pound of meat}. Fold the wing tips back behind the shoulders to secure them in twisted triangles. Cover loosely and refrigerate.
If desired, make the carcass and scraps into Guinea Hen Stock. Reduce about 3/4 cup of it, or of the chicken stock, to about 1/3 to 1/2 cup.
Roasting the guinea hen and making the sauce:
Preheat the oven to 500°.
Pat the pieces of guinea hen dry. Warm the olive oil in an ovenproof 12-inch skillet over medium heat. When the oil is hot enough to sizzle boldly on contact, arrange the pieces of meat skin side down in a single layer. Reduce the heat only if the oil threatens to smoke. Leave to set a golden crust, about 5 minutes; turn off the heat. Turn over the legs and wing pieces. Remove the breasts and set aside. Pour off all but a film of fat, then tuck the bay leaves, cloves or allspice berries, and cinnamon under the legs. Set the pan in the lower half of your oven and roast for about 15 minutes. Add the breast pieces, skin side up, and roast until just cooked through, another 8 to 10 minutes.
Remove the pan from the oven and pour off the few drops of fat. Add the Madeira and orange zest and set over medium heat. Swirl the pan and use a wooden spoon to scrape the sides and rub the pan with the orange zest. When the Madeira has boiled hard for about 5 seconds, add the reduced stock and the dates and continue swirling the pan and stirring the sauce. Taste every few seconds, and pull from the heat when the sauce has a little body and concentrated flavor. Bear in mind that the big pan will continue cooking and reducing the little sauce until it is served, so be prepared to work quickly. If the sauce does get too strong or thick, add a few drops of water to correct.
Distribute the meat among the plates and spoon the sauce over. {Don’t pour directly from the pan~the hot lip of the pan will boil the sauce along the way, further reducing it and producing splatters that will land on the plates.}
GUINEA HEN BREAST SALTIMBOCCA
BASED ON THE WELL-KNOWN VEAL DISH THAT PROMISES TO JUMP INTO YOUR MOUTH. Guinea hen has enough character to welcome salty-sweet prosciutto and pungent sage in this variation on the Roman classic. We substitute extra-virgin olive oil for the usual butter; it adds spiciness to a chord of rich flavors.
Serve with wilted spinach or asparagus. and roasted potatoes.
Wine: Savigny-les-Beaune Premier Cru Les Vergelesses, Simon Bize, 1999
FOR 4 SERVINGS:
4 boneless guinea hen breasts {see here} {about 5 ounces each}
Salt
About 1-1/4 cups Guinea Hen Stock {here} or Chicken Stock {here}
4 thin slices prosciutto with a ribbon of fat around the edges
12 small fresh sage leaves
3 to 4 tablespoons extra-virgin olive oil
1 lemon
Freshly cracked black pepper
Trimming and seasoning the breasts {for the best flavor and succulence, do this step a few hours in advance}:
Peel the skin from the guinea hen breasts and discard it. Turn the breasts with the skinned side down. Trim any ragged edges and gently pound the thickest section of the meat. If it resists, you may need to make a few shallow parallel incisions, with the grain, at the thickest spot and then try again. The goal is to produce a 1/2- to 3/4-inch-thick cutlet. Salt the breasts very lightly on the skinned side and more liberally on the other side. Cover loosely and refrigerate.
Reduce the guinea hen stock or chicken stock to about 3/4 cup.
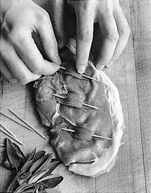
Position a slice of prosciutto neatly on the lightly salted side of each breast, then decorate with 3 sage leaves. Pin each leaf, through the prosciutto, to the breast with a toothpick: hold the toothpick flat against the breast and poke it on a shallow angle into the meat; if you stab all the way through, you’ll have a curvy saltimbocca that won’t sit flat in the pan and won’t cook evenly.
Warm about 2 tablespoons of the oil in a 12-inch skillet over medium heat. Lay the saltimbocca prosciutto side down in the oil. You should hear a friendly sizzle~if it starts to crackle, reduce the heat. Cook for about 1 minute, then turn over. The ham should be mottled with bronze. Brown the other side for 1 minute, then reduce the heat and cook through, another 2 to 3 minutes per side.

 |
Remove the pan from the heat and place the saltimboccas on warm plates. Pour off a little of the oil from the pan. Slide out the toothpicks and steal 1 sage leaf from each saltimbocca. Add the stolen leaves to the skillet. Use a zester to carve about a teaspoon of thin strips of lemon zest directly into the pan. Add a long squeeze of lemon juice. Set over low heat and add the reduced stock. Stir and scrape to encourage any caramelized juices to dissolve in the sauce. Simmer just until the sauce has a little body. Taste. Finish with a long trickle of extra-virgin olive oil.
Spoon the sauce over the breasts. Offer black pepper.
ROASTED OR GRILLED QUAIL, & MARINATED GRILLED QUAIL
QUAIL IS A VERSATILE BIRD WHOSE LEAN FLESH AND SMALL SIZE MEAN IT BOTH cooks quickly and welcomes pretty salsas or the richest side dishes, such as Braised Peas {here} or Creamed Corn {here}. I like it with a dollop of Porcini Pearà Sauce {here} or Pappa al Pomodoro {here}. We always salt the little birds in advance, which makes them a little more succulent; if you add herbs, the salt will drag those flavors into the bird as well.
Quail is finger food~once you get past the plump breast meat, utensils become obstacles between you and the tasty bits of meat. I don’t bother with “boneless” quail; it is only mostly that, and unless you prop it up with stuffing, it makes a floppy roast. That poses less of a problem when you butterfly them for grilling, but I still cling to the delicious ritual of picking at the bony birds. Grilled quail marinated for a few hours, or days, in Salmorigano or Chimichurri makes a great hors d’œuvre.
Wine: St. Francis Sonoma Valley Merlot Reserve, 1997
PER SERVING:
2 whole quail {about 6 ounces each} or 2 dressed quail {about 4 ounces each}
Salt
Freshly cracked black pepper {optional}
A sprig or two of fresh rosemary, sage, thyme, or marjoram {optional}
2 teaspoons mild-tasting olive oil or unsalted butter, softened
A trickle of brandy {optional}
Seasoning the quail {for the best flavor and succulence, do this step 12 to 24 hours in advance}:
If using whole quail, first cut off the feet at the knee joint and the head at the base of the neck. {You can double-wrap and freeze these meager trimmings for a future bird stock.} Season the quail lightly all over with salt, and pepper, if using. If using herbs, strip the leaves from the sprigs, then lightly pound and bruise them in a mortar to release their flavor. Sprinkle over the quail and massage lightly. Cover loosely and refrigerate.
Cooking the quail:
Turn on the broiler and position the rack so the quail will be about 3 to 4 inches from the element.
Wipe the quail dry. Pick off any bits of herb {so they don’t burn}, then use your fingers to rub with oil or butter. To enhance browning, rub with the optional brandy.
Place the quail breast side up on a shallow-rimmed heavy baking sheet. The quail need to be a few inches apart so they will brown evenly; since they won’t throw off much juice, there is no concern with its burning in the wide pan. A wide ceramic gratin dish is also a workable choice, though you should preheat it thoroughly.
Slide the pan under the broiler. Turn the quail over after the breasts have browned, 5 to 6 minutes. Leave for a few minutes to brown the back, then turn back over for a minute or two before removing from the oven. The breasts should be firm, like a ripe peach; the inside should be opaque and beige with a tinge of pink. The few minutes it will take you to serve the quail and for diners to assess how to attack them will give the meat a chance to rest.
 TO BUTTERFLY & GRILL QUAIL:
Dress the quail and season as described above, but, before seasoning, remove {and discard} the backbone, then spread each quail open and use your fingers to crack the sternum where it meets the collarbone. Give each butterflied bird a restrained whack with a meat pounder to flatten it further.
Prepare a fire and let it burn to glowing coals. Spread out the coals; position the grill about 4 inches above them and preheat it.
Wipe the quail dry, brush lightly with the oil or butter {which you can set in a dish on the grill to melt first}, and place skin side down on the grill. Grill for 4 to 6 minutes per side. {Alternatively, you can use the same specifications to pan-fry quail over medium heat. In this situation, I like to use cast iron.}
TO MARINATE GRILLED BUTTERFLIED QUAIL:
These are good with beans, roasted potatoes, polenta, or grilled bread rubbed with garlic. Crowd the warm quail, more or less flat, in a gratin dish. Warm up enough Salmoriglio {here} or Chimichurri {here} to bathe the quail liberally. Stir, then pour the sauce over the warm birds. Turn the quail over in the sauce after 30 minutes. Serve at room temperature, or rewarm briefly in a 300° oven. If you don’t intend to serve the quail within an hour or two, cover tightly and refrigerate.
To rewarm refrigerated marinated quail, preheat the oven to 275°. Cover the quail loosely and heat until warm through, about 25 minutes.
QUAIL & SAUSAGE BRAISED with GRAPES
A FALL DISH, TRADITIONALLY MADE WITH WINE GRAPES~AND WITHOUT QUAIL~in Umbria. This is a tame interpretation of that dish, salsiccia all’uva {sausage with grapes}, which is intensely flavored and crunchy with grape seeds. For our version, we use mostly seedless grapes, Black Emerald or Red Flame, in combination with a few seedy ones~wine grapes when we can get them. Choose varieties that are not too sweet, or the result will be cloying. Small grapes with lots of skin in proportion to flesh cook down quickly and produce the best flavor and texture. I don’t recommend cooking this dish in advance; the grape sauce quickly loses its bright flavor and the quail and sausages risk drying out. And it’s so quick and easy, there is no need to.
Serve with polenta~soft, grilled, or roasted {here}~or grilled bread, and a salad of bitter greens mixed with thinly sliced raw fennel.
Wine: Rosso di Montalcino, La Gerla, 1998
FOR 4 SERVINGS:
4 whole quail {about 6 ounces each} or 4 dressed quail {about 4 ounces each}
Salt
About 6 tablespoons extra-virgin olive oil
A few pinches of fennel seeds, barely crushed
About 2 pounds stemmed, small, red or black grapes {5 to 6 cups}, at least two-thirds of which are seedless varieties
Balsamic or red wine vinegar, as needed
4 fresh sausages {3 to 4 ounces each}, preferably fennel sausage {to make your own, see Pork Sausage, here}
Seasoning the quail {for the best flavor, do this step 12 to 24 hours in advance}:
If using whole quail, first cut off the feet at the knee joint and the head at the base of the neck. {You can double-wrap and freeze these meager trimmings for a future bird stock.} Season the quail evenly all over with salt, cover loosely, and refrigerate.
Cooking the quail:
Warm about 1/4 cup of the olive oil with the fennel seeds in a 3-quart sauté pan over medium heat. Add the grapes. Stir regularly as the grapes sizzle and release their fruity aroma, until the skins begin to split and the grapes yield their juice. Cook uncovered, stirring occasionally until the grape sauce has a little body, 20 to 30 minutes. You should have about 2 cups. Taste. If the grapes are quite sweet, add a pinch of salt and/or a dribble of vinegar.
Warm about 2 tablespoons olive oil in a 12-inch skillet over medium heat. Wipe the quail and sausages dry, then place in the pan. They should sizzle on contact. Brown the quail and sausages evenly, 3 to 4 minutes on each side. Reduce the heat, tilt the pan, trapping the quail and sausages behind tongs or a strainer, and pour off the excess fat. Add the grapes. They will seethe regally as they bubble up around the quail and sausages~a moment to look forward to when making this dish. Cover and cook over medium-low heat until firm, like a ripe peach, another 12 minutes or so, turning the quail and sausages a few times to ensure even cooking. Uncover and simmer to reduce the sauce to a rich, jammy consistency. Taste and correct with salt or vinegar.
Serve immediately.
ROASTED SQUAB
THE “RED MEAT” BIRD, SQUAB {YOUNG PIGEON} IS A QUICK, CONVENIENT single-portion roast. It requires nothing more than a little salt and about fifteen minutes in a very hot oven. Roasted whole and hot, the skin sets to a delicious, caramel crispiness. We don’t bother to truss squab~I prefer to leave as much skin as possible exposed, to render its fat and crisp it. I like to eat squab rosy; it can taste livery if cooked beyond medium-rare. {For a general discussion of roasting, see here.}
Many of the vegetable dishes in this book are good with squab: Hashed Sweet Potatoes {here}, Fagioli all’Uccelletto {here}, and Rosemary-Roasted Potatoes {here} are some of my favorites. I also like squab with Brandied Fruit {here}, warm Spiced Prunes {here}, or with roasted fresh fruit~figs, cherries, sprigs of Zante grapes, or ripe apricot halves {whose cut face we dredge in sugar before roasting}. When we serve squab with fruit, we nest it in a room-temperature salad of frisée, arugula, or watercress, with a few ribbons of raw fennel tossed in. Squab is gorgeous next to a Savory Apple Charlotte {here}.
Wine: Château Langoa-Barton, Saint-Julien, 1996
PER SERVING:
1 squab {about 1 pound whole, or 3/4 pound dressed}
Salt
A few tablespoons Squab Stock {here}, a scant 1/2 cup “squab tea” {see below}, or a generous splash of Chicken Stock {here}, dry white wine, or balsamic vinegar
Seasoning the squab {for the best flavor and succulence, do this step 12 to 24 hours in advance}:
If using whole squab, cut off the feet, head and neck, and the last two wing joints. {Use these parts to make Squab Stock, or simply roast until golden at 475°, then place in a small saucepan, add water to cover, and simmer for about 30 minutes to make a quick half-cup or so of “squab tea”.} Rinse and dry the squab inside and out. Sprinkle evenly all over with salt. Cover loosely and refrigerate.
Cooking the squab:
Preheat the oven to 500°.
Wipe the squab dry and set it in a shallow baking pan. A flameproof gratin dish is a workable choice, though you should preheat it thoroughly. If cooking more than one squab, make sure they are several inches apart, so they brown evenly.
Place the pan of squab in the center of the oven. In most ovens, it should begin browning within 7 minutes~if it hasn’t, turn on your broiler for a few minutes to coax it to color, then turn the heat back to 500°. Roast for about 12 minutes for rosy meat, a few minutes longer for medium. In either case, let the squab rest in the roasting pan for about 5 minutes after removing it from the oven.
A minute or two before serving, remove the birds, and do one of the following to stretch the usually meager drippings in the roasting pan:
 Add the squab stock or “squab tea” to the roasting pan and simmer until it has a little body.
Add the chicken stock, dry white wine, or balsamic vinegar and stir and scrape to tease the few drops of drippings into a spoonful or so.
To serve, cut each squab in half and remove the backbone. Arrange on plates and dribble with sauce. We don’t usually carve the bird~figuring a pretty display would require leaving juice, fragrance, and some delicious nibbles of skin in the kitchen in quest of refinement. Fingers are the best tools for full enjoyment of squab.
GRILLED SQUAB
Before seasoning, remove and discard the backbone, then flatten~butterfly~the bird, making sure to completely crack the sternum so it will not revert to its original shape on the grill.
Prepare a fire and let it burn down to glowing coals. Place the grill grate about 4 inches over the coals. Don’t oil the squab; simply place it skin side down on the grill. Grill for about 5 minutes, moving the birds if dripping fat starts to flare up. Grill the other side another 5 minutes or so, then return to the skin side to cook another 2 minutes for a rosy result. The breast should feel firm but not hard. Let the squab rest for about 5 minutes before serving.