LATE SUMMER AND AUTUMN
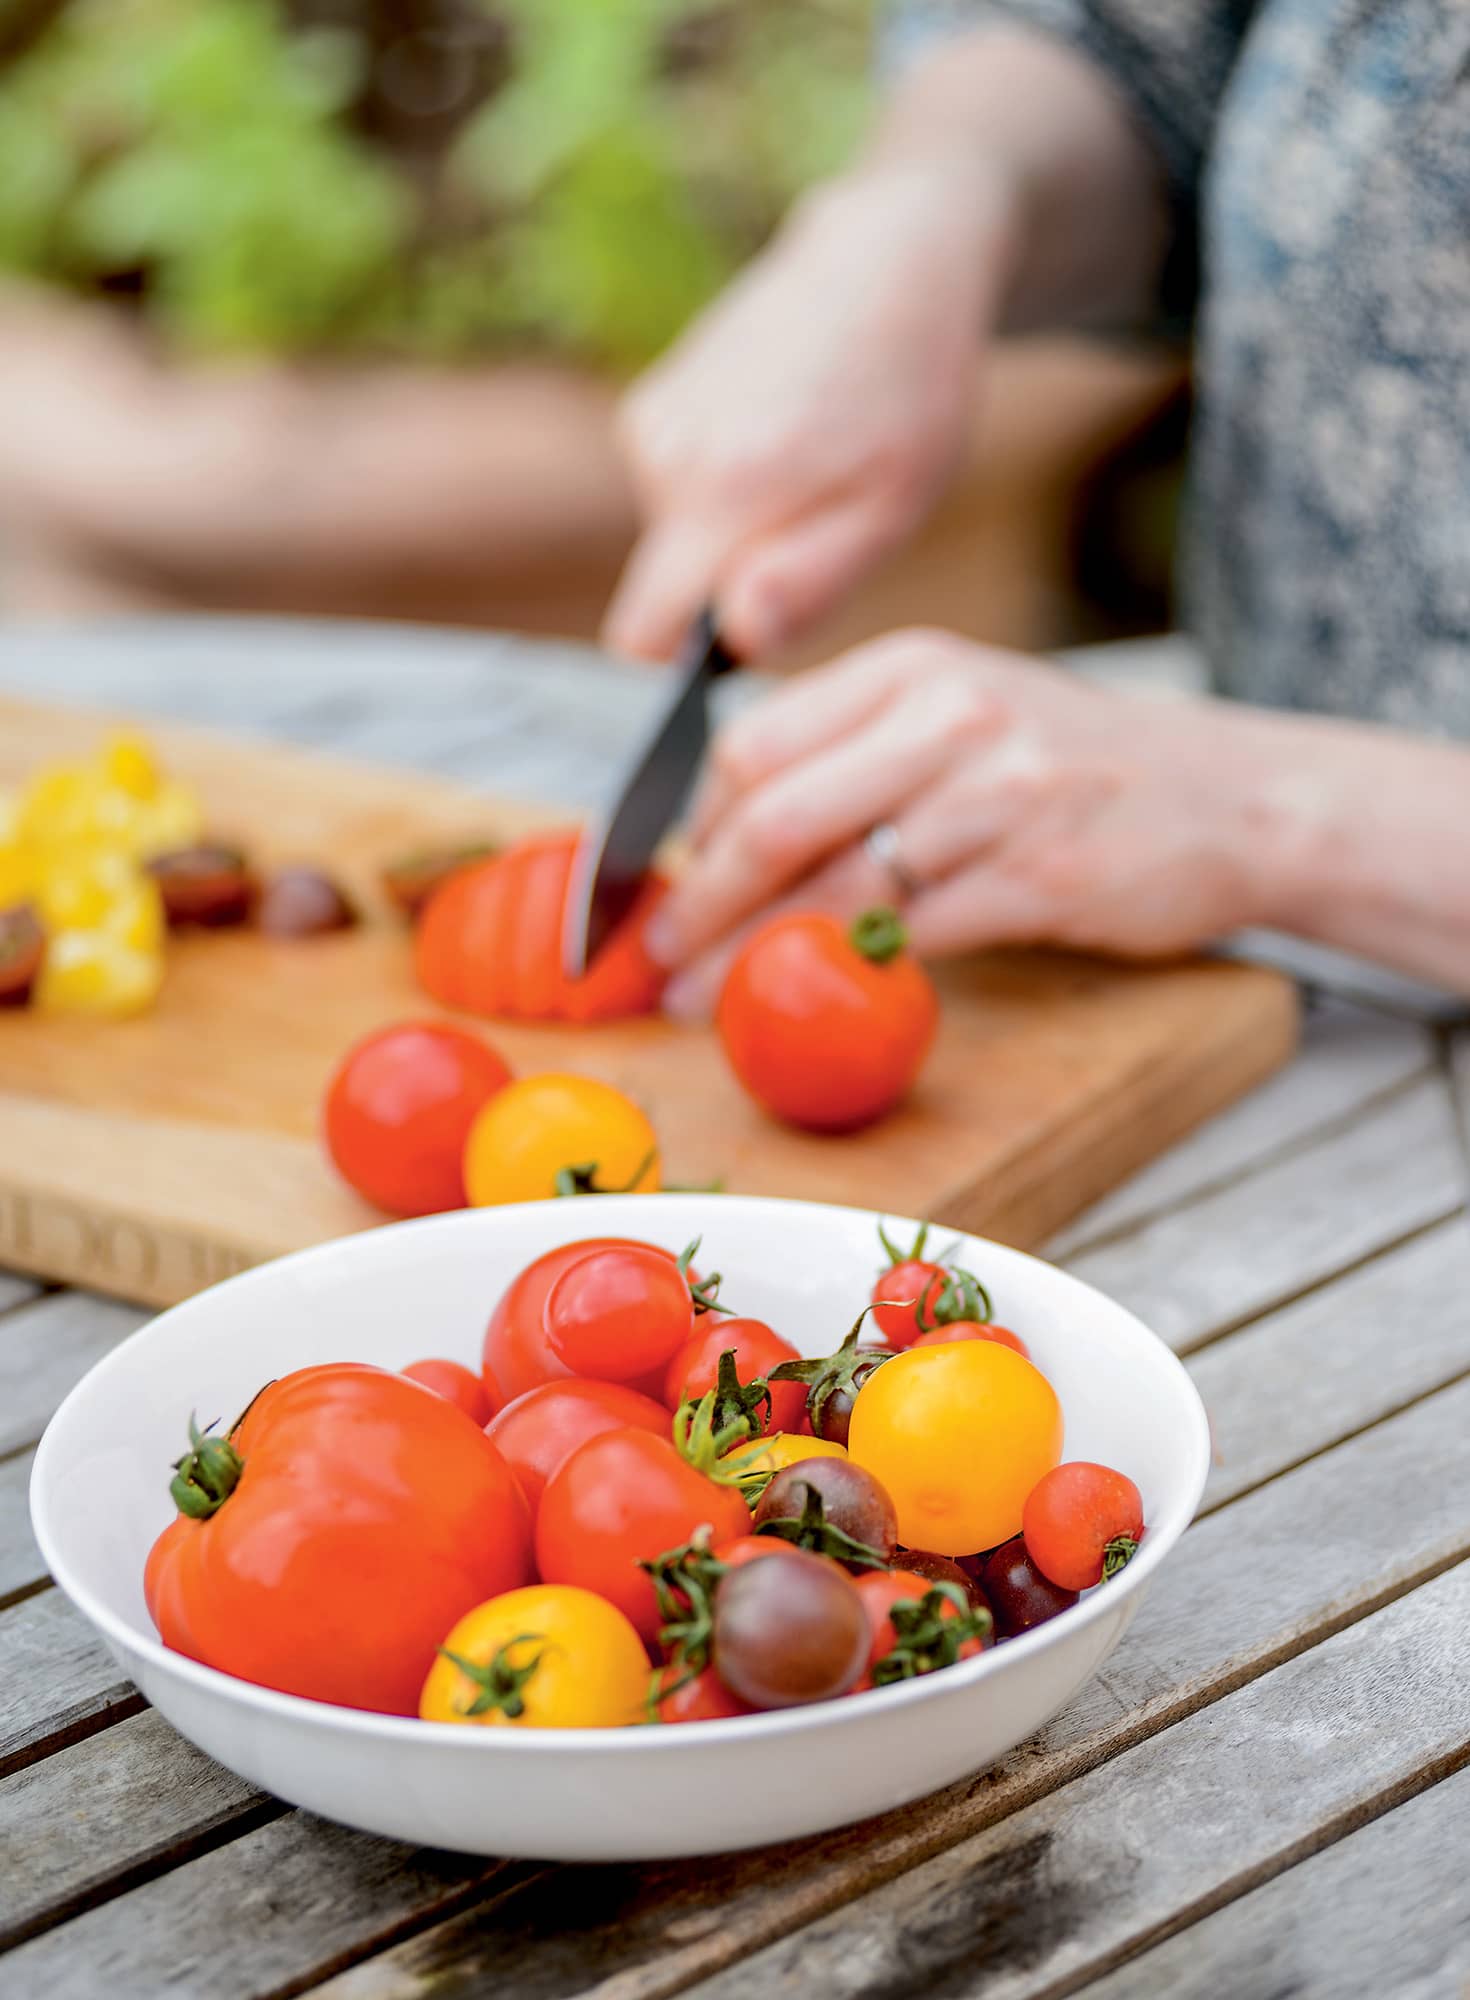
Growing tomatoes
There really is no excuse for not growing your own tomatoes these days. Young plants are available in every garden centre and often supermarkets too, as well as seeds in a huge choice of varieties. You do not even need a garden because there are cultivars specifically for growing in hanging baskets and on windowsills. And like the apple in the Garden of Eden, once you have taken that first bite of a home-grown tomato, there really is no going back.
BEST VARIETIES
Variety choice will come down to your own personal favourites, but there are a few groups to consider. First check the growth habit: indeterminate/vine plants are those grown as a cordon – a tall plant with a single stem tied into a support; determinate/bush plants are bushier and can be grown more easily in a pot or basket. There are some varieties that will fare better outdoors, others that need a greenhouse or similar protection and some that will do fine outdoors but would prefer a greenhouse.
Then decide what type(s) of tomato you want to grow: big beefsteaks, plum, salad or cherry? For preserving, the best groups are plum or cherry, and for a tomato jam that veers more towards the sweet than the savoury try ‘Rosella’ or ‘Orange Paruche’ – or ‘Green Envy’ for a Green tomato jam.
PLANTING
Sow seeds under cover in late winter, and pot on before planting out after the last frost in early summer. Seeds need temperatures of at least 15°C/59°F to germinate. Alternatively buy young plants. All plants need hardening off before planting into pots, growbags or the open ground. Put in stakes to support cordon varieties.
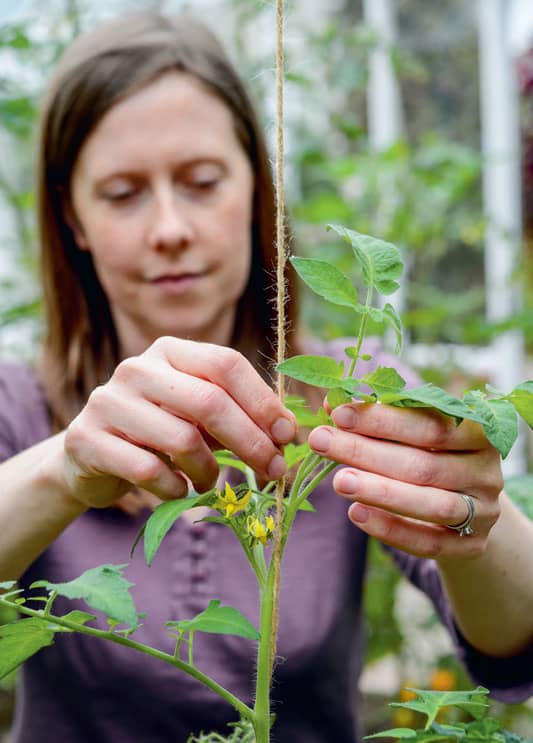
MAINTENANCE
Tie in the stems of cordon varieties every 20–30cm/ 8–12in, and remove side shoots as they appear in the axils of fruit trusses and leaves off the main stem. Pinch out the main stem once it reaches the top of the stake. Keep well watered, and once the fruit starts to develop apply fertilizer regularly according to the manufacturer’s instructions. Removing the lower leaves to allow more light to the fruit can also help ripening.
Blight is by far the biggest problem with tomatoes, especially on outdoor plants in humid, overcast summers. Keep an eye on the leaves and stems for brown, dead patches and discard the affected parts as soon as possible, burning them or removing from the garden. This may be enough to halt the spread, but, if not, take off any unaffected tomatoes (green ones can still be jammed – see Green tomato jam) and destroy the plant.
HARVEST
Pick as the fruit ripens to its final colour. Harvesting after midday will give the fruit the maximum concentrated flavour. If you are not able to use them straight away (always recommended), store them at room temperature – never in the refrigerator.
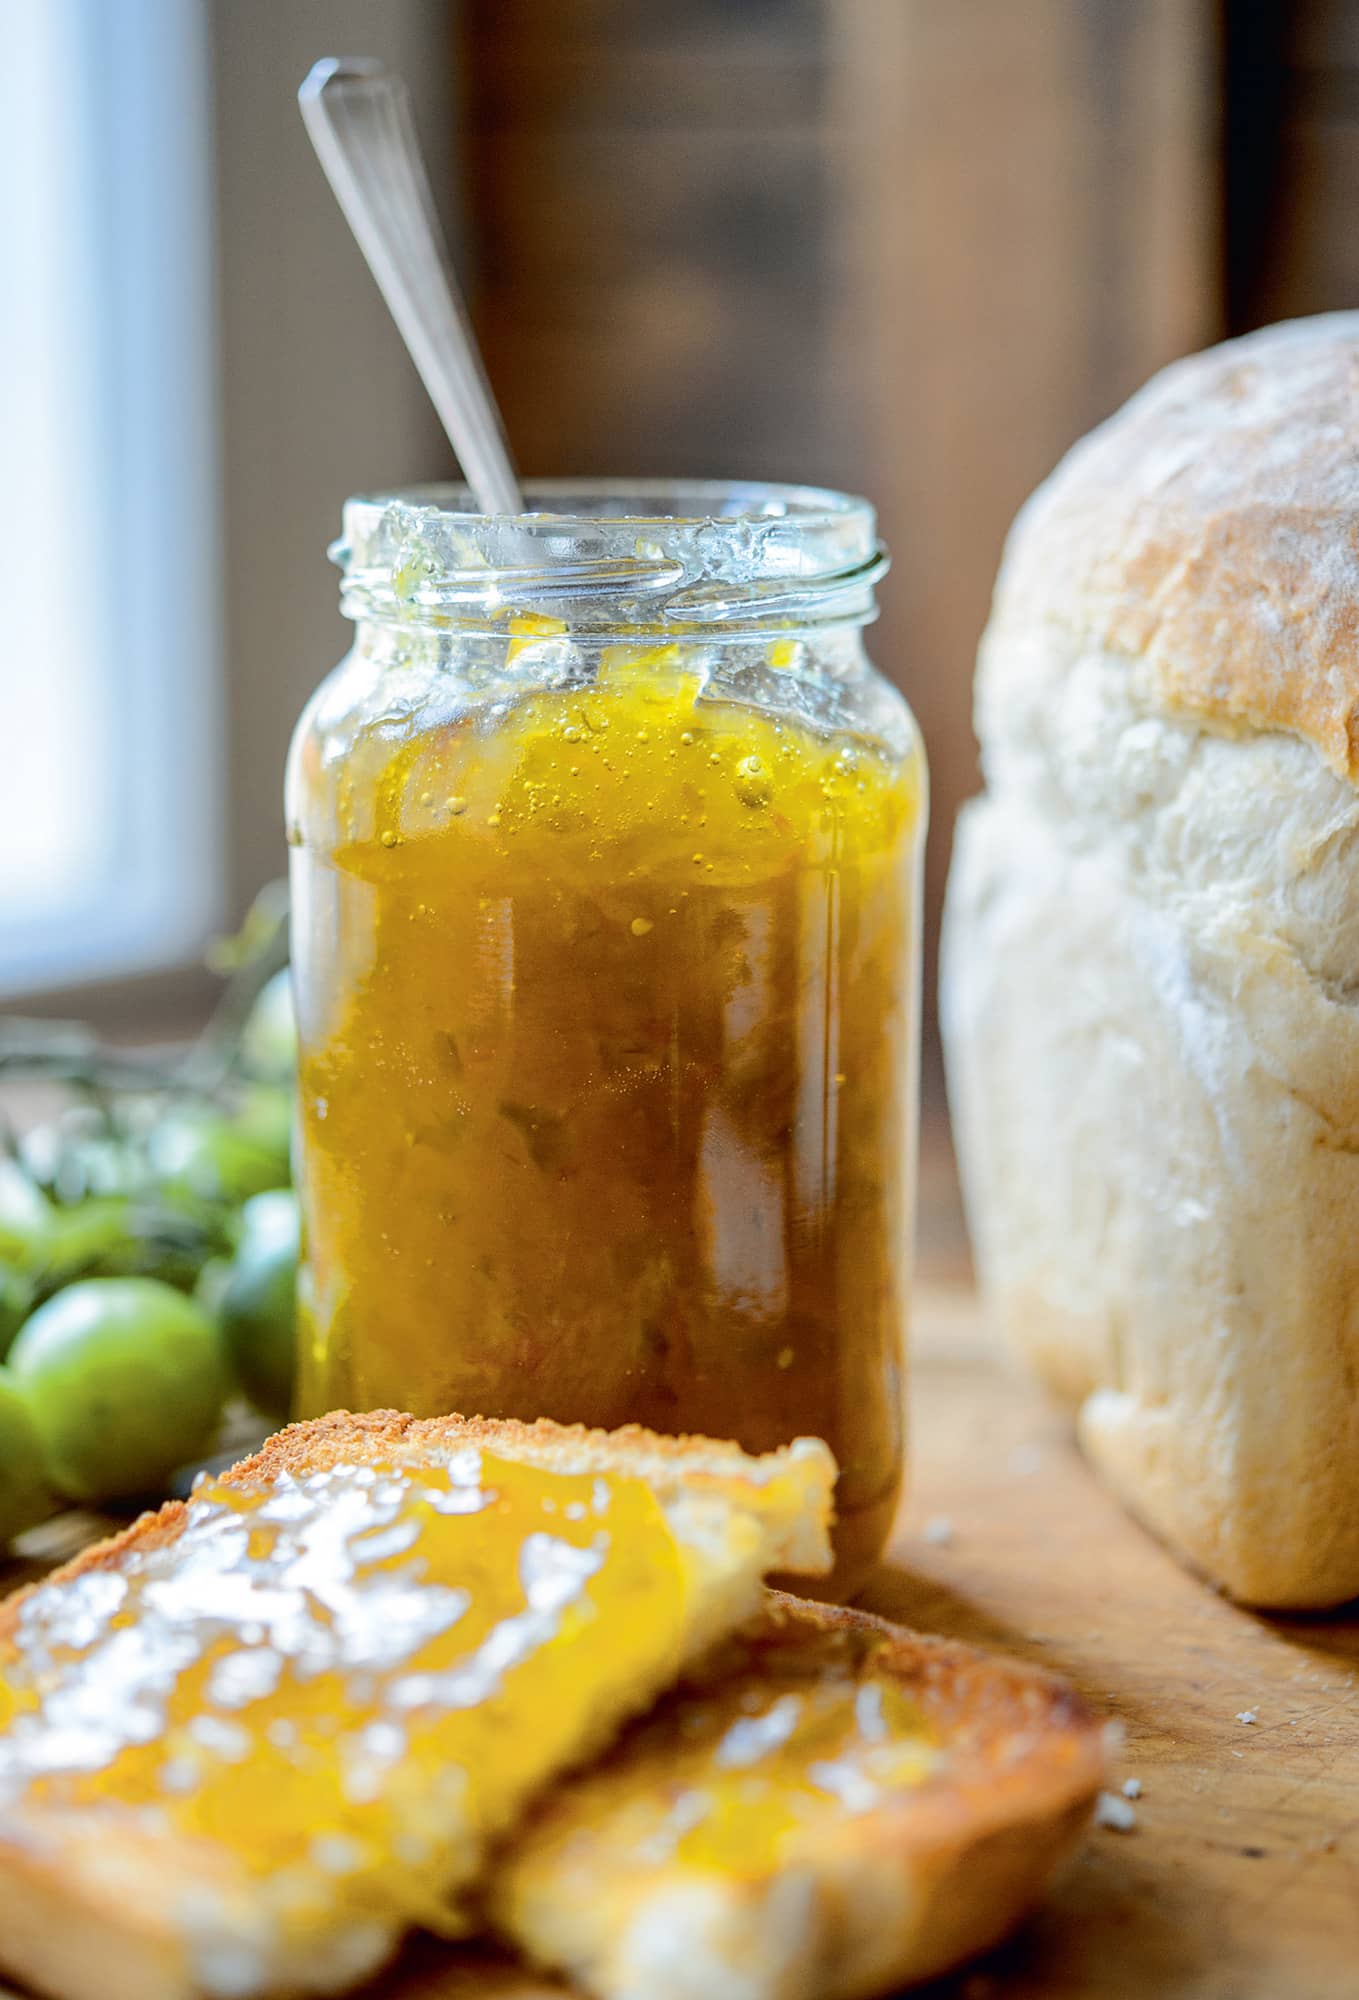
Green tomato jam ▻
Of course we all want our tomatoes to ripen to beautiful shades of red, but sometimes nature has other ideas. If you have had to harvest your fruit while it is still green because of blight or early frosts, use it to make this zingy, herbaceous jam instead of the more usual chutney. Alternatively, grow a variety that is still green when ripe, such as ‘Green Envy’.
▪ 1.2kg/2lb 10oz green tomatoes, halved
▪ 1kg/2lb 3oz granulated sugar
▪ Scoop out each tomato’s seedy innards, with a teaspoon, and put them into a jelly bag. Then finely chop the tomato flesh (use a food processor if you have one) and put it in a large pan.
▪ Finely grate the zest of the lemons and then juice them. Add the lemon zest to the pan, and put the squeezed-out lemon halves into the jelly bag.
▪ Pour the lemon juice into a measuring jug and top it up with water to give a total volume of 1.2 litres/ 21/4 pints. Add this liquid to the pan.
▪ Tie up the jelly bag and place it in the pan as well.
▪ Bring the pan mixture to a simmer and cook gently until the ingredients are soft (about 45 minutes).
▪ Wearing rubber gloves to protect your hands, remove the jelly bag and squeeze as much liquid as possible back into the pan. Discard the contents of the bag.
▪ Add the sugar and stir until it dissolves, then turn up the heat and bring the jam to the boil. Boil rapidly until the setting point is reached (see Testing for a set).
▪ Remove the pan from the heat and scrape off any scum. Then pot into warm, sterilized jars.
Store in a cool, dry, dark place
◁ Tomato jam
I rather like this jam in a cheese sandwich, in place of fresh tomatoes when they are not in season. Like many preserves, this jam walks the line between sweet and savoury and how you use it will depend a lot on the variety of tomato you put in. The light muscovado sugar gives the flavour a caramel depth, but use granulated if you prefer.
▪ 1kg/2lb 3oz tomatoes, halved and deseeded
▪ 1kg/2lb 3oz light muscovado sugar
▪ Roughly chop the tomato flesh (no pieces too big as that will leave big bits of skin in the jam) and put into a large pan with the lemon juice, salt and water. Simmer over a low–medium heat until the tomatoes are soft, then mash thoroughly.
▪ Add the sugar and stir until it is dissolved, then turn up the heat and bring to the boil.
▪ Boil rapidly until the setting point is reached (see Testing for a set).
▪ Remove any scum and pot into warm, sterilized jars.
Store in a cool, dry, dark place
Tomato ketchup
Whether you eat it only on chips or, like Pop Larkin, smother everything on the plate at every meal, tomato ketchup is a staple food for many. Choose your paprika depending on what flavour you would like it to impart: smoked paprika gives it a (you guessed it) smoky edge; sweet paprika is the baseline paprika flavour; and hot smoked paprika has a bit of a kick.
▪ 1kg/2lb 3oz tomatoes (off the vine weight)
▪ 100g/31/2oz light muscovado sugar
▪ Preheat the oven to 180°C/350°F/gas mark 4.
▪ Put the tomatoes and garlic cloves in a roasting tin (so that they fit snugly) and roast for 30 minutes.
▪ Pop the cloves out of their skins and blend with the tomatoes and their juices.
▪ Push the puréed tomatoes through a sieve into a medium-sized saucepan, to remove the seeds, then add the remaining ingredients.
▪ Stirring to dissolve the sugar, bring to a gentle simmer over a low heat. Continue simmering until the ketchup is reduced to a thick sauce. It should still be pourable – it will thicken further as it cools.
▪ Pour into warm, sterilized jars or bottles.
Store in a cool, dry, dark place; once opened, keep in the refrigerator
Keeps for six months or more; once opened, lasts for two months
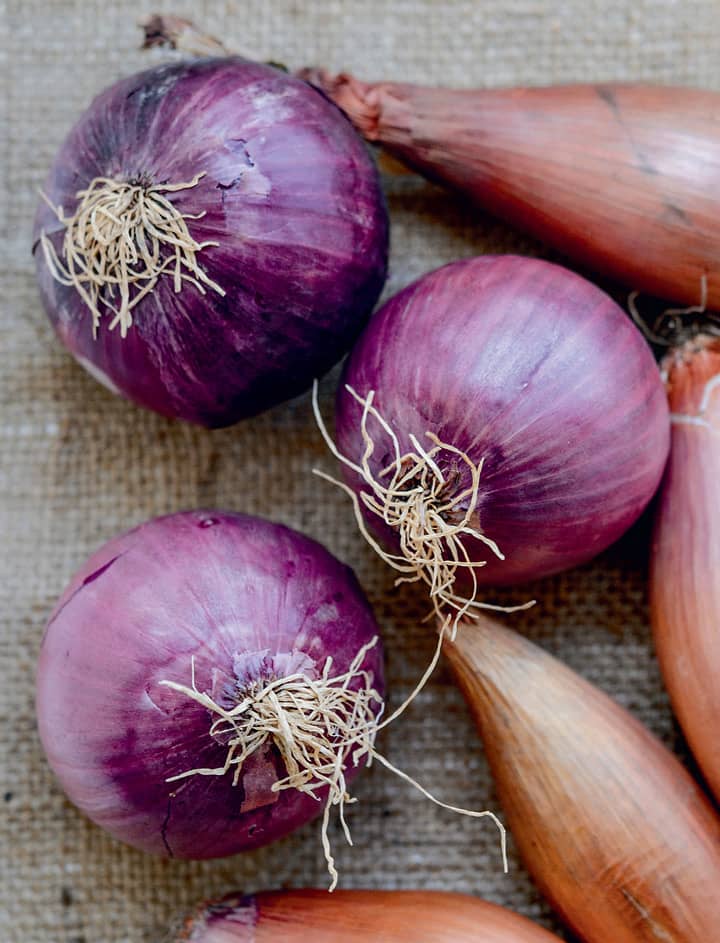
Growing onions and shallots
Admittedly onions come pretty low on the list of ‘must grow’ vegetables, unless you are aiming for self-sufficiency. Generally it is hard to grow a basic white onion that tastes significantly better than a shop-bought one, and after buying sets or seed, and adding in your time, home-grown onions will come out much more expensive too. If you have only limited space, concentrate on other crops, but, if you can, grow red onions and shallots as they are much more worth the effort.
BEST VARIETIES
‘Red Baron’ is a widely available, reliable and tasty red onion, or else ‘Electric’. For shallots, the chef’s choice is ‘Eschalote Grise’ (not technically a shallot but sold as one) and ‘Jermor’ and ‘Pikant’ are also good choices. If you want to grow white onions, try ‘Centurion’.
PLANTING
Onions and shallots need full sun, well-drained soil and good air circulation because humidity fosters fungal diseases, which can ruin the crop. For most varieties you have the choice of growing from seed or planting sets (small onions or shallots that have been grown and then stopped, ready for replanting and growing to maturity). Sets are by far the easiest choice, especially for cool-temperate areas, although they have a higher propensity to bolt if not heat-treated. On the other hand, you may not be able to get your desired cultivars as sets, and in fact long, thin shallots such as ‘Eschalote Grise’ are best grown from seed.
Sow seed in late winter under cover, then plant out in mid-spring, or just sow direct in mid-spring – sowing into modules or station sowing is best, thinning to the strongest seedling. Plant sets in autumn or early spring, pushing them into the ground to leave only the tip showing. For onions, leave 10cm/4in between plants and 30cm/12in between rows. Shallots should be spaced at 4cm/11/2in between seeds, 15cm/6in between sets (sets will produce a larger cluster of bulbs, seeds a single bulb), and 20cm/8in between rows.
MAINTENANCE
Keep the rows weed-free. Water as required in dry weather, but avoid splashing the foliage and bulbs themselves, because this can encourage disease.
HARVEST
The foliage will start to yellow and die from mid- to late summer. Once this happens, pull up the onions/shallots (wait for a dry spell) and lay them out to dry in the sun, either on the soil, a bench or a piece of chicken wire suspended off the ground. The aim is to encourage good air circulation around each bulb as its outer layers dry in the sun; this should prevent rot setting in. Once dried for a few days they are ready to store in a cool, dry place.
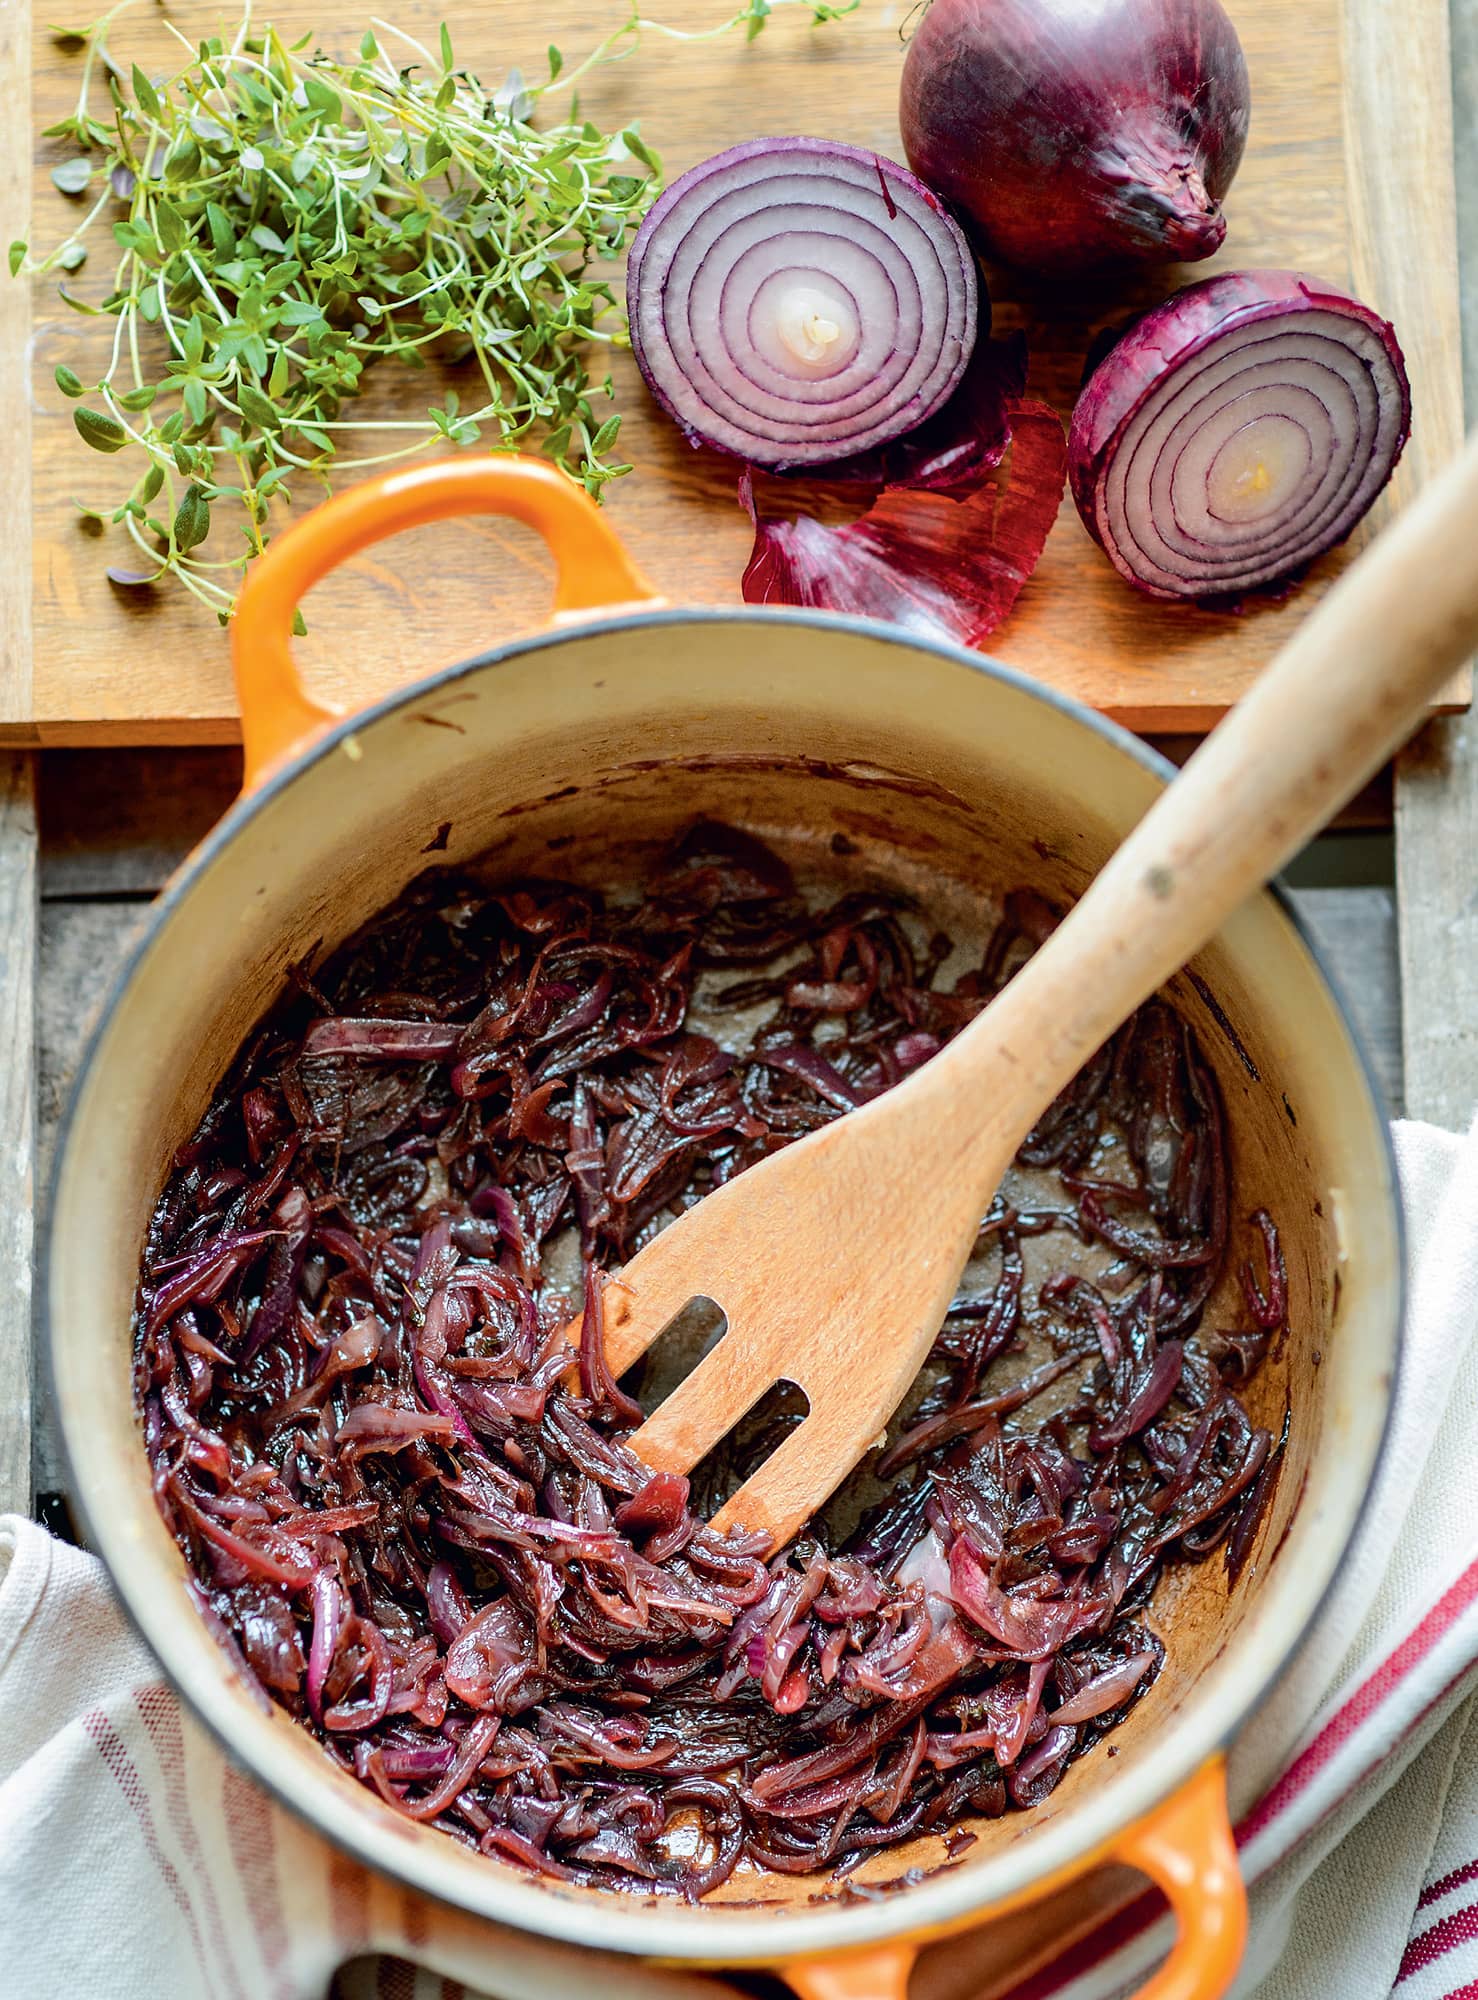
◁ Caramelized onion marmalade
This isn’t really a marmalade in the true sense of the word, but the sweet, sticky reduction of onions that has come to be widely known by that name. It is also one of the few chutney-type preserves that is ready to eat straight away – and indeed is better the sooner you eat it. Use caramelized onion marmalade in a sandwich with meats or cheese, to glaze sausages cooked in the oven or as a filling for a savoury tart or quiche.
Note: Red onions are naturally sweeter than white onions, so require less additional sugar.
▪ 450g/1lb onions, finely sliced
▪ 6 sprigs of thyme, leaves only
▪ 2 tbsp dark muscovado sugar (1 tbsp if red onions are used)
▪ Heat the oil in a heavy-based frying or saucepan over a low heat. Add the onions, garlic, salt, thyme and star anise and sweat very gently (do not let the onions brown) until very soft (this can take up to an hour). Stir regularly.
▪ Remove the star anise, and add the vinegars and sugar and continue to cook until the onions are caramelized and most of the liquid is gone.
▪ Pot into warm, sterilized jars.
Keeps for a month or more, but better eaten sooner
Growing French beans
Also known as green beans, these prolific plants will give plenty of pickings for pickles and for eating fresh. Purple- and white-podded varieties add colour to the garden, as well as to the plate and the pickle jar, and their pretty flowers are loved by bees.
BEST VARIETIES
Choose first how you want French beans to grow – dwarf varieties do well in pots and in rows, giving a heavy crop but not over such a long period as climbing varieties. However, by making two or three sowings from early spring of dwarf plants, and protecting them with horticultural fleece or cloches, you can have a good supply all summer and into autumn. Climbing French beans take up very little ground, especially if you grow them up a trellis, or even up your sweetcorn plants (see here). Having settled on the growth habit, you can then choose whether it should have a round or flat pod, and what colour the pods should be.
Good dwarf choices are: the green, flat-podded ‘The Prince’; the green, round-podded ‘Delinel’; the purple, round-podded ‘Purple Teepee’; and the yellow/white, flat-podded ‘Rocquencourt’. Climbers ‘Cobra’ and ‘Blue Lake’ are well-established, green, round-podded varieties, or you could try ‘Kingston Gold’ for its yellow/white, flat pods and ‘Cosse Violette’ for its purple, rounded ones.
PLANTING
French beans are frost tender. Sow in modules or pots under cover in mid-spring, potting on as necessary, and plant out once there is little risk of frost. Alternatively sow direct in late spring, station sowing in rows for dwarf beans and at the base of canes/hazel stakes or similar supports for climbers. Space dwarf beans 25cm/10in apart, and give them a small cane for support, tying them in as required. Two climbers per cane/stake is sufficient for a five- or six-stake wigwam. Plant two seeds per station and thin to the strongest plant.
MAINTENANCE
Other than watering, especially when flowering and fruiting, French beans need relatively little assistance. You may however need to help each climber get that initial twist around its cane, and to feed plants growing in pots. Also keep an eye out for slugs. If you are making early and late sowings, protect plants from frosts with cloches or tunnels of horticultural fleece or plastic.
HARVEST
The beans are best gathered often and when small, before the seeds inside begin to swell. Check over the plant regularly for any you may have missed, because if a pod of seeds begins to dry out it will signal to the plant to stop producing more pods. Cut the clusters of beans off any dwarf variety, to avoid pulling up the whole plant, and pick climbing French beans carefully.
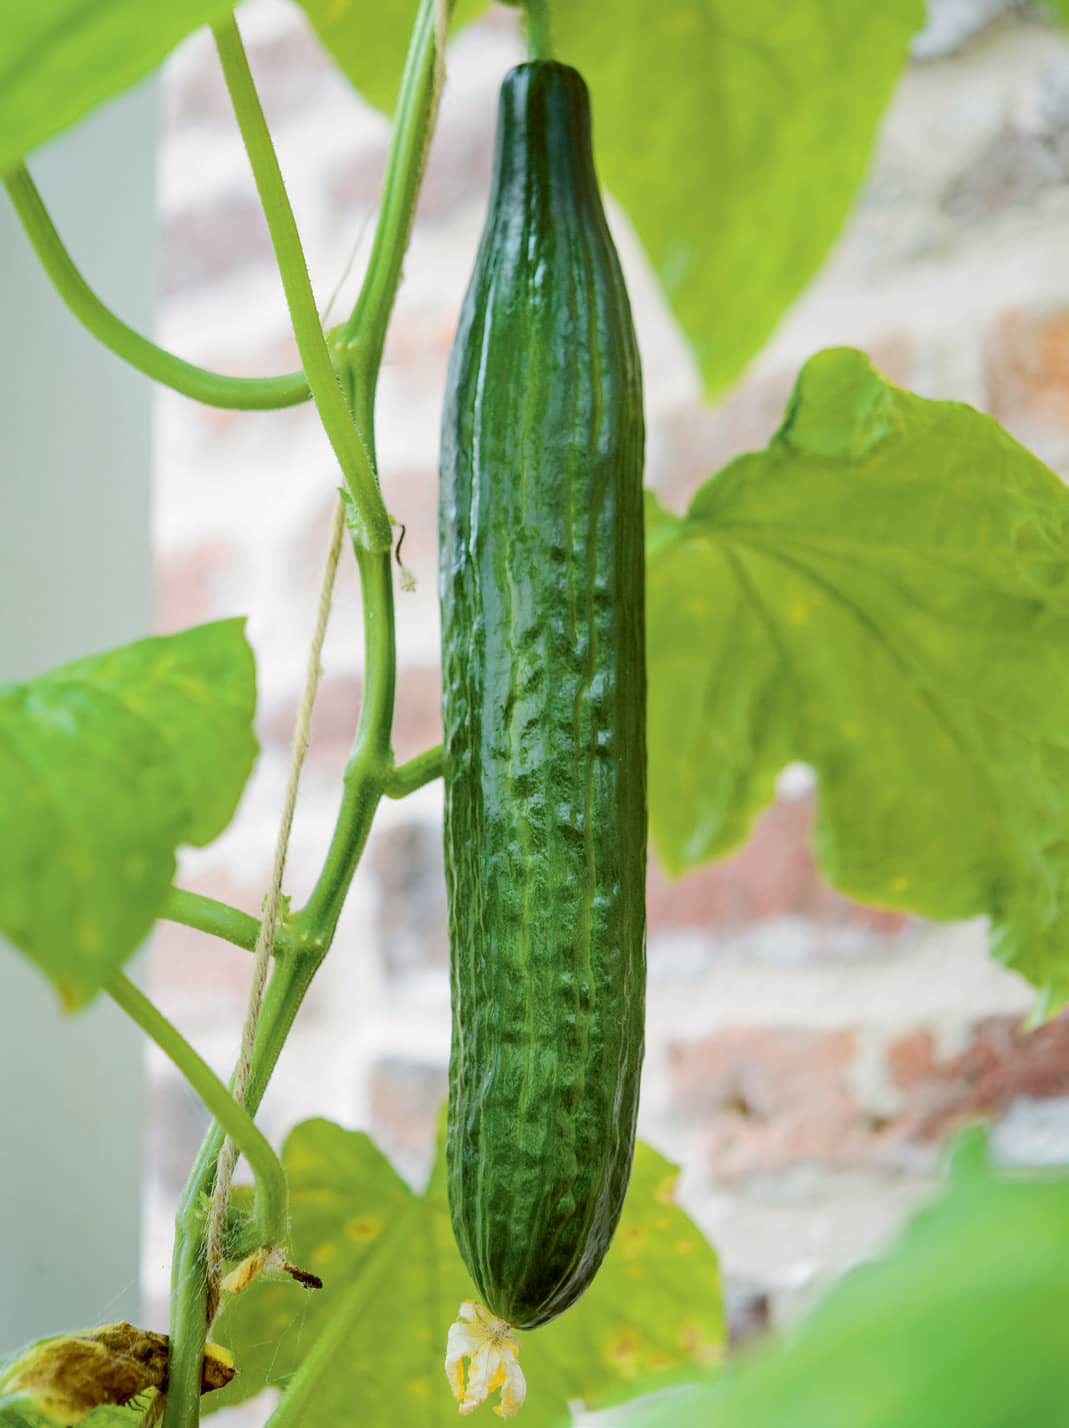
Growing cucumbers
Cucumbers are prolific but tender crops and will not survive a frost, but it is just as possible to get a successful harvest when growing them outside as it is in a greenhouse. The smaller fruits and miniature versions used for pickled gherkins or cornichons may be harder to get hold of in shops, too, so it is worth growing a plant or two.
BEST VARIETIES
Varieties are split into types of fruit and those good for growing outside or under cover. Good outdoor cucumbers include ‘Burpless Tasty Green’ and ‘Crystal Lemon’; for greenhouses try ‘Petita’. Gherkin varieties to try are ‘Venlo Pickling’ and ‘Vert Petit de Paris’.
PLANTING
Sow seed in modules under cover in mid-spring, giving the seeds temperatures of 18–20°C/64–8°F. Pot on into small pots once the roots start to appear at the bases of the modules. Harden off and plant out in early summer after the last frosts. Alternatively sow direct in pots or growbags in a greenhouse in late spring.
Cucumbers need a sunny, warm position and rich, moist (but not wet) soil. Incorporate plenty of compost into the soil if planting in the open ground, and mulch after planting with more compost. Cucumbers are best grown up a wigwam, stakes, wires or a trellis to save space, but they will need tying in gently every 30cm/12in or so, to the support.
MAINTENANCE
Keep the soil moist at all times and give the plants some liquid feed if growth or fruiting slows. Pinch out the tip of the stem when it reaches the top of the support, and reduce side shoots to seven leaves. If white blotches appear on the leaves (powdery mildew) remove the affected parts promptly, to avoid it spreading further. Cucumber mosaic virus, which causes the leaves to develop a yellow mosaic pattern and growth to become distorted, is not treatable, so remove the whole plant.
HARVEST
Cut cucumbers and gherkins once they have reached 10–15cm/4–6in long. If any shorter, they may be bitter; if larger than this, the skins thicken and the flavour lessens.
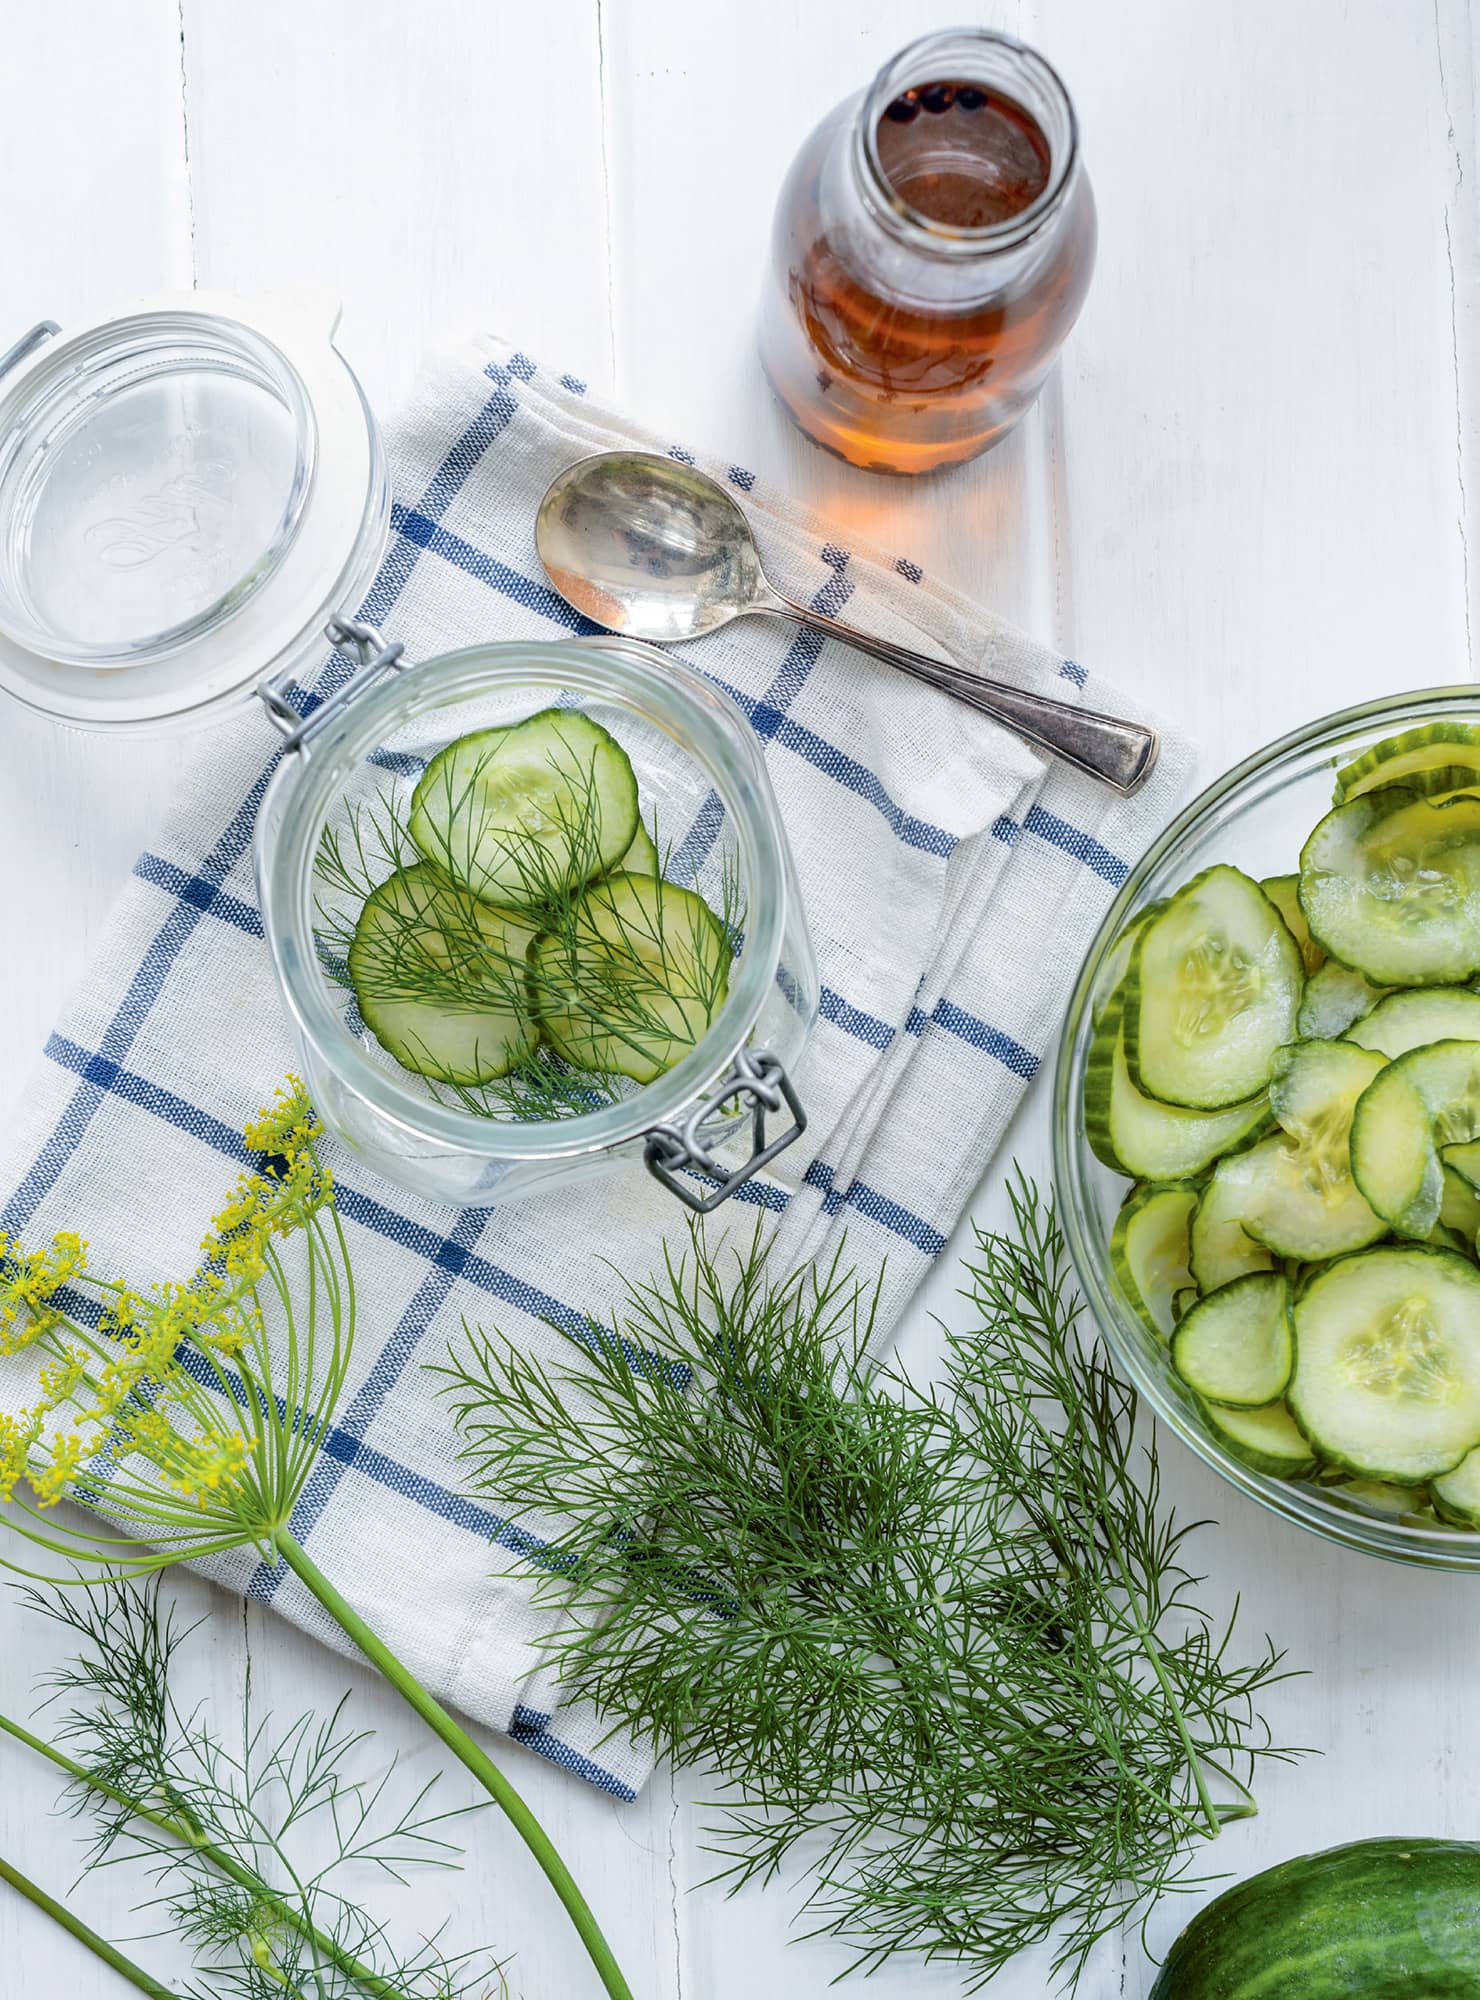
◁ Pickled cucumber
Cucumbers grow so fast and freely in the summer months that they are the ideal candidate for preserving. Whether you prefer thin slices or whole gherkins, pickled cucumbers are deservedly popular, and especially good with fish and fatty meats such as salmon pâté or fried chicken. Dill is a classic pairing flavour-wise, and also has health benefits because it helps us digest the naturally indigestible cucumber.
Note: The final quantity made will depend on how the cucumbers are sliced, if at all, and therefore the amount of space around them for liquid in the jar. If you have left-over liquid, store it in a jar in the refrigerator. Pour it over fresh sliced veg and leave for 2–3 hours to make a quick pickle.
▪ 3 juniper berries (or more – 3 per jar)
▪ medium-sized bunch of fresh dill fronds
▪ Prepare the cucumbers – nick off any knobbly bits, then slice larger cucumbers into rounds or sticks as you prefer. Smaller gherkins/cornichons can be left whole. Put the cucumbers into a ceramic or glass bowl and toss in the salt. Cover and leave at room temperature for 24 hours.
▪ Heat the vinegar, sugar, peppercorns and juniper berries in a small saucepan, stirring to dissolve the sugar. Bring to the boil, then remove the pan from the heat and leave the liquid to cool.
▪ Drain, rinse and pat dry the cucumber. Then pack the cucumber into a sterilized jar (or jars) with the dill, and pour over the cold liquid and seal. There should be a clear 1cm/1/2in of vinegar at the top of the jar, then a further 1cm/1/2in of space below the lid. Leave for a few days for the flavours to mellow.
Keeps for six months, once opened lasts for a month
Growing cauliflower
Brassicas – the family that includes cauliflower, as well as broccoli and cabbages – and I have a difficult relationship. As a rule I prefer to keep my vegetable garden looking as natural as possible, but brassicas are a crop that absolutely must be protected from birds and butterflies, and I resent the plants for needing that mesh covering. But . . . the variety of crops they provide, especially the cauliflowers, make up for it. Just.
BEST VARIETIES
There are varieties of cauliflower that can mature in almost any month of the year, but I focus here on the autumn-harvesting types. ‘Graffiti’ is a purple variety, while ‘White Rock’ a reliable, white one. The miniature varieties such as ‘Igloo’ or ‘Fremont’ are a good choice for smaller spaces. ‘Romanesco’ is sometimes described as a broccoli, but to my mind it is a cauliflower. Its distinctive, pointed, lime-green florets are perfect for pickling.
PLANTING
Cauliflowers prefer a rich soil in full sun, so dig in plenty of compost before sowing or planting. Sow seeds in modules in mid-spring; plant out the seedlings once they have reached a good size. Alternatively station sow, thinning to the strongest seedling, with plants spaced 45cm/18in apart – 60cm/24in for larger cultivars (check the instructions on the seed packet). For miniature plants, allow 15cm/6in each way. Make sure plants are firmed in well and cover them as soon as they are planted out, or when the seedlings appear. Horticultural fleece or fine mesh will keep out cabbage white butterflies and pigeons – stretch it over hoops stuck in the ground and peg down securely – or else buy premade tunnels.
MAINTENANCE
Ensure that plants are well-watered, especially in hot, dry conditions to avoid bolting, and keep the weeds in check to avoid stunting the plants.
HARVEST
Once the curd (head) of a cauliflower has reached a good size, cut the stalk below it. Leaving the plant in the ground may encourage it to produce some smaller side shoots, or else you can dispose of the whole plant.

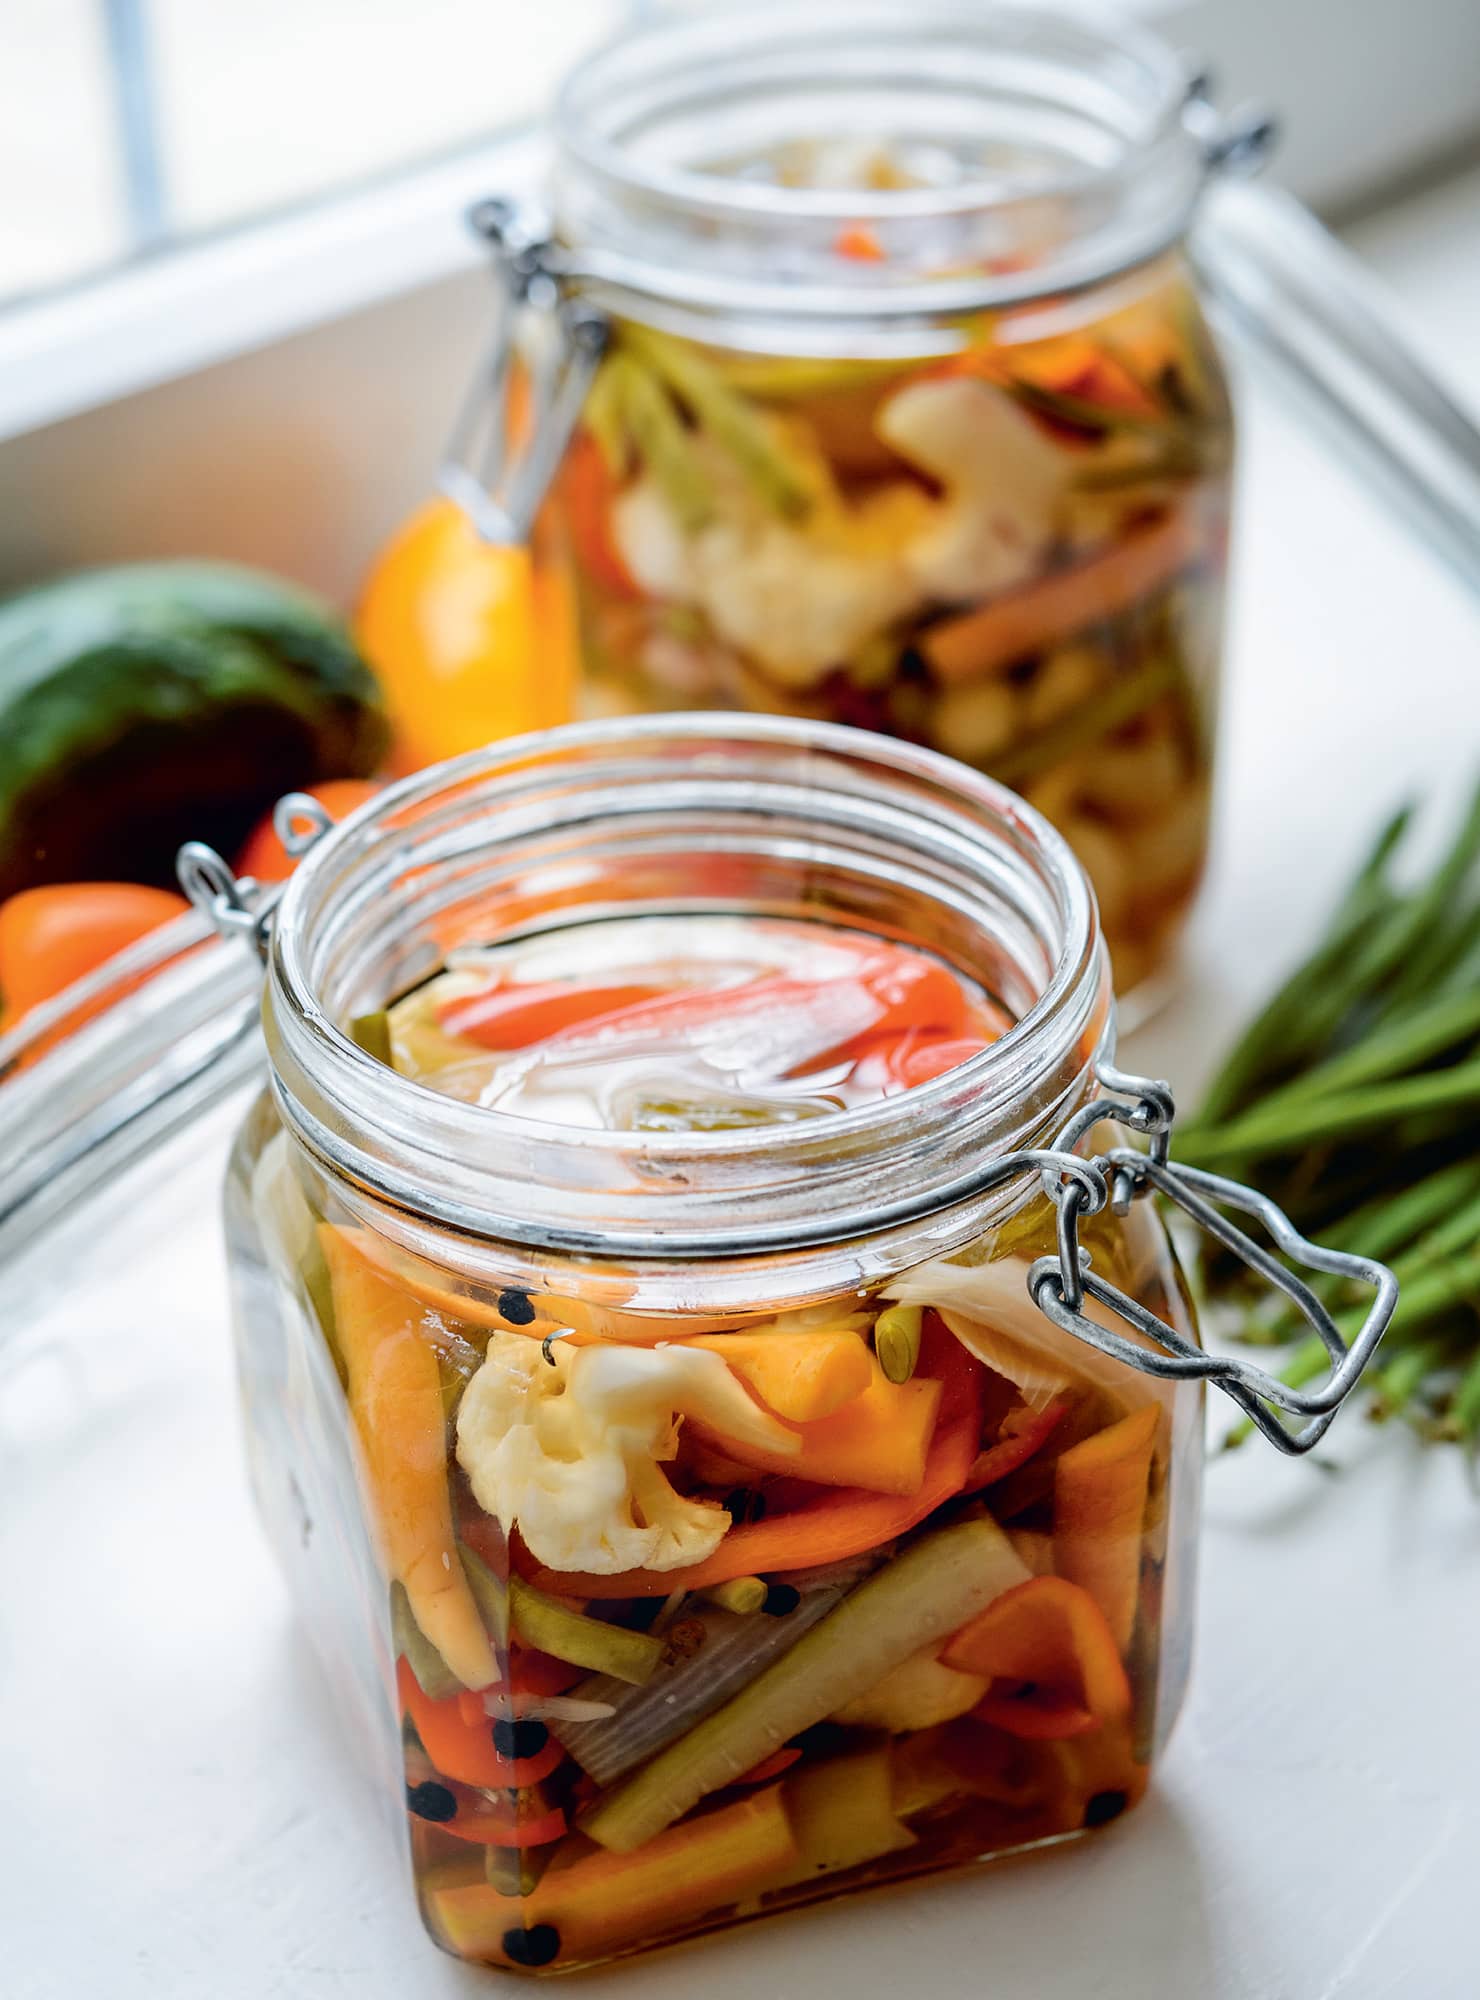
◁ Giardiniera
Every culinary culture has its own version of a mixed vegetable pickle – the British have piccalilli, the Americans chow-chow. This Italian recipe for a clear pickle is very similar to the French version, and both are translated roughly as ‘of the garden’. Any combination of vegetables can be used: the beauty is in the mixture and the colourful, fresh look each ingredient gives to the finished pickle.
▪ 1kg/2lb 3oz mixed vegetables (a combination of some or all of carrots, cauliflower, baby onions or shallots, cucumber, sweet peppers and French beans)
▪ 1 litre/13/4 pints cider vinegar
▪ 1 tsp coriander or fennel seeds or sprigs of fresh rosemary (1–2 per jar)
▪ Prepare the vegetables into roughly bite-sized pieces: slice the carrots and cucumber lengthways into batons; break the cauliflower into small florets; cut the onions/shallots into quarters; remove the pith and seeds from the peppers and slice into lengths; and top and tail the beans.
▪ Put all the vegetables into a large ceramic or glass bowl and toss through the salt. Cover and leave at room temperature overnight (or for up to 24 hours).
▪ Drain the vegetables, rinse them thoroughly, then pat dry. Leaving them to dry further, put the remaining ingredients into a large pan and heat the vinegar mix gently, stirring to dissolve the sugar.
▪ Bring the vinegar mix to the boil, then add the vegetables.
▪ As soon as the ingredients return to the boil, scoop out the vegetables and pack (as tightly as possible) into warm, sterilized jars.
▪ Pour over the hot liquid and seal.
▪ Leave the jars to cool to room temperature before storing. Ideally leave the giardiniera for a day or two before eating, although it can be used straight away.
Note: If you have some liquid left over, store it in a jar in the refrigerator to make quick pickles (pour it over prepared vegetables and leave for an hour or two before serving) at a later date.
Keeps for three months or more
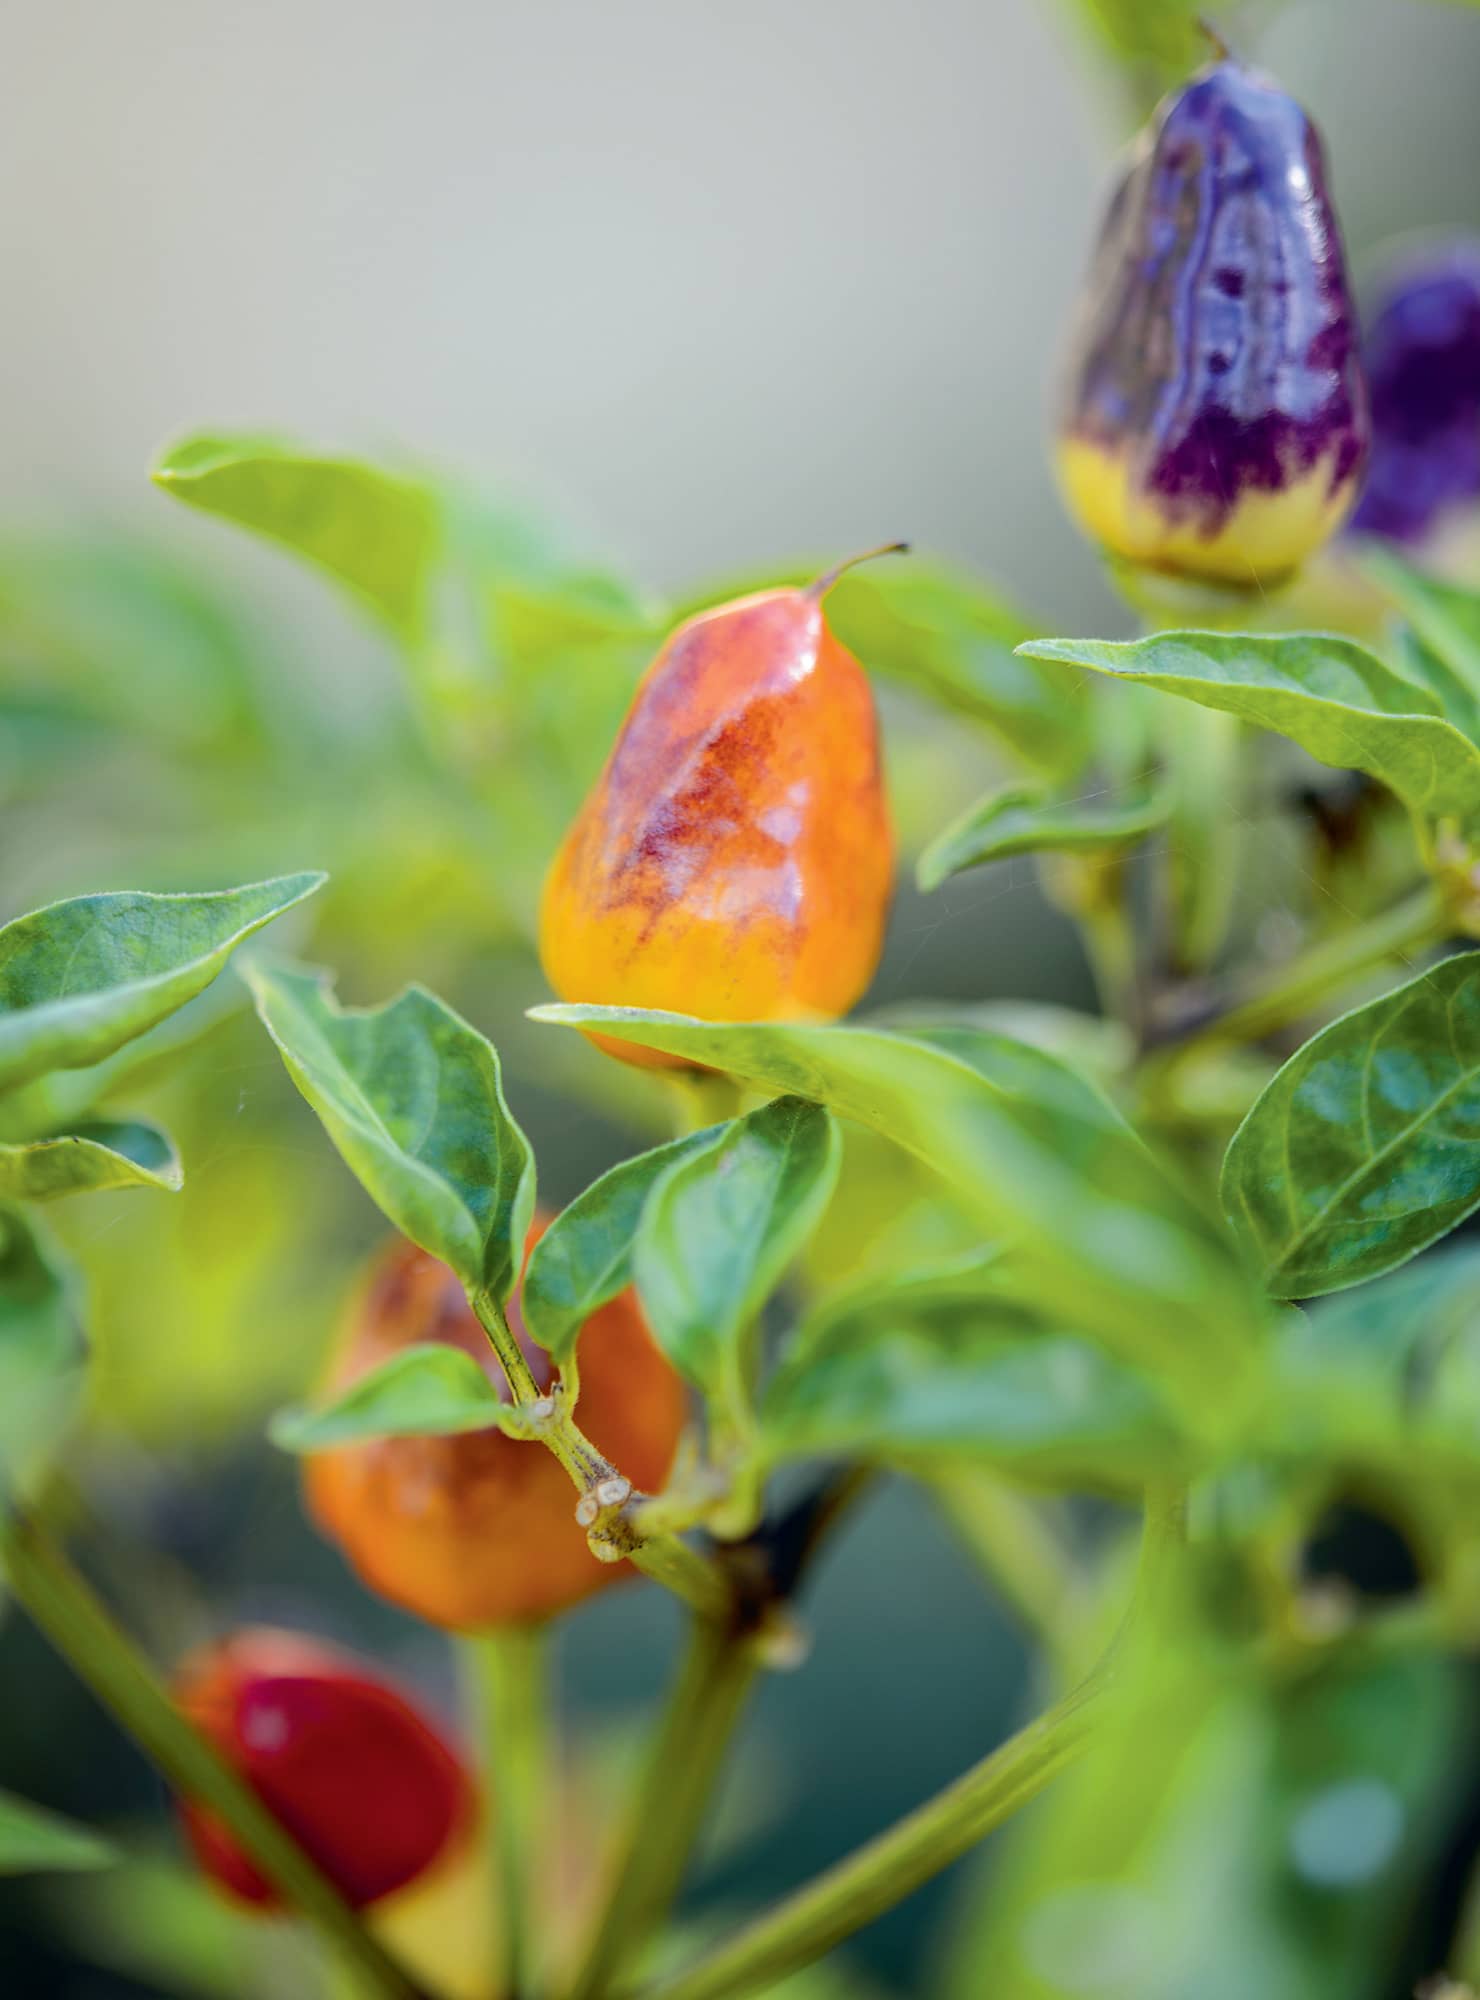
Growing chillies and sweet peppers
There is more to chillies than simple heat levels – they have real depth of flavour too. From the mild poblano types – try them in the pepper variation of Tomato ketchup – to the fruity habanero (Scotch bonnet) types, there is a chilli to suit all tastes and heat tolerances. Many growers have open days and festivals where you can buy the fruit – and also plants and seeds – and this can be a good way to discover your favourites. Likewise sweet peppers reveal a lot more variety from the seed catalogue than from the supermarket shelf.
BEST VARIETIES
I lean towards the medium–hot habaneros such as ‘Apricot’ and ‘Trinity’ for preserving. ‘Cayenne Long Slim’ is a good hot chilli, while ‘Hungarian Hot Wax’ or ‘Hungarian Black’ are other milder but flavoursome choices. Smoky poblano peppers are generally sold simply as ‘Poblano’ seeds.
If you are going to grow sweet peppers, choose the long, tapering types rather than the ubiquitous bell shapes. Good ones include ‘Friggitello’, ‘Mohawk’ (which matures early, making it ideal for temperate climates) and the baby pepper ‘Minibel Orange’.
PLANTING
Sow peppers in late winter, indoors and preferably in a heated propagator as they need temperatures of at least 18°C/64°F to germinate. Alternatively buy young plants: specialist growers will have the widest variety range.
Plant out after the last frost into the sunniest, hottest patch of ground you have. Chillies and some sweet peppers (check the packet for the size) also do well in pots on the patio or windowsill.
MAINTENANCE
Keep plants well watered and fed, especially those in pots. Help pollinate plants grown indoors by spraying them with water when they are flowering.
The branches of varieties with large fruits, and even those without, can get overladen and benefit from being tied into a stake. Starting at the cane, mentally divide the branches into three sections, and loop the twine around each section in turn, returning to loop round the cane between each one. Tie off the twine at the cane. Do this about 15cm/6in above soil level when the plant is 30cm/12in high, and again at 30cm/12in high once the plant is 40–50cm/16–20in high.
HARVEST
Peppers will be ready to harvest from midsummer, depending on the variety and when it was sown. A pepper is mature when it feels firm to a gentle squeeze, and can be picked then, even if it is green. For the best flavour wait until the pepper is ripe, when it will be its final colour.
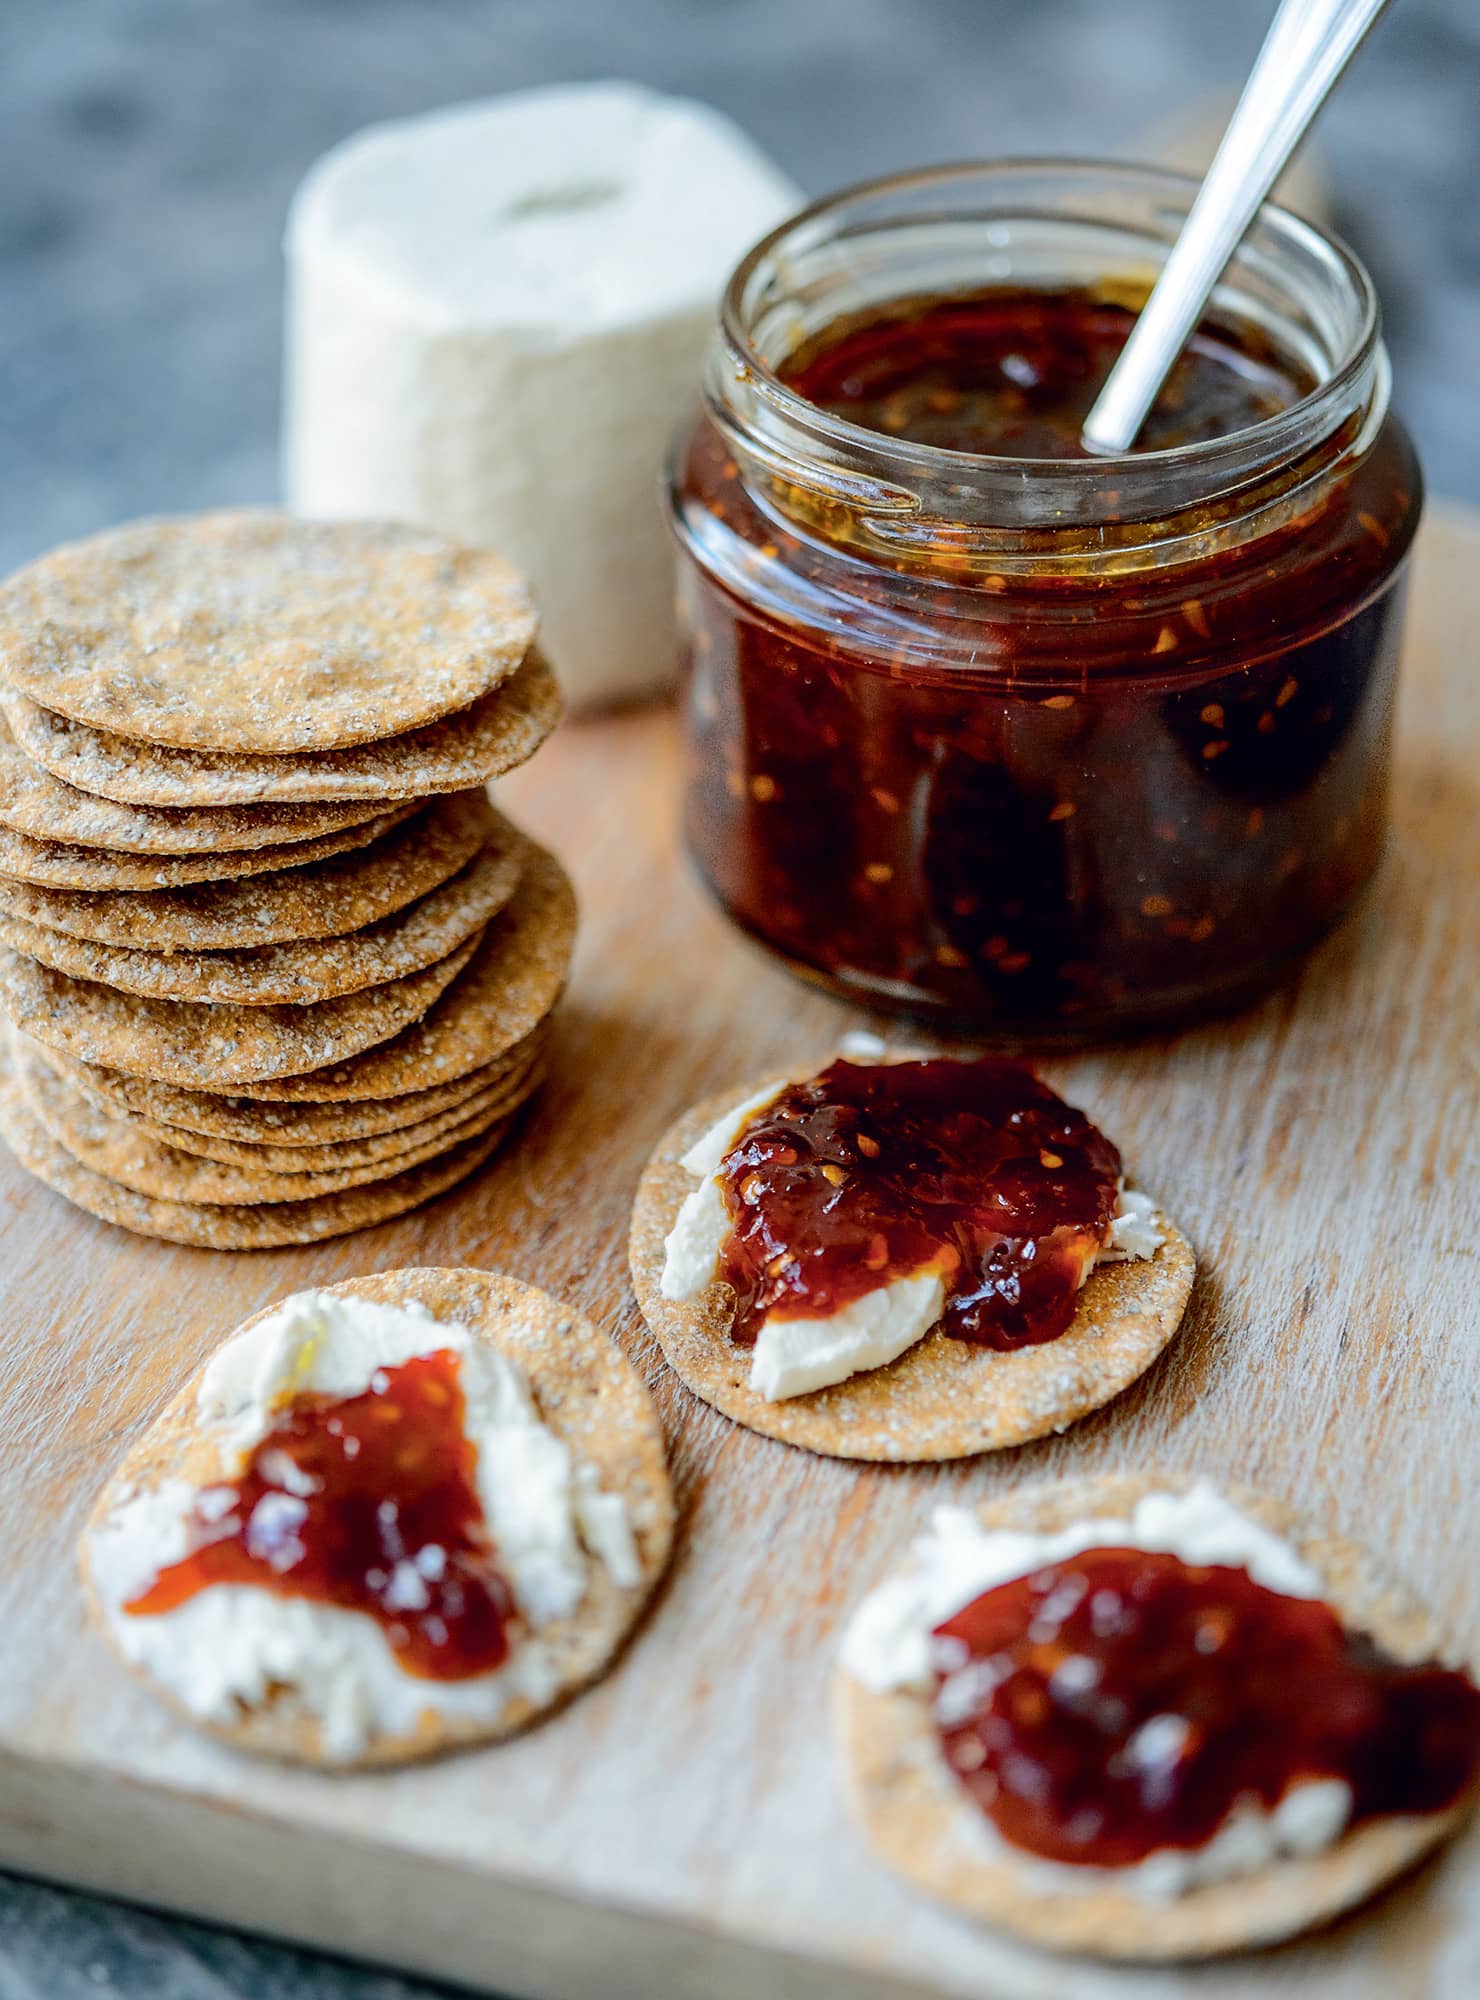
◁ Chilli jam
The joy of making your own chilli preserves is that you have complete control over how hot they are. Not only can you add more or less chilli as you prefer, but you can also grow and use chilli peppers of your desired heat rating and flavour. The recipe below is for a mild(ish) jam that’s perfect with goats’ cheese, but goes with just about anything.
▪ 6 red chillies, cored, deseeded and finely chopped (leaving the white pith will make the final jam hotter – remove it if you prefer)
▪ 140g/5oz light muscovado sugar
▪ Preheat the oven to 180°C/350°F/gas mark 4.
▪ Toss the tomatoes and garlic cloves in the olive oil and put into a roasting dish so that they fit snugly. Roast for 30 minutes until they are soft and the scent of the garlic is wafting out of the oven.
▪ Remove from the oven and pop the garlic cloves out of their skins.
▪ Blend the chillies, tomatoes and garlic pulp together until smooth and then pour into a saucepan.
▪ Stir in the lemon juice, salt and vinegar and bring to a simmer over a medium heat.
▪ Add the sugar and honey, stirring to dissolve them, and continue to simmer, stirring regularly, for 45–60 minutes until it is reduced and can be parted in the base of the pan.
▪ Pour into warm, sterilized jars and seal.
Store in a cool, dry, dark place; once opened, keep in the refrigerator
Keeps for a year or more; once opened, lasts for 3–4 months
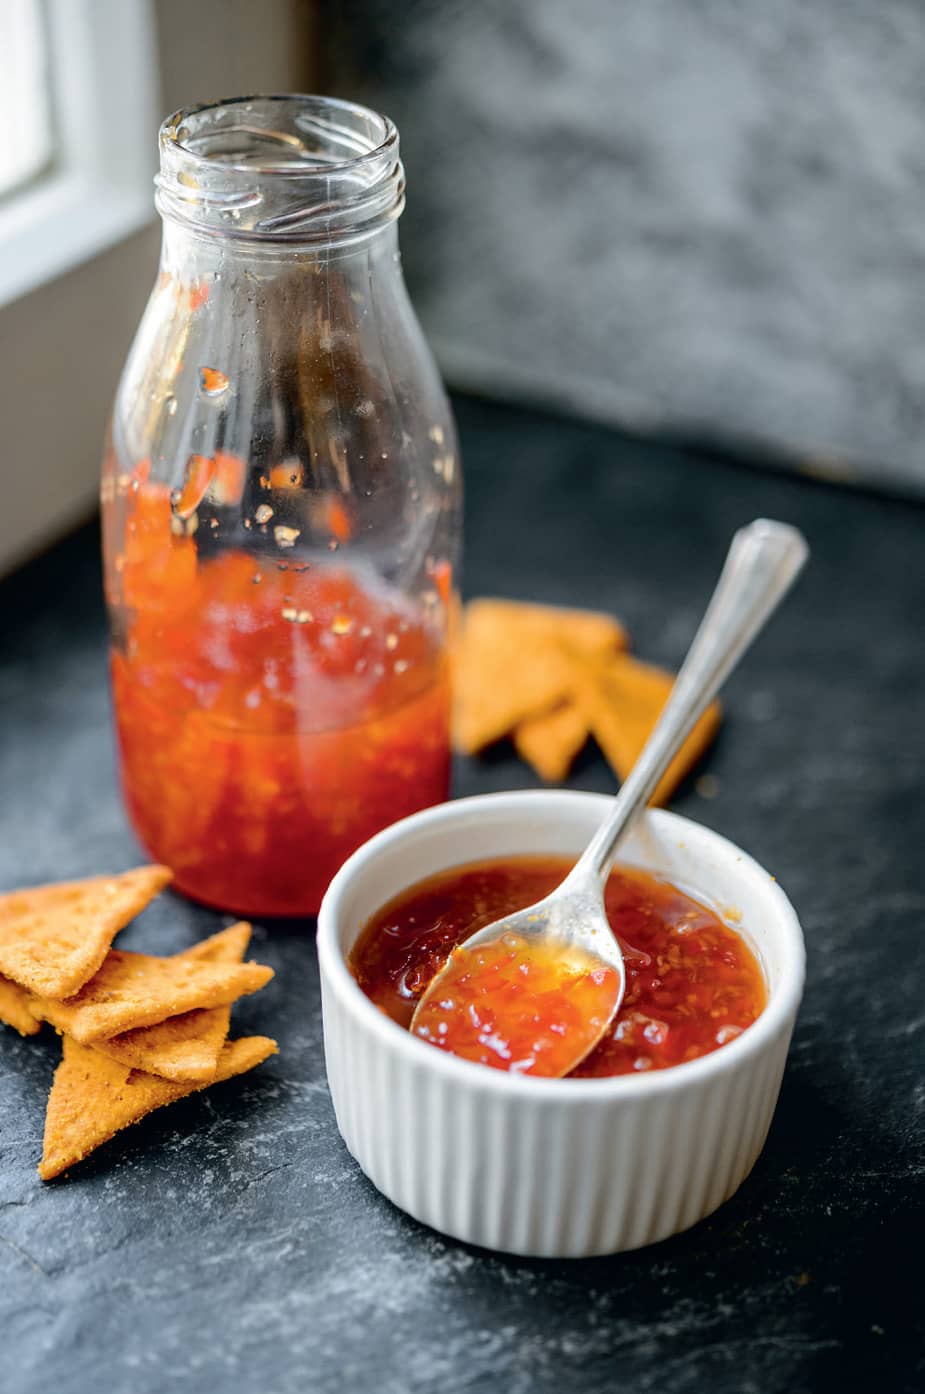
Sweet chilli dipping sauce
Ubiquitous in the Thai section of the supermarket shelves, sweet chilli sauce is actually incredibly easy to make yourself. Plus you can use your favourite chillies for the best flavour and heat, making it the perfect sauce just for you. Drizzle it over a curry and rice, or simply dip your favourite crackers or other savoury biscuits into it.
▪ 5 red chillies, cored, deseeded and finely chopped
▪ Put all the ingredients into a medium saucepan. Stirring to dissolve the sugar, bring the mixture to a simmer over a low–medium heat.
▪ Simmer until the sauce is much reduced and syrupy.
▪ Pour into warm, sterilized jars or bottles.
Store in a cool, dry, dark place; once opened, keep in the refrigerator
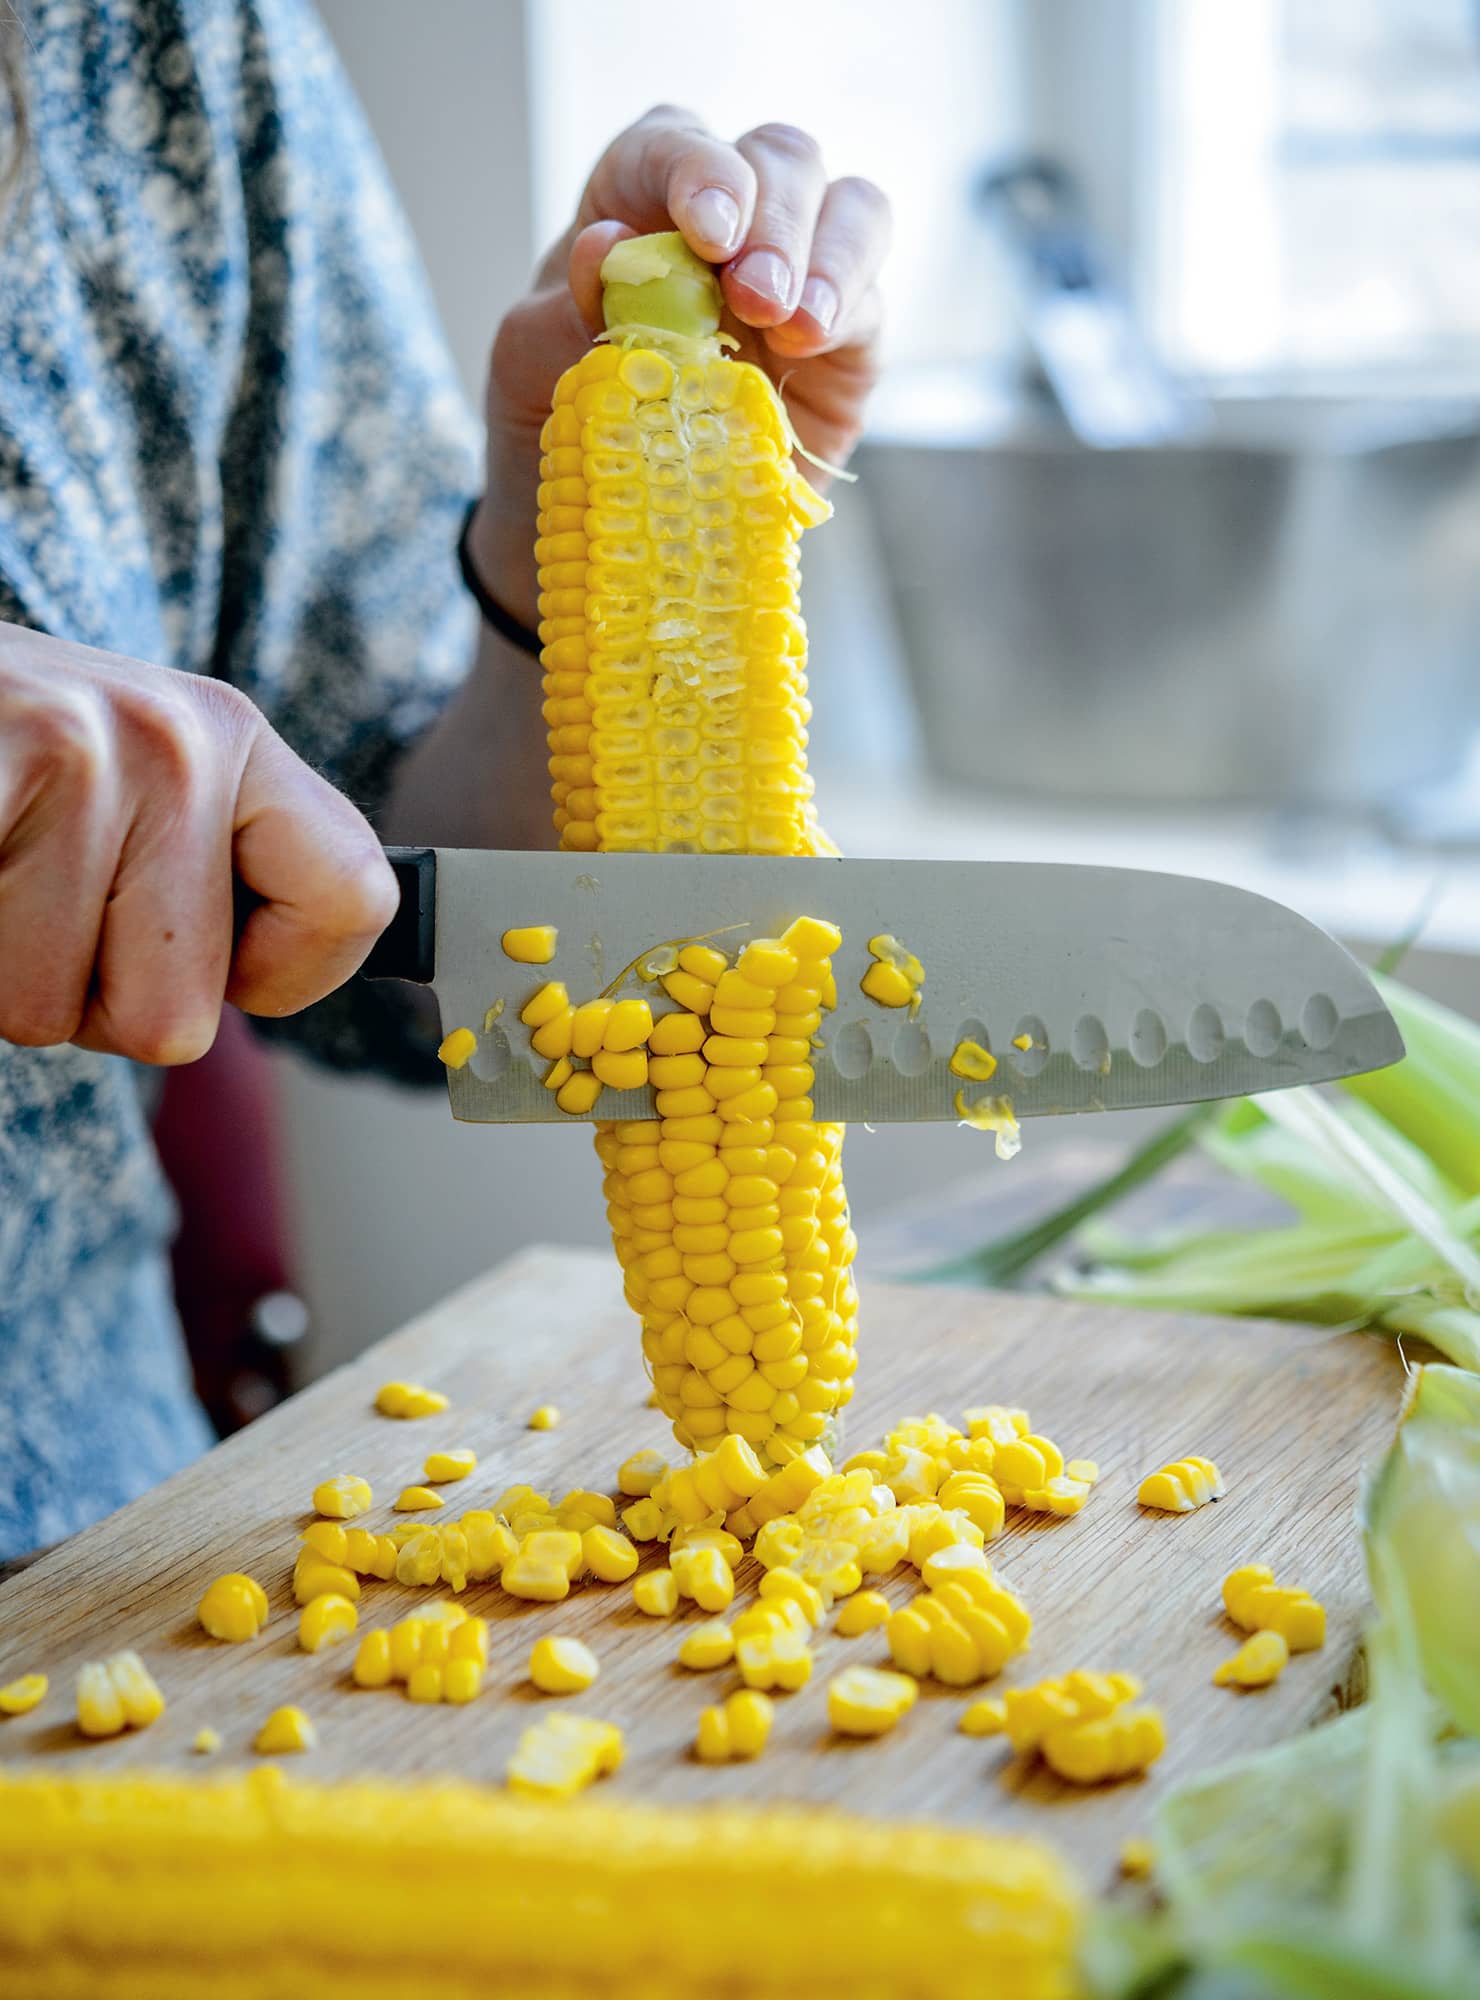
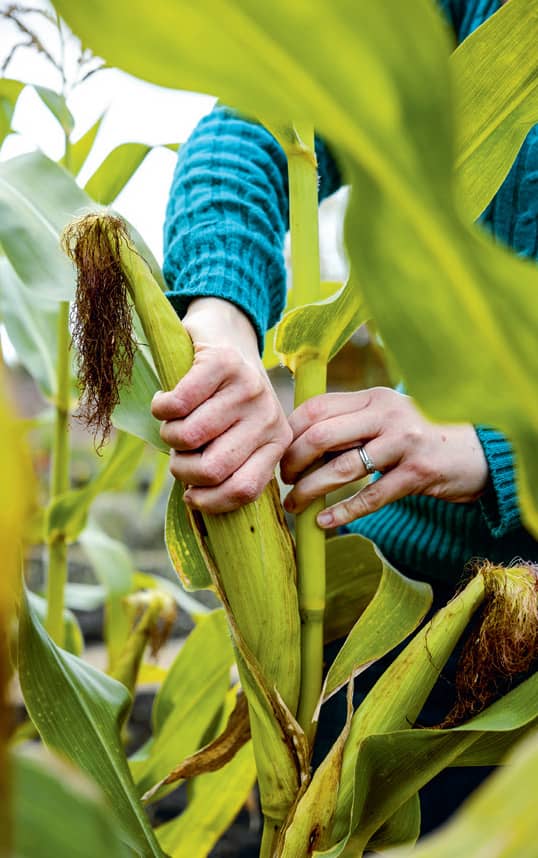
Growing sweetcorn
The clue is in the name: sweetcorn. This is another of those crops that really benefits from being home-grown, because you can cook it within minutes of picking, unlike sweetcorn cut by farmers, even with all their fancy bits of enormous machinery that process the corn in the field. In a good summer, you can be overrun with cobs, making them perfect for preserving.
BEST VARIETIES
There are some super-sweet varieties available, such as ‘Earlibird’, but the less sweet ones have more flavour, perform better in temperate climates and are still vastly sweeter than anything you could get from the shops. ‘Swift’ and ‘Sundance’ are both reliable performers, while baby varieties such as ‘Blue Jade’ (with blue/black kernels) and ‘Minipop’ are suitable for container growing.
PLANTING
Sweetcorn likes well-drained, light soil in full sun. It also benefits from being sheltered from strong winds, if it is to pollinate well (see below).
Station sow sweetcorn in late spring, putting two or three seeds per station, in a block formation rather than in rows. Space the plants 35cm/14in apart in rows 45cm/18in apart. Such block planting significantly enhances pollination rates, because sweetcorn is wind-pollinated, and the breeze shakes the pollen from the male tassels at the top of the plant down to the female flowers. Covering each station with half a plastic bottle as a mini-cloche gets the plants off to a good start – remove the bottle once the plant is pushing against the top. Thin to one or two seedlings per station.
Seeds can also be sown in modules – preferably root-trainers or old loo-roll inner tubes to give the roots plenty of space.
MAINTENANCE
Sweetcorn does not need much water until the cobs start to form, and even then will require only a few good soaks. Keep weeds down, or else plant in a ‘three sisters’ formation. In this old space-saving method, the following three crops are planted together: sweetcorn; a weed-suppressing mat of pumpkins or other winter squashes beneath; and climbing beans, which scramble up the sweetcorn. Alternatively, omit the beans for a ‘two-sisters’ approach.
HARVEST
In late summer and early autumn as the tassels turn brown, test each cob for readiness by piercing a kernel with your nail. If it is ripe, it will exude a milky liquid. Pull the cob off the plant with a twisting motion.
◁ Sweetcorn relish
No barbecue is complete without a jar of this relish. The pepper does not have to be red, but it does make the finished relish more colourful.
▪ 3 large or 4 medium sweetcorn cobs
▪ 1 red sweet pepper, cored and deseeded
▪ 500ml/171/2fl oz cider vinegar
▪ Bring a large pan of salted water to the boil then add the cobs. Cook for 3 minutes, then remove them from the water and cut off the kernels.
▪ Finely dice the pepper and shallots to pieces approximately the same size as the sweetcorn kernels, then mix with the sweetcorn.
▪ Put the remaining ingredients in a large pan and whisk to combine and dissolve them over a low heat.
▪ Bring to the boil, then add the vegetables.
▪ Simmer for 25–30 minutes until the sauce is thickened and coating the vegetables.
▪ Scoop off the scum and pot into warm, sterilized jars.
Store in a cool, dry, dark place; once opened, keep in the refrigerator
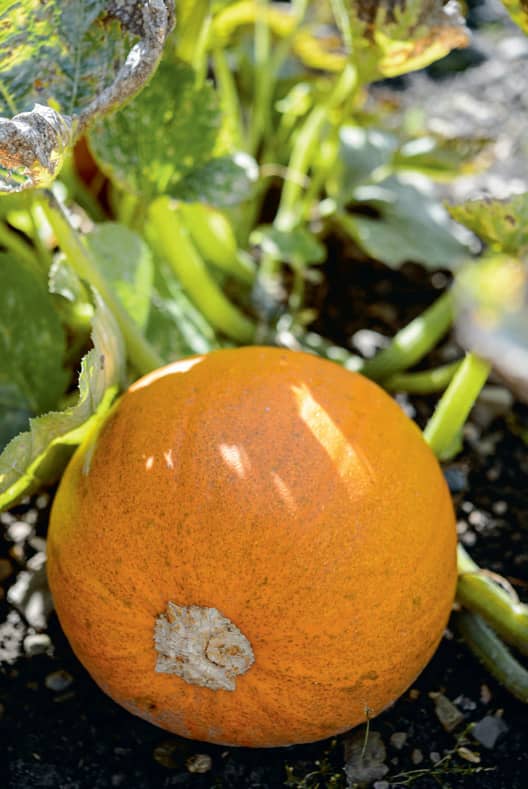
Growing pumpkins and other winter squash
Autumn is my favourite season. I love the colours in the leaves, the fabulous frosty but sunny mornings, and the bounty of fruit and vegetables that are harvested at this time. My kitchen windowsill is not complete without a collection of pumpkins and squashes – until they all get cooked and eaten that is.
BEST VARIETIES
Although of course you can eat them, avoid the pumpkins grown more for Halloween carving than their culinary prowess. Instead opt for varieties that are well known for their great flavour, such as ‘Crown Prince’ and ‘Kabocha’, although really it comes down to personal taste so trial your own choices. For jamming, there is actually a specific Italian variety, ‘Zucca da Marmellata’ (literally, jam pumpkin), but ‘Bonbon’ would be a good substitute. Check that the growing habit fits your site: trailing varieties need space but can be tied up to strong trellis or stakes with adequate hammock supports for the fruit; other varieties have bushy habits.
PLANTING
All pumpkins and other winter squash need a long, warm summer and early autumn to grow well and ripen properly before the autumn frosts arrive. Sow seeds under cover in modules in mid-spring, potting on before planting out in early summer once all frosts have passed. The plants need an open, sunny, warm site with rich, well-drained soil and at least 1sq m/ 11sq ft of space per plant (unless you are training them upwards).
MAINTENANCE
Water well at the roots, especially in dry periods and as the fruit begins to swell. If a plant produces a lot of baby fruits, cut off the smaller ones to leave around three per plant, to ensure those left develop to a decent size. Place the fruits on pieces of slate, or even chicken wire suspended over two bricks, to ensure they do not rot where they are in contact with the ground.
Tie in plants trained on vertical supports regularly, just under a leaf axil each time. Suspend old pairs of tights or netting bags beneath the fruits to avoid the vine breaking under the weight.
HARVEST
Do this once a fruit has coloured all over and sounds hollow when tapped – but always harvest before the first frosts or the remaining fruits will rot. For the best flavour, and to store into winter, cure the pumpkins or other winter squashes by placing them on a cool, sunny, dry windowsill for at least a month.
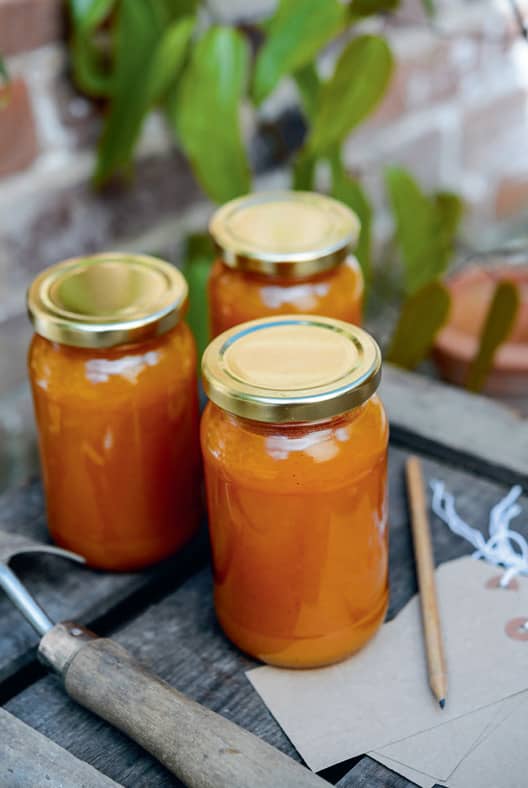
◁ Pumpkin jam
Roasting the pumpkin first really intensifies the flavour of this jam. You could also use any other type of winter squash if you don’t have pumpkin. Like the Carrot jam, this preserve is lightly spiced and is my favourite autumnal alternative for filling a Victoria sponge cake.
▪ 2kg/4lb 7oz pumpkin, halved or cut into large sections and deseeded
▪ 700g/1lb 8oz granulated sugar
▪ Preheat the oven to 180°C/350°F/gas mark 4.
▪ Roast the pumpkin by putting the pieces skin-side down on a baking tray and covering with foil. Cook for 45–60 minutes, until soft. Remove from the oven and leave to cool.
▪ Scoop the roasted pumpkin flesh out of the skins. Blend 900g/2lb of the flesh to a smooth purée.
▪ Melt the butter in a large saucepan over a low–medium heat, then add the puréed flesh and stir until heated through.
▪ Stir in the sugar, orange juice, spices and salt and keep stirring until the sugar is dissolved. Bring to a gentle, plopping simmer and cook until the jam is thick and parts easily at the base of the pan.
▪ Pot into warm, sterilized jars.
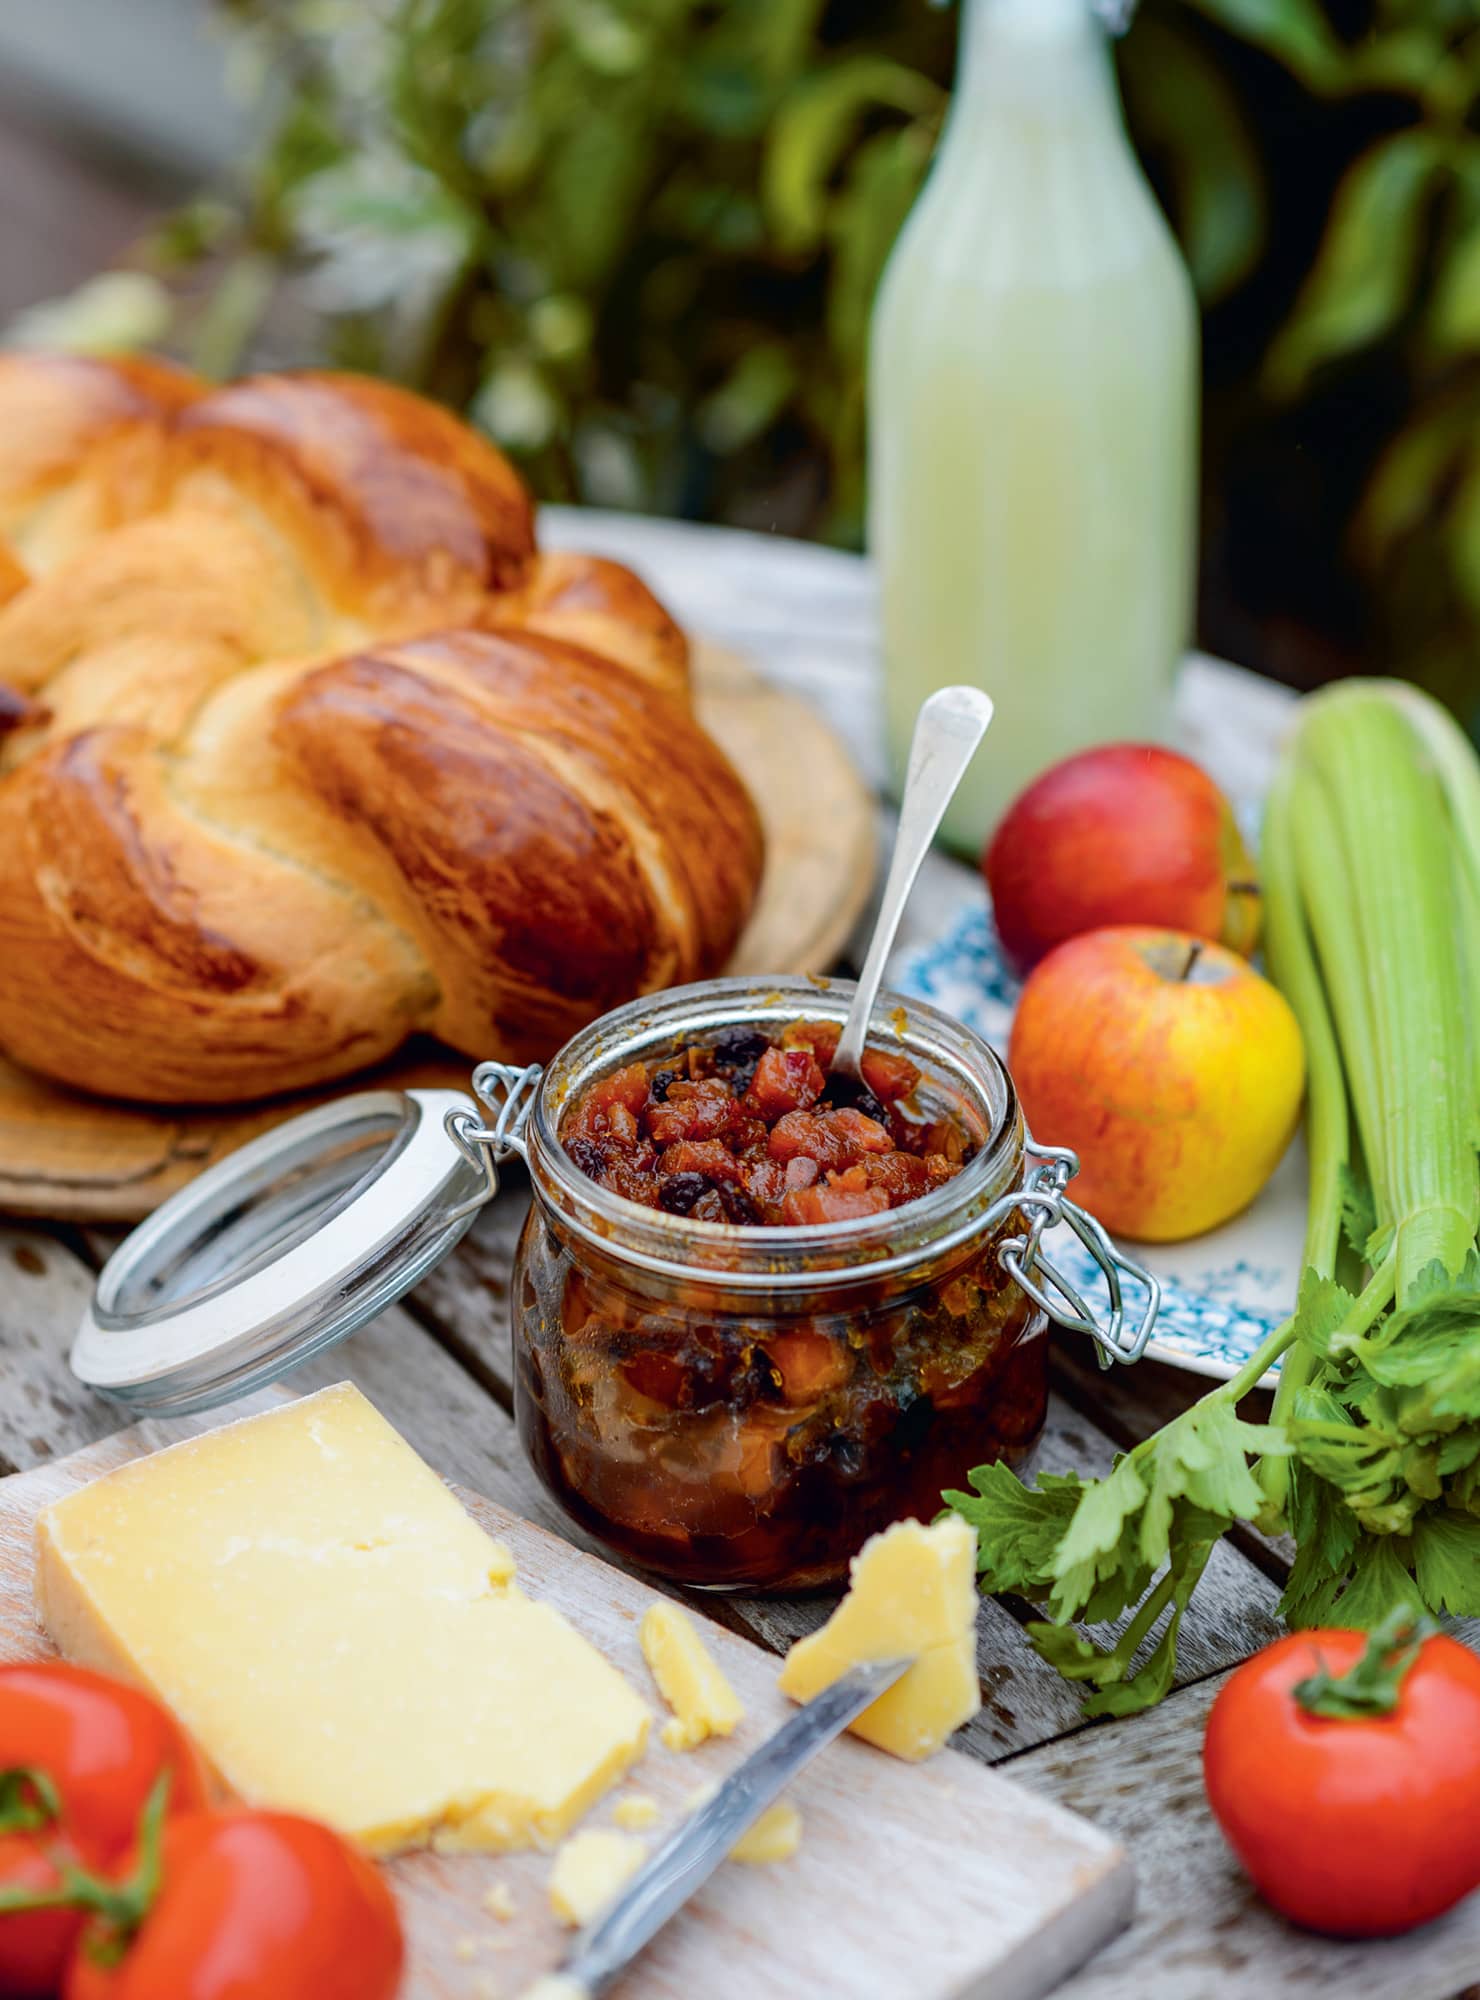
◁ Pumpkin chutney
This is probably the chutney I am most proud of in this book. With its sweet pumpkin (or squash) flesh, and just a hint of heat from flecks of red chilli, it is perfect with a mature cheddar and just about every other kind of sandwich you can think of.
▪ 2kg/4lb 7oz pumpkin/squash, deseeded and cut into large pieces
▪ 200g/7oz onions, finely diced
▪ 1 red chilli, cored, deseeded and finely chopped
▪ 400g/14oz light muscovado sugar
▪ 500ml/171/2fl oz cider vinegar
▪ Preheat the oven to 180°C/350°F/gas mark 4.
▪ Put the pumpkin pieces on a baking tray and cover with foil. Roast for around 30 minutes, until the flesh just yields to the point of a table knife – if for any longer, the pieces will disintegrate too much in the final cooking. Remove from the oven and leave to cool.
▪ Put the onions and oil into a large pan over a low heat and fry them very gently while you prepare the other ingredients.
▪ Chop 1kg/2lb 3oz of the roasted pumpkin flesh into cubes of 1cm/1/2in or smaller. Add these and the remaining ingredients to the onions in the pan and mix together thoroughly.
▪ Simmer gently over a medium–low heat for around 2 hours, or until the contents of the pan can be parted on the base and there is no free liquid.
▪ Pot into warm, sterilized jars and store for 2 weeks before using.