
EATING OUT OF YOUR CUPBOARD
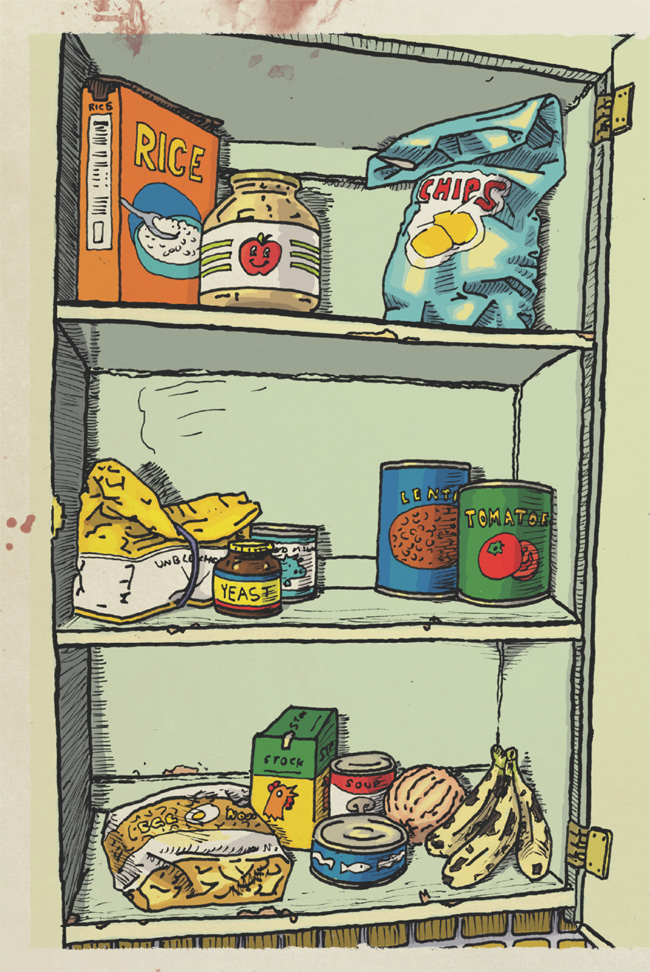
Alas, it’s been days since the initial outbreak started, and those damn zombies are still picking at what’s left of the living hors d’oeuvre platter beyond the four walls of your safe and well-fortified domicile. Plus, the power has been out for a while now—all the fresh food is long gone save for some onion, garlic, and a couple of sad potatoes.
Welcome to carb country. Unless you have a locavore’s personal stash of preserved or canned summer bounty, chances are you’re going to be surviving on a lot of starchy fare until it’s safe to go outside again.
As you will see in the following pages, there is quite a lot that can be done with the common North American pantry staples like flour, dried pastas, rice, canned proteins, beans, vegetables, and fruits. These recipes are simple and easy to prepare (some of them ludicrously so), and focus on very simple ingredients that most people keep kicking around in the cupboard—meaning there is lots of room to add or amend based on your own pantry stash.
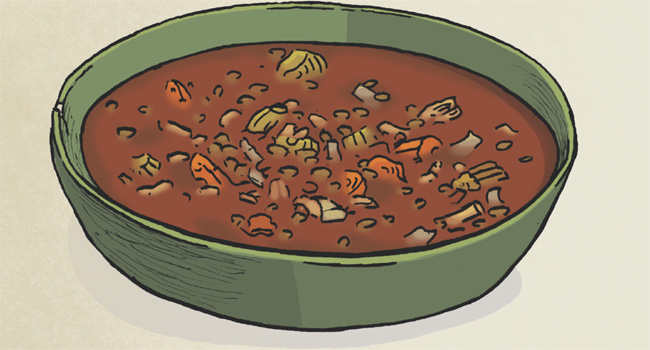
MENTAL FRUIT LENTIL SOUP
In the wise words of the famed and politically charged hip-hop duo Dead Prez, “Lentil soup is mental fruit.” Frankly, if you want to keep the walkers away from your own mental fruit, you better do all that you can to keep yourself well-nourished.
Any bean is a healthy bean, and the lentils in this recipe can easily be replaced with cannellini, navy, pinto, garbanzo, or any other bean. Beans offer up a healthy helping of B vitamins that are crucial for the healthy functioning of the nervous, digestive, and immune systems—some of the key differentiators between us and them. Plus, beans pack plenty of fiber, ’cause the last thing you want is to be backed up when fighting off the undead.
The recipe does call for a few fresh ingredients, but they’re ones that don’t require refrigeration, like onion and garlic. Potatoes could also be thrown in the mix. If you have a piece of Parmesan in your fridge pre-zpoc, hold onto the rind—it can sit out unrefrigerated for an extended period and makes a great addition to this soup. Otherwise, the majority of this soup comes from the cupboard.
YIELDS:
2 Hungry Survivor servings, 4 Regular Joe servings
REQUIRES:
Chef’s or survival knife and cutting board
1 large pot
1 wooden spoon or other cooking utensil
2 large heat-proof mixing bowls
1 colander, spider strainer, or slotted spoon
1 can opener
HEAT SOURCE:
Direct, Rocket Stove (page 77) or other Stovetop Hack (page 42)
TIME:
10 minutes prep
5–10 minutes attended cooking time
15–30 minutes unattended cooking time
INGREDIENTS:
1 c. bite-sized pasta (orecchiette, macaroni, penne, etc.)
1–2 tbsp. olive or other vegetable oil
1 medium onion, minced
2 cloves garlic, minced
½ tsp. dried thyme or oregano
6 c. (or 2 qt.) stock: vegetable, chicken, or beef (bouillon cubes can be used if needed)
1 x 28-oz. can tomatoes (whole, crushed, diced—whatever)
1 bay leaf
2 x 15-oz. cans of lentils (or 1 c. dried lentils, or other bean you have on hand)
Parmesan rind (approx. 1″ piece, optional)
1 x 15-oz. can diced carrots
Red wine or red wine vinegar, to taste
Salt & pepper, to taste
METHOD:
 Set up a Rocket Stove or other Stovetop Hack. Bring 6 cups of water to a boil in a large pot. Add two pinches of salt and cook the pasta about 2–3 minutes less than directed by the package. If using bouillon cubes to make the stock, drain the pasta water into a large heat-proof bowl once the pasta is done, then add the cubes and set aside. Otherwise, save the pasta cooking water for another use. Drizzle the cooked pasta with some olive oil and toss in a large mixing bowl to prevent sticking. Set aside.
 Add oil to the pot and sauté the onions until softened, 2–3 minutes.
 Add the garlic and thyme/oregano and continue to sauté until aromatic, about 30 seconds.
 Add the stock, canned tomatoes, bay leaf, dried lentils, and Parmesan rind (if using).
 Lower the heat by adjusting the amount of fuel in your Rocket Stove or elevating the pot with supports. Let the soup simmer for 30–35 minutes if using dried lentils, then add the canned carrots and heat through. Otherwise, simmer for about 20 minutes, then add the canned lentils and carrots and heat through.
 Remove the bay leaf and Parmesan rind. Add a good glug of red wine or red wine vinegar, taste, and adjust seasoning if needed.
 Serve with a hunk of No-Knead to Panic Bread (page 88) if you have it.
MAKE IT A RIBOLLITA: Ribollita literally means “reboiled” in Italian, but it also refers to a great dish that uses leftover soup and stale bread (if you end up even finding yourself with leftover No-Knead to Panic Bread (see below). Just reheat the soup over medium heat and submerge a good quantity of sliced bread in the soup until it is completely softened. Using a spoon or potato masher if you have one, mash the bread into the soup until it is sufficiently broken up and the Ribollita is nice and thick. Enjoy.
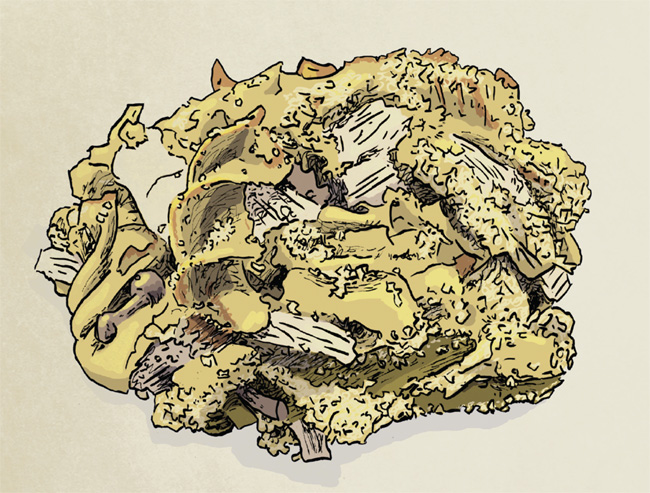
NO-KNEAD TO PANIC BREAD
It’s another day of being completely consumed by the rise of the undead, so why not soothe your troubled soul with the rise of a dead easy and absolutely delicious bread?
Bless Jim Lahey’s hopefully-still-living soul for developing this recipe. You may know Lahey, owner of New York’s Sullivan Street Bakery, for the no-knead bread revolution he kicked off via food journalist and author Mark Bittman in the early aughts—it took the home-cooking scene by storm and spread almost as quickly as an undead plague. His approach makes use of a long rising time and a very wet dough where gluten molecules are mobile and free to align themselves naturally (rather than relying on kneading). Translation: it takes a while, but requires no bread-making skill or specialized knowledge and virtually zero work.
The versatility of bread goes without saying. It makes a mean companion to Mental Fruit Lentil Soup (page 86), but can be schmeared, topped, dipped, or sandwichized in any number of ways—raid your cupboard and experiment.
This recipe is adapted from “No-Knead Bread” in Jim Lahey’s My Bread: The Revolutionary No-Work, No-Knead Method, an excellent book to have on hand for a variety of zpoc-friendly no-knead breads.
YIELDS:
1 x 1½-lb. loaf, or enough for 2–3 Hungry Survivors
REQUIRES:
1 small bowl
1 large mixing bowl
1 mixing spoon
Plastic wrap
2 clean cotton kitchen towels or other clean breathable cloths
1 large, heavy pot or other oven-proof vessel, with lid
HEAT SOURCE:
Indirect, Ammo Can Oven or other Oven Hack (page 44)
TIME:
5 minutes prep
14–20 hours mostly unattended rising time
45 minutes baking time
30 minutes cooling time
INGREDIENTS:
¼ tsp. active dry yeast
1¾ c. plus 2 tbsp. warm water
Pinch of sugar
3 c. all-purpose or bread flour, more for dusting
1¼ tsp. salt
METHOD:
Proof the yeast by mixing it with 2 tablespoons of warm water (not hot!) and a pinch of sugar in a small bowl—it is ready to use when the top is foamy, about 5 minutes.
Mix together the dry ingredients in a large mixing bowl until blended. Add water and any wet flavorings (like honey) and mix until well combined. Your dough will be wet and sticky.
Cover the bowl with plastic wrap if available (you can write the time down on the plastic with a marker), and one of the kitchen towels and pop it in a now nearly useless microwave or other dark spot to rest at least 12 hours, preferably 18 hours. The dough is ready for the next stage when the surface is bubbly.
Lightly sprinkle a work surface with flour and fold your dough out onto it. If using any add-ins (see Variations), sprinkle them on top of the dough now. Sprinkle the dough with a small amount of flour, then fold it over on itself two times. Loosely cover with plastic wrap and let it sit for 15 minutes.
Cover a kitchen towel with a generous amount of flour. Dust your hands with flour, and sprinkle just enough flour on the dough to prevent it from sticking to you, then shape it quickly into a ball. An imperfect zombies-are-breaking-down-my- defenses ball is just fine.
Place your ball seam side down onto the prepared cloth and generously dust the top with more flour. Cover the ball with a second towel and let rest for 2 hours.
Half an hour before the 2-hour mark of the second rise, set up your Ammo Can Oven for 450°F (see Judging Temperature, page 47), then place the oven-proof dish with the lid inside to preheat.
 After the two-hour rise is complete, carefully remove the hot pot or other vessel from the Ammo Can Oven and, after removing the lid, plop your ball of dough into it, seam side up.
 Bake, with the lid on, for 30 minutes. Remove the lid carefully, then bake another 15–30 minutes until nicely browned. Let cool for about 30 minutes before eating.
VARIATIONS:
 2 tbsp. honey (added at beginning with water), 1 tbsp. of fennel seeds, ½ c. of raisins, and cornmeal for dusting
1 small potato (peeled, diced, sautéed until browned), ½ small onion (minced and sautéed until soft), and ½ tsp. dried dill
½ c. olives, preferably jarred but canned work too
1 medium apple (peeled and diced), 1 tsp. cinnamon combined with 1 tbsp. sugar
When the Yeast Runs Dry
Even if you typically keep yeast on hand, when the zombie apocalypse comes you will eventually run out. Good thing you can harness the power of naturally occurring yeasts by making your own spontaneous wild yeast, or levain.
The yeasts you are looking to harness live on the grain itself and are still present even when the grain is milled into flour. What kind of yeasts are present and how long it will take to cultivate the community to maturity for bread making will vary from batch to batch, cup of flour to cup of flour, place to place. The times given here are guidelines; more important than following the time lines listed, keep an eye out for the visual cues.
Whole wheat and unbleached flours are best for making a levain because they are less processed and therefore have a higher yeast content. For optimal levain growth, the ambient temperature should be no higher than 80°F. Cooler temperatures are OK, but the process will be slower than outlined.
To be sure, bread making with spontaneous yeasts or “levains” is an entire art and science unto itself, but this quick-and-dirty guide to wild levain should have you ready to bake some (No-Knead to Panic Bread, page 88) within the first week of the outbreak.
To start, mix equal parts of flour and water in a glass bowl or jar. Two tablespoons of each is a good amount to start with, though the amounts suggested here can be easily scaled up as long as the same starter to flour to water ratio is maintained. Cover and set aside for 24 hours. On each of the following two days, add the same amount of flour and water. Mix until combined, cover, and set aside.
On the 4th day, transfer ¼ cup of the starter to a new clean glass container and use the remainder in pancakes or another baking application. Add ¼ cup flour and 2 tablespoons water to the fresh container, mix well, then cover. You might start to notice a stink coming from the starter—this is a normal phase your levain might go through as the microbial community evolves. You should also start to see a visible rising then falling of the starter as the critters consume the flour—you’ll see evidence of this on the sides of the container.
Repeat this process again on the 5th day, transferring ¼ cup of starter to a new container and feeding it with ¼ cup flour and 2 tablespoons water. If you start to see a thin layer of liquid on top of your starter when feeding, it means the yeasts are consuming their food quickly and need an increased amount of flour. Start by feeding the starter twice daily. Additionally, increase the proportion of food by cutting the amount of starter in half: When feeding transfer  cup of starter to a fresh container, then add ¼ cup flour and 2 tablespoons water.
By the 6th day or so, the smell should have dissipated. Continue feeding regularly, and when the mixture emits a pleasant yeasty aroma and the flour is consumed (that is, the rise and fall happens) within a matter of hours of feeding, your levain is ready for baking.
To use your levain in bread making, substitute 20% of the flour called for in the recipe (by weight) with the starter. So for example, if the recipe calls for 2 cups (250 g) of unsifted all-purpose flour, you would use ¼ cup (50 g) of levain and 1¾ cups (200 g) of flour. Adjust for next time if you notice your levain is markedly stronger or weaker than needed after making bread.
To maintain the starter, you can now switch to a 1:2:2 ratio of starter to flour to water— cup of starter, ½ cup of flour, and 4 tablespoons of water. Feed twice daily (every 12 hours) using the same process as above. You may notice your starter needs more food than the 1:2:2 ratio provides. Increase the amount of flour and water incrementally by one part at a time until you find the right proportions.
RECOMMENDED READING: For more on baking with levain or natural starters, check out Flour Water Salt Yeast: The Fundamentals of Artisan Bread and Pizza by Ken Forkish.
I WANT MY MOMMY CASSEROLE
This is a zpoc spin on an already nearly completely shelf-stable meal, one that is classic American comfort food spanning decades and generations. It is what some might call “junky,” but in the event of a zombie apocalypse, a hot pile of creamy, salty, fatty goodness topped with crunchy potato chips is A-OK in my book. Go ahead and make it as junky as possible, knowing full well that this meal could potentially be your last. You only live once, right? Oh, wait.
This is also a recipe that is primo for substitutions: No egg noodle? No problem. Use macaroni or rice. No potato chips? Use crackers or Goldfish or even Bugging-In Breadcrumbs (page 94). No tuna? Use canned chicken. No peas? How about green beans, potatoes, or asparagus? And virtually any other creamed soup will work in place of mushroom—except for say, maybe, cream of shrimp (yeah, that’s a thing).
This recipe is safe–house friendly and can easily be adapted to use freeze-dried vegetables and shredded cheese, (Believe it or not, freeze-dried shredded cheese isn’t totally gross—read on to Cooking in the Well-Stocked Safe House, page 203, for more!)
YIELDS:
2–3 Hungry Survivor servings, 4 Regular Joe servings
REQUIRES:
Chef’s or survival knife and cutting board
1 large pot
1 small sauté pan
1 wooden spoon
1 colander
1 large mixing bowl
1 can opener
1 fork or multi-tool
1 small bowl
1 Dutch oven or another baking vessel (at least 7″ x 11″)
HEAT SOURCE:
Direct, open flame or other Stovetop Hack (page 42), and indirect, Dutch Oven or other Oven Hack (page 44)
TIME:
10 minutes prep
30 minutes baking time
INGREDIENTS:
1 small onion, minced
1 x 12-oz. package egg noodles
2 cans tuna, preferably chunk in oil
½ can peas
2 x 14-oz. cans cream of mushroom soup (In this case, Campbell’s really is the best)
1 c. breadcrumbs, preferably panko or crushed natural potato chips
¼ tsp. garlic powder
½ tsp. ground cumin
½ tsp. cayenne pepper
Salt & pepper, to taste
OPTIONAL ADD-INS:
½ c. dried mushrooms, reconstituted
2 tbsp. dry sherry
METHOD:
Preheat the Dutch Oven or other Oven Hack for 400°F baking (see Judging Temperature, page 47) in addition to building a small fire or other Stovetop Hack to boil water. Put a large pot of potable water on to boil. In the meantime, in a small pan sauté the minced onion over medium-high heat until soft and browned.
Once the water has come to a rolling boil, cook the egg noodles for half the recommended time on the package. If using dried mushrooms, remove some cooking water from the pot to reconstitute them. Drain, then add the noodles to a large mixing bowl, set aside for now.
Drain the tuna if it’s packed in water; otherwise, drain the oil off onto the breadcrumbs, then break the tuna up lightly with a fork or multi-tool and add it to the noodles. Add the peas, sautéed onion, mushroom soup, reconstituted dried mushrooms (if using), and dry sherry (if using) to the mixing bowl and toss well. Taste and season with salt (if needed) and pepper. Set aside.
In a small bowl, add the breadcrumbs, reserved tuna oil (or the equivalent of another oil, like olive oil), garlic powder, cumin, cayenne, and salt and pepper (to taste). Mix until the breadcrumbs are evenly coated.
Carefully remove the lid of the preheated Dutch oven and add a light layer of oil using a paper towel or another clean cloth. Transfer the mixed noodles to the Dutch oven or, if using another Oven Hack, to a lightly greased baking dish. Sprinkle the breadcrumb mixture evenly over the noodles.
Bake covered for about 25 minutes, until hot and bubbling.
Let cool for about 5 minutes before eating. Take a deep breath and allow nostalgic memories of your mom (before she tried to tuck into your abdomen) perk you up while tucking in yourself.
EGG NOODLE SUBSTITUTION: You can also use 16 ounces of macaroni or other small pasta or 1½ cups cooked rice plus additional ½ cup of liquid in place of egg noodles.
Like a Fine Wine
According to one of the world’s foremost food scientists Harold McGee (in the article “On Cans,” appearing in Issue 6: Winter 2013 of Lucky Peach magazine), the best-before dates on canned food are often more like just-getting-interesting dates.
Food technicians who develop and test canned foods define shelf life not by how long it takes for the food to become inedible but by how long it takes a trained sensory panel to detect a “just noticeable difference” between a newly manufactured and a stored can. That means many canned foods will be edible long after their expiration dates with only minor effects on texture and flavor.
Some foods actually become better with years of aging: Sardines and tuna become wonderfully tender and rich; canned natural cheddar cheese (there are artificial and processed versions) becomes deeper in color and flavor and gets that slight crunch characteristic of aged hard cheeses; marmalades darken and intensify; even Spam becomes softer and crisps up better when fried. The higher the quality of the canned good, the better it will age, so splurge on your “cellar” cans.
You can experiment with aging different kinds of foods without having to wait for the zombie apocalypse to see the results—simply increase the storage temperature. According to Harold, every 20°F increase in temperature doubles the aging process. So a 20°F increase in temperature will give you the effects of 1 year of aging time in 6 months, a 40°F increase will give you the effects in 3 months, and so on. You can also gently simmer cans of food at low temperatures to change their flavors and textures. Gently braising a can of tuna in oil gives it a beefier flavor, while braising Spam gives it a softer texture.
PASTA AGLIO E OH NO!
Pasta aglio e olio (pasta with garlic and oil) is, in these pre-zpocalyptic times, a popular snack among Italian bachelors after a night out on the town because of its simplicity and whip-up-ability. It works equally well as a surprisingly tasty dinner after a long day of fighting for survival. Yes, there are lots of ways you can spice this dish up or make it more hearty, but at its core the recipe is 3 ingredients: spaghetti (or any pasta), olive oil, and garlic—ingredients that most survivors will have on hand. The recipe below includes chili flakes for a kick and breadcrumbs (also known as poor man’s cheese) for texture.
YIELDS:
2–3 Hungry Survivor servings, 4 Regular Joe servings
REQUIRES:
Chef’s or survival knife and cutting board
1 large sauté pan or shallow pot
1 large pot
1 wooden spoon
1 colander
1 mug or container for pasta cooking water
1 pair of tongs
HEAT SOURCE:
Direct, Rocket Stove (page 77) or other Stovetop Hack (page 42)
TIME:
5 minutes prep
15 minutes cooking time
INGREDIENTS:
½ c. olive oil
8 garlic cloves: 6 sliced finely and 2 minced, separated
½–1 tsp. chili flakes
1 lb. package of spaghetti (or any other pasta on hand)
½ c. toasted breadcrumbs, preferably panko or make your own (see Bugging-In Breadcrumbs, opposite)
METHOD:
Set up a Rocket Stove or other Stovetop Hack.
Heat a large sauté pan with olive oil over medium-low heat for 1–2 minutes, then add the sliced garlic and chili flakes. Gently cook until the garlic is nice and translucent, about 5 minutes—be careful not to brown the garlic (a little color is OK)—you can manage heat here with a pot support (see Heat Control & Pot Supports, page 44) or by moving the pan on and off the heat. When soft, remove the pan from the heat and set aside.
Bring water to a boil in a large pot. When the water is boiling, add salt to your liking (a hearty 3 pinches or so should do). Add the pasta and cook about 1 minute less than directed on the package. When the pasta is done, drain the water, being sure to reserve and set aside about 1 cup.
Add the cooked pasta to the pan with the oil, cooked garlic, and chili flakes. Add the reserved minced garlic. Toss with tongs until thoroughly coated. Add pasta water in quarter cup increments, tasting and adding salt and more oil (if needed) as you go until you get a consistency and flavor you are happy with. Heat through until pasta is cooked al dente or to your preference.
Serve immediately, sprinkled with toasted breadcrumbs.


If after a few days of battling with the walkers you find yourself with some stale bread—hamburger/hot dog buns, toast bread, dinner rolls, or leftover No-Knead to Panic Bread (page 88)—the easiest and best way to avoid wasting it is by making some breadcrumbs! If the bread is in a plastic bag, remove it and lay it out on a baking tray covered with a clean dish towel. Let the bread dry out completely, then transfer to a resealable food bag and use a weight (a can of food works well) to gently crush it into crumbs.
To brown, drizzle the breadcrumbs with olive oil and sprinkle with salt and pepper, then mix to incorporate evenly. Sauté over a low flame or with another Stovetop Hack (page 42), stirring constantly until they are slightly browned. Let cool and put them back into the resealable bag. Use as a topping for Pasta Aglio e Oh No! and in Boy Scout Meatloaf (page 76).
NICE RICE PUDDING
This is another no-fuss-no-muss comfort food that is a snap to throw together while also snapping zombie necks. Flavor profiles and add-ins can be easily changed based on whatever you find hiding at the back of your cupboard—I have included here a classic rendition.
YIELDS:
2–3 Hungry Survivor servings, 4 Regular Joe servings
REQUIRES:
1 can opener
1 large mixing bowl
1 whisk
1 rectangular metal baking dish (at least 9″ x 13″), lightly greased
Foil to cover baking dish
HEAT SOURCE:
Indirect, Hibachi Grill or other Oven Hack (page 44)
TIME:
5 minutes prep
1 hour baking time, mostly unattended
INGREDIENTS:
1 c. condensed milk, reserving the rest of the can for drizzling
2 x 12-oz. cans evaporated milk or coconut milk
1 tsp. vanilla
2 small cinnamon sticks or 1 tsp. ground cinnamon
½ tsp. ground nutmeg
Pinch of salt
 c. uncooked white rice
OPTIONAL ADD-INS:
½ c. raisins, dried cherries, or dried cranberries
½ c. toasted grated or flaked coconut, for garnish
½ c. roughly chopped toasted nuts, for garnish
METHOD:
Set up the Hibachi Grill or other Oven Hack for 300°F baking (see Judging Temperature, page 47).
Whisk together the condensed milk, evaporated milk, vanilla, spices, and salt in a large mixing bowl.
Add the rice to a lightly greased baking pan. Sprinkle with dried fruit, if using.
Add the liquid mixture, stir, and cover the pan with foil.
Bake for 30 minutes, then remove the foil and stir. Replace the foil cover and bake for another 30 minutes, replenishing fuel as needed.
Remove the foil and stir again, checking for doneness. The pudding is done when the rice is plump and tender—it should still be fairly fluid because it will thicken considerably while cooling. If not done by this point, bake an additional 10-minute increments until ready.
Let cool and thicken for another 30 minutes. Before serving, drizzle with condensed milk and sprinkle on toasted coconut or nuts, if using.
Sit back and sigh with contentment at still being alive. Enjoy.