Negative and positive space is given equal importance in this thread-wrapped wire piece. Twelve open squares are divided into quarters and assembled diagonally in pairs joined at the points. Fine taught threads were stitched in pairs from sides to centre.
‘You cannot begin with the result…’
Paul Klee (Swiss-German artist, 1879–1940)
A myriad of patterns can be generated digitally on the computer, and many people enjoy working this way, before translating their computer printouts in terms of stitched textiles. Designs can be very rapidly produced, altered in scale, colour and emphasis at the tap of a key and click of the mouse, resulting in amazingly complex, beautiful and sophisticated designs. Whilst I admire some of these attractive results and the people who produce them, computer work remains a mystery to me – one I am not eager to solve. Moreover, I believe that knowing which keys to press does not necessarily promote an understanding of pattern and how patterns can be made.
The computer certainly has its place in modern design methods, but the benefits of working hands-on with your materials should not be overlooked. Touching, feeling, manipulating and sensing materials as you handle them gives you a greater sense of the possibilities and potentials than working on-screen. Handling and using simple design materials, such as pencils, pens, templates, stencils, colouring media, glue etc., and then moving to first experiments with fabrics and threads, promotes thinking and the development of ideas. Although this is slow and laborious compared to working with a computer, with tools in my hands I can see what I am doing, remain in control while making decisions and gradually make any adjustments I feel are needed, at all stages.
All my work shown in this book was made in his way, so raw, very simple design beginnings are completely transformed by the choice of fabrics, threads and methods of stitching. The process of developing work is a gradual one, subject to changes made along the way, which is why the quotation by Paul Klee (see here) seems so apt.
A flexible open surface is created on the sewing machine in a simple grid pattern. The opaque paper squares were trapped between two layers of fine soluble film, then caught in place with rows of machine stitching. Careful washing out of the soluble film in a sieve is required, but I like the manner in which the paper becomes slightly crumpled and distressed in this process.
Being open to change is also important in pattern-making. Whether you start on a computer or with paper and pencil, be prepared to think outside the box, to change the focus of your design or even to abandon your first ideas and start again. When you are on a computer, it is easy to become locked into a design because you have already put a lot of work into it. This is another reason why I prefer the slow, hands-on approach.
The following examples have all been made using very low-tech methods, such as tracing and the use of templates and simple blocks.
Grids can be the starting point for many patterns, and lots of fun can be had creating different designs using some graph or squared paper and a felt-tip pen. In the examples below, the first set of patterns (A) are divided with vertical and horizontal lines, showing some of the simple designs you can make in this way. The second set of patterns have all been divided diagonally (B). Which do you prefer and why?
Once you have identified a few designs that you like, you can think about combining them, or linking them in some way. What if you turn one element by 45 degrees? The drawings shown opposite should give you some ideas and you can also look at Arabic tiling and patchwork designs for further inspiration.

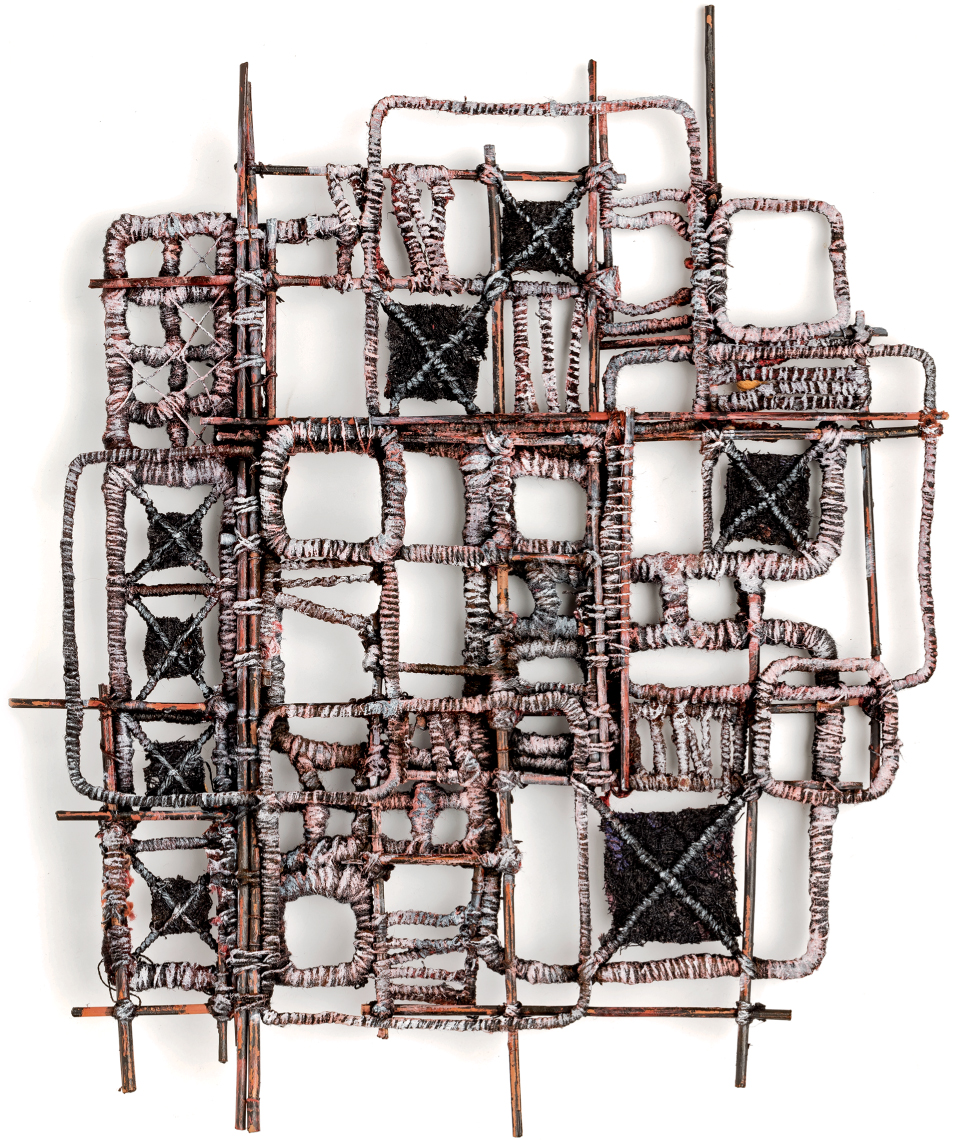
This deep multi-layered piece was assembled from several different sized grids and open squares made from thread-wrapped wires and fine sticks. Crossing threads and solid machine-embroidered squares decorate the spaces. The piece was finished with paint highlighting the threads.
A number of very different grid patterns were tried out on this experimental sample. The vivid silk background was printed with metallic fabric paint, upon which delicate hand stitching, applied leathers and fine sticks were added. Changes of scale are very important in this work, showing how richness and variation can be achieved from very simple stitches. The common repeating factor is cross stitch and double cross stitch.
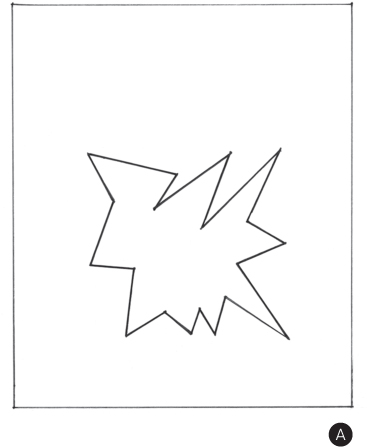
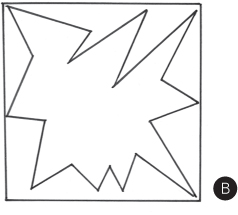
When designing, it all too easy to be so focused on the main shape being used that its surroundings are forgotten. But when a design element, (the positive shape) is placed within a frame or a repeating block shape, the placement is critical. If the element is placed bearing no relationship to the outside frame (A), it can appear unsupported and disconnected. In contrast, a much more dynamic effect is produced when the element connects or relates to the outside frame, drawing attention to the interesting and vital negative part of the design (B). In a repeating pattern, the negative shapes also connect, are integrated into the design and provide additional interest.
In almost all cases, the positive and negative parts of a design, though possibly unequal in size, are equally important to the overall effect.

An artist renowned for his clever use of positive and negative shapes was Dutch mathematician M.C. Escher (1898–1972). His tessellations are fascinating, and some of them include changes of scale.
Symmetry, with its order and regularity, is widely appealing to many people and, having many possible variations, it can be quite a complex concept. However, put simply, it can be expressed as using reflection or rotation. Compare it to repetition, where a pattern is simply repeated, as shown below.

When the motif is reflected (C), we have symmetry. Rotational symmetry is another example in this category (D).
Symmetry in design cannot be considered without paying some attention to asymmetry. Asymmetrical designs are less predictable than symmetrical ones and can sometimes be more interesting. Examples may be seen in some of the random repeating rhythms seen in natural patterns in Chapter 1 and here (C).

Most people respond strongly to the rhythm of repeating patterns. When some of the natural patterns discussed in Chapter 1 are stylized and enclosed within an outside shape, they can be repeated in a regular manner. There are many choices to be made in the placement of a design and the way it is moved, making it possible to produce different repeating patterns.

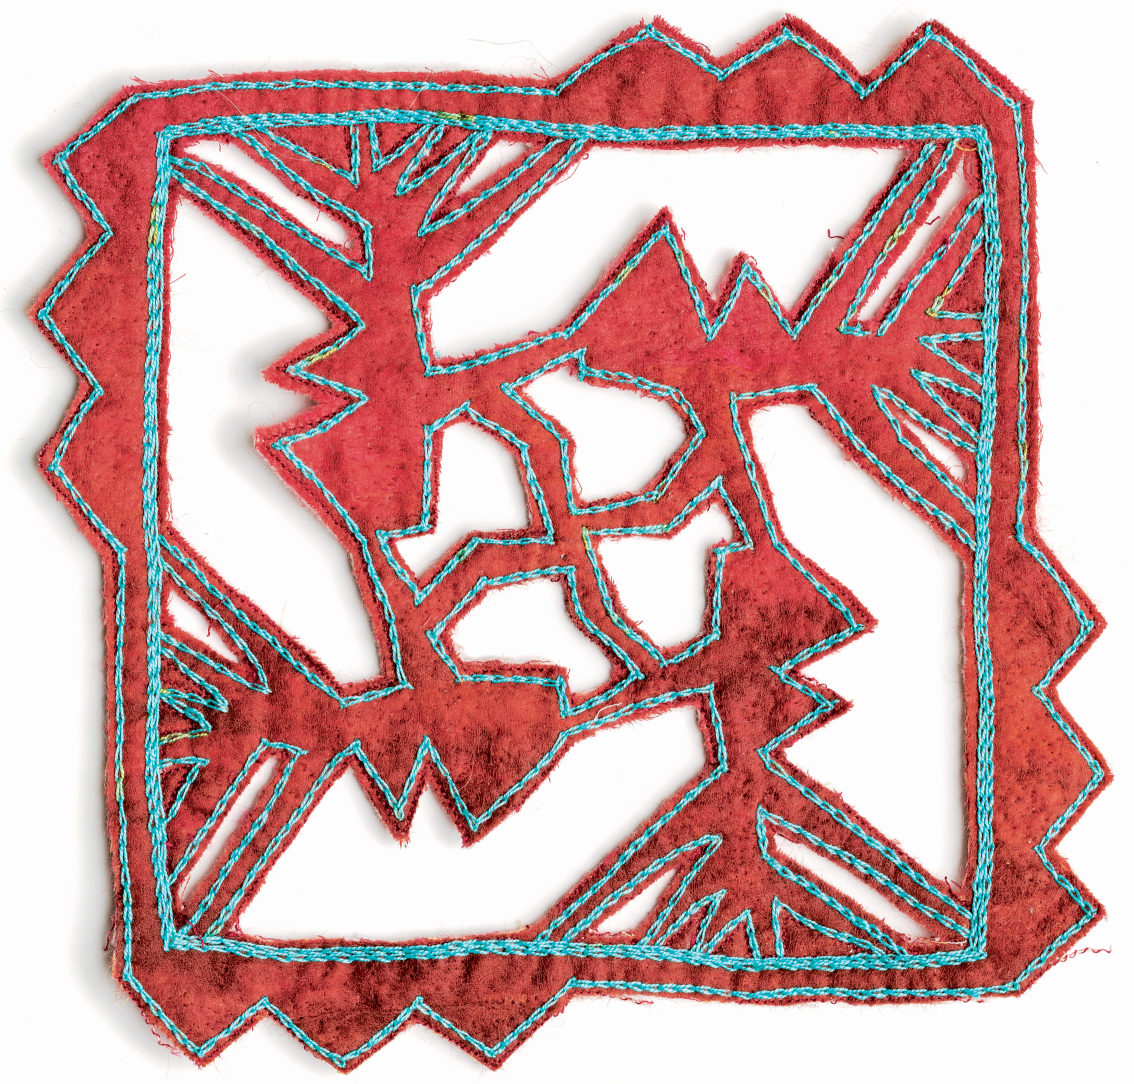
Sample showing an interpretation of a rotational symmetrical pattern in which just one complete repeat is used. For the sake of completing this small sample, groups of three points were added to the outside edge. A needle-felted fabric was marked with the pattern, then hand stitched with chain stitch to outline the shapes. All the negative shapes were cut away, making an open design. There are many possible variations, including repeating the design over a large area to create a bold lace-like work, and/or making similar work on the sewing machine.
FURTHER WORK
• Make a template of a pattern element set within a square and try making repeating patterns using the placements shown above. Then use the same template to produce randomly repeating, perhaps overlapping patterns. Try stitching some of these patterns.
Mathematically there are 17 possible different arrangements of planar patterns – patterns which are two-dimensional. The simplest option is just to repeat your basic design or block vertically and horizontally in neat rows and columns, as shown below left (A). If you take that pattern and shift alternate columns vertically by half a repeat, you get the effect shown in B. Depending on the nature of the motif, the result can look much more complicated than expected. Other simple arrangements include brick patterns (C), and symmetrical ones (D).

A series of simple repeating patterns created by different placement of one block or template. Repeating in even horizontal and vertical rows (A). Half drop placing (B). Brick pattern placing (C). Mirror-image placing (reversing) both horizontally and vertically (D).
The repeats provide a great starting point for further exploration – the lines and shapes can be joined, extended and altered exponentially to create a multitude of interesting patterns for stitch.
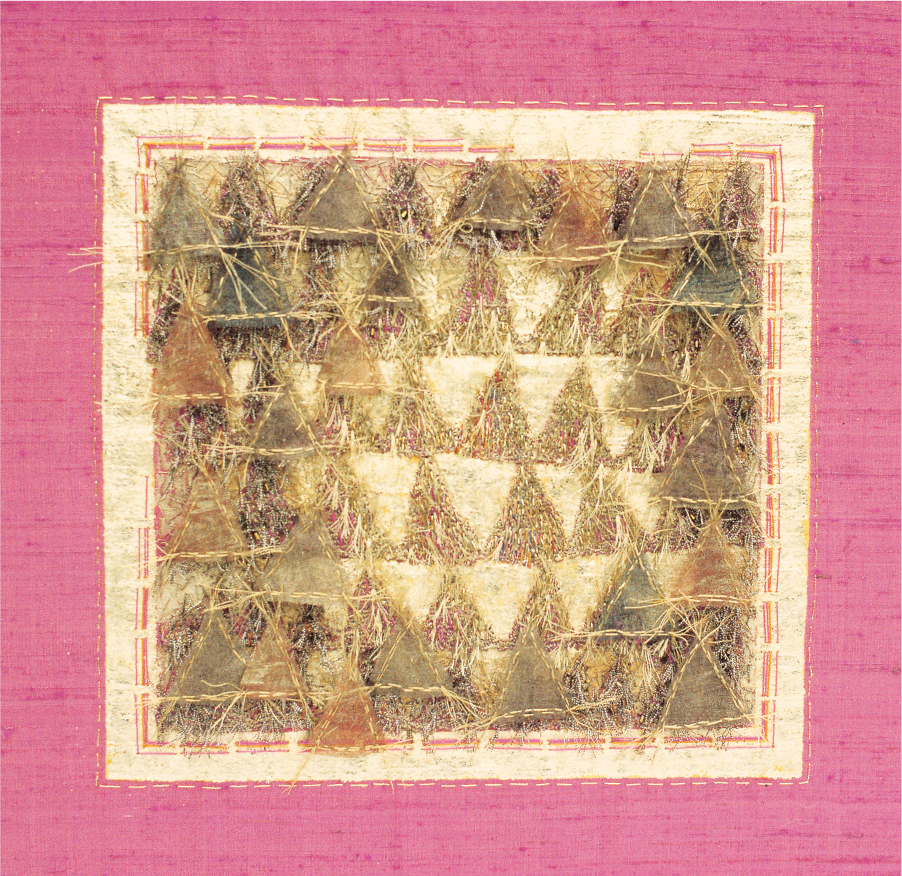
To give you an idea of how your pattern-making might progress, included here are drawings, experimental samples, design sheets and resolved work on the theme of triangles. My starting point was a sea shell, the aptly named Conus textile (textile cone) which is actually the shell of a venomous and deadly sea snail. The intriguing two-colour pattern on its shell has much in common with some African and Polynesian textile designs. For me, it was the combination of triangles and lines that was particularly interesting.
I hope that the following examples of my working process will help you see just how many ideas can be derived from a simple beginning. They also show the value of exploring a single subject in depth.

The Two experimental samples using bright coloured cotton fabrics to construct some of the basic appliqué methods shown on pages here). All show appliqué samples simply trying out variations of spacing and scale.
Based on the shell patterns on here, this series of stitch samples was produced to explore patterns using triangles and connecting lines. In keeping with most of my sampling and development of work, I do not have preconceived results in mind, but allow one idea to lead to another. This method can also be seen in the linear stitch samples on here. Here closed buttonhole stitch (in which the ‘legs’ of the stitch converge at one point thus making a triangle), was used in various sizes and densities. Fillings of close French knots and fine couched lines were also used.
The next stage of development was a very large series of line diagrams in which, again, one idea led to the next. Beginning with the simplest of configurations, the drawings gradually gain in complexity as different borders were tried out. Finally, in contrast to the enclosed designs, a series of drawings was made exploring possibilities with freer, sculptural structures.
FURTHER WORK
• Draw an enlarged detail from a natural object.
• Simplify the elements you observe.
• Develop a series of samples and resolved work based on your observations.