The sense of calm, focus, and balance that draws adults to the practice of yoga is also available to children, even ones as young as 3, as long as you introduce them to it in a playful, child-friendly fashion. When guided with a developmentally appropriate approach, preschoolers and the primary school set alike can reap yoga’s numerous benefits, such as improved concentration skills, an ability to calm and center themselves, and greater self-esteem and self-confidence. The following sections give you some tips on engaging your child in yoga, as well as several poses to try.
Finding yoga postures kids love
The postures in the following sections were designed to be kid-friendly, and the accompanying text is intended to be parent-friendly to help you guide your child. You can find more detail about each of the postures in the chapters in Book II.
When done in sequence, this set of postures forms a well-balanced routine. In addition to providing you with instructions to give your child as he gets into the posture, the sections suggest sounds he can make while in the pose. The sounds serve a dual purpose: They inspire your child’s imagination while he’s holding the pose (keeping him engaged) and also guide him to breathe rather than hold his breath. But if your child is reluctant to make the animal sounds, don’t try to force it.
 Children need to skip the headstand and shoulder stand. Although their bodies are flexible, they lack the strength and stability to do those postures safely.
Note:
In these sections, you see references to yummy poses. The term yummy pose is just a kid-friendly description of a resting pose, in which you allow your body and mind to release. Afi Kobari, a specialist in yoga for children, coined the phrase.
 Children have short attention spans. You know your child best, so do only as many postures as he has attention for. In time, he’ll be able to do more. Also, ask your child to hold the position only as long as you feel she will be comfortable. If she starts to get squirmy, have her come out of the position.
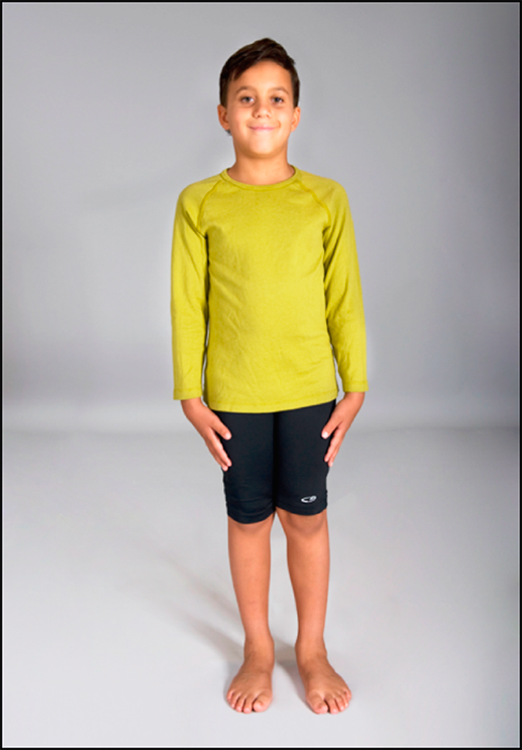
The mountain posture
Figure 2-1 gives you and your child a visual of this kiddie posture; flip to Book II, Chapter 3 for more info on the adult version. Give your child the following instructions:
- Stand tall like a mountain.
- Breathe through your nose, and imagine you’re in a very, very quiet place.
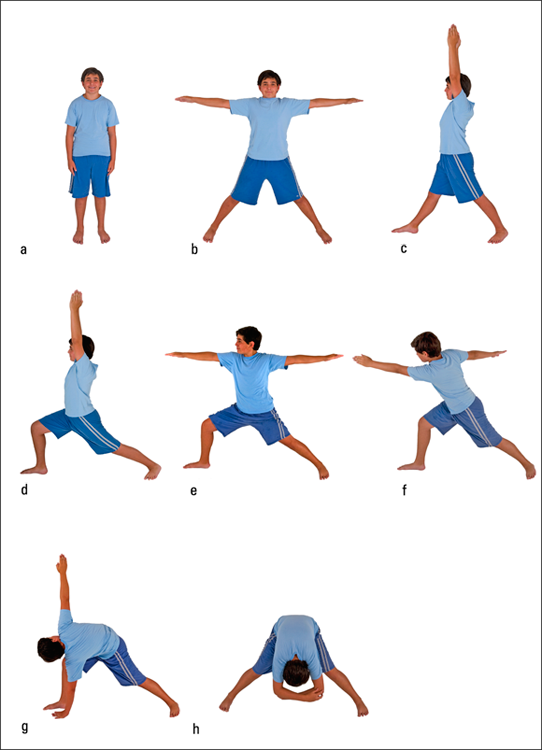
Warrior I
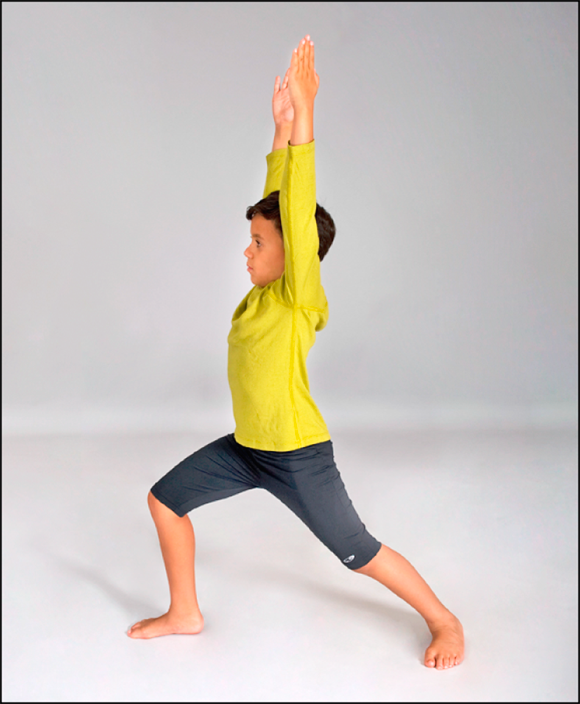
 See the preceding section for instructions to get your child into mountain posture. Figure 2-2 and Book II, Chapter 3 give you more guidance on warrior I. You can also find general information about preparing for and moving into the warrior pose in at
 www.dummies.com/go/yogaaiofd.
-
Start in the mountain posture, and take a big step forward with one leg.
 If your child’s knee bends so much that you see it extending farther than the ankle, tell him to bend the knee a little bit less.
- Bend your front knee and raise your arms overhead by your ears.
- Feel how powerful and strong you are in this posture; next time, as you bend your knee and raise your arms, say, “Yes! I can!”
- Keeping your knee bent and your arms raised, stay in this position and really feel like a warrior.
- Try the same movements on the other side.
Bear posture
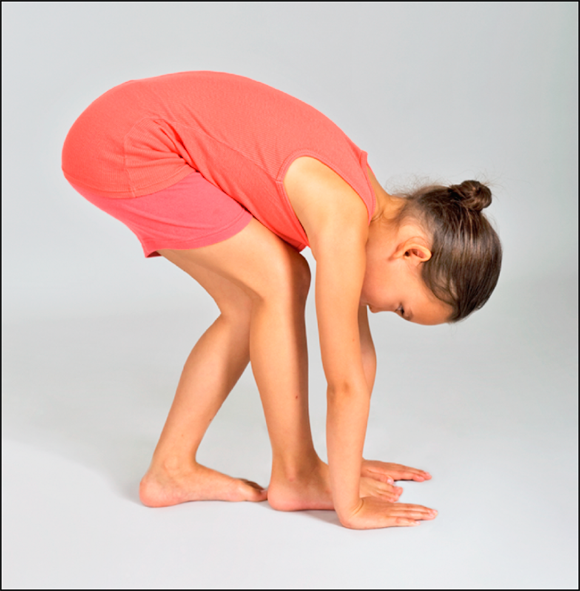
Check out Figure 2-3 and the following instructions to direct your child into bear posture.
- Start in the mountain posture, and then bend forward and hang down.
- Staying bent, walk around, dragging your arms and hands as you growl and imagine you’re a bear.
Cat and cow
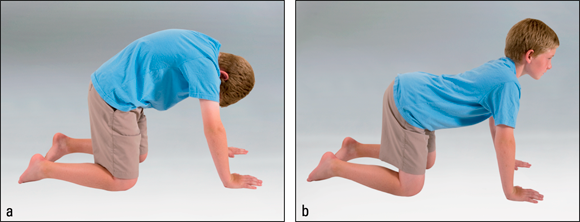
The following directions help you walk your child through cat and cow; kids usually have a lot fun with this sequence, especially when you do it with them.
- Get down on your hands and knees as if you’re going to crawl, but stay in one place.
- Make your back round so you can look down and back at your legs (see Figure 2-4a).
- Imagine you’re a cat, and make the sound of a cat: meow.
-
Move your back so that your belly goes down toward the floor, your chest goes up, and you look ahead.
Show your child Figure 2-4b for help in visualizing this step.
- Imagine you’re a cow, and make the sound of a cow: mooo, mooo.
Jumping frog
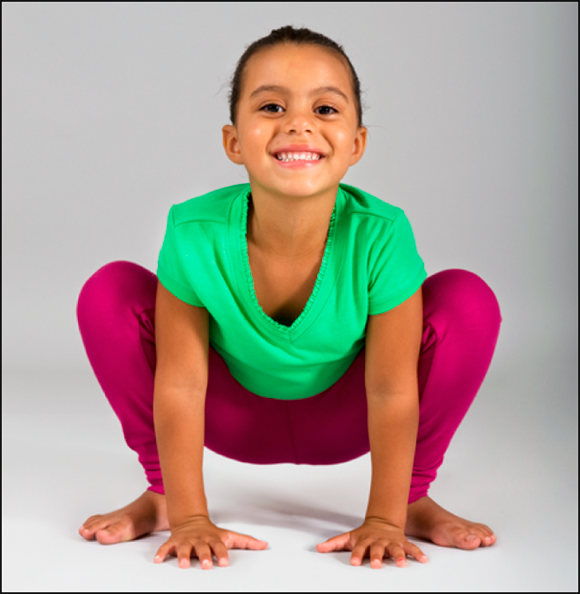
Use these instructions to lead your tot through jumping frog.
- Stand with your feet wide apart, and squat low (see Figure 2-5).
- Place your hands on the ground, and then jump and raise your arms.
- Imagine you’re a frog, and make the sound of a frog: ribbit, ribbit.
Tree posture
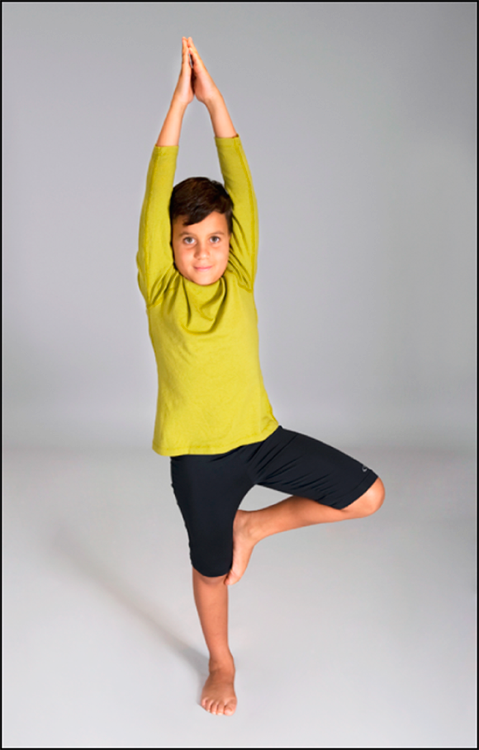
Work your child through tree posture by using the following instructions, and check out Figure 2-6 for an illustration. Flip to Book II, Chapter 3 for more information on the adult version.
- Start in the mountain posture, standing tall and still.
- Bend one of your legs, and place the bottom of that foot high on the inside of your other thigh.
- Bring your hands together high above your head, and imagine that you’re a tree as you make the sound of the wind blowing through your leaves: shhhhhhhh.
- Now try the same movements on the other side.
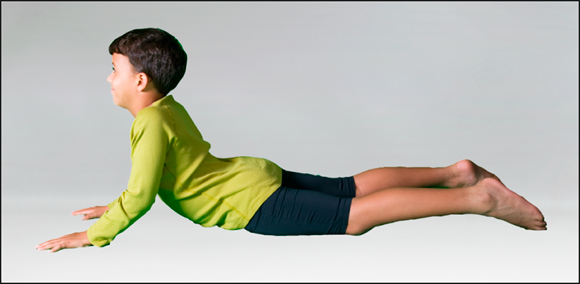
Cobra II
 Book II, Chapter 7 gives you more information on the adult version of cobra II, as does the video at
 www.dummies.com/go/yogaaiofd; the following instructions and Figure 2-7 help you lead your child through this version.
- Lie flat on your belly, and place your hands on the floor near your armpits, with your fingers going forward.
- Raise your head, shoulders, and back as you press down on your hands, keeping your hips on the ground.
- Imagine that you’re a cobra, and make the cobra’s sound: sssssss.
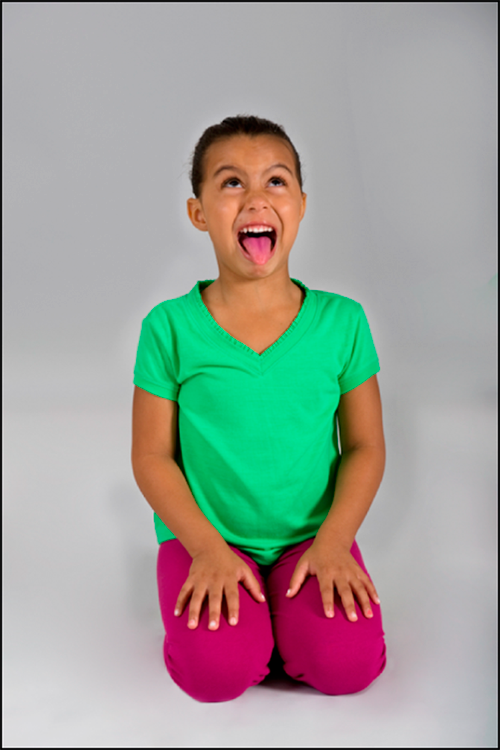
Lion posture
With the help of these instructions and Figure 2-8, your youngster can take pride in the lion posture. Book II, Chapter 2 provides additional information on the adult version.
- Sit on your heels, and place your hands on your knees.
- Open your mouth wide, stick your tongue way out, and roll your eyes upward as though you’re trying to see something high above you.
- Imagine you’re a mighty lion, and roar: ahhaahh!
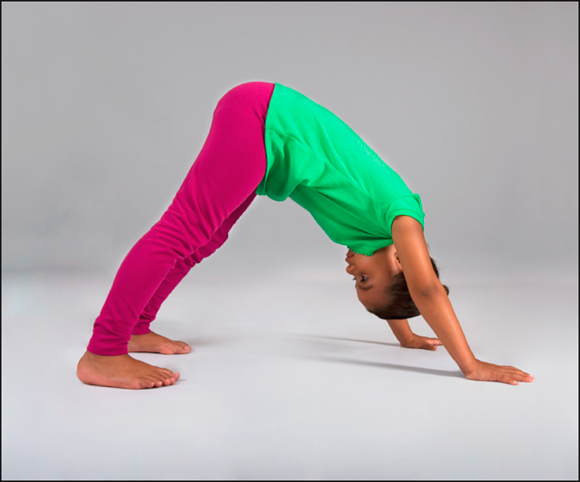
Downward-facing dog
You can find the adult version of this posture in Book II, Chapter 3, but the following steps and Figure 2-9 lay out a child-friendly variety.
- Start on your hands and knees.
- Press through your arms, pushing down on your hands; straighten your legs and look down.
- Imagine that you’re a dog, and bark: woof, woof.
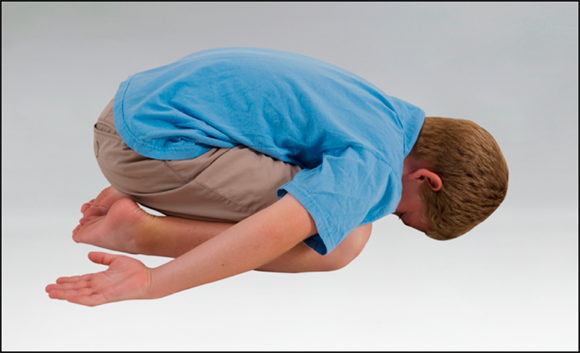
Child’s posture
This pose (one of the yummy poses) even has child in the name! Use the following instructions and Figure 2-10 to guide your tyke through the child’s posture.
- Kneel on the ground and fold up like a ball.
- Place your hands at your sides, with your palms up.
- Relax and think good thoughts.
The bridge
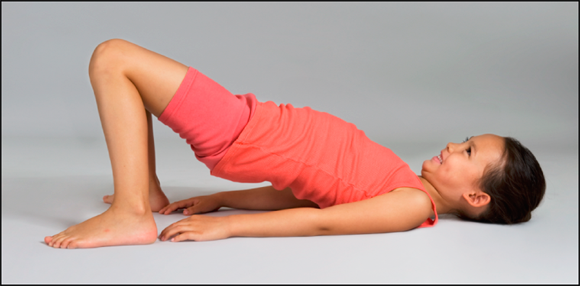
Figure 2-11 illustrates this easy posture. Give your child the following instructions to help him through the pose, and check out Book III, Chapter 1 for the adult bridge.
- Lie on your back, bending your knees and letting your feet be firm on the ground.
- Place your arms at your sides, with your palms down.
- Raise your hips and become a bridge.
- Imagine that you’re a bridge, and make the sound of the cars traveling over you: chuga chuga chuga.
The wheel
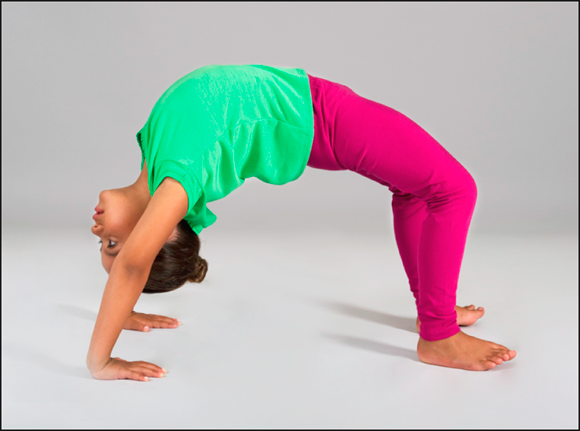
The following directions and Figure 2-12 help your child get rolling with the wheel posture.
 This advanced posture requires a fair amount of strength and flexibility. If your child isn’t ready for it, come back to it when he’s stronger and more flexible.
- Lie on your back with your knees bent and your feet on the ground.
- Place your arms over your head, and turn your hands so that they’re flat and your fingers are facing back toward the top of your shoulders.
- Press up into the wheel.
- Smile from the inside out.
Knee-hugger
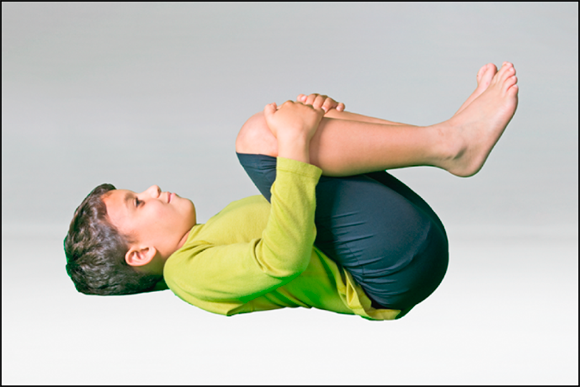
Knee-hugger is another of the yummy poses. These steps and Figure 2-13 show you how to help your child do it. You can find the adult version in Book III, Chapter 1 (there it’s called knees-to-chest posture).
 For an added benefit, have your child rock his knees from side to side while he’s hugging them — it gently massages the back.
- Lie on your back, and then bend and hug your knees.
- Just relax and think good thoughts.
Easy posture
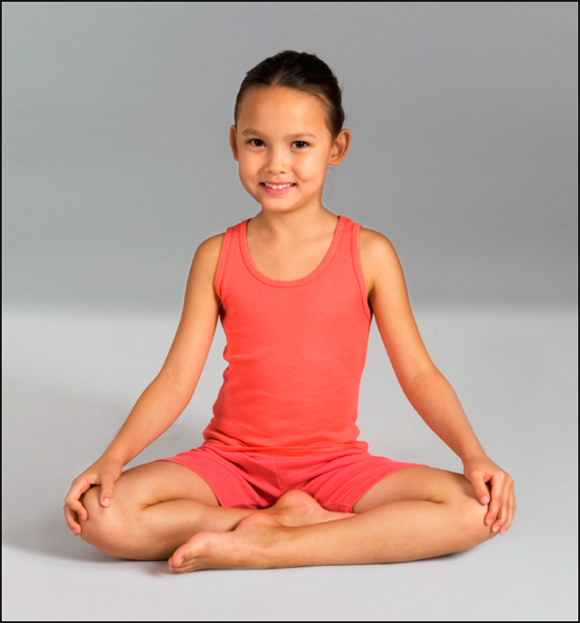
These instructions help you walk (sit?) your young yogini through the easy posture; check out Figure 2-14 for the proper sitting posture. (The adult version is covered in Book II, Chapter 2.)
 Your child may be more comfortable with a blanket under her hips.
- Sit on the floor and cross your legs comfortably.
- Keep your back and head tall, without straining.
- Imagine a big balloon in your belly: When you breathe in, fill the balloon, and when you breathe out, let the air out of the balloon.
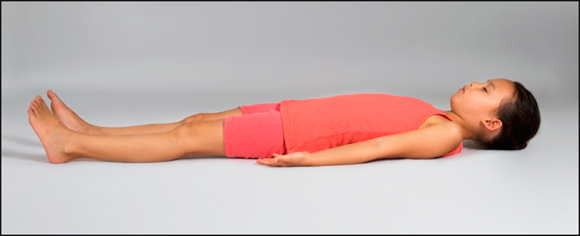
The big yummy posture: Shavasana
Use the following instructions to help your child relax at the end of the session. Figure 2-15 illustrates the pose, and you can read more about the adult version in Book VII, Chapter 2.
- Lie flat on your back, turning your palms up and letting your feet flop out.
- Close your eyes gently, or keep them open and soft — whichever feels best.
- Relax and think good thoughts.
 Making yoga fun and safe for kids
 Trying some kid-friendly poses
 Easing the stress of adolescence with yoga
 Checking out challenging yoga routines perfect for teens and young adults
 Children need to skip the headstand and shoulder stand. Although their bodies are flexible, they lack the strength and stability to do those postures safely.
 Children have short attention spans. You know your child best, so do only as many postures as he has attention for. In time, he’ll be able to do more. Also, ask your child to hold the position only as long as you feel she will be comfortable. If she starts to get squirmy, have her come out of the position.
 See the preceding section for instructions to get your child into mountain posture.
 If your child’s knee bends so much that you see it extending farther than the ankle, tell him to bend the knee a little bit less.