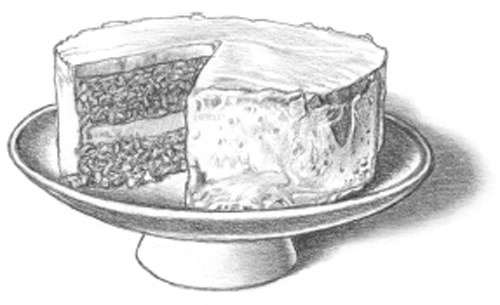
This is the classic layer cake, no matter what form it takes—from cupcakes to pound cake—and what I mean when I say “cake.” A high ratio of fat (usually butter but sometimes oil) to flour inhibits gluten formation, making for a tender and flavorful crumb. If I’m talking about another type of cake, I’ll let you know.
FOAM CAKE
These have little to no fat, and their lift comes from whipped eggs. Angel food has no fat at all; sponge and jelly-roll cakes get their only fat from egg yolks; genoise and chiffon have a little extra fat from oil or butter, but not much. They’re not rich on their own, but they’re porous and fantastic for layering or soaking.
CUSTARD CAKE
Cheesecakes are the prime example. These have a thick, egg-enriched base and may have no flour at all.
YEASTED CAKE
A cousin to bread and pastry; yeast is used for leavening instead of baking powder, baking soda, or eggs.
The difference between a basic cake and an extravagant one usually comes down to assembly and decoration. Elaborate cakes are typically composed of several simple parts, and making one well comes down to good planning.
The upshot is that all cakes are mix-and-match friendly, offering endless options for customizing. Choose a shape you like: layer, cupcakes, babycakes, sheet cake. Choose your frosting. Add a cake soak or glaze if you like or top with something simple like a dusting of confectioners’ sugar or a dollop of whipped cream. You can bake from this chapter for a year and never make the same cake twice.
The Basics of Cake Baking
Cakes are more forgiving than they’re reputed to be. The important thing is to nail the basics: good ingredients, the right pans, and a little attention to technique. Give yourself enough time to follow each step, don’t cut corners, and you’re halfway there.
INGREDIENTS
Homemade cake is meltingly tender, tasting of butter, eggs, and simple flavorings. It’s difficult to argue that there’s a single component that is of paramount importance, but cakes have a way of showcasing “off” flavors: if an ingredient is stale or even second-rate, you’ll notice it. Use the highest-quality butter, chocolate, eggs, extracts, and nuts for the best cakes.
Flour is the base of most cakes, and all-purpose is usually a good option, but if you want a tender cake with a fine crumb, you’re better off using cake flour in the recipes that give it as the first option. It has less protein than all-purpose, so it doesn’t produce as much gluten. (Gluten makes foods chewy—think bread—and cakes should be tender, not chewy.) If you don’t have it, see the sidebar to the left for a quick and easy substitution.
Some lighter cakes call for superfine sugar, which is somewhere between granulated and confectioners’ sugar. It’s ideal because the fine crystals dissolve quickly in batters that you may not want to overwork. If you can’t find it, you can make your own by grinding granulated sugar in a food processor for a few seconds.
The temperature of your ingredients makes a difference: Softened butter behaves differently than melted or ice-cold when you mix it with the other ingredients, so use only what the recipe tells you to do (see page 20 for a faster way to get soft butter). Anytime you’re making a foam cake, the temperature of your eggs is equally important—room-temperature egg whites are more relaxed so you can beat more air into them. You can stick cold eggs in a bowl of warm (not hot) water for 5 to 10 minutes to prep them.
EQUIPMENT
Most cake pans are made of lightweight, light-colored metal, like aluminum or stainless steel, which is ideal for even browning. Those are the pans I use. Darker metal pans attract more heat, and glass pans take longer to heat up but hold on to heat longer. If you’re using either, decrease the oven temperature by 25 degrees to make sure your cakes don’t burn. Less common are silicone pans, which never stick but are good only for very light-colored cakes—they’ll hardly brown.
Most of the recipes in this chapter call for standard bakeware, but if you’re missing the right pans, you can substitute mindfully. If my high school math is serving me correctly, the difference between an 8-inch and a 9-inch cake pan is around 13 square inches—that’s a large extra space over which to spread a batter and will change the cooking time. See Substituting Cake Pans (below) for more info on changing pan sizes and adjusting your cook time accordingly.
A decent pan is all the special equipment you need to make a cake, but if you get into cake baking, you may want to boost your arsenal—see The Cake-Making Tool Kit for extra gear.
TECHNIQUES
PREPARING AND FILLING CAKE PANS
There’s nothing more disappointing than taking a cake out of the oven only to find that it won’t budge from the pan. A good cake is delicate, so you’re better safe than sorry—especially if you’re baking a cake to serve to other people—so it’s worth taking the extra steps to ensure a clean release. Do this before you start on the batter, because batter that sits may start to break down. Here’s how:
Grease the bottom and sides of the pans with butter. Add a tablespoon or so of flour (or cocoa powder if the cake is chocolate) to each pan, then rotate and tap to make a thin, even layer. Give the pan a few good thumps over the sink or trash can to get rid of any excess. For cakes that are more likely to stick, I grease the bottom and sides of the pan and then cover the bottom of the pan with parchment or wax paper. Cutting the paper to size can be a bit of a pain, but you can use the bottom of the pan as a stencil, or buy precut sheets for standard-size pans. Grease and flour the parchment paper.
When adding batter to layer cakes, pans should be equally full to ensure even baking. If you’re worried about eyeballing it, you can weigh each pan or—less fussy—use a toothpick to check the level of batter in each pan. Once you’ve poured the batter, use a spatula to smooth it out, lift the pan a few inches from the counter, and let it drop to force out any large air bubbles; this helps it rise more evenly.
Note that there’s a slightly different process for preparing springform pans, which are used specifically for more delicate cakes, like cheesecake or flourless chocolate, that can’t be inverted. See page 223 for more info.
It can be tricky to remove bundt cakes from their pans, especially those with complex patterns. Your best bet for greasing every nook and cranny is a pastry brush and melted butter.
MIXING
Creaming butter and sugar together is not just a mixing technique; it plays a role in leavening and giving structure to cakes. The quick beating (done most easily with an electric mixer or stand mixer, although it can be done by hand) breaks up the fat with the sugar crystals, forcing air into the mixture that adds lift as the desserts bake. The eggs or egg yolks, usually added at the last stage of creaming, enrich and lighten the batter even further.
Most cake recipes call for you to combine the dry ingredients separately, then to gently and gradually combine them by hand with the creamed butter mixture, along with any other wet ingredients, like milk, if they haven’t already been incorporated. This helps prevent overworking the batter, and since the success of many cakes is in the tenderness of their crumb, you shouldn’t hurry through this step. Rubber spatulas are best for the job since they’re flexible but firm.
One traditional step you usually can skip is sifting. Flour, once an inconsistent product, is now so fine that sifting is usually unnecessary; most of the time, you can just whisk it to eliminate any lumps. The same goes for cocoa powder and other dry ingredients. When a recipe calls for sifting, though, don’t skip it; those cakes are more delicate, and sifting aerates the ingredients for the lightest possible crumb. A fine- or medium-mesh sieve is great for this, and it’s also what you should use to dust anything with confectioners’ sugar or cocoa powder.
BAKING
Place your pan(s) in a fully preheated oven, as close to the center as you can, so that the air circulates evenly. As with cookies, rotate the pans once, about halfway through baking, so that different sections cook in different parts of the oven for equal times. Resist the urge to open and close the oven any more than you need to, though: doing so makes the temperature fluctuate and can keep cakes from rising as much as they should.
Test doneness of any cake with a toothpick or fork inserted into the center; when it comes out dry or with a few moist crumbs, the cake is ready. Once it’s out of the oven, let it cool in the pan on a rack for 5 minutes or so; richer, moister cakes should cool in their pans a bit longer. To remove a cake, gently loosen the edges with a dull knife, put the rack over the top of the pan, get a steady grip on both, hold your breath, and . . . flip. For most people, this is the scariest step, but well-greased pans won’t give you any problems.
Cakes that will be slathered with frosting can cool with their bottoms facing up. Bundt cakes should always cool top up to preserve their appearances. They also require careful removal from their pans. Instead of inverting the cake onto a rack, put the rack over the opening of the pan, pinch the rack and the bundt pan together, and invert them as a unit. After you feel the cake fall out, remove the pan and let the cake finish cooling.
Any other kind of cake that you are not going to frost should cool top up so you won’t see the marks of the cooling rack. Invert the cake onto a plate first, and then invert again from the plate onto the rack so the top side is up.
FROSTING
For some people (and most kids), cake is an excuse to eat frosting. In addition to being creamy and sweet, frosting is a way to add other flavors and textures to your cake (and preserve it a bit longer). There are very few rules here—flavor combinations are limited largely by your imagination. The only nonnegotiable is to let the cake cool completely first so the frosting doesn’t melt. Frosting sheet cakes, cupcakes, and single-layer cakes is straightforward, but if you’re making two- or three-layer cakes, follow the directions on page 198. See Frosting for Pros for the lowdown on crumb coats, which are never necessary but can win you some style points and ensure a perfect presentation.
STORAGE
Wrapped tightly in plastic wrap, unfrosted cakes can hold for a couple days at room temperature, as can covered, frosted cakes. But no cake—iced or not—is ever as tender and moist as it is the day you make it. Frosted layer cakes look gorgeous in a cake stand with a cover. If you don’t have one (I don’t), just keep the frosted cake on a plate at room temperature and either tent it with foil or cover it with an extra-large mixing bowl, making sure the bowl doesn’t touch the cake.
That said, cakes freeze beautifully, making them one of the best make-ahead desserts. Bake and let cool completely at room temperature before wrapping each layer very tightly in a few sheets of plastic wrap and then foil; freeze for up to a few months. Let thaw at room temperature before unwrapping and frosting. If you plan to level the cakes or split the layers (page 198), do it while the cakes are still frozen, when they’re easiest to manipulate, then rewrap and thaw at room temperature for the best consistency.
Frosting, too, can be made ahead, refrigerated for a day or two, and brought to room temperature before assembling the cake; whip it for a minute or so to bring it back to life and make it light and spreadable.
Once you’ve cut into a cake, keep it fresh by pressing a piece of plastic wrap or wax paper up against the sliced part and covering as usual.
There are many more sizes and shapes of cake pans, but these are the essentials. It’s obvious, but it bears mentioning: The size and shape of a cake can have a significant effect on its presentation.
TYPE OF PAN: Round pan
ESSENTIAL SIZES: 9 inches round (buy 2) or 8 inches round (buy 3)
TYPES OF CAKE: Single- and multiple-layer cakes
RECOMMENDED RECIPES: Any butter cake, such as Yellow, White, Chocolate, or Red Velvet
TYPE OF PAN: Rectangular pan
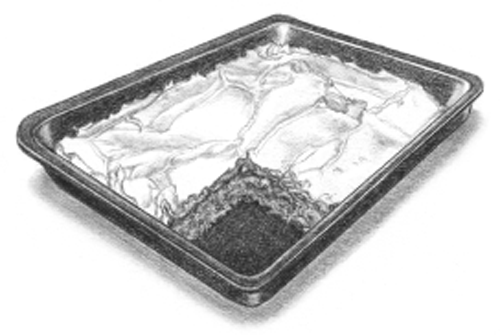
ESSENTIAL SIZES: 13 × 9 inches
TYPES OF CAKE: Sheet cakes, served in a single large layer
RECOMMENDED RECIPES: Same as above
TYPE OF PAN: Muffin tin

ESSENTIAL SIZES: Standard cup size is 3½ ounces; you want at least 1 pan with 12 cups
TYPES OF CAKE: Muffins or cupcakes; great for feeding a crowd, easy transportation, and any occasion with kids
RECOMMENDED RECIPES: Any butter cake
TYPE OF PAN: Jelly-roll pan

ESSENTIAL SIZES: 15 × 10-inch or 17 × 12-inch shallow rectangular pans, like rimmed baking sheets
TYPES OF CAKE: Thin layers of cake to fill and roll into jelly rolls or Bûche de Noël or frosted and served as a sheet for a crowd
RECOMMENDED RECIPES: Sponge Cake or Genoise
TYPE OF PAN: Loaf pan

ESSENTIAL SIZES: 9 × 5 inches (buy 2) or 8 × 4 inches (buy 3)
TYPES OF CAKE: Dense cakes that don’t need to be frosted or embellished
RECOMMENDED RECIPES: Classic Pound Cake, Chocolate-Sour Cream Pound Cake, Pumpkin Spice Cake, or Honey-Spice Cake
TYPE OF PAN: Bundt (tube) pan

ESSENTIAL SIZES: 12 cups
TYPES OF CAKE: Elegant cakes for entertaining; top with glaze or dust with confectioners’ sugar. Tube pan is a close relative
RECOMMENDED RECIPES: Angel Food Cake, Caribbean Rum Cake, or Pumpkin Spice Cake
TYPE OF PAN: Springform pan

ESSENTIAL SIZES: 9 inches round
TYPES OF CAKE: Ideal for custard and other delicate cakes
RECOMMENDED RECIPES: Cheesecake, Dense Flourless Chocolate Cake, Lemon Cornmeal Cake