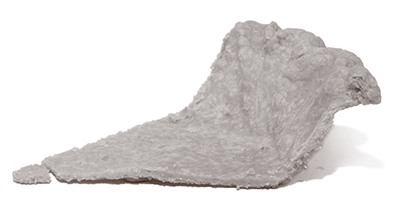
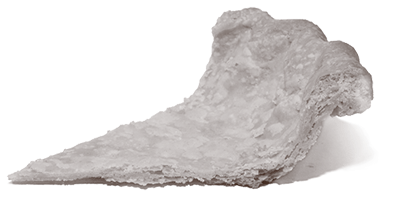
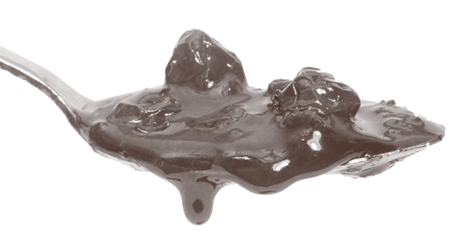
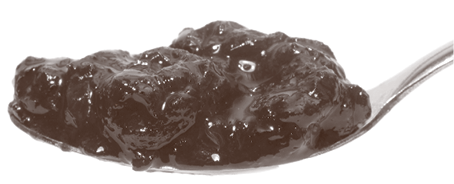
GLUTEN MINIMIZATION AT WORK
PIE DOUGH
Replacing part of the ice water with vodka is the key to creating a well-hydrated dough that is easy to work with. And because the vodka doesn’t activate gluten, our dough bakes up flaky. In contrast, most well-hydrated doughs made with just ice water bake up tough and leathery because the extra water activates too much gluten. In addition to the recipes in this concept, pie dough is a key ingredient in Pumpkin Pie and Lemon Meringue Pie.
FOOLPROOF DOUBLE-CRUST PIE DOUGH
MAKES ENOUGH FOR ONE 9-INCH PIE
Vodka is essential to the tender texture of this crust and imparts no flavor—do not substitute water. This dough is moister than most standard pie doughs and will require lots of flour to roll out (up to ¼ cup). A food processor is essential for making this dough—it cannot be made by hand.
|
2½
|
cups (12½ ounces) all-purpose flour
|
|
2
|
tablespoons sugar
|
|
1
|
teaspoon salt
|
|
12
|
tablespoons unsalted butter, cut into ¼-inch pieces and chilled
|
|
8
|
tablespoons vegetable shortening, cut into 4 pieces and chilled
|
|
¼
|
cup vodka, chilled
|
|
¼
|
cup ice water
|
|
|
|
1. Process 1½ cups flour, sugar, and salt together in food processor until combined, about 5 seconds. Scatter butter and shortening over top and continue to process until incorporated and mixture begins to form uneven clumps with no remaining floury bits, about 15 seconds.
2. Scrape down bowl and redistribute dough evenly around processor blade. Sprinkle remaining 1 cup flour over dough and pulse until mixture has broken up into pieces and is evenly distributed around bowl, 4 to 6 pulses.
3. Transfer mixture to large bowl. Sprinkle vodka and ice water over mixture. Stir and press dough together, using stiff rubber spatula, until dough sticks together.
4. Divide dough into 2 even pieces. Turn each piece of dough onto sheet of plastic wrap and flatten each into 4-inch disk. Wrap each piece tightly in plastic and refrigerate for 1 hour. Before rolling dough out, let it sit on counter to soften slightly, about 10 minutes. (Dough can be wrapped tightly in plastic and refrigerated for up to 2 days or frozen for up to 1 month. If frozen, let dough thaw completely on counter before rolling it out.)
FOOLPROOF BAKED PIE SHELL
MAKES ONE 9-INCH PIE SHELL
Vodka is essential to the tender texture of this crust and imparts no flavor—do not substitute water. This dough is moister than most standard pie doughs and will require lots of flour to roll out (up to ¼ cup).
|
1¼
|
cups (6¼ ounces) all-purpose flour
|
|
1
|
tablespoon sugar
|
|
½
|
teaspoon salt
|
|
6
|
tablespoons unsalted butter, cut into ¼-inch pieces and chilled
|
|
4
|
tablespoons vegetable shortening, cut into 2 pieces and chilled
|
|
2
|
tablespoons vodka, chilled
|
|
2
|
tablespoons ice water
|
1. Process ¾ cup flour, sugar, and salt together in food processor until combined, about 5 seconds. Scatter butter and shortening over top and continue to process until incorporated and mixture begins to form uneven clumps with no remaining floury bits, about 10 seconds.
2. Scrape down bowl and redistribute dough evenly around processor blade. Sprinkle remaining ½ cup flour over dough and pulse until mixture has broken up into pieces and is evenly distributed around bowl, 4 to 6 pulses.
3. Transfer mixture to medium bowl. Sprinkle vodka and ice water over mixture. Stir and press dough together, using stiff rubber spatula, until dough sticks together.
4. Turn dough onto sheet of plastic wrap and flatten into 4-inch disk. Wrap tightly in plastic and refrigerate for 1 hour. Before rolling dough out, let it sit on counter to soften slightly, about 10 minutes. (Dough can be wrapped tightly in plastic and refrigerated for up to 2 days or frozen for up to 1 month. If frozen, let dough thaw completely on counter before rolling it out.)
5. Adjust oven rack to middle position and heat oven to 425 degrees. Roll dough into 12-inch circle on floured counter. Loosely roll dough around rolling pin and gently unroll it onto 9-inch pie plate, letting excess dough hang over edge. Ease dough into plate by gently lifting edge of dough with 1 hand while pressing into plate bottom with other hand. Leave any dough that overhangs plate in place. Wrap dough-lined pie plate loosely in plastic and refrigerate until dough is firm, about 30 minutes.
6. Trim overhang to ½ inch beyond lip of pie plate. Tuck overhang under itself; folded edge should be flush with edge of pie plate. Crimp dough evenly around edge of pie using your fingers. Wrap dough-lined pie plate loosely in plastic and refrigerate until dough is fully chilled and firm, about 15 minutes, before using.
7. Line chilled pie shell with double layer of aluminum foil, covering edges to prevent burning, and fill with pie weights.
8A. FOR A PARTIALLY BAKED CRUST: Bake until pie dough looks dry and is pale in color, about 15 minutes. Remove weights and foil and continue to bake crust until light golden brown, 4 to 7 minutes longer. Transfer pie plate to wire rack. (Crust must still be warm when filling is added.)
8B. FOR A FULLY BAKED CRUST: Bake until pie dough looks dry and is pale in color, about 15 minutes. Remove weights and foil and continue to bake crust until deep golden brown, 8 to 12 minutes longer. Transfer pie plate to wire rack and let crust cool completely, about 1 hour.
FOOLPROOF SINGLE-CRUST PIE DOUGH FOR CUSTARD PIES
We like rolling our single-crust dough in fresh graham cracker crumbs because they add flavor and crisp textural appeal to our custard pies.
Crush 3 whole graham crackers to fine crumbs. (You should have about ½ cup crumbs.) Dust counter with graham cracker crumbs instead of flour. Continue sprinkling dough with crumbs, both underneath and on top, as it is being rolled out.
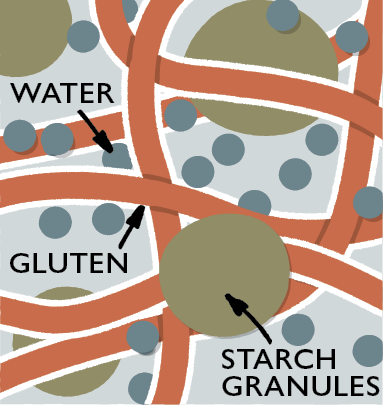
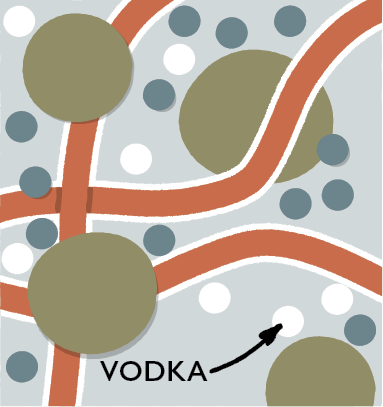
 WHY THIS RECIPE WORKS
Pie dough can go wrong so easily: dry dough that is too crumbly to roll out, a flaky but leathery crust, or a tender crust without flakes. We wanted a recipe for pie dough that would roll out easily every time and produce a tender, flaky crust. We found the answer in the liquor cabinet: vodka. While gluten (the protein that makes crust tough) forms readily in water, it doesn’t form in ethanol, and vodka is 60 percent water and 40 percent ethanol. Adding ¼ cup of vodka produced a moist, easy-to-roll dough that stayed tender. (The alcohol vaporizes in the oven, so you won’t taste it in the baked crust.)
USE TWO FATS Butter contributes rich taste—but also water, which encourages gluten development. For a crust that’s both flavorful and tender, we use a 3:2 ratio of butter to shortening, a pure fat with no water.
USE MORE OF THEM We incorporate roughly a third more total fat in our dough than the typical recipe, which coats the flour more thoroughly so less of it can mix with water to form gluten. Also, the extra fat makes the dough more tender. (It makes it taste better, too.)
CREATE LAYERS Traditional recipes process all the flour and fat at once, but we add the flour in two batches. We first process the fat with part of the flour for a good 15 seconds to thoroughly coat it, then give the mixture just a few quick pulses once the remaining flour is added, so less of it gets coated. Besides providing protection against toughness, this approach aids in flakiness by creating two distinct layers of dough—one with gluten and one without.
SHAPE THE DOUGH INTO A ROUND Many bakers struggle to roll dough into an even circle. The first mistake they make is not shaping the dough into a round disk before refrigerating it. Take a minute to shape the dough into a 4-inch disk and you will find it much easier to roll it out into a 12-inch circle.
CHILL DOUGH, FLOUR COUNTER To prevent the dough from sticking to the counter (and to keep the butter from melting), it’s best to chill the dough for an hour before attempting to roll it out. If the dough has been refrigerated for longer (it can keep in the fridge for two days or be frozen for four weeks and then defrosted in the fridge) it will be too cold. Let it warm up on the counter for 10 minutes before rolling it out.
ROLL AND TURN Two key pointers to keep in mind when rolling dough: First, always work with well-chilled pastry; otherwise, the dough will stick to the counter and tear. Second, never roll out dough by rolling back and forth over the same section; each time you press on the same spot, more gluten develops that can toughen the dough. Also, rolling back and forth makes it impossible to roll the dough into an even circle. Instead, roll the pin over the dough once, then rotate the dough 90 degrees and roll again. By rolling and rotating the dough you ensure that the dough forms a neat circle and that no part of the dough is getting overworked and tough. We like to use long, tapered French rolling pins; they are gentler on delicate dough than standard rolling pins.
MOVE THE DOUGH To move the dough into the pie plate, place the rolling pin about 2 inches from the top of the dough round. Flip the top edge of the dough over the rolling pin and turn once to loosely roll around the pin. Gently unroll the dough over the plate. Then, lift the dough around the edges and gently press it into the corners of the plate, letting excess dough hang over the edge. For a double-crust pie, roll out the second piece of dough and chill both it and the bottom crust while you make the filling. When you’re ready, fill the bottom crust, add the top crust, then trim and flute.
BLUEBERRY PIE
SERVES 8
This recipe was developed using fresh blueberries, but unthawed frozen blueberries will work as well. In step 3, cook half the frozen berries over medium-high heat, without mashing, until reduced to 1¼ cups, 12 to 15 minutes. Use the large holes of a box grater to shred the apple. Grind the tapioca to a powder in a spice grinder or mini food processor.
|
1
|
recipe Foolproof Double-Crust Pie Dough
|
|
30
|
ounces (6 cups) blueberries
|
|
1
|
Granny Smith apple, peeled, cored, and shredded
|
|
¾
|
cup (5¼ ounces) sugar
|
|
2
|
tablespoons instant tapioca, ground
|
|
2
|
teaspoons grated lemon zest plus 2 teaspoons juice
|
|
|
Pinch salt
|
|
2
|
tablespoons unsalted butter, cut into ¼-inch pieces
|
|
1
|
large egg white, lightly beaten
|
1. Roll 1 disk of dough into 12-inch circle on lightly floured counter. Loosely roll dough around rolling pin and gently unroll it onto 9-inch pie plate, letting excess dough hang over edge. Ease dough into plate by gently lifting edge of dough with 1 hand while pressing into plate bottom with other hand. Leave any dough that overhangs plate in place. Wrap dough-lined pie plate loosely in plastic wrap and refrigerate until dough is firm, about 30 minutes.
2. Roll other disk of dough into 12-inch circle on lightly floured counter. Using 1¼-inch round cookie cutter, cut round from center of dough. Cut 6 more rounds from dough, 1½ inches from edge of center hole and equally spaced around center hole. Transfer dough to parchment paper–lined baking sheet; cover with plastic and refrigerate for 30 minutes.
3. Place 3 cups berries in medium saucepan and set over medium heat. Using potato masher, mash berries several times to release juices. Continue to cook, stirring often and mashing occasionally, until about half of berries have broken down and mixture is thickened and reduced to 1½ cups, about 8 minutes; let cool slightly.
4. Adjust oven rack to lowest position, place rimmed baking sheet on rack, and heat oven to 400 degrees.
5. Place shredded apple in clean kitchen towel and wring dry. Transfer apple to large bowl and stir in cooked berries, remaining 3 cups uncooked berries, sugar, tapioca, lemon zest and juice, and salt until combined. Spread mixture in dough-lined pie plate and scatter butter over top.
6. Loosely roll remaining dough round around rolling pin and gently unroll it onto filling. Trim overhang to ½ inch beyond lip of pie plate. Pinch edges of top and bottom crusts firmly together. Tuck overhang under itself; folded edge should be flush with edge of pie plate. Crimp dough evenly around edge of pie using your fingers. Brush surface with beaten egg white.
7. Place pie on heated baking sheet and bake until crust is light golden brown, about 25 minutes. Reduce oven temperature to 350 degrees, rotate baking sheet, and continue to bake until juices are bubbling and crust is deep golden brown, 30 to 40 minutes longer. Let pie cool on wire rack to room temperature, about 4 hours. Serve.
 WHY THIS RECIPE WORKS
If the filling in blueberry pie doesn’t jell, a wedge can collapse into a soupy puddle topped by a sodden crust. But use too much thickener and the filling can be so dense that it’s unpleasantly gluey to eat. We wanted a pie that had a firm, glistening filling full of fresh, bright flavor and still-plump berries. The use of tapioca and a natural pectin, as well as a hot oven, gets us exactly what we want.
USE THE RIGHT THICKENER We prefer using tapioca to cornstarch to thicken the filling of a pie made with juicy fruit, but in order to get the pie to set enough to slice neatly, we have to use a lot of it, and then we end up with a filling that is gluey and dull. (Flour and cornstarch yield a pasty, starchy filling no matter how much, or how little, we use.) We reduce the amount of tapioca and pulverize it in a spice grinder before adding it to the filling so that it doesn’t leave any telltale “pearls” in the finished pie.
COOK HALF THE BERRIES Cooking just half of the berries is enough to adequately reduce their liquid and prevent an overly juicy pie. After cooking, we fold the remaining berries in with the cooked, creating a satisfying combination of intensely flavored cooked fruit and bright-tasting fresh fruit. (This allows us to cut down on the tapioca, as well.)
USE NATURAL PECTIN As we watched the blueberries for our pie bubble away in the pot, we thought about blueberry jam. The secret to the great texture of well-made jam is pectin, a carbohydrate found in fruit. Blueberries are low in natural pectin, so commercial pectin in the form of a liquid or powder is usually added when making blueberry jam. The only downside to commercial pectin is that it needs the presence of a certain proportion of sugar and acid in order to work. Increasing the sugar makes the filling sickeningly sweet. A test with “no sugar needed” pectin set up properly, but this additive contains lots of natural acid, which compensates for the lack of extra sugar—and its sourness did not appeal. Our solution? Apples. Apples contain a lot of natural pectin. We fold one peeled and grated Granny Smith apple into the berries along with a bit of tapioca. The apple provides enough thickening power to set the pie beautifully, plus it enhances the flavor of the berries without anyone guessing the secret ingredient. (See “The Apple of My Pie.”)
ADD SUGAR, NOT SPICE To our filling we add sugar, of course, and lemon juice and zest. But nothing else. We want the filling to taste like berries, not cinnamon.
MAKE HOLES, NOT A LATTICE To vent the steam from the berries, we found a faster, easier alternative to a lattice top in a cookie cutter, which we use to cut out circles in the top crust.
START HOT We begin baking our pie in a 400-degree oven on a preheated baking sheet (see “How to Prevent a Soggy Crust”) to help jump-start the browning process. After 25 minutes, we lower the heat to 350 degrees and keep baking for another 30 to 40 minutes.
LET IT COOL If you want neat slices of pie, it must cool. The filling will continue to set as the pie cools down to room temperature—a process that will take four hours. If you like to serve warm pie, let it cool fully (so filling sets), then briefly warm the pie in the oven before slicing. But don’t overdo it! Leave the pie in a 350-degree oven for 10 minutes—just long enough to warm the pie without causing the filling to loosen.
DEEP-DISH APPLE PIE
SERVES 8
You can substitute Empire or Cortland apples for the Granny Smith apples and Jonagold, Fuji, or Braeburn for the Golden Delicious apples.
|
1
|
recipe Foolproof Double-Crust Pie Dough
|
|
2½
|
pounds Granny Smith apples, peeled, cored, and sliced ¼ inch thick
|
|
2½
|
pounds Golden Delicious apples, peeled, cored, and sliced ¼ inch thick
|
|
½
|
cup (3½ ounces) plus 1 tablespoon granulated sugar
|
|
¼
|
cup packed (1¾ ounces) light brown sugar
|
|
½
|
teaspoon grated lemon zest plus 1 tablespoon juice
|
|
¼
|
teaspoon salt
|
|
1⁄8
|
teaspoon ground cinnamon
|
|
1
|
large egg white, lightly beaten
|
1. Roll 1 disk of dough into 12-inch circle on lightly floured counter. Loosely roll dough around rolling pin and gently unroll it onto 9-inch pie plate, letting excess dough hang over edge. Ease dough into plate by gently lifting edge of dough with 1 hand while pressing into plate bottom with other hand. Leave any dough that overhangs plate in place. Wrap dough-lined pie plate loosely in plastic wrap and refrigerate until dough is firm, about 30 minutes. Roll other disk of dough into 12-inch circle on lightly floured counter, then transfer to parchment paper–lined baking sheet; cover with plastic and refrigerate for 30 minutes.
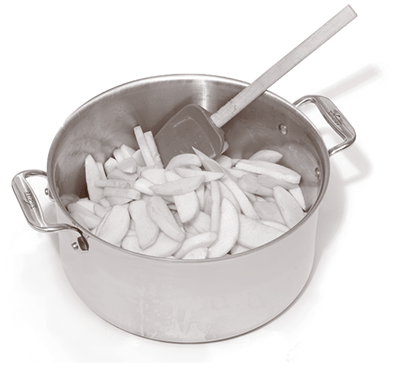
2. Toss apples, ½ cup granulated sugar, brown sugar, lemon zest, salt, and cinnamon together in Dutch oven. Cover and cook over medium heat, stirring often, until apples are tender when poked with fork but still hold their shape, 15 to 20 minutes. Transfer apples and their juices to rimmed baking sheet and let cool to room temperature, about 30 minutes.
3. Adjust oven rack to lowest position, place rimmed baking sheet on rack, and heat oven to 425 degrees. Drain cooled apples thoroughly in colander, reserving ¼ cup of juice. Stir lemon juice into reserved juice.
4. Spread apples in dough-lined pie plate, mounding them slightly in middle, and drizzle with lemon juice mixture. Loosely roll remaining dough round around rolling pin and gently unroll it onto filling. Trim overhang to ½ inch beyond lip of pie plate. Pinch edges of top and bottom crusts firmly together. Tuck overhang under itself; folded edge should be flush with edge of pie plate. Crimp dough evenly around edge of pie using your fingers. Cut four 2-inch slits in top of dough. Brush surface with beaten egg white and sprinkle evenly with remaining 1 tablespoon granulated sugar.
5. Place pie on heated baking sheet and bake until crust is light golden brown, about 25 minutes. Reduce oven temperature to 375 degrees, rotate baking sheet, and continue to bake until juices are bubbling and crust is deep golden brown, 25 to 30 minutes longer. Let pie cool on wire rack until filling has set, about 2 hours; serve slightly warm or at room temperature.
 WHY THIS RECIPE WORKS
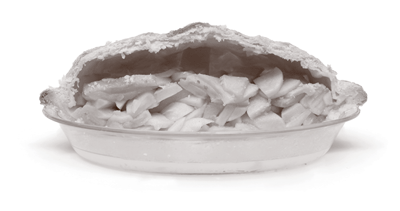
The problem with deep-dish apple pie is that the apples are often unevenly cooked and the exuded juices leave the apples swimming in liquid, producing a bottom crust that is pale and soggy. Then there is the gaping hole left between the shrunken apples and the top crust, making it impossible to slice and serve a neat piece of pie. We wanted our piece of deep-dish pie to be a towering wedge of tender, juicy apples, fully framed by a buttery, flaky crust. Precooking the apples solved the shrinking problem, helped the apples hold their shape, and prevented a flood of juices from collecting in the bottom of the pie plate, thereby producing a nicely browned bottom crust.
PRECOOK THE APPLES For a deep-dish pie you need a lot of apples. But all those apples make the crust soggy and the filling soupy. Not to mention that when all those apples cook down you’re left with a top crust that sits far above the filling. Precooking the apples solves all of these problems—and precooked apples require no thickener, which can dull their flavor. (See “The Incredible Shrinking Apple,” that follows.)
COOK GENTLY Though it’s tempting to cook the apples over high heat in order to quickly drive off their liquid, it’s not the right choice. Precooked at high heat, the apples in the pie end up mealy and soft. Cooking apples slowly over gentle heat gets rid of excess moisture and actually strengthens the internal structure of the apples, making them better able to hold their shape when baked in the pie. (For more on the science of precooking vegetables, see concept 27.)
USE TWO APPLES, SUGAR, AND SPICE We like tart apples, like Granny Smith and Empire, because of their brash flavor, but used alone their flavor can seem one-dimensional. To achieve a fuller, more balanced flavor, we find it necessary to add a sweeter variety, such as Golden Delicious or Braeburn. Another important factor in choosing the right apple is the texture. Even over the gentle heat of the stovetop, softer varieties such as McIntosh break down readily and turn to mush. With the right combination of apples, heavy flavorings are gratuitous. We add some light brown sugar along with the granulated sugar to heighten the flavor, as well as a pinch of salt and a squeeze of lemon juice (added after stovetop cooking to retain its flavor). We’re content with just a hint of cinnamon.
MAKE VENTS IN THE TOP CRUST Apples are a lot less juicy than berries and you’ve precooked all the filling (not just half), so four vents in the top crust are plenty to allow steam to escape. Brushing the crust with egg white and sprinkling with sugar give the crust a pretty (and tasty) sheen.
START IN A HOT OVEN We begin baking our pie in a hot oven (425 degrees), on a preheated baking sheet set on the lowest rack, in order to help brown up the bottom crust and keep it from becoming soggy. We then turn the temperature down to 375 degrees to finish it off.
GLUTEN MINIMIZATION AT WORK
EMPANADAS
Empanadas can be a lot of work. Many recipes braise meat for hours for the filling. Then you have to make the dough, which can be tricky. Then comes filling and shaping all those little empanadas, followed by several rounds of frying. We wanted a simpler approach, so we started with ground beef and decided to bake rather than fry. We decided to make larger empanadas suitable for dinner so there would be less folding and shaping involved. But what about the dough? Could we use what we learned about pie dough to make this dough easier, too?
BEEF EMPANADAS
MAKES 12 EMPANADAS, SERVING 4 TO 6
The alcohol in the dough is essential to the texture of the crust and imparts no flavor—do not substitute. Masa harina can be found in the international foods aisle with other Latin American foods or in the baking aisle with the flour. If you cannot find masa harina, replace it with additional all-purpose flour (for a total of 4 cups).
|
FILLING
|
|
1
|
slice hearty white sandwich bread, torn into quarters
|
|
2
|
tablespoons plus ½ cup low-sodium chicken broth
|
|
1
|
pound 85 percent lean ground beef
|
|
|
Salt and pepper
|
|
1
|
tablespoon olive oil
|
|
2
|
onions, chopped fine
|
|
4
|
garlic cloves, minced
|
|
1
|
teaspoon ground cumin
|
|
¼
|
teaspoon cayenne pepper
|
|
1⁄8
|
teaspoon ground cloves
|
|
½
|
cup minced fresh cilantro
|
|
2
|
Hard-Cooked Eggs, chopped coarse
|
|
1⁄3
|
cup raisins, chopped coarse
|
|
¼
|
cup pitted green olives, chopped coarse
|
|
4
|
teaspoons cider vinegar
|
|
DOUGH
|
|
3
|
cups (15 ounces) all-purpose flour
|
|
1
|
cup (5 ounces) masa harina
|
|
1
|
tablespoon sugar
|
|
2
|
teaspoons salt
|
|
12
|
tablespoons unsalted butter, cut into ½-inch pieces and chilled
|
|
½
|
cup cold vodka or tequila
|
|
½
|
cup cold water
|
|
5
|
tablespoons olive oil
|
1. FOR THE FILLING: Process bread and 2 tablespoons broth in food processor until paste forms, about 5 seconds, scraping down sides of bowl as necessary. Add beef, ¾ teaspoon salt, and ½ teaspoon pepper and pulse until mixture is well combined, 6 to 8 pulses.
2. Heat oil in 12-inch nonstick skillet over medium-high heat until shimmering. Add onions and cook, stirring frequently, until beginning to brown, about 5 minutes. Stir in garlic, cumin, cayenne, and cloves; cook until fragrant, about 1 minute. Add beef mixture and cook, breaking meat into 1-inch pieces with wooden spoon, until browned, about 7 minutes. Add remaining ½ cup broth and simmer until mixture is moist but not wet, 3 to 5 minutes. Transfer mixture to bowl and cool for 10 minutes. Stir in cilantro, eggs, raisins, olives, and vinegar. Season with salt and pepper to taste and refrigerate until cool, about 1 hour. (Filling can be refrigerated for up to 2 days.)
3. FOR THE DOUGH: Pulse 1 cup flour, masa harina, sugar, and salt in food processor until combined, about 2 pulses. Add butter and process until homogeneous and dough resembles wet sand, about 10 seconds. Add remaining 2 cups flour and pulse until mixture is evenly distributed around bowl, 4 to 6 quick pulses. Empty mixture into large bowl.
4. Sprinkle vodka and water over mixture. Using hands, mix dough until it forms tacky mass that sticks together. Divide dough in half, then divide each half into 6 equal pieces. Transfer dough pieces to plate, cover with plastic wrap, and refrigerate until firm, about 45 minutes or up to 2 days.
5. TO ASSEMBLE: Adjust oven racks to upper-middle and lower-middle positions, place 1 rimmed baking sheet on each rack, and heat oven to 425 degrees. While baking sheets are preheating, remove dough from refrigerator. Roll out each dough piece on lightly floured counter into 6-inch circle about 1⁄8 inch thick, covering each dough round with plastic wrap while rolling remaining dough. Place about 1⁄3 cup filling in center of each dough round. Brush edges of dough with water and fold dough over filling. Trim any ragged edges. Press edges to seal. Crimp edges of empanadas using fork. (Empanadas can be made through step 5, covered tightly with plastic wrap, and refrigerated for up to 2 days.)
6. TO BAKE: Drizzle 2 tablespoons oil over surface of each hot baking sheet, then return to oven for 2 minutes. Brush empanadas with remaining 1 tablespoon oil. Carefully place 6 empanadas on each baking sheet and cook until well browned and crisp, 25 to 30 minutes, switching and rotating baking sheets halfway through baking. Let empanadas cool on wire rack for 10 minutes and serve.
BEEF EMPANADAS WITH CORN AND BLACK BEAN FILLING
Omit raisins and cook ½ cup frozen corn kernels and ½ cup rinsed canned black beans along with onions in step 2.
 WHY THIS RECIPE WORKS
As all-in-one meals go, empanadas—the South American equivalent of Britain’s pasties, or meat turnovers—are hard to beat: a moist, savory filling encased in a tender yet sturdy crust. But most recipes for empanadas are enormously time-consuming and fussy. We wanted a streamlined recipe that would be hearty enough to stand as a centerpiece on our dinner table. To do this, we enhance our ground chuck with aromatics, spices, and a mixture of chicken broth and bread, and make a few Latin-inspired changes to our Foolproof Pie Dough.
MAKE THE FILLING MOIST Using ground beef is certainly faster than braising and shredding a tough cut, but ground beef can be dry. Using a panade (made with bread and chicken broth), which helps the meat to retain moisture, is the key. (For more on panades, see concept 15.)
BUILD FLAVOR QUICKLY Sautéing the onions and then blooming the garlic and spices (see concept 33) before adding the beef creates a flavor base in just minutes. Punch up the flavors by adding olives, raisins, vinegar, and hard-boiled eggs—salty, sweet, tart, and rich—along with cilantro for a fresh herbal hit.
USE MASA For these empanadas, straight-up pie dough wasn’t right. Using our Foolproof Pie Dough as is makes the empanadas seem too much like British pasties. Therefore, we replace some of the flour with masa harina, the dehydrated cornmeal used to make Mexican tortillas and tamales. Though unusual, the cornmeal provides a welcome nutty richness and rough-hewn texture. Even better, less flour means less protein in the dough; less protein means we don’t need shortening (to tenderize the dough) and can switch to all butter for better flavor. We keep the vodka (although tequila is just as good).
ROLL, FILL, AND CRIMP To assemble the empanadas, first divide the dough in half, then divide each half into six equal pieces. Roll each piece into a 6-inch round, about 1⁄8 inch thick. Place 1⁄3 cup of filling on each round, and brush the edges with water. Fold the dough over the filling, and then crimp the edges using a fork.
OVEN “FRY” Most pastry shells (and empanada crusts) receive an egg wash before baking for a lustrous finish, but we are not the type for cosmetics if they don’t improve the flavor and texture. For a crisp crust, we brush the shells with a little oil for the tops to boast shine and crunch. To take care of the underside of the empanadas, we preheat the baking sheet and drizzle the surface with oil. The result is a crust so shatteringly crisp that it almost passes for fried, giving way to a flavorful filling.
PRACTICAL SCIENCE
HUMIDITY AND FLOUR
Short-term humidity should not affect flour.
Many baking experts claim that baking on very dry or very humid days can affect flour. We were a little skeptical but thought we’d run some tests while developing our recipe for Foolproof Pie Dough. We constructed a sealed humidity-controlled chamber in which we could simulate various types of weather. We made pie crusts at relative humidities of at least 85 percent (more humid than New Orleans in the wet season) and below 25 percent (drier than Phoenix in midsummer and the average air-conditioned office), leaving the lid to the flour container open for eight hours beforehand. We found that over the course of the test, the flour’s weight varied by less than 0.5 percent between the two samples, and after being baked, the crusts were indistinguishable.
If an occasional humid day doesn’t make a difference, what about long-term exposure to excess humidity? According to King Arthur Flour Company, flour held in its paper packing bag (even unopened) can gain up to 5 percent of its weight in water after several months in a very humid environment. At this level, humidity might affect baked goods. But this problem is easily avoided by transferring flour to an airtight container (preferably one wide enough to accommodate a 1-cup measure) as soon as you get home.
