So far, you've been considering XHTML snippets—portions of a complete XHTML document. In this section, you'll learn how to put it all together and create your first genuine Web page.
To create a true XHTML document, you start out with three container elements: <html>, <head>, and <body>. These three elements work together to describe the basic structure of your page.
- <html>
This element wraps everything (other than the doctype) in your Web page.
- <head>
This element designates the header portion of your document. The header can include some optional information about your Web page, including the required title (which your browser displays in its title bar), optional search keywords, and an optional style sheet (which you'll learn about in Chapter 6).
- <body>
This element holds the meat of your Web page, including the actual content you want to display to the world.
There's only one right way to combine these three elements. Here's the correct arrangement of elements, with the doctype at the beginning of the page:
<!DOCTYPE html PUBLIC "-//W3C//DTD XHTML 1.0 Strict//EN"
"http://www.w3.org/TR/xhtml1/DTD/xhtml1-strict.dtd">

<html xmlns="http://www.w3.org/1999/xhtml">

<head>
...
</head>

<body>
...
</body>

</html>
Every Web page uses this basic framework. The ellipsis (…) shows where you insert additional information. The spaces between the lines aren't required—they're just there to help you see the element structure more easily.
You'll notice that the <html> start tag has an extra piece of information wedged inside of it. This is a known as the XHTML namespace, and it, like the doctype, is another non-negotiable part of the XHTML standard.
Once you have the XHTML skeleton in place, you need to add two more container elements to the mix. Every Web page requires a <title> element, which goes in the header section. Next, you need to create a container for text in the body section. One all-purpose text container is the <p> element, which represents a paragraph.
Here's a closer look at the elements you need to add:
- <title>
This element sets the title for your Web page. The title plays several roles. First, Web browsers display the title of the current Web page at the top of the window. Second, when a Web visitor bookmarks your page, the browser uses the title to label the bookmark in your Bookmark (or Favorites) menu. Third, when your page turns up in a Web search, the search engine usually displays this title as the first line in the search results, followed by a snippet of content from the page.
- <p>
This indicates a paragraph. Web browsers don't indent paragraphs, but they do add a little space between consecutive paragraphs to keep them separated.
Here's the Web page with these two new ingredients:
<!DOCTYPE html PUBLIC "-//W3C//DTD XHTML 1.0 Strict//EN" "http://www.w3.org/TR/xhtml1/DTD/xhtml1-strict.dtd"> <html xmlns="http://www.w3.org/1999/xhtml"> <head><title>Everything I Know About Web Design</title></head> <body><p></p></body> </html>
If you open this document in a Web browser, you'll find that the page is still empty, but now the title appears (as shown in Figure 2-7).
Figure 2-7. When a browser displays a Web page, it shows the page's title at the top of the window, with a little bit of extra text tacked on the end. If your browser uses tabbed browsing (as Internet Explorer does, shown here), the title also appears in the tab.
As it stands right now, this XHTML document is a good template for future pages. The basic structure is in place—you simply need to change the title and add some text.
You're finally ready to transform this XHTML skeleton into a real document by adding content. This detail is the most important, and it's the task you'll work on through most of this book.
For example, let's say you're writing a simple résumé page. Here's a very basic first go at it:
<!DOCTYPE html PUBLIC "-//W3C//DTD XHTML 1.0 Strict//EN" "http://www.w3.org/TR/xhtml1/DTD/xhtml1-strict.dtd"> <html xmlns="http://www.w3.org/1999/xhtml"> <head><title>Hire Me!</title></head> <body><p>I am Lee Park. Hire me for your company, because my work is <b>off thehizzle</b>.</p></body> </html>
This example highlights the modifications to the basic XHTML structure—a changed title and a single line of text. It uses a single <b> element inside the paragraph, just to dress up the page a little. Before you go any further, you may want to try creating this sample file in your own text editor (using the process you learned on Cracking Open an XHTML Document) and opening it in your favorite Web browser (see Figure 2-8).
Figure 2-8. Welcome to the Web. This page doesn't have much in the way of XHTML goodies (and it probably won't get Lee hired), but it does represent one of the simplest possible XHTML pages you can create.
You're now ready to build on this example by trying out all the XHTML tricks described in the following sections. Next up, you'll give Lee Park a better résumé.
Tip
Even if you have high-powered XHTML editing software like Dreamweaver, don't use it yet. To get started learning XHTML, it's best that you do it by hand so you understand every detail that's going into your Web page. Later on, when you've mastered the basics and are ready to create more sophisticated Web pages, you'll probably want to switch to other tools, as discussed in Chapter 4.
As you start to create more detailed Web pages, you'll quickly discover that building a Web page isn't as straightforward as, say, creating a page in Microsoft Word. For example, you may decide to enhance the résumé page by creating a list of skills. Here's a reasonable first try:
<!DOCTYPE html PUBLIC "-//W3C//DTD XHTML 1.0 Strict//EN"
"http://www.w3.org/TR/xhtml1/DTD/xhtml1-strict.dtd">

<html xmlns="http://www.w3.org/1999/xhtml">

<head>
<title>Hire Me!</title>
</head>

<body>
<p>I am Lee Park. Hire me for your company, because my work is <b>off the
hizzle</b>.

My skills include:
*Fast typing (nearly 12 words/minute).
*Extraordinary pencil sharpening.
*Inventive excuse making.
*Negotiating with officers of the peace.</p>
</body>

</html>
The trouble appears when you open this seemingly innocent document in your Web browser (Figure 2-9).
The problem is that XHTML ignores extra white space. That includes tabs, line breaks, and extra spaces (anything more than one consecutive space). The first time this happens, you'll probably stare at your screen dumbfounded and wonder why Web browsers are designed this way. But it actually makes sense when you consider that XHTML needs to work as a universal standard.
Say you were to customize your hypothetical Web page (like the one shown in Figure 2-10) with the perfect spacing, indenting, and line width for your computer monitor. The problem is, it may not look as good on someone else's monitor. For example, some of the text may scroll off the right side of the page, making it difficult to read. And different monitors are only part of the problem—today's Web pages need to work on different types of devices. Lee Park's future boss might view Parks' résumé on anything from the latest laptop to a fixed-width terminal to a Web-enabled cellphone.
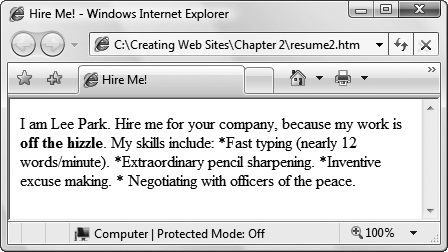
Figure 2-9. XHTML disregards line breaks and consecutive spaces, so what appears as neatly organized text in your XHTML file can turn into a jumble of text when you display it in a browser.
To deal with this range of display options, XHTML uses elements to define the structure of your document. Instead of telling the browser, "Here's where you go to the next line and here's where you add four extra spaces," XHTML tells the browser, "Here are two complete paragraphs and here's a bulleted list." It's then up to the browser to display the page according to the instructions contained in your XHTML.
To correct the résumé example, you need to use more paragraph elements and two new container elements:
- <ul>
Indicates the start of an unordered list. A list is the perfect way to detail Lee's skills.
- <li>
Indicates an individual item in a bulleted list. Your browser indents each list item and, for sentences that go beyond a single line, properly indents subsequent lines so they align under the first. In addition, it precedes each list item with a bullet (•). You can only use the <li> element inside a list element like <ul>. In other words, every list item needs to be a part of a list.
Here's the corrected Web page (shown in Figure 2-10), with the structural elements highlighted in bold:
<!DOCTYPE html PUBLIC "-//W3C//DTD XHTML 1.0 Strict//EN" "http://www.w3.org/TR/xhtml1/DTD/xhtml1-strict.dtd"> <html xmlns="http://www.w3.org/1999/xhtml"> <head> <title>Hire Me!</title> </head> <body><p>I am Lee Park. Hire me for your company, because my work is <b>off the hizzle</b>.</p><p>My skills include:</p><ul><li>Fast typing (nearly 12 words/minute).</li><li>Extraordinary pencil sharpening.</li><li>Inventive excuse making.</li><li>Negotiating with officers of the peace.</li></ul></body> </html>
You can turn a browser's habit of ignoring line breaks to your advantage. To help make your XHTML documents more readable, add line breaks and spaces wherever you want. Web experts often use indentation to make the structure of nested elements easier to understand. In the résumé example, you can already see this trick in action. Notice how the list items (the lines starting with the <li> element) are indented. This has no effect on the browser, but it makes it easier for you to see the structure of the XHTML document, and to gauge how a browser will render it.
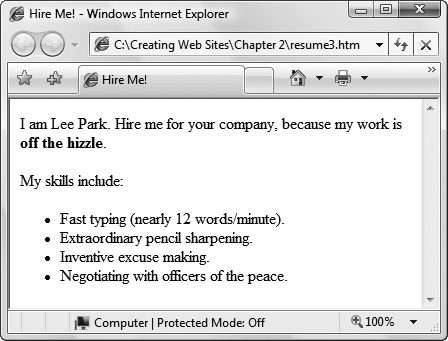
Figure 2-10. With the right elements (as shown in the code earlier on this page), the browser understands the structure of your XHTML document, and knows how to display it.
Figure 2-11 analyzes the XHTML document using a tree model. The tree model is a handy way to get familiar with the anatomy of a Web page, because it shows the page's overall structure at a glance. However, as your Web pages get more complicated, they'll probably become too complex for a tree model diagram to be useful.
Figure 2-11. Here's another way to look at the XHTML you've created. The tree model shows you how you've nested XHTML elements. By following the arrows, you can see that the top-level <html> element contains <head> and <body> elements. Inside the <head> element you have the <title> element, and inside the <body> element are two paragraphs and a bulleted list with four items. If you stare at the tree model long enough, you'll understand why XHTML calls all these elements "container elements."
If you're a masochist, you don't need to use any spaces. The previous example is exactly equivalent to the following much-less-readable XHTML document that omits white space entirely:
<!DOCTYPE html PUBLIC "-//W3C//DTD XHTML 1.0 Strict//EN"
"http://www.w3.org/TR/xhtml1/DTD/xhtml1-strict.dtd"><html xmlns="http://www.
w3.org/1999/xhtml"><html ="http://www.w3.org/1999/xhtml"><head><title>Hire
Me!</title></head><body><p>I am Lee Park. Hire me for your company, because
my work is <b>off the hizzle</b>.</p><p>My skills include:</p><ul><li>Fast
typing (nearly 12 words/minute).</li><li> Extraordinary pencil sharpening.</
li><li>Inventive excuse making.</li><li> Negotiating with officers of the
peace.</li></ul></body></html>
Of course, it's nearly impossible for a human to write XHTML like this without making a mistake.
Whether it's a stock chart, a logo for your underground garage band, or a doctored photo of your favorite celebrity, the Web would be a pretty drab place without pictures. So far, you've seen how to put text into an XHTML document, but what happens when you need an image?
Although it may seem surprising, you can't store a picture inside an XHTML file. There are plenty of good reasons why you wouldn't want to anyway—your Web page files would become really large, it would be hard to modify your pictures or do other things with them, and you'd have a fiendish time editing your pages in a text editor because the image data would make a mess. The solution is to store your pictures as separate files, and then link them to your XHTML document. This way, your browser pulls up the pictures and positions them exactly where you want them on your Web page.
The linking tool that performs this trick is the <img> element (short for "image"). The <img> element points to an image file, which the browser retrieves and inserts into the page. You can put the image file in the same folder as your Web page (which is the easiest option) or you can put it on a completely different Web site.
Although you'll learn everything you ever wanted to know about Web graphics in Chapter 7, it's worth considering a simple example right now. To try this out, you need a Web-ready image handy. (The most commonly supported image file types are JPEG, GIF, and PNG.) If you downloaded this book's companion content (from the Missing CD page at www.missingmanuals.com), you can use the sample picture leepark.jpg. Assuming you put this file in the same folder as your Web page file, you can display the image with the following image element:
<img src="leepark.jpg" alt="Lee Park Portrait" />
Like the <br /> element discussed earlier, the <img> element is a standalone element with no content. For that reason, it has a forward slash before its closing angle bracket. However, there's an obvious difference between the <br> element and the <img> element. Although <img> is a standalone element, it isn't self-sufficient. In order for the element to mean anything, you need to supply two more pieces of information: the name of the image file, and some alternate text, which is used in cases where your browser can't download or display the picture (see Alternate Text). To incorporate this extra information into the image element, XHTML uses attributes. Attributes are extra pieces of information that appear after an element name, but before the closing > character.
The <img> example includes two attributes, separated by a space. Each attribute has two parts—a name (which tells the browser what the attribute does) and a value (a variable piece of information you supply). The name of the first <img> attribute is src, which is shorthand for "source"; it tells the browser where to get the image you want. In this example, the value of the src attribute is leepark.jpg, which is the name of the file with Lee Park's headshot.
The name of the second <img> attribute is alt, which is shorthand for "alternate text"; it tells a browser that you want it to show text if it can't display the image. Its value is the text you want to display, which is "Lee Park Portrait" in this case.
Once you've unraveled the image element, you're ready to use it in an XHTML document. Just place it inside an existing paragraph, wherever it makes sense.
<!DOCTYPE html PUBLIC "-//W3C//DTD XHTML 1.0 Strict//EN"
"http://www.w3.org/TR/xhtml1/DTD/xhtml1-strict.dtd">

<html xmlns="http://www.w3.org/1999/xhtml">

<head>
<title>Hire Me!</title>
</head>

<body>
<p>I am Lee Park. Hire me for your company, because my work is <b>off the
hizzle</b>.
<img src="leepark.jpg" alt="Lee Park Portrait" />
</p>
<p>My skills include:</p>
<ul>
  <li>Fast typing (nearly 12 words/minute).</li>
  <li>Extraordinary pencil sharpening.</li>
  <li>Inventive excuse making.</li>
  <li>Negotiating with officers of the peace.</li>
</ul>
</body>

</html>
Figure 2-12 shows exactly where the picture is displayed.
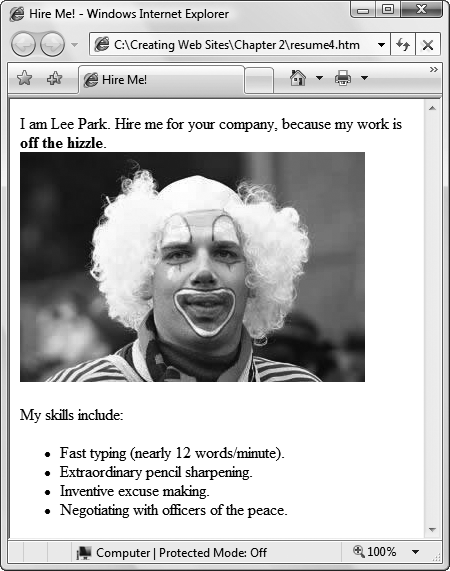
Figure 2-12. Here's a Web page that embeds a picture, thanks to the linking power of the image element (shown on The 10 Most Important Elements (and a Few More)). To display this document, a Web browser performs a separate request to retrieve the image file. As a result, your browser may display the text of the Web page before it downloads the graphic, depending on your connection speed.
Note
You'll learn many more tricks for Web graphics, including how to change their size and wrap text around them, in Chapter 7.
You've now reached the point where you can create a basic XHTML document, and you're well on your way to XHTML mastery with several elements under your belt. You know the fundamentals—all that's left is to expand your knowledge by learning how to use more elements.
XHTML has a relatively small set of elements. In fact, there are just over 60 in all. You'll most likely use fewer than 25 on a regular basis.
Note
You can't define your own elements and use them in an XHTML document because Web browsers won't know how to interpret them.
Some elements, like the <p> element that formats a paragraph, are important for setting out the overall structure of a page. These are called block-level elements. You can place block-level elements directly inside the <body> section of your Web page or, sometimes, inside another block-level element. Table 2-1 provides a quick overview of some of the most fundamental block-level elements, several of which you've already seen. It also points out which of these are container elements and which are standalone elements. (As you learned on Understanding Elements, container elements require start and end tags, but standalone elements get by with just a single tag.)
Table 2-1. Basic block-level elements.
Element | Name | Type of Element | Description |
|---|---|---|---|
<p> | Paragraph | Container | As your high school English teacher probably told you, the paragraph is the basic unit for organizing text. When you use more than one paragraph element in a row, a browser inserts a certain amount of space between the two paragraphs—just a bit more than a full blank line. Full details appear in Chapter 5. |
<h1>,<h2>,<h3>,<h4>,<h5>,<h6> | Heading | Container | Heading elements are a good way to add structure to your Web page and make titles stand out. They display text in large, boldfaced letters. The lower the number, the larger the text, so <h1> produces the largest heading. By the time you get to <h5>, the heading has dwindled to the same size as normal-sized text, and <h6>, although bold, is actually smaller than normal text. |
<hr> | Horizontal Line | Standalone | A horizontal line can help you separate one section of your Web page from another. The line automatically matches the width of the browser window. (Or, if you put the line inside another element, like a cell in a table, it takes on the width of its container.) |
<ul>,<li> | Unordered List, List Item | Container | These elements let you build basic bulleted lists. The browser automatically puts individual list items on separate lines and indents each one. For a quick change of pace, you can substitute <ul> with <ol> to get an automatically numbered list instead of a bulleted list (ol stands for "ordered list"). |
Other elements are designed to deal with smaller structural details—for example, snippets of bold or italicized text, line breaks, links that lead to other Web pages, and images. These elements are called inline elements. You can't put inline elements directly inside the <body> section. Instead, they have to be nested inside a block-level element. Table 2-2 lists the most useful inline elements.
Table 2-2. Basic inline elements
Element | Name | Type | Description |
|---|---|---|---|
<b>, <i> | Bold and Italic | Container | These two elements apply character styling—either bold or italic text. Some people use the more descriptive <strong> and <em> (for emphasis) elements, instead. They do exactly the same thing. |
<br> | Line Break | Standalone | Sometimes, all you want is text separated by simple line breaks, not separate paragraphs. This keeps subsequent lines of text closer together than when you use a paragraph. You'll learn more about text layout in Chapter 5. |
<img> | Image | Standalone | To display an image inside a Web page, use this element. Make sure you specify the src attribute to indicate the file name of the picture you want the browser to show. |
<a> | Anchor | Container | The anchor element is the starting point for creating hyperlinks that let Web site visitors jump from one page to another. You'll learn about this indispensable element in Chapter 8. |
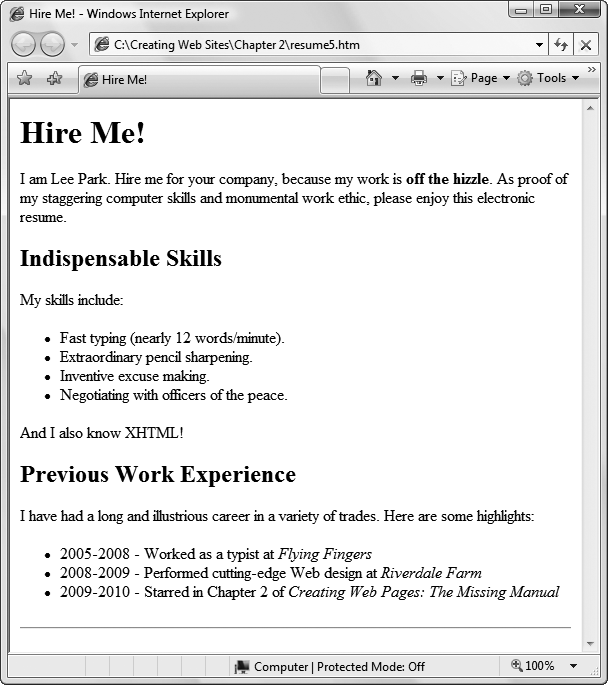
To make the sample résumé look really respectable, use a few tricks from Table 2-1 and Table 2-2. Figure 2-13 shows this revised version of the Web page:
<!DOCTYPE html PUBLIC "-//W3C//DTD XHTML 1.0 Strict//EN"
"http://www.w3.org/TR/xhtml1/DTD/xhtml1-strict.dtd">

<html xmlns="http://www.w3.org/1999/xhtml">

<head>
  <title>Hire Me!</title>
</head>

<body>
  <h1>Hire Me!</h1>
  <p>I am Lee Park. Hire me for your company, because my work is <b>off the
hizzle</b>. As proof of my staggering computer skills and monumental work
ethic, please enjoy this electronic resume.</p>

  <h2>Indispensable Skills</h2>
  <p>My skills include:</p>
  <ul>
    <li>Fast typing (nearly 12 words/minute).</li>
    <li>Extraordinary pencil sharpening.</li>
    <li>Inventive excuse making.</li>
    <li>Negotiating with officers of the peace.</li>
  </ul>
  <p>And I also know XHTML!</p>

  <h2>Previous Work Experience</h2>
  <p>I have had a long and illustrious career in a variety of trades. Here
are
   some highlights:</p>
  <ul>
    <li>2005-2008 - Worked as a typist at <i>Flying Fingers</i></li>
    <li>2008-2009 - Performed cutting-edge Web design at <i>Riverdale
     Farm</i></li>
    <li>2009-2010 - Starred in Chapter 2 of <i>Creating Web Pages: The
     Missing Manual</i></li>
  </ul>

  <hr />
</body>

</html>Even a Web designer with the best intentions can run afoul of the strict rules of XHTML. Although browsers really should catch these mistakes, virtually none of them do. Instead, they do their best to ignore mistakes and display flawed documents.
At first glance, this seems like a great design—after all, it smoothes over any minor slip-ups you might make. But there's a dark side to tolerating mistakes. In particular, this behavior makes it all too easy for serious errors to lurk undetected in your Web pages. What's a serious error? A problem that's harmless when you view the page in your favorite browser, but makes an embarrassing appearance when someone views the page in another browser; a mistake that goes undetected until you edit the code, exposing the mistake the next time your browser displays the page; or a problem that has no effect on page display but prevents an automated tool (like a search engine) from reading the page.
Fortunately, there's an easy way to catch problems like these. You can use a validation tool that reads through your Web page and checks to see if it meets the strict rules of XHTML. Validators can catch a number of problems that you've seen in this chapter, including:
Missing mandatory elements (for example, the <title> element)
A start tag without a matching end tag
Incorrectly nested tags
Incorrect capitalization (for example, <B> instead of <b>)
Tags with missing attributes (for example, an <img> element without the src attribute)
Elements or content in the wrong place (for example, text that's placed directly in the <body> section)
If you use a professional Web design tool like Dreamweaver, you can use its built-in error checker (Chapter 4 has the details). If you create pages by hand in a text editor, you can use a free online validation tool.
You can choose from plenty of validation tools, but most only validate pages that are already online. The validator at www.validome.org (shown in Figure 2-14) is a bit better—it lets you validate an online page or upload an XHTML document straight from your hard drive.
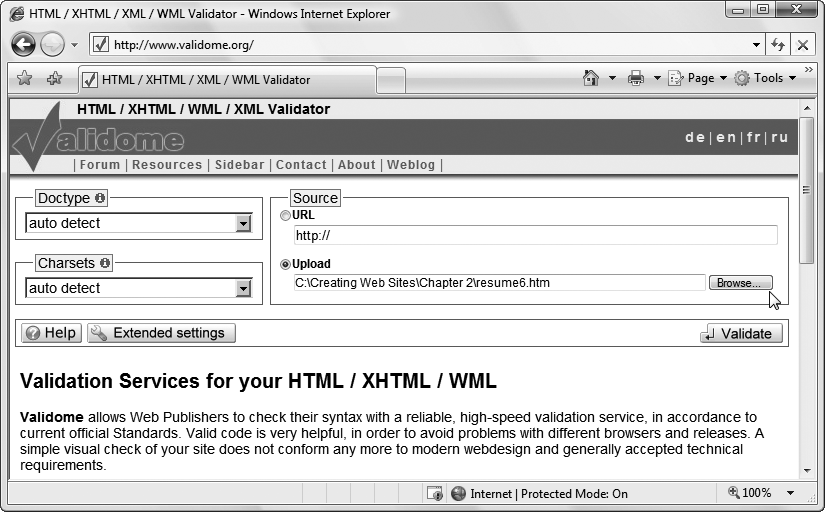
Figure 2-14. The Web site www.validome.org gives you two options for validating XHTML. You can fill in the address of another Web page, or you can click the Browse button to call up an XHTML file on your own computer.
To validate a page at www.validome.org, follow these steps:
Go towww.validome.org.
Click the Upload option to choose to validate a file from your computer.
On the other hand, if you want to validate a file that's already online, choose the URL option, enter a Web page address (like http://www.MySloppySite.com/FlawedPage.html/), and then jump to step 5.
Click the Browse button.
An Open dialog box appears.
Browse to the location of your XHTML file, select it, and then click Open.
The file name appears in the text box, as shown in Figure 2-14.
At this point, you can set other options, but you probably won't. It's best to leave the Doctype set to "auto detect"—that way, the validator will use the doctype specified in your Web page. Similarly, use "auto detect" for the Charsets option unless you have an XHTML page that's written in another language and the validator has trouble determining the correct character set.
Clicking the Validate button sends your XHTML page to the Validome Web server and, after a brief delay, the report appears. You'll see whether your document passed the validation check and, if it failed, what errors the validator detected (see Figure 2-15).
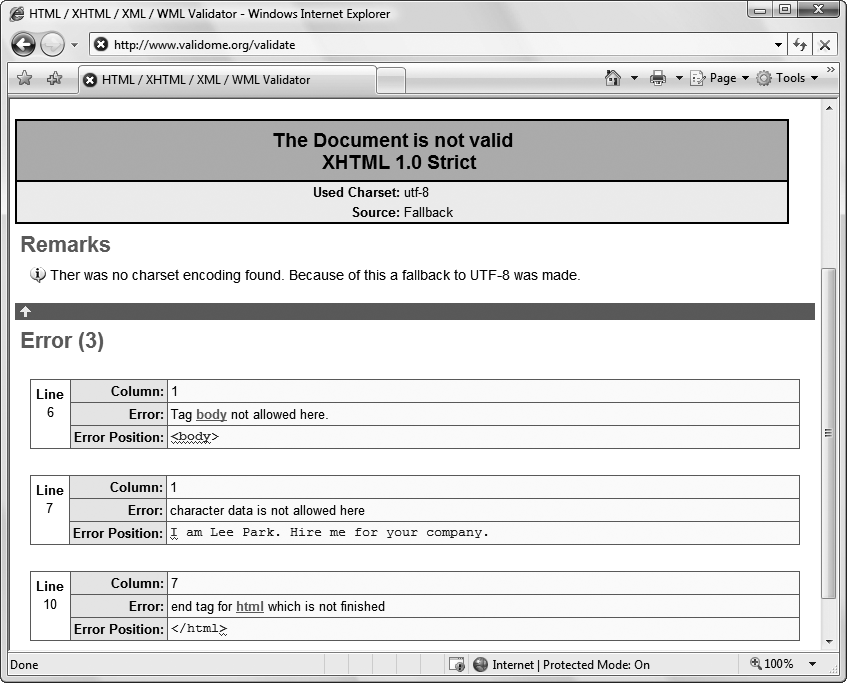
Figure 2-15. The validator has discovered three errors in this file that stem from two mistakes. First, the page is missing the mandatory <header> section. Second, it contains text that's placed directly in the <body> section, rather than in a block-level element (like a paragraph). Incidentally, this file is still close enough to correct that most browsers will display it correctly, without warning you about the sloppy XHTML inside.