Chapter 2 Choosing a Service Provider
> Why Your Choice of Provider Is So Important
> Selection Criteria
> Print Processes
> Software
Why Your Choice of Service Provider Is So Important
The first step in any photo book project is choosing which service provider will print your book. You are probably asking yourself why this is so, as you can print pictures or text on any printer you like without having to choose in advance which device you want to use.
The reason things are different with photo books is that, in addition to actually printing the finished book, photo book providers usually have their own proprietary layout software. The functionality offered by this software differs widely from provider to provider, so the provider you choose can have a significant effect on how your finished book will look. For example, very few providers offer transparent text backgrounds, so if you want to include this type of element in your layout, your choice of providers is limited from the start.
Some, but by no means all, providers allow you to upload your book in PDF format. You can create PDFs using just about any program that has print functionality, making it possible to create your layout using a text editor like Microsoft Word or pro-grade layout programs such as Adobe InDesign or QuarkXPress. In any case, your choice of provider will determine which software you can use while creating your layout, underscoring the need to make the right choice at the beginning of the process.
GOING DEEPER HOME PRODUCTION There is no reason you can’t print your photo book yourself. Home printing gives you complete control over the entire process and gives you the freedom to choose your own materials, such as paper and cover type. Some high-end paper manufacturers, such as Hahnemühle, offer complete photo albums; and dealers like Adorama and B&H in the United States, or Calumet Photographic in Great Britain, sell albums that allow you to simply slide in your printed pages. However, if you want to produce a professional-quality book, you will need to have access to a high-end photo printer and top-quality paper. You will also need to have use of one or more specialized layout programs, as the software provided by most photo book providers is not designed for home use. Printing photo books at home involves a lot of effort and significant cost. For those interested in delving deeper into the subject, I can thoroughly recommend Fine Art Printing for Photographers by Jürgen Gulbins and Uwe Steinmüller, also published by Rocky Nook. 
Selection Criteria
A Google search for photo book service providers produces a huge number of hits, and the PhotoBookGirl.com comparison website lists more than 30 providers in the United States alone—and even those are by no means all the ones that exist.
There are big differences among the services on offer, including everything from print quality to price. In order to find the right provider for your particular project, you need to systematically consider certain basic aspects of the provider you will use. Some things to consider are:
 The print process
Overall quality
Software functionality
Price
If you have special requirements with regard to the size of your book or the type of cover you want—leather or linen, for example—you might find there is only one provider among the hundreds out there that can fulfill your wishes.
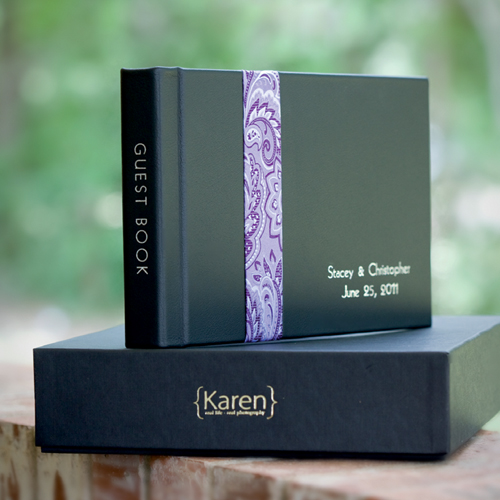
GOING DEEPER PRO-GRADE SERVICES Some providers tailor their services specifically to professional photographers. These include Leather Craftsmen, KISS, and AsukaBooks in the United States, and Graphistudio in Italy. Leather Craftsmen and GraphiStudio both offer plug-ins for Apple’s Aperture. The selection criteria for these services are exactly the same as those listed above, even if they are weighted slightly differently. In the professional arena, price is probably less important than the quality and reliability of the service being offered (see also the section below titled “Other Factors”).
Figure 2.1: Services such as Leather Craftsmen are aimed at professional photographers, and offer exotic cover materials for their products
(Photo: Leather Craftsmen)
Most providers, whether for the hobbyist or professional, offer print processes that are the same as or similar to those described in the next section. Printing on photo paper is a popular option, but comprehensive color management support and a wide range of papers and covers types are areas that distinguish most pro-level providers from their hobby-grade counterparts. Many providers give great emphasis to custom cover design, and the range of options on offer includes leather, linen, or metal decorated with all sorts of extras, such as embossed lettering. Pro-level providers also offer offbeat options that are less common, such as quilted covers or high-end sleeves.
Some providers offer special paper finishes, such as the metallic look included in the Graphistudio range.
Links to high-end providers in the United States:
http://leathercraftsmen.com
http://kissweddingbooks.com
http://asukabook.com
And in Europe:
http://www.graphistudio.com
http://www.bulmark.com
http://www.manuart.com
Print Processes
One of the main distinguishing features of pro- and hobby-grade service providers is the print process they use. There are two main options:
Digital offset printing
Printing on photo paper
The process you prefer depends on the type of book you want to produce, as well as budget considerations and personal taste. The major differences between the two processes are described below, but it is always a good idea to check out physical differences first hand, such as the thickness of the paper. Photo stores and trade shows are great places to get a hands-on feel of a real photo book, or you can ask your friends who have already had photo books printed about their experiences. Some providers, such as Blurb, offer paper samples.
In addition to the vagaries of personal taste, the following hard facts distinguish the two main printing processes from one another.
Digital Offset Printing
The term digital offset printing is intended to emphasize the similarity of this process to the traditional offset printing techniques that have been in use for more than 100 years. High-end photo books, such as exhibition catalogs or artists’ monographs, are still printed using the offset process. However, traditional offset printing requires the production of unalterable custom printing plates for each job. The effort and costs involved make the process suitable for large print runs but not for single issues.
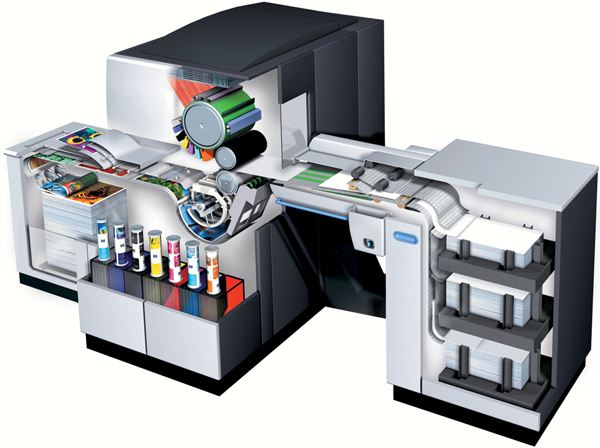
Figure 2.2: The digital offset printing field is dominated by HP’s Indigo machines
(Photo: HP)
In 1993, digital technology allowed for a major breakthrough in printing. A company called Indigo introduced an indirect printing process that uses a rubber blanket to carry the impression and requires no printing plates or films. This new process made production of single issues and small print runs affordable, and signaled the birth of the modern photo book industry. The Indigo process—now owned by Hewlett-Packard (HP)—still dominates the market. According to HP’s figures, Indigo machines were used to print more than 75 percent of all photo books in 2009. [Fig. 2.2]
Both the traditional and digital offset processes typically use four different ink colors (cyan, magenta, yellow, and black—also known as CMYK) to produce color images. Offset printing also allows the use of additional colors, and some digital printing services (such as Viovio) use seven colors. The process creates a pattern of tiny dots (i.e., a raster) to assign the different colors to the appropriate place on the page.
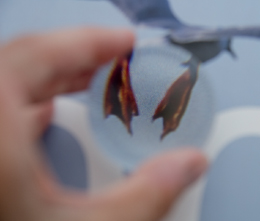
Figure 2.3: The digital offset print raster is visible if you view an image through a magnifying glass. Prints made on photo paper do not display a raster.
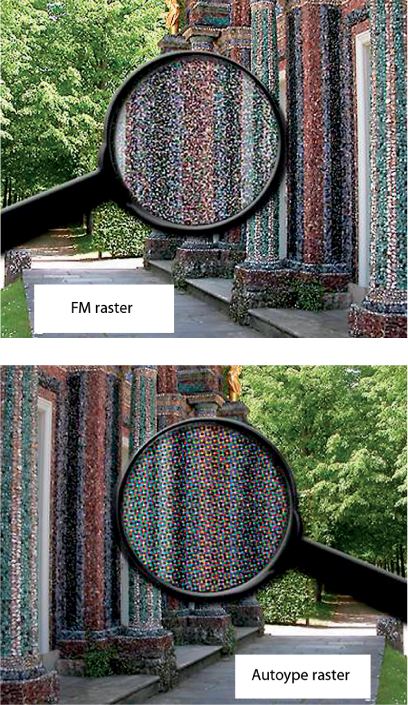
Figure 2.4: The digital offset printing process uses various types of print raster
(Photo: Fotobuch XXL)
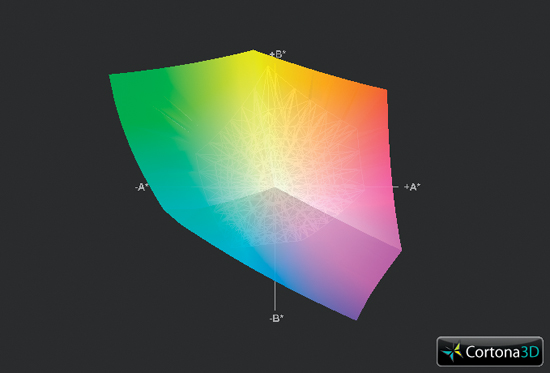
Figure 2.5: The usable color space covered by the digital offset print process is usually smaller than that offered by prints made on photo paper. The illustration above compares the Saal Digital photo paper color space (the colored surface in the background) with the digital offset Blurb color space (represented by the grid in the center).
(Illustration created at ICCView.de)
You can see these dots if you use a magnifying glass, but they are not visible at normal viewing distances.
There are various types of rasters in use, the most common of which is the autotype raster, which uses circular dots that are formed from the center outward. A frequency modulated raster distributes the dots randomly, and is thus better for portraying fine details, however this technique is rarely used in the mass market. [Fig. 2.4]
Purists maintain that rasterized images—regardless of which type of raster is used—do not have as much punch or luster as traditional photo prints. This perception is probably also due to the smaller color space that the use of CMYK colors allows. [Fig. 2.5]
Contemporary digital offset prints offer nearly the same quality as traditional offset methods, although the latter is still preferable if you are thinking of producing a large print run.
In both cases, the paper looks and feels like that used in a traditional book, and enables you to create volumes with as many as several hundred pages.
Digital offset printing is more widespread, is generally cheaper than having your book printed on photo paper, and offers a broader range of formats and binding options.
Printing on Photo Paper (“Real Photo” Books)
Alongside offset printing, the other most commonly used printing method is the traditional optical/chemical photo print technique that has been in use since the earliest days of photography. If you have ever had the opportunity to work in a darkroom, you will understand the magic involved in producing images using silver halide paper. The same principle still applies to photographic prints and photo books printed on photo paper, and the only real difference is that today’s labs use laser light sources. The resulting pictures are still developed using chemicals and light-sensitive paper.
This process doesn’t require the use of a raster, and allows us to use a larger color space than the offset process (for more on color spaces see chapter 3 under the section titled “Color Space: sRGB”), even if not all providers make use of it. Experts can see that books printed on photo paper are a touch more punchy and vibrant than their offset counterparts, especially if the print process includes proper color management. For more detail on this topic see section 11.2, “Final Corrections.”
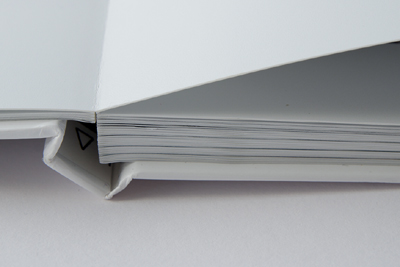
Photo paper is usually slightly thicker than offset print paper and has to be doubled up in order to produce pages that have images on both sides. This makes photo books printed on photo paper significantly thicker than offset-printed books. In turn, this means that books printed on photo paper often have a maximum of 100 pages or fewer. Offset printing is much more flexible. Blurb, for example, offers photo books with up to 440 pages. But thick pages are not always a disadvantage; they can convey a feeling of quality that enhances the value of a wedding album or a photo book produced as a gift. [Fig. 2.6, 2.7]
Figure 2.6: Each page of a book printed on photo paper consists of two sheets of paper that are glued together. This makes the pages much thicker than offset-printed pages.
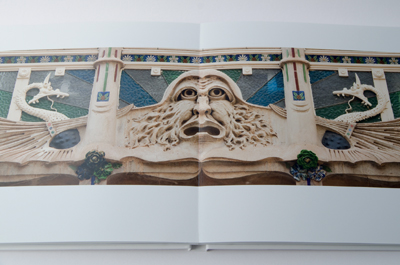
Figure 2.7: Books printed on photo paper have no unsightly crease in the center of double-page spreads
(Panorama by Werner Pluta)
The additional effort involved makes books printed on photo paper more expensive than digitally printed books. Photo-paper books are available in a smaller range of formats, and not every service provider offers them.
Other Print Processes
In addition to the two major print processes described above, there are a number of niche processes offered by a small number of service providers. Most of these are fine art printing processes that center around high-end inkjet printers. These processes can achieve print resolutions of up to 600 dpi with very fine detail rendition. Most of these types of photo books are handmade and can cost as much as several hundred dollars.
Which is the Best Print Process for My Project?
There is no hard and fast rule that dictates which process is better. Generally speaking, printing on photo paper is the better choice for panoramas and other projects that depend on squeezing every last drop of quality out of the images on display. This is also the way to go if you want to create the best possible impression for books with relatively few pages. For projects that span a large number of pages or contain large amounts of text, digital offset printing is the best bet, especially if you have to watch your costs. However, your choice will also be a matter of taste, and the debate concerning the relative values of both processes continues. Some find the thicker pages in a photo paper book classier, while others prefer the “real” book feel that the digital offset process provides.
Print Quality
To a degree, print quality depends on the print process used to make a book. Books printed using the digital offset process always use a raster, but the coarseness of the raster can vary. The brilliance of the resulting colors also depends on the print process you use and the size of its associated color space.
Most providers use HP Indigo machines for digital offset printing, making the basic differences in print quality between providers less significant than you might expect. This is also why cheaper photo books often do just as well in tests as their more expensive counterparts. Tests also regularly confirm that the print quality offered by some service providers varies significantly from book to book. This is due to the large number of factors that influence complex mechanical print processes. Varying degrees of paper whiteness can produce widely differing colors, and even air temperature and humidity can influence the results of print processes. Other factors that influence results are the maintenance intervals for machinery and the software version used to rasterize pictures. And, last but not least, print quality depends on how often a printer is linearized (i.e., properly calibrated). All of these factors are subject to short-term fluctuations, which can produce differences in print quality that require constant attention.
Another factor that can influence the quality of the book you receive is a provider who uses third-party printers. If you want to be absolutely sure of getting consistent print quality from project to project, it is best to use a provider who prints in-house and has control over the various factors affecting the print process.
TIPS & TRICKS A few providers, such as Edition One, offer their customers proofs of individual book pages to aid in the decision process. The only way to judge the quality offered by all other providers before printing is simply to order the cheapest books offered and check them out at home. Many of the test results that appear in the popular photo press are based on subjective impressions gleaned from single, random photo books, rather than on objective, scientific tests of the actual color quality produced by various providers. 
Binding
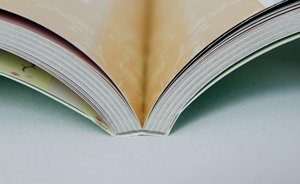
In addition to print quality, the binding is also an important aspect of overall photo book quality. The thicker a photo book and the more often it is opened and viewed, the stronger the binding has to be. A sewn binding is generally the strongest, although high-quality PUR (Polyurethane Reactive) glued bindings can be almost as strong if well executed. Most providers list details of the available binding types on their websites, and some even offer binding guarantees that range from two years to lifelong. [Fig. 2.8]
Figure 2.8: The binding is an important factor in the overall quality of a photo book. Modern PUR adhesive bindings like this one can be just as strong as traditional stitched bindings.
Figure 2.9: Picaboo and MyPublisher offer a special “lay-flat” binding that doesn’t produce the break in the middle of double-page spreads that is common to most other photo books
(Photo: Picaboo)
Most bindings cause a break in the middle of each double page that makes large pictures look “split.” Some providers (such as Picaboo and MyPublisher) offer “lay-flat” bindings, which use an integrated, flexible hinge to allow the pages to lay completely flat when bound. [Fig. 2.9]
An advantage of this so-called leporello style of binding (also called flush mount by some providers) is that double-page spreads can be laid out completely flat when the book is open. This technique is often used in children’s books, and avoids the unsightly crease in the middle of a double-page spread that can be detrimental to the look of a large photo. This makes printing on photo paper the method of choice for books of panoramas or other images that cover more than one page.
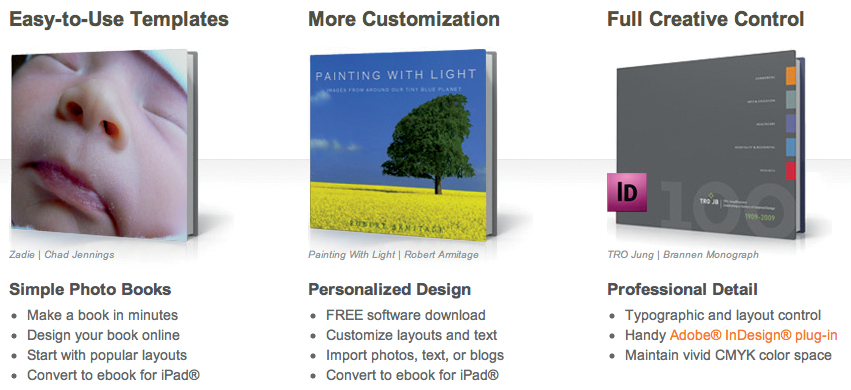
Figure 2.10: Blurb offers three different routes for creating photo book layouts: standalone download software, online software, and an InDesign plug-in that outputs your layout in the form of a PDF document
Software
Photo book software is available in two basic categories: proprietary provider-specific software and provider-independent image-processing or layout software with built-in photo book functionality or output tools. (At the end of this section you can find further information on how to use Photoshop and InDesign to create a photo book.) Some programs, such as iPhoto and Aperture, have built-in modules or third-party plug-ins that work with specific service providers’ websites. This high degree of integration simplifies the book creation process and is a great aid to beginners. However, such dedicated functionality is only available to Mac users to date. [Fig. 2.10]
Most people end up using their provider’s free software, which is usually available either as a standalone package or as an online tool. Some providers, such as Blurb or SmileBooks, offer both types, while others, such as AdoramaPix or PhotoBox, offer only online layout functionality. Still others, such as MyPublisher, offer only downloadable software. In general, U.S. providers tend to offer online tools, whereas European providers lean toward downloads.
Standalone software is generally the more flexible choice for large projects. Most online tools require you to upload your images before you begin to create a layout, which can take a very long time if you want to include a large number of high-resolution photos. Some software packages allow you to upload low-resolution preview images to help you get started more quickly, and then you transfer your full-resolution images at the end of the process—a step that can, in fact, take place in the background while you do other things. Standalone software also gives you a better overview of the different layout versions you create as well as more flexible backup options. You also have the option of reordering a particular layout in the future. Online tools, such as the one offered by SmileBooks, sometimes automatically delete layouts after a preset period of time. One benefit of online tools, however, is that they make it possible to collaborate with others in creating your project—a function explicitly supported by Mixbook.
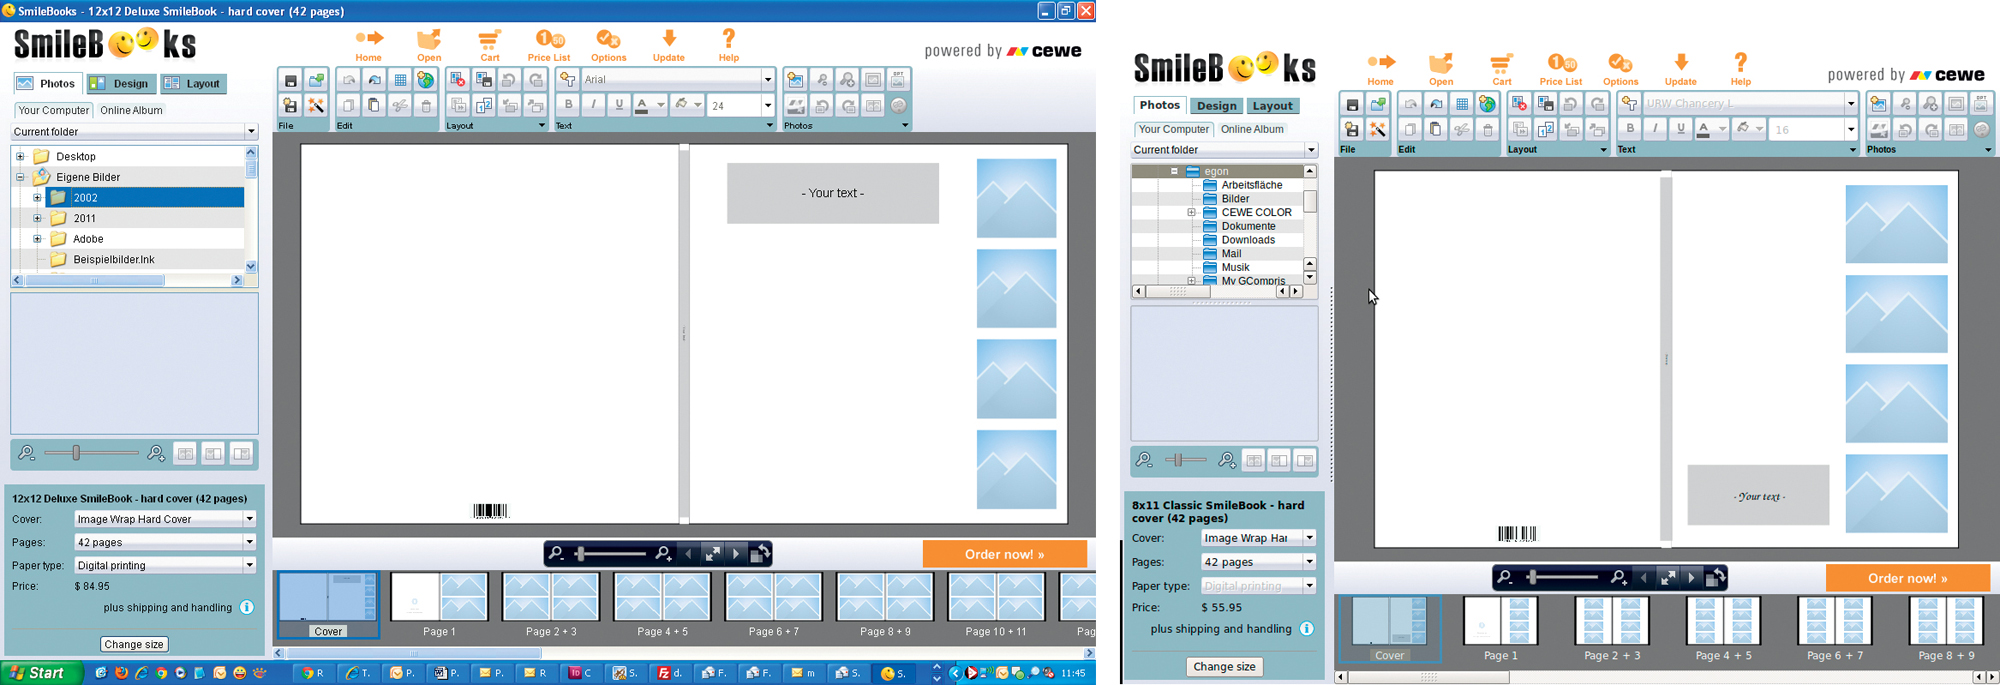
The major advantage of online layout tools is that they work independently of your computer’s operating system. Standalone software is not always available for all common operating systems, and Mac or Linux users often draw the short straw. SmileBooks offers software for all three platforms, while Blurb and Picaboo cover PC and Mac. There are many forum entries that describe how users have managed to get Blurb’s software running on Ubuntu Linux, and one user has even posted a link to a privately programmed installer. [Fig. 2.11]
Figure 2.11: Some providers, such as SmileBooks, offer software for Windows, Mac, and Linux. All three SmileBooks versions have virtually identical interfaces.
The choice of providers becomes even more limited if you want to work on a single project using multiple operating systems—for instance, on a workplace Mac during the day and on a home PC in the evening. Blurb and SmileBooks allow you to move book files easily between Windows and Mac machines, and SmileBooks even adds Linux to the mix. Online tools like the ones offered by AdoramaPix and MPix are generally compatible with various operating systems.
The level of file portability varies from provider to provider too. Blurb, SmileBooks, and MyPublisher allow you to decide exactly where you want to save book project files, making it simple to copy them to removable media such as a USB stick. In contrast, Picaboo saves projects to a predefined folder that cannot be changed by the user.
The range of fine-tuning options also differs among providers. For example, some providers offer a wide range of frame or cutout effects while others offer hardly any, and transparent backgrounds are standard in some places but unheard of in others. The available options will also influence your choice of provider.
The variations in today’s photo book software show that the market is still young and that firm standards have yet to be established.
Wizards and Templates
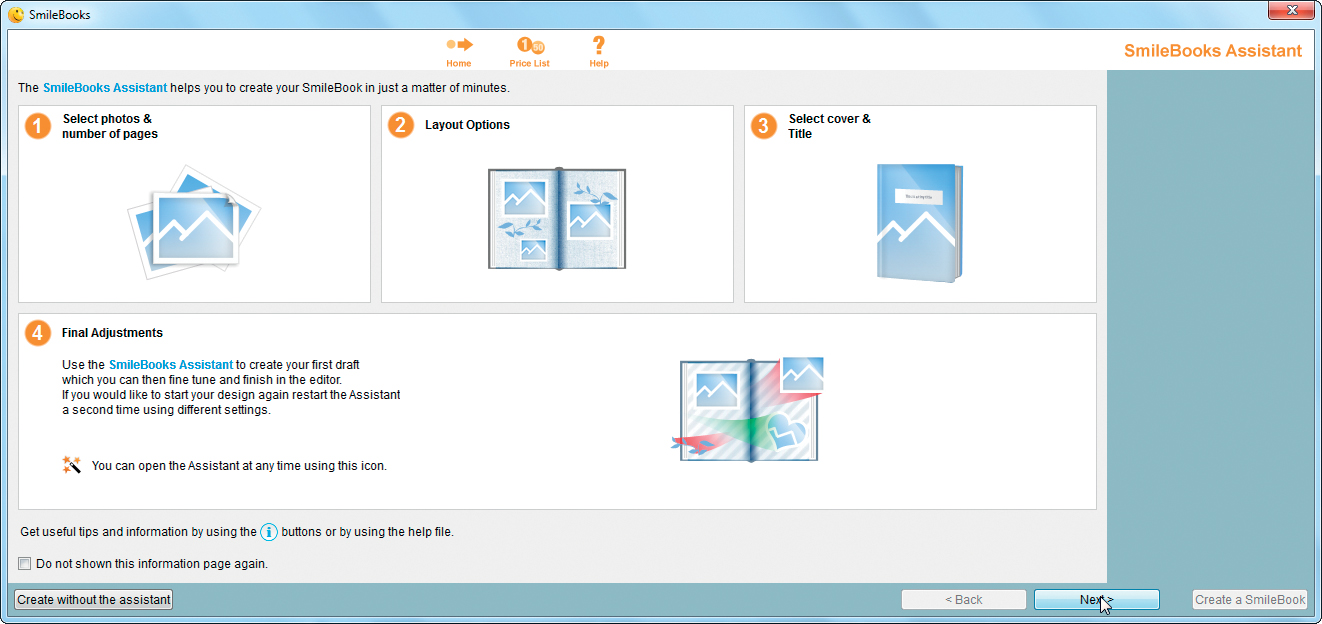
Wizards help you create your book step by step, and are an important aid for photo book beginners. Once you have gained some experience, you will probably no longer need to use a wizard. The templates offered by most providers are another useful option if you are looking for ideas for a particular event, such as a vacation, wedding, or the arrival of a new baby. Themed templates (or styles, as they are called by some providers) usually include appropriate backgrounds and clip art. [Fig. 2.12]
Figure 2.12: Wizards (like the one from Smile-Books shown above) help you create your book step-by-step, and are an important aid for photo book beginners
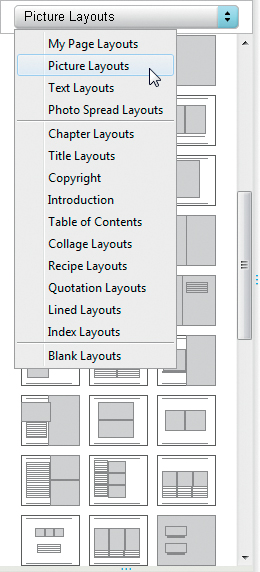
While experienced users usually work without wizards or complete book templates, page layout templates can help all users get better results. A layout template predefines the size and position of text and image elements, and can be applied to a (double) page using a single mouse click. This makes creating a layout much quicker, as you no longer have to manually position each photo and text box. Again, the range and quality of the templates on offer varies from software to software, and some providers even allow you to load templates directly from the Internet. Viovio also allows you to use other designers’ templates.
Templates can usually be individually adjusted to suit a particular page, and high-quality providers allow you to create and save your own templates. Some providers (Blurb, for instance) also provide text style sheets to help repeat users recreate a particular look. Automatic page numbering is not a standard feature, although Blurb and SmileBooks do offer it as an option.
Figure 2.13: Some providers, such as MyPublisher, provide a built-in image editor for cropping or converting images to black-and-white
Image Processing Options
Once you have created the basic page layout, the next step is to insert your photos. In addition to the standard option of uploading images from your hard disk, Blurb, Picaboo, and AdoramaPix offer the option of loading images directly from online photo websites such as Picasa or Flickr, making it simple to include other people’s photos in your book.
Most providers offer basic image-processing functionality, such as cropping or rotating, while some offer more sophisticated options that include brightening, increasing contrast, converting images to black-and-white, and adding visual effects such as vortexing. [Fig. 2.13]
I recommend using built-in image-processing functionality only if you don’t have your own image-editing software or if you are not yet up to speed performing your own image corrections. Some providers offer the ability to make perfectly adequate minor adjustments, such as black-and-white conversion or sepia toning, but the range of editing options offered by specialist software such as Photoshop and Lightroom is much broader and thus preferred. For instance, with specialist software you are able to adjust each color channel separately during conversion.
TIPS & TRICKS
AUTOMATIC IMAGE CORRECTIONS
If you edit your own images before uploading them to your chosen provider, make sure that the print process doesn’t include automatic image correction, or if it does, that it can be switched off from within the layout software interface. Ideally, you should be able to choose whether auto correction is used for single images or the whole book. At AdoramaPix (and others), this step is part of the order process.
Frames and Backgrounds
Frames (or “image masks,” as SmileBooks calls them) are one of the most commonly used effects, and are available in a whole range of styles, from Blurb and Picaboo’s pure and simple designs to the exotic, editable choices offered by AdoramaPix and SmileBooks. [Fig. 2.14]
Figure 2.14: AdoramaPix is one of a number of providers who offer a wide range of frame effects
Page backgrounds, too, are available with a wide range of predefined images and patterns, and can often be enhanced using additional material downloaded from the provider. You can, of course, also use simple colors for your background. Blurb, Picaboo, and AdoramaPix allow you to choose from the range of colors offered by your operating system—in other words, there is virtually no limit to the colors you can select. AdoramaPix and MyPublisher both have a practical eyedropper tool that allows you to select a color from a photo to use as your background color.
CHECKLIST: SOFTWARE OPTIONS
 Book creation wizard
Themed book templates
Choice of predefined page layouts
Attractive background images and patterns
Free choice of background color
Built-in image-processing functionality
Free choice of frame color and shape
Use of empty frames as graphic elements
Object transparency
Text transparency
Range of standard typefaces or use of user-selected typeface
Text import option
Text templates and formats
Option to save and re-use your own page and book templates
Option to alter book size after layout has been completed
Editing Text
Some providers, such as AdormaPix, Picaboo, and MixBook, only allow you to use their predefined typefaces and styles. This can be practical if you don’t have your own favorite fonts or don’t want to spend time searching for unusual styles on the web. In contrast, Blurb, Smilebooks, and MyPublisher are more flexible and allow the use of virtually any font you like, which is especially useful if you have to stick to a predefined corporate image or want to use your own favorite font.
The text options on offer are largely similar, and cover the style, size, and type (bold, italic, underlined, etc.) of font. Maximum font sizes vary widely. MixBook, for example, limits you to a maximum font size of 126 points, while Blurb offers type in almost limitless sizes. This can be important if you want to use individual letters as decorative elements on a page.
As with background colors, you can usually set text and text background colors using all the shades available to the operating system, although not all providers offer colored backgrounds for text. An attractive but rare option is the ability to adjust the opacity of text box backgrounds to give text elements a semi-transparent look. [Fig. 2.15]
Figure 2.15: Some providers, such as Picaboo, offer transparency effects for text box backgrounds
Text transparency functionality is only available from a few providers (AdoramaPix is one), but there are workarounds (see chapter 10). Among the European providers we looked at, myphotobook offers transparency effects that you can adjust directly in the software interface.
Generally, it is possible to import text directly from word-processing programs. If your provider’s software has no dedicated copy and paste buttons, you can usually perform these steps with the commonly used copy and paste functions on your computer.
Inserting Graphic Elements
Another way in which book creation software varies is in the ability to include graphic elements, such as colored boxes, in addition to text and photos. To do this, the software has to either include dedicated functionality or allow the user to insert empty text boxes or image elements into a page and give those elements a colored background. SmileBooks, AdoramaPix, and Picaboo offer this type of function. [Fig. 2.16]
Figure 2.16: Picaboo is one provider which offers users the option of inserting additional graphic elements into a layout
Creating a Layout using Photoshop
TIPS & TRICKS If you want to use Photoshop and your provider’s software to create a layout, make sure that you can scale images across double-page spreads. Not all providers offer this option.
Using an image-processing program like Photoshop to create your layout means that you only have to do all the hard work once, and can upload and print the results using as many service providers as you like. Creating your layouts this way also means that you can reorder your book years later using the same layout, without having to worry about future software compatibility issues or whether the provider will still be in business. Provider independence is a very good reason for using your own software to create your layout. However, most providers won’t simply accept a collection of Photoshop-based images or a PDF file as the basis for a photo book. Blurb and Viovio are two exceptions.
This approach also raises the question of whether it makes sense to use your own software to create a layout, especially for beginners. Using Photoshop to create frames for photos and other decorative elements is much more complex than using a provider’s free tools. Additionally, independent programs don’t include the automatic warnings built into provider software that tell you, for example, when your images have too little resolution for successful printing.
Specialized image-processing programs like Photoshop also don’t provide an overview of a complete layout. They require you to create and upload a separate file for each double-page spread, or you must go through the trouble of creating a single PDF from your source files. Another potential drawback of this approach is that you have to rename all of your files should you decide to change the page order later on. It is also possible to upload each finished page to your provider as a whole-page image, but this means constantly juggling at least two separate programs.
If you do use your own software, double check that the sizes and resolutions of the finished pages are the same as those used in the book’s layout; otherwise, you could end up with mismatches and odd-looking fonts.
TIPS & TRICKS If you want to use Photoshop to create a layout, adjust the canvas size to match the size of each book page exactly—for example, 12 × 12 inches at 300 dpi. This way, you can be sure to give your pages sufficient resolution for successful printing.
At the end of the day, creating an entire layout using Photoshop is probably best left to Photoshop experts, and only really makes sense if you want to create unusual special effects. However, using Photoshop (or other image-processing programs) to prepare your images for printing is definitely worthwhile. For more information on how and why, see section 3.5, “Optimizing Your Image Settings.”
Creating Layouts using Dedicated Layout Software
Dedicated layout software, such as InDesign or QuarkXPress, is perfect for creating complex custom layouts. These programs offer a wide range of options, but are quite expensive and have a fairly steep learning curve. For beginners, it is often difficult to get a handle on the sheer number of options these programs offer. Blurb offers ready-made InDesign layouts with preset margins and other important settings, and also offers an InDesign plug-in that simplifies layout creation.
PRO-GRADE SOFTWARE FREE ALTERNATIVES TO PRO-GRADE LAYOUT SOFTWARE
VivaDesigner and Scribus are two free software packages for Windows, Mac, and Linux that contain many of the features found in their more expensive, pro-grade counterparts. iCalamus is a free Mac-only layout program that allows you to import files directly from iPhoto or Aperture. None of the currently available freeware has quite the same range of functionality as InDesign or QuarkXPress, but these freeware programs offer more options than most providers’ proprietary software. [Fig. 2.17] 
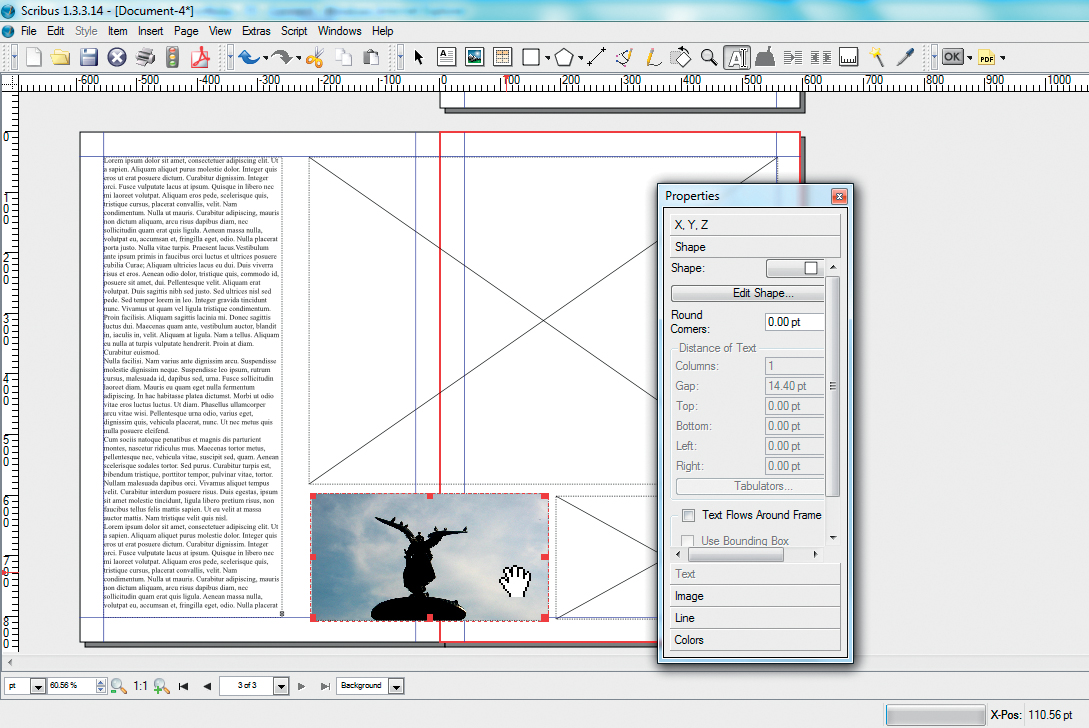
Figure 2.17: Scribus is a professional-grade layout program that you can download for free
If you have access to a high-end layout program and you know how to use it, it is certainly a viable alternative. In addition to the advantages listed above, such programs also give you many more creative options—for instance, fine-tuning the interaction of text flow with the images and other elements on a page. [Fig. 2.18]
The degree of automation built into dedicated layout software can also help increase the efficiency of your workflow. You can use it to set up text and image style templates or complete page layouts, which makes designing large books quicker and easier than it is using free provider-based software. Provider software is geared toward the consumer end of the market, and emphasizes simplicity of use rather than efficiency or a broad range of functions. [Fig. 2.19]
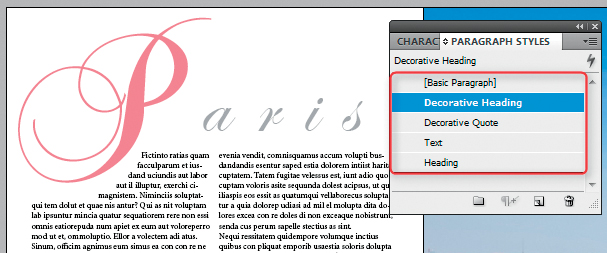
Figure 2.18: High-end layout programs like Adobe InDesign offer many more creative options—such as adjustable text flow or text shading—than the proprietary software offered by service providers
Figure 2.19: InDesign allows you not only to set up complete page layouts, but also to create unique text and image styles
Dedicated layout software is particularly useful if you are producing a photo book that contains large amounts of text spread across multiple pages. Provider software often limits you to inserting text into boxes that cannot be “linked” (or “threaded” as InDesign calls it), which makes the creation of multi-page text complex and time-consuming.
Price
The price of a photo book is also an important factor when it comes to choosing a service provider. The range of prices is enormous, and can vary by as much as 50 percent, even among better-known, high-end service providers. Page prices typically start at between 50 cents and $1, depending on the format. The major criteria that influence the price of a photo book are the print process the provider uses and the number and size of the pages. Books printed on photo paper are usually more expensive than those printed using the digital offset process, and the price can differ by as much as $30 for the same book. Optional extras such as lay-flat bindings also cost about 50 cents extra per page. High-quality cover materials also increase the price, and a leather cover can cost as much as $20 more than linen. There are exceptions though—for example, Picaboo and MyPublisher even offer linen covers for less than an image wrap (i.e., a photo cover).
In addition to the cost of the book itself, some providers also charge a one-time service fee per job and they charge delivery fees that depend on the size of the book and the speed of the delivery service you select. Surface mail typically costs $5–$10, while express charges can be as much as $25. Services that are affiliated with a store (like AdoramaPix) also offer a pick-up service.
Volume discounts can save you some money. For example, Blurb offers discounts of between 5 and 15 percent for orders of 7 to 50 books. MyPublisher offers a 10 percent discount for 10 books and close to a 20 percent discount for 100 copies or more.
Generally speaking, the more pages your book contains, the more expensive it will be; although there are exceptions here, too. Some providers offer a page-volume discount that reduces the per page price the more pages you order. At Blurb, a 20-page book with a soft cover costs about 85 cents per page, whereas a 440-page book costs just 17 cents per page. Other providers have simple linear price scales, so it’s definitely worth comparing prices before you have a big book printed.
Taking advantage of special offers is also a great way to save money, and subscribing to a provider’s e-mail newsletter is the best way to find out what’s currently on offer. MyPublisher regularly offers discounts of up to 50 percent, and you can often find offers for 25 percent off the regular price if you shop around. Keep an eye out for new customer discounts, too. Experienced users tell me that they have never actually paid the list price for a photo book.
Other Factors
Bar Codes and Logos
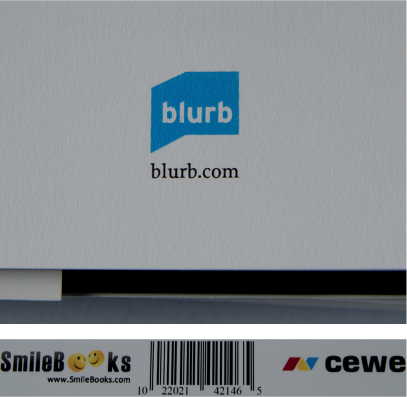
Some users select a service depending on whether or not the provider prints its own logo or a bar code on (or inside) the back cover, the way Blurb does. A third-party logo is a no-no for professional photographers, and often spoils the look of a book even if you don’t object to the reader knowing who printed it. Unfortunately, most providers include logos and bar codes for technical and marketing reasons. Because the cover and the contents of a book are often printed separately, bar codes ensure that the right components are brought together at the production stage. For a small fee Blurb and MyPublisher will leave their logos out, while others, such as Picaboo, offer certain types of books that don’t include a logo at all. AdoramaPix is one of the few providers that never includes a logo. [Fig. 2.20]
Figure 2.20: Many service providers print their own logo on the back cover and a bar code on the last page. Some even print their logo on the first or last page of the book.
Special Requests
The ability to deal with special requests can play a role in your choice of provider. If you want to create a book with pages larger than the standard sizes or with more than 100 pages, your choice of service will be fairly limited. Blurb is one of the most flexible, and offers book sizes up to 12 × 12 inches with as many as 440 pages. Particularly small or thin books are also a specialty, and are only offered by a few providers. The smallest standard format is 6 × 4 inches, although MyPublisher and Viovio include a 2.75 × 3.5-inch mini-sized book. The minimum number of pages you can select is usually 20; the exceptions here are AdoramaPix, which offers 14-page books, and Viovio, which has no minimum page count. If you are on the lookout for something really special, like a photo book in CD-insert format, you may not find anyone who can fulfill your wishes; the only alternative is to look for a specialist printing service. This can, however, end up being quite an expensive route to take. [Fig. 2.21]
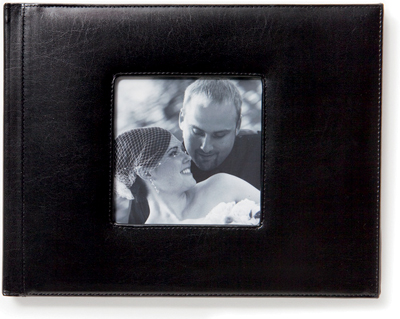
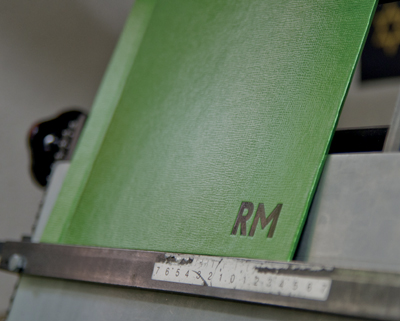
Figure 2.21: Nearly all photo book services include linen covers in their range
Linen covers are generally standard, often with a cutout view of a photo underneath. Other extra-cost options include photo covers (image wraps) or a custom dust jacket. MyPublisher, AdoramaPix, and Picaboo also offer leather covers for an extra charge.
Figure 2.22: Some providers—Picaboo, for example—offer leather covers with cut-outs
(Photo: Picaboo)
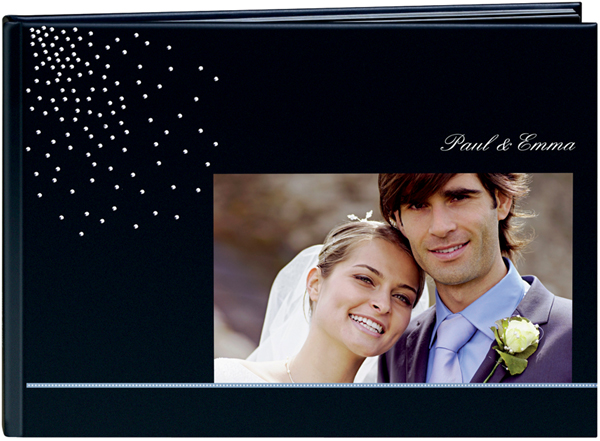
The European service provider PhotoBox even offers covers with inlaid Swarovski crystals.
Figure 2.23: Special cover options include Swarovski crystals, as offered by PhotoBox
(Photo: PhotoBox)
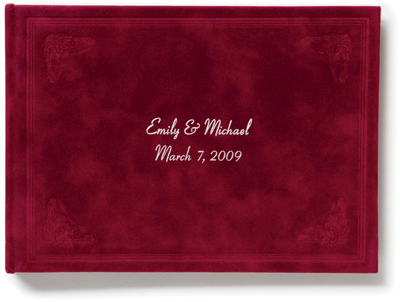
Only a very few providers offer embossed lettering for their leather covers. This is an option for the Victorian, Ranch, and Flush Mount products offered by Picaboo, and AdoramaPix offers a gold-stamping option.
Figure 2.24: Picaboo offers embossed cover lettering
(Photo: Picaboo)
A choice of paper qualities is also a rare option, and Blurb leads the field with its wide range of paper types. Semi-matte paper is usually standard, but an increasing number of providers, including AdoramaPix and MyPublisher, now offer glossy paper too. Interestingly, the high gloss books we looked at were less sensitive to dirt and fingerprints than conventional glossy prints. This is due to an additional protective coating that is applied to the printed pages, making them harder to accidentally rip, and even enabling you to carefully clean them with a damp cloth.
Generally, the weight of the paper used depends on the book format you select. This is a benefit for photo book beginners, as it can actually be quite tricky to select the appropriate paper weight for a particular page size. On the other hand, experts will appreciate the wide choice of paper types offered by Blurb.
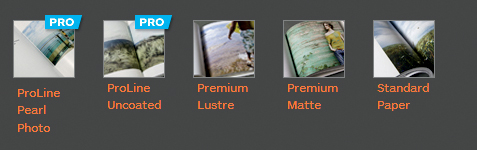
Blurb offers a paper sample “swatch kit” for a small fee to help you make the right choice between “Pearl,” “Uncoated,” and a range of other paper and cover options. The swatch makes it much easier to imagine how your photos will look when printed on various types of paper. Checking out sample books in stores and workshops or at trade shows is also a great way to get a feel for the many different options available.
Figure 2.25: Blurb offers a wide range of different paper types
GOING DEEPER
USING A BOOKBINDING SERVICE
If you need a really special cover that photo book services don’t offer, you can always take your printed book to a specialist bookbinder to have the cover replaced.
A bookbinder can also advise you on the options available for applying embossed lettering to your book’s cover. [Fig. 2.26]
Figure 2.26: A specialist bookbinding service is a great alternative option when it comes to creating a custom cover for your book. The example shown here was created during a photo book workshop.
Preview Options
Shareable online or PDF previews are great features that not all providers offer. You will often find that you can only look at a preview of your book using the provider’s software. This is because the provider wants you to use their print service rather than giving you the opportunity to print a preview at home. This limitation makes error correction much more laborious, as it is more difficult to spot mistakes on a computer screen than in a printout. (iPhoto and Aperture are exceptions that allow you to create PDFs from your layouts.)
Figure 2.27: Blurb offers full previews and buttons that link directly to the most popular online social networks
Online previews are a great tool if you are producing a book with a team spread across multiple locations. AdoramaPix, MyPublisher, and Blurb all offer direct links for sharing previews via online social networks. [Fig. 2.27]
Again, Blurb leads the field in simplicity with its animated previews (showing the entire book or selected pages) and its Facebook and Twitter buttons. Blurb previews even adjust automatically for viewing on an iPad.
Figure 2.28: At Blurb, you can advertise your book and make it available for order by the general public
Customer Service
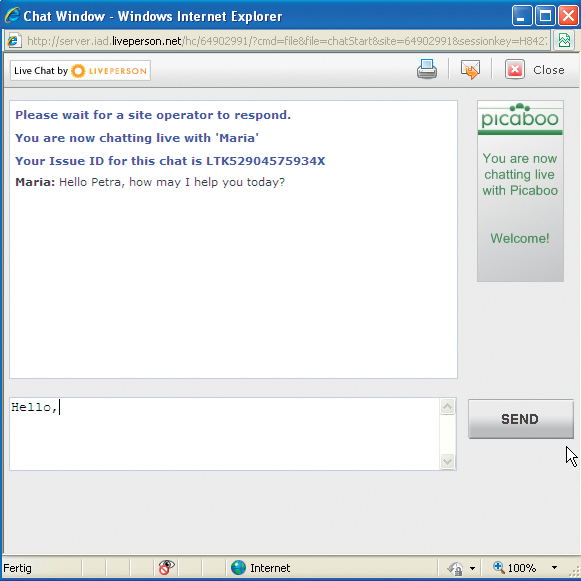
The levels of customer service on offer vary widely. All providers offer basic software help and online FAQs, but detailed guides or printed manuals are a rarity. Individual support generally takes place via email or an online contact form, and free telephone support rounds out the offers from MyPublisher and SmileBooks. MyPublisher, Picaboo, Blurb, and MixBook also offer online chat support, mostly during normal office hours. [Fig. 2.29]
Online video tutorials are a great aid if you are just starting out, and again, Blurb leads the way.
Figure 2.29: Picaboo’s online chat-based support offers quick and easy solutions to many software queries
Reordering
If you create a layout using a provider’s proprietary software and the provider subsequently goes out of business, you will most likely have to recreate your entire layout using a different provider if you want to have your book reprinted. It’s a good idea to find out how long a provider has been in business before trusting your precious data to them. A supplier like Adorama, which has been around since the 1970s, is more likely to be in business in five years’ time than a new overseas startup. If you want to remain truly provider-independent over a period of many years, you should create your layout using a pro-grade layout program and save the results as a PDF.
Speed of Service
Most providers take from three to ten days to produce a photo book, and shipping usually takes another two to five days. Most providers also offer express delivery as an option. If you decide to use an express delivery service, you should still allow one day more than scheduled for delivery, or at least see if you can find any indications of the provider’s reliability online.
If you want to have a photo book delivered before a specific date, especially around Christmas time, be sure to leave plenty of time for production and shipping, and chase down any orders that seem to be taking too long. The enormous growth that some service providers are going through can make them less reliable at peak periods.
Some product lines at MixBooks and Picaboo are labeled with production times of three to five days. If you need a book faster, the Kodak print kiosks used by companies like RitzPix and large drugstore chains like CVS and Walgreens promise a book in an hour, or at least offer same-day pickup.
GOING DEEPER
EBOOK AND IPAD SOFTWARE
All manner of electronic reading devices are now part of our everyday lives. Devices that have e-paper screens, such as the Amazon Kindle, use very little power but can only reproduce 16 grayscale tones, making them unsuitable for viewing photos. However, tablet computers like the iPad have full-color screens and are tailor-made for viewing photos and other electronic media. There are now many photo viewing programs, or “apps,” to choose from, most of which present photos in the form of a slide show.
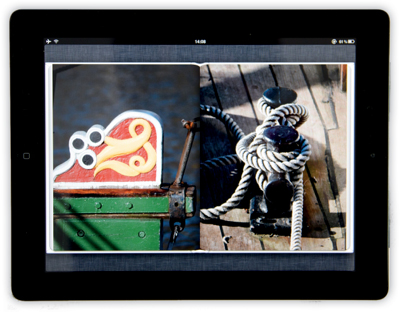
Figure 2.30: Tablet computers are perfect for viewing photos
Photo book services have quickly latched onto this trend and are beginning to offer their own apps. At the time of this writing, Blurb had already gone live with its Blurb Mobile iPhone and iPad services, following the vision of Blurb founder and CEO Eileen Gittens to allow users to view photo books using whichever medium is best suited to the project at hand.
This level of integration would mean that you could produce a family photo album in print for your parents, as an iPad ebook for your technically-minded sister, and in the future, maybe even on television for the whole family to enjoy. The multimedia functionality built into the iPad and other tablet computers brings the vision of enhanced photo book media one step closer to reality.
Blurb now offers an extra-cost service for converting conventional photo books created using Blurb’s own Bookify or BookSmart software into iPad-compatible media. At the time of this writing, there was no other additional iPad-based functionality available, but the company has promised to change that very soon.
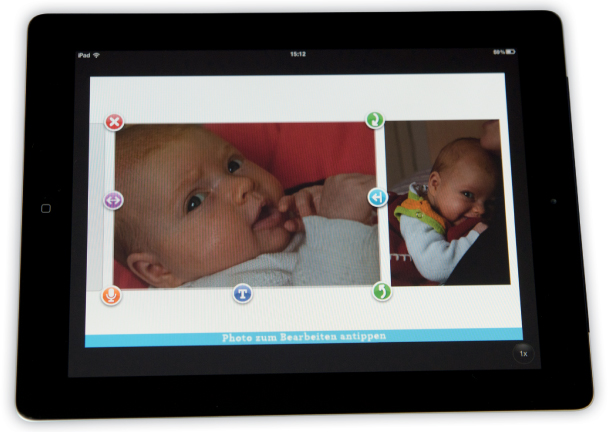
Figure 2.31: The Blurb Mobile app is designed for telling stories using the iPad or iPhone medium
The Blurb Mobile software is designed to tell stories using a sequence of photos just like a photo book, but with the added options of sound and video. The app doesn’t yet allow you to insert text, mainly due to its orientation toward smart phone use.
The manufacturers of dedicated layout software such as InDesign and QuarkXPress already include functionality for creating tablet-compatible layouts. Check out the sample iPad photo book project in chapter 13 for more details.
Service Provider Options Overview
|
SmileBooks |
AdoramaPix |
Picaboo |
Blurb |
Print Process |
|
|
|
|
Printing on photo paper |
yes |
yes |
yes |
no |
Digital offset printing |
yes |
no |
yes |
yes |
|
|
|
|
|
Software/online creation |
|
|
|
|
Online book creation tool |
yes |
yes |
no |
yes |
Software (available operating systems) |
yes (Win, Mac, Linux) |
no |
yes (Win, Mac) |
yes (Win, Mac) |
Third-party software/PDF compatibility |
no |
no |
no |
Lightroom 4/PDF upload |
|
|
|
|
|
Sizes |
|
|
|
|
Number of different offset/photo paper book formats |
8/3 |
0/13 |
5/2 |
7/0 |
Minimum size |
5.5 × 5 inch |
6 × 4.5 inch |
6 × 8 inch |
5 × 8 inch |
Maximum size |
16.5 × 12 inch |
12 × 12 inch |
11 × 14 inch |
12 × 12 inch |
Bindings |
stapled*, perfect bound* hinged lay flat* binders* |
leporello binding |
perfect bound* hinged lay-flat* |
perfect bound (soft cover), library binding (hard cover) |
Covers |
hard cover*, soft cover* |
hard cover* |
hard cover, soft cover* |
hard cover, soft cover |
Special covers |
leather*, linen* |
leather*, gold stamping* |
leather*, linen*, embossing* |
dust jacket, linen* |
User-controllable paper selection |
no |
yes (Kodak Luster finish, Fujifilm HD High Gloss finish) |
no |
yes (5 different paper types) |
Provider bar code/logo |
yes |
no |
depending on book type |
yes, deletable for a small fee |
|
|
|
|
|
Software/Online Service Features |
|
|
|
|
User-selectable saving location |
yes |
no |
no |
yes (for export) |
Layout wizards |
yes |
yes |
yes |
yes |
Number of layout templates for pages |
more than 200 |
depends on book style |
more than 200 |
nearly 200 |
Custom user templates savable |
yes |
no |
no |
yes |
Frame effects |
yes, additional effects can be downloaded |
yes, over 300 cutouts and frames |
yes, over 30 shapes and corners |
yes, over 50 border styles |
Empty text and photo boxes with background color |
yes (text)/no (photo) |
yes (text)/no (photo) |
yes (text)/no (photo) |
no (text)/no (photo) |
Opaque text boxes background/photos |
no/yes |
no/yes (via effects) |
yes/yes (called “fade”) |
no/no |
Opaque text |
no |
yes |
no |
no |
* availability depends on book size/style |
|
SmileBooks |
AdoramaPix |
Picaboo |
Blurb |
Use/install own fonts |
yes |
no |
no (additional ones downloadable via PIcaboo) |
yes |
Number of built-in fonts |
all available on computer |
60 |
41 |
all available on computer |
Text import and auto resize of text box |
yes/yes |
yes/yes |
yes/yes |
yes/no |
Style sheets for text |
sort of |
no |
no |
yes |
Number of built-in background patterns |
more than 100; additional patterns can be added |
nearly 1,000 |
more than 10,000 downloadable |
85 patterns |
Background colors |
34 predefined monochrome colors |
infinite, color picker available, hex codes |
infinite, color picker available, hex codes |
infinite via color panel of computer |
Themed book templates |
5 categories with 6 to 20 styles |
67 themes |
themes in 21 different categories with 1 to 9 styles each |
11 starter layouts, 15 book themes for each layout |
Built-in image processing |
yes (proprietary image editor) |
no |
yes (basic) |
no |
Image effects |
many, including art effects like oil painting |
opacity |
few (black & white, sepia, fade) |
no |
Book size adjustable after creation |
yes |
no (only images can be kept) |
yes, book style, size is selected during the ordering process |
yes (in same orientation) |
|
|
|
|
|
Previews |
|
|
|
|
Online |
yes, after ordering |
yes |
yes |
yes |
Conveniently printable |
as web page printout |
as web page printout |
no |
yes |
Sharing capabilities (Facebook, Twitter, etc.) |
Link, Facebook integration |
email link or personal page at AdoramaPix |
email link, Facebook |
Flash widget for integration with Facebook, personal website etc. |
|
|
|
|
|
Special Features |
|
|
|
|
Sales and marketing platform |
no |
personal public page at AdoramaPix website, no bookshop |
no |
yes, including bookshop |
Design service |
yes, directly via SmileBooks |
no |
no |
list of book designers (BlurbNation Directory) |
Color management |
no |
yes (ICC profile) |
no |
Yes (ICC profile) |
|
SmileBooks |
AdoramaPix |
Picaboo |
Blurb |
Help and Support |
|
|
|
|
Live chat |
no |
yes |
yes |
yes |
Online help/videos |
FAQ and 10+ videos |
extensive knowledge forum |
extensive knowledge base, brief video tutorial |
knowledge base, many videos |
Online webinars |
no |
yes (frequently) |
no |
yes (once in a while, recordings available) |
User forum |
no |
yes |
no |
yes |
|
|
|
|
|
(Volume) Discounts/Partner Program |
|
|
|
|
Volume discounts |
not available |
from 10+ books, pricing scheme on website |
from 10+ books, custom quote |
10–199 books 10 %, 200 – 399 books 15 % |
|
|
|
|
|
Company Info |
|
|
|
|
Land of origin (headquarters) |
Germany |
U.S. (New York) |
U.S. (Menlo Park) |
U.S. (San Francisco) |
In business since |
1961 |
1976 (camera store) |
2002 |
2005 |
Resellers |
50,000 partners worldwide |
|
|
|
Pickup in shop |
no |
yes (New York) |
no |
no |