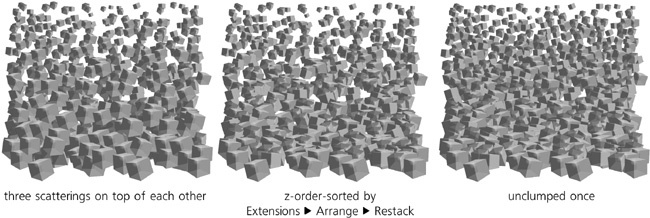
This treatment is similar to the color-tracing tessellation in that it is created using the Create Tiled Clones dialog. However, in most other respects it is different: It is randomized instead of regular, pseudo-3D instead of flat, and uses three different original objects—and thus three intermingled patterns—instead of a single one.
Let’s start by drawing these three original objects by the 3D Box tool. Convert each of them to a group of paths ( ) and duplicate (
 ). In the bottom copy of a box, enter it as a group, select all six sides and union them (
 ), then ungroup. This turns a box into a single box-shaped path; unset its fill— in the clones, this one will take the color of the backround. For the second copy of the box, use 50% opacity and white or black color; this will be the shading that will allow each box look like a box despite changing overall color. Finally, group the background shape and the shading into a single group.
Now, for each of the prepared cubes, create a P1-symmetry scattering over the area you want to cover, using color-to-color tracing in the Create Tiled Clones dialog (16.6.6 Tracing). Randomize their rotation (slightly, so as to not destroy the perception of all boxes being in a common perspective), their size, and their position. To imitate the effect of a 3D field, set scaling and row spacing to increase from top to bottom (i.e., per row), as shown in Figure 24-13.
Now, repeat this procedure for the two other cubes we’ve prepared, covering the same area. This combined field of cubes doesn’t really look like a field, yet, because the z-order is wrong: The cubes that are closer to the bottom and larger are supposed to be closer to us and therefore on top of the others, but they are not. To fix this, use the Restack extension (from Extensions ▸ Arrange) to rearrange the z-order of the boxes so that they stack from top to bottom. Then, perform a single Unclump action from the Align and Distribute dialog so that there are fewer gaps in the arrangement of cubes.
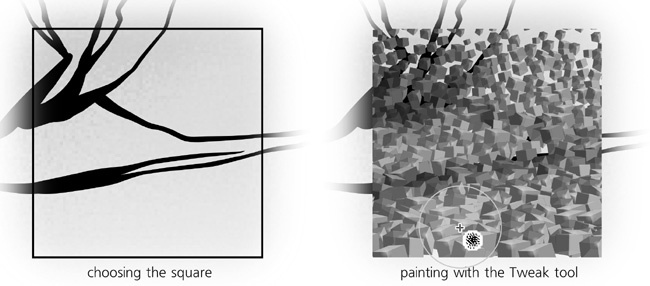
Remember that our eventual goal is to trace a square area of the rose’s background layer. Choose the area you want to trace, group all the cubes, and clip (18.4 Clipping and Masking) the group to the chosen square. Now, you may or may not have enabled automatic color-to-color background tracing (as we did in 16.6.6 Tracing) for all three patterns; however, even if you did, the colors you got from that are likely quite drab. This is inevitable, as the boxes are relatively large and sample color from large areas, averaging it and therefore making it less saturated than the original background image.
So, it looks like we will need to paint the cubes manually. Just select all the cube clones, choose the Color Paint mode of the Tweak tool (8.7 Color Tweaking), choose a bright red color (or pick it from the background image with Dropper, 8.6 The Dropper Tool) and paint over the red area of the image. Then, do the same for other colors, including the black ink lines. (If it does not work, it means you forgot to unset fill in the bottom path in each cube, see Figure 24-12.) This smooth, bitmap-like paintjob is a fun way to edit a vector drawing!


