1. Fit—Sew them to fit your shape! If, when you buy jeans, the waist is always too big, and the crotch too tight, you are a sew-them-yourself jeans body. (See page 8 for more on ease in jeans.)
2. Price—Now that jeans (even kids’) cost as much as the weekly grocery bill, it will behoove you to learn to copy these easy-to-sew-once-you-learn-how money-savers.
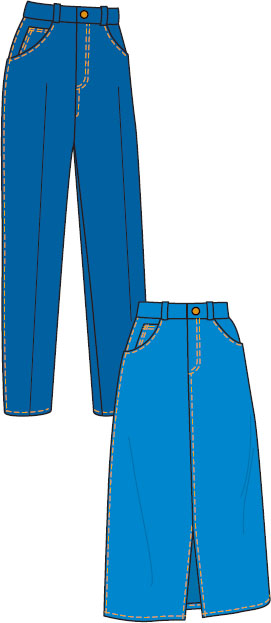
3. Creativity—Go beyond denim; try velveteen, satin, synthetic suedes, or stretch denim. Embroider on the pocket—why wear some other designer’s name! You can even sew bias jeans, which are very comfortable.

Follow these simple steps:
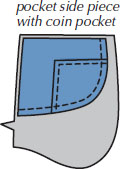
Create SIDE INSET. Sew coin pocket to side piece, then side piece to side inset (usually lining).
FACE FRONT. Sew pocket facing (lining) to front.
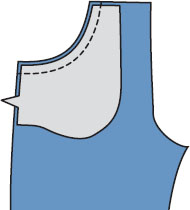
Turn and press. Topstitch.
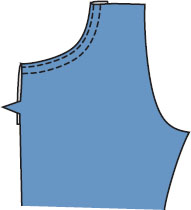
SEW POCKET BAGS. Place side unit under front and stitch side unit to side inset.
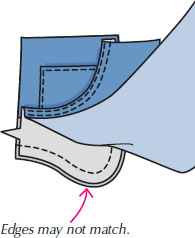
TIP: The side inset can be made from fashion fabric alone if it is not too heavy.
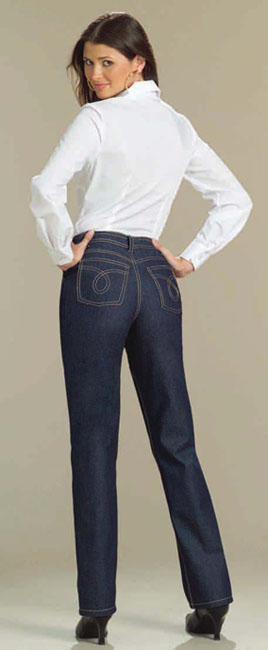
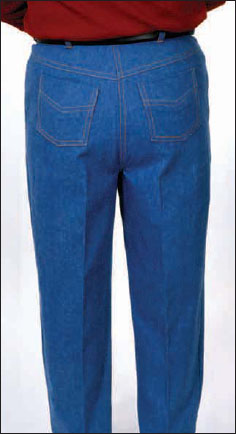
If you want this fit, you need this body! After Marta and Pati tried to get jeans to fit like they do in the photo to the left, they decided to accept reality.
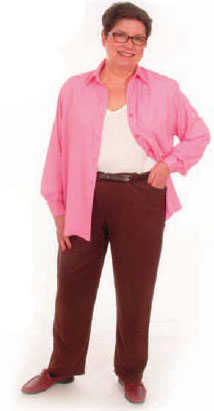
Nancy, whose shape is more like Pati’s and Marta’s, made jeans that looked so good, we invited her to be on the cover. She has a low, flat derriere, so having that high, full, tight fit is not for her. Follow Marta’s new order of sewing jeans to get the best fit for any figure. It includes a fabric fitting BEFORE you do any sewing.
1. Pin fabric together and try on. Make adjusments in fabric.
2. Sew the details in the front and back.
3. Fit side and inseams.
4. Sew side and inseams.
5. Attach waistband and hem.
Photo courtesy The McCall Pattern Company
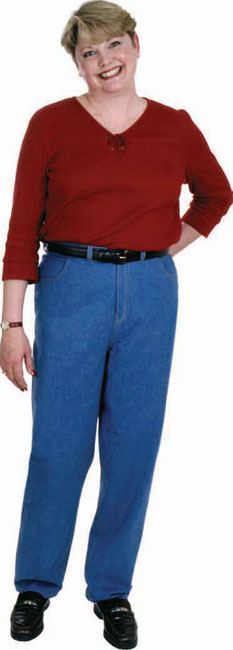
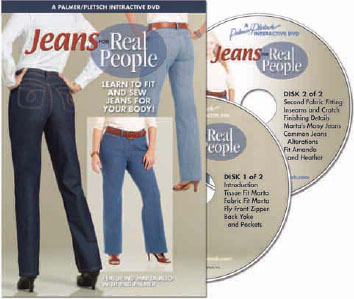
Marta has become THE JEANS EXPERT, having sewn dozens of jeans and starring in our Jeans for Real People DVD.
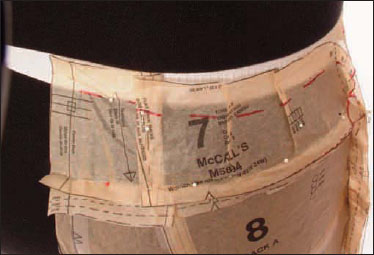
With the elastic where she wants to wear the jeans waistband, she matches the bottom of the elastic to the waist seamline that she marked on the tissue. She also makes sure the center front and back come to hers.
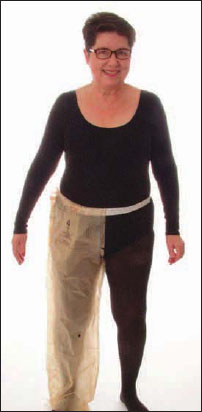
TIP: Marta started at the back because if she starts at the front, she can’t get the tissue up to the waist in the back.
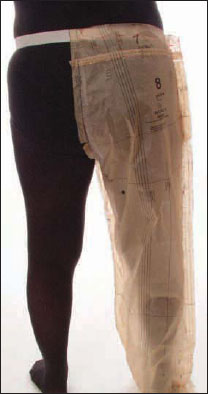
She adjusted the center back to match her center back, and the waistline seam on the tissue is at the bottom of her elastic. She pinned the tissue to her elastic.
We like to fit the tissue so the crotch stitching line on the tissue touches your body. This is hanging an inch too low.
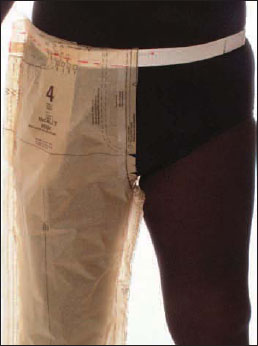
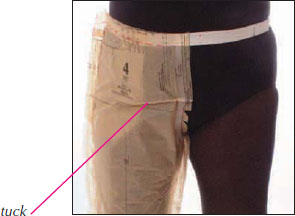
Marta pinched a horizontal tuck at the center front so she would know how much to take out of the front and back crotch depth.
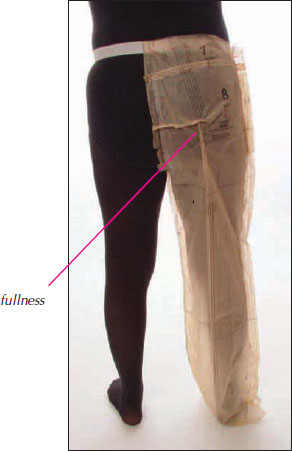
Then she pinched the same size horizontal tuck in the back. While there, she could see that the back was too full across her flat derriere, so she pinched out the excess vertically at the fullest part.
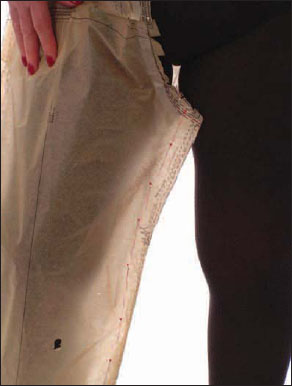
Since Marta’s inner legs are full in the knee area, she needs to straighten out the inseam curve. She drops the tissue to repin.
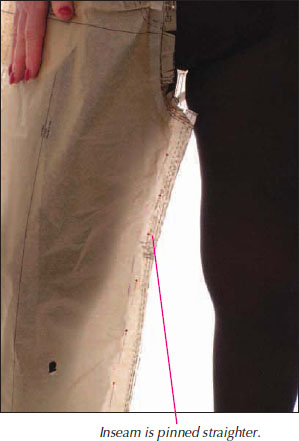
Marta has repinned the inseam from the top to just past her knee to make it straighter, giving her more width for her inner leg.
Marta shortened the front crotch in two places, the zipper and just below the zipper. She took the same amount out of the back, but in one place, well above the crotch curve.
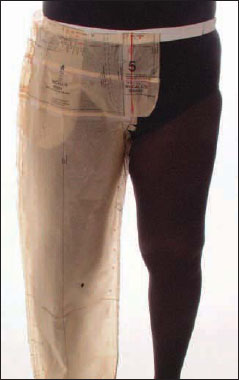
The vertical tuck made the back more form-fitting. There is bagginess in the knee area. She needs to pull the pants up, but her derriere is pushing down on the crotch seam. She needs to lower the crotch seam in the back.
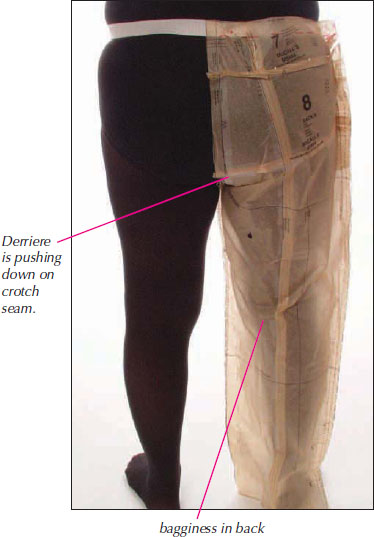
She lowered and retaped the back crotch seam. This allowed her to pull up the back of the pant by pinning the yoke lower at the center back to nothing at the side. There is still a little stress on the back crotch, so in fabric she will lower it more.
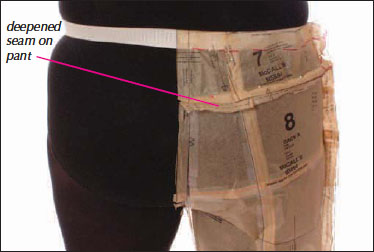
Marta is curvy in the back just below the waist so she needs to shape the yoke to her body.
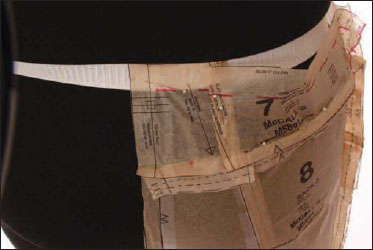
We darted the tissue to shape the yoke to Marta. She will tape these out and will have a more curved yoke. She will mark the bottom of the elastic for her new waistline seam.
Marta cut out the pants and pinned or machine basted all the parts together. If you don’t want to baste the crotch, you can use safety pins.
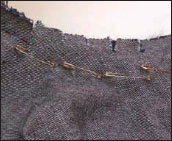
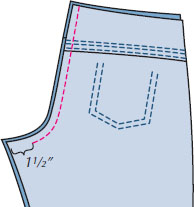
Stop pinning or sewing the crotch 1½” from the inseams so that you can pin inseams wrong sides together. Having the seams pinned or basted to the outside makes adjusting easier.
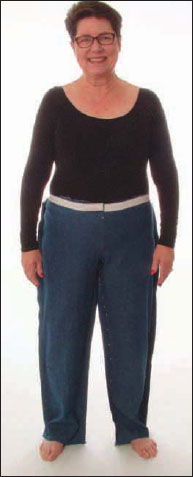
We used to sew the pockets and yoke before fitting, but if we needed to pull the pants up in the back to eliminate bagginess, the back pockets could end up in the yoke seam. Marta needs to pull up the pants in the back, but first she will need to sew the back crotch deeper by at least 3/4″.
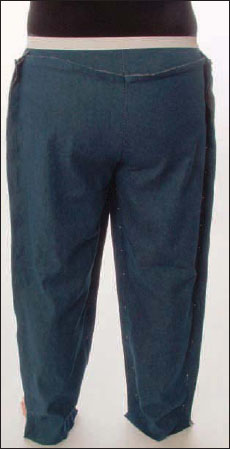
To decide on the amount, we pulled the pants up at center back until they hung straight by pinning a dart-tuck in the pants below the yoke. 1″ was pinched out. That is the amount we will need to lower the crotch in order to lower the yoke that amount onto the pant. VOILA! Aren’t we glad we didn’t sew the pockets on!!
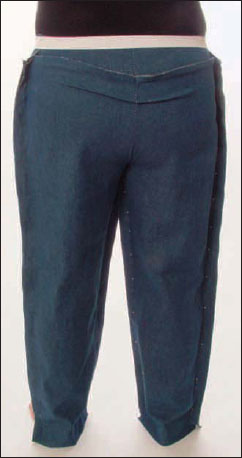
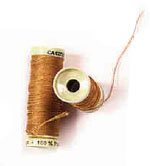
NOTE: If you are using topstitching thread and finishing seams with a serger, this order combines steps to minimize changing back and forth from regular to topstitching thread.
1. With regular thread, sew pocket lining to fronts.
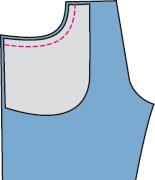
Sew front crotch seam from circle marking zipper to within 1½” of inseam.
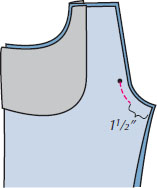
Sew fly extention to front on overlap side. Sew yokes to backs.
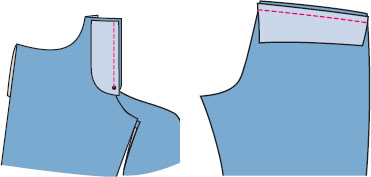
2. With the serger, finish yoke seams, leaving a ½” seam allowance. Serge all edges of the patch pockets.
3. With topstitching thead, edgestitch, then topstitch ¼” away using presser foot as a guide.
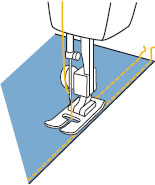
NOTE: Check the tension first by testing on a scrap. Try a longer stitch length of 3 to 4mm.
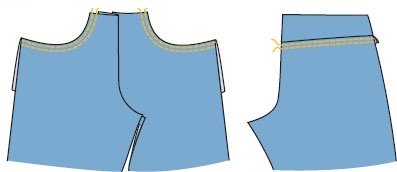
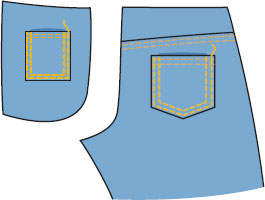
Topstitch front pocket edges and back yokes.
Topstitch patch pocket hems.
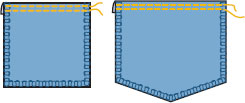
Topstitch pockets in place.
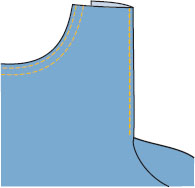
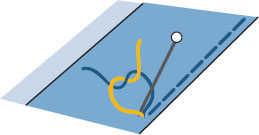
Pull the needle thread to the wrong side and with the bobbin thread, tie a knot.
Topstitch underlap to zipper. Using double stick basting tape, stick the overlap over the underlap, matching center fronts.
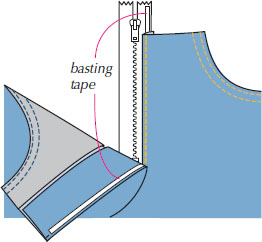
Sew the fly extension to the other side of the zipper.
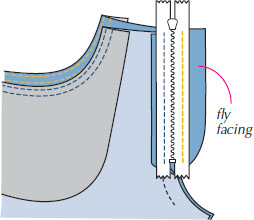
Topstitch zipper to front with two rows ¼” apart. Start at the top along the edge of the tape and stitch to the center front and turn, stitch for ¼” and turn and stitch to top.
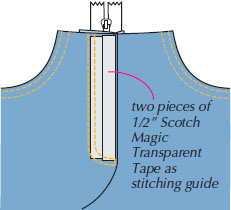
4. With regular thread, sew center back seam to within 1½” of inseam.
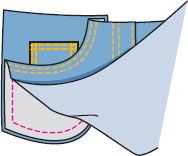
Pin side front to front. (Pocket edges may not match.) Sew pocket lining to side front and serge to finish.
5. Second fabric fitting. Pin side seams and inseams, wrong sides together, with seam allowances sticking out. Try on and mark any changes.
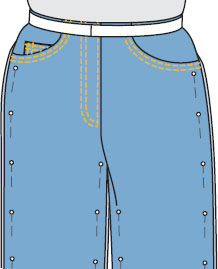
6. With regular thread, sew inseams. Serge to finish or make flat-felled seams.

7. Press inseams toward front and with topstitching thread, edgestitch inseams. A second row of stitching is optional.
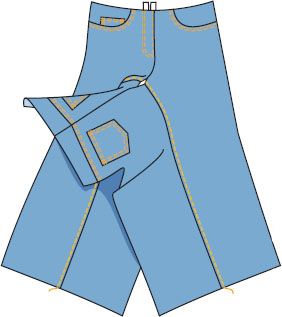
8. With regular thread, finish sewing lower crotch, then side seams. Press side seams toward back.
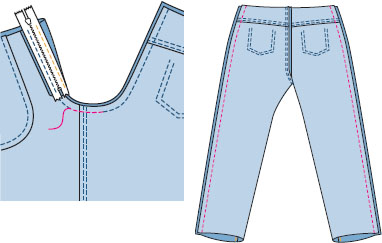
9. Serge side seams together. Very carefully serge the crotch seam leaving ½” seam allowance for a smooth topstitched seam. Serge one side of belt carrier strip, leaving it 1½” wide. Finish one long edge of the waistband.
10. With topstitching thread, edgestitch and topstitch the crotch from center back at waist to the bottom of the zipper; then turn and sew ¼” away to where you started.
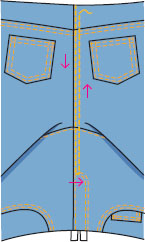
NOTE: You may find it easier to topstitch the crotch seam before sewing the side eams.You will just need to change the threads an extra time.
Edgestitch from waist to bottom of pocket on side seams.

Make belt carriers. (See page 109.)
11. Third fitting. Try on to mark waistband seam-line. It may have changed. Decide how tight you want the waistband. (See page 105.)
12. With regular thread, sew waistband to jeans.
13. With top-stitching thread, edgestitch along bottom of waistband.
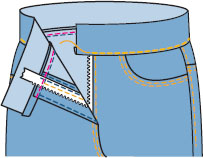
14. With regular thread, finish ends of waistband (page 107. Pin inside of waistband in place. Stitch in the well of the seam from right side.
15. With topstitching thread, edgestitch waistband ends and top edge. Use a zigzag stitch width of 1.5mm and length of 1-1.3mm to bar tack belt carriers in place.
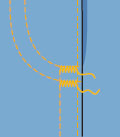
You can use the same bar tack stitch to make a buttonhole and secure zipper fly at the bottom.

To hem, turn up ¼” then 3/8″ and topstitch.
Now you’re are ready for the buttonhole and rivets! Turn the page.
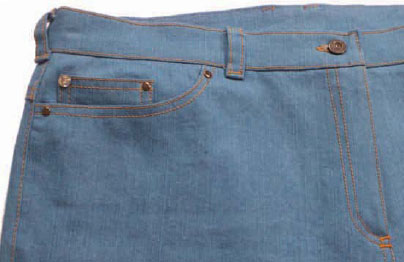
Denim comes in many weights of all cotton or with a small percentage of spandex for stretch. Denim usually gets softer after washing. We have found that it shrinks again after the second washing and a bit more after the third, so we recommend washing and drying three times before cutting.
Jeans can be made from other fabrics including denim-looking knits with a mock fly front and elastic waist. Marta wears jeans made from a medium-weight Tencel fabric.
Regular sewing thread is used for seams. Topstitching thread is used in the needle only. Coats & Clark and Gutermann have gold topstitching thread for jeans. Sulky makes a 12 weight in many colors that works for topstitching.
Interface the waistband with PerfectFuse Medium. Use regular cotton for pocket lining so you can match your fabric. Quilt cottons are fine.
Rivets by Dritz are generally silver. Tandy Leather Factory carries darker colors and rhinestones. Use an awl to make the hole. Put the post through the hole from the wrong side. Position the cap on the right side and pound with a hammer. NOTE: Rhinestone rivets come with the post attached to the rhinestone, so they are pushed through from the right side. (See photo on page 161.)
Make a test sample through all layers with your machine buttonholer. If using topstitching thread, use a narrow zigzag and sew a freehand keyhole shape.
Sew seams WRONG sides together with topstitching thread in the needle. Sew from the side that will be on top when done. Trim the under seam allowance to ¼” Fold the other seam allowance over the trimmed one to encase it. Edgestitch next to the fold with topstitching thread. NOTE: If you have a flat-felled foot for your machine, make a test sample to check that your topstitching thread will end up on the right side of the fabric.
Trim.

Fold over.

(faster, easier, and less bulky)

Sew seam right sides together. Zigzag or serge the seam allowances together. Press to one side. NOTE: To reduce bulk, trim one seam allowance, then press the other seam allowance over it.
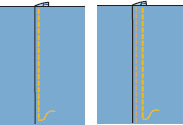
Edgestitch close to seam. Topstitch ¼” away.
A true jeans fly has a sewn-on extension. Originally, the sewn-on extension was used because it was more durable for the miners and workmen. A cut-on fly is easier. See page 101 for how to add one.
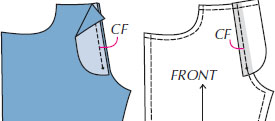
Men need a fly protector for obvious reasons, but it also prevents scratching if the zipper is metal. Today’s polyester coil zippers are flat and smooth. You can eliminate bulk by eliminating the fly protector. See page 167 for how to add one.
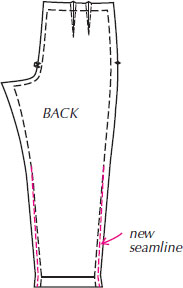
Narrow jeans will reveal extended calves. There are wrinkles in the front leg and the side seam bows to the back in the calf area.
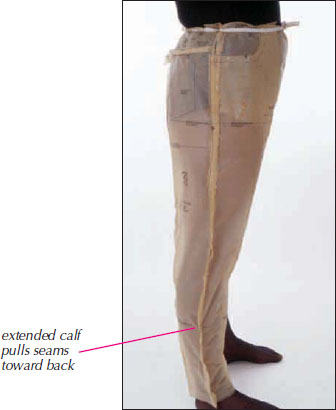
From the knee down we let out the back inseam and side seam to create more room for her fuller calf in this slim pant.
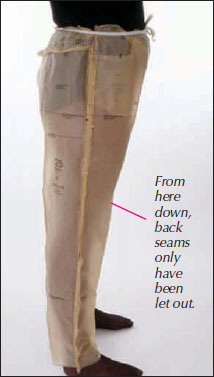
We added to back seams only.
The back is slightly full.
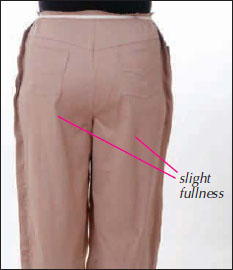
A quick way to solve this in fabric is to deepen the crotch seam. This also straightens it a bit, which works well if you have a flat derriere.
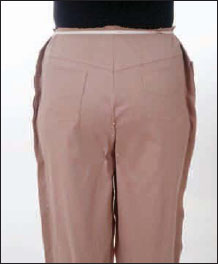
We have also pinched out a little of the back inseams. We will take them in as well.
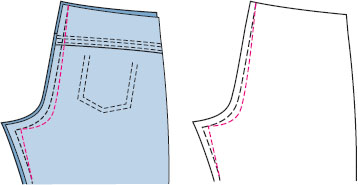
Reshape the crotch so it is straighter. This will remove the fullness. Then mark the final stitching line on your pattern to make it easier next time.
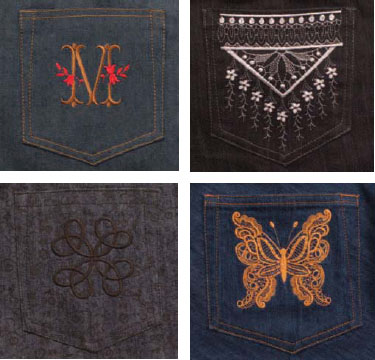
You can simply straight stitch with regular or topstitching thread on your back pockets. Marta, however, makes full use of her embroidery sewing machines as you can see below. She used her initial, tone on tone, and contrast thread for her designs.
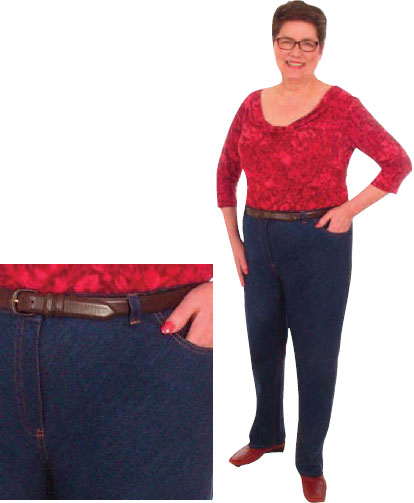
Marta experimented by sewing an all-bias pair of jeans. She thought they might stretch out more than straight-grain jeans, but to her surprise, they were not only very comfortable, but held their shape nicely. She has now sewn three pairs.
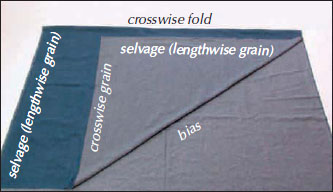
Bias jeans take about 2½ yards in 60″ fabric. Fold the yardage in half crosswise, and then fold up one selvage edge parallel to the crosswise fold.
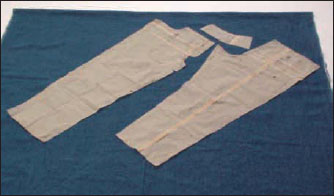
The front, back, and yoke are cut on the bias. The side inset and waistband are not.
Marta models her all-bias jeans in our DVD! To watch her fit and sew jeans “live” on herself and other shapes, this two-disk set is invaluable. See page 175.
