2 Setting Up a Project
Lesson overview
In this lesson, you’ll learn how to do the following:
Create and save a new document.
Understand cloud documents.
Create and edit artboards.
Add grids to artboards.
Work with multiple artboards.
Manage artboards with the Layers panel.

This lesson will take about 45 minutes to complete. To get the lesson files used in this chapter, download them from the web page for this book at www.adobepress.com/XDCIB2020. For more information, see “Accessing the lesson files and Web Edition” in the Getting Started section at the beginning of this book.

In this lesson, you’ll start a new app design project and create and manage the artboards that will become the screens in your project.
Starting the lesson
In this lesson, you’ll create your first project in Adobe XD and begin to set up design screens for a hiking app you will design, prototype, and share. To start, you’ll open a final lesson file to get an idea of what you’ll create in this lesson.
Start Adobe XD, if it’s not already open.
On macOS, choose File > Open From Your Computer. On Windows, click the menu icon (
 ) in the upper-left corner of the application window and choose Open From Your Computer. Open the file named L2_end.xd, which is in the Lessons > Lesson02 folder that you copied onto your hard disk.
 Note
NoteIf you have not already downloaded the project files for this lesson to your computer from your Account page, make sure to do so now. See the “Getting Started” section at the beginning of the book.
 Note
NoteFor either macOS or Windows, if the Home screen is showing with no files open, click Your Computer in the Home screen. Open the file named L2_end.xd, which is in the Lessons > Lesson02 folder that you copied onto your hard disk.
Choose View > Zoom To Fit All (macOS), or choose Zoom To Fit All from the Zoom menu (Windows) in the upper right.
 Note
NoteThe screen shots for this lesson were taken on Windows. On macOS, you’ll see the menus above the application window.
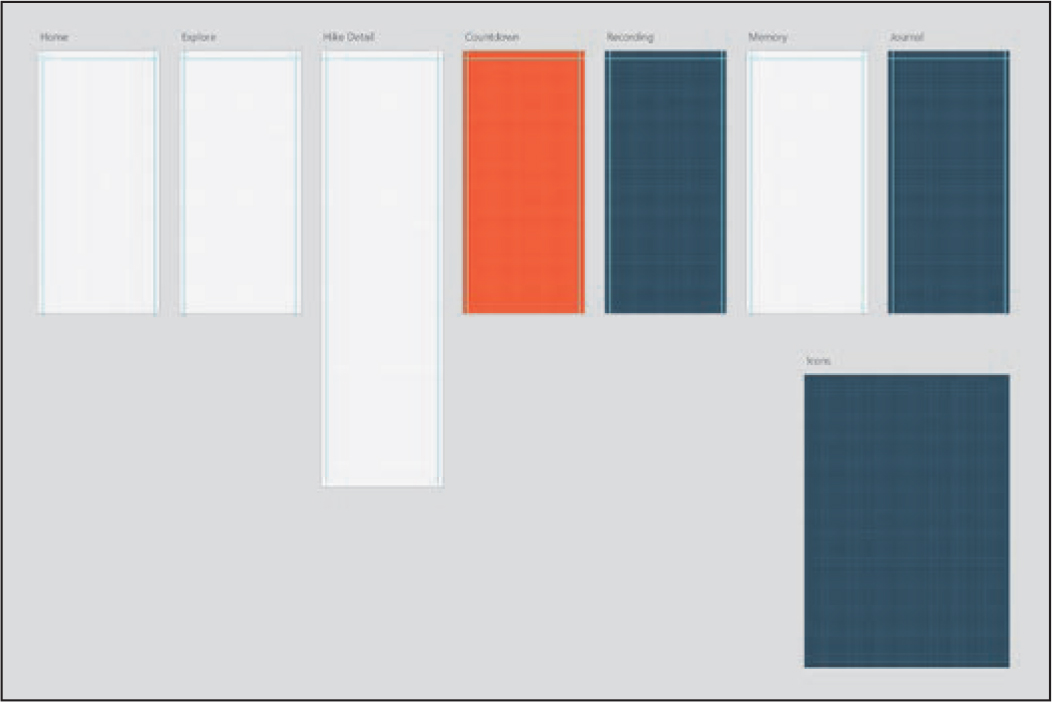
This file shows you what you will create by the end of the lesson.
You can either leave the file open for reference or close it. To close it, choose File > Close (macOS) or, on Windows, click the X in the upper-right corner of the open window to close the file.
Creating and saving a new document
You’ll now begin your app design by creating a new document. In Adobe XD, you can have a number of project files open at one time and easily move between them.
If the Home screen isn’t showing (if you have the L2_end.xd file open), choose File > New (macOS) or, on Windows, click the menu icon (
 ) and choose New.
 Tip
TipTo show the Home screen, with a document open, you could also click the Home button (
 ) in the upper-left corner of the application window.
With Adobe XD, you can start your document using a range of screen sizes. In the Home screen that opens, you’ll find a row of icons representing the generic device sizes used in app design, web design, and more. From left to right, the icons represent phones, tablets, general web pages, and custom screen sizes. Within Adobe XD, screens are represented by artboards. Know that no matter what screen size you start with, you can always edit that size in your document later.
In the Home screen, click the iPhone X/XS/11 Pro name to reveal a menu of sizes. Click iPhone XR/XS Max/11 (414 x 896), and a new document opens with a single artboard showing.

 Note
NoteYou may see different screen sizes in the Home screen, and that’s okay. The Home screen reflects the most widely used screen sizes and will change over time.
 Tip
TipIn the Home screen, you can click the Custom Size icon (not the W and H fields) to create a new document without any artboards.
Choose View > Zoom To Fit All (macOS), or choose Zoom To Fit All from the Zoom menu (Windows) in the upper right.
The file that opens is your working file and will include all of the screens (artboards), images, colors, and more that make up your project.
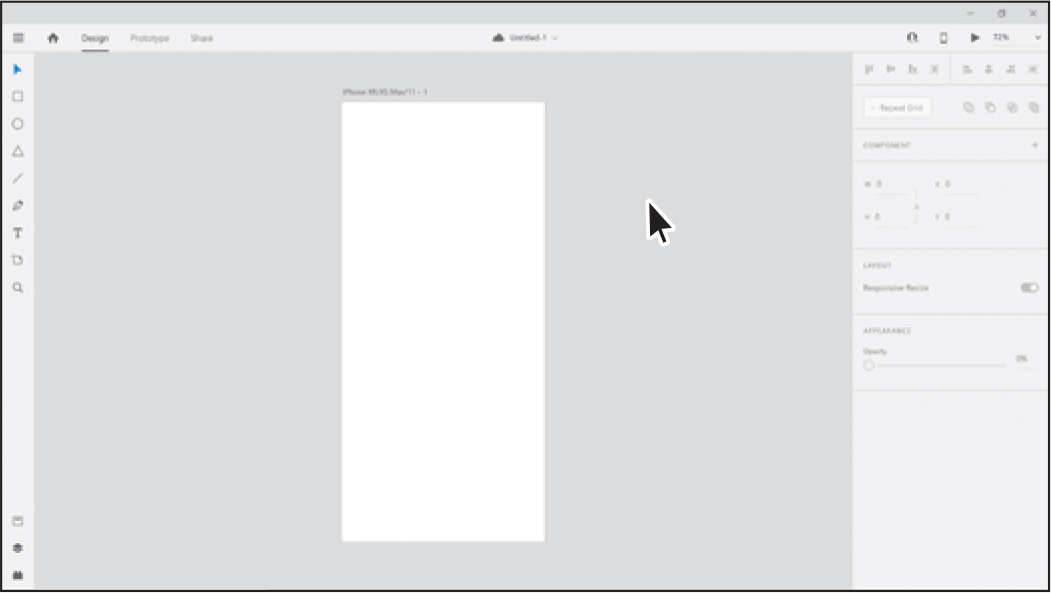
When you create a new document in Adobe XD, by default it is saved as a cloud document. If you look above the document at the title, you’ll see a cloud icon (
 ) and “Untitled-1” (or something similar, like “Untitled-2”).
Cloud documents are stored and managed in Creative Cloud and are counted toward your Creative Cloud storage quota. If you work on a cloud document offline, changes will be saved to your local device and synced back to the cloud when you reconnect. Cloud documents and local XD documents are both fully compatible with XD.
Adobe XD’s cloud-native document type has a number of unique benefits that a locally saved XD file does not, including the following:
Autosave: When you save your document to Creative Cloud, the autosave feature ensures that your document is updated and you don’t lose your work.
Faster sharing: You can share XD documents right from within XD and use co-editing to simultaneously edit XD documents with others.
Access all of your work: You can use the Cloud Document Organizer to quickly find all your documents, and the documents shared with you, right from within XD. You can see any cloud documents you save by visiting assets.adobe.com/cloud-documents.
Access documents across devices: You can save your documents as cloud documents and access them across devices, including mobile preview using the XD mobile app.
See previous design versions: Manage document revisions.
While working through the lessons, you will work on a document saved to your hard drive (local) rather than in the cloud.
Choose File > Save As (macOS), or on Windows click the menu icon (
 ) in the upper-left corner of the application window and choose Save As, to reveal a menu of options.
In the menu of options that appears, you can change the name of the document and click Save to save the document to Creative Cloud as a cloud document. If you want to save the document locally, you can click Your Computer and navigate to a location on your computer.
 Tip
TipAnother way to save a file is to click the filename above the document, revealing the menu of options.
Change the name to Travel_Design. Click Your Computer, then click the folder icon beneath the option to open an operating system dialog box.

In the dialog box that opens, navigate to the Lessons folder on your computer, and click Choose (macOS) or Select Folder (Windows). Click Save.
The XD document is now saved locally. In Lesson 9, “Previewing a Prototype,” and Lesson 10, “Sharing Your Designs” you’ll learn about saving as cloud documents in Adobe XD, which will allow you to share cloud documents.
Working with cloud documents 
To learn about how to save and work with cloud documents in Adobe XD, check out the video “Working with Cloud Documents,” which is part of the Web Edition of this book. For more information, see the “Web Edition” section of “Getting Started” at the beginning of the book.
Creating and editing artboards
When you first set up a document in Adobe XD, you typically start with a single artboard at a size you choose. You can then add as many artboards as you need of similar or different sizes and orientations. Each artboard represents a screen in your app design, web design, presentation, and so on. For example, to create a web design, you might create different artboards for the mobile, tablet, and desktop versions of that web page. Alternatively, if you’re creating an app, you may want to create a single file with a separate artboard for each screen in your app.
Artboards in XD lay the groundwork for your design and are a feature you will spend a fair amount of time working with. In this part of the lesson, you’ll use different methods to create and edit artboards in the hiking app you’re designing.
Creating artboards with the Artboard tool
In this section, you’ll learn about the different ways to create artboards with the Artboard tool (![]() ). Later, you’ll use faster ways to create artboards, including duplicating existing artboards.
). Later, you’ll use faster ways to create artboards, including duplicating existing artboards.
Select the Select tool (
 ) and double-click the artboard name (iPhone XR/XS Max/11 – 1). Change the name to Home and press Return or Enter to accept the name.
Naming artboards helps you keep track of your screens when you’re editing your design content, for targeting specific artboards for interactivity during prototyping, and more.
Click in an empty area away from the artboard to deselect it.
Select the Artboard tool (
 ) in the toolbar on the left.
 Tip
TipTo access the Artboard tool, you can press the A key.
Notice the preset screen sizes, grouped by device platform—Apple, Google, and so on—that appear in the Property Inspector on the right side of the workspace.
Click the iPhone XR/XS Max/11 size in the Property Inspector to add a new artboard to the document at that size.

 Note
NoteWith content selected in the document and the Artboard tool selected, you will see content properties as well as the default artboard sizes listed in the Property Inspector.
Because of the ever-changing nature of technology, the preset screen sizes you see may be different, and that’s okay. By default, the new artboard is added to the right of the currently selected artboard. If there are other artboards to the right of the selected artboard, the new artboard is added to the far right of the other artboards.
Choose View > Zoom Out (macOS), or press Command and – (macOS) or Ctrl and – (Windows) once, to zoom out.
Double-click the artboard name (iPhone XR/XS Max/11 – 1) above the new artboard and change it to Explore. Press Return or Enter to accept the name change.

 Note
NoteBe careful if you double-click an artboard name with the Artboard tool selected. If you miss, you may wind up creating an artboard instead.
 Tip
TipTo delete an artboard, simply click its name to select it, and then press Delete or Backspace. Deleting an artboard also deletes any content associated with that artboard.
To select an artboard with the Artboard tool selected, you need to click the artboard name. With the Select tool selected, there are other methods for selecting artboards, which you will learn about later.
With the Artboard tool selected, click to the left of the artboard named Home to add another.
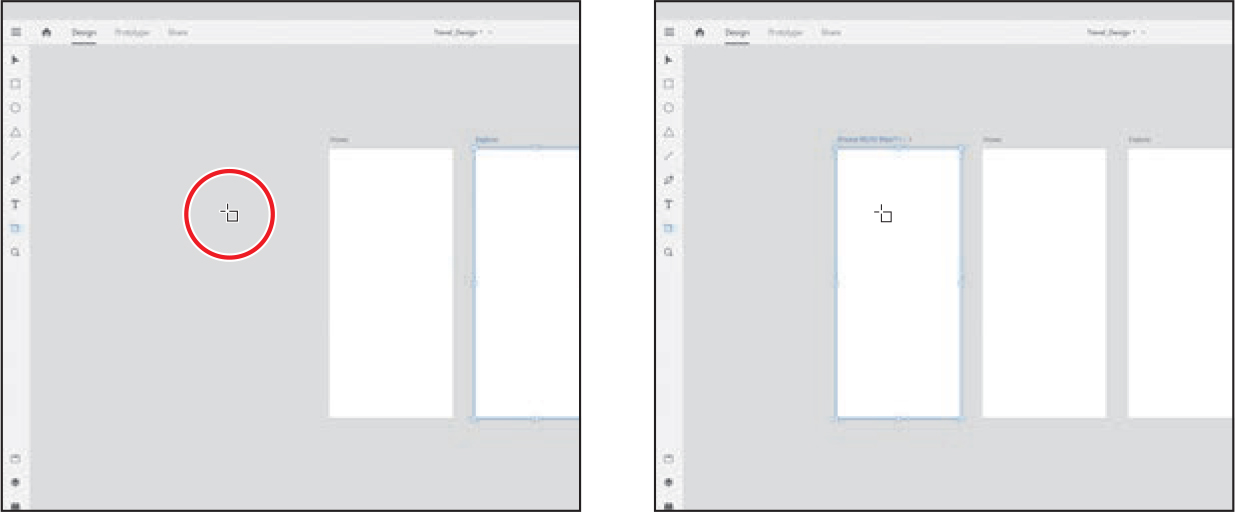
Double-click the name of the new artboard and change it to Countdown. Press Return or Enter to accept the name change.
With the Artboard tool still selected, press Command and – (macOS) or Ctrl and – (Windows) a few times to zoom out.
Click in the Explore artboard to add another artboard to the right.

In this step, you can see that if there are other artboards to the right of the selected artboard (Countdown), the new artboard is added to the far right of the other artboards.
Change the new artboard name to Hike Detail. Press Return or Enter to accept the name. This artboard will eventually contain detailed information about a hike.
There are many ways to add artboards, including drawing a custom-size artboard, which is what you’ll do next.
Move the pointer to the right of the Hike Detail artboard, in line with its top edge. An aqua guide appears, telling you when the pointer is aligned with the top edge. Drag down and to the right to draw an artboard. As you drag, you’ll see the Width and Height values changing in the Property Inspector. Release the mouse button when the artboard roughly matches the size you see in the second part of the figure.

 Note
NoteYou may need to scroll up in the Property Inspector to see the Width and Height values.
You can draw an artboard of almost any size or orientation, and artboards you create can also overlap.
 Tip
TipAs you draw an artboard, you can press the Option (macOS) or Alt (Windows) key to draw from the center, or press the Shift key to constrain the proportions. When you are finished drawing, make sure to release the mouse button and then the key(s).
Change the name of the new artboard to Icons. Press Return or Enter to accept the name.
You can work a lot of different ways, including creating the artboards you need at the start of the project or duplicating artboards with existing content and resizing the design content and artboards to match different screen sizes.
Choose File > Save (macOS), or on Windows click the menu icon (
 ) in the upper-left corner of the application window and choose Save.
Editing artboards
While creating your design, you will most likely need to change the position of artboards, resize them, and more. Next, you’ll see how to reposition, resize, and duplicate artboards as well as set a few other properties for them.
With the new Icons artboard still selected, in the Property Inspector on the right side of the workspace you can now see options specific to that selected artboard. Change Width to 700 and Height to 1000 in the Property Inspector. Press Return or Enter after the last value entered.
 Tip
TipYou can select the Lock Aspect icon (
 ) before resizing so that width and height change together proportionally.
Make sure that the Portrait option (
 ) is selected. It should be, since the dimensions you enter will change the orientation of the selected artboard.
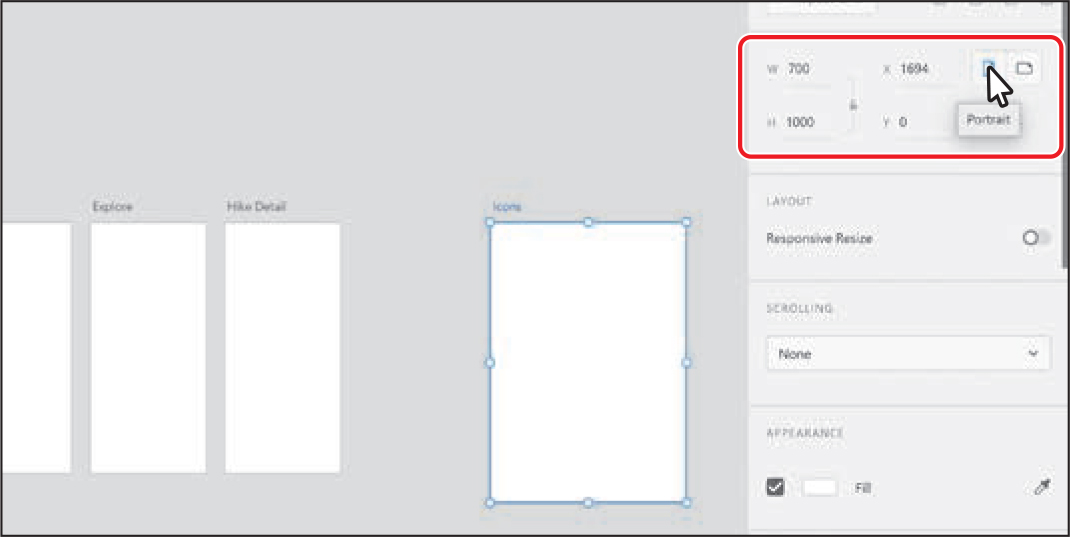
You can change properties such as width and height for a single artboard or multiple selected artboards at one time. Changing the size or orientation of an artboard does not affect the artwork on that artboard.
Press Command+0 (macOS) or Ctrl+0 (Windows) to see all of the artboards and center them in the document window.
Select the Select tool (
 ) in the toolbar. Click in the Hike Detail artboard to select it. Drag the bottom-middle point down to make the artboard taller.
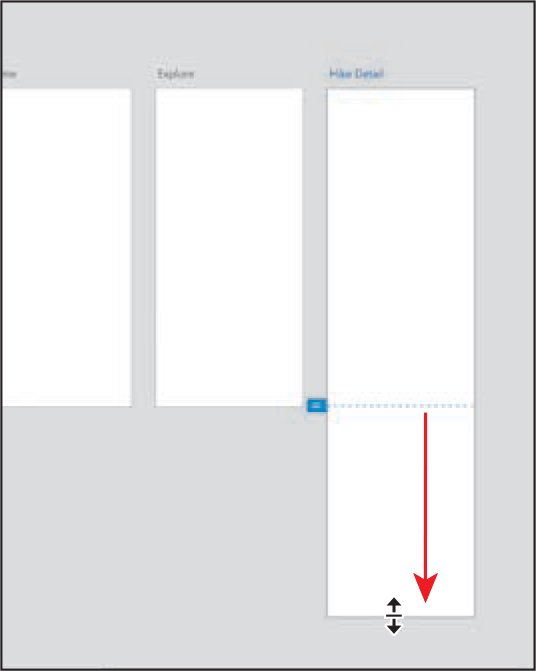
You can resize any of the existing artboards using the Select tool or the Artboard tool. You will notice that a dashed line and widget appear on the artboard when the height of the artboard is taller than the original size. This indicates the original height of the artboard and the start of scrollable content, which you’ll learn about in Lesson 5, “Organizing Content.”
With the Select tool still selected, drag the Icons artboard below the row of smaller artboards. Don’t worry about its exact position right now.
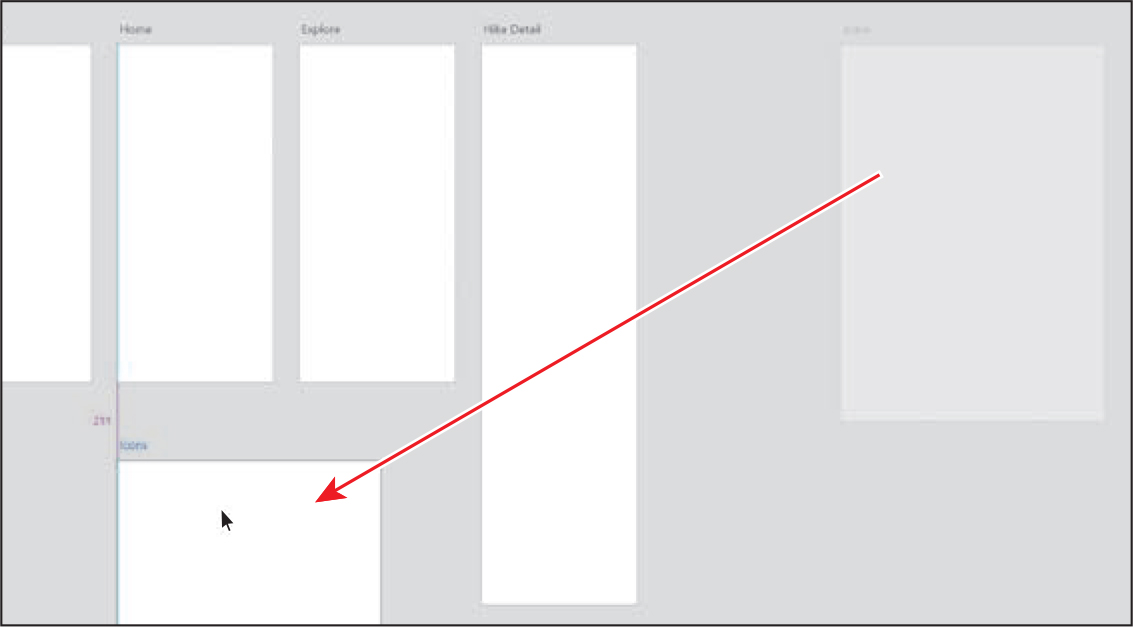
With the Select tool, you can select an artboard by clicking its name, by clicking in the artboard area if the artboard is empty, or by dragging across the artboard. You can arrange your artboards in a configuration that makes sense for your project and process.
Next, you’ll arrange the artboards in an order that makes sense for the flow of screens in the app, and make copies to create new artboards. This can be done with either the Artboard tool or the Select tool selected.
Drag the Countdown artboard to the right. Drag until purple spacing guides show a value of 70 and you see aqua horizontal guides (indicating it is aligned with the others).
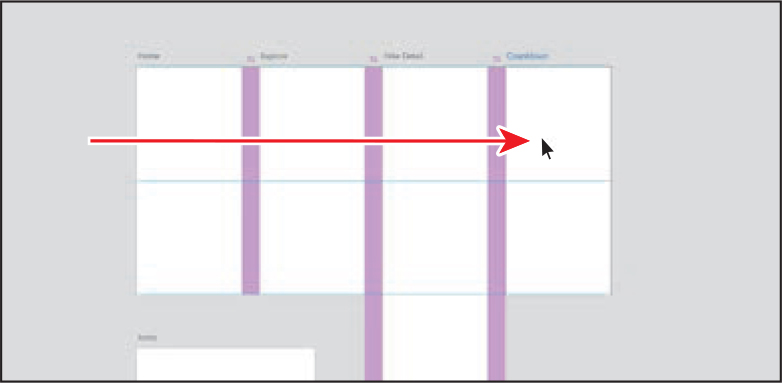
The purple spacing between the objects (artboards, in this case) appears when the space between them is the same.
Option-drag (macOS) or Alt-drag (Windows) from within the Countdown artboard to the right. Drag until the purple spacing guides show a value of 70 and you see aqua horizontal guides (indicating it is aligned with the others). Release the mouse button and then the key.

 Note
NoteIf the Artboard tool is selected, in order to drag-duplicate an artboard, you need to drag it by the artboard name, not from within the artboard.
Change the name of the new artboard to Recording. Press Return or Enter to accept the name.
Option/Alt-dragging an artboard is a great way to make a copy of an artboard and all of its content, placing it where you want. In Adobe XD, you’ll find that there are a lot of ways to create artboards. If you just want to add artboard copies in the same row, you can use a keyboard command to duplicate them.
 Tip
TipYou can also copy and paste artboards, even between documents.
With the Recording artboard still selected, press Command+D (macOS) or Ctrl+D (Windows) to create a duplicate that is placed to the right.
 Note
NoteIf you zoom out far enough, the artboard names may appear truncated.
Change the name of the new artboard (Recording - 1) to Memory. Press Return or Enter to accept the name.
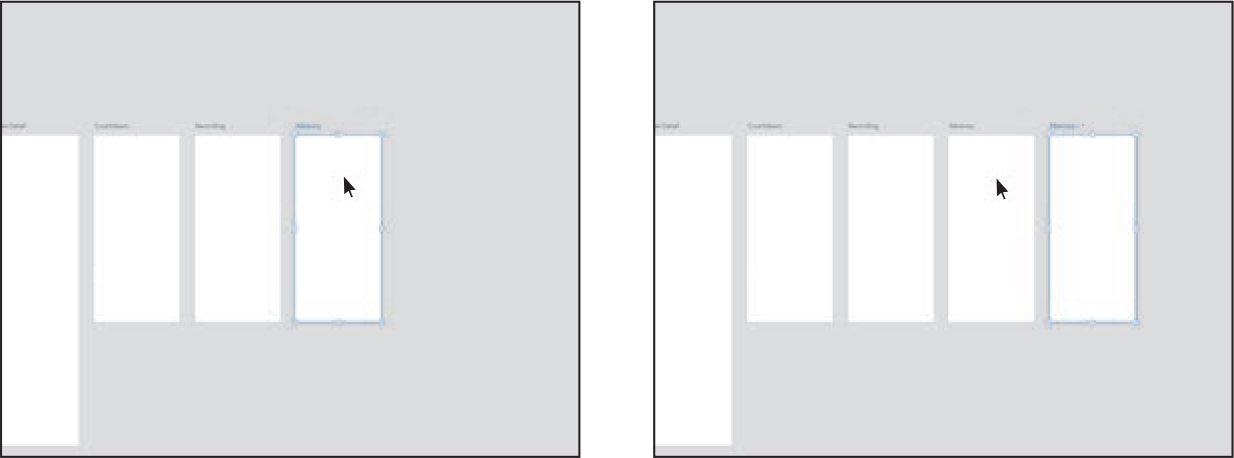
With the artboard named Memory selected, press Command+D (macOS) or Ctrl+D (Windows) to create a duplicate to the right. Leave the name as is for now.
Choose File > Save (macOS), or on Windows click the menu icon (
 ) in the upper-left corner of the application window and choose Save.
Changing artboard appearance
You can change several properties for each artboard in your document, including the background color, size, grids, and more. Changing the background color could be useful for showing white icons on a dark background or previewing a screen designed with a dark background, for instance. Next, you’ll change the appearance of an existing artboard.
Press Command+0 (macOS) or Ctrl+0 (Windows) to fit all artboards in the Document window.
With the Select tool (
 ) selected, click in the Countdown artboard to select it.
In the Property Inspector on the right, deselect the Fill option.

You can turn off the default fill of an artboard, but notice that the artboard outline is still visible.
Select the Fill option in the Property Inspector to turn the default white fill back on.
 Tip
TipYou can select multiple artboards and change the background color for all at once.
Click the Fill color box, to the right of that same option, to show the color picker. Drag the circle in the vertical color slider to an orange color (first part of the following figure). Drag the Saturation/Brightness slider toward the upper-right corner to select an orange color (second part of the following figure).

Adobe XD offers a lot of ways to edit color, including visually.
Press the Esc key or click somewhere to hide the color picker.
Working with multiple artboards
You can change properties like background color and size for multiple artboards at one time. This can greatly speed up your design process. Next, you’ll apply a background color to multiple artboards.
With the Select tool (
 ) selected, click in the Recording artboard to select it. To also select the Memory – 1 artboard, Shift-click in the Memory – 1 artboard.
You need to apply a background color to the Recording and Memory – 1 artboards so those app screens have a blue background. Next, you’ll apply a color you were given as HSB (Hue, Saturation, and Brightness) values.
Click the Fill color box in the Property Inspector to show the color picker. Choose HSB from the color menu in the lower left corner of the color picker, and change the values to H=205, S=88, B=35. Press Return or Enter after typing the last value.

 Note
NoteEven though the Memory artboard appears to be selected on your screen, it isn’t.
Press the Esc key to hide the color picker.
Choose File > Save (macOS), or on Windows click the menu icon (
 ) in the upper-left corner of the application window and choose Save.
Aligning artboards
You can easily select and align or distribute the spacing between artboards to keep them more visually organized. As you drag artboards, alignment guides and spacing guides make it relatively easy to align them, but you can also align and distribute artboards using the alignment methods at the top of the Property Inspector. Next, you’ll align the Icons artboard to the Memory – 1 artboard so the Icon artboard is closer to that group of artboards.
Click in the Icons artboard and Shift-click the Memory – 1 artboard.
Click the Align Right option (
 ) at the top of the Property Inspector to align the right edge of the Icons artboard to the right edge of the Memory – 1 artboard.
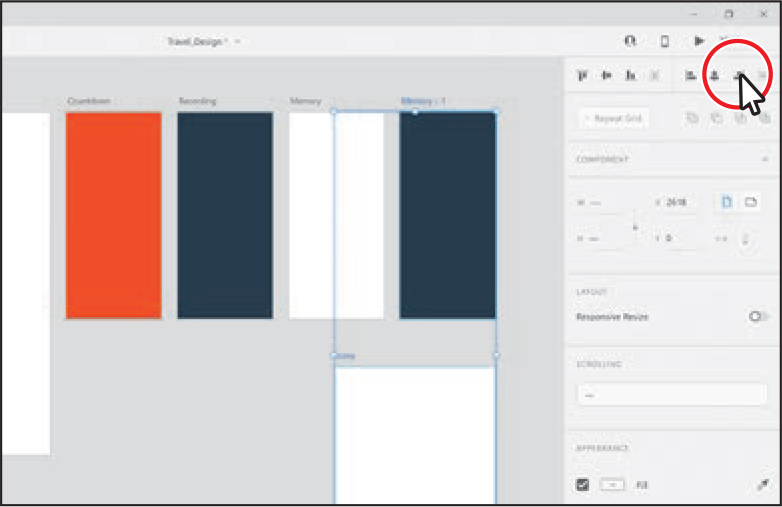
The Align options are pinned at the top of the Property Inspector, which means they are always showing. They are also contextual, which means they are dimmed when they’re not available. You’ll learn all about aligning content and artboards in Lesson 5.
Click in the gray pasteboard area to deselect the artboards.
Choose File > Save (macOS), or on Windows click the menu icon (
 ) in the upper-left corner of the application window and choose Save.
![]() Note
Note
You’ll learn all about responsive resize in Lesson 7, “Using Effects, Repeat Grids, and Responsive Layout.”
Adding grids and guides to artboards
In Adobe XD, there is a universal pixel grid that you can snap content to. In addition, there are several ways to position and lay out objects with precision: square grids, layout grids, and artboard guides.
![]() Note
Note
Adobe XD uses a virtual pixel for most of its measurements and font sizes, which is the same unit of measurement as a CSS pixel, the basic unit of measurement in iOS. The virtual pixel is roughly equal to one physical pixel on a 72 dpi monitor (and is equal to one point). You cannot change the unit of measurement in Adobe XD.
Square grids provide horizontal and vertical guides that you can align content to. When you draw or transform content, objects snap to the grid automatically when the edges of the object are within the grid’s snap-to zone. Square grids can be useful for aligning objects and also for giving an idea of measurement when designing, and they are most often used when designing apps.
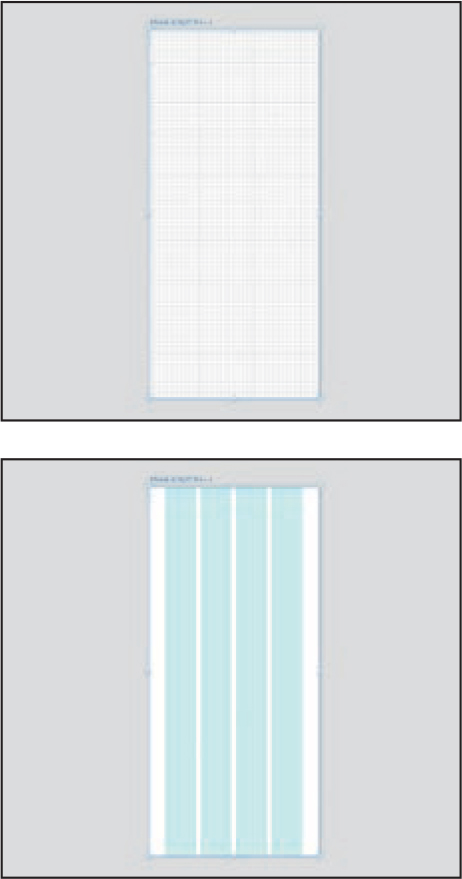
Layout grids can be used to define columns on each artboard. A layout grid helps you define the underlying structure of your design and how each component in it responds to different breakpoints for responsive designs (web design). In Lesson 7, you’ll learn about responsive resize, which allows you to resize artboards while maintaining spatial relationships at different sizes to best adapt to multiple screen sizes.
Artboard guides will be discussed later in this section.
Working with square grids
In this section, you’ll explore turning on a square grid for artboards and changing the appearance of grids. Square grids provide horizontal and vertical guides that you can align content so they can be useful for determining the measurements of objects.
With the Select tool (
 ) selected, click in the Home artboard to select it. Press Command+3 (macOS) or Ctrl+3 (Windows) to zoom in to that artboard.
Choose Square from the Grid menu in the Property Inspector. Make sure that the option is selected to turn the default square grid on for all artboards.

 Note
NoteThe default grid you see may look different. That’s okay, since you’ll change the grid type shortly.
 Tip
TipYou can also choose View > Show Square Grid (macOS) or press Command+’ (macOS) or Ctrl+’ (Windows) to toggle the square grid on and off for the selected artboard(s).
When you enable a square grid for one artboard, square grids are added globally to all artboards in the document. You can customize the appearance of the grid, like color and grid size, on different artboards.
In the Property Inspector, click the color box to the left of Square Size to open the color picker, and change the appearance of the grid. Drag the Alpha slider (on the far right in the color picker) down to make the grid less visible. You can adjust the color to whatever makes sense to you.
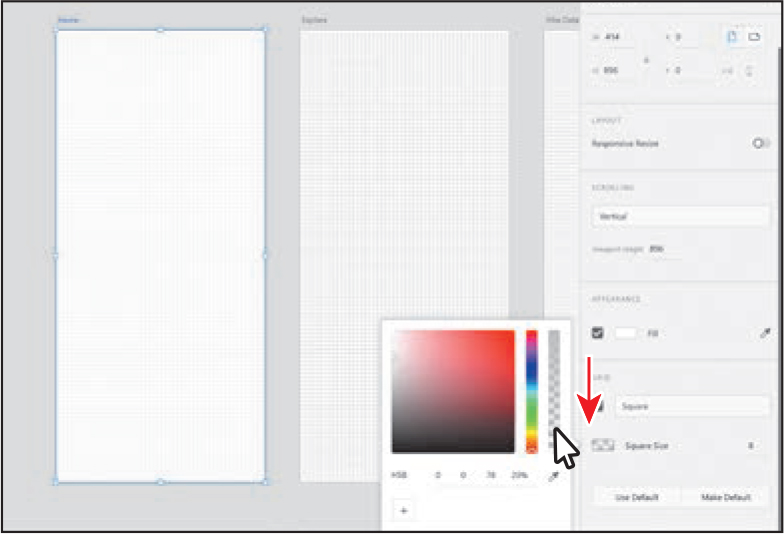
Notice that the grid on the Home artboard is the only one affected by the subtle color change. If you want to change the appearance of the square grid on more than one artboard, you would select those artboards first.
Layout grids and square grids overlay the design content of the artboard. Later, when you add content to these artboards, making the layout grid more transparent can make it easier to focus on the content rather than the grid. You can also toggle the visibility of a grid, which is what you will do at times in later lessons.
Select the Square Size value, and change it to 20. Press Return or Enter to accept the value.
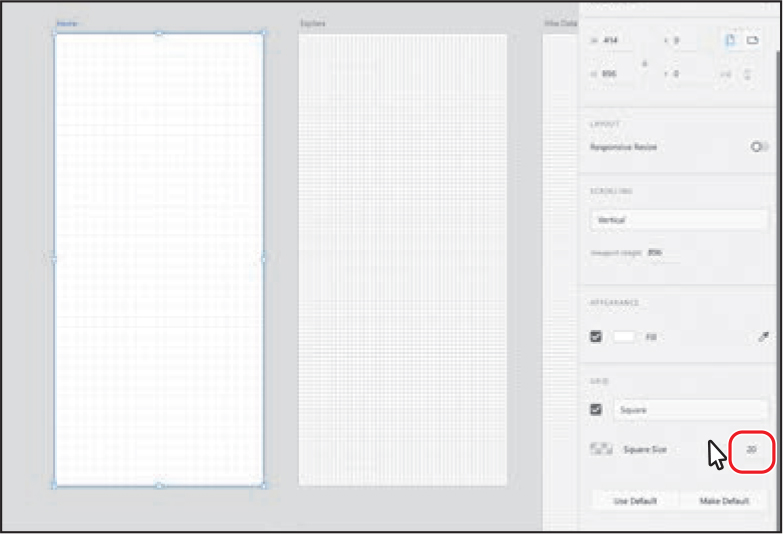
Once again, the selected artboard (Home) is the only one affected by the change. You’ll notice that the smaller the grid size number, the denser the grid is, and the larger the grid size number, the looser the grid is. An 8 pt grid system is relatively standard—or at least a grid system whose lines are divisible by 8.
Change the Square Size value back to 8.
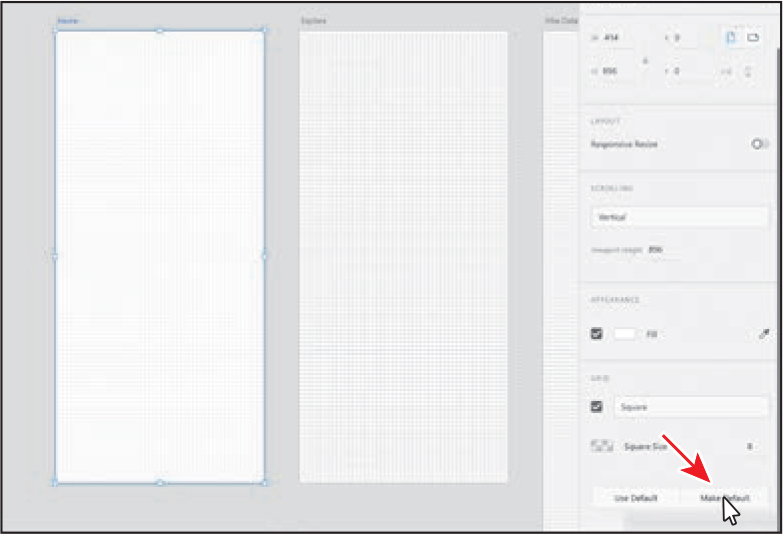
Click the Make Default button to ensure that these square grid settings are the default for square grids you apply going forward. You may need to scroll down in the Property Inspector to see it.
 Note
NoteSquare grids are only visible when the zoom level is greater than 25%.
Now you’ll select a series of artboards and apply the new default square grid appearance to them all at once.
Press Command+0 (macOS) or Ctrl+0 (Windows) to fit all artboards in the document window.
Move the pointer off the upper-left corner of the Explore artboard. Drag down and across the artboard. Keep dragging until the blue marquee box surrounds the entire artboard. When the artboard is highlighted (selected), continue dragging across all of the artboards in the same row, and release the mouse button to select them all. See the figure. Make sure not to select the Icons artboard.

 Tip
TipWhen dragging to select multiple artboards, only one of them needs to be fully encompassed within the selection area.
With a series of artboards selected, you could also change other values that appear in the Property Inspector, like Fill or Width and Height. Selecting a series of artboards and applying properties like Width and Height can be a great way to ensure uniformity.
Click the Use Default button in the Property Inspector to apply the default square grid appearance to the selected artboards. You may need to scroll down in the Property Inspector to see the button.
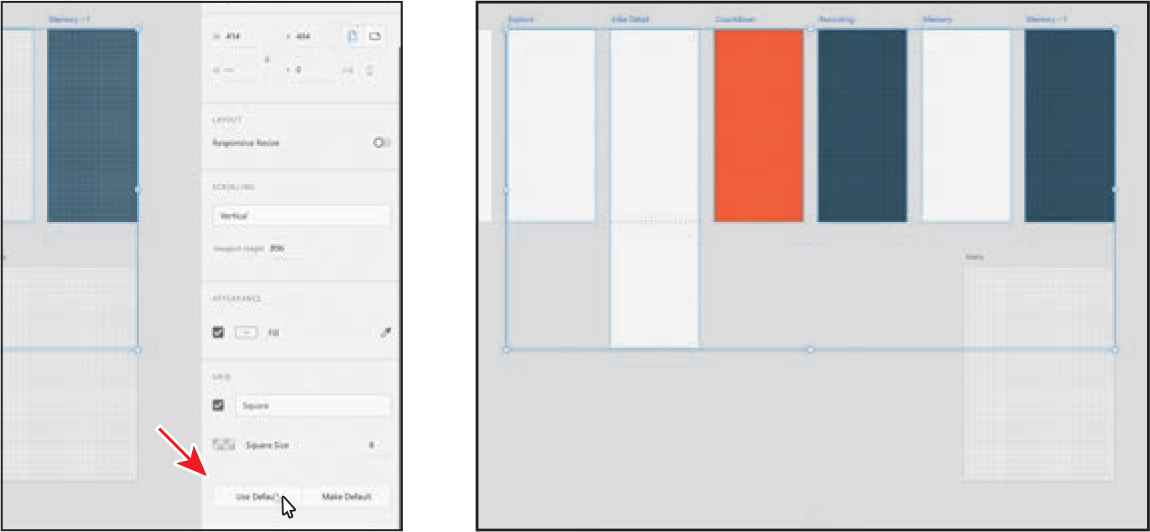
The square grid on each of the selected artboards should now match the default square grid you set on the Home artboard.
Choose File > Save (macOS), or on Windows click the menu icon (
 ) in the upper-left corner of the application window and choose Save.
Applying a layout grid
Now you’ll apply a layout grid to artboards in a new web design document you create. In Lesson 7, you’ll learn about responsive resize which allows you to resize artboards while maintaining spatial relationships at different sizes to best adapt to multiple screen sizes.
To create a new document, choose File > New (macOS) or, on Windows, click the menu icon (
 ) and choose New.
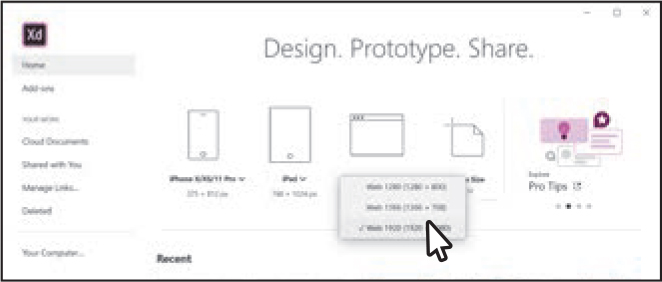
In the Home screen, click the Web 1920 name to reveal a menu of sizes. Choose Web 1920 (1920 x 1080), and a new document opens with a single web design sized artboard showing.
Choose View > Zoom To Fit All (macOS), or choose Zoom To Fit All from the Zoom menu (Windows) in the upper right.
Choose File > Save As (macOS), or on Windows click the menu icon (
 ) in the upper-left corner of the application window and choose Save As, to reveal a menu of options.
Change the name to Travel_Design_web. Click Your Computer, then click the folder icon beneath the option to open an operating system dialog box.
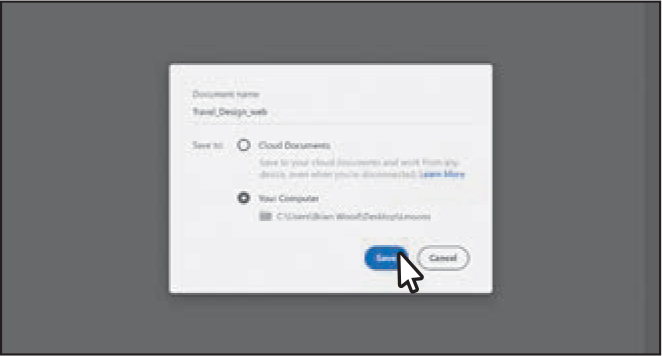
In the dialog box that opens, navigate to the Lessons folder on your computer, and click Choose (macOS) or Select Folder (Windows).
Click Save.
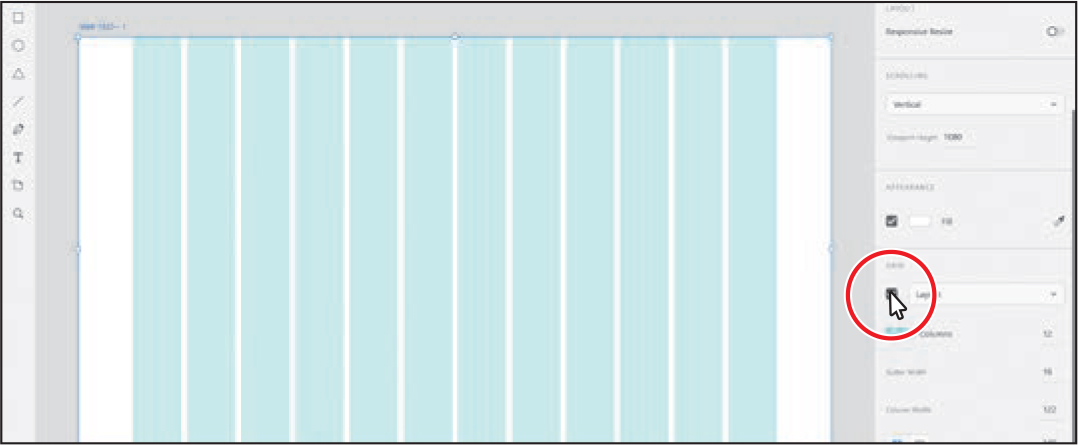
Choose Layout from the grid menu in the Grid section of the Property Inspector, if it isn’t already, and make sure that the option is selected to turn the default layout grid on for the selected artboard.
 Tip
TipYou can also choose View > Show Layout Grid (macOS) or press Shift+Command+’ (macOS) or Shift+Ctrl+’ (Windows) to toggle the Layout grid on and off for the selected artboard(s).
The number and size of the columns displayed in the artboard depends on the size of the artboard. For example, a phone-sized artboard has fewer and narrower columns than does the default layout grid for a desktop artboard. If you resize an artboard, the column widths in the layout grid change to fit the new artboard size. You can change grid properties depending on your design needs. You’ll do that next.
Scroll down in the Property Inspector, if you need to and click the Different Margin For Each Side (
 ) button, and ensure that the values for the margins are 0, 32, 0, and 32, as shown in the figure. After entering the last value, press Return or Enter. You may need to scroll in the Property Inspector to see the values.
 Note
NoteYou may need to adjust the Gutter Width and Column Width values to achieve those margin values.
 Note
NoteLots of designers will create a grid based on their design. You can do a quick drawing of your layout on paper to get an idea for the number of columns. Many popular frameworks also use a grid system of 12 columns, which usually divides the page area (artboard, in this case) easily into 12 even sections.
Gutter Width and Column Width are automatically calculated based on the size of the artboard, the number of columns, and the margins set. The Gutter Width is the distance between the columns, and the Column Width is the width of each column. You can change either the Gutter Width or the Column Width values at this point, depending on your design needs. Values you see in the Grid section of the Property Inspector are values automatically calculated by XD. Leave the columns set to 12.
There are two options for setting margins: Linked Left/Right Margins (
 ) (default) or Different Margin For Each Side (
 ). If you need to set different margins on any of the sides of the artboard, you can select Different Margin For Each Side and change the value(s).
Choose File > Save (macOS), or click the menu icon (
 ) in the upper-left corner of the application window and choose Save (Windows).
To close the Travel_Design_web document, choose File > Close (macOS) or click the X in the upper-right corner (Windows).
You should be back in the Travel_Design.xd document.
Creating artboard guides
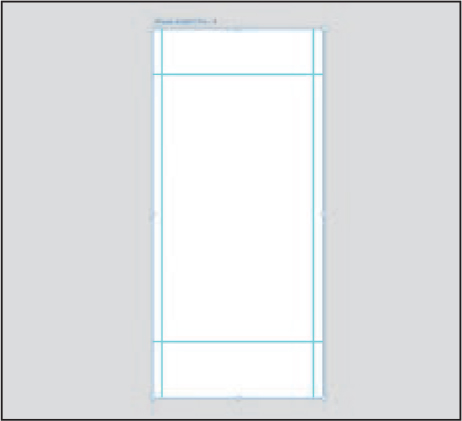
You can also add custom guides to each artboard or a series of artboards to help you position and lay out objects with precision. In this section, you’ll add a few guides to dictate where content will go in later sections.
Press Command+0 (macOS) or Ctrl+0 (Windows) to fit all artboards in the document window.
With the Select tool (
 ) selected, click in the Home artboard to select it. Press Command+3 (macOS) or Ctrl+3 (Windows) to zoom in to that artboard.
 Note
NoteYou don’t need to select an artboard in order to add guides to it.
To create a guide that you can use to position status bar content that contains the wireless signal icon, time, and more, at the top of each artboard, move the pointer just off the top edge of the artboard, below the “Home” name. When you see a double-arrow (
 ), press and drag down into the artboard area. As you drag, you’ll see a Y position, indicating the distance between the guide and top edge of the artboard. When you see a Y value of approximately 26, release the mouse button to create a horizontal guide.
 Note
NoteIf there are other guides on the artboard, the distance between the guides is displayed off the left edge (for horizontal guides) or top edge (for vertical guides) of the artboard.
With the guide created, now you’ll create two vertical guides so that content you add to the artboards will have a visible margin between the content and the left and right edges of the artboard.
Move the pointer just off the left edge of the artboard. When you see a double-arrow (
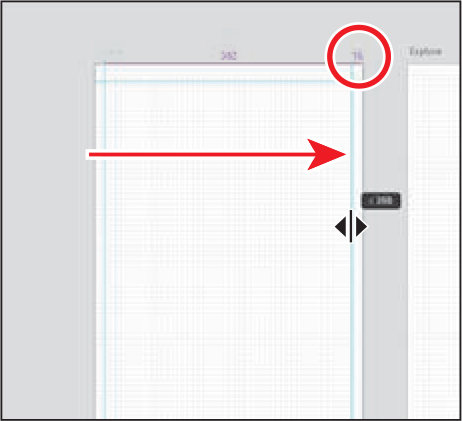
 ), press and drag to the right, into the artboard area. When you see an X position (the distance from the left edge of the artboard and the new guide) of 16, release the mouse button to create a vertical guide.
Move the pointer just off the left edge of the artboard. When you see a double-arrow (
 ), press and drag to the right, into the artboard area. When you see a distance of approximately 16 above the top edge of the artboard (circled in the figure), indicating the distance between the new guide and the right edge of the artboard, release the mouse button to create a vertical guide.
 Tip
TipTo delete a guide, drag the guide off of the artboard. To delete all the guides on an artboard, select the artboard and choose View > Guides > Clear Guides (macOS) or right-click an artboard and choose Guides > Clear Guides (Windows).
Now you’ll copy those three guides to all of the artboards.
 Tip
TipPress the Shift key when dragging guides to snap them to 10 pixel increments.
Press Command+0 (macOS) or Ctrl+0 (Windows) to see all the design content in the document.
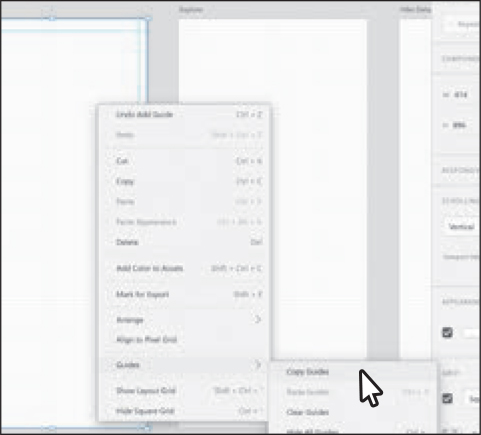
Choose View > Guides > Copy Guides (macOS) or, on Windows, right-click in the Home artboard (the artboard with the guides on it) and choose Guides > Copy Guides to copy all three guides on the selected artboard.
To paste the guides, move the pointer off the upper-left corner of the Explore artboard. Drag down and across the artboard. Keep dragging until the blue marquee box surrounds the entire artboard. When the artboard is highlighted (selected), continue dragging across all of the artboards in the same row, and release the mouse button to select them all. Make sure not to select the Icons artboard.
Press Cmd+V (macOS) or Ctrl+V (Windows) to paste the guides on all of the selected artboards.

Duplicating an artboard also duplicates the guides created on that artboard.
To lock the guides, so you can’t accidentally move them, choose View > Guides > Lock All Guides (macOS) or right-click the artboard and choose Guides > Lock All Guides (Windows).
 Tip
TipTo lock all of the guides in your document you can press Cmd+Shift+; (macOS) or Ctrl+Shift+; (Windows).
While the guides are locked, you can create guides and snap objects to guides, but you cannot change their position on the canvas.
Managing artboards with the Layers panel
In Lesson 1, “An Introduction to Adobe XD,” you were introduced to the Layers panel and saw how you could use it to navigate artboards in your documents. In this section, you’ll see how you can also create and manage your artboards from the Layers panel. As you proceed through the lessons, you’ll use what you learn here.
With the Select tool (
 ) selected, click in the gray pasteboard area to deselect.
It’s important that nothing be selected for the next step.
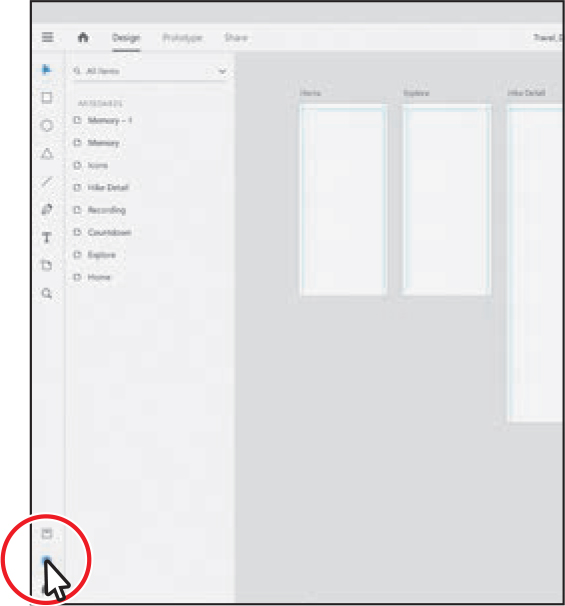
 Tip
TipYou can also press Command+Y (macOS) or Ctrl+Y (Windows) to toggle the visibility of the Layers panel.
Click the Layers panel button (
 ) in the lower-left corner of the application window to open the Layers panel.
In the Layers panel, with nothing selected, you’ll see a list of all the artboards in the document. Notice that the artboards are listed in the order in which they were created, with the last artboard you created at the top of the list.
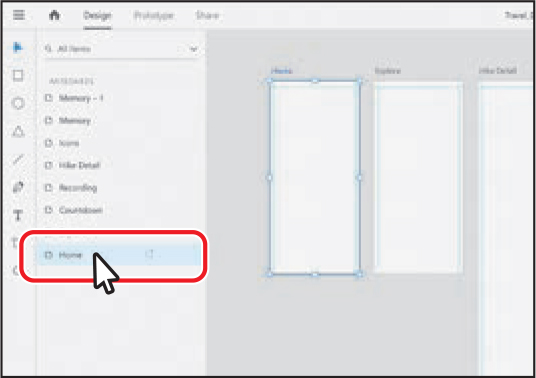
Click Home in the Layers panel list.
When you select an artboard in the list, the artboard is selected in the document, as you saw in Lesson 1. Selecting artboards using the Layers panel can sometimes be easier.
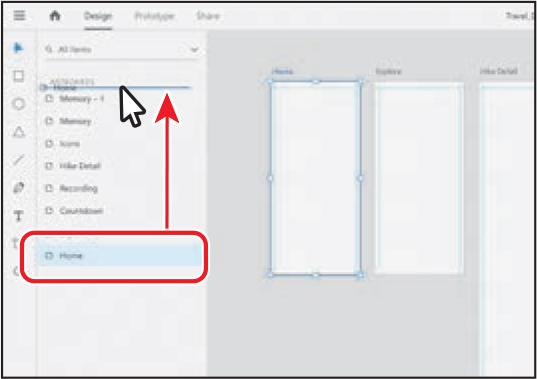
Drag the Home artboard up in the Layers panel list to the top. When you see a line appear above the first item in the list (mine is “Memory – 1”), release the mouse button.
I tend to drag the artboards in an order that matches the path the user takes from one screen to another in the document. In other words, in an app you may have a login screen. After the user enters their login information, the next screen they may see in the app is their home screen. The home screen artboard would follow the login screen artboard in the flow (usually from left to right). This can also make the artboards easier to find later. You can organize them however you want.
Drag the artboards into the order in the Layers panel you see in the figure. It follows the general flow of the screens.
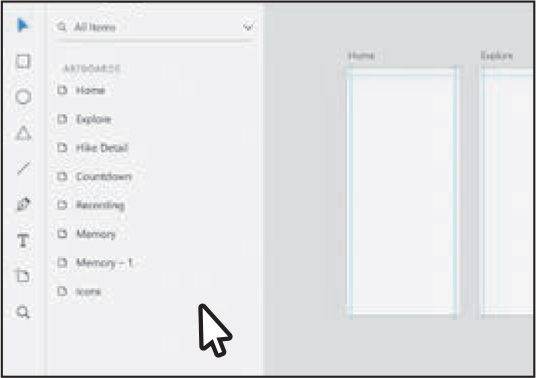
Double-click the Memory – 1 artboard name in the Layers panel to select the name. Change the name to Journal and press Return or Enter.

Right-click the Journal artboard name in the Layers panel and choose Copy.
In the context menu that appears when you right-click, you will see a series of commands, such as Copy, Delete, Duplicate, and more. These commands can be applied to selected artboards. Performing these kinds of operations in the Layers panel can sometimes be faster, especially when dealing with a lot of artboards at once.
Right-click the Icons artboard name in the Layers panel and choose Paste Appearance to paste the blue fill.

The guides on the Journal artboard are not part of the appearance, so they aren’t copied to the Icons artboard, but the square grid was. If your zoom level is 25% or less, you may not see the grid.
Click in the gray pasteboard area in the document to deselect all content.
Choose File > Save (macOS), or click the menu icon (
 ) in the upper-left corner of the application window and choose Save (Windows).
If you plan on jumping to the next lesson, you can leave the Travel_Design.xd file open. Otherwise, for each open document, choose File > Close (macOS) or click the X in the upper-right corner (Windows).
Review questions
1. What does an artboard represent in Adobe XD?
2. By default, when you resize an artboard to be taller, a dashed line appears on the artboard. What does that dashed line indicate?
3. Which tool must be selected to see the preset artboard sizes that come with Adobe XD with a document open?
4. What purpose does an artboard grid serve?
5. What are at least two things you can do with artboards in the Layers panel?
Review answers
1. In Adobe XD, artboards represent a screen (app) or page (website) in your design. Each Adobe XD file can contain many artboards of similar or differing sizes and orientations.
2. The dashed line that appears on an artboard after making the artboard taller indicates the original height of the artboard and the start of scrollable content. It’s useful for determining what’s initially visible on the device.
3. To see the preset artboard sizes that come with Adobe XD when a document is open, you must have the Artboard tool (![]() ) selected.
) selected.
4. In Adobe XD, each artboard can contain either a layout grid or a square grid that provides guides for aligning content. Grids can be useful for aligning objects and can also help you get a quick idea of measurement when designing.
5. In the Layers panel, you can change artboard names, reorder the artboards, copy an artboard, delete an artboard (and its contents), select and zoom in to an artboard, and much more.