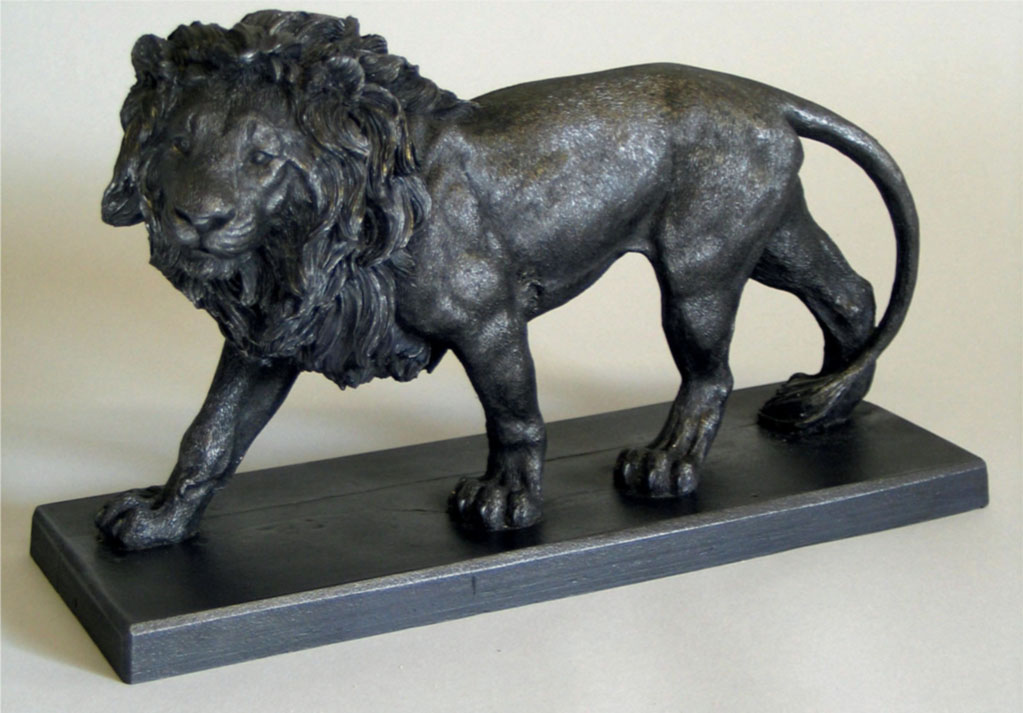
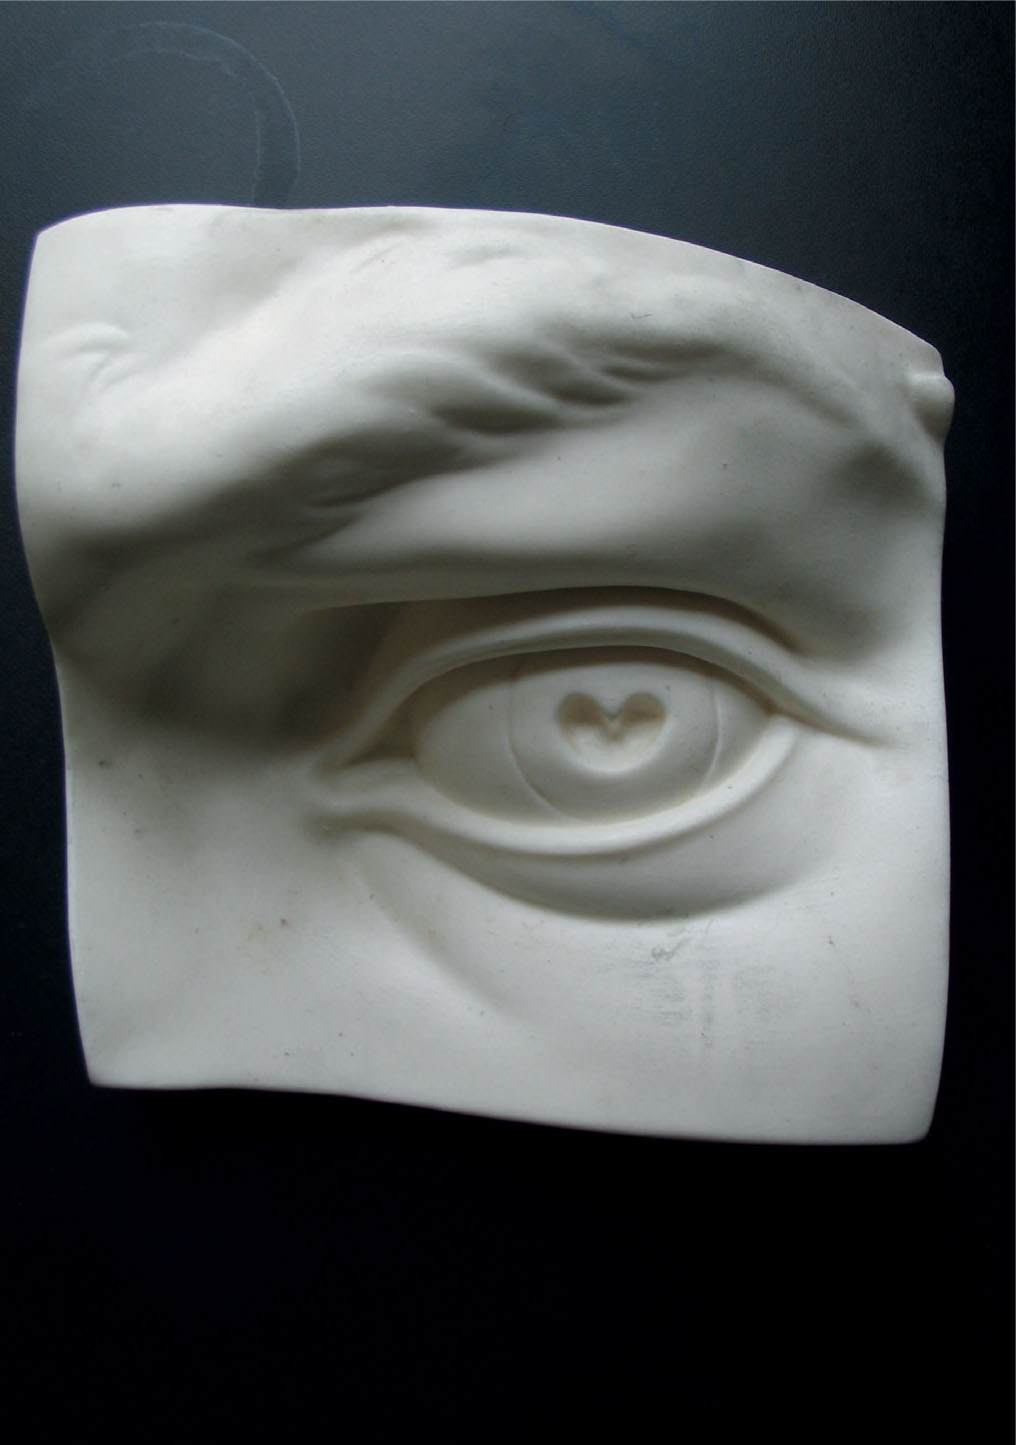
Black-pigmented and applied graphite paste polyurethane resin cast (L:320mm; W: 110mm; H: 200mm).
Black-pigmented and applied graphite paste polyurethane resin cast (L:320mm; W: 110mm; H: 200mm).
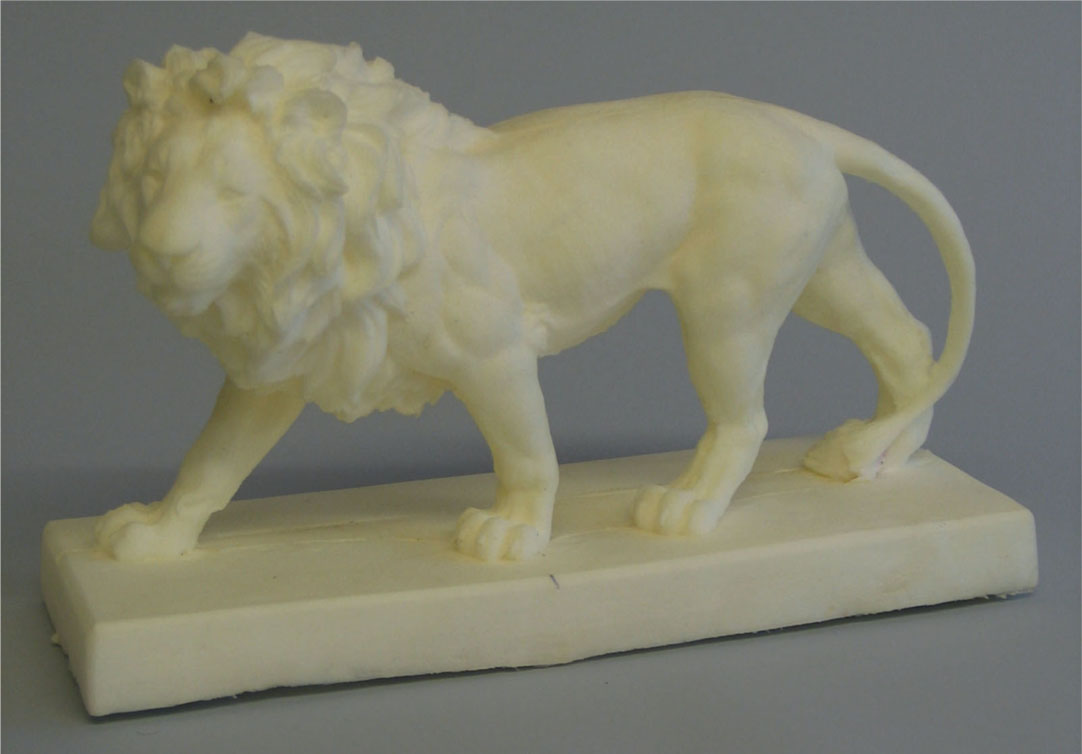
Polyurethane expanded foam cast (L: 320mm; W: 110mm; H: 200mm).
CHAPTER EIGHT
POLYURETHANE RESINS AND EXPANDING FOAM
Polyurethane Resins
Polyurethane resins are fast-curing casting resins from the Methylene bis(phenylisocyanate) chemical family. They are usually supplied as a two-part pack with a very easy-to-mix ratio of 1:1. These resins have a very low viscosity, which makes them ideal for small and bubble-free castings without the use of degassing equipment.
With setting times of between two and five minutes and demoulding times of between ten and thirty minutes very quick turn-around can be achieved for multiple-cast runs. Polyurethane resins can be coloured using dedicated polyurethane resin pigments. Powdered metal and stone additions can be used to achieve metallic and stone-finished castings.
Due to very high Shore hardness, the advantages of polyurethane resins over polyester resins in tensile strength without brittleness are significant. They enable the creation of slushed thin-section hollow castings of great strength (see Chapter 12).
Materials
Fast cast As the name suggests these resins have a very fast setting time of approximately two minutes and demould times of ten to thirty minutes (but do check individual manufacturer’s specifications). These are good for very fast multiple-cast production and have very low viscosity for bubble-free castings.
Slow cast Although still fast these resins have a slightly longer pouring/setting time of approximately five minutes and demould times of twenty minutes to an hour. Slower setting times can be advantageous for pigmented or filled gel coat castings.
Clear These are used for both clear and coloured translucent castings. They are also good for pigmented or metal/ stone-filled castings.
A polyurethane resin life cast.
A polyurethane cast (H: 400mm).
Shelf Life
The shelf life of these resins is at least six months at room temperature. Opened containers of resin should be resealed tightly after use, as any atmospheric moisture contamination can cause foaming when next used. A moisture purging dry-gas aerosol can be sprayed into open containers to prolong the shelf life.
Fillers
Fillers can collectively, in general terms, be described as very fine mesh powders that are mixed into the resin. They can be broken down into three main groups.
Inert fillers (aluminium trihydrate) These are very fine inert mineral powders that are mixed in equal parts with the resin. Mixing the resin with a filler reduces the amount of resin needed to fill a cast solid, which is useful for two reasons: first, to lower exotherm (the heat generation during setting), and second, to reduce casting costs. Calcium carbonate can be added to resin to produce a very white casting. Storage should be at moderate temperatures in dry conditions.
Metal fillers These are fine mesh metal powders added to resins to produce castings with metallic finishes. Unlike metallic paint finishes these are powders derived from the metal itself and once cut back with abrasives and polished will appear as the metals they are (for instance, an iron-filled casting will start to rust if exposed to moisture). Storage should be at moderate temperatures in dry conditions.
Stone fillers These are powdered stone materials added to the resin to produce stone finishes. They are usually more granular than metal fillers. Storage should be at moderate temperatures in dry conditions.
Metal and stone fillers can be used as a gel coat and painted, to a thickness of 2–3mm, onto the surface of a mould, allowed to set and then backed up with resin or resin/inert filler mix to cut down on the cost of metal and stone fillers.
Tools and Equipment
Dispensing and Mixing
Waxed paper cups or white plastic containers For dispensing and mixing batches of resin. Plastic containers can be allowed to dry after use and the set resin cracked out for reuse.
Disposable wooden spatulas For combining resin parts and mixing pigments and fillers into batches.
Scales Although polyurethane resins are often 1:1 two-part mixes some types are 1:0.9 and accurate digital scales should be used to calculate weights and measures of resin parts safely according to manufacturer’s instructions.
Laminating
Brushes Brushes of various sizes are needed to paint gel coats onto the mould surface. Specially manufactured brushes are available that will withstand the harsh chemicals involved and not lose bristles; however, ordinary decorating brushes of a good quality will last quite a long time.
Disposable wooden spatulas For mixing batches.
Trimming and Finishing
Rasps and files These can be used for the initial trimming of cured resin casts.
A hacksaw Used for initial trimming.
Tin snips and heavy duty shears Used for initial trimming.
Powered jigsaws and multi-tools These can be very useful to take some of the hard work out of trimming (ensure strict dust control measures are observed).
A power drill Holes can be drilled safely mechanically or by hand into set resins.
Powered abrasive tools For cutting-back flashing on seams and exposing metal/stone-filled surfaces. Beware of cutting backfilled casts mechanically as they can take too much away too quickly (ensure strict dust control measures are observed).
Wet-and-dry abrasive paper This is used for removing sharp edges after initial trimming and cutting back metal-filled casts prior to polishing.
Needle files For very fine and difficult-to-access trimming and cutting back.
Wire brushes For clearing tools clogged with material.
Polishing equipment For polishing castings after cutting back with abrasives, this can be done mechanically or by hand.
Safety and Good Studio Practice
■ Polyurethane resins emit isocyanate fumes at working temperatures above 40°C, which can be hazardous. Keep working temperatures below 40°C and provide adequate ventilation measures.
■ In addition to good ventilation personal respiratory equipment can be used. It is essential that respiratory equipment is specified as suitable for use with polyurethane resin. Using equipment that is not designed for use with resins is sometimes worse than wearing none at all; always check the manufacturer’s specifications.
■ Work surfaces can be protected with a heavy-gauge polythene that can be disposed of or replaced when necessary.
■ Overalls are a good idea as resins are extremely difficult to remove from clothing.
■ Working with resins and their associated products can cause skin reactions, particularly if you have a sensitive skin type. Barrier creams provide a protective barrier between you and these materials and should always be employed even for those without sensitive skin. Disposable plastic or rubber gloves will provide further levels of hand protection. The only efficient and safe way to clean hands is to use specific proprietary hand cleaners.
■ Disposal of excess resins, empty storage and dispensing containers and any other associated materials should be carried out with regard to an understanding of flammability and environmental consequences. If possible follow the guidelines set out by manufacturers, which should be available through the retailer.
■ Safety data sheets for all materials should be requested from retailer if not supplied with the products. All health and safety labelling on materials should be understood and adhered to.
Principal Casting Techniques
Mixing
Polyurethane resins are supplied as two-part systems. Ensure the ratios of parts are correct and exact by weighing on digital scales. Ensure both resin parts and moulds are at room temperature; studio temperature should be above 15°C and maintained at that temperature during setting and curing times. Ensure mixing vessels and tools are dry.
Combine both resin parts in a mixing vessel and stir vigorously for one minute, scraping the sides and bottom to ensure thorough mixing.
Additional catalysts can be used to speed up curing times but should be batch tested for the job beforehand. Do not use more than 1 per cent of additions. Pour into the mould immediately.
Pigment and Filler Addition
Use a slower-setting resin for pigmented and filler addition castings to allow for the additional mixing time. Mix both resin parts before introducing additions. Ensure fillers are dry.
COLOURED GEL COATS
To obtain castings with integral colour, pigments can be added to the resin to create a gel coat layer of the casting. These are not gel coats in the traditional polyester resin sense as polyurethane resin is not thixotropic, but if worked with quickly enough mixes can be applied to a thickness of 2–3mm to create a first layer to the casting. Specific polyurethane resin pigments have been developed that are raw earth pigments suspended in a resin binder. A gel coat resin is used to carry the pigment of the casting.
1. Dispense the amount of resin required to apply a layer approx 2–3mm thick to the mould surface. If laying up large moulds be aware of the amount of resin that can be applied within the working time or pot life of a batch. If it will be necessary to lay up the mould with several batches of gel coat it will be necessary to colour-match each batch. Add the pigment in small amounts until the colour required is obtained; note that only small amounts of pigment are needed to produce very vivid colours. Additions of approximately 2–5 per cent by weight of resin should be adequate, but in practice it is much easier to mix by eye.
2. Once thoroughly mixed the batch can be applied to the mould surface with a brush or can be slushed (see Chapter 12). Be aware that it will set very quickly and that it will need to be kept moving over the surface of the mould in order to coat it evenly, to a thickness of about 2–3mm. Use batches of a size that can be used within the pot life.
3. It is sometimes a good idea to apply a second gel coat to moulds with a lot of detail. In such cases allow the first gel coat to cure and dry before application of the second.
4. Allow the gel coat to set before backfilling with resin or resin/inert filler mix.
METAL/STONE-FILLED GEL COATS
Metal and stone effect castings can be obtained using very fine mesh (finely ground) metal and stone powders (known as fillers) mixed into the resin. A wide range of fillers is available, including:
■ bronze;
■ copper;
■ iron;
■ brass;
■ marble;
■ slate; or
■ stone.
Fillers are added to the resin to form a brushable gel coat that is applied to the mould surface and then backfilled with a resin or a resin/inert filler mix that fills the mould. When calculating the amount of metal filler a rough rule of thumb is to use equal quantities by volume of resin to filler.
1. Dispense the required amount of resin into a container and then dispense an equal quantity by volume of the filler required. Do not mix the resin and filler at this stage. For a gel coat mix the quantity of resin and filler combined will need to cover the entire surface of the mould to a thickness of approximately 2–3mm, depending on the amount of detail. Moulds containing a combination of raised and deep fine detail may need a second application of gel coat once the first has set.
2. Laying up a large mould will require several batches of gel coat in order to apply it within the pot life (working time). Colour-matching of metal and stone fillers needs to be considered when laying up several batches of gel coat.
3. Mix consistencies will depend on their use. Gel coats should be brushable but thixotropic; that is, they can be painted onto the mould surface to a thickness of 2–3mm but will not run off. The use of equal quantities of resin and filler should be taken as only a rough guide, and where possible more filler should be used without compromising the required consistency. Using less than 50 per cent filler will not produce good metal and stone effects.
4. Once thoroughly mixed the batch can be applied to the mould surface with a brush or can be slushed (see Chapter 12). Be aware that it will set very quickly and that it will need to be kept moving over the surface of the mould in order to coat it evenly, to a thickness of about 2–3mm. Use batches of a size that can be used within the pot life.
5. Allow the gel coat to set before backfilling with resin or resin/inert filler mix.
Solid and Backfilled Castings
Polyurethane resins can be poured in one operation for solid castings or for backfilling gel-coated castings. (See Project 1 for an illustrated example of a pigmented solid-filled casting.)
1. Arrange the mould so that it can be levelled in two directions. This is done easily using small balls of clay under each corner or opening the flange of the mould and pushing the mould down into them to obtain a level that can be checked with a spirit level.
2. Estimate the amount of resin needed.
3. Estimate the amount of pigment or filler needed (see previous section). Bear in mind that the mix needs to pour well, so do not overestimate the filler.
4. Mix the resin and pigment or filler together very quickly but thoroughly for one minute.
5. Fill the mould by pouring from one spot and allowing the mix to rise, pushing out any air entrapment as it does. A little agitation of the mould will bring up any air bubbles and allow the mix to seep into the mould detail.
6. Exotherm (heat generation) should be considered when pouring polyurethane resins to form a solid. Different polyurethane resins will have varying maximum and minimum casting size limits so always check the individual specifications of the resin being used. (See Chapter 10 for an understanding of exotherm and resin casting.)
7. Allow to set thoroughly.
CLEAR CASTINGS
1. Follow the stages as described above.
2. An additional pre-coat of clear resin can be applied before the mould is cast to achieve highly polished clear castings. This should be poured as above and the excess poured out of the mould. Allow to set before pouring the main casting.
3. As for step 6 in the previous section, careful consideration should be given to the exothermic heat that will be generated when casting. Always adhere to the size limits and specifications of the resin being used.
4. Polyurethane clear castings will benefit greatly if degassing techniques are employed (see Chapter 9).

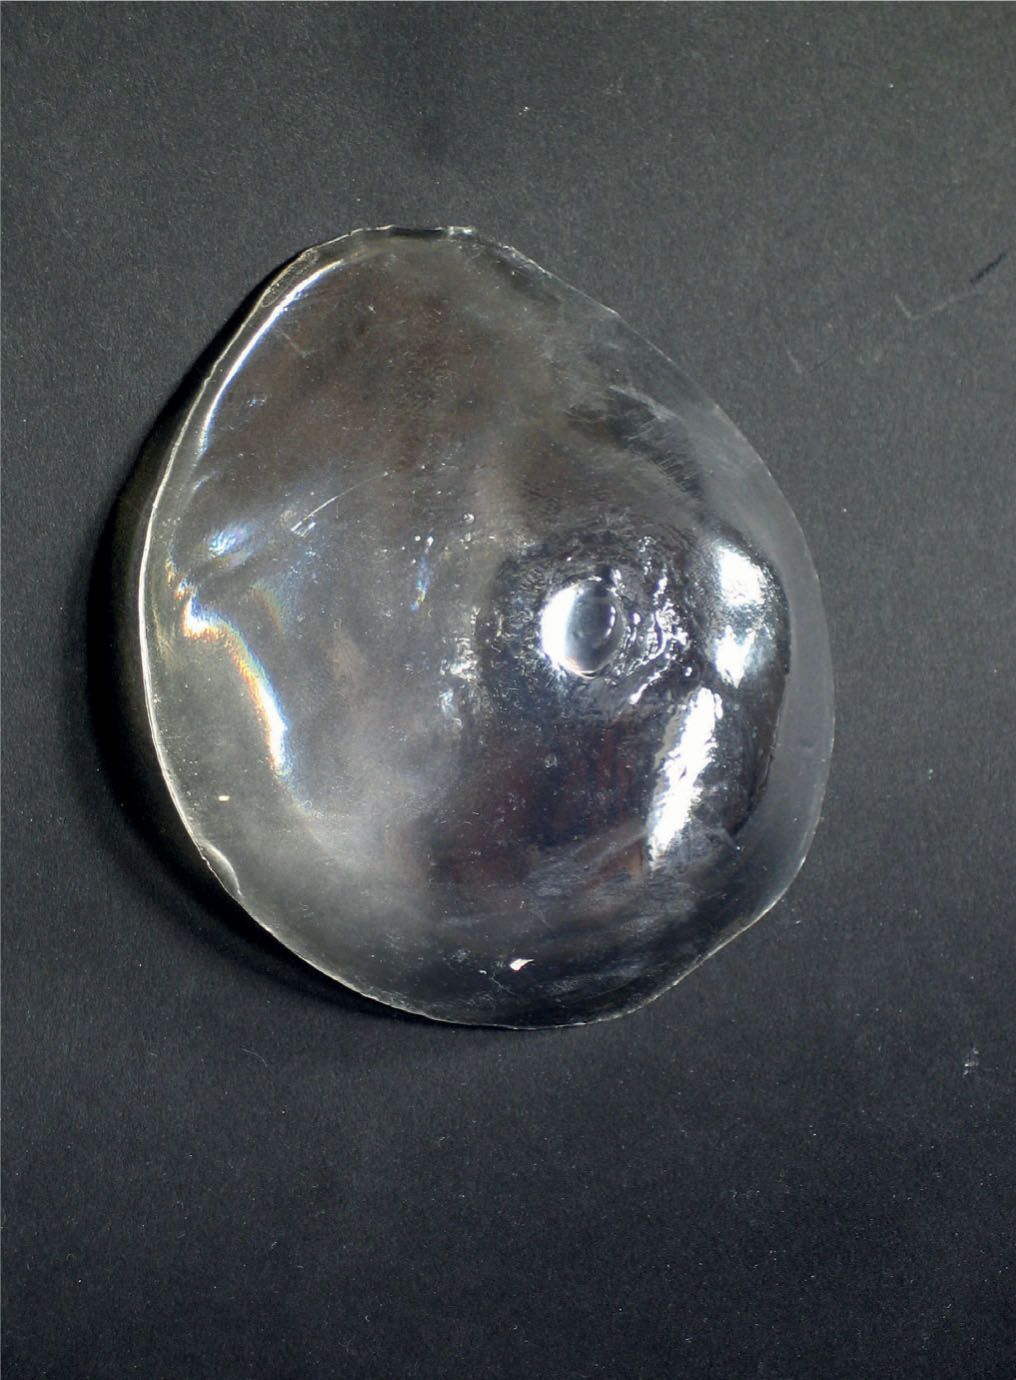
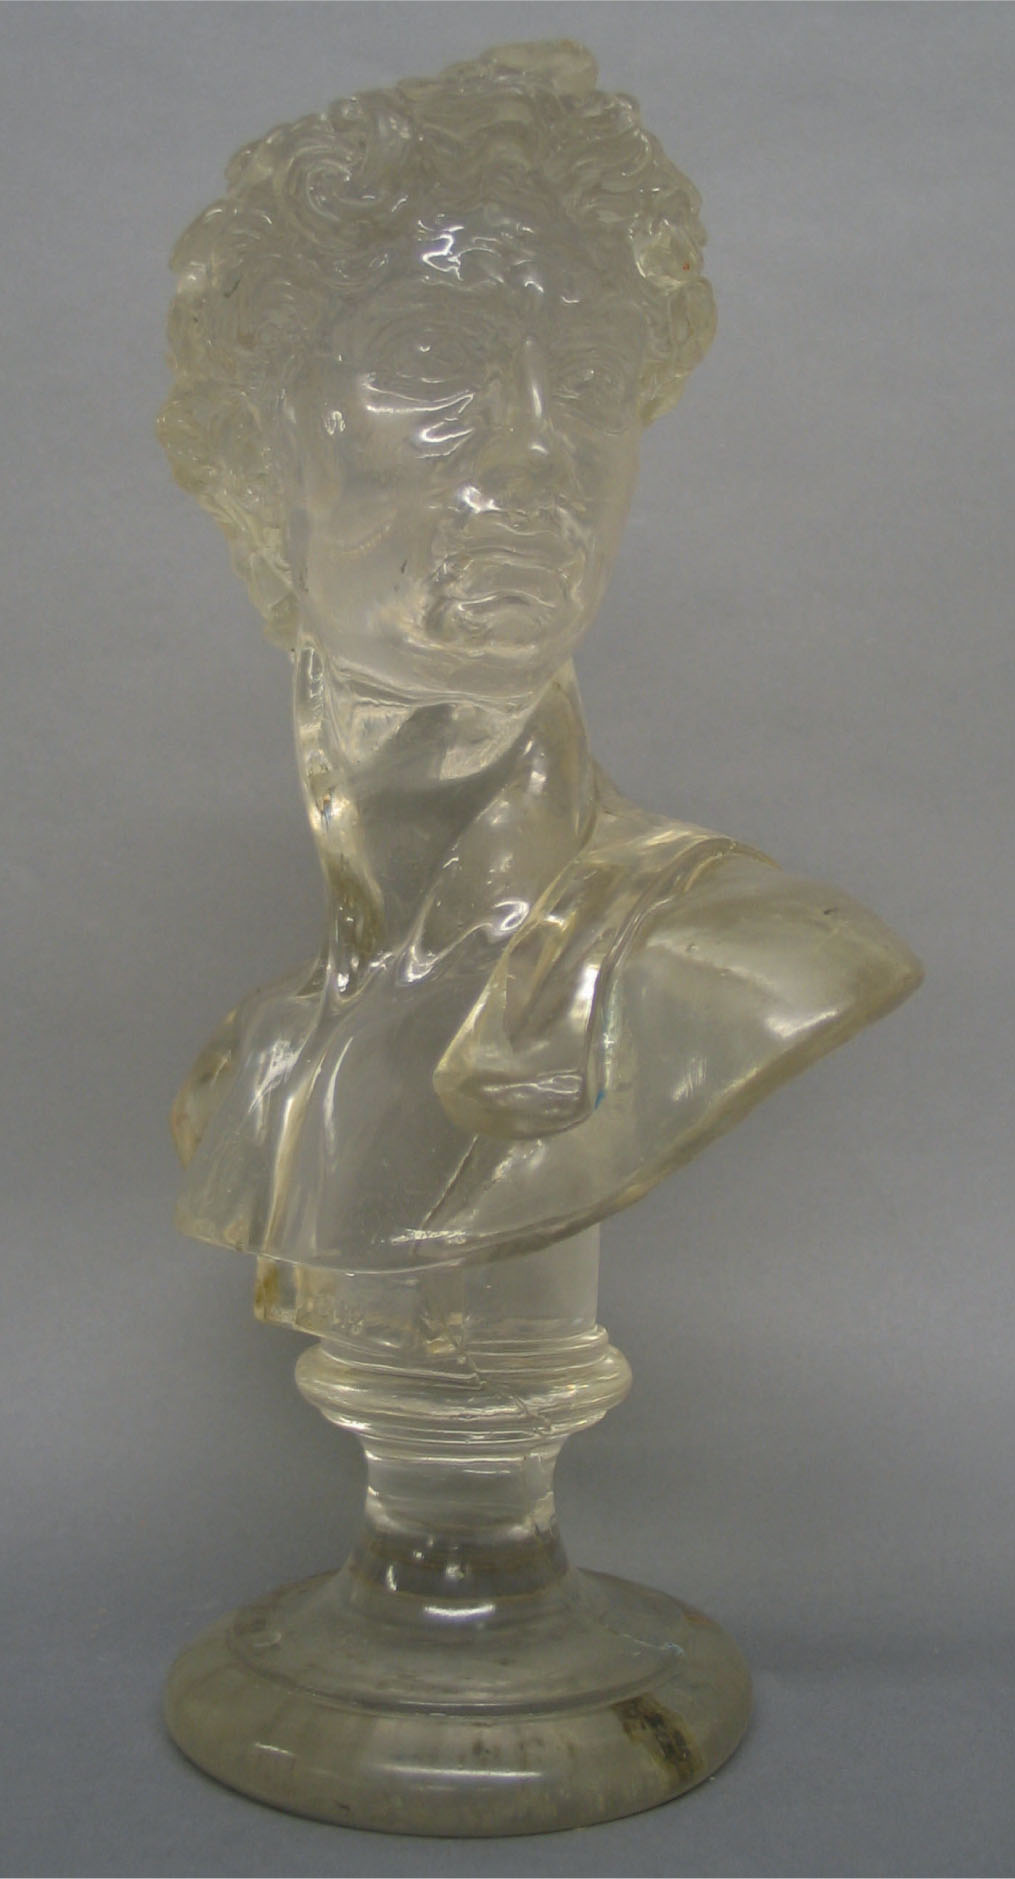
Clear polyester resin (life size).
Unpigmented polyurethane resin (H: 120mm, W: 180mm).
HOLLOW CASTINGS
1. Follow the mixing, additions and pouring stages as above.
2. Hollow castings can be achieved by slushing (see Chapter 12). Moulds should be filled approximately a third full and then constantly and evenly rotated until the resin sets. This is easiest with a mould ‘in-the-round’, where the pouring hole of the mould can be bunged and it can be rotated in all directions. However, tilting an open mould carefully to allow the resin to cover up to the edges is also possible.
3. Moulds may need several coats in this way, allowing time for the resin to set between coats, to achieve an adequate thickness of 3–5mm.
4. Allow to set thoroughly.
Demoulding
The techniques for demoulding – removing the finished cast from the mould – will largely depend on what type of mould is being used.
Plaster one-piece Moulds can be tapped or levered out from the inside of the cast using a chisel. Soaking in hot soapy water can help to ease out difficult casts.
Plaster multi-piece Moulds should be eased apart piece by piece. Small moulds can usually be parted using a strong-bladed knife. Larger moulds may require a thin chisel to initially crack the seam until a wooden or plastic wedge can be driven in. On particularly long seams a series of wedges can be gradually driven in sequentially until parted.
Plaster waste See Chapter 4 of Mouldmaking and Casting for detail on chipping out plaster waste moulds.
Fibreglass As above, although there can be a certain degree of flexibility in a fibreglass mould depending on how thickly it has been made.
Flexible moulds (without a case) Demoulding from flexible moulds without a case is a combination of flexing and peeling the mould while easing out the cast.
Flexible moulds (with a case) First remove the case (this should be carried out as for plaster one-piece moulds) and then peel the mould away from the cast. It is possible to peel the mould away from the cast with these moulds as they are thinner and more flexible than flexible moulds without a case.
Gelflex moulds Resin casts from gelflex moulds should be allowed to cool down thoroughly after the setting process as the mould may soften slightly due to the high exotherm generated and will need time to reset.
Trimming and Cutting Back
Once the cast has been demoulded any excess cast and seam lines (flashing) can be trimmed back.
1. Initially the extremities of any excess can be broken off carefully by hand or a pair of pliers, but be careful not to break off too much. Then a number of tools can be employed depending on the size of the cast and how much resin is to be removed (chisels, hacksaw blades, surforms, rasps and so on).
2. The initial trim should not be taken right back to the surface of the cast and should only be used to remove bulk excess.
3. Smaller and smaller tools should be used as you work closer to the cast surface.
4. Final cutting back to the surface of the cast should be achieved with increasingly finer grades of abrasive paper. Fine files including needle files can be useful for getting into difficult-to-access area of the cast (a fine brass or wire brush is also useful to clear clogged files).
5. Once excess flashing has been taken back to the surface the final cutting back and/or polishing of the entire cast surface can be tackled.
Surface Finishing and Polishing
Casts that have coloured gel coats and clear casting resins will usually come out of their moulds with a matt surface finish; metal/stone-filled gel coats will be matt and the base material not fully visible. To obtain the full effect of metal and stone, or to achieve gloss colours or glass-clear surfaces, castings will need to be cut back with abrasive papers and then polished.
CUTTING BACK WITH ABRASIVES
Wet-and-dry abrasive papers are used to cut back cast surfaces and these should be used wet to avoid dust (which can be carcinogenic) and prevent the paper from clogging. The papers are graded by the number of particles of grit per square inch of paper and a variety of grades should be used in sequence from coarse to fine. Depending on the job 100–600 grit paper (100 being coarsest and 600 finest) should be used in succession, with the very fine grades usually being reserved for clear casting resins.
■ Standard sheets of abrasive paper should be cut up into pieces that are suitable for the size of the job and laid out in sequence.
■ Initially use the coarsest grade just to take off the worst of any seam lines and to give the whole surface ‘bite’. With metal and stone surfaces this will just remove the surface layer of resin and expose the base material. Where there are smooth areas or areas that have little detail coarse papers should be used sparingly and it may be preferable to start with a finer paper.
■ As the paper becomes clogged either rinse it under a running tap or in large bowl of water.
■ Once the whole surface has been cut back with one grit size wash the cast, change your rinsing water and move on to the next grit size. In this way the whole surface of the cast is cut back progressively using finer and finer paper, with scratches created by the coarser grades being removed by the finer grades.
■ You will notice that metal fillers will become more and more visible as the abrasive exposes them.
■ Clear resins will remain cloudy even after the finest grade and will not become clear until polished unless they are pre-coated.
■ It is difficult to gauge whether casts have been thoroughly abraded enough until after polishing, but a thorough and methodical abrading will produce better polished results. If polished results are not good it will usually mean returning to the abrasives before polishing again.
■ Once exposed, metal surfaces can be polished to a high shine or paginated using cold pagination processes (see ‘Finishing’ section).
POLISHING
Polishing can be done either mechanically or by hand using specifically designed polishing compounds. Polishing compounds come as either a hard waxy block or a cream and are applied to the cast surface with lint-free cloth or a mechanically spun polishing mop.
Cloth polishing mops for block compounds and sponge mops for cream compounds can be mounted, using the correct arbour, to a standard electric drill with variable speed control or can be mounted in a dedicated polishing machine. Polishing machines are bench-mounted so this will restrict the size of the cast that can be polished mechanically. Electric drills can be used freehand or bench-mounted securely using a clamping system specific to the machine you are using. Care should be taken when using electric drills for polishing as they have no guards; goggles should always be worn whichever system of polishing is being used.
Polishing compounds are a very fine level of abrasive and come in grades of coarseness like the abrasive papers. They should be used in sequence from coarse to fine methodically over the entire surface of the cast. Compounds usually come in two or three grades and castings should be washed between grades of polish. Cold-cast metal castings can be given a final polish using a proprietary metal polish suitable to the base metal used.
If after polishing through the grades of compound the levels of gloss, brightness or clarity required have not been achieved it may be necessary to return to the abrasive papers to cut back more and then to repolish.
TIPS
■ When cutting back and polishing cold-cast metal casts with a lot of difficult-to-access detail different grades of wire wool or very fine wire brushes can be used. These should be used dry so care should be taken not generate too much dust and a dedicated dust mask should be worn.
■ Wire wool should not be used on white or light-coloured castings as they may discolour.
■ When cutting back any casting with abrasives the object is to remove the surface layer of resin to expose the colour or base materials. On castings with very fine detail this process may remove some detail; there is no way round this so the balance of how far to cut back without losing too much should be considered carefully.
■ Castings with areas of high and low detail will produce areas that are brighter on the high points. This can look very effective if a ‘foundry sculpture’ effect is required.
■ Once cut back and polished cold-cast metal castings will begin to oxidize over time and can be brought back to brightness with a proprietary metal polish.
■ Cold-cast bronzes (and other metals) can be displayed as such, as long as they are labelled ‘cold cast’ to distinguish them from ‘foundry cast’.
■ Toothpaste is an ultra-fine abrasive polish and can be a good final polishing compound.
FINISHING
Cold-cast bronze, copper and brass castings can be ‘paginated’ following the same methods as for full bronzes although pagination times may need to be reduced due to the smaller amounts of metal contained within the resin (for pagination techniques research other publications).
■ Casts can be wax-polished to retain brightness.
■ Metal shellacs can be used to create permanent seals.
■ Domestic metal polishes can be used to rejuvenate brightness on oxidized castings.
■ Iron-filled castings can be submerged in water to produce a ‘rusted bloom’ on the surface.
■ Unpigmented castings will yellow if exposed to direct sunlight and should be painted or sealed if they are intended for exterior use.
■ Castings can be painted with oil-based paints and should be degreased thoroughly beforehand.
■ Castings can be drilled, sanded and machined.
Faults and Repairs
■ Small holes or cracks can be filled from the surface with additional mixes. A mix of resin and the appropriate metal powder combined at a ratio of one part resin to at least two parts powder produces a thick paste that is useful for filling and making repairs. Overfill, cut back any excess and finish in the usual way.
■ Broken-off cast pieces can be glued back with resin mix containing a little metal powder or colour.
■ Wax gilt crayons can be used to touch up minor blemishes.
■ Breaks can be also be repaired with epoxy resin adhesives.
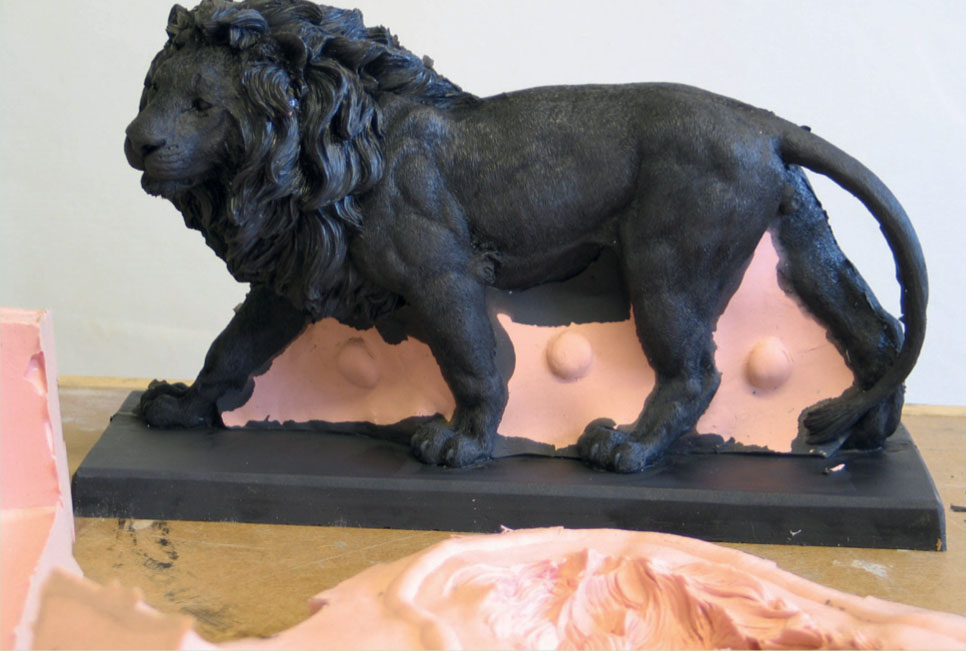
Specification
A polyurethane resin pigmented black lion on a base, from a silicone rubber ‘core’ mould. Size: 320mm (L), 110mm (W) and 200mm (H).
Time Required
Allowing for setting times this project can be carried out in approximately two hours.
Materials
■ Easyflo 60 polyurethane resin (supplied by Notcutt Ltd); and
■ black polyurethane resin pigment.
Tools
See ‘Tools and Equipment’ section for polyurethane resins.
Method
This project was carried out using the multi-piece cored silicone rubber lion mould produced by the project in Chapter 1. To create the cast follow the steps from the earlier section in this chapter from ‘Solid and Backfilled Castings’ onwards.
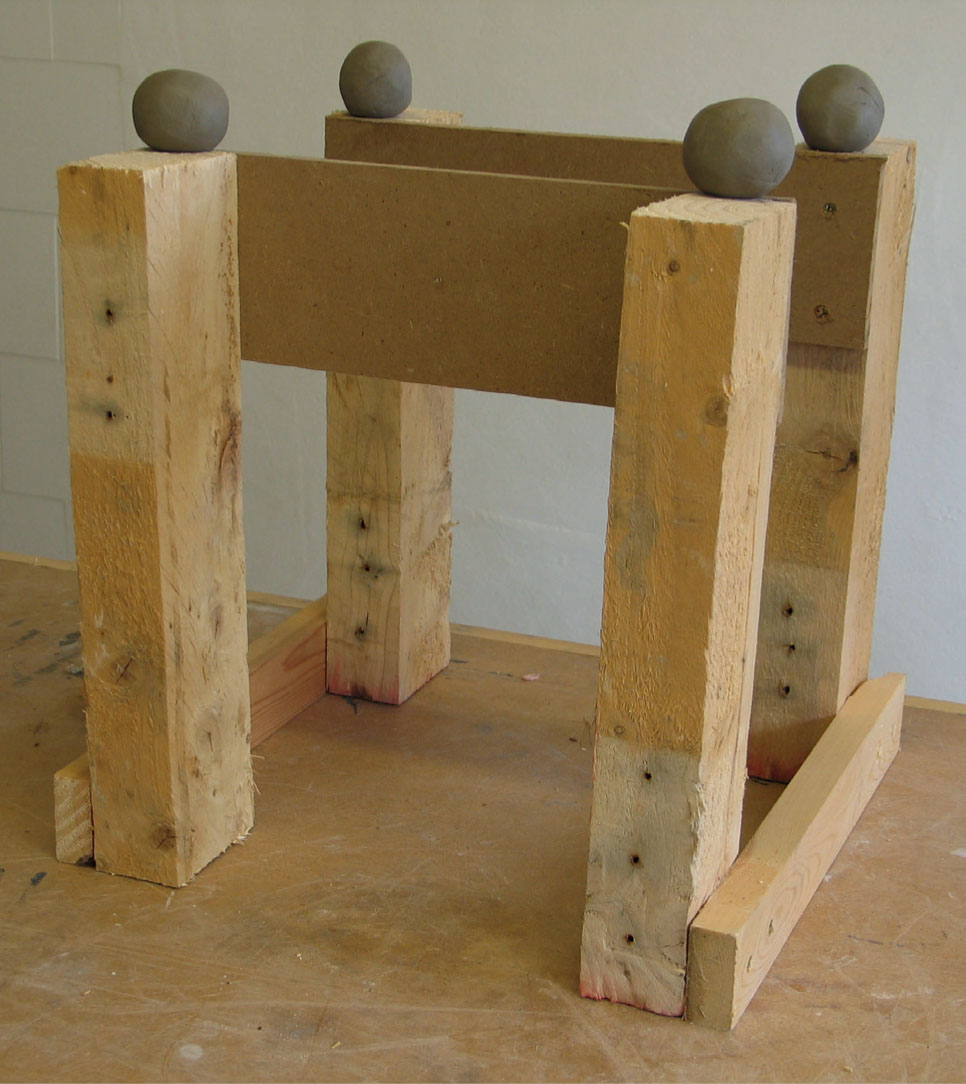
Balls of clay are placed on the four corners of the mould support.

The mould levels are set in two directions by pushing the mould down into the clay balls.
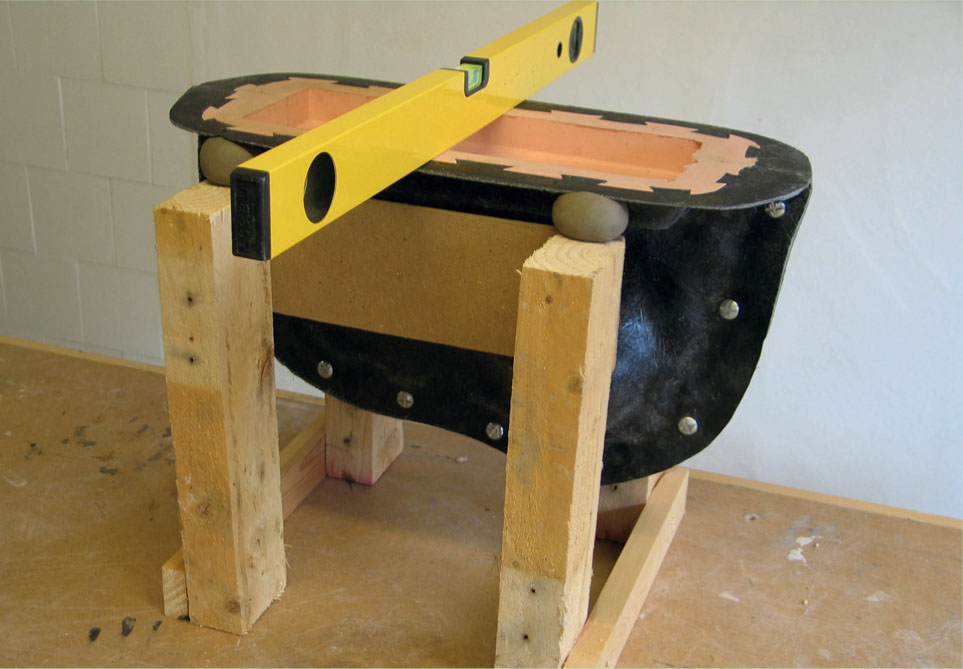
The mould is levelled.

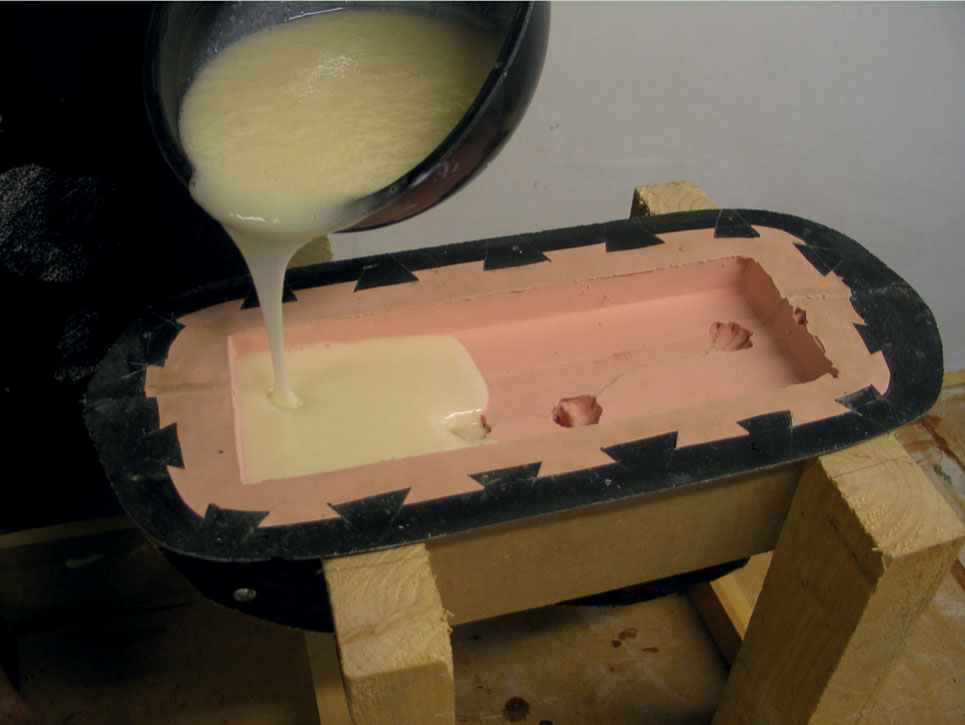
Pigmented polyurethane resin is poured into the mould from one point.
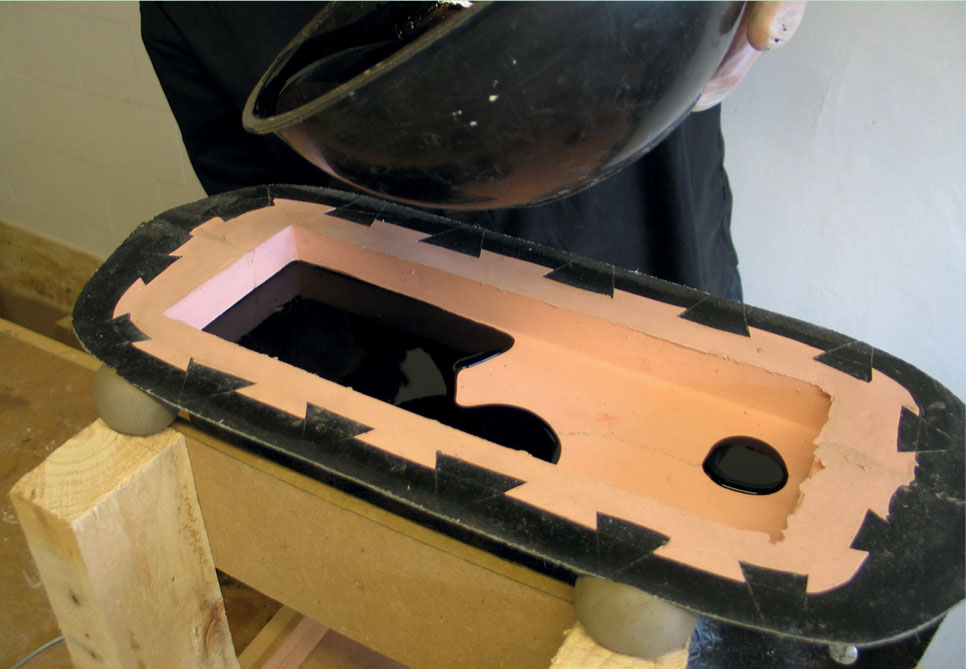
The resin is allowed to rise in the mould, pushing out any air entrapment as it does.
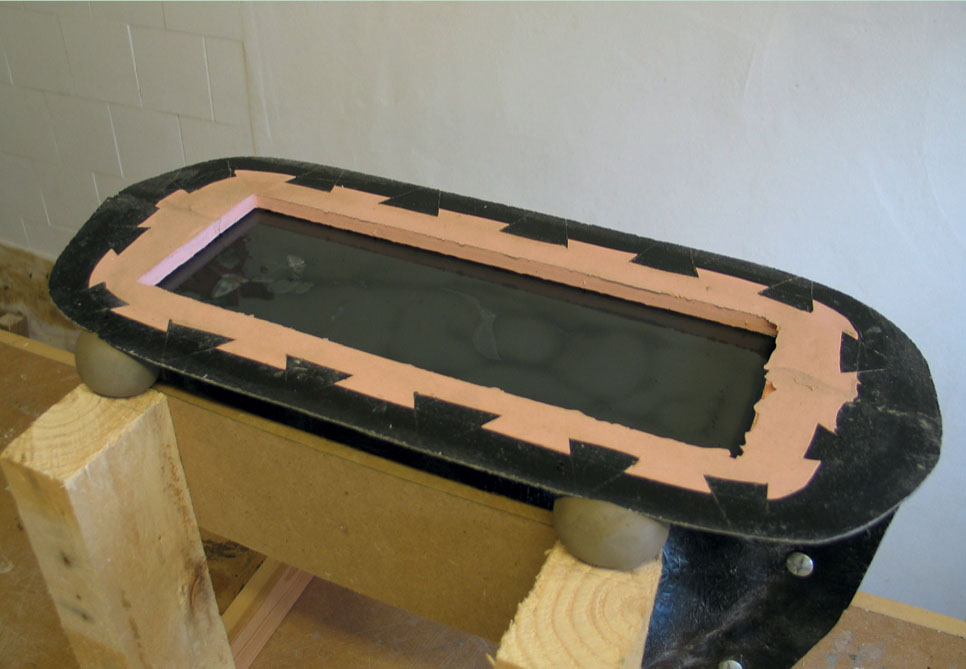
Once the mould is filled the resin should be allowed to set fully and harden.

The case seam is helped open with a knife.
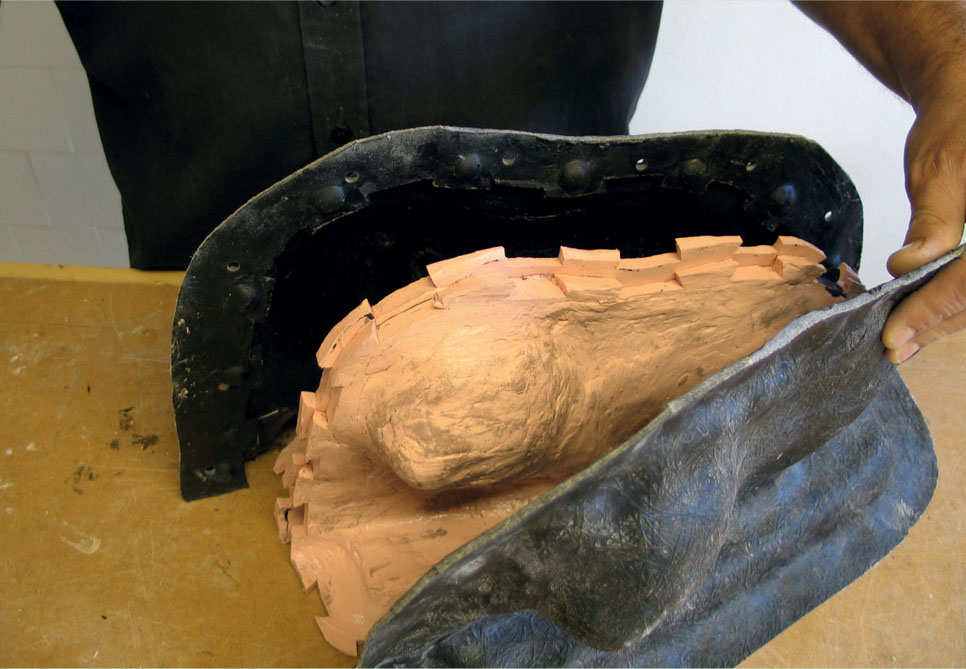
The case pieces are removed from the silicone mould.
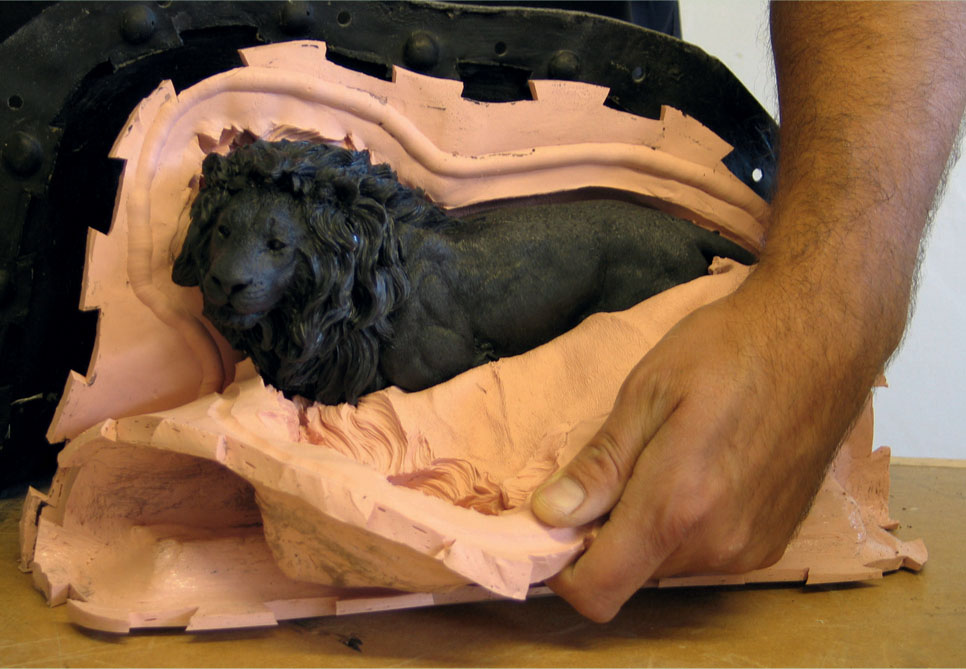
The two silicone side pieces are pulled away from the cast.
The cast with silicone mould core in situ.

The core is removed last.
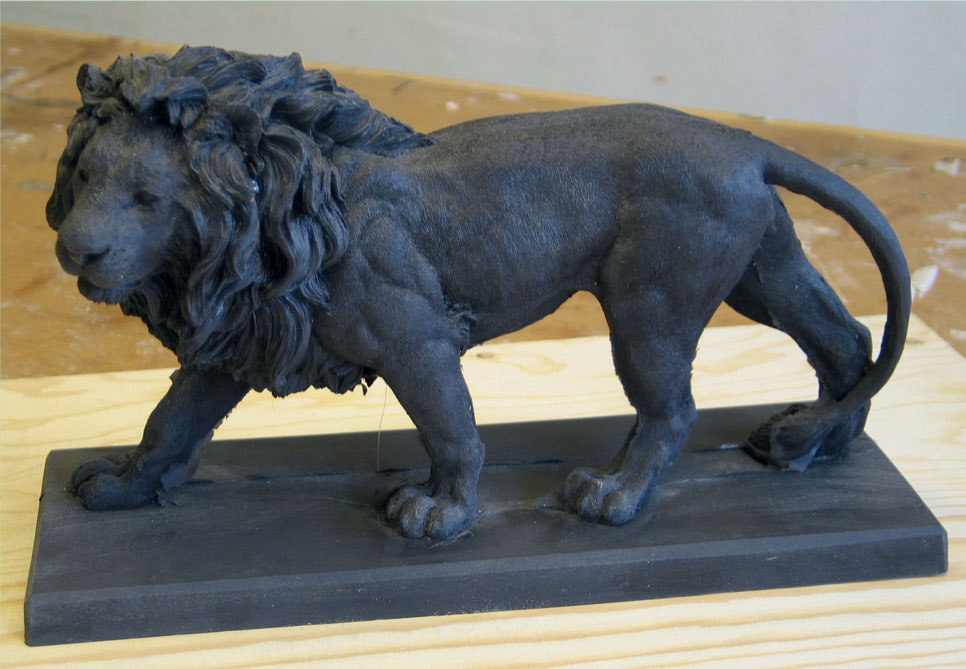
The demoulded pigmented polyurethane cast.
Polyurethane Expanding Foam
Part of the same chemical family as the resins, polyurethane expanding foams are two-part liquid systems that when combined expand and then set to form a solid. The resultant solid can be of infinitely varying flexibility, from a firm to very flexible set foam.
Foams have advantages for all sort of uses, from variable flexible castings to semi-rigid backfillings for any number of cast materials.
Flexible castings can be advantageous to the initial mould-making process. Moulds for flexible casts can sometimes be made in fewer parts, with the flexibility of the casting allowing it to bend and contract past minor undercuts.
Materials
Flexible foam Variable density foams are available in a range of flexibilities. The ‘open’ (bubbled) textured surface varies depending on the density. Flexible foam is good for the backfilling of hollow castings to reduce the cost of the original material. It can also be used for casting if surface detail is not an issue.
Self-skinning flexible foam As above but this has a smooth skin that develops while setting. This is preferable when casting fine detail.
Pigments Specific polyurethane foam pigments can be added at the mixing stage to produce integrally coloured castings.
Shelf Life
The shelf life for polyurethane foams is at least six months at room temperature. Opened containers of resin should be tightly resealed after use, as any atmospheric moisture contamination can cause foaming when next used. A moisture purging dry-gas aerosol can be sprayed into open containers to prolong shelf life.
Some liquids can become crystalline, develop sediment and become cloudy if stored below room temperature and this will reduce the physical properties of the foam. To restore it, loosen the lid and warm to 48–71°C until clear.
Tools and Equipment
Dispensing and Mixing
■ Polyethylene plastic containers These can be used for mixing and can often be reused when the excess is set and removed after use.
■ Flat-bladed spatulas or a palette knife Used to mix small batches.
■ A cordless drill and mixing blade These allow for mechanical mixing, useful for larger amounts.
Trimming and Finishing
RIGID FOAMS
Rasps and files These can be used for initial trimming.
A hacksaw This can also be used for initial trimming.
Tin snips and heavy duty shears These can also be used for initial trimming.
Powered jigsaws and multi-tools These can be very useful to take some of the hard work out of trimming (ensure strict dust control measures are observed).
A power drill Holes can be drilled safely mechanically or by hand.
Powered abrasive tools Beware of cutting back mechanically as powered tools tend to take too much away too quickly (ensure strict dust control measures are observed).
Wet-and-dry abrasive paper This is used in a selection of grades for fine-surface trimming.
Needle files These are used for very fine and difficult-to-access trimming and cutting back.
FLEXIBLE FOAMS
A Stanley knife or craft knife Used for initial trimming.
A scalpel or razor blade Used for secondary or fine-surface trimming.
Note: Foam dust can ignite readily and care should be taken with waste dust from abrasive action.
Safety and Good Studio Practice
Safety and good studio practice should be followed in the same way as for polyurethane resins (see previous section).
Principal Casting Techniques
Project 2 at the end of this chapter provides an illustrated example of flexible foam casting. See also Chapter 11 for an example of backfilling.
Compaction and Volume Calculation
To calculate the required density of foam for the job and the resultant volume of liquid foam to use, a compaction calculation should be performed. The ‘set’ foam density will determine the weight and detail pick-up of the casting. The density of material is calibrated in weight per cubic area. ‘Free rise’ density describes the density of foam allowed to set not contained within a mould and this will be a lower density than the ‘moulded density’. Moulded density is therefore the figure to consider when determining casting densities.
The more liquid the mix of foam you put into a mould (referred to as ‘packing’), the denser the resultant set foam will be. As the liquid mix starts to set bubbles are formed as it expands. The less room there is inside the mould for it to expand, the less bubbles can form and the denser the casting will be and vice versa.
Note that packing the mould with too little foam will hinder self-skinning properties and therefore detail pick-up. Packing the foam to a minimum of 2–3lb per cubic foot above free rise density will result in good detail pick-up.
Mould Preparation
Moulds should be clean and dry and preferably heated to 23–9°C for best results. For open moulds a lid should be made with a pouring hole and vent holes to allow air to escape while the foam is rising. Blocks should be prepared to block these holes securely once the foam has started to rise and the required packing is achieved. Moulds, lids and blocks should be prepared with release agents.
Mixing
The amounts of the liquids to combine to create the foam are usually in ratios of two parts, i.e. 2:1 or 1:1. Always check the manufacturer’s instructions for the specific material you are using. The amount of liquid foam to be used should be found by weighing and not calculated by volume.
Dispense both parts of the liquid foam into one container to avoid a loss of material from pouring from one container into another to combine (which can result in under-curing and tackiness). Mix small batches with a flat-bladed palette knife, scraping material from the sides and bottom of the container to combine thoroughly. Larger batches should be mixed with a cordless drill and mixing blade.
The amount of time to mix batches is known as ‘cream time’ and this can be 15–45 seconds (always check the manufacturer’s individual material specifications).
Pouring
Mixes should be poured as soon as they are mixed, in one continuous steady operation to avoid air entrapment. Do not scrape the sides and bottom of mix containers to avoid introducing unmixed liquid foam parts (which can result in under-cured or soft areas of the casting).
Curing
The amount of time the foam takes to fully expand is known as ‘rise time’, and this can be 1–6 minutes. Demould times can be 20–45 minutes. These are minimum times before remoulding and for certainty full cure should be achieved before demoulding.
Full cure times can be 12–24 hours. Some foams can benefit from ‘post-curing’ at raised temperatures to achieve their full properties. Check the manufacturer’s individual material specifications for all these stages and times.
Demoulding
The techniques for demoulding, removing the finished cast from the mould, will largely depend on what type of mould is being used.
■ Moulds used in rigid foam casting should be removed as for resin demoulding but with extra care to avoid damaging the cast surface as some can be quite soft.
■ Flexible foam castings have the advantage of being able to be bent and contorted to release them from their moulds. Be careful not to tear any cast seam lines (flashing) when demoulding.
Trimming and Cutting Back
Once the cast has been demoulded any excess flashing can be trimmed back.
RIGID FOAMS
■ Initially the extremities of any excess can be broken off carefully, by hand or with a pair of pliers, being careful not to break off too much. Then a number of tools can be employed depending on the size of the cast and how much foam is to be removed (chisels, hacksaw blades, surforms, rasps and so on).
■ The initial trim should not be taken right back to the surface of the cast and should only be used to remove bulk excess.
■ Smaller and smaller tools should be used as you work closer to the cast surface.
■ Final cutting back to the surface of the cast should be achieved with increasingly finer grades of abrasive paper. Fine files including needle files can be useful for getting into difficult-to-access area of the cast (a fine brass or wire brush is also useful to clear clogged files).
■ Once excess flashing has been taken back to the surface the final cutting back can be done in the same way as for resins (see the section earlier in this chapter on Surface Finishing and Polishing).
Note: Foam dust can ignite readily and care should be taken with waste dust from abrasive action.
FLEXIBLE FOAMS
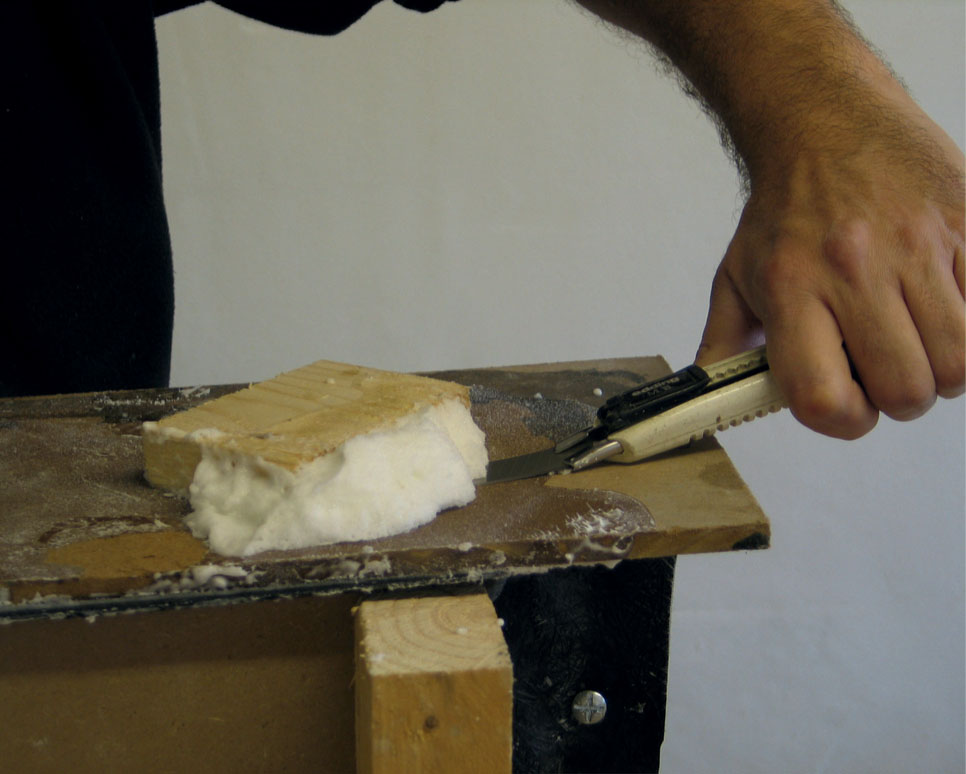
■ Flexible foams can really only be trimmed.
■ A Stanley knife, craft knife or nail scissors can be used for the initial trimming.
■ A scalpel or razor blade should be used for secondary or fine-surface trimming.
■ For the final trim the foam can be stretched a little, with tweezers if necessary, cut and then allowed to spring back to achieve a close-to-the-surface cut.
Finishing
■ Foam castings can yellow and become chalky with exposure to sunlight and should be painted and sealed before exterior use.
■ Castings can be painted once fully cured. The compatibility of primer and paints should be tested before commitment.
Faults and Repairs
■ Tears or breaks in polyurethane foam castings can be repaired using water-based flexible adhesives such as liquid latex glues. Proprietary polyurethane mastics are also available for this purpose.
■ Holes are more problematic to repair. Additions of more foam will adhere to casting surfaces but will need to be trimmed and sculpted back to the cast surface once expanded and set.
Specification
A polyurethane flexible foam lion on a base, from a sili-cone rubber ‘core’ mould. Size: 320mm (L), 110mm (W) and 200mm (H).
Time Required
As for polyurethane resin (see Project 1).
Materials
■ Polyfoam F5 polyurethane casting foam (supplied by Notcutt Ltd).
Tools
See ‘Tools and Equipment’ section for polyurethane expanding foam.
Method
This project was carried out using the multi-piece cored silicone rubber lion mould produced by the project in Chapter 1. To create the flexible foam cast follow the steps from the section ‘Principal Casting Techniques’ for polyurethane expanding foam. (See also Chapter 11 for another example.)
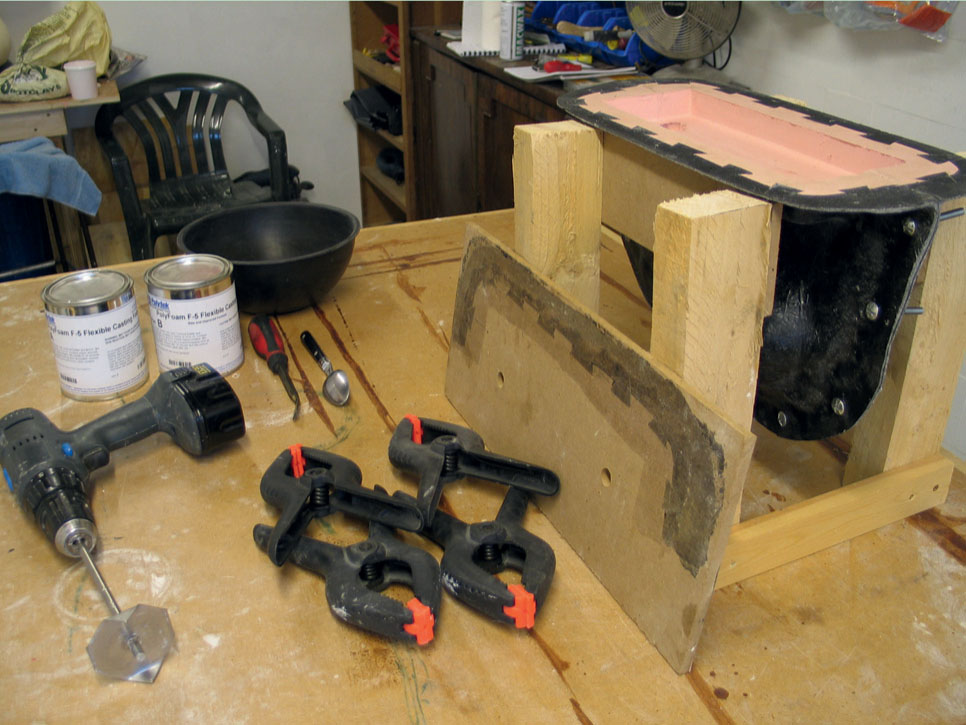
The mould, materials and equipment set up for polyurethane foam casting.
The foam is mixed and poured into the mould quickly.
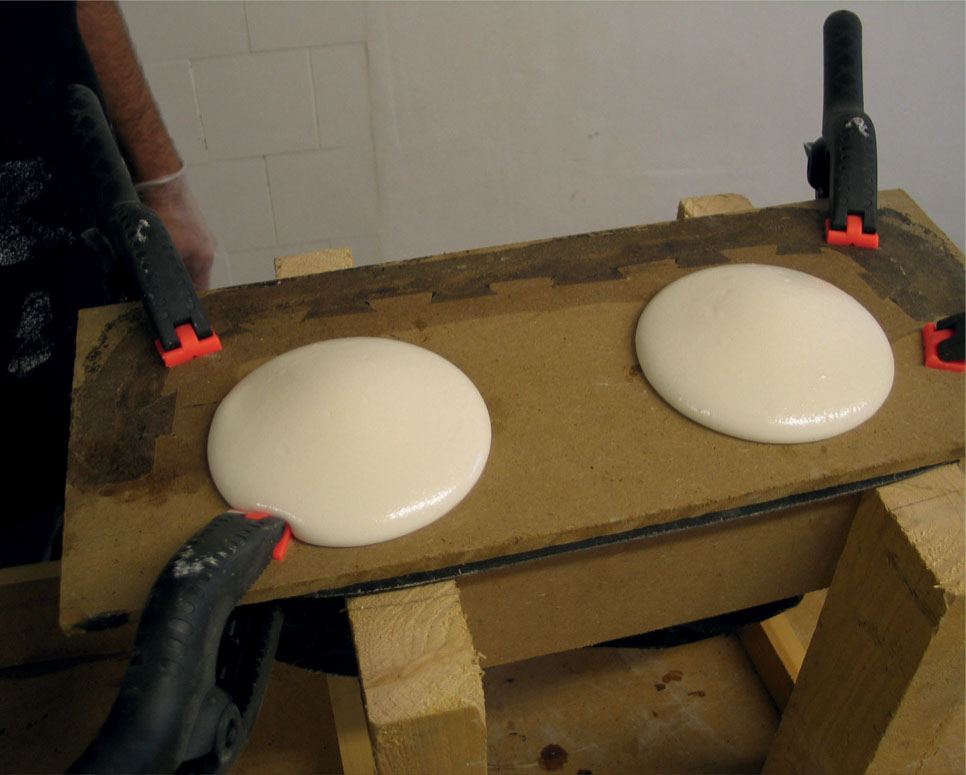
A top board is secured to the mould opening and foam is allowed to rise from the vent holes.
If a tighter foam compaction is required the vent holes can be blocked and weighted to prevent the foam from rising further.
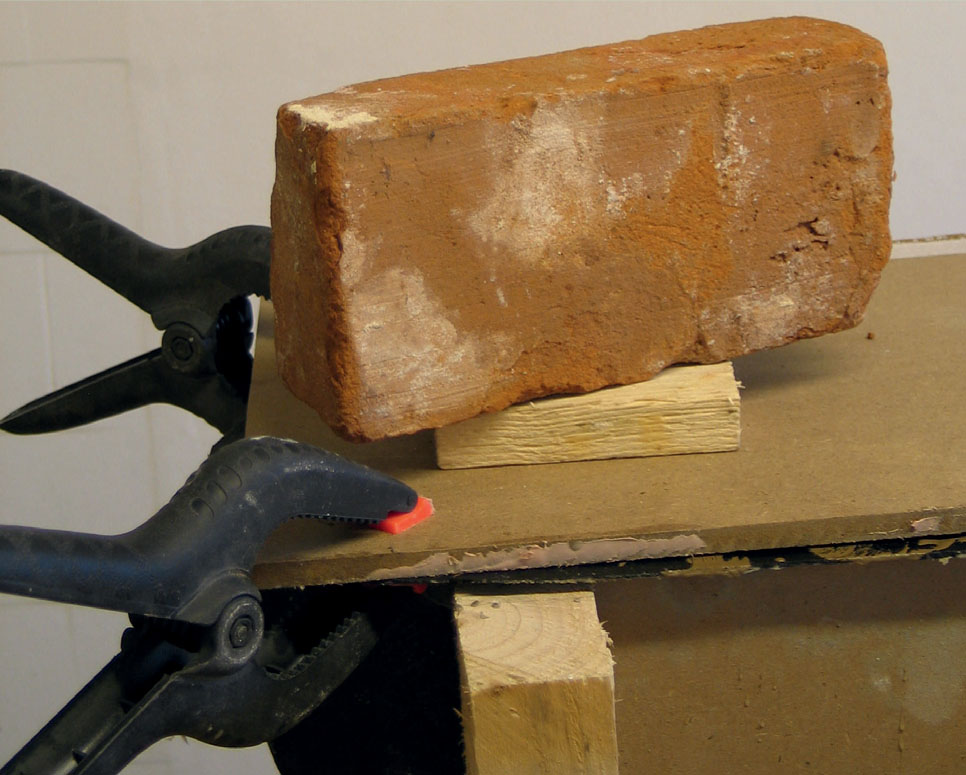
Once the foam has set blocks can be cut away from the top board.
The top board may need to be cut away from the mould opening.
The top board has been removed from the mould.
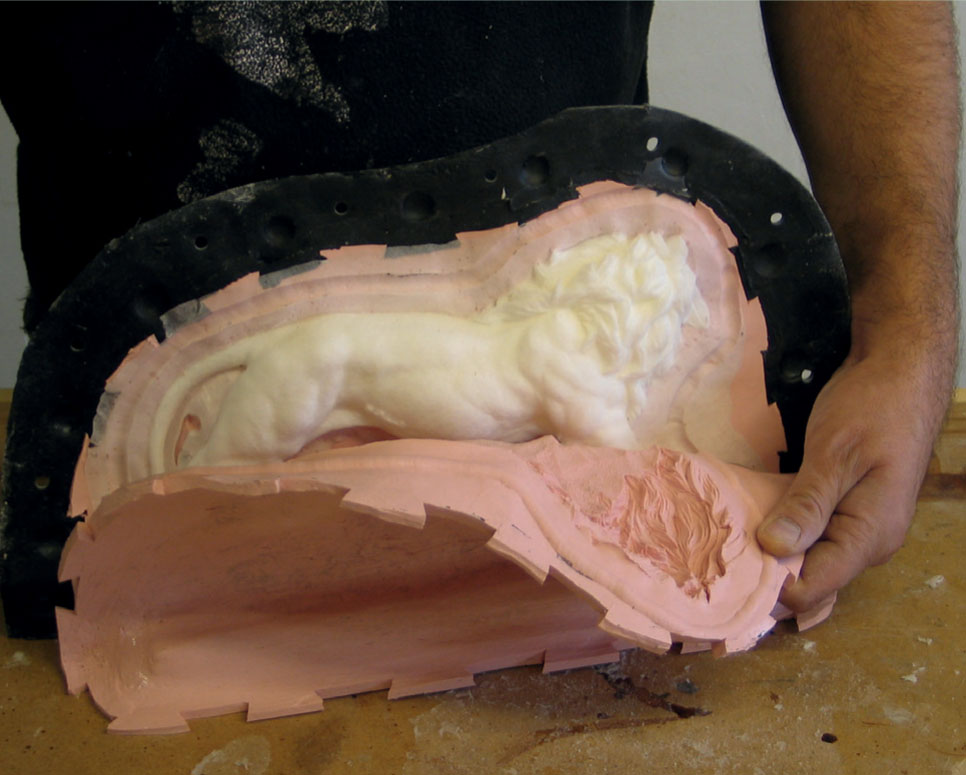

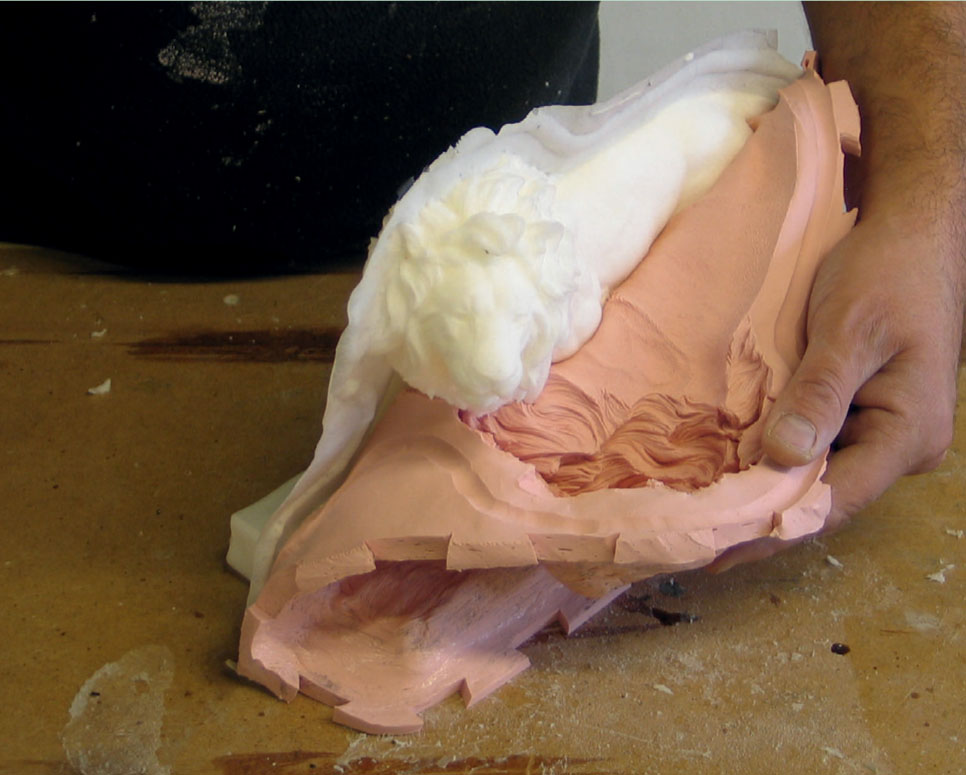
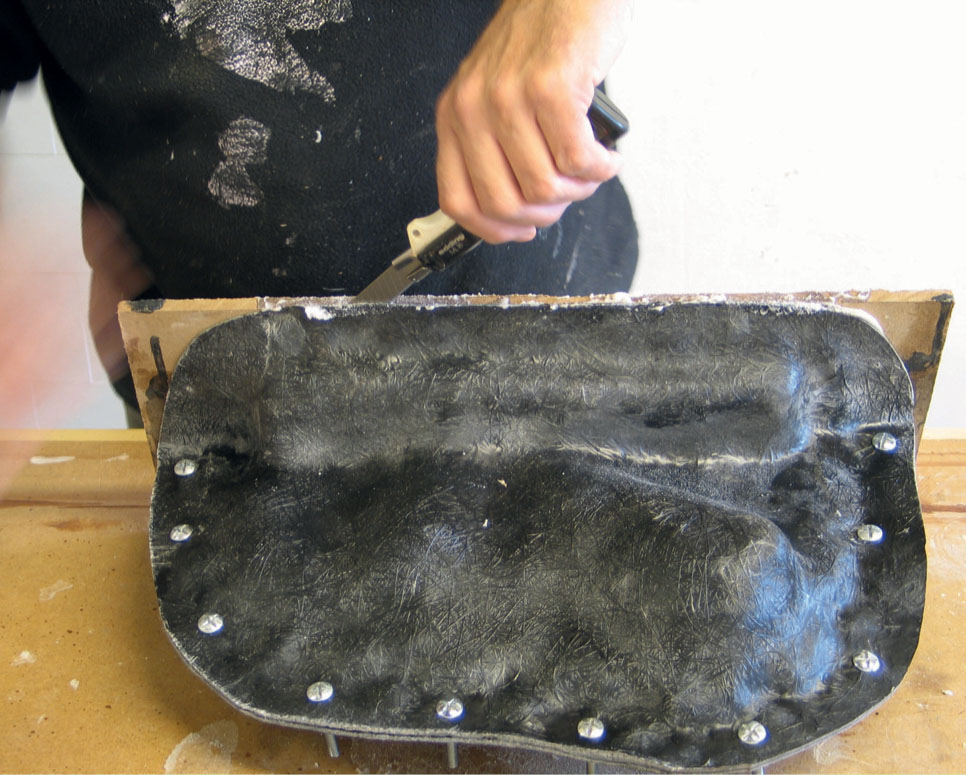
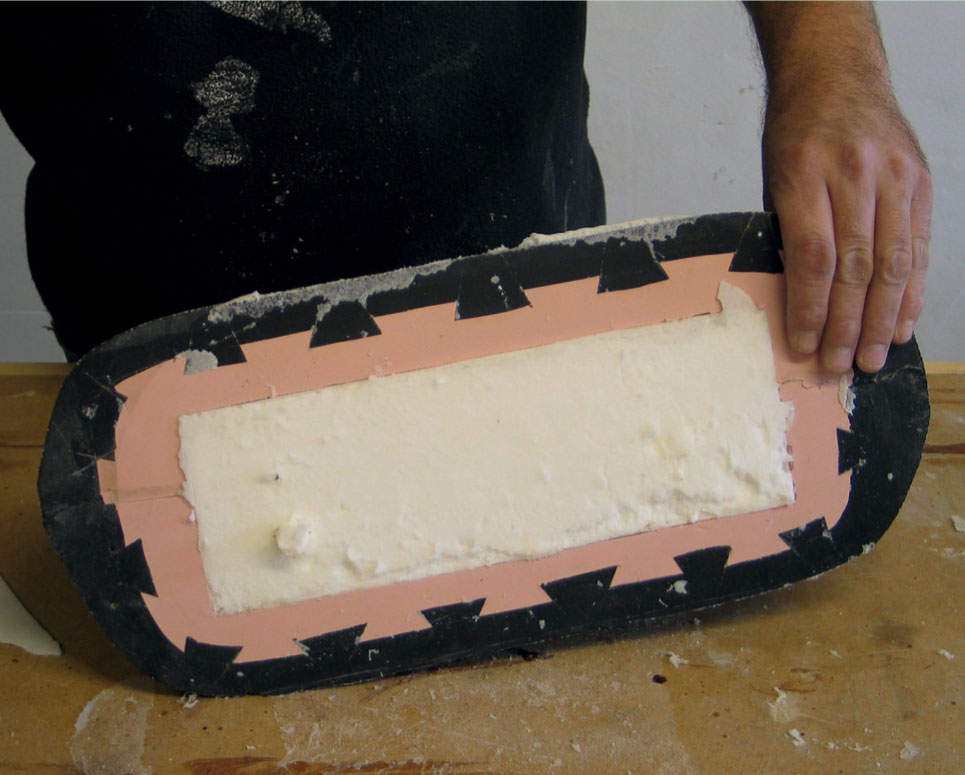
The mould case is removed and the silicone mould pieces are removed in sequence.
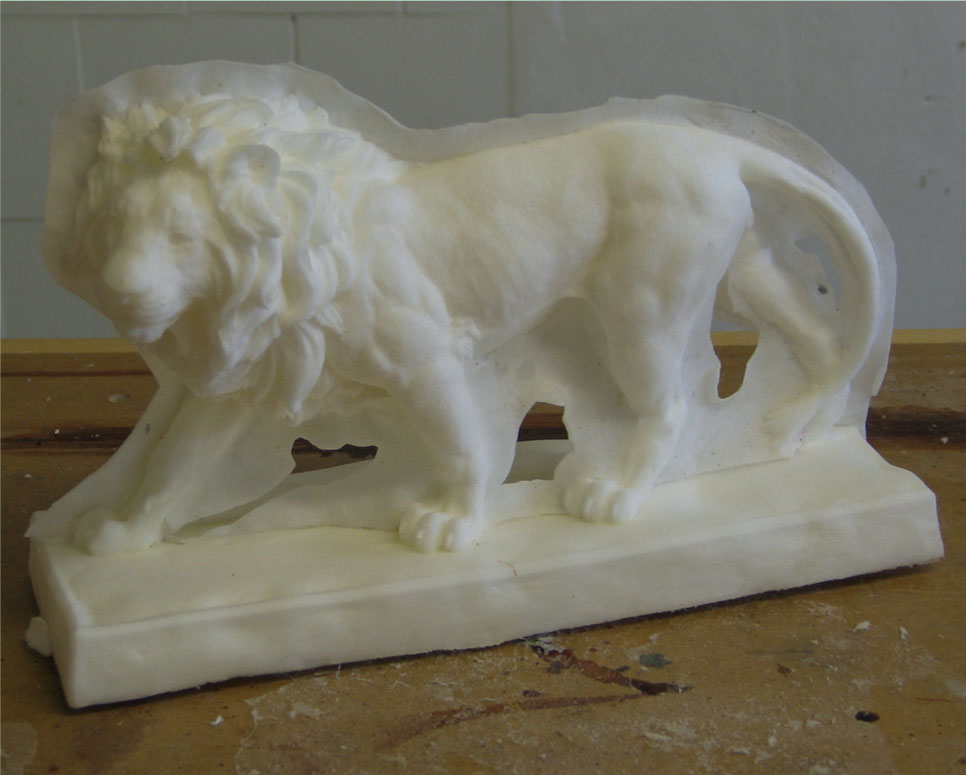
The demoulded cast.
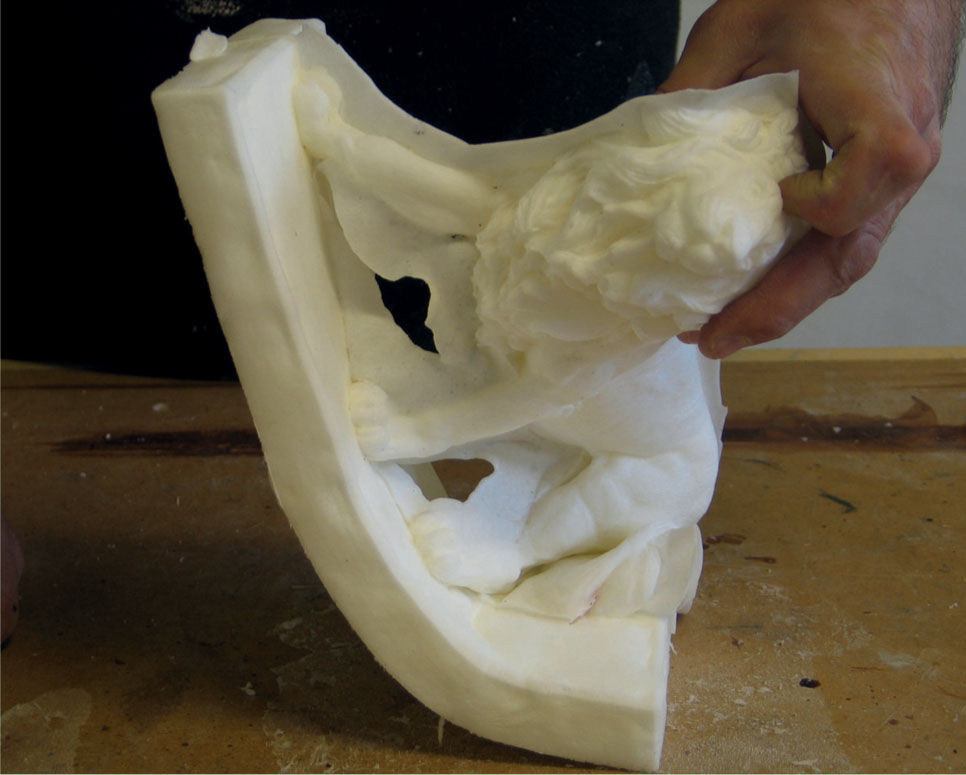
Showing the flexibility of the polyurethane foam cast.