In the rest of this chapter, you'll create a variety of selector types and see how each affects a web page. This tutorial starts with the basic selector types and then moves on to more advanced styles.
To get started, you need to download the tutorial files located on this book's companion website at www.sawmac.com/css2e/. Click the tutorial link and download the files. All of the files are enclosed in a ZIP archive, so you'll need to unzip them first. (Detailed instructions for unzipping the files are on the website.) The files for this tutorial are contained inside the folder named 03.
Open selector_basics.html in your favorite text editor.
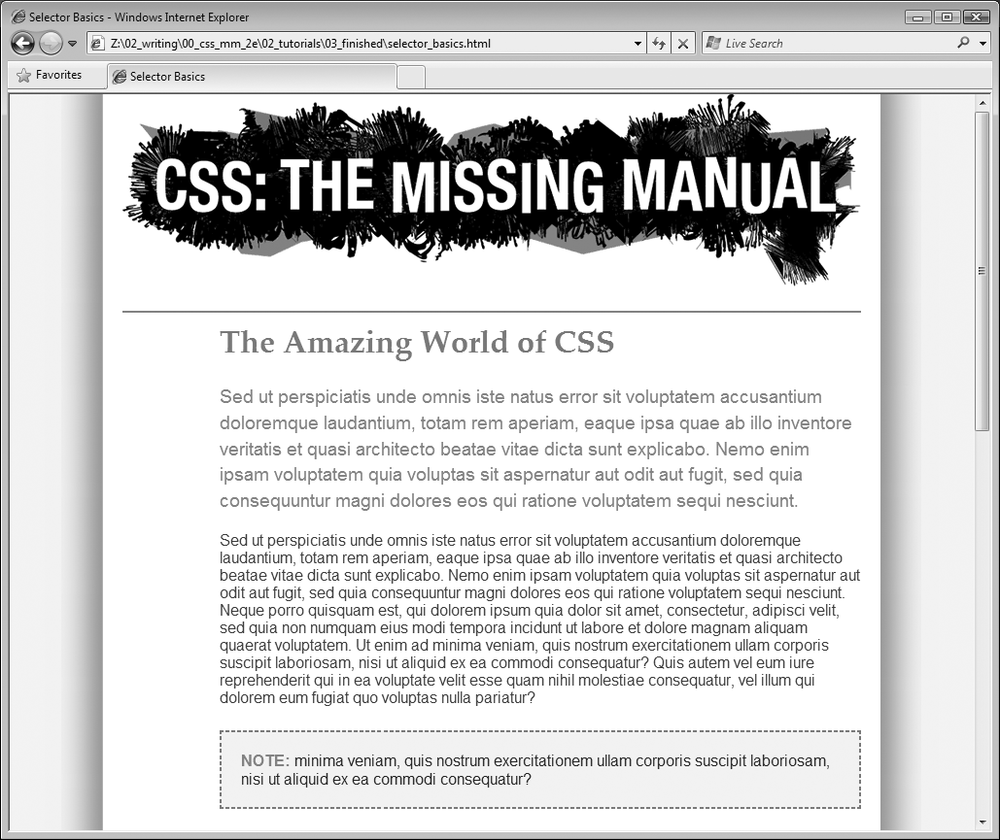
This page is made of very basic HTML tags. The most exciting thing about it is the graphic banner (see Figure 3-7). But you'll liven things up in this tutorial. You'll start by adding an internal style sheet to this file.
Figure 3-7. Plain HTML looks cold and monotonous in a web browser. But with a little CSS, you can turn drab (left) into fab (Figure 3-10) in 31 easy steps.
Click directly after the closing </title> tag, hit Enter (Return) and type <style type="text/css">. Press Enter twice and then type </style>.
These are the opening and closing style tags—it's a good idea to type both tags at the same time, so you don't accidentally forget to add the closing </style> tag. Together, these two tags tell a web browser that the information between them is Cascading Style Sheet instructions. The HTML should now look like this (the stuff you added is in bold):
<title>Selector Basics</title>
<style type="text/css"></style></head>Type selectors—such as the tag selector you're about to create—are the most basic type of selector. (If you completed the tutorial in the last chapter, you've already created a few.)
Click between the opening and closing style tags you just added and type p {, hit return twice and type the closing }.
As mentioned on Creating an Internal Style Sheet, it's a good idea to always add the closing brace immediately after typing the opening brace, just so you don't forget. To create a tag selector, simply use the name of the HTML tag you wish to format. This style applies to all paragraphs of text within <p> tags.
Click between the style's opening and closing braces ( { } ) and add the following four CSS properties to supply the style's formatting—color, size, font, and left indent:
p {color: #505050;font-size: 1em;font-family: "Helvetica Neue", Arial, Helvetica, sans-serif;margin-left: 100px;}Press Enter to place each CSS property on its own line. It's also a good idea to visually organize your CSS code by indenting each property with the Tab key.
Note
These property names and their values may look unfamiliar. For now, just type them as is. You'll learn what 1em and 100px mean, along with all the ins and outs of text-formatting properties, in Chapter 6.
Your style sheet is complete. Time for a look-see.
Open the page in a web browser to preview your work.
Unless you tinker with the preference settings, most browsers display black text in a standard serif font like Times. If your CSS style works properly, then you should see seven indented paragraphs in a sans-serif font in a darkish gray color.

Sometimes you'll want several different elements on a page to share the same look. For instance, you may want all your headings to have the same font and color for a consistent style. Instead of creating separate styles and duplicating the same property settings for each tag—<h1>, <h2>, and so on—you can group the tags together into a single selector.
Return to your text editor and the selector_basics.html file.
You'll add a new style below the <p> tag style you just created.
Click at the end of the closing brace of the tag selector, press Enter to start a new line, and then type h1, h2, h3 {.
As explained earlier in this chapter, a group selector is simply a list of selectors separated by commas. This rule applies the same formatting, which you'll add next, to all <h1>, <h2>, and <h3> tags on the page.
Hit Enter, and then add five CSS properties:
color: #BD8100;
font-family: Baskerville, "Palatino Linotype", Times, serif;
border-top: 2px solid #86A100;
padding-top: 7px;
padding-left: 100px;
There's a lot going on here, but basically you're setting the color and font type for the headlines, adding a border line above the headlines for visual interest, and controlling the top and left spacing using the padding property. In a nutshell, this property adds space from the edges of an element without affecting a background or border—in other words, you're scooting the headline text in from the left and down from the top without moving the border line that spans the entire page.
Finally, hit Enter, and then type the closing brace to complete this style. It should look like this:
h1, h2, h3 {
  color: #BD8100;
  font-family: Baskerville, "Palatino Linotype", Times, serif;
  border-top: 2px solid #86A100;
  padding-top: 7px;
  padding-left: 100px;
}
Save the file, and preview it in a web browser.
The <h1> heading near the top of the page and the <h2> and <h3> headings lower on the page all have the same font and font color as well as green border along their tops (see Figure 3-8).
Tag selectors are quick and efficient, but they're a bit indiscriminate in how they style a page. What if you want to style a single <p> tag differently than all the other <p> tags on a page? A class selector is the answer.
Return to your text editor and the selector_basics.html file.
Add a new style below the group selector style you just created.
Click at the end of the closing brace of the h1, h2, h3 selector, press Enter (Return), and then type .note {.
This style's name, note, indicates its purpose: to highlight paragraphs that contain extra bits of information for your site's visitors. Once you create a class style, you can apply it wherever these notes appear—like the second paragraph, in this case.
Hit Enter, and then add the following list of properties to the style:
color: #333;
border: 2px dashed #BD8110;
background-color: #FBF8A9;
margin-top: 25px;
margin-bottom: 35px;
padding: 20px;
Most of these properties should look familiar by now, but the background-color property may be new to you. Logically enough, it adds a color to the background of the element.
Finally, complete the style by pressing Enter and typing the closing brace. The completed class style should look like this:
.note {
 color: #333;
 border: 2px dashed #BD8110;
 background-color: #FBF8A9;
 margin-top: 25px;
 margin-bottom: 35px;
 padding: 20px;
}
If you preview the page now, you see no changes. Unlike tag selectors, class selectors don't have any effect on a web page until you apply the style in the HTML code.
In the page's HTML, there are two <p> tags that begin with the word "Note" inside <strong> tags.
To apply a class style to a tag, simply add a class attribute, followed by the class selector's name—in this case, the note style you just created.
Click just after the "p" in the first <p> tag, and then type a space followed by class="note". The HTML should now look like this (what you just typed is in bold):
<p
class="note"><strong>NOTE:</strong> Ut enim adBe sure not to type class=".note". In CSS, the period is necessary to indicate a class style name; in HTML, it's verboten. Repeat this step for the second paragraph (it's just above the <h3> tag with the text "Not Me!").
Save and preview the web page in a browser.
The two note paragraphs are nicely highlighted on the page (see Figure 3-9).
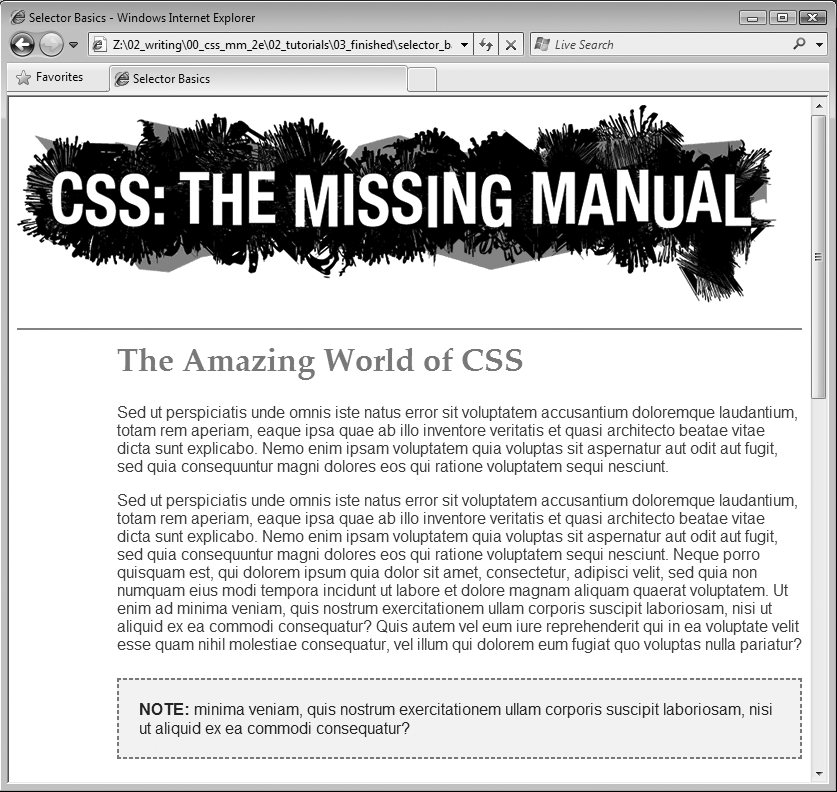
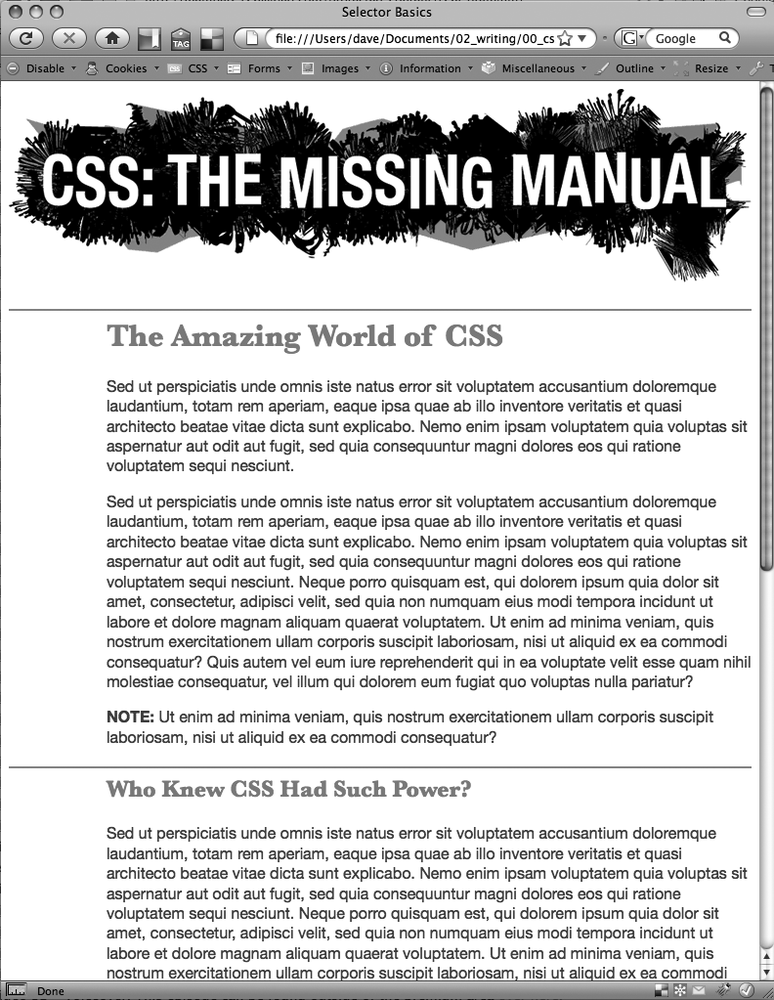
Figure 3-9. You can make detailed formatting changes with class selectors. A class style gives selected paragraphs different formatting from all other paragraphs on the page. The distinctive note box pictured here uses a class style to stand out from the crowd.
Note
If your page doesn't look like Figure 3-9, then you may have mistyped the name of a property or its value. Double-check your code with the steps on pages Tutorial: Selector Sampler–Creating and Applying a Class Selector. Also, make sure to end each declaration—property:value combination—with a semicolon and conclude the style with a closing brace at the very end. When your style is not working correctly, missing semicolons and closing braces are frequent culprits.
On the selectors_basics.html page, you applied the note class to two paragraphs. Each of those paragraphs begins with the word "Note:" in bold—actually the word is wrapped inside the HTML <strong> tag, which all browsers display as bolded text. But what if you want to format those bolded words in bright orange? You could create a tag style for the <strong> tag, but that would affect all <strong> tags on the page, and you only want to change the strong tag inside those note boxes. One solution would be to create a class style—.noteText, for example—and apply it to each of the <strong> tags inside the note boxes. But that's work, and you might forget to apply the class if you have a lot of pages with those notes.
A better method is to create a descendent selector (The HTML Family Tree), which targets only the <strong> tag when it's inside one of these note boxes. Fortunately, that's easy to do.
Return to your text editor and the selector_basics.html file. Create a new empty line for the descendent selector style.
If you just completed the previous steps, click after the closing brace of the .note style, and then hit Enter (Return).
Type .note strong {
The last tag in the selector—strong—is the element you ultimately want to format. In this case, the style formats the <strong> tag only when it's inside another tag with the class note applied to it. It has no effect on <strong> tags inside other paragraphs, lists, or heading tags, for example.
Hit Enter, type color: #FC6512;, and then hit Enter (Return) again to create another blank line. Finish the style by typing the closing brace character.
The finished style should look like this:
.note strong {
  color: #FC6512;
}
Save the page and preview it in a web browser.
The word "Note:" should appear in orange in each of the note boxes on the page.
Descendent selectors are among the most powerful CSS tools. Professional web designers use them extensively to target particular tags without littering the HTML with CSS classes. This book uses them routinely, and you can learn a lot more about descendent selectors in Chapter 15.
You can apply class selectors to multiple elements on a page. For example, earlier you created a .note class style and applied it to two paragraphs, but you could apply it to even more paragraphs (or even other tags) if you wanted to. ID selectors look and act just like classes, but you can apply an ID only once per page. Web designers frequently use ID selectors to indicate unique sections of a page, as explained on ID Selectors: Specific Page Elements.
In this exercise, you'll create a style that sets a specific width for a web page's content, centers it in the middle of the browser window and adds a decorative background image to the page. You'll apply the ID to the page's <body> tag to indicate a unique page design.
Return to your text editor and the selector_basics.html file.
You'll add a new style below the .note strong class style you created before.
Click after the previous style's closing bracket (}), hit Enter (Return) to create a new line, and then type # article {.
ID selectors always begin with the pound symbol (#). The style's name indicates which type of page this is—it's common on websites to have different designs for different types of web pages. For example, the home page will look different from a page advertising a product, which may look different from a page with the text of a blog post. In this case, you're going to identify this page as an "article" (as in a newspaper) by creating and applying an ID to the <body> tag.
Hit Enter again, and then type:
background-color: #FDF8AB;
background-image: url(images/bg_page.png);
background-repeat: repeat-y;
background-position: center top;
padding: 0;
margin: 0 auto;
width: 760px;
There are a lot of properties here, but basically you're adding a color to the page, inserting an image in the background (and controlling how it's positioned), removing space around the browser window's edges, setting a fixed width for the page's content, and centering everything in the middle of the page.
Finish the style by typing the closing brace. The whole thing should look like this:
#article {
 background-color: #FDF8AB;
 background-image: url(images/bg_page.png);
 background-repeat: repeat-y;
 background-position: center top;
 padding: 0;
 margin: 0 auto;
 width: 760px;
}
Just as with a class, this style doesn't do anything until you apply it to the page. So you'll add an ID attribute to the page's HTML, indicating where you want the ID style to apply.
Find the page's opening <body> tag and add id="article" so that the tag looks like this (your changes are in bold):
<body
id="article">Now the <body> tag reflects the formatting defined in the #article style. As with all things CSS, there are many ways to arrive at the same destination: You can instead use a class style and apply it to the <body> tag (as long as you don't apply it more than once on the page; otherwise any other elements with the 'article' class will get that same formatting). You can even create a plain body element style with the same formatting properties as long as all the other pages on your site share these same formatting choices. But in this case, you're using an ID selector since the point of this style—identifying the type of page—is in keeping with the general notion of ID selectors.
Save the page, and preview it in a browser.
Everything on the page, the logo and all of the text, now have a set width and float in the center of the browser window. Even if you resize the browser window—try it!—the content remains centered. In addition, a drop shadow appears on either side of the content, thanks to the handy background-image property (you'll learn about that cool property in depth on Background Images).
For fun, you'll add one more advanced style—an adjacent sibling selector discussed on Adjacent Siblings—to format the paragraph immediately following the first headline on the page. (You can achieve the same effect by creating a class style and applying it to that paragraph, but the adjacent sibling selector requires no changes to your HTML.)
Return to your text editor and the selector_basics.html file. Create a new empty line for a new style.
If you just completed the previous steps, click after the closing brace of the #article style, and then hit Enter (Return).
Type h1+p {.
This style will apply to any paragraph that immediately follows an <h1> tag—in other words, the first paragraph after the top headline on the page. It won't apply to the second or any subsequent paragraphs. This selector provides an easy way to create a unique look for an introductory paragraph to set it off visually and highlight the beginning of an article.
Hit Enter, and then add the following list of properties to the style:
 color: #FF6600;
 font-size: 1.2em;
 line-height: 140%;
 margin-top: 20px;
Here you're changing the font color and size as well as adding a bit of space above the paragraph. The line-height property (which you'll read about on Formatting Entire Paragraphs) controls the space between lines in a paragraph (also known as leading).
Finally, complete the style by pressing Enter and typing the closing brace. The completed class style should look like this:
h1+p {
 color: #FF6600;
 font-size: 1.2em;
 line-height: 140%;
 margin-top: 20px;
 }
If you preview the page now, you'll see that the top paragraph is orange and the text is larger and there's more space between each line of text (see Figure 3-10). If you actually deleted this paragraph in the HTML, you'd see that the remaining paragraph would suddenly be orange with larger text, since it would be the new adjacent sibling of the <h1> tag.
Note
Internet Explorer 6 doesn't understand adjacent sibling selectors, so in that browser, the first paragraph will look just like all the others on the page.
And there you have it: a quick tour through various selector types. You'll get familiar with all of these selectors (and more) as you go through the tutorials later in the book, but by now, you should be getting a hang for the different types and why you'd use one over the other.