When you buy books, magazines, and newspapers, they show up on the Daily Shelf, and you can read them from there, or drag them to your Home screen so they’re always available. But after a while the books and periodicals vanish from the Daily Shelf because new items are continually added (The Daily Shelf). And you can’t put all of your books and periodicals on the Home screen, because it will quickly fill up.
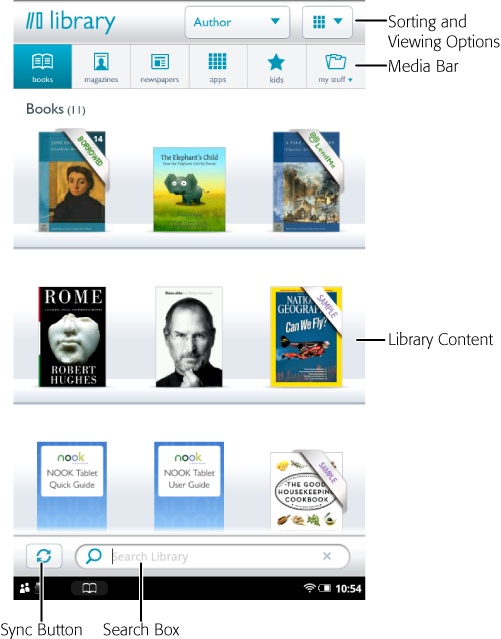
That’s where the Library comes in. It’s the central location for all your books, newspapers, magazines, and more. Get there by tapping the Library icon on the Quick Nav bar. Here’s what you can access from the Library:
All the books, newspapers, magazines, and other materials you bought from the NOOK Store.
Books you’ve borrowed from NOOK Friends or your local library. (See Chapter 7 for details.)
Files such as music files, Microsoft Office files (Word, Excel, PowerPoint), PDF files, and books in the EPUB format that you’ve transferred to your NOOK from your PC or Mac. (See Transferring Files to Your NOOK Tablet for details.)
Files (the same ones as mentioned in the previous point) that you’ve stored on your SD card, if you’ve installed one. (See Chapter 11 for details.)
The Library is divided into several sections to make it easier to find and manage everything:
Media bar. This row of icons across the top of the screen sends you to different areas of the Library, based on their content—Books, Magazines, Newspapers, Apps, and so on. Tap any icon to get to that section. (For more details about the Media bar, see the next page.)
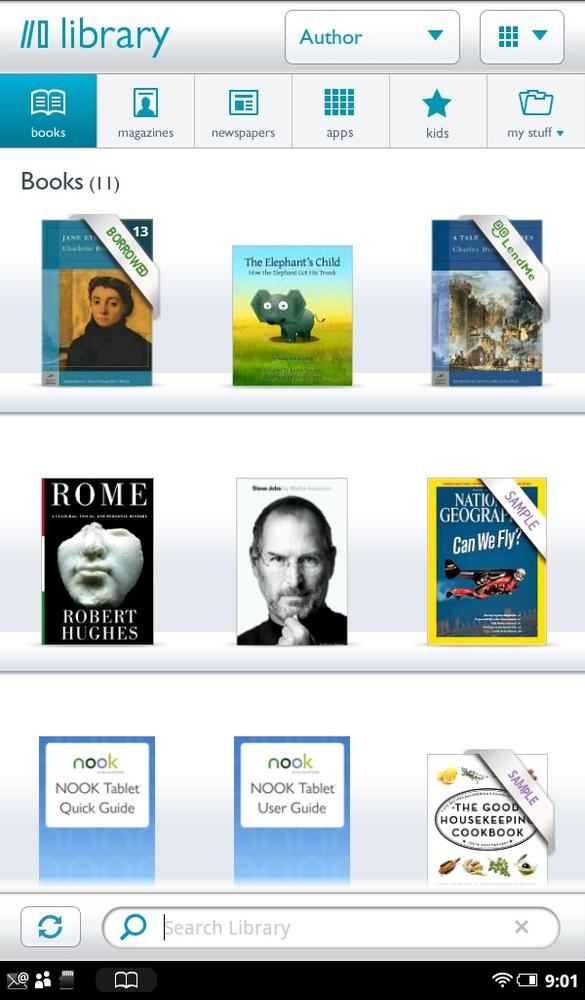
Library content. Here’s the reason you go to the Library in the first place—for the content you have there. This section changes according to what area of the Library you’re in—Books, Magazines, Newspapers, Apps, and so on.
Search box. Tap here and search the Library. No matter what area of the Library you’re in, you’ll search the entire Library, not just that section (Searching the Library).
Sync button. If you’ve bought books, publications, or other items for the NOOK from another device such as a tablet, computer, or smartphone, tapping this button downloads them to your NOOK.
Sorting and viewing options. Up at the top of your screen there are two buttons for sorting and viewing your books in a variety of different ways (Changing the Library View and Re-Sorting the Library).
There’s lots to know about the Library. First, you’ll start with the Media bar.
The Media bar is the main way you’ll navigate through your Library and see all your content. Here are the areas it lets you go to on your NOOK:
Books shows all the books you’ve downloaded from the NOOK Store.
Magazines shows all the magazines you’ve bought from the NOOK Store.
Newspapers shows all the newspapers you’ve bought from the NOOK Store.
Apps shows all the apps on your NOOK. Not only does it show the apps that come preloaded, such as for email and Netflix, but also all the apps that you’ve downloaded. (See Chapter 9 for more details on apps.)
Kids shows children’s books and magazines you’ve bought, including NOOK Kids Books.
My stuff, which drops down a menu that lets you navigate to even more areas, including My Shelves (your personalized bookshelves); My Files (shows files that you’ve transferred to your NOOK from your personal computer, including to an SD card if you’ve installed one); LendMe (lets you borrow and lend books and shows your borrowed and lent books; as discussed in Lending and Borrowing Books with LendMe); Everything Else (shows a variety of items that can’t be displayed on your NOOK, such as the NOOK Study eTexbooks that are in your BN Lifetime Library); and Archived, which are books and periodicals that you’ve archived into the B&N Lifetime Library.
The content area is where you’ll spend most of your time in the Library. After all, that’s the whole reason you’re there. Using it is straightforward: Tap a book or periodical you want to read, an app you want to run, and so on, depending upon what area of the Library you’re in. That’s all there is to it. If any area has more content on its shelves that can fit in a single screen, flick to see more shelves.
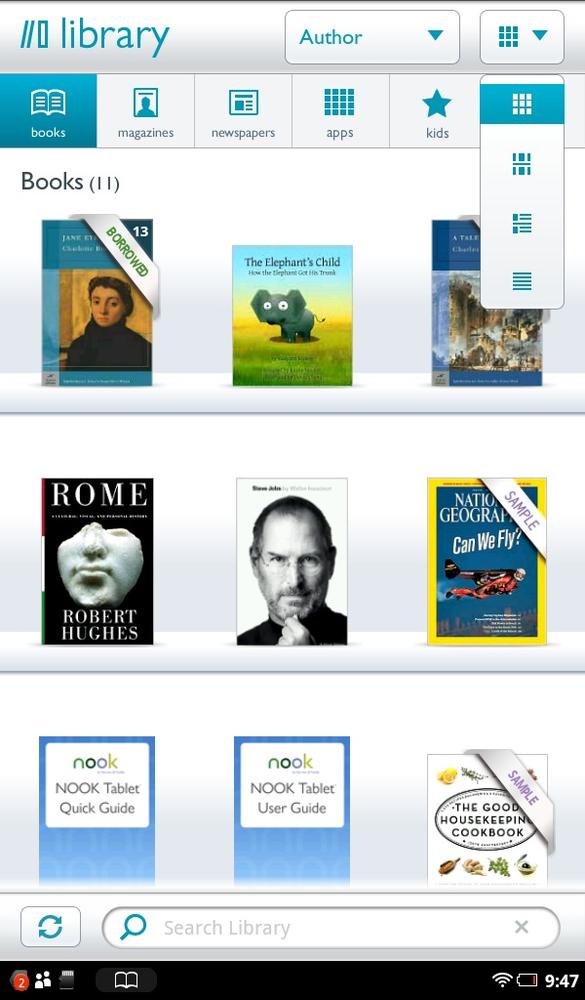
When you’re in the Books area, you’ll see the books’ covers, but no further description. In the magazine area, you’ll see the magazines’ covers, plus their issue dates. When you’re browsing newspapers, you’ll see the front page of each newspaper, as well as the headline of the lead story, and its beginning text.
If you buy a book or periodical and it isn’t fully downloaded yet, there’s a Download banner (which the NOOK calls a badge) on it. You also see a bar on the cover that shows how much of the book has been downloaded, and how much is left to go.
There are plenty more badges on book and periodical covers you’ll likely come across in the Library, most notably these:
Download. Indicates that the book or periodical hasn’t yet been downloaded, or is in the process of downloading. If it hasn’t been downloaded, tap to do the deed.
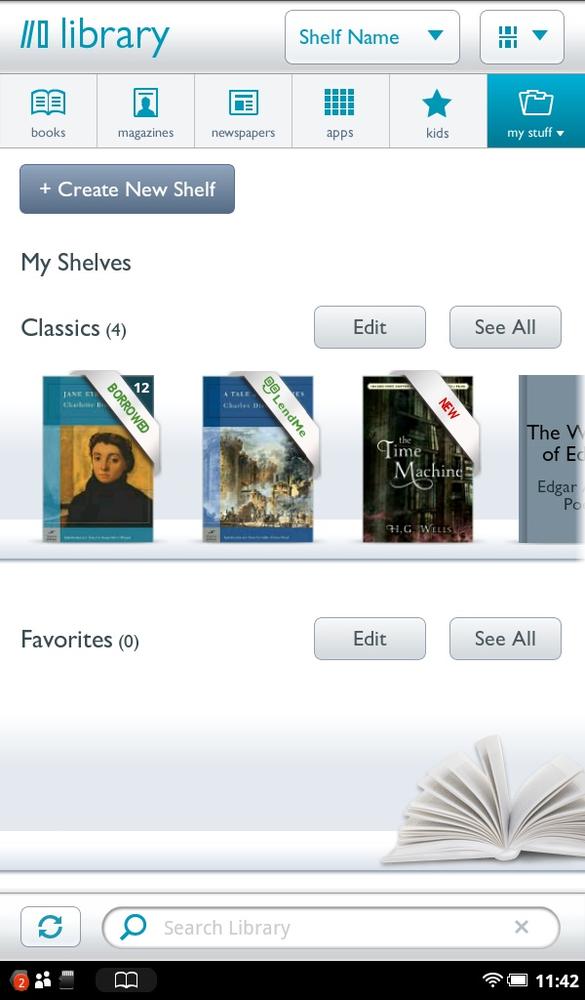
New. The item has recently been downloaded to your NOOK and is anxiously waiting to be read.
Sample. A free excerpt of a book or periodical. These samples generally don’t time out and will live forever, but they’re only a portion of the book or publication.
Recommended. A NOOK Friend has recommended the item to you. For details, see Sharing Your Reading.
LendMe. You can lend this to a friend. For details, see Lending and Borrowing Books with LendMe.
Lent. You’ve borrowed this item from someone or from a library. The badge indicates how many days are left in the borrowing period. Typically you can borrow something for up to 14 days.
Pre-order. The item isn’t yet available for sale, but if you want it as soon as it’s released, you can order it ahead of time.
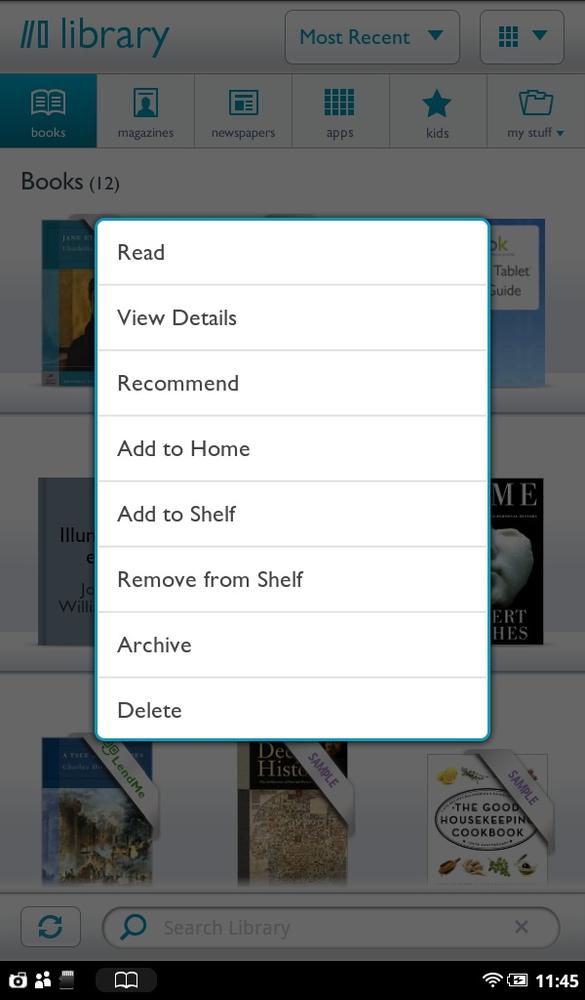
To read a book or periodical, or to run an app, just tap it. But there’s plenty more you can do with your books, magazines, and newspapers (and apps) in the Library. Press and hold your finger on a book, and you get the following choices:
Read. Opens the book, newspaper, or magazine to read. Why open this menu rather than simply tapping the book? Only you can answer that.
View details. Shows you details about the book or periodical. It’s the same information you saw on the screen before buying.
Open. Runs an app.
Recommend. Lets you recommend the book or periodical to a friend. Turn to Sharing Your Reading for details.
Add to Home. Puts a shortcut to the item on your Home screen.
Add to Shelf. Lets you add it to a shelf that you’ve created in My Shelf. (See The Media Bar for details.)
Remove from Shelf. Lets you remove it from a shelf.
Archive. Moves it off of your NOOK, but still keeps it accessible whenever you want. See Archiving Books and Periodicals for details.
Delete. Deletes the item from your NOOK. Be careful when choosing this, because unlike with archiving, you can’t retrieve the item if you change your mind later. If you decide at some later point you want to read it again, you’ll have to buy it again.
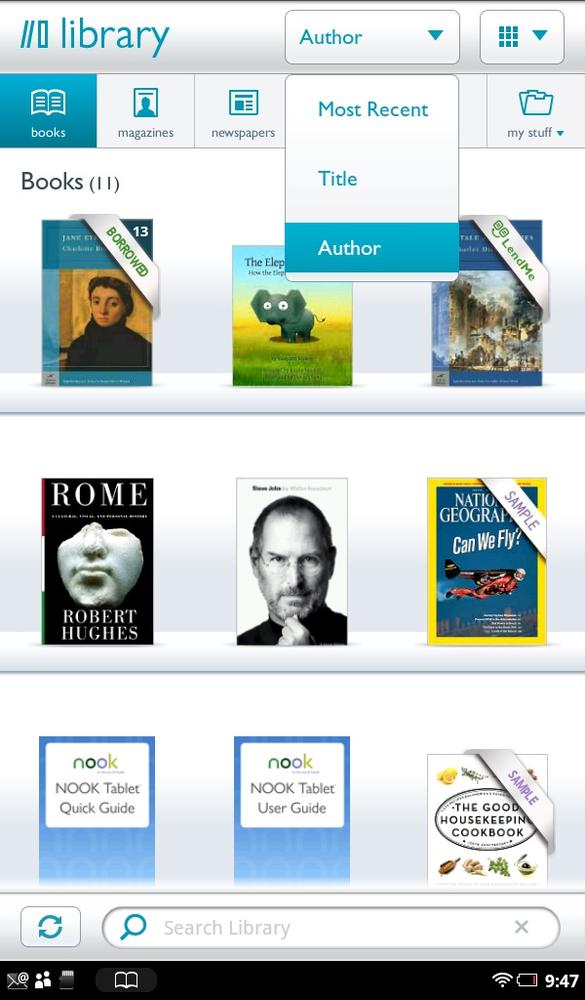
At the top of the Library, you’ll find two large buttons for changing the order in which the Library displays your items and the way they’re displayed:
Change the sort order. Tap this button, and you can change the order in which items are displayed. The options available here vary according to what section of the Library you’re in. In Books and Kids, you can sort by Most Recent, Title, and Author. In Magazines and Newspapers, you can sort by Most Recent and Title. In Apps, you can sort by Most Recent, App Name, and Category.
Change the display. Gives you control over how the items are displayed. Out of the box, the NOOK displays them on a grid of shelves, with large pictures and very little detail about each item—for example, in Books, just the book cover.
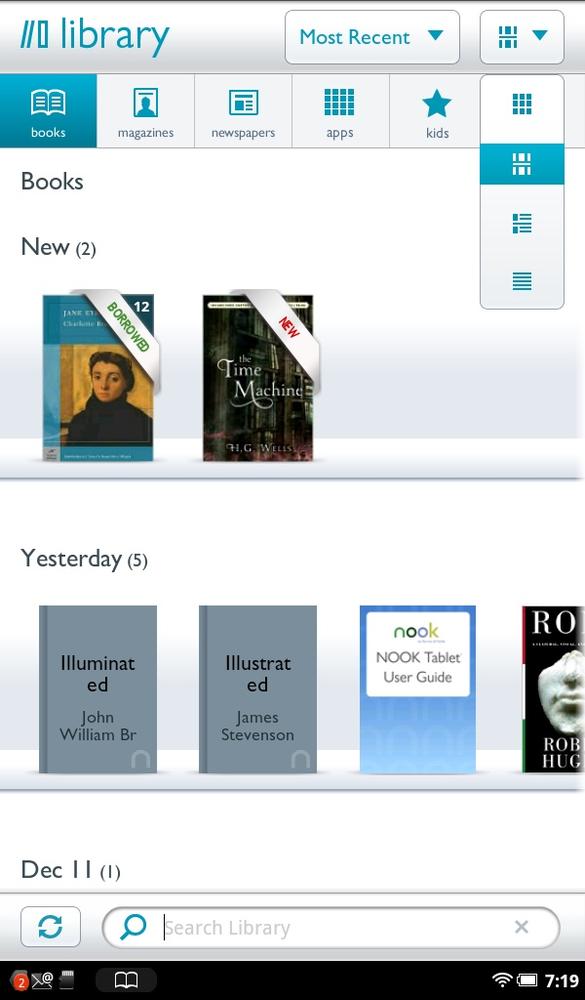
The second choice from the top also only shows the book cover, but labels the shelves, so there are fewer items on each shelf.
The third choice from the top shows a detailed list of the items, including, in the Books area, author, rating, review summary, and description.
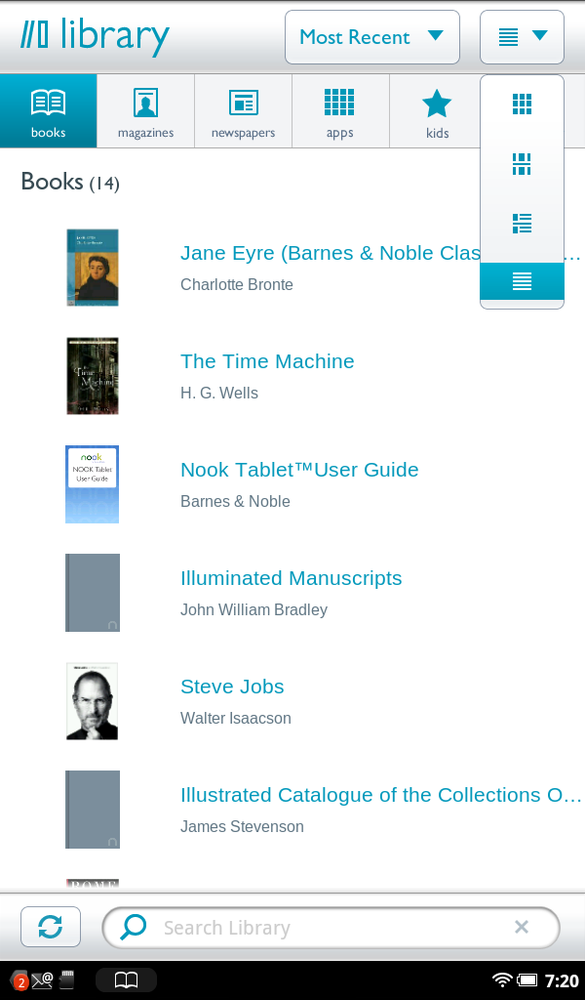
The bottom choice shows a simple list with fewer details. In the Books area, for example, you’ll see the title and author only.
If you buy enough books or periodicals (which of course you do—why else do you have a NOOK?) you may find that the Library’s organization options aren’t enough. What if you want to browse your collection of literary novels, mystery novels written by women, or books about footwear in 17th century France? (OK, maybe that last collection isn’t big enough to browse through, but you get the idea.)
There’s a simple solution: Organize your books (or other Library items) into shelves, just as you would on a physical bookshelf. You get to decide which books to keep together so you can find them easily.
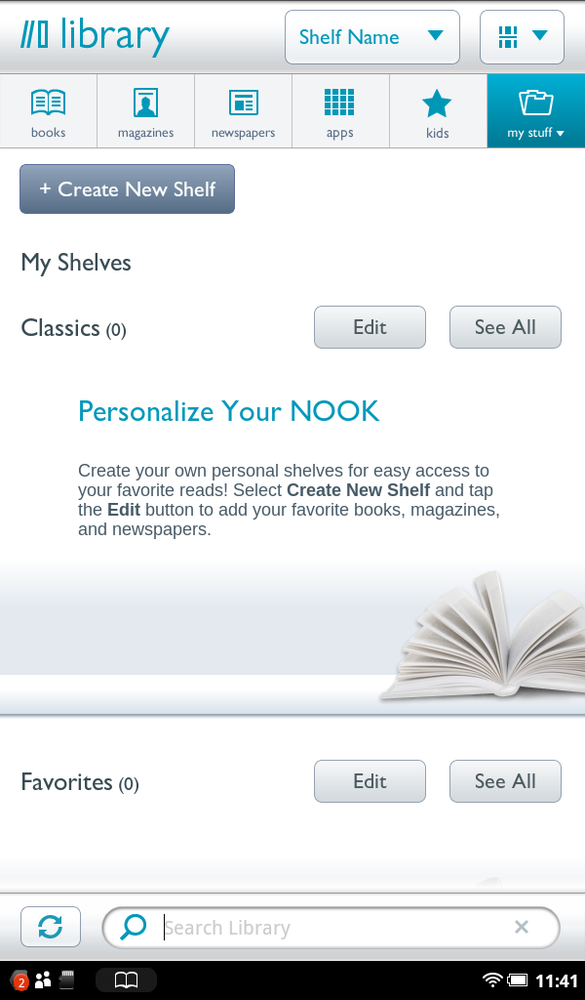
To organize your books into shelves, tap the “My stuff” icon in the Library, and then choose My Shelves. Here’s what to do next:
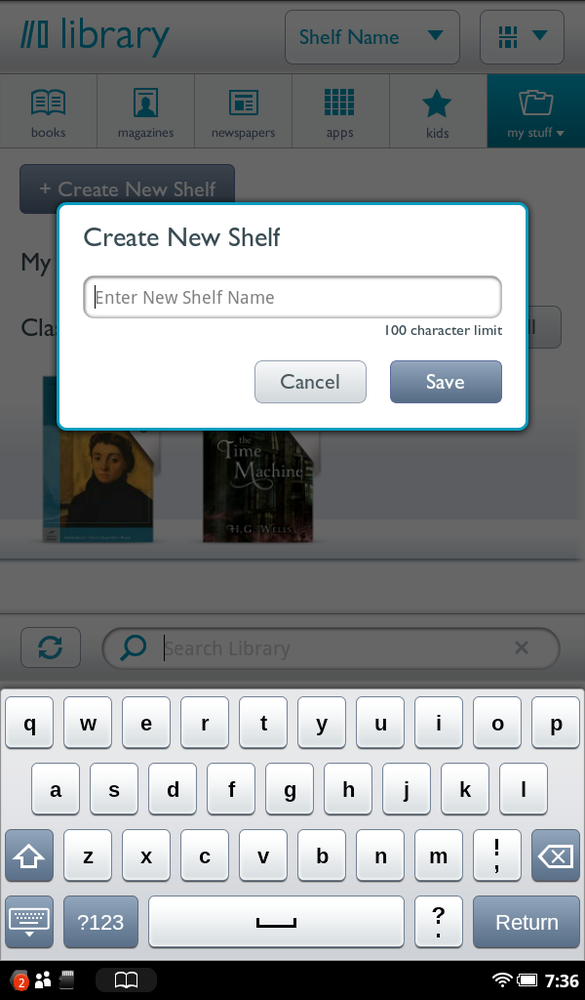
Tap Create New Shelf.
On the My Shelves screen that appears, type the Name for your new shelf. Tap Save. You end up back on My Shelves screen again, with the new (and still empty) shelf on it.
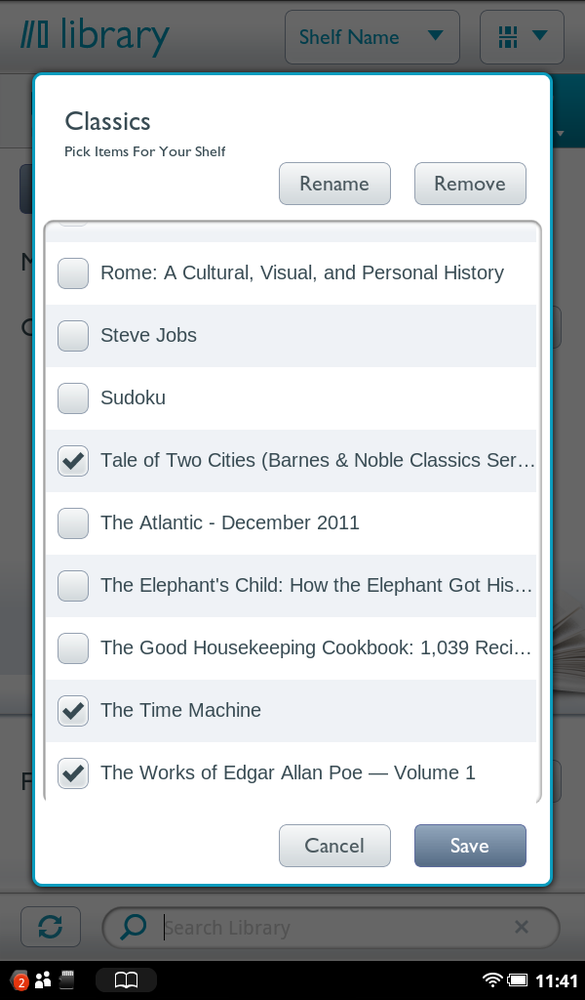
Tap the Edit button next to the shelf where you want to put items. A screen appears with all the items in your Library. Tap the box next to any item you want to put on the shelf. A checkmark appears next to it. If you’ve already got items in the shelf, those items also have checkmarks.
When you’re done, tap Save. You arrive back on your My Shelves screen, and the new shelf displays your items.
Once you’ve created a shelf, it’s easy to add or remove items from it, or edit its name. Go back to the My Shelves area from the “My stuff” menu, and then tap Edit next to the shelf you want to edit. Tap Rename to rename the shelf, and add and remove items in the usual way.
You can also remove an entire shelf. When you tap the Edit button next to the shelf you want to delete, tap Remove. This removes the Shelf, but all the items in it remain on your NOOK.
Your NOOK Tablet has plenty of storage space, and if you add an SD card, you get even more. Still, there may come a time when you begin to run out of space—or feel as if you are. In that case, you can archive books and periodicals. When you archive them, the books are still stored in your Barnes & Noble account on the Web, and you can have them sent to your NOOK Tablet whenever you wish by a simple process called unarchiving.
Note
Have you ever heard the terms cloud or cloud storage? If you read technology news, you probably have. The cloud refers to storage space on the Internet that you can access whenever you want, from any Internet-connected device. You don’t need to store the item on any computer or gadget. When you archive items, you’re using your own personal cloud, courtesy of Barnes & Noble. Welcome to the cloud.
Basic information about your archived items stays on your NOOK, including its cover, title, author, and description. This information stays in your Library, on your shelves, and it’s searchable so you’ll always be able to find things you’ve archived, and get them back on your NOOK at a moment’s notice. As you can see, archiving is an easy way to save on storage space.
To archive an item, head to the Library. Press and hold your finger on an item, and choose Archive from the menu. The item is immediately archived. It disappears from the content area of the Library, but shows up in a shelf labeled Archived in the My Files area. To get to it, tap “My stuff”→Archived.
If you’ve created any personal shelves, the item also shows up there. And if you do any searches, you’ll find it as well.
To unarchive an item, hold your finger on it and select Unarchive. It’s sent back to your NOOK, and appears just as it always did, no harm done.
