1
HOW TO USE THIS BOOK
Ready, Set, Get Inspired!
This book assumes that you have used a computer before, that you have some interest in visually representing the world on fabric and paper, and that you like the idea of making things.
We wrote the instructions so that anyone can be successful, including the complete beginner, and we structured the chapters so that skills build upon one another. Of course, if you are already proficient in the ways of design, you can skip around and pull inspiration to do your own thing. Or if you have a specific interest, you can start there and then flip back and forth as necessary to pick up the skills you need. We’ve included lots of cross-references so you can always find your way. We’re very into doing your own thing at Spoonflower. We just want to make sure that we equip you with everything you need to feel empowered as you go.
Spoonflower isn’t the only way you can print on demand. There are methods you can try at home, and other services out there as well. Frankly, we’re thrilled to see so much interest in surface design, and we always encourage experimentation and innovation. In the end, this book is all about showing you how to make things your own, whether or not you use Spoonflower to generate your materials. To get started, here is an overview of how it all happens.
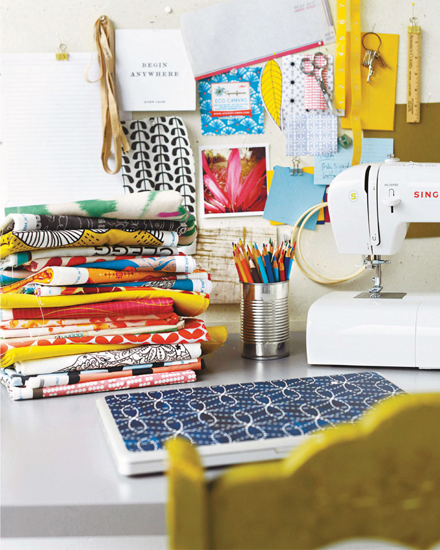
All you need to get started designing is a computer and an idea.
To decorate the laptop shown here, we printed out a swatch of a sashiko-inspired design by Bonnie Phantasm on peel-and-stick wallpaper. A lot of us at Spoonflower have used the peel-and-stick paper to personalize our laptops, tablets, and phones.
What is Print-on-Demand?
Having something custom-made for you is not a new idea. But being able to design your own fabric, wallpaper, and gift wrap and have it printed to your specifications is a pretty new idea. Spoonflower makes print-on-demand possible by using digital textile printers.
Traditional textile printing has a lot of steps. For each color in a design, an individual silk screen or etching has to be made and mounted on a rolling cylinder, which prints the ink or dye onto the fabric. Fabrics go through a “strike off” process back and forth with the designer, in which small runs are printed to check colors and print quality. Once the designer approves the fabric, custom ink colors are mixed and the factory machines are set up to print thousands of yards from the design. For an individual who only wants to make a few yards of a fabric, the setup time and costs involved in this kind of printing just don’t make sense.
Digital textile printers, like we have at Spoonflower, are large-format inkjet printers specially modified to run our fabrics and papers. Unlike conventional textile manufacturing, digital printing requires no setup. There are no screens to make or custom inks to mix. The printer gets the instructions from the computer file you upload to the site and can start printing right away—whether you need a swatch or hundreds of yards (meters) of fabric or paper. This is the essence of print-on-demand: the ability to print exactly what you want, just the way you want it.
How Does Spoonflower Print for Me?
To get custom, one-of-a-kind fabric and papers at spoonflower.com, we print from your design: that’s what this book is all about! In the following chapters, we teach you everything you need to know for all kinds of projects. It doesn’t matter if the design is as simple as a little doodle you make on a sticky note and photograph with your phone … or as complex as the vector art you will read about in Chapter 10—the basic process is always the same.
Step 1: Create an Account
Creating a Spoonflower account and username allows you to save your designs in your Design Library. And, if you decide to make your designs public, your username is how others will find you. It only takes a minute to set up a Spoonflower account, and it’s completely free. Log on at spoonflower.com. Go to “Join” or click on “Log In.” If you can’t wait to get started, you can even begin the design process without an account if you prefer.
Step 2: Upload Your Design
Once you have your design ready to go, the first step is to upload your artwork to the Spoonflower site using the “Create” link. Uploading involves choosing a file from your computer and clicking the “Upload” button, which you’ll see as soon as you click the “Create” link. There are some specifics about how large your file can be and its format, which we outline in the chapters to come.
Step 3: Preview & Choose a Repeat
When the design has finished uploading to your Design Library, you will see a preview of what it looks like when it is repeated, along with a ruler that helps you judge the scale of your pattern (see right). There are several ways you can adjust and customize your design once it is uploaded:
CHOOSE A REPEAT. The design you have uploaded will be tiled—or repeated—to fill the surface. There are five different repeat styles built into our system (we cover them in Chapter 5) and you can easily click to switch between them. For example, you can choose to have your image repeat in straight orderly rows (a basic repeat), or you can print a single centered image (a center repeat).
ADJUST THE SIZE. If your image has high enough resolution (this page), you will be able to click and adjust the size of the repeat tile.
CHANGE COLORS. This tool will help you pick areas of color out of your design and switch them to different colors. Let’s say you want blue leaves instead of green leaves in your uploaded design; use the tool to pick the color you want to change and choose a new one with a simple click (see Chapter 4).
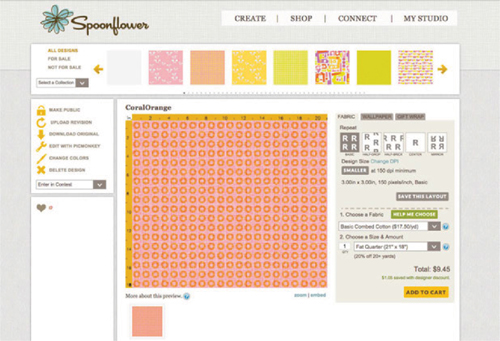
Every time you upload a design, it goes to your personal Design Library. From here you can see a preview of how your design will print, make some adjustments, and when ready, place an order.
CHANGE PRIVACY. You can toggle between making this design private, so only you can see it (the default), or public, so everyone can join in on the fun. If your skills develop to the point that you’d like to make your designs available for purchase, there is an additional checkbox so you can share a design in the Marketplace (our onsite shop).
MAKE REVISIONS. It’s easy to go back and adjust your design later, because it’s always saved in your Library.
Step 4: Choose a Surface & an Amount
Each time you order, you can choose to have your design printed on any surface, including more than a dozen fabrics, two types of wallpaper, or two types of gift wrap. Next you choose an amount (swatch, fat quarter, yards, rolls). At this point you will see a preview of what it will look like based on your specifications. Remember that the ruler will show you how your pattern will fill the surface on which you plan to print.
Step 5: Place Your Order
Once you have placed your order, we start printing. Then we cut it, pack it, and ship it directly to you.
How This Book Is Structured
Now that you understand the print-on-demand process, here is how our book will help you turn a spark of inspiration into a package of wonderful fabric or paper waiting at your front door.
PART 1 is all about getting comfortable with digital design. We’ve organized it into five chapters that are friendly mini-lessons, so that we can walk you through the process step-by-step.
You’re reading Chapter 1, HOW TO USE THIS BOOK, now, which is about how the print-on-demand process works, the basic equipment you need to get started, and the most important thing you need before you begin—inspiration for your designs.
Chapter 2, IT STARTS WITH THE SURFACE, teaches you about the fabrics and other surfaces Spoonflower prints on. We briefly review the different types and sizes, and explain how to start thinking about your surface as a canvas. The surface you print on can influence your design in many ways—an intricate pattern may look great on a smooth surface but not so hot on a textured one, for example—so it’s important to think about that as you develop your design.
In Chapter 3, DIG INTO DIGITAL, we explore how a design becomes an electronic file. We detail it all from the beginning, step-by-step. It starts with making sure you understand the basics, like pixels and types of digital images. The choices you make about resolution and format (terms defined in the chapter) will change the look and scale of your design.
Chapter 4, LEARN ABOUT COLOR, tackles the big, beautiful rainbow of color. The world wouldn’t be the same without color, and neither would digital design. But that doesn’t mean everything about how color and surface go together is obvious, so we supply you with the information you need. We help you sort through the most common questions and introduce you to a piece of wonderfulness known as the Spoonflower Color Map.
And then you’ll be ready for Chapter 5, GET TO KNOW REPEATS, where we demystify one of the most fundamental elements of surface design. A repeat is a continuous pattern that fills the surface. We know that repeats intimidate some people, so we start from the beginning and walk you through this concept step-by-step. By the end, you’ll be whipping up seamless repeats in your sleep and casually dropping phrases like “half-brick.”
PART 2 is when it really gets fun, because we show you how to take what you’ve learned and apply it to specific projects. With each chapter we introduce more skills and techniques that can be used on their own or mixed and matched. These projects are just a starting point. There are no limits to what you can design and make.
In Chapter 6, RAID THE JUNK DRAWER: DESIGN WITH FOUND OBJECTS, we work with collage and odds and ends you might find around the house or in nature. You’ll practice using a scanner and creating simple repeats when you make the projects in this section.
In Chapter 7, THROUGH THE VIEWFINDER: DESIGN WITH PHOTOS, we show you easy things that you can do with photos using whatever free photo-editing software is already on your computer. But, if you’re ready for a bit of adventure, we walk you through some really simple things to try in Adobe Photoshop.
Chapter 8, FROM PAINT TO PIXELS: DESIGN WITH DRAWINGS, PAINTINGS, AND PRINTS, shows you some tricks for cleaning up your art after you scan it. This is the point at which you will discover that you don’t have to be Michelangelo to work from your original art—even what may begin as a random scribble can be transformed into an interesting design with a few easy-to-use tools.
In Chapter 9, READ ALL ABOUT IT: DESIGN WITH WORDS, TEXT, AND LAYERS, we teach you how to manipulate letters, words, and text to create cool projects, and then in Chapter 10, THE WORLD OF VECTORS: ALL-DIGITAL DESIGNS, we dive right into design that starts from a blank digital canvas. But by this point, you’ll be ready for the challenge. And finally, in Chapter 11, NO REPEATS NECESSARY: DESIGN CUT AND SEW AND WHOLE CLOTH, we explore how to design a whole canvas without creating repeats.
A
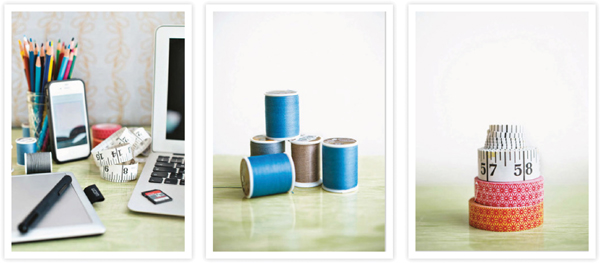
Design Equipment You Need to Get Started
You can spend a lot of money on design equipment and software, but you don’t need to do that when you are just getting started. In fact, we thought very carefully and came up with this short list of basics.
+ COMPUTER with Internet connection
+ GRAPHICS SOFTWARE: This means anything you can use to edit photos or make original digital art. Adobe Photoshop, PicMonkey, Adobe Illustrator, and Gimp are all examples of graphics (or image editing) software. It’s really about picking your favorite and what works for you, including the free option that comes standard on your computer. The more expensive software can have lots more options and tools, but the price is higher and you will have a lot to learn. Bottom line: You can make great designs with any graphics program. You can learn and upgrade as you figure out what you need. (See the list of resources on this page, and also check out https://support.spoonflower.com/hc/en-us/articles/204444640-What-design-tools-do-you-recommend for an even more up-to-date list.)
Each program has a set of tools that help you accomplish tasks such as cropping a photo or resizing an image. Although the symbols and names to denote these tasks can vary slightly from program to program, they all achieve the same result. (Imagine that they all speak the same language but with different accents and dialects.) Once you learn how to recognize each tool, which we teach you how to do in this book, you should be able to sit down with any kind of graphics software and intuitively figure out what to do. If you’ve never used a graphics program before, check for online tutorials to help you learn the basics. Your local community college may offer classes too.
+ SCANNER: This is a device that looks like a flatbed copier but is used to transform what you scan—anything from a document or photo to your child’s drawing to a leaf—into a digital file. Technically, this is optional equipment. But scanning is a useful way to transform hand-drawn artwork into digital art. Look for a scanner with a scanning bed size that makes sense for you: a 9 × 12-inch (23 × 30.5 cm) bed is usually large enough, unless you tend to work on larger-format projects, in which case you might want a scanner with an 11 × 17-inch (28 × 43 cm) bed. Look for one designed for scanning photos and text, as there are document scanners that are really only good for print pages. Also, make sure it has options for setting the scan resolution. All-in-one printers also have scanning capabilities, so you can experiment with scanning if you already have this piece of equipment at home or in your workspace.
+ DIGITAL CAMERA: This is also optional—but good if you want to work from your own photos. Digital cameras have come so far that there really is no minimum anymore. A smartphone camera provides plenty of pixels, and the quality is really very good.
+ DIGITAL DRAWING TABLET SUCH AS A WACOM TABLET: This is a fun tool to add to your repertoire once you get going. A digital drawing tablet allows you to make and edit artwork digitally using a tool similar to writing with pen and paper. There are many styles of tablets; some use a pencil-like stylus to draw directly on the tablet screen, while you can use your fingertip on others.
Basic Sewing Tools
You don’t need everything on this list for every sewing project in this book, but you will need most of them. Have the following on hand when you see “Basic Sewing Tools” in the Materials and Tools list for a project. When required, we add specialty items not on this basic list.
+ Sewing machine
+ Hand-sewing needles
+ Thread
+ Pins
+ Iron and ironing board
+ Scissors (fabric and basic craft)
+ Pinking shears
+ Paper
+ Pencil
+ Ruler and tape measure
Our sewing directions are geared toward DIYers with very basic sewing skills (you’ve threaded a machine before and understand how to sew lines and curves). If you’ve never sewn before, but you’re a quick study, you might pick up everything you need to know about how to sew from the instructions we give. But to really understand sewing, we recommend consulting a sewing reference book or online site.
Myths and Facts About Using Spoonflower
We’ve heard some myths about what you need to know to design for fabric and other surfaces digitally. Maybe you’ve heard them, too. Just in case, let’s clear the air.
MYTH: YOU HAVE TO OWN LOTS OF EXPENSIVE EQUIPMENT.
FACT: Chances are you already have what you need to get started. Got a smartphone and a computer? You’re set. Add an inexpensive scanner and you have even more options.
MYTH: YOU HAVE TO BE GOOD AT DRAWING.
FACT: Thank goodness this one isn’t true. Not all designs begin with sketches. If you’re not handy with colored pencils, don’t sweat it! Many projects are derived from photographs (like the Infinity Scarf on this page) or scans (like the First Class Tag on this page).
MYTH: YOU HAVE TO BE A TECH GEEK.
FACT: Tech geeks are more than welcome. Spoonflower wouldn’t be here without them. But you don’t have to embrace all things technology to use Spoonflower. And the pieces of technology you do need? We explain how they work step-by-step. With pictures!
MYTH: YOU HAVE TO BE TRAINED IN GRAPHIC DESIGN.
FACT: Nope. Many of our most prolific designers are completely self-taught (meaning they never took a class in school or worked professionally as a graphic designer). At its heart, this book is about teaching. The early chapters introduce tools slowly and logically and explain what you need to know in simple terms.
MYTH: YOU HAVE TO OWN PHOTOSHOP AND ILLUSTRATOR AND BE PROFICIENT IN BOTH.
FACT: For many of the projects, you use can a pencil and paper and your scanner, or simply your camera and free photo-editing software. If you are attempting to use programs like Photoshop and Illustrator for the first time, our instructions explain the specific tools you’ll likely need.
MYTH: YOU HAVE TO HAVE LOTS OF TIME ON YOUR HANDS.
FACT: Work (or play) when you have time! Simple designs might only take a matter of minutes to prepare. For example, you could create the design for the Photo Panel Wall Art on this page while you brew a cup of tea.
MYTH: YOU HAVE TO BE A COLOR EXPERT.
FACT: Color is really important when designing your surface. So that’s why we have an entire chapter about it, and that’s why we give you several tools on the site to help you with it. We explain how you can use these tools in Chapter 4 (this page), and we walk you through the different ways of describing and translating color. But remember that we’re all about letting you do your own thing, so you can print in any colors that you want—from your school colors to your daughter’s favorite shades of pink and purple. Orange is okay, too!
MYTH: YOU HAVE TO HAVE A BEAUTIFUL AESTHETIC THAT’S MAGAZINE-WORTHY.
FACT: Playful, quirky, vintage, charming, geeky, traditional, funky, futuristic, abstract: All design styles have a home at Spoonflower! What makes our community so strong is that everyone brings a different sense of style with them. Read about our contests on this page, and you’ll see what we mean.
MYTH: YOU HAVE TO MASTERMIND A DESIGN/SEWING/CRAFT BLOG THAT THE WORLD LUSTS OVER.
FACT: We have some fantastic bloggers and makers in the Spoonflower community. If you aspire to that, we are thrilled to be a part of your journey. But everyone’s endgame is different, and we are here to empower you on your creative path, whatever it may be.
Get Inspired
So, you’re excited about the idea of creating your own fabric for a quilt or your own gift wrap for special occasions. All you really need to start is an idea and a willingness to try. We see this in practice every day when people from all over the globe upload amazing designs to Spoonflower. We’re constantly inspired just looking at them.
But peering into that beautiful and textured world can also feel intimidating when you’re just beginning to understand how to translate your inspirations into a design. Our advice is to start with what you love, discount nothing, and pay attention to everything. Inspiration can truly come from anywhere: the landscape in front of you, a memory, a design aesthetic, a hobby, your kids, traveling, history, your favorite artists, your favorite characters in literature, a classic television show, fashion magazines, nature. It is all there for you, waiting to be transformed into fabric and other surfaces!
If you’re not sure how to reflect your personal style or your interests in your designs, turn the page to find out what some of the most prolific members of the Spoonflower community have to say about inspiration. When you see how diverse these folks are—and appreciate how wonderful their designs are, despite being so different—you may begin to hear your own imagination ticking.
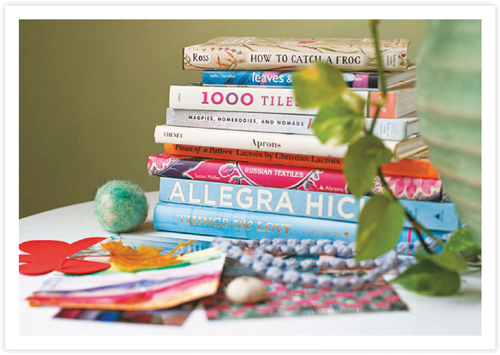
Books are, of course, an endless source of inspiration. You might find ideas in the photos, illustrations, endpapers, typefaces, colors, or text.
A
SPOONFLOWER DESIGNERS TALK ABOUT INSPIRATION
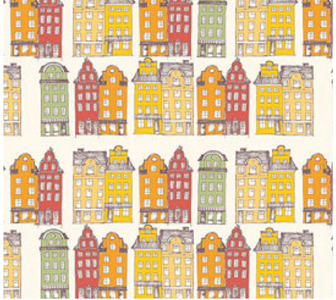
I am inspired by colors. Light. Different styles. Words. I strive to mimic the atmosphere from whatever inspired me for each design. I was born and raised in Sweden and moved to the United States as an adult. I’m continually inspired by Old Town Stockholm, because it’s many hundreds of years old. The buildings have a whimsicality that feels right at home with my sketchy hand-drawn style.
—ANNELIE HERVI (mrshervi)

Movies and television make great inspiration. Using a photo-editing program, I took some iconic scenes from “I Love Lucy” and turned them into simplified images.
—DIANA PIKE (closet_crafter)
This design was inspired by a wall hanging/sconce I saw in an Olive Garden restaurant. There were three terra-cotta pots in a metal wall planter with flowers in it. I sketched out my design on a napkin right there in the restaurant.
—CYNTHIA STRICKLAND (ckstudio80)
I first envision a design on a finished product in a home, and my main inspiration revolves around a narrative. I’m interested in the story that a pattern creates or finishes: Who would use it in their home? Maybe they’re well traveled, or maybe they would use it alongside some wonderful vintage finds. The history of a thing, or the thought of its future story, makes it beautiful.
—ANDREA WHALEN (domesticate)
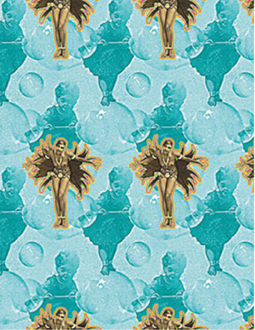
I’m a queer, black, Caribbean woman science-fiction writer. My several communities are both under- and misrepresented in the popular imagination. Part of the joy for me is being able to write us back into history, to imagine our own fantasies and whimsies as an act of intervention. Spoonflower lets me do so visually, in ways that can be both playful and political. I collect historical imagery that speaks to me. I sketch and take photographs. Then I use collage and alteration to remix and re-envision. It’s like being a DJ, only with fabric.
—NALO HOPKINSON (nalo_hopkinson)
Currently, there is so much to be inspired by … brilliant design, excellent coffee, creative people, unique color palettes, fun DIY projects, stellar mood boards, and living well. Even so, when it’s hard to muster a single idea or spark of creativity, I start sketching or doodling on my tablet. This inevitably brings out something interesting that I can build a pattern around. If I am on the go, I jot down notes or a thumbnail sketch to remind me for later.
—HOLLI ZOLLINGER (holli_zollinger)
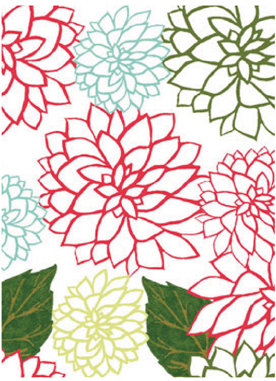
I am inspired by the perfect days of May and June, painting images of my garden, and the cycle of seasons and color: the blue and purple (crocuses, grape hyacinths, irises, anemones) that come after the Toronto snow, followed by white and yellow (daffodils, tulips) and by pink (peonies, poppies, sweet peas), then white. Finally, I’m inspired by my mother, who has always brought color to my life.
—VIVIAN DUCAS (cest_la_viv)

My goal is to tell a story by manipulating traditional patterns and injecting them with characters inspired by books, dreams, nature, and, well, life.
—CATE ANEVSKI (cateanevski)

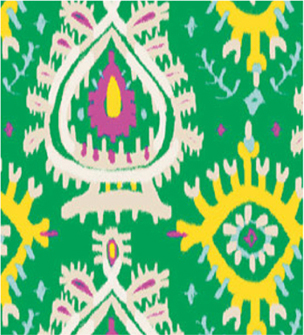
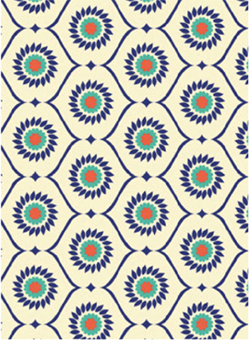
This is my ode to the breathtakingly beautiful handmade tradition of Mexican Otomi embroidery. So much time and care is taken when creating all of the needlework flora and fauna details. I wanted to not only honor it with my design, but offer up a printed version that would not be wince-inducing to cut up and sew into something, because embroidered Otomi designs are too wonderful to do that to!
—SAMARRA KHAJA (sammyk)
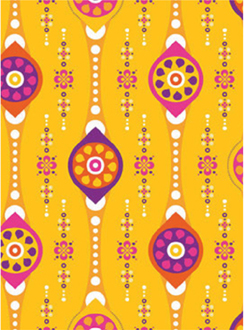
Traveling to colorful countries all over the world is a great starting point for inspiration. But even cultures that I haven’t seen with my own eyes can be inspiring. I love doing research because it feels a little bit like going on a trip. In some of my designs this inspiration is very evident; in others it’s less so, but it’s always there even if just in the choice of colors.
—INE BEERTEN (zesti)
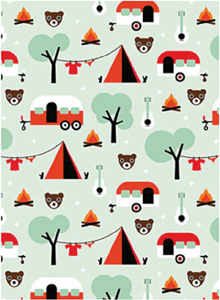
This design was inspired by the camping trips I used to take with my family as a little girl. I loved those getaways. We set up our tents on large green fields of grass and listened to music next to the campfire. Sometimes a guitar, sometimes a little boom box playing electronic ’80s tunes. I always imagined wild animals in the trees behind our tents. I travel a lot nowadays and visit new places and experience new cultures—these trips are an inspiration I translate into my illustrations and design work—but it all started out with those family camping trips.
—MAIKE BOOT (littlesmilemakers)
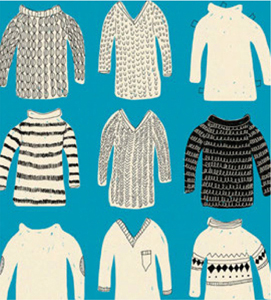
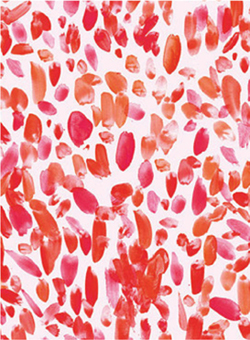
My love for texture and appreciation of all things knit by hand (despite my inability to knit much of anything at all), inspired this fun pattern that features simple lines and a limited color palette.
—SAMANTHA COTTERILL (mummysam)